
All the best detailing advice starts with one simple truth: preparation is everything. The real secret to a professional, swirl-free finish isn't in the final polish—it's what you do before a wash mitt ever touches your car. Getting this groundwork right is the single most important part of achieving that jaw-dropping, showroom shine.
Setting The Stage For a Perfect Detail
The journey to a flawless finish begins long before you even think about turning on the hose. Too many people jump straight into washing, only to find themselves baking water spots into the paint under a hot sun or creating a web of fine scratches with the wrong tools. The pros know that the initial setup isn't just a step; it's the foundation for the entire detail.
Your first move? Find the right spot. Always, always work in a shaded area or wait for a cool, overcast day. When your car's panels are hot to the touch, soap and water evaporate in seconds, leaving behind stubborn mineral deposits we all hate—water spots. A cool surface gives your products time to do their job and lets you rinse everything away cleanly.
Your Pre-Wash Detailing Checklist
Before you start, gather everything you'll need. Having your tools and products ready and within arm's reach makes the whole process smoother and prevents you from having to stop mid-wash. This isn't just about grabbing a random bucket and sponge; choosing the right gear is what separates a safe wash from a scratch-fest.
Here’s a quick checklist of the essentials to get you started.
| Tool/Product | Purpose | Pro Tip |
|---|---|---|
| Two Buckets with Grit Guards | Separates clean soapy water from dirty rinse water to prevent scratches. | Label your buckets "SOAP" and "RINSE" with a marker so you never mix them up. |
| pH-Neutral Car Soap | Cleans effectively without stripping wax, sealants, or ceramic coatings. | Look for high-lubricity soaps that help your mitt glide smoothly across the paint. |
| Foam Gun or Foam Cannon | Creates a thick layer of pre-wash foam to loosen and lift dirt. | The SwiftJet Foam Gun is perfect for home use—it hooks right up to a garden hose, no pressure washer needed. |
| Plush Microfiber Wash Mitt | Safely lifts dirt away from the paint's surface, unlike sponges that trap grit. | Have a separate, dedicated mitt just for the lower, dirtier parts of the car. |
Having these items ready to go will make a world of difference in your results.
The Power of The Pre-Soak
If I could give just one piece of advice to minimize scratches, it would be this: get as much dirt off the car as you can before you touch it. This is exactly where a foam gun becomes your best friend.
By pre-soaking the vehicle, you cover it in a thick blanket of foam that clings to the surface. It immediately goes to work, loosening and encapsulating all that abrasive road grime, allowing most of it to be safely rinsed away with zero physical contact. This one step elevates your process from a simple car wash to a true detail. In fact, studies show a foam pre-soak can cut your washing time by 40% and slash the risk of swirl marks by an incredible 70% compared to just hosing the car down.
Pro Tip: This pre-soak stage is non-negotiable for dark-colored cars, where every tiny scratch and swirl mark shows.
Want to learn more about dialing in your technique? Check out our in-depth guide on how to power wash a car the right way.
This obsession with preparation is a huge reason the global car detailing services market is projected to hit USD 97.2 billion by 2035. Professionals understand that meticulous prep work doesn't just deliver a stunning result—it protects and preserves the vehicle's value for years to come.
The Art of a Scratch-Free Wash
If you want to move beyond a quick spray-down and into the world of proper detailing, you have to master the scratch-free wash. This is, without a doubt, the most important physical contact you'll have with your car's paint. Getting it right is the difference between a glossy finish and a car covered in microscopic scratches that create that dreaded dull, swirled look over time.
It all boils down to a combination of smart technique and the right tools. The absolute foundation of a safe wash is the legendary two-bucket method, which gets a serious upgrade when you add a foam gun to the mix. By using one bucket for your pH-neutral soap and a separate one with clean water to rinse your wash mitt, you trap all the gunk you pull off the paint instead of dragging it right back across the finish. This simple change is a game-changer.
The Foam Gun Advantage
Before your wash mitt even thinks about touching the paint, a thick blanket of foam should do the heavy lifting. This is where a tool like the SwiftJet Foam Gun completely changes your process. It hooks right up to a standard garden hose and lays down a rich, clinging foam that immediately starts to break down and lift dirt, road film, and grime.
This pre-soak isn't just for show; it's a critical safety step. The foam lubricates the entire surface, allowing a huge amount of those abrasive particles to be rinsed away without you ever touching the car. This dramatically cuts down the risk of causing swirl marks, which are really just tiny scratches from grinding dirt against your clear coat.
This flowchart breaks down the essential prep work for a successful detail.
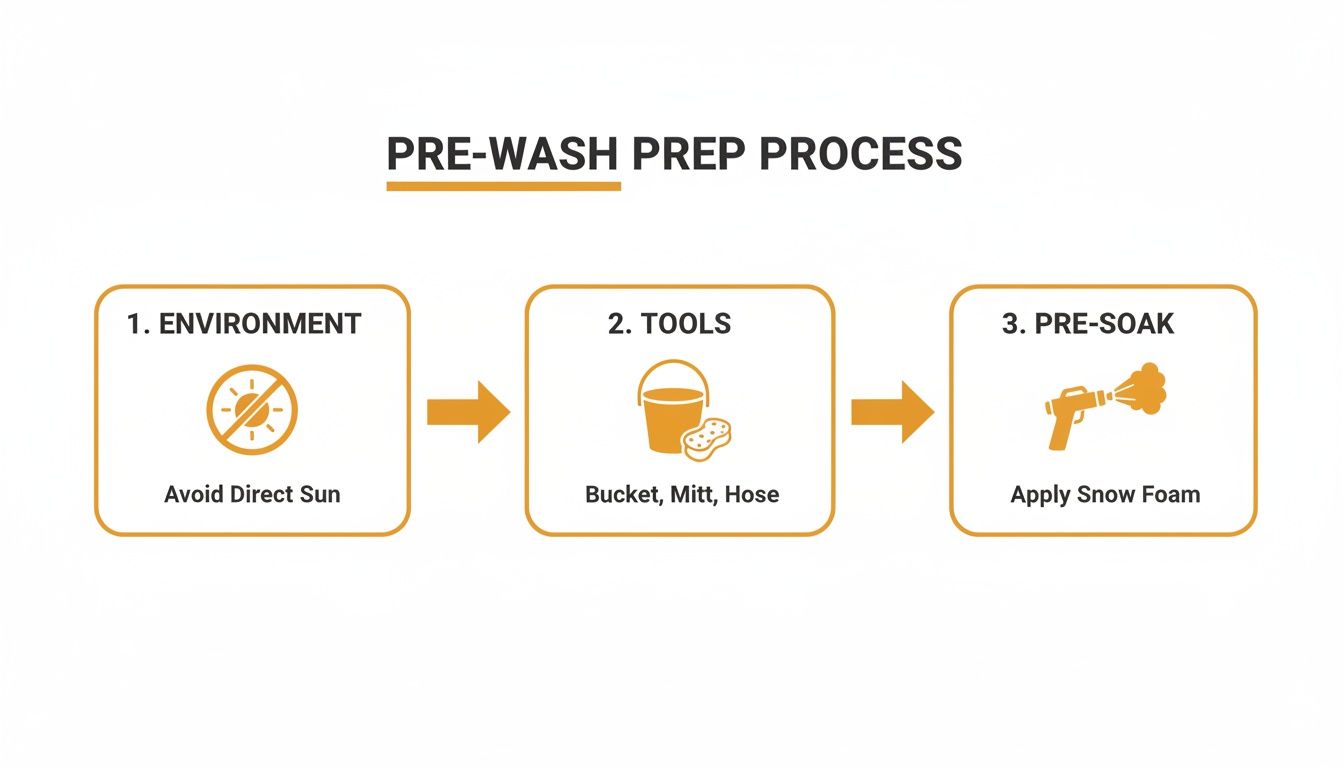
Nailing your environment, tools, and pre-soak strategy sets you up for a safe and effective wash every single time.
Master the Top-to-Bottom Technique
Once the car is pre-soaked and rinsed, it’s time for the contact wash. The golden rule here is simple: always wash from the top down. Gravity is your best friend. It pulls all the dirt and suds downward, preventing you from contaminating the panels you just cleaned. Start with the roof, then work your way down to the glass, hood, trunk, and the upper parts of the doors.
You should always save the dirtiest parts for last. We’re talking about the lower rocker panels, bumpers, and the areas behind the wheels—these get hammered with heavy road grime. Following this order ensures the grit from the filthiest sections never gets dragged across the cleaner, more visible upper panels.
Pro Tip: One of the best things you can do to prevent cross-contamination is to use a completely separate wash mitt for the lower third of the car. It’s a small investment that pays off big time in keeping your paint looking clear and swirl-free.
This methodical process is why the car detailing market is projected to grow from USD 1.68 billion in 2025 to USD 2.49 billion by 2029. Professionals know that while old-school sprays can miss up to 60% of contaminants, the thick foam from a tool like SwiftJet clings 5x longer to safely loosen grime. It’s a simple switch that can also cut water usage by 50%. Pair that with a quality microfiber wash mitt that traps 99% of dirt, and you'll avoid the holograms that plague an estimated 40% of amateur home washes.
Why Wheels Always Come First
Now, before you even think about foaming the body of the car, you need to tackle the wheels and tires. For professional detailers, this is non-negotiable. Your wheels are caked in highly abrasive brake dust and stubborn road grime that you absolutely do not want splashing onto your clean paint.
By cleaning them first, you can be as aggressive as you need with your dedicated wheel brushes and cleaners without worrying about slinging that mess onto the rest of the car. Once the wheels are done, you can move on to the body wash, knowing the dirtiest part of the job is already behind you. You can learn more about the specific benefits of a car foaming gun in our dedicated guide.
Common (and Damaging) Mistakes to Avoid
A perfect wash is as much about what you don't do as what you do. Steer clear of these common habits that can ruin all your hard work:
- Washing in Circles: Don't do it. Always wash in straight, overlapping lines that follow the car's body panels. Circular motions create obvious swirl marks, while light scratches from a straight-line wash are much harder to see.
- Using a Single Bucket: This is the cardinal sin of washing a car. Without a separate rinse bucket, you’re just dunking your mitt into a soup of grit and rubbing it all over your paint.
- Applying Too Much Pressure: Let the soap and your wash mitt do the work. Scrubbing hard doesn’t clean better—it just grinds dirt into your clear coat. Use a light touch and let the slick soap help your mitt glide effortlessly across the surface.
By adopting these professional techniques, you can turn a weekend chore into a meticulous process that actually protects and enhances your vehicle's finish for years.
Getting Your Paint Truly Clean: Decontamination
Ever wash your car meticulously, only to run your hand over the paint and feel a gritty, rough texture? It's not dirt. Those are bonded contaminants—tiny bits of industrial fallout, brake dust, and tree sap that have literally latched onto your clear coat. No amount of soap and water will get them off.
To get that perfectly smooth, glass-like surface, you have to decontaminate the paint. This is a two-part process that most weekend warriors skip, but it's the real secret to unlocking your paint's true potential.
Start with a Chemical Attack
Before you go rubbing anything on your paint, it's best to dissolve what you can first. This is where a good iron remover is your best friend. These sprays are formulated to react with iron particles (like brake dust) embedded in your paint.
You just spray it on a cool, dry panel and wait a few minutes. You'll see the magic happen as the chemical reacts with the iron, causing it to "bleed" a vivid purple color. A quick rinse washes it all away, taking a ton of that gritty feeling with it and making the next step much safer for your paint.
The Pro Tip: Use the "Plastic Bag Test" Not sure if your paint needs this? Wash and dry your car, then stick your hand in a thin plastic sandwich bag. Gently glide it across the paint. The plastic will amplify every little bump and imperfection, making it obvious if you have contaminants that need to be removed.
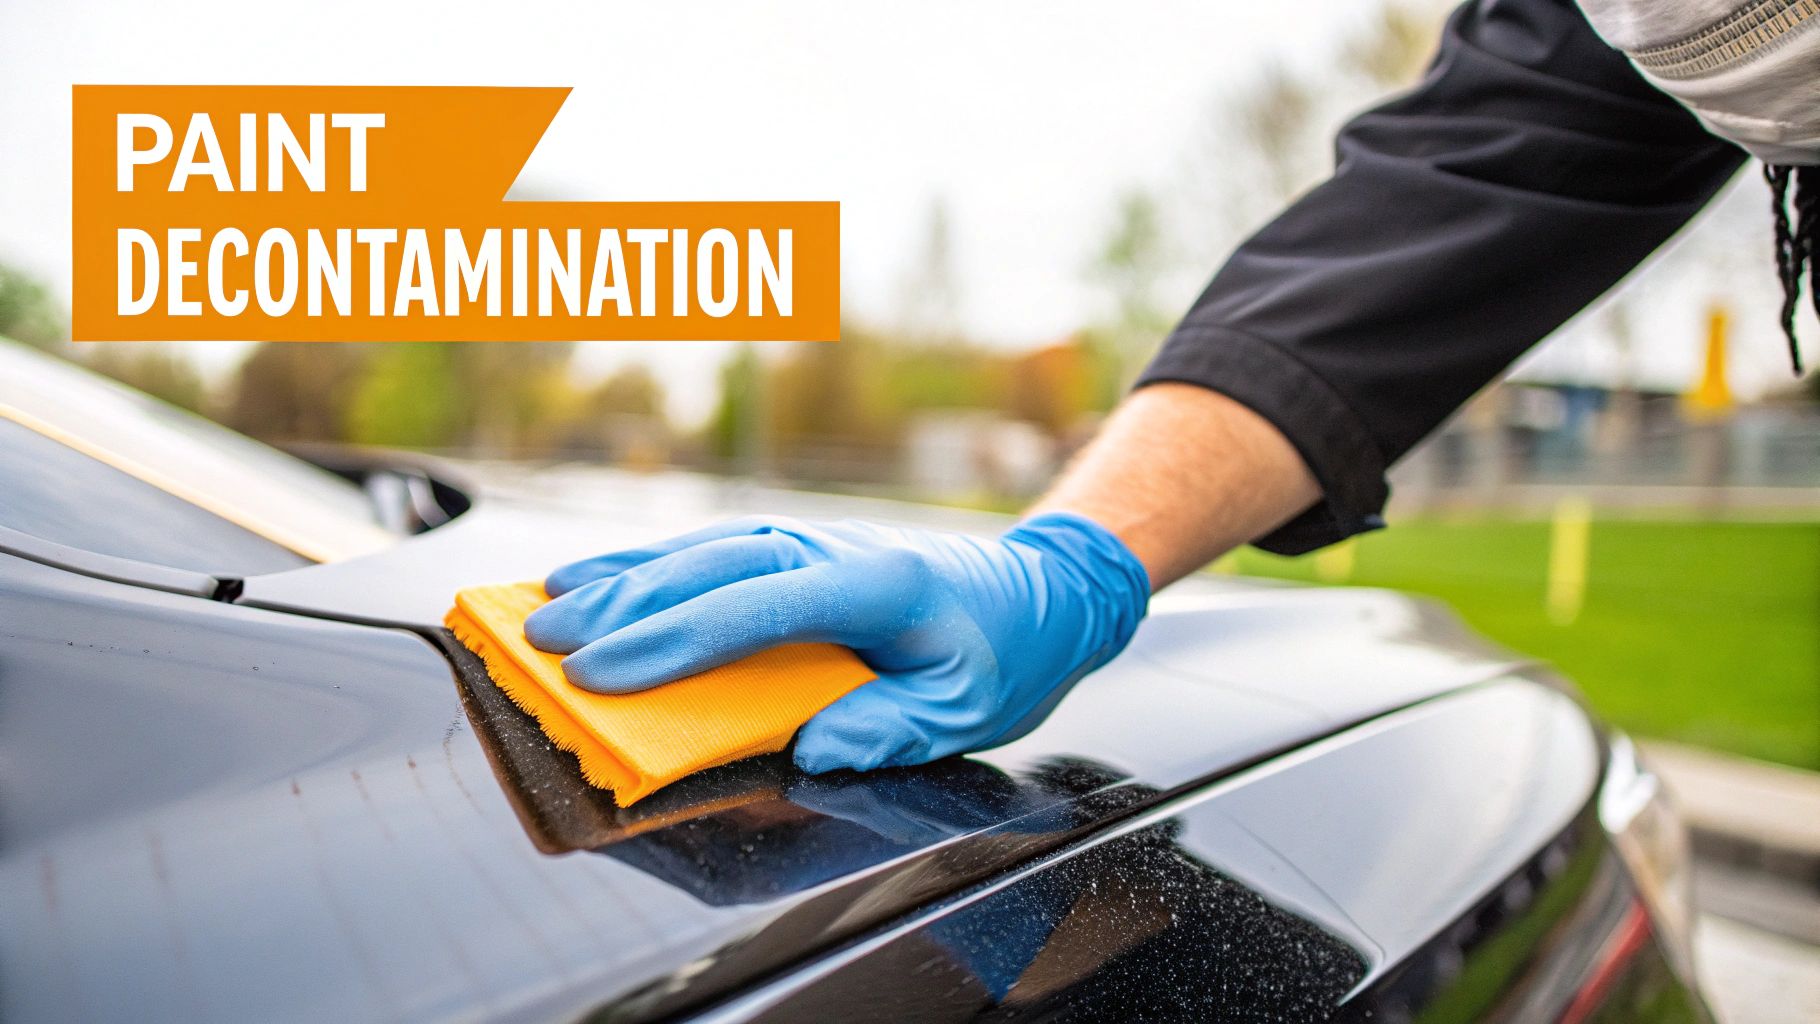
Time for a Physical Touch: The Clay Bar
Now that you've chemically dissolved the metal bits, it's time to physically lift off everything else. This is the job of a detailing clay bar or a clay mitt. Think of it as a super-gentle abrasive that glides across the paint, grabbing and pulling out anything still stuck to the surface.
Technique is everything here. Mess this up, and you could scratch your paint.
- Work Small. Don't try to tackle the whole hood at once. Stick to a 2x2 foot section at a time.
- Lube is Your Friend. Never, ever use a clay bar on a dry surface. You need a dedicated clay lubricant or a quality quick detailer to create a slick barrier for the bar to glide on.
- Glide, Don't Grind. Use light pressure and gentle, back-and-forth motions. Let the clay and the lubricant do the work for you.
- Knead and Fold. After each section, look at the clay. You'll see the gunk it pulled off. Fold it in on itself to expose a fresh, clean side. When the whole bar looks dirty, toss it and grab a new piece.
Once you’re done, the paint will feel impossibly smooth. This perfect surface isn’t just for paint, either; getting glass free of imperfections is just as important. For tips on that, check out this guide on DIY windscreen scratch repair.
This decontamination stage is what separates an amateur wash from a professional detail. It's wild to think that regular washing can leave behind up to 80% of these embedded contaminants, which can cut your car’s shine by 50% in just a year. The whole exterior detailing market, worth over $22 billion, is built on getting surfaces perfectly prepped like this.
This is also where quality prep tools shine. A good foam gun like the SwiftJet, for instance, outperforms a standard hose nozzle by 300% in coverage, dramatically reducing the risk of wash-induced scratches by 75% before you even get to this stage.
With a truly pure, decontaminated surface, your vehicle is now ready for the main event: paint correction and protection. This is where you'll build that deep, wet-looking gloss.
Protecting Your Paint for a Lasting Shine
After all that hard work—the washing, decontamination, and polishing—your paint is finally looking its absolute best. But now comes the most important part: locking in that gloss and protecting your finish from the real world. This is where you lay down a sacrificial layer to shield your clear coat from everything life throws at it, from UV rays and bird droppings to road grime.
Picking the right protection is all about balancing durability, how easy it is to apply, and the specific look you're after. Each option has its own personality, so figuring out what works for your car and your schedule is key.
Wax vs. Sealant vs. Ceramic: The Showdown
When it comes to paint protection, you’ve basically got three main players: traditional carnauba waxes, modern synthetic sealants, and the heavy-hitter, ceramic coatings. Think of it as a spectrum of commitment and reward.
-
Carnauba Wax: The old-school classic. Car guys love it for the warm, deep glow it gives, especially on darker cars. It's an organic product that’s a pleasure to apply, but it's not a long-hauler. You’ll be lucky to get 4-8 weeks of protection. This is perfect for the enthusiast who genuinely enjoys the ritual of waxing their car on a Sunday afternoon.
-
Paint Sealants: These are fully synthetic polymers cooked up in a lab for one thing: durability. They bond to the paint to form a slick, glassy shell that stands up to chemicals and UV rays far better than a natural wax. They apply just like a wax but hang around a lot longer—typically 4-6 months. This makes them a fantastic, low-maintenance choice for most drivers.
-
Ceramic Coatings: This is the top tier of paint protection today. Ceramic coatings are liquid polymers that form a chemical bond with your car's clear coat, creating a super-hard, semi-permanent layer of glass. A pro-grade coating can last for years, providing unmatched resistance to light scratches, chemicals, and whatever the weather throws at it. The catch? The prep work has to be flawless. The surface must be surgically clean for the coating to bond correctly, making the application process intense and unforgiving.
How to Apply Protection Like a Pro
Spreading protection on your paint isn't just a matter of "wax on, wax off." Your technique makes all the difference, and the number one mistake I see people make is piling on way too much product.
With waxes and sealants, less is always more. You're aiming for a whisper-thin, even coat. If you can see a thick, white, cakey haze on the panel, you've gone too heavy. The goal is a layer so thin it’s almost invisible. This doesn't just save you money on product—it makes buffing it off a breeze and prevents streaking.
Grab a soft foam applicator and work in straight, overlapping lines to get complete coverage. Always, always read the bottle for the recommended "cure time," which is how long the product needs to sit and haze over before you wipe it away. Wipe it off too soon, and you get a greasy, streaky mess. Wait too long, and you’ll need a chisel to get it off.
The Final Touch: Drying Without Damage
You're at the finish line, but this is a spot where so many people undo their hard work by scratching the paint. Please, step away from the old bath towel or that crusty squeegee. Both are guaranteed to put swirls right back into your perfectly polished paint.
The best way to dry your car is with a high-quality, plush microfiber drying towel. Instead of dragging it across the surface, use the "blotting" method. Lay the towel out flat on a panel, gently pat it to soak up the water, then lift it and move to the next spot. This simple change drastically reduces friction. To really get this right, you can learn more about how to choose and use microfiber towels for cleaning in our full guide.
For a 100% touch-free dry, nothing beats a dedicated car dryer or even a powerful electric leaf blower. It's the perfect tool for blasting water out of panel gaps, mirror housings, and grilles, stopping those annoying drip marks that always seem to appear after you've put everything away.
Bringing the Interior Back to Life
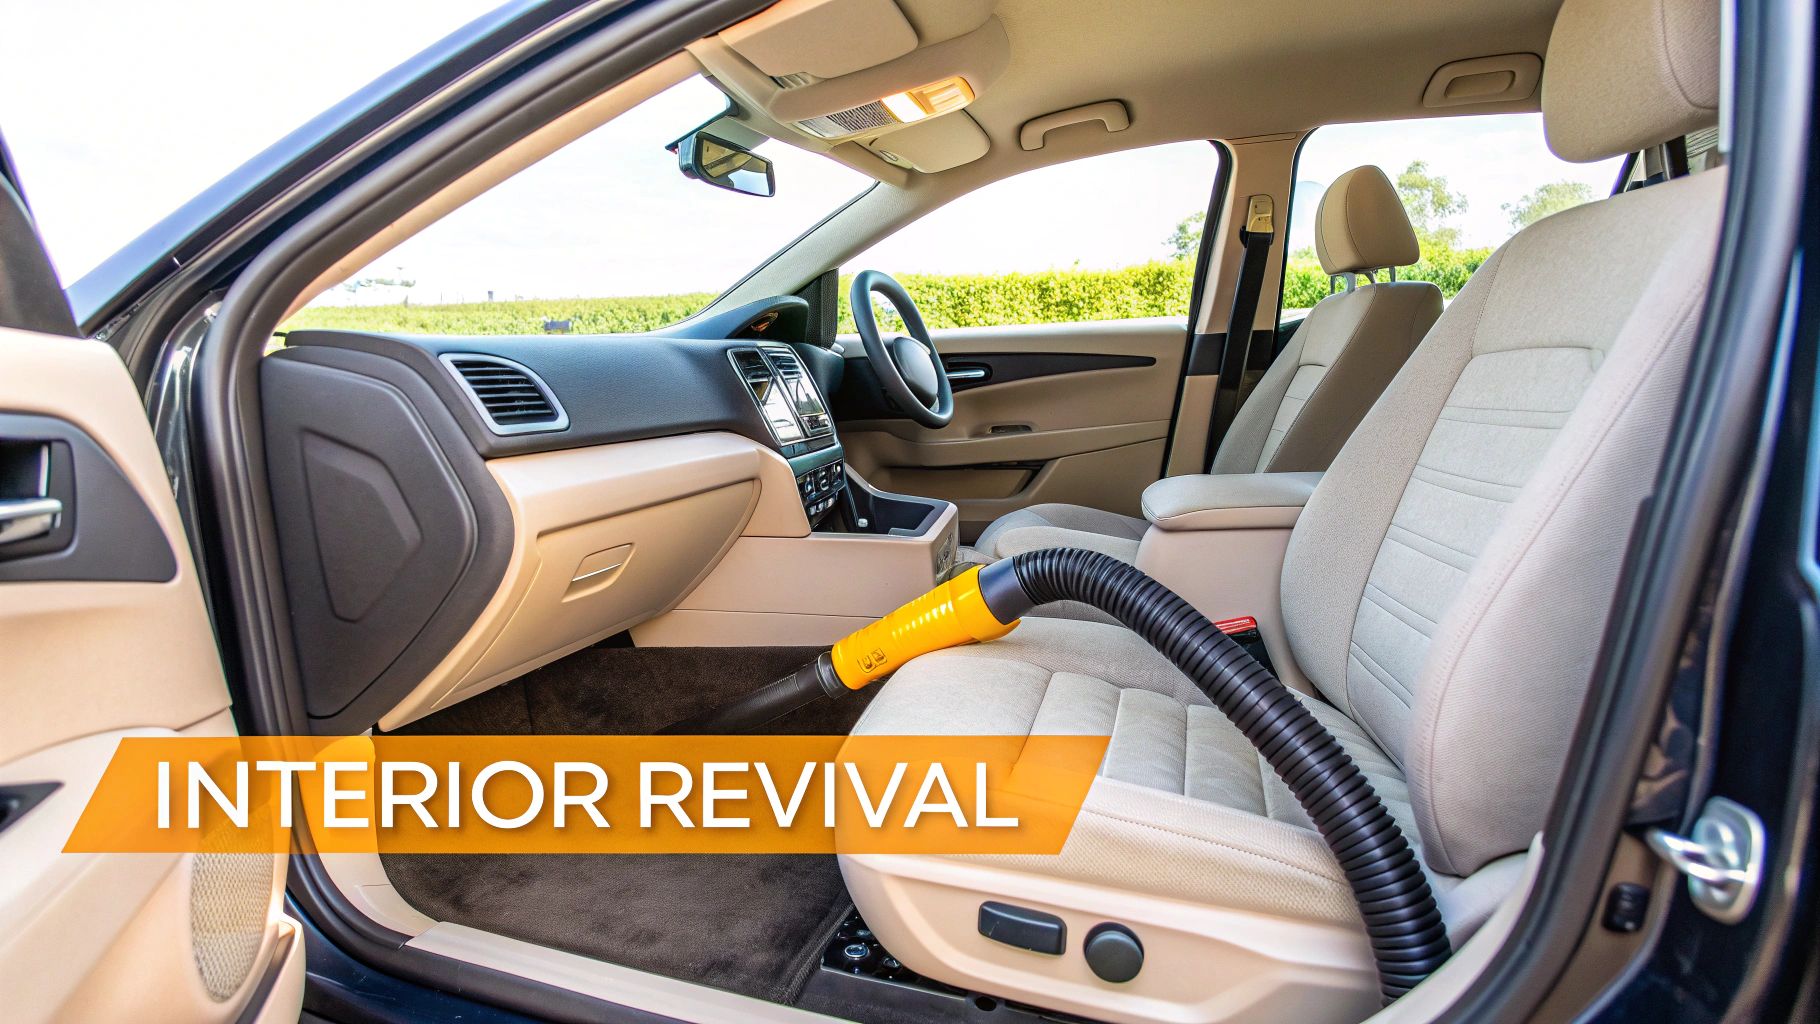
A killer shine on the outside is only half the battle. If you open the door to a cabin that’s anything less than spotless, the job just isn't finished. A truly immaculate interior transforms how you feel about your car, making every drive that much better. This isn't about a quick wipe-down; we're diving into a systematic process to revitalize every single surface inside your vehicle.
The absolute foundation of any interior detail is a serious vacuuming session. Don't just grab a standard attachment and call it a day. To get professional results, you need the right tools to hunt down the crumbs, dust, and pet hair that find their way into every nook and cranny.
Mastering the Art of Vacuuming
First things first: clear the decks. Pull out the floor mats and any personal clutter to give yourself an empty canvas to work with. This is always the starting point for a proper cabin detail.
To be truly effective, you'll need to switch up your vacuum attachments. A methodical approach is key to making sure no spot gets missed.
- Crevice Tool: This is your best friend for tight spots. Use it to get deep into the seams of the seats, down the sides of the center console, and under the seats where everything seems to collect.
- Brush Attachment: The soft bristles on this attachment are perfect for agitating and lifting dust from delicate surfaces. Think dashboards, door cards, and even the headliner—it's gentle enough to clean without causing damage.
- Floor Attachment: Save this one for the big, open carpeted areas. Make sure you slide the front seats all the way forward, then all the way back, to get every square inch of the floor pan.
Beyond the usual vacuum and wipe, some specialized cleaning can make a huge impact. For instance, knowing how to clean car AC vents can drastically improve the air quality and eliminate those musty smells.
Cleaning and Protecting Every Surface
With all the loose debris gone, it's time to tackle the surfaces. This is where using the right product for the job is critical. A one-size-fits-all spray is a rookie mistake that can lead to faded plastics or dried-out leather.
Your dashboard, door panels, and plastic trim are constantly bombarded by UV rays, which causes them to fade, crack, and turn brittle. I always use a quality interior cleaner first, followed by a dedicated UV protectant. This two-step process not only cleans but leaves a non-greasy, satin finish that acts like sunscreen for your interior.
Fabric seats and carpets tend to take the most abuse. For light dirt, a good all-purpose cleaner and a microfiber towel will do the trick. For tougher stains, you'll need to step up to an upholstery cleaner and a stiff brush to really work the product into the fibers before blotting it up with a fresh towel.
Caring for Leather and Forgotten Areas
Leather needs a specific approach to stay healthy. Harsh, all-purpose cleaners will strip the natural oils right out of it, leading to a dry, cracked mess down the road. Always start with a pH-balanced leather cleaner.
I like to use a soft-bristled brush to gently agitate the cleaner into the grain, which lifts out embedded dirt. Wipe it clean with a microfiber, and immediately follow up with a high-quality leather conditioner. This replenishes the moisture and keeps the leather feeling soft and supple.
Pro Tip: If your leather seats look shiny, they're dirty. Clean, healthy leather has a rich, satin finish. That glossy look is just a buildup of body oils and grime.
Finally, let's hit those little spots that are so often overlooked. These "finishing touches" are what separate a quick clean from a true detail.
- Door Jambs: These collect a surprising amount of road grime and grease. Wipe down all the painted and plastic surfaces inside the door frames.
- Pedals: Use an all-purpose cleaner and a stiff brush to scrub the gunk off the gas, brake, and clutch pedals. It looks better and provides a safer, non-slip surface.
- Glass: Grab a dedicated, ammonia-free glass cleaner. Use one microfiber towel to apply and clean, and a second, completely dry one to buff away any remaining streaks for a perfectly clear view.
By tackling each area with the right technique, you’ll take your car's interior from simply "clean" to something you can be truly proud of.
Answering Your Top Vehicle Detailing Questions
Even with a solid plan, questions are bound to pop up. Detailing is a craft, and experience is the best teacher, but we all have to start somewhere. Let's tackle some of the most common questions I hear from people just getting serious about their car's finish.
Getting these fundamentals right will not only make your car look incredible but will also save you from some common and costly mistakes.
How Often Should I Really Detail My Car?
This is probably the number one question, and the answer isn't a simple one—it all depends on what you mean by "detail."
A full-blown detail, where you're breaking out the clay bar and polisher, is a pretty intensive process. You only want to do that once or twice a year. Any more than that, and you're needlessly wearing down your car's clear coat.
Maintenance, on the other hand, is a completely different ballgame. To keep your car looking its best and protect the paint, a good, safe wash every two to four weeks is the sweet spot.
Here’s a simple schedule to follow:
- Maintenance Wash: Every 2-4 weeks. This is your foam gun and two-bucket wash to keep the grime from building up.
- Protection Top-Up: Every 3-6 months. This is when you'll reapply your favorite wax or sealant to make sure that protective barrier is still going strong.
- Full Detail: Once or twice a year. This is the deep clean—decontaminating, polishing, and resetting the finish for the season ahead.
Honestly, the best tip I can give you is to stay on top of regular, gentle cleanings. It prevents dirt from bonding to the paint and makes those big annual details a whole lot easier.
Can I Just Use Dish Soap to Wash My Car?
Please, no. This is a persistent myth that causes a lot of damage. Using dish soap on your car is one of the worst things you can do to the paint. Think about it: dish soap is designed to be a powerful degreaser, stripping every bit of oil and grime from your dinner plates.
When you apply that same logic to your car, it strips away everything you want to keep—wax, sealants, and any protective oils. It leaves your clear coat totally exposed and vulnerable to UV rays and environmental fallout.
My Two Cents: Always, always use a dedicated, pH-neutral car wash soap. These are specifically designed to lift dirt and contaminants gently without destroying the protective layers you've worked so hard to apply. It’s such an easy switch to make for the long-term health of your paint.
What's the Difference Between Polishing and Waxing?
I see people mix these terms up all the time, but they are polar opposites. Getting this right is the key to a truly flawless finish.
Polishing is for correction. A polish contains micro-abrasives that carefully level the clear coat, physically removing a microscopic layer to get rid of imperfections. It's the step that actually fixes things like:
- Annoying fine scratches
- Those dreaded swirl marks
- Dullness from oxidation
Polishing is what brings back that deep, wet-looking gloss.
Waxing is for protection. A wax or sealant does the complete opposite—it adds a sacrificial layer on top of your paint. It doesn't fix or hide any defects. Its only job is to shield the paint underneath from the elements. The sequence is non-negotiable: wash, decontaminate, polish (to make it perfect), and then wax (to keep it perfect).
Do Foam Cannons Actually Make a Difference?
Oh, absolutely. Using a foam gun or foam cannon is a huge upgrade for both safety and efficiency. The thick foam clings to the car, giving it time to break down and encapsulate all those abrasive dirt particles before you touch the paint.
When you rinse that foam off, a huge amount of grit goes with it—long before your wash mitt ever makes contact. This is a game-changer for preventing swirl marks, which are almost always caused by dragging tiny bits of dirt across the surface. While the two-bucket method is still a must for the contact wash, starting with a quality foam pre-wash is the single best way to lubricate the surface and get a safer clean.
Ready to step up your car wash game and finally get a safer, more effective clean every time? The SwiftJet Car Wash Foam Gun hooks right up to your garden hose, giving you that thick, professional-grade foam without needing a pressure washer. Stop scratching your paint and start protecting your investment. Get your SwiftJet today and see the difference for yourself!