
If you want to keep your car’s paint looking brand new, using a pressure washer is hands down the safest and most effective way to get it clean. The whole idea is to use the power of high-pressure water to blast away the heavy, gritty stuff before you ever touch the paint. That’s the real secret to a swirl-free finish.
When you add a foam cannon to the mix, you've got a setup that can deliver a professional-level clean right in your own driveway.
Why a Pressure Washer Is a Game Changer for Your Car
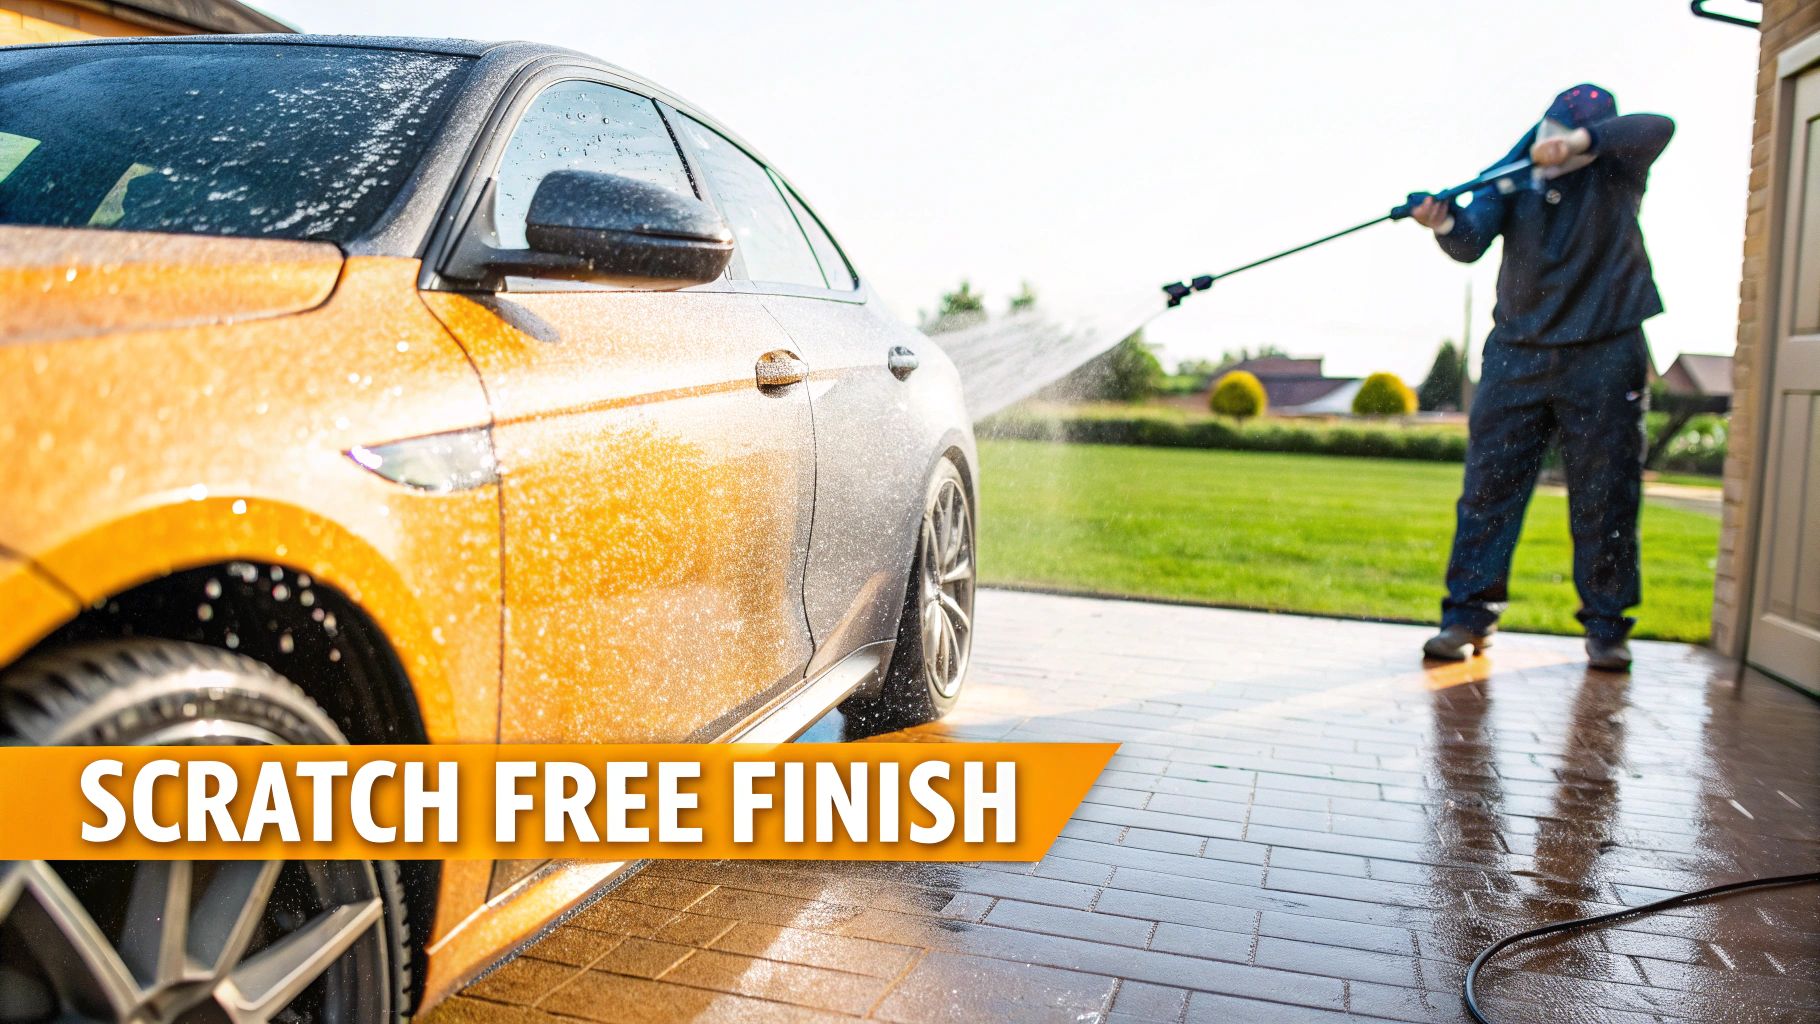
Let's be real for a second. The old-school bucket and sponge method? It’s often doing more damage than you think. Every time you drag that sponge across a dirty door, you're essentially grinding tiny bits of road grit right into your car’s clear coat. This is exactly how you get that dreaded spiderweb of fine scratches we all know as swirl marks.
A pressure washer car wash completely flips that script. It’s not just about being faster; it’s about doing a "touchless" pre-wash that safely gets rid of all those dangerous particles first. This is where a quality foam cannon, like the SwiftJet Foam Gun, becomes your best friend.
The Power of a Thick Foam Pre-Wash
Covering your car in a thick blanket of suds isn't just for show. That foam is doing some serious work. It clings to the paint, giving the cleaning agents in the soap enough time to break down and lift away all the road grime, bug guts, and dirt. As the foam sits there, it gently pulls those particles off the surface.
This pre-wash step is what truly separates a DIY job from a professional detail. By the time you rinse all that foam off, you've already removed up to 80% of the loose dirt. That means when you finally do grab a wash mitt, you're just cleaning the paint itself, not grinding leftover grit into it.
Pro Tip: I always start by applying foam to the bottom of the car and working my way up. This simple trick stops the suds from running down clean panels too fast, which gives the soap maximum time to work on the grimiest parts of the vehicle near the wheels and rocker panels.
More Than Just a Pretty Foam
Preventing scratches is the main goal, but a proper pressure washer setup gives you a few other big wins that make it the go-to method for any car enthusiast or mobile detailer.
- It’s Fast: You can get through the entire pre-wash and rinse in a tiny fraction of the time it would take to do it by hand.
- Saves Water: Believe it or not, modern pressure washers use way less water per minute than your average garden hose, so it’s a much more eco-friendly choice.
- A Deeper Clean: The high-pressure stream gets into all those nooks and crannies you could never reach with a sponge, like deep inside your wheel wells, front grille, and around emblems.
At the end of the day, this approach protects your car's value, saves you a ton of time, and delivers that incredible, just-detailed look every single time.
Choosing the Right Tools for a Flawless Finish
Jumping into a pressure wash without the right gear is like trying to cook a gourmet meal with a single, dull knife—you’re just setting yourself up for a bad time. For your car, that "bad time" can mean scratched paint or a stripped clear coat. So let’s build your toolkit, starting with the heart of the operation: the pressure washer itself.
When it comes to washing cars, an electric pressure washer is the clear winner. Why? Control. Gas-powered models are fantastic for blasting grime off concrete, but they’re often way too aggressive for automotive paint.
You'll want to find a machine that offers between 1,200 and 1,900 PSI (pounds per square inch). This is the sweet spot—powerful enough to lift stubborn dirt but gentle enough to respect your car's finish. Alongside PSI, look at the GPM (gallons per minute). A flow rate of 1.4 to 1.6 GPM is ideal, giving you enough water to rinse effectively without being wasteful.
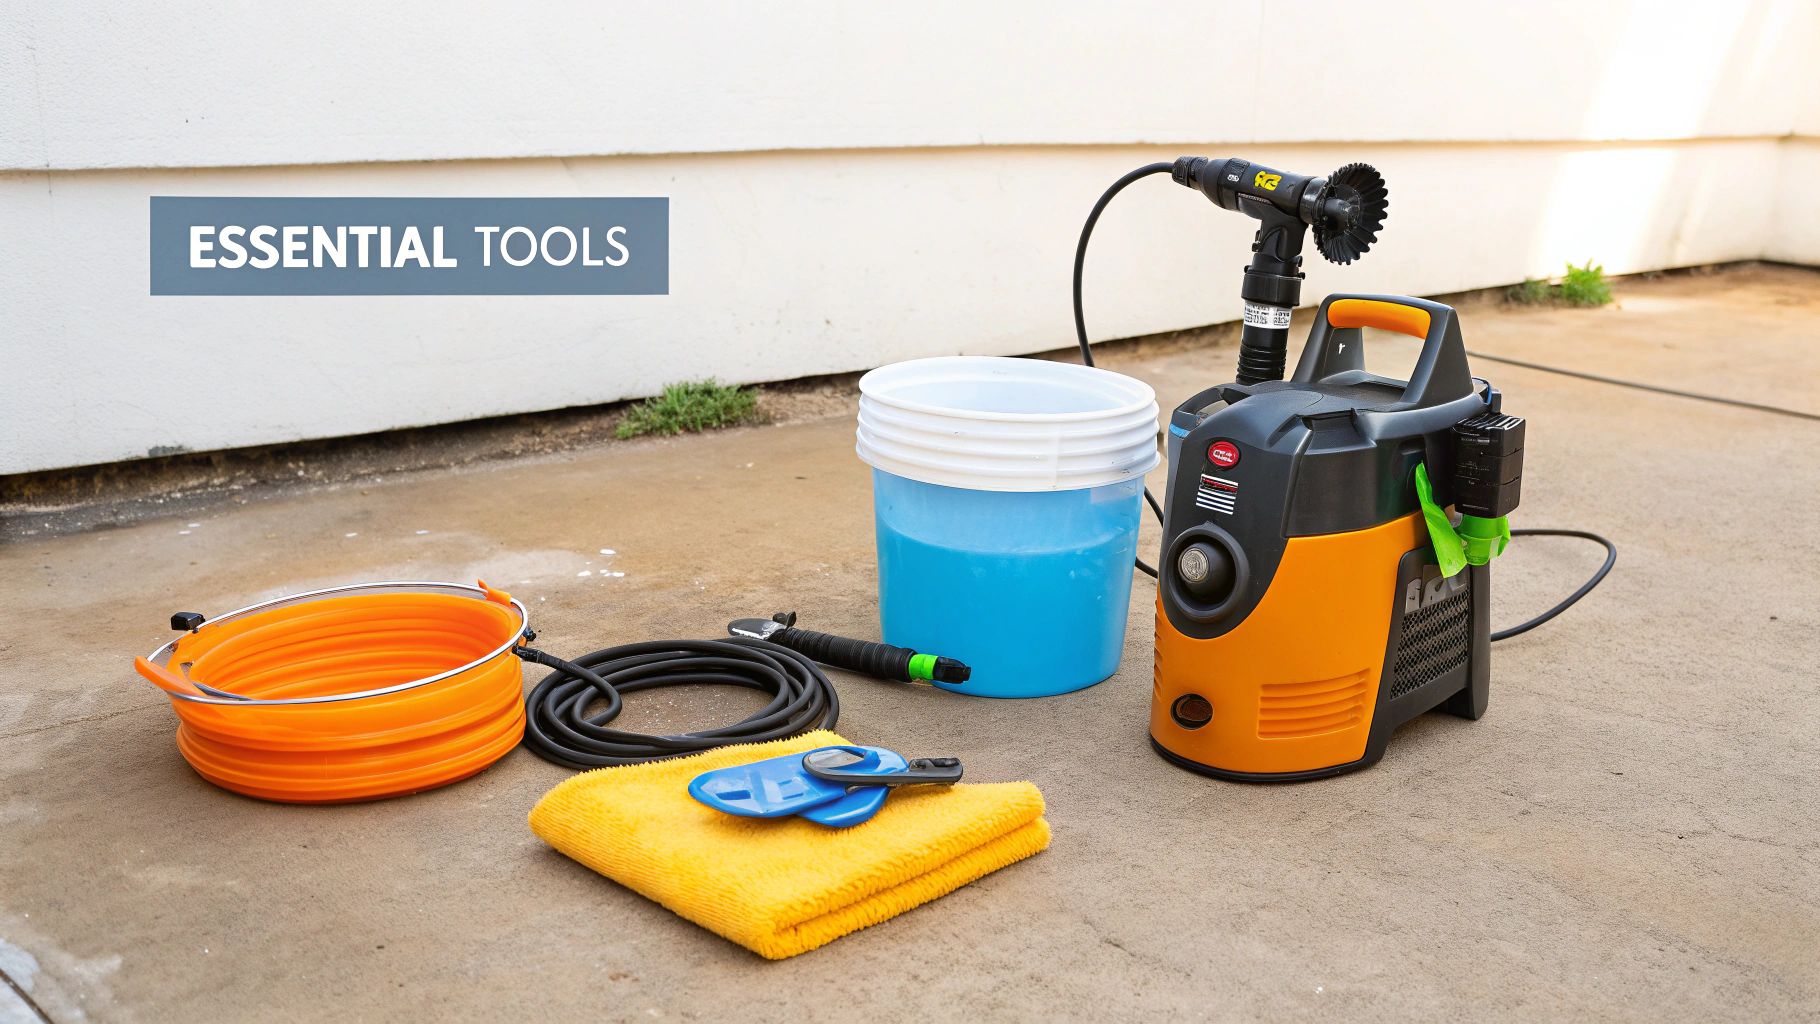
Your Core Car Washing Arsenal
With the pressure washer sorted, a few other items are absolutely essential for getting that pro-level, swirl-free shine. These aren't just accessories; they're your paint's best friends.
The star of the show is a quality foam cannon, like the SwiftJet Foam Gun. This is what transforms your car soap into that thick, satisfying foam that clings to the car, loosening and lifting dirt before you ever lay a hand on it.
Of course, the foam is only as good as the soap inside it. Always, always use a dedicated, pH-neutral car soap. Your car’s wax or ceramic coating is a delicate shield, and harsh detergents will strip it right off, leaving your paint vulnerable. If you want to dive deeper, we've put together a complete guide on how to build the ultimate home car washing kit.
Here's a pro tip that's been around forever because it works: the two-bucket method. Keep one bucket for your soapy water and a second one with just clean water for rinsing. After you wash a panel, dunk and agitate your mitt in the clean water bucket first. This releases all the picked-up grit before you go back for more suds, preventing you from dragging those dirt particles all over your paint.
The Finishing Touches That Matter
Now for the supporting cast—the smaller tools that make a massive difference in preventing scratches and those dreaded water spots.
First, you need a set of color-coded pressure washer nozzles. These aren’t just for looks; each color signifies a different spray angle and pressure. When you're washing your car, the 40-degree white nozzle is your best friend. It’s perfect for almost everything, from the initial pre-rinse to the final rinse-off.
To make sure you're not putting tiny scratches in your paint, picking the right nozzle is critical. This little guide will keep you out of trouble.
Pressure Washer Nozzle Guide for Safe Car Washing
| Nozzle Color | Spray Angle | Primary Use for Car Washing | Safety Level |
|---|---|---|---|
| White | 40-Degree | General rinsing, soap application, and final rinse-down. | Safest Choice |
| Green | 25-Degree | Use with extreme caution for rinsing wheel wells or undercarriage. | Use with Caution |
| Yellow | 15-Degree | Not recommended for paint. May be used on tires with care. | High Risk of Damage |
| Red | 0-Degree | NEVER use on a vehicle. This will strip paint instantly. | Dangerously High |
Stick with the white and green nozzles for automotive work, and you'll keep your paint looking fantastic.
Finally, let's talk about what actually touches your car:
- Plush Microfiber Wash Mitt: Forget old sponges that just push dirt around. A good mitt has deep fibers that pull grit away from the surface, trapping it safely.
- Grit Guards: A simple but brilliant invention. These plastic grates sit at the bottom of your buckets, keeping all the dirt you've rinsed off from getting mixed back into your water and onto your mitt.
- Ultra-Absorbent Drying Towels: Look for high-GSM (grams per square meter) microfiber towels. They're designed to drink up water quickly, which is your best defense against leaving water spots behind.
Giving Your Car a Pre-Wash Foam Bath
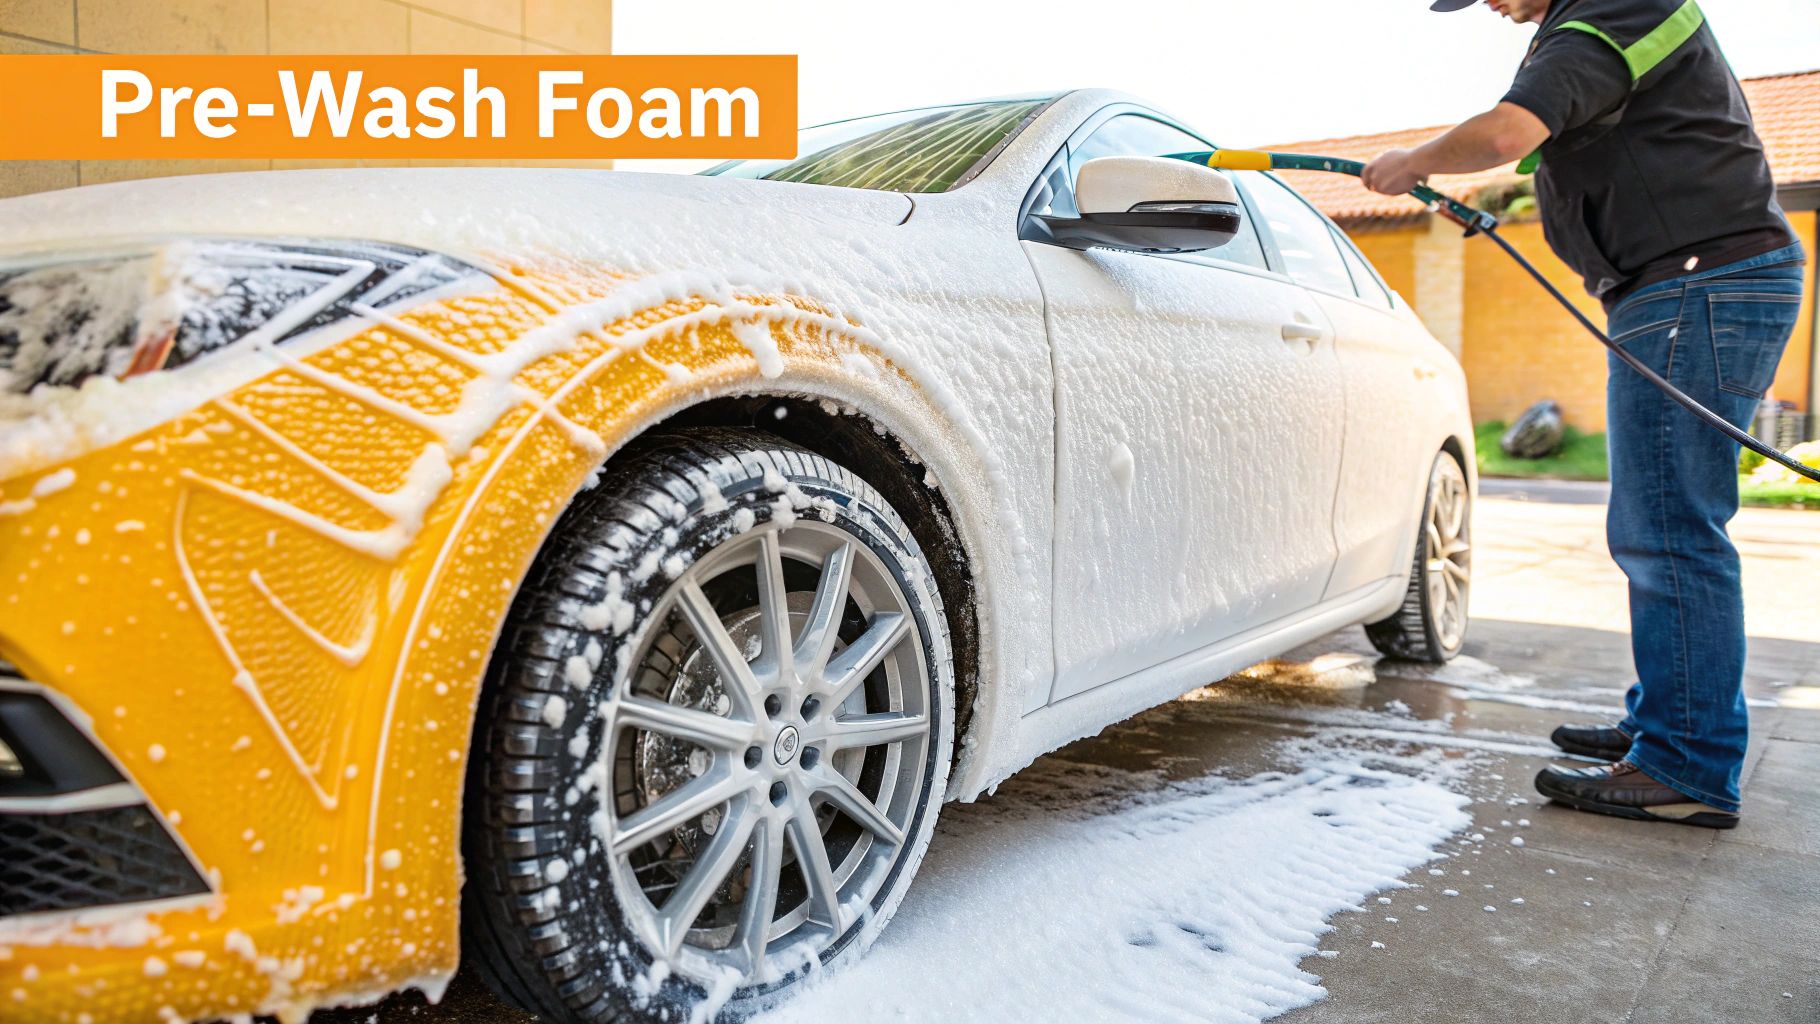
If there's one step that separates a quick rinse from a professional detail, this is it. The pre-wash foam bath is, hands down, the most crucial part of a safe pressure washer wash. So many people get it wrong or, even worse, skip it completely.
The goal here isn't to get the car perfectly clean. Instead, you're using a thick blanket of foam to safely lift and lubricate the nastiest, most abrasive dirt before you ever touch the paint with a wash mitt.
Think of it as a safety net for your car's finish. That rich, shaving-cream-like foam from a good foam cannon encapsulates all the sharp stuff—sand, road grit, brake dust—and pulls it away from the surface. This single action dramatically cuts down the risk of inflicting swirl marks when you move on to the contact wash. This is where the magic really happens.
How to Apply Foam Like a Pro
Believe it or not, there's a right and wrong way to do this. Most people instinctively start at the top and work their way down. It seems logical, but it's actually the least effective method. Why? Gravity. As you foam the roof, the soap immediately starts running down over the dirtier lower panels, sliding off before it has a chance to work.
Here’s what the pros do: start foaming from the bottom of the car and work your way up. Hit the rocker panels, bumpers, and lower doors first—these are always the grimiest areas. By finishing with the roof and hood, you give the foam maximum "dwell time" on every single panel, letting the soap do its job breaking down all that grime. Getting a feel for your car foaming gun is essential to mastering this technique.
The real goal is a uniform blanket of foam that clings, not a runny mess that slides right off. You're looking for a consistency that will stick around for a few minutes, visibly getting darker as it pulls the dirt out of your paint. If it's too watery, you'll need to tweak your foam cannon's settings or your soap-to-water ratio.
Getting the Most Out of Dwell Time
Once the car is completely covered, just let it sit. The foam needs time to work its magic. Your ideal dwell time is usually somewhere between 5 and 10 minutes, though this can change depending on the weather. The golden rule is to never let the foam dry on the surface. This is especially important if you're washing in direct sun or on a windy day.
You can actually see it working. The foam will start to break down road film, bug guts, and all sorts of other gunk. As it slowly drips off the car, it takes the loosened dirt with it. On really filthy areas, like behind the wheels or on the front bumper, you'll see the foam turn a nasty brown color—that's proof it's doing its job.
- Hot Day Tip: Washing in the heat? Do a quick pre-rinse with cool water to bring down the panel temperature. This keeps your soap from drying out too fast.
- Soap Matters: Always use a quality, pH-neutral car soap made specifically for foam cannons. Using dish soap or harsh cleaners will strip off any wax or sealant you have, leaving your paint totally exposed.
- Watch and Learn: Pay attention to what the foam is doing. If it slides off in less than a minute, your mixture is too thin. If it's so thick that it's just clumping up, you've probably used too much soap concentrate.
Nailing this pre-wash step is what sets you up for a truly safe and effective pressure washer car wash, making sure the rest of your detail is as scratch-free as possible.
The Two-Bucket Method and Final Rinse
With the heavy grime gone, it's time for the hands-on part of the wash. This is where the classic two-bucket method becomes essential. If you're serious about keeping your paint scratch-free, this isn't just a good idea—it's non-negotiable.
The concept is brilliantly simple. You have one bucket with your pH-neutral car soap and another with just clean water. Both buckets need a grit guard at the bottom. This simple setup is your defense against scratches, keeping the clean, soapy water separate from the dirt you're pulling off the car. It's this growing passion for home detailing that has helped the global pressure washer market swell to a value of USD 3.28 billion. You can dig deeper into this industry trend and its future on Straits Research.
Perfecting Your Washing Technique
Let's get started. Dunk your high-quality microfiber wash mitt into the soapy water and wring it out slightly. The trick here is to tackle the car in small, manageable sections—think one door, or half the hood at a time. This keeps the soap from drying on the paint, which is a fast track to stubborn water spots.
Always, and I mean always, wash from the top down. Let gravity do the work for you, pulling dirt away from the areas you’ve just cleaned. And here’s a pro tip: wash in straight, overlapping lines. Never use circles. That circular scrubbing motion is exactly what creates those hideous, web-like swirl marks in your paint.
After you finish a panel, rinse your mitt in the plain water bucket. Really scrub it against the grit guard to release all the dirt and grit before you even think about putting it back in your soap bucket.
Real-World Scenario: Picture yourself washing a black car on a warm, sunny afternoon. If you try to soap up the whole car at once, the suds on the first panel will have baked on by the time you get to the last. Working panel-by-panel ensures you can rinse each section before the soap dries, leaving a perfectly clean finish.
The Final Sheeting Rinse
Once the whole car is washed, it’s time to rinse everything off with your pressure washer. Grab your widest angle nozzle—the 40-degree white tip is your best friend for this step.
Instead of just blasting away, stand back a few feet. Aim the stream at the top of the roof or hood and let the water flow down over the panel in a solid sheet. This is called "sheeting," and it’s a game-changer. The water’s surface tension pulls the rest of the water and leftover suds right off the car with it.
This technique is fantastic for two reasons:
- Less Drying: Most of the water is already gone, which means way less work for you and your drying towel.
- Fewer Water Spots: Less standing water means fewer mineral deposits left behind to ruin your finish.
This gentle sheeting rinse is the perfect way to wrap up the contact wash, setting you up for a quick, safe, and spot-free dry.
Drying Techniques to Prevent Water Spots
You can do everything right during the wash, only to see it all fall apart in the last ten minutes. Drying is where a good wash becomes a great one, and the main enemy here is the dreaded water spot. These are just mineral deposits left behind when water evaporates, but over time, they can actually etch into your car's clear coat.
The secret to a spot-free finish isn't just about drying quickly; it's about using the right gear and the right approach. While the pros might use a dedicated car blower to blast water out of every nook and cranny, the most reliable and accessible method for almost everyone is a set of high-quality microfiber towels.
Mastering Microfiber Drying
This is where you need to forget about old bath towels or that chamois your dad used to use. Those can be surprisingly rough on your paint. Instead, you want a large, plush microfiber drying towel—the kind designed specifically to soak up a ton of water without scratching anything. Look for a towel with a high GSM (grams per square meter) rating; anything over 500 GSM is going to be incredibly absorbent and safe.
The best way to use it is what we call the "drape and drag" method. Just lay the towel out flat across a large panel, like the hood or the roof, and gently pull it straight toward you. No need to scrub or apply any real pressure. The weight of the towel and the thousands of tiny fibers will do all the work, pulling the water away from the paint.
For vertical surfaces like doors and fenders, switch to the blotting method. Fold your towel into a smaller, more manageable square and simply press it against the panel. This lifts the water straight off, preventing you from accidentally dragging any tiny bit of leftover grit across the surface.
The key takeaway here is to let the towel absorb, not wipe. Aggressive rubbing, even with a clean microfiber, is how you get those annoying micro-scratches. Let the tool do its job.
This simple infographic sums up the foundational steps that get you to this crucial final stage.
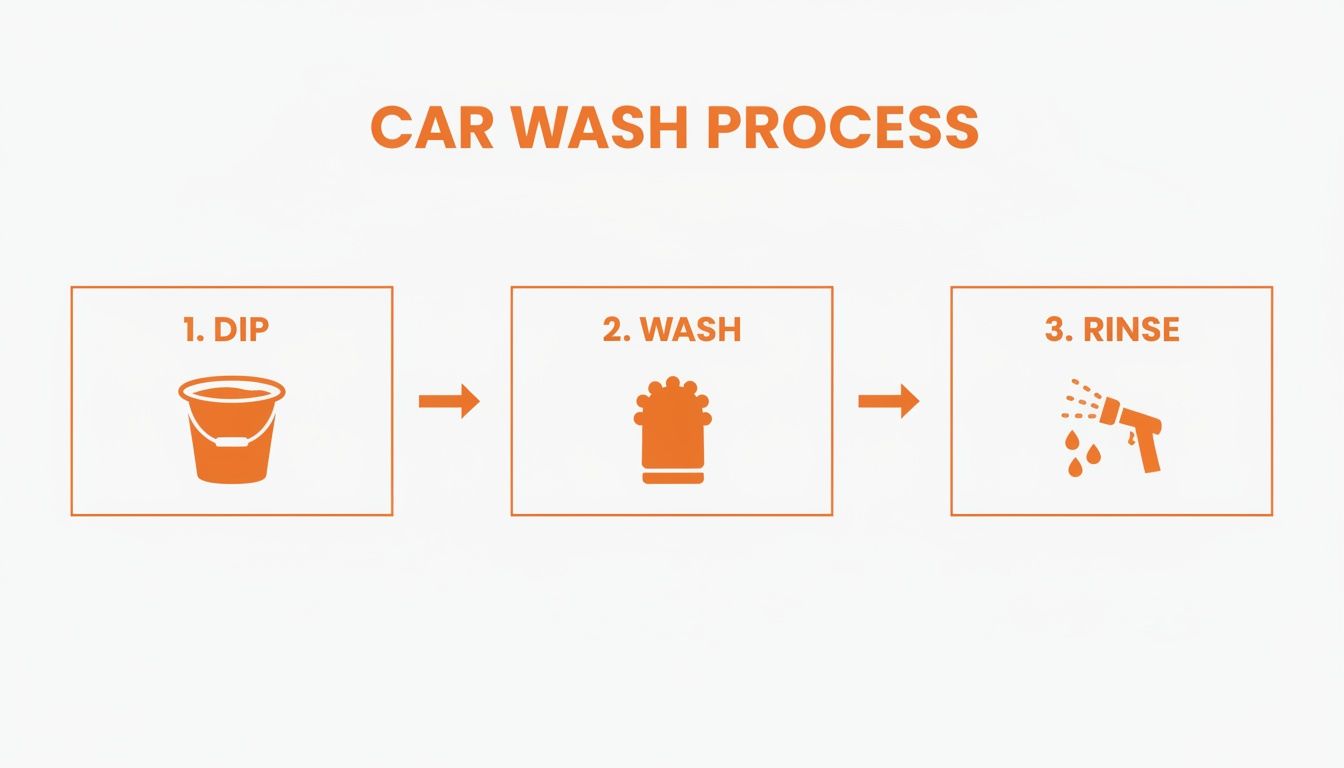
It’s a good visual reminder of the "dip, wash, rinse" sequence that has to happen before you can even think about laying a drying towel on the paint.
Tackling Tricky Spots
Water is sneaky. It loves to hide in tight spots and then drip out ten minutes later, leaving a frustrating streak down your perfectly dried door. You have to be methodical and chase it down. Always dry these problem areas last:
- Mirrors: Gently push the towel into the seam where the glass meets the housing.
- Grilles and Emblems: Grab a smaller, dedicated microfiber to carefully blot around these intricate parts.
- Door Jambs: This is a must. Open every door and thoroughly wipe down the sills and jambs.
- Tailgate and Trunk Lid: Pop the trunk and get the hidden edges and channels where water always pools.
For a finishing touch that really makes the paint pop, consider using a spray wax or quick detailer as a drying aid. Just give a light mist onto a panel while it's still a tiny bit damp, then come back with a fresh, dry microfiber towel to buff it to a high shine. This not only helps you get that last bit of moisture but also adds a quick layer of protection, making your next wash even easier. To go deeper on towel selection and care, check out our guide on why microfiber towels for cleaning are the undisputed champs of the detailing world.
Avoiding Common Pressure Washing Mistakes
Even with the best gear, pointing a pressure washer at your car for the first time can be a little nerve-wracking. But trust me, once you know what not to do, you'll gain confidence fast and get amazing results every time. Most of the problems beginners run into are actually super simple to fix with a bit of know-how.
A classic frustration I see all the time is weak, runny foam. If your suds are just sliding off the paint instead of clinging, the problem is almost always the soap-to-water ratio in your foam cannon. Just tweak the dial to pull in more soap concentrate, and you'll get that thick, shaving-cream-like blanket you're looking for.
Another common headache? Those stubborn water spots that show up after you're done. The easiest way to prevent this is to avoid washing in direct sunlight and to dry the car thoroughly before the water has a chance to evaporate, leaving behind mineral deposits.
Protecting Your Paint and Trim
If there's one mistake you absolutely must avoid, it's getting too aggressive with the wrong nozzle. Using a narrow-stream tip—like the 15-degree yellow one—or simply holding any nozzle too close to the car is a recipe for disaster. You can easily etch the clear coat, chip your paint, or even blast an emblem right off the trunk.
Always keep a safe distance of at least 12-18 inches between the nozzle and the car's surface. Think of this as your safety buffer, especially around delicate areas like plastic trim, rubber window seals, and vinyl wraps, which are easily damaged by high pressure.
It helps to think of that high-pressure stream as a blade. Respect its power. Understanding the differences in pressure washing techniques, like soft washing versus a full-on blast, really drives home why you need to dial back the force for a vehicle's finish.
The explosion in at-home detailing is part of a much bigger picture. The pressure washer market in the U.S. alone is a USD 390 million industry right now, and it's on track to jump to USD 570 million by 2034. That growth is happening right alongside the massive USD 14.74 billion car wash industry. If you're interested in the full market analysis, you can dig into the research from Research and Markets.
We Get These Questions All the Time
Even with the best instructions, you're bound to have a few questions pop up, especially when you're starting out. Here are some of the most common ones we hear from fellow car enthusiasts.
Can I Use a Gas-Powered Pressure Washer?
You can, but you have to be really careful. Gas-powered units are beasts and can easily push out enough force to damage your paint if you're not paying attention.
If you're using a gas model, stick with the widest angle nozzle you have – the 40-degree white tip is the only one you should be using on your paint. Make sure you keep a good 18-24 inches of distance between the nozzle and the car's surface. A good pro-tip is to always start the spray pointed away from the car, then bring the stream onto the panel. For most of us, though, a solid electric pressure washer has more than enough power and is a much safer bet.
How Often Should I Really Be Washing My Car?
For a car you drive every day, giving it a proper wash every two weeks is a solid routine. This keeps things like bird droppings, bug guts, and road grime from sitting too long and actually eating into your clear coat.
Keep in mind, this can change with the seasons. If you're dealing with road salt in the winter or a ton of tree sap in the spring, you’ll probably want to bump that up to a weekly wash to keep your paint protected.
Is a Pressure Washer Safe for My Wheels and Tires?
Definitely. In fact, it's one of the most effective ways to deep clean them. A pressure washer is fantastic at blasting away that caked-on, stubborn brake dust that’s a pain to scrub off by hand.
You can get a bit more aggressive with the tires themselves and use a 25-degree (green) nozzle on the rubber. But when you move to the actual face of the wheel—especially if they're painted or clear-coated—always switch back to that gentle 40-degree nozzle to prevent any chance of chipping or scratching.
Ready to create that perfect, thick foam and achieve a flawless finish every time? The SwiftJet Foam Gun connects to any garden hose, making a professional-grade clean accessible to everyone. Get yours today at https://swiftjetusa.com.