

You walk out to your car, see yolk running down the door or hood, and your first instinct is usually anger. Your second should be speed. Egg on paint isn't just messy. It starts turning into a paint correction problem almost immediately.
If you're trying to figure out how to get egg off a car without making things worse, the first rule is simple. Don't scrub. Don't reach for paper towels. Don't assume a normal wash will handle it. The right method depends on one thing above all else: whether the egg is still wet or has already dried.
The Clock Is Ticking Why Egg Is a Paint Emergency
A fresh egg on a panel can turn into clear coat damage before you finish running errands. On paint, egg acts like a hot-weather chemical contaminant, not a harmless food spill. The albumen and yolk dry fast, trap heat, and leave behind residue that can mark the surface if it sits.
That is why speed matters so much.
Published guidance from the University of Illinois Extension notes that egg white is alkaline, typically around pH 7.6 to 9.2, and that matters on a warm vehicle because alkaline residue left on the surface has more time to dry, concentrate, and bite into the finish. Heat from sun-soaked metal makes that process worse. A black hood in summer gives you far less margin for error than a cool car in the shade.
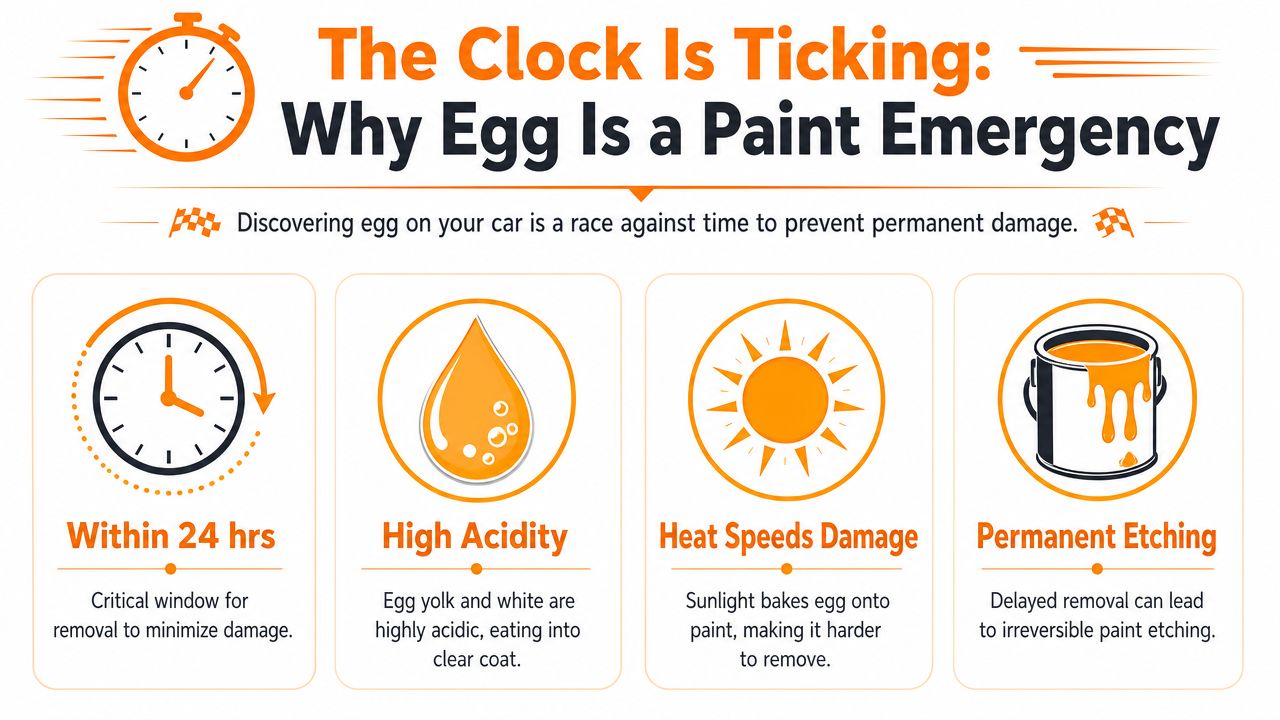
Why waiting causes real paint damage
The danger is not only the mess you can see. As egg dries, the proteins tighten onto the paint, and the shell fragments left behind become an abrasive if anyone starts wiping too soon. Once the residue hardens, removal shifts from simple cleaning to controlled softening and careful lift-off. If the panel is hot, that window gets shorter.
I see the same pattern in detailing bays after vandalism calls. Owners often do one of two things. They leave it until they get home, or they attack it with paper towels and pressure. Both choices raise the odds of scratches, hazing, or etching.
The urgency is similar to other organic fallout that can stain a finish in heat. If you have dealt with bird droppings baking into car paint in direct sun, the cleanup logic is very similar. Remove contamination fast, keep it wet, and avoid grinding anything into the panel.
What owners get wrong
The first mistake is treating egg like ordinary road grime. It is not. Road film usually waits for your next wash. Egg keeps changing while it sits.
The second mistake is assuming a successful cleanup means the paint is fine. Sometimes the residue is gone and the clear coat is still marked. That is why this guide separates fresh egg from dried egg, then checks for etching after removal instead of stopping at “looks clean.”
Use this priority order:
- Contain the mess first: Flush away loose shell before your towel touches the paint.
- Soften residue next: Moisture and dwell time do more than pressure.
- Inspect the finish last: Look for dull spots, ghost outlines, or texture changes once the panel is clean and dry.
If the egg is still wet, you are dealing with a time-sensitive cleaning job. If it has dried and baked on, you may also be dealing with paint correction.
Immediate Action for Fresh Wet Egg
If the egg is still wet, you've got the best possible chance to save the finish with minimal follow-up work. But this is also when people ruin their own paint by smearing shell and protein across the panel.
Egg should be removed from car paint within 5 to 10 minutes because the proteins start bonding as the residue dries. The verified removal protocol is to rinse with warm water, remove all shell fragments, then lay a saturated microfiber cloth soaked in warm soapy water over the stain for 10 minutes before gentle wiping. That protocol is based on the verified data provided for this article.
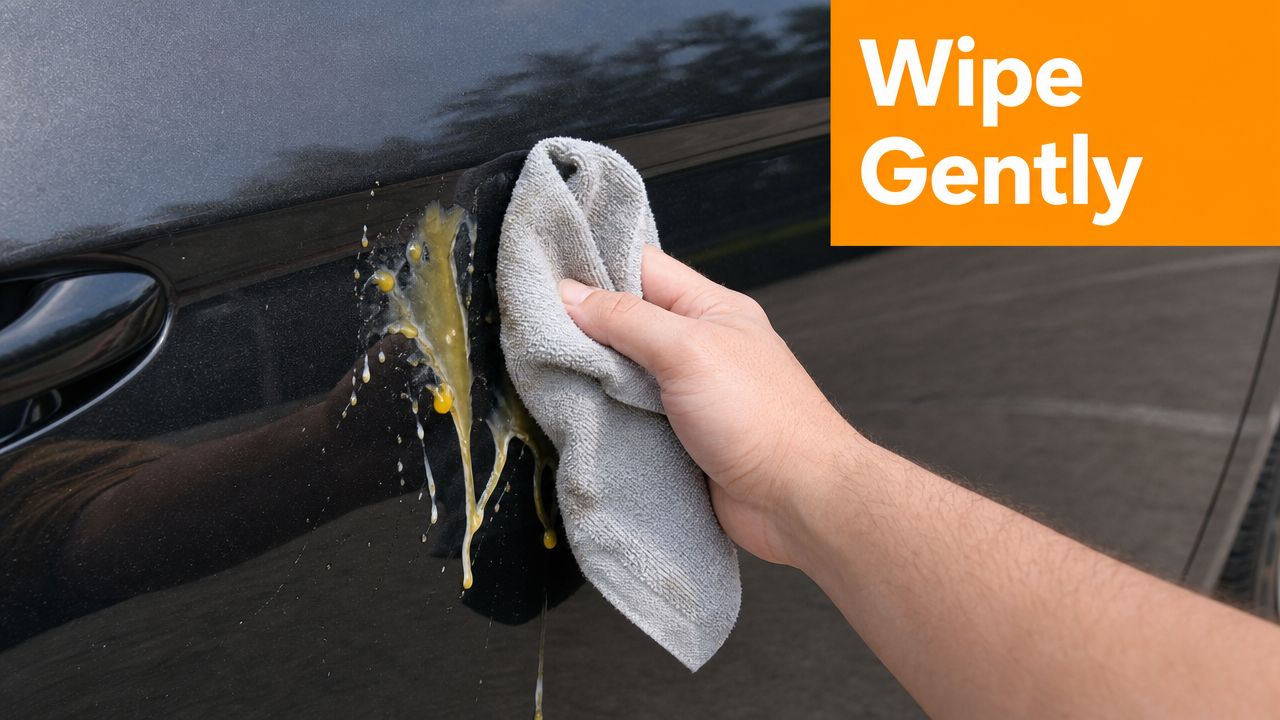
Fresh egg removal step by step
- Move the car out of heat if you can. Shade buys you time. Direct sun speeds drying and bonding.
- Rinse, don't touch. Use a gentle flow of warm water and let it carry away loose shell, which acts like grit.
- Soak the spot. Take a clean microfiber towel, saturate it with warm soapy water, and lay it on the affected area for 10 minutes. You're trying to rehydrate and loosen the egg, not wipe it dry.
- Lift with light pressure. After the soak, wipe gently with a plush microfiber towel. Fold the towel often so you're always using a clean section.
- Rinse again. Flush the area to remove any remaining protein film.
Why soaking works better than wiping
Wiping fresh egg immediately usually spreads contamination and drags fragments across the paint. Soaking changes the job. It lets moisture and soap loosen the protein so the towel can lift instead of grind.
That same logic is why bird dropping removal works best with a dwell period rather than quick friction. If you want a similar contamination-safe approach, this guide on removing bird poop from a car follows the same principle of softening before contact.
If the towel sticks to the panel, the egg hasn't softened enough. Add more moisture and give it more time. Force is what creates scratches.
What not to do with wet egg
A few shortcuts almost always backfire:
- Don't use paper towels: They're too rough and tend to drag shell.
- Don't scrub in circles: That smears residue into a larger area.
- Don't use your fingernail on stuck bits: You can score the clear coat faster than you think.
- Don't reach for glass cleaner: That belongs nowhere near egg-contaminated paint.
If the stain doesn't release after the soak and gentle wipe, stop treating it like fresh egg. At that point, move to a dried-egg process.
Tackling Stubborn Dried-On Egg Stains
Dried egg is different. Once the albumen hardens, ordinary soap often won't dissolve it well enough to remove it safely. At this point, impatient washing turns a contamination issue into visible scratching.
Professional detailers commonly use a non-abrasive solvent protocol with WD-40 or kerosene, and benchmark data shows a 92% removal success rate for dried egg when the product is allowed to dwell for 5 minutes before wiping, according to the verified data linked from the Miata forum discussion. The same source notes a common mistake: skipping the warm-water pre-rinse, which occurred in 35% of observed cases and led to shell fragments scratching the surface.
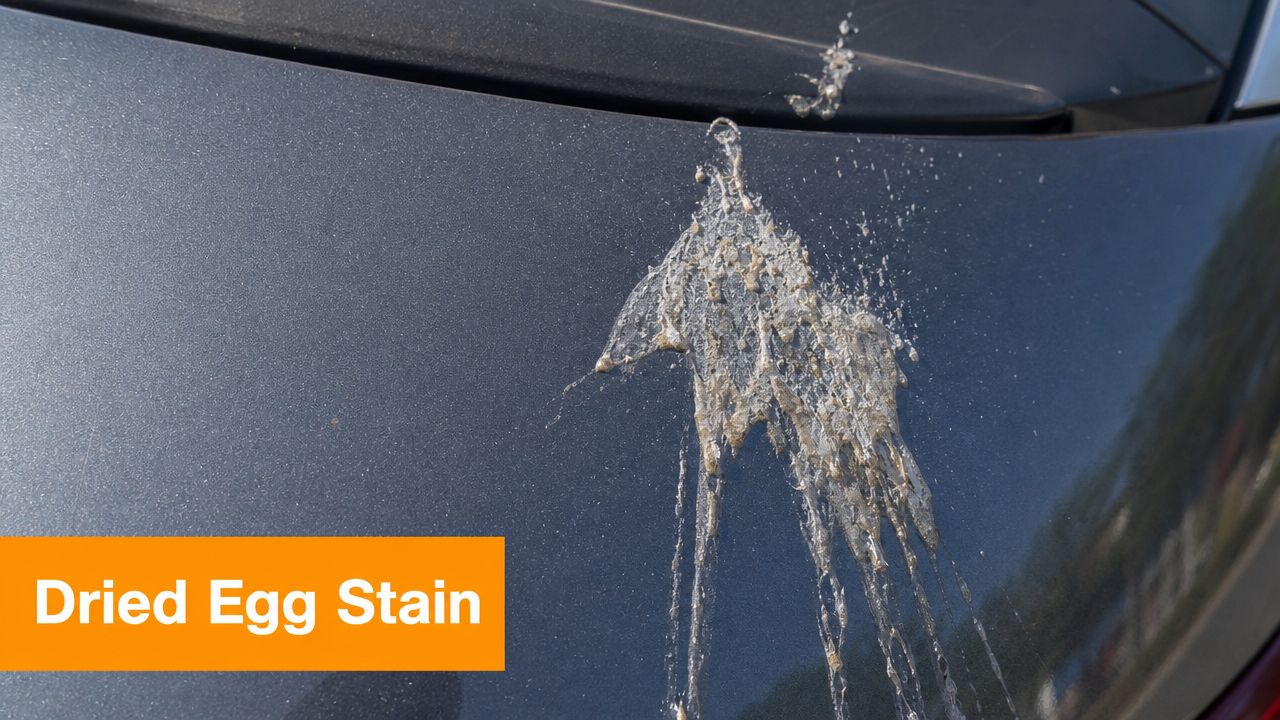
The right order matters
For dried egg, don't start with friction. Start with separation. You want to remove abrasive shell, break down the hardened protein layer, and only then wipe.
Here's the safe working sequence I'd use on a customer car:
- Pre-rinse with warm water: Flush away every loose shell fragment you can.
- Apply a non-abrasive solvent: WD-40 or kerosene are verified options in the data you provided.
- Respect the dwell time: Let the solvent sit for 5 minutes so it can penetrate the protein matrix.
- Wipe with damp microfiber: Use light, straight-line passes.
- Repeat if needed: One gentle second pass is better than one aggressive first pass.
Dried egg removal options compared
| Method | Effectiveness | Risk Level |
|---|---|---|
| Warm water and car soap alone | Limited on hardened residue | Moderate if you start wiping too soon |
| WD-40 with 5-minute dwell | High on dried egg | Low when used gently with microfiber |
| Kerosene with 5-minute dwell | High on dried egg | Low to moderate, depending on handling |
| Abrasive scrubbing or paper towels | Poor despite effort | Very high |
A quick visual can help if you want to see the kind of residue you're dealing with and how careful removal should look in practice.
When soap stops being enough
Dried egg often forms a film that behaves more like glue than food. That's why people keep washing and still see a crusty edge or cloudy outline. The residue may be partly removed, but the bonded protein remains.
At this stage, these habits help:
- Use more than one towel: One for removal, one for final wipe-down.
- Keep the panel wet: Dry wiping is how marring starts.
- Inspect from an angle: What looks clean straight-on may still have bonded residue along the edges.
Don't confuse “it moved a little” with “it's safe to scrub now.” Dried egg usually gives way in layers.
If the egg sat long enough to bake into the paint, solvent alone may remove the residue while leaving etching behind. That's not a cleaning failure. It means the contamination is gone and the paint now needs evaluation.
Essential Supplies and What to Avoid at All Costs
The right kit buys you safety. The wrong one turns an egg cleanup into a paint correction job.
I keep this simple for customers. Your supplies need to do three things: soften protein, carry grit away from the paint, and minimize friction while you wipe. If a product or tool does the opposite, leave it out.
Use this instead of that
| Better choice | Avoid | Why it matters |
|---|---|---|
| Plush microfiber towels | Paper towels, old rags | Soft, split fibers trap residue away from the paint instead of dragging it across the clear coat |
| Warm water pre-rinse | Dry wiping | Shell pieces are abrasive and should be flushed off before any contact |
| pH-balanced car wash soap | Household degreasers | Car soap adds lubrication without stripping protection or stressing trim |
| Diluted white vinegar | Ammonia-based glass cleaner | Vinegar can help loosen protein residue. Glass cleaner is not made for this job and can create more risk on paint |
A practical supply kit
You do not need a shelf full of specialty products. You need a small set of paint-safe tools you can trust under stress.
- Two to four plush microfiber towels: One towel loads up fast once egg white and shell start transferring. Swap towels early instead of grinding debris back into the panel. If you want a quick standard for what to buy, this guide to microfiber towels for cleaning explains the differences well.
- A bucket of warm water with car wash soap: Warm water helps loosen fresh residue, and the soap gives you the lubrication plain water lacks.
- White vinegar diluted with water: Keep it mild and use it as a spot-treatment tool, not an all-over cleaner. It can help on protein film that soap leaves behind.
- WD-40 or kerosene: These are for dried, bonded residue only. Use a small amount, let it dwell briefly, and wipe with a clean microfiber. If you are uncomfortable using a solvent on paint, stop there and hand the job to a detailer.
- A separate towel-care product: If your microfiber picks up egg and you want to pre-treat it before washing, Fillaree's eco-friendly stain stick is a reasonable option for the towel itself. Do not use a laundry stain product on the car's paint.
What to avoid at all costs
Paper towels are the big one. They feel soft in your hand, but on clear coat they can act like a light abrasive, especially once shell dust is in the mix.
Skip dish sponges, shop towels, old bath towels, and mystery rags from the garage. Avoid glass cleaner, heavy household degreasers, and anything scented or tinted that was not made for automotive paint. These products solve the wrong problem.
One more rule matters here. Keep your tools dedicated. A towel that touched wheels, interior plastics, or driveway grime should never touch egg-contaminated paint. Cross-contamination is how a simple cleanup turns into swirls, hazing, and a much bigger bill.
Assessing and Repairing Lingering Paint Etching
Once the egg is gone, don't stop at “looks better.” Check the surface carefully. A lot of owners remove the residue and then wonder why the panel still looks dull, rough, or slightly stained. That's usually etching, not leftover dirt.
Most DIY guides miss the important line between cleaning and correction. Verified guidance notes that egg proteins bond to paint within 15 to 30 minutes, causing etching that soap alone cannot fix, and delaying beyond 30 minutes often means machine polishing is needed, according to Nextzett's detailing guidance.
How to tell if it's etched
Check the area in bright, angled light. Then feel it with clean fingertips after the panel is fully washed and dried.
You're looking for three common signs:
- A dull patch: The gloss doesn't match the surrounding paint.
- A faint ring or outline: The contamination is gone, but its shape remains.
- Texture change: The surface feels slightly rough or uneven.
If you only see a light haze and the surface still feels mostly smooth, hand polishing may help. If the mark is sharp, sunken, or obvious from multiple angles, you're likely beyond a simple wipe-down fix.
A safe DIY approach for light etching
Use a consumer-grade paint polish and a microfiber or foam applicator pad. Work by hand first. That gives you control and keeps you from removing more clear coat than necessary.
A careful sequence looks like this:
- Wash and dry the panel completely.
- Apply a small amount of polish to the applicator.
- Work a small area with moderate pressure in overlapping passes.
- Buff off with a clean microfiber towel.
- Inspect before repeating.
If you're comparing options, this guide to car paint restorer products is a useful starting point for choosing a polish that fits light correction rather than heavy defect removal.
When to stop and call a pro
Some damage is too deep for a safe hand fix. That's especially true if the egg baked on for too long or sat through heat. In those cases, a professional may need machine polishing, defect correction, or more advanced paint work.
That same judgment call comes up on larger vehicles too. If you're dealing with oxidation, etched graphics, or bigger exterior finish problems on a motorhome, a specialist in exterior RV restoration works in the same general world of surface correction and finish recovery.
If hand polish improves the spot but doesn't remove it, don't keep chasing it aggressively. You can remove clear coat faster than you remove the mark.
The right goal isn't perfection at any cost. It's preserving the finish while deciding if the panel needs professional correction.
The Final Wash and Future-Proofing Your Paint
After egg removal and any polishing, the panel is usually carrying leftover soap film, solvent traces, or spent polish dust. That residue needs a proper wash so you can reset the surface and see the true condition of the paint.
Start with a full exterior wash using plenty of lubrication and a clean mitt. Work top to bottom, rinse thoroughly, and pay extra attention to seams, trim edges, and emblems where egg residue can hide. Dry with a clean microfiber towel and inspect once more in natural light.
Protect the paint for next time
No protection makes egg safe, but a maintained wax or sealant layer gives you a sacrificial barrier. In the verified data, waxing after correction is recommended to restore protection and reduce future damage exposure. In practical terms, that means contaminants release more easily and you get a little more margin before the paint itself takes the hit.
A few habits help over time:
- Park smart: Shade is helpful, but avoid parking where vandalism is common.
- Keep wash tools ready: A clean microfiber towel and paint-safe soap in the garage save time.
- Maintain protection: Wax or sealant won't stop impact damage, but it can make cleanup safer.
- Wash after any incident: Even if the spot looks clean, residues can linger around edges.
If you ever have to deal with this again, speed and restraint are what save the finish. Fast response matters. Gentle technique matters just as much.
If you want an easier way to handle the final reset wash after contamination cleanup, the SwiftJet foam gun makes that step simpler. It connects to a standard garden hose, lays down thick foam for better lubrication, and helps you wash off solvent residue and loosened grime without turning the job into another scratch risk.
