

You wash your car, step back, and it still looks tired. The color seems flatter than it used to. Under sunlight, you notice fine spiderweb marks on the hood and a grayish haze that kills the shine. A lot of people look at that finish and assume the paint is ruined.
Usually, it isn't ruined. It's worn, contaminated, oxidized, or scratched at a microscopic level. That's an important difference, because car paint restorer products are designed to deal with surface-level defects. The trick is knowing what problem you have before you start rubbing anything into the paint.
If you remember one idea from this guide, make it this one: preparation matters more than the restorer itself. A great finish starts with diagnosis, washing, and decontamination. The compound or polish only works well when the surface is clean enough to correct safely.
Why Your Car's Paint Looks Dull and How to Fix It
Most modern vehicles use a layered paint system. Imagine it as a clear raincoat over the color layer. When that outer layer gets covered in contamination or develops tiny defects, light stops reflecting evenly. That's why the paint looks dull, hazy, or washed out instead of deep and glossy.
A lot of beginners think “restoration” means adding shine on top. Sometimes it does, but the better kind of restoration usually means removing what's interfering with the shine. That can be oxidation, embedded grime, swirl marks, or a thin layer of damaged clear coat.
What dull paint usually means
Here's the simple version:
- Oxidation makes paint look faded or chalky.
- Swirl marks are tiny scratches that show up in direct light.
- Bonded contamination makes paint feel rough and look less crisp.
- Minor defects in the clear coat scatter light and reduce gloss.
That's why paint correction is a lot like skincare. If skin looks dull, you don't fix it by piling on makeup first. You clean it, exfoliate it carefully, and then protect it. Cars work the same way.
Practical rule: Shine comes from smoothness. If the surface isn't clean and level, no miracle bottle will make it look truly polished.
This isn't some fringe corner of car culture, either. The global car care products market was valued at USD 4.4 billion in 2022 and is projected to reach USD 4.8 billion by 2027, with major players including 3M, Sonax, and Wurth Group. That tells you something useful. You're working inside a mature category built on long-established automotive chemistry, not chasing a gimmick.
What a realistic fix looks like
For a beginner, the path usually looks like this:
- Diagnose the problem correctly
- Wash and decontaminate the surface
- Choose the least aggressive product that can solve the issue
- Correct the paint
- Protect the finish so the work lasts
That order matters. If you skip the early steps, the later ones get harder, riskier, and less effective.
Diagnosing Your Paint Before You Choose a Product
Before you buy anything, inspect the paint like a detailer, not a shopper. A restorer can help with some problems, but it can't fix all of them. If you treat every dull panel the same way, you'll waste time and may even make the finish worse.
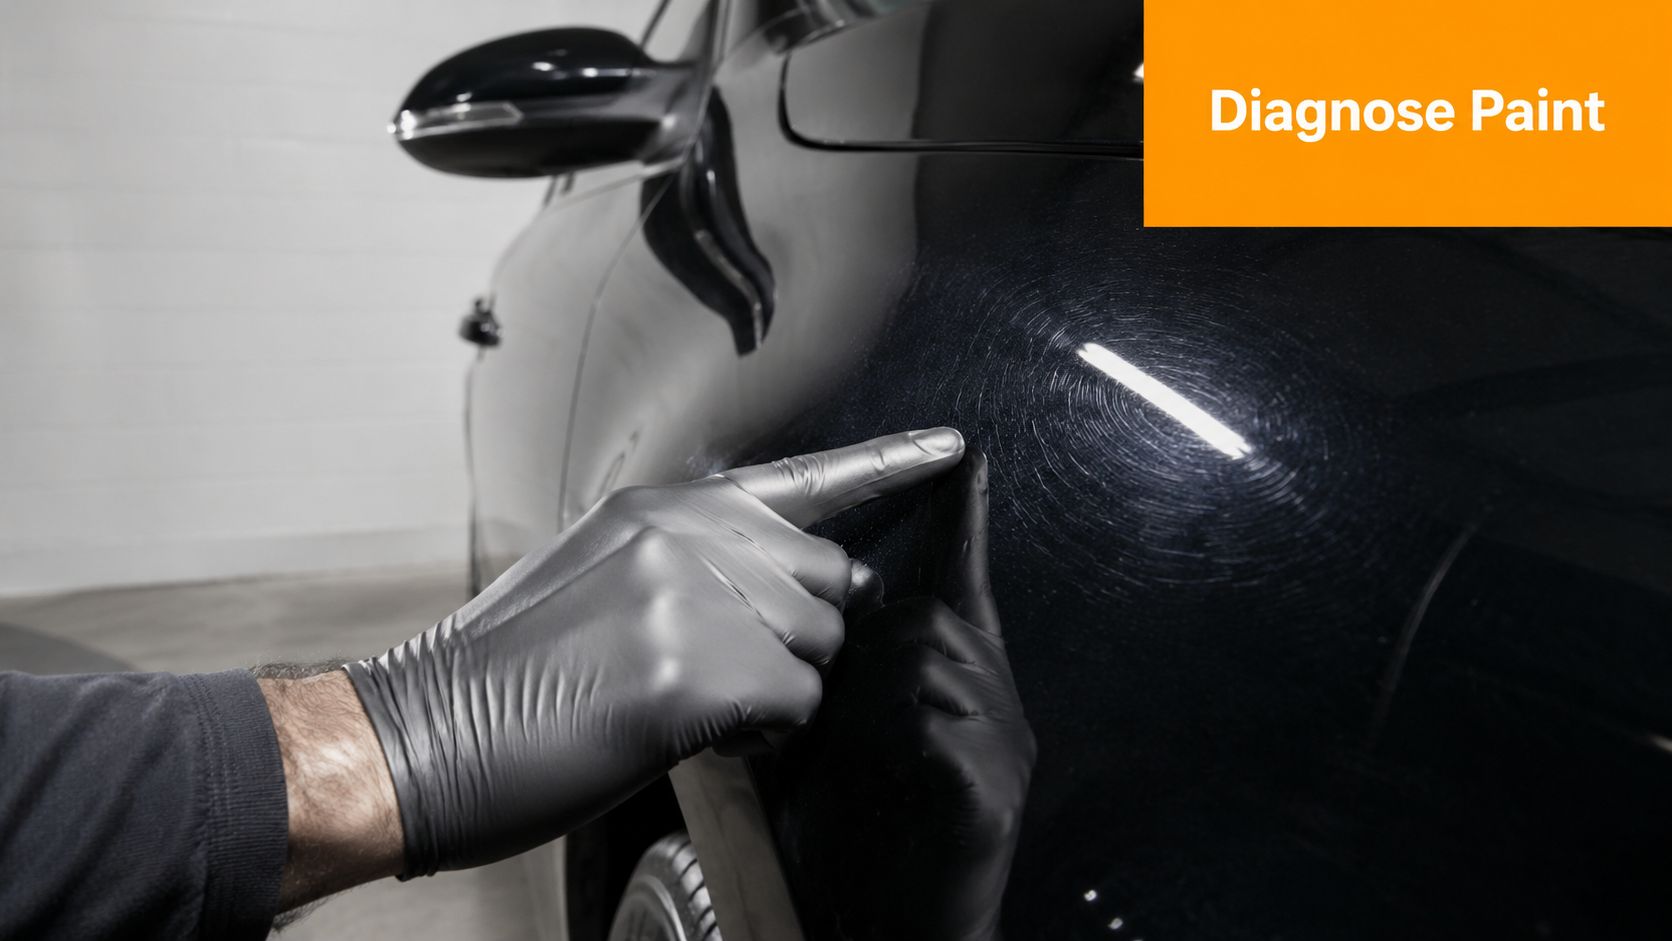
Look at the paint in honest lighting
Garage lighting hides defects. Sunlight or a focused inspection light reveals them fast.
Here's what to look for:
- Swirl marks look like fine circular spiderwebs, especially on dark paint.
- Oxidation shows up as a flat, cloudy, tired-looking surface.
- Light scratches usually follow contact points, such as around door handles or trunk openings.
- Contamination makes the paint feel rough, even if it looks decent from a distance.
If you want a deeper primer on stronger correction products, this guide to a heavy cut compound is useful after you've confirmed the paint needs that level of cut.
Separate fixable defects from finish failure
A lot of confusion starts here. People see peeling, milky, or patchy clear coat and assume a restorer will bring it back. It won't.
Professional guidance from UTI notes that washing and clay-bar decontamination come before compounding and polishing, and it also points out an important limit: when the clear coat is too far gone, compounding won't restore it and refinishing may be the only answer. Their walkthrough on how to restore car paint is helpful because it focuses on diagnosis before correction.
Use this quick mental checklist:
- If the paint feels rough, contamination may be the main problem.
- If the paint looks dull but uniform, oxidation or light marring may be the issue.
- If you see isolated lines, you're likely dealing with scratches.
- If the surface is peeling, flaking, or permanently cloudy in patches, that points more toward clear coat failure than simple correction.
Try a simple scratch check
You don't need a lab to make a better decision. One old detailer habit still works well: inspect the scratch closely and feel whether it seems superficial or deeper than the surrounding finish. If it looks sharp, catches light hard, and remains obvious after washing, don't assume a mild product will erase it.
If the defect is contamination, decontaminate. If it's oxidation, correct. If it's clear coat failure, stop polishing and rethink the job.
That pause saves paint. A beginner's biggest mistake isn't usually buying too little product. It's trying to solve the wrong problem.
The Four Main Types of Car Paint Restorer Products
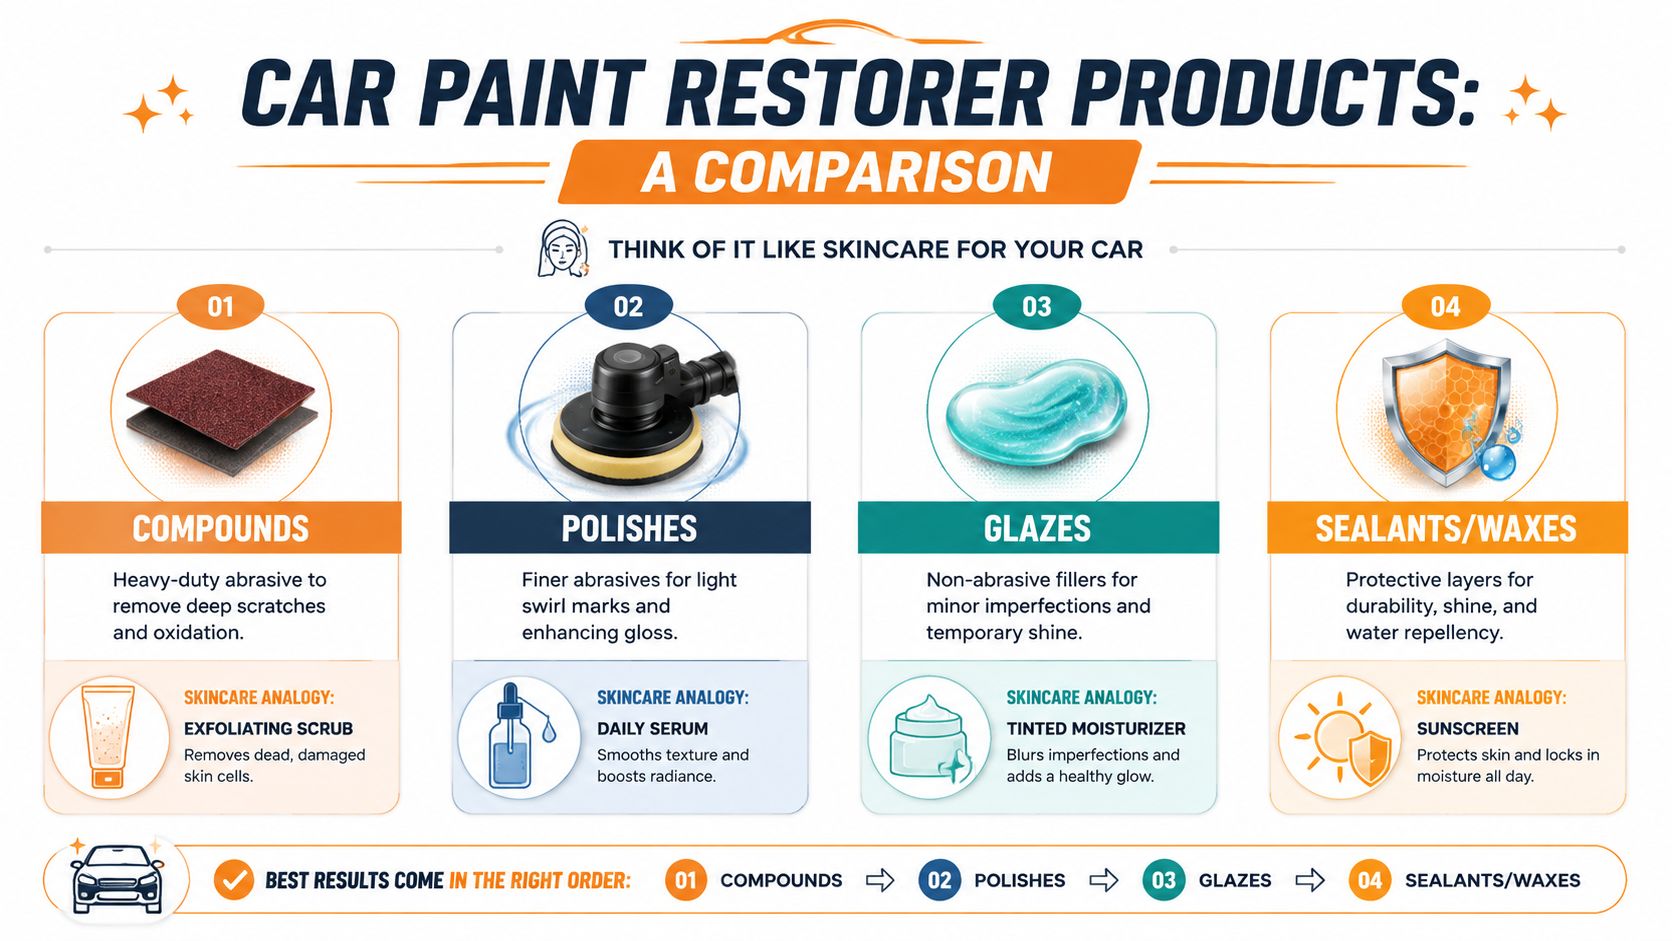
Not all paint restorers do the same job. Some remove defects. Some refine the finish. Some hide damage temporarily. Some protect what you already corrected. If you mix them up, the results get confusing fast.
A helpful way to think about them is skincare. One product exfoliates aggressively, another smooths, another blurs imperfections, and another seals in the finished look.
Why these products exist at all
Modern paint correction only makes sense because modern automotive finishes became more standardized over time. The American Coatings Association notes that DuPont's “Duco” was the first paint specifically developed as an automotive coating, and thermoplastic acrylic resin technology later dominated the automotive topcoat market from the 1950s through the 1970s. Today's compounds and polishes are built around that layered logic: primer, color, clear coat.
That's why a restorer isn't just “shiny stuff in a bottle.” It's chemistry designed to interact with a specific kind of surface.
The four product families
Compounds
A compound is the strongest correcting product in the basic lineup. It uses abrasives to level defects by removing a small amount of damaged material from the top surface.
Think of it as a heavy exfoliant. You use it when the finish has obvious oxidation, stronger swirl marks, or more noticeable scratches. The tradeoff is that compounds can leave a slightly hazier finish that often needs refinement afterward.
Polishes
A polish also uses abrasives, but they're finer. Its job is to refine the surface, restore gloss, and clean up the haze left by heavier correction.
If compounds are the rough exfoliator, polish is the gentler finishing scrub. Many beginners need a polish, not a compound. If your paint has light wash marring and mild dullness, starting with a polish is usually the safer call.
Glazes
A glaze is mostly about appearance, not correction. It fills very minor imperfections and boosts gloss, especially on darker paint.
This is the cosmetic side of detailing. A glaze is like makeup primer for paint. It can make the finish look richer and smoother, but it doesn't permanently remove the defect the way an abrasive product does.
Sealants and waxes
These don't correct defects. They protect the finish after correction or enhancement.
A sealant or wax is your moisturizer and sunscreen. It helps the restored surface resist water, grime, and environmental wear while keeping the shine from fading as quickly.
Paint Restorer Product Comparison
| Product Type | Primary Job | Abrasiveness Level | When to Use |
|---|---|---|---|
| Compound | Remove heavier oxidation, deeper swirls, and more visible defects | Heavy-cutting | When lighter products won't level the damage |
| Polish | Refine paint, remove lighter marring, boost gloss | Light to medium abrasive | After compounding, or as a one-step correction for mild defects |
| Glaze | Fill tiny imperfections and enhance shine temporarily | Non-abrasive or nearly non-abrasive | When appearance improvement matters more than permanent correction |
| Sealant/Wax | Protect corrected paint and maintain gloss | Non-abrasive | After the paint looks the way you want it |
The best product isn't the strongest one. It's the least aggressive one that solves the problem.
That single rule protects more paint than any brand preference ever will.
How to Prep Your Car for Flawless Restoration
Most bad polishing results start before the polisher ever touches the paint. Dirt, mineral residue, road film, and bonded contamination sit on the surface like tiny bits of grit. If you start correcting over that mess, you're dragging contamination across the finish.
That's why prep is the foundation. In many cases, it also creates the first big visual improvement.
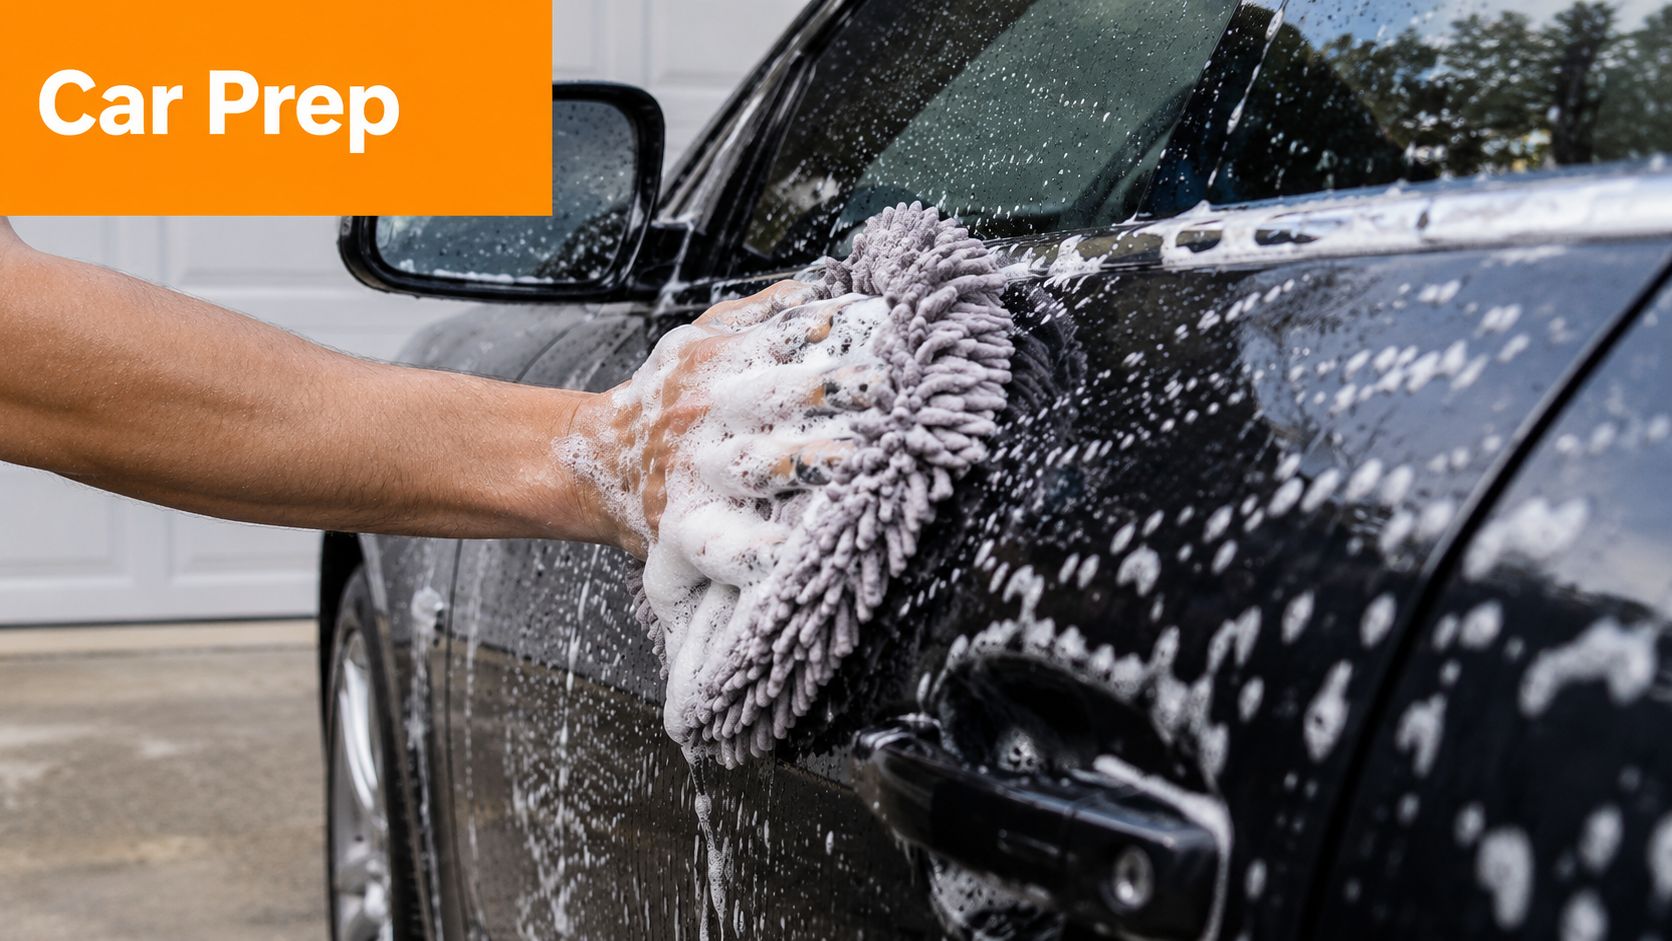
Start with a careful wash
The goal of the wash stage isn't just to make the car look cleaner. It's to remove loose dirt without inflicting new scratches.
A foam gun helps because thick foam clings to the panel and adds lubrication while dirt loosens and rinses away. That matters more than people think. Wash-induced marring is one of the most common reasons paint loses clarity in the first place.
A smart wash routine includes:
- Pre-rinse first to knock off loose grime
- Foam the vehicle thoroughly so dirt softens before contact washing
- Use a quality microfiber mitt instead of a harsh sponge
- Rinse the mitt often so you're not recirculating debris
Decontaminate before you correct
After washing, run your clean fingertips lightly across the paint. If it feels rough, the surface still holds bonded contamination. That contamination can include fallout, road film, and stubborn debris that ordinary washing won't remove.
Professional restoration guides emphasize that washing and clay-bar decontamination should happen before compounding or polishing, and they note that removing bonded contamination can significantly improve gloss and clarity before any abrasive product is used. That's the key lesson from UTI's earlier-cited guidance.
Use a clay bar or similar decontamination tool with proper lubricant. The clay picks contaminants out of the surface the way adhesive lint rollers lift fuzz from fabric. Afterward, paint usually feels dramatically smoother.
Why prep changes the final result
Beginners often expect the magic to happen during polishing. A lot of the magic happens earlier.
Here's what proper prep does:
- Improves gloss immediately by removing grime and bonded residue
- Makes defects easier to read so you can choose the right product
- Reduces the risk of adding scratches during correction
- Helps compounds and polishes work evenly instead of fighting surface contamination
Rubbing a restorer into contaminated paint is like sanding wood with pebbles stuck in the paper. The tool may be right, but the surface is wrong.
When the paint is fully washed and decontaminated, correction becomes more controlled, more predictable, and much safer.
Applying Paint Restorers The Right Way
Once the surface is clean and diagnosed, you can finally correct it. Patience matters more than force. Good technique beats aggressive technique almost every time.
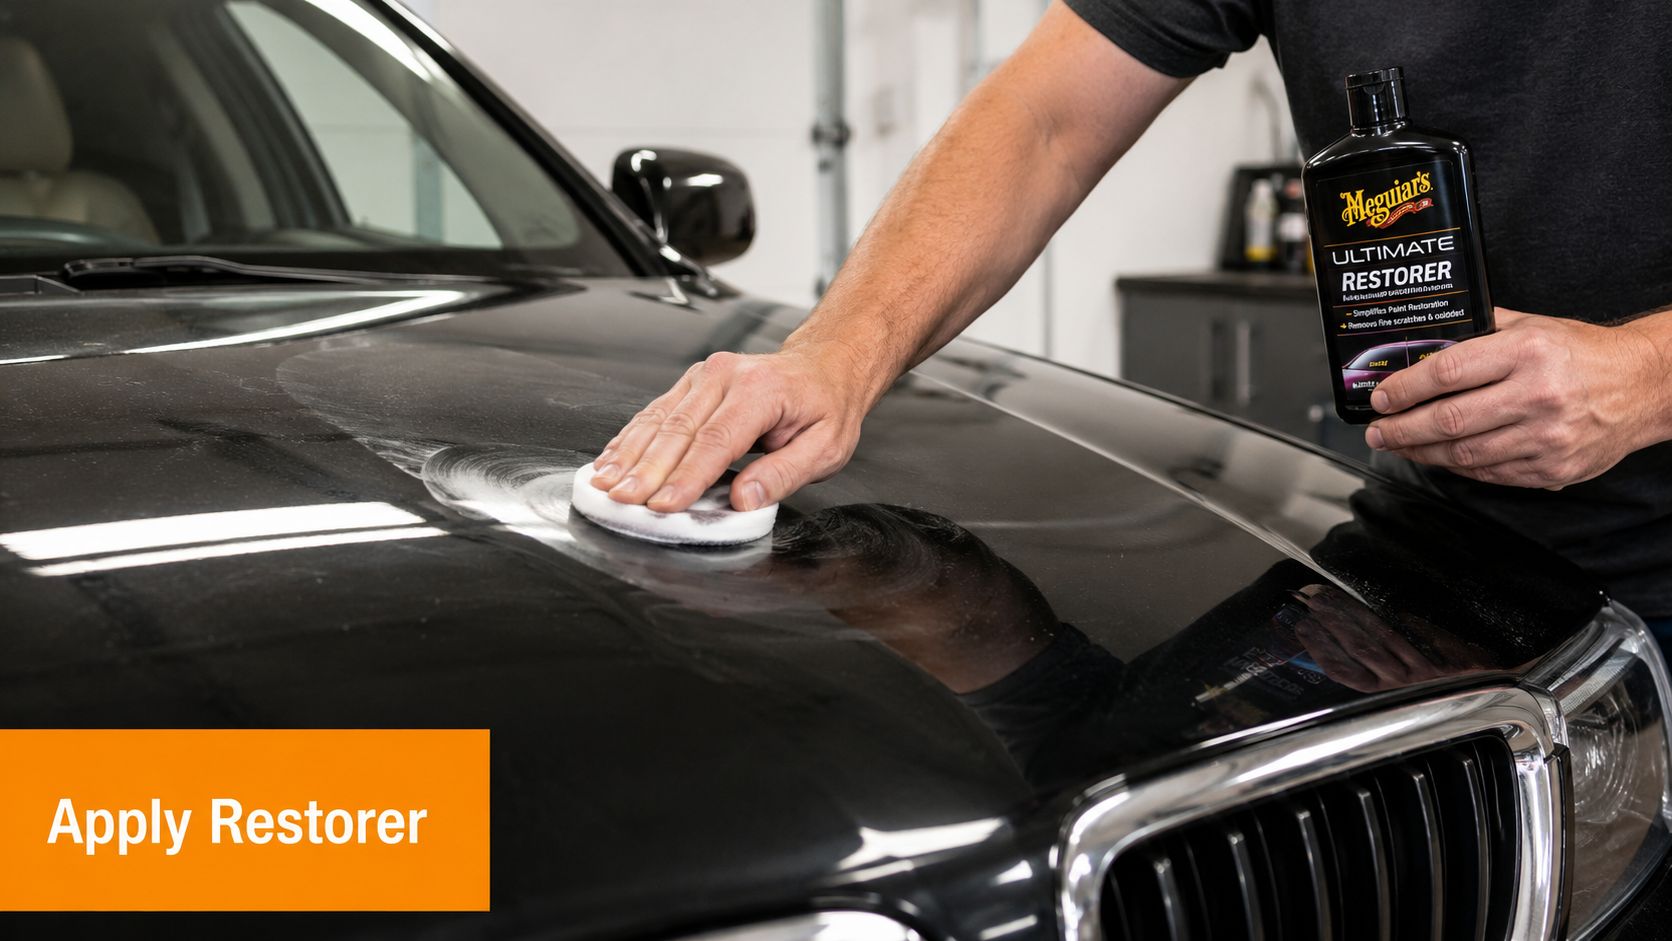
Start with a test spot
Never begin on the whole car. Pick a small area and test your method there first. That tells you whether the product, pad, and technique are improving the finish.
If a light polish fixes the problem, don't step up to a compound. If the test spot barely changes, you may need a more aggressive combination.
A safe workflow looks like this:
- Choose a small area that shows the defect clearly.
- Try the least aggressive combo first.
- Inspect the result in good light.
- Only increase cut if necessary.
Hand application versus machine correction
By hand, you can improve mild oxidation, add gloss, and work specific spots. Hand application gives control, but it's slower and less consistent for larger defects.
A dual-action polisher is the more efficient option for real correction. According to Chemical Guys' paint restoration guidance, using a dual-action polisher at 4,000 to 6,000 RPM with the right compound can remove 5 to 10 microns of damaged clearcoat and achieve up to a 95% reduction in visible defects. That same guidance also stresses working in small sections and avoiding pad contamination.
If you're comparing machine options, this guide to electric polishers for cars helps clarify what beginners should look for.
Work small and stay methodical
Don't spread product across an entire hood and hope for the best. Work in small areas. A section about the size of a manageable square is easier to control, inspect, and wipe down cleanly.
For each section:
- Apply a modest amount of product to the pad or applicator
- Spread it evenly before increasing speed or pressure
- Use overlapping passes in a consistent pattern
- Wipe residue with a clean microfiber towel
- Reinspect before moving on
The pad matters as much as the liquid. A cutting pad paired with a compound removes defects faster. A softer pad paired with polish refines the finish.
Here's a visual walkthrough if you want to see the process in motion:
Keep your pads clean or you'll create new defects
This is one of the most overlooked mistakes in DIY correction. A dirty pad stops being a precision tool and starts acting like a contamination trap.
Chemical Guys specifically warns that resting the pad face-down on contaminated surfaces can reintroduce grit and create new scratches. Treat pads like surgical tools. Keep them clean, keep them off the ground, and swap them out when they get saturated or dirty.
Clean paint can still be ruined by a dirty pad.
That's why pros often bag or cover pads between uses and check them constantly during the job.
Common Paint Restoration Mistakes to Avoid
The fastest way to get frustrated is to use the right product the wrong way. Most correction mistakes come from impatience, not bad intentions.
The errors that show up most often
- Going too aggressive too soon. If you reach for a compound when a polish would do the job, you remove more material than necessary and create extra finishing work.
- Working on hot panels or in direct sun. Product dries too fast, becomes harder to work, and can wipe off unevenly.
- Skipping the test spot. That's how people discover a bad pad-product combo on the most visible part of the hood.
- Using too much product. More liquid doesn't mean more correction. It usually means more mess, more dust, and harder wipe-off.
- Sealing a flawed surface too early. Waxing over contamination or haze just locks in the disappointment.
How to stay out of trouble
The safer mindset is simple: start gentle, inspect often, and let the surface tell you what it needs.
If the finish isn't improving, don't automatically press harder. Check the basics first. Is the paint fully decontaminated? Is the pad clean? Is the product matched to the defect? Are you working too large an area?
A careful beginner often gets better results than a reckless enthusiast with expensive tools.
Protecting and Maintaining Your Restored Shine
Corrected paint looks great because the surface reflects light evenly again. Protection helps keep it that way. Once you've restored gloss, add a wax or sealant so dirt, water, and daily exposure don't undo the work too quickly.
Maintenance matters just as much as correction. If you wash carelessly after polishing, you can reintroduce swirl marks and dullness faster than you expect. Use gentle wash media, plenty of lubrication, and a method that minimizes rubbing dirt back into the surface.
Build a maintenance routine that preserves the finish
A good routine usually includes:
- Gentle washing with quality mitts and plenty of foam
- Prompt removal of contamination before it bonds harder to the paint
- Periodic protection with your preferred wax, sealant, or coating
- Better storage habits when possible, because environmental exposure wears paint over time
If your vehicle sits outside year-round, shelter makes maintenance easier. It can be useful to compare carport specs and costs if you're thinking about reducing constant sun, rain, and debris exposure.
For longer-lasting surface protection after correction, it also helps to understand how a ceramic coating for vehicles fits into the bigger maintenance picture.
The big takeaway is simple. Don't think of restoration as a one-time rescue. Think of it as part of a cycle: diagnose, prep, correct, protect, maintain. When you respect that order, the shine lasts longer and each future correction job becomes lighter.
If you want the prep stage to be faster and safer, take a look at SwiftJet. A quality foam gun helps you lay down thick, clinging suds before contact washing, which makes decontamination and paint correction much easier on the finish.
