

You fill the bottle, snap the foam cannon onto the washer, pull the trigger, and get a weak layer that looks more like dishwater than a pre-wash. That's a common starting point. The problem usually isn't the foam cannon. It's that they're chasing spectacle instead of useful foam thickness.
Good foam has a job. It has to cling long enough to soften and suspend dirt, rinse cleanly, and leave the surface safer for contact washing. Bad foam either slides off too fast or sits there as heavy residue that looks impressive but doesn't help much. Once you learn to read the foam by sight, sound, and behavior on the panel, dialing in your setup gets much easier.
Why Your Quest for Thick Foam Matters
The appeal is obvious. Thick white foam looks like professional detailing. But the reason detailers care about foam thickness has less to do with looks and more to do with paint safety.
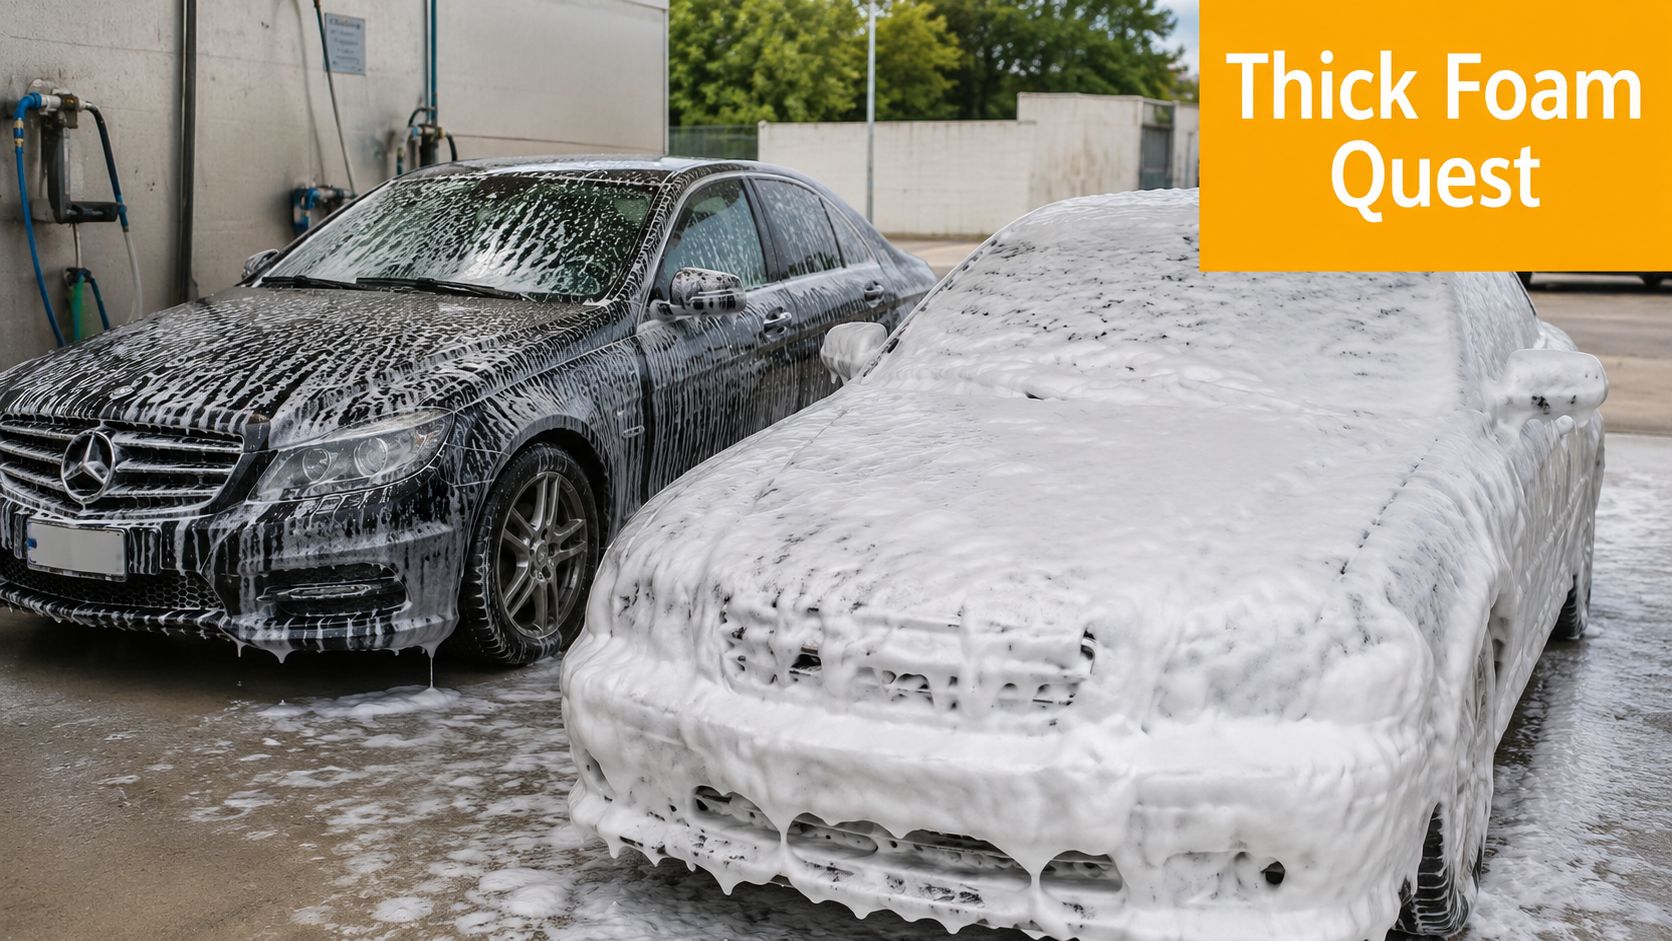
A proper foam layer buys you time. It spreads cleaning solution across the panel, loosens road film, and helps carry grit away before a mitt ever touches the paint. According to Car and Driver's foam cannon testing guide, thick foam is essential because it offers a higher density and softness range, which helps the foam cling to the vehicle's surface, thereby trapping dirt and reducing the risk of swirl marks or fine scratches during the wash process.
Effective foam versus oversized foam
This is the part many people miss. Maximum foam isn't always the goal. Effective foam has enough body to cling, enough lubrication to stay slick, and enough rinseability to release contamination instead of turning into paste.
Practical rule: If the foam looks huge but turns watery the moment it lands on the paint, you don't have thick foam. You have inflated foam.
In real use, the best foam sits on a vertical panel in an even blanket, then slowly begins to move. It shouldn't disappear instantly. It also shouldn't cake up into dry clumps around badges, trim, and panel edges.
What your paint is telling you
You can often diagnose the wash before you even touch the car.
- Fast runoff: Foam is too thin, too wet, or under-concentrated.
- Big, airy bubbles: The mix is often over-aerated or not balanced for the machine.
- Shaving-cream patches with sticky residue: Foam may be overly concentrated for the water flow and won't sheet cleanly.
- Even cling with soft, tight bubbles: That's usually the sweet spot.
The finish line isn't “as thick as possible.” It's foam thickness that cleans safely and predictably.
Calibrating Your Soap to Water Ratio
Most foam problems begin in the bottle. People tweak nozzles for ten minutes when the issue is that the mix was wrong from the start.
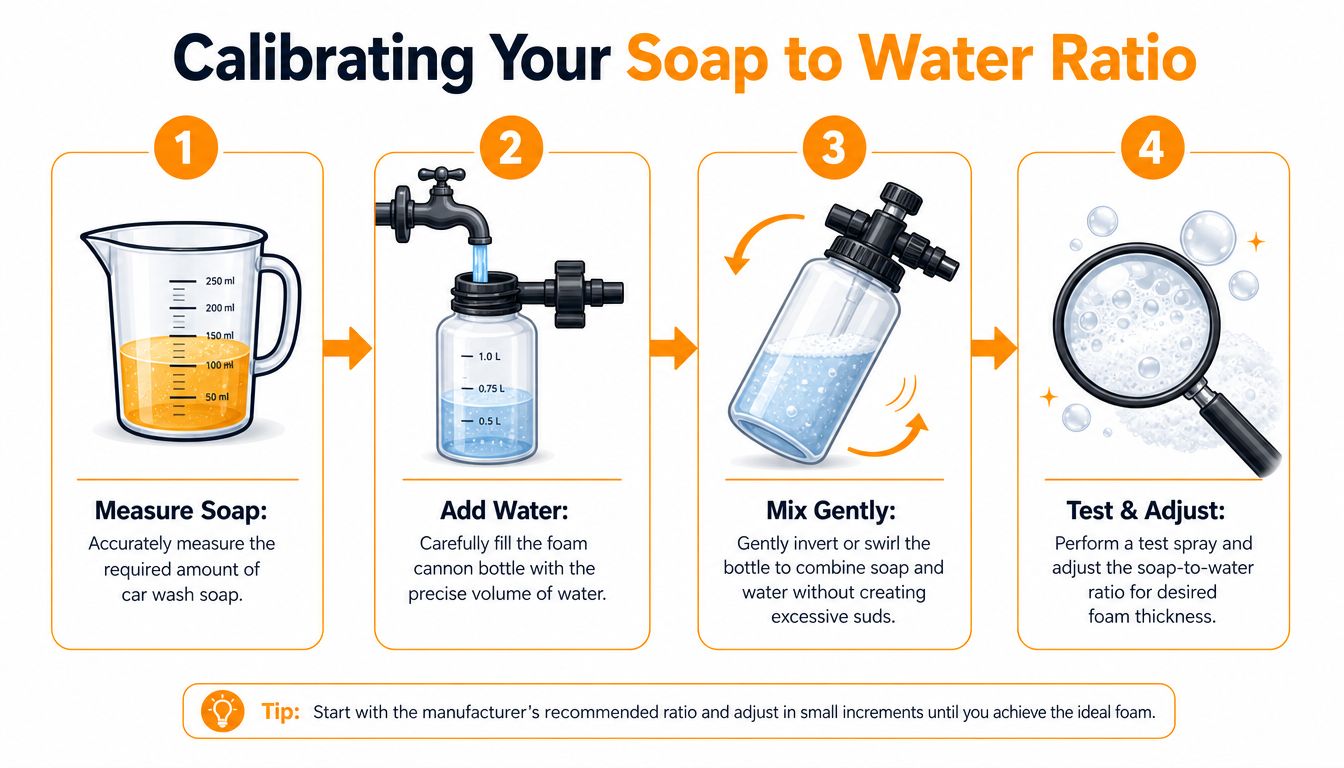
The strongest baseline is the industry recommendation of 1:10 soap to water for foam cannons, which directly affects foam density and thickness. Start there using the ratio noted earlier, then tune from observation instead of guessing. If you want to compare product styles before mixing, this guide to the best foam soap for cars is a useful reference point.
Start with a controlled mix
Don't eyeball it. Use the same measuring cup every time and fill the bottle consistently. That gives you a repeatable baseline, which matters more than chasing a miracle soap.
A good process looks like this:
- Measure the soap first. Don't pour straight from the bottle unless it has clear markings.
- Add water carefully. Filling too aggressively can pre-foam the bottle and make it harder to judge the actual mixture.
- Swirl instead of shaking. Vigorous shaking creates suds in the bottle, not better performance at the nozzle.
- Test on one panel. The hood or a door is enough to tell you a lot.
Read the mixture by bubble structure
Once sprayed, look closely at the foam itself.
| Foam look | Likely cause | What to adjust |
|---|---|---|
| Large, loose bubbles | Mix is too weak or too wet | Increase concentration slightly |
| Tight, creamy bubbles | Mix is close to right | Leave ratio alone and tune flow |
| Heavy residue after dwell | Mix may be too rich | Back down soap slightly |
| Thin film with almost no body | Soap is under-dosed or unsuitable | Increase soap or change product |
The bubble structure matters because it tells you whether the chemistry and water are cooperating. Hard water can flatten some soaps. Thick soaps may need more patience during mixing. Some shampoos marketed for bucket washing don't foam well through a cannon.
What to change first
If the first spray disappoints, don't change everything at once.
- If it runs immediately, increase soap concentration slightly.
- If it clings but feels dry or sticky, reduce concentration a touch.
- If the foam looks uneven, remix the bottle gently and test again.
- If the result changes from wash to wash, standardize your measuring routine.
A repeatable wash starts with a repeatable bottle mix.
Experienced detailers get rich foam because they remove variables. Same soap, same measuring method, same fill level, then one small adjustment at a time.
Mastering Pressure Flow and Nozzle Settings
Once the bottle is right, the machine takes over. At this stage, many DIY setups either come alive or fall flat.
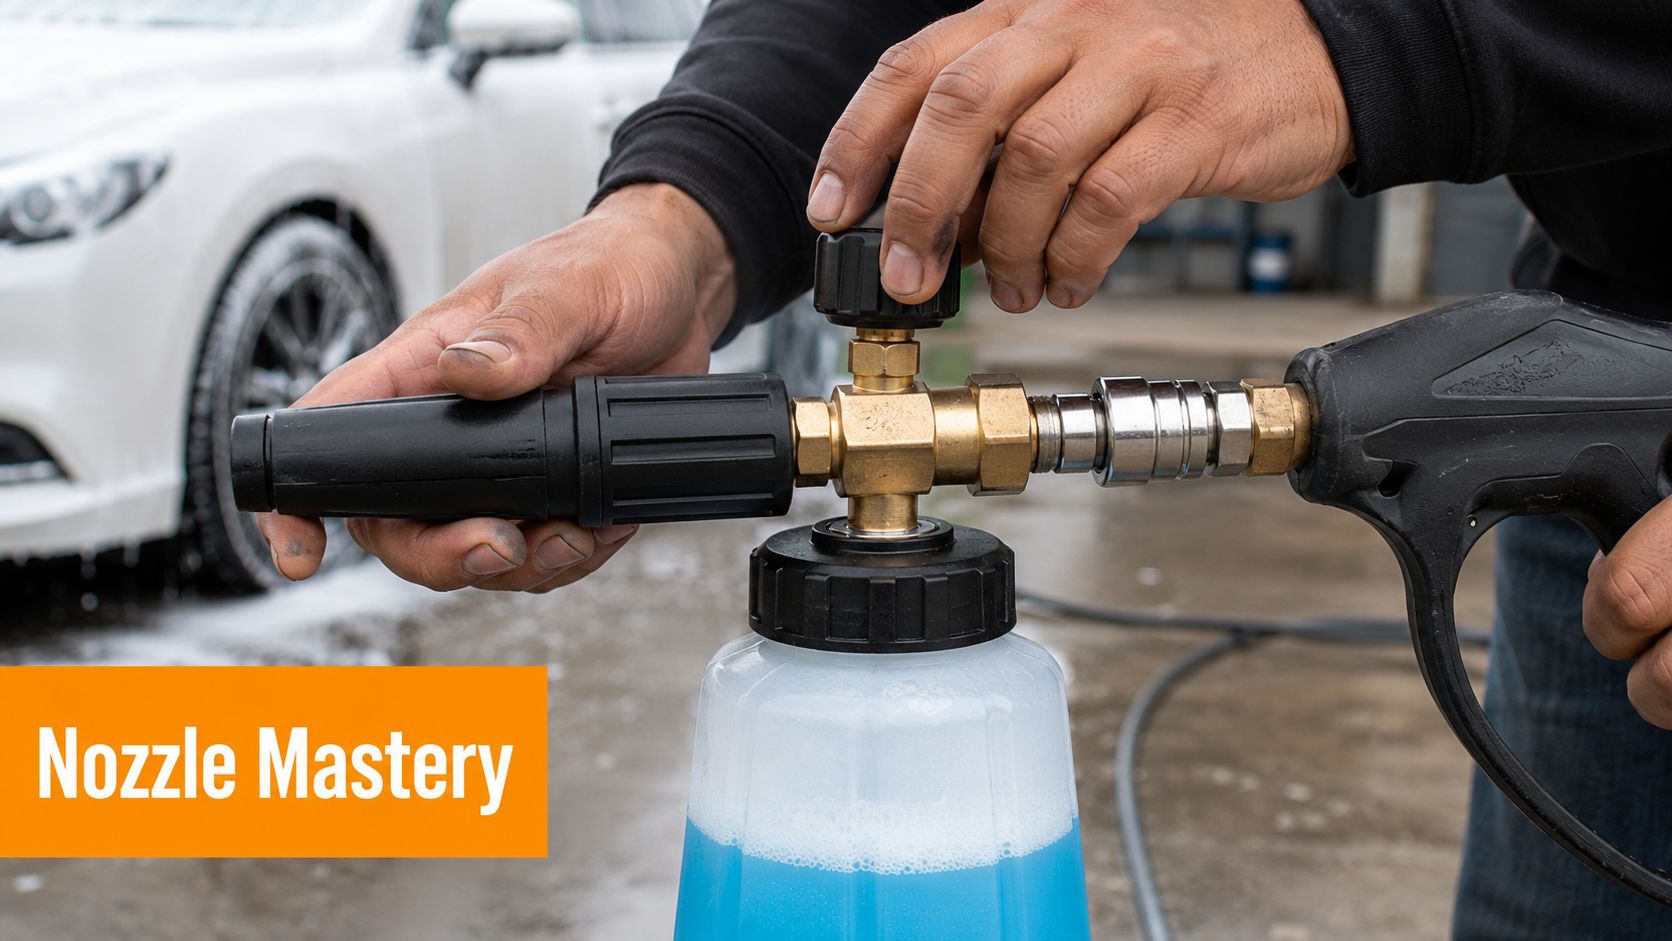
Professional operators often start with approximately 10 PSI air injection to the foamer and 40 PSI water pressure, then raise air pressure gradually while keeping it below 20 PSI for the best foam quality, as discussed in this foam thickness pressure thread on Car Wash Forum. That matters because more air doesn't automatically mean denser foam. Push it too far and the foam gets airy instead of rich.
What each control actually does
Most foam cannons give you two key adjustments.
- Top dial or metering knob: This changes how much solution the cannon pulls into the water stream.
- Front nozzle pattern: This changes the spray shape, usually from a narrow jet to a wider fan.
The metering knob changes the character of the foam. The front nozzle changes how it lands on the car. People mix those up all the time.
A wide fan usually gives the most even blanket on doors, fenders, and hoods. A narrower pattern can help on wheels, grills, lower rockers, and tight spots where you want more focused application.
Tune one variable at a time
Don't spin every knob and then wonder what changed. Use a simple sequence.
First pass
Set the metering knob near the middle. Open the fan pattern to a practical width. Spray half a panel and watch the behavior.
If the foam is too wet, adjust the solution draw first. If the foam texture looks decent but coverage is patchy, adjust the fan pattern next. If neither gets you there, your pressure washer output may be the limiting factor.
For users working with lighter-duty equipment, a pressure washer foam nozzle setup guide can help sort out pattern and flow issues without random trial and error.
Here's a visual walk-through of foam cannon tuning in action:
What good tuning sounds like
A dialed-in setup doesn't just look right. It sounds steadier. The spray note is more consistent, and the cannon doesn't pulse or spit. If you hear intermittent sputtering, check for a partial clog, poor bottle seal, or inconsistent water supply before changing the mix again.
More pressure isn't the same as better foam. Balanced pressure produces better foam.
If you're testing on a warm panel, work fast and read the foam within moments of application. Heat can fool you into thinking the setup is weak when the surface is accelerating runoff.
How to Measure and Test Your Foam Quality
Foam is often judged by one thing. How dramatic it looks from ten feet away. That's not enough. High-quality foam is defined by its density, thickness, and softness, optimized for the job rather than pushed to maximum bulk, as noted in this discussion of foam quality in wash applications.
The cling test
Pick one vertical panel out of direct sun. Spray a full, even coat from top to bottom and watch what happens.
You're looking for a controlled descent. Good foam stays uniform at first, then begins to creep downward in sheets and channels. Thin foam breaks apart fast and leaves bare patches almost immediately. Overloaded foam may cling in lumps and collect around trim, door handles, and emblems.
Cling alone doesn't prove the foam is right. It only tells you whether the foam has enough body to stay in contact with the surface.
The sheeting test
After the dwell phase, rinse one section and watch the water behavior. Foam that did its job should release cleanly and carry loosened grime away without leaving a greasy film.
Use this quick diagnostic list:
- Clean sheeting: The foam was balanced and rinsed off without hanging on.
- Patchy residue: The solution may be too rich, or the panel may have product buildup.
- Instant collapse during rinse: The foam may have lacked structure from the start.
- Streaky release: Coverage may have been uneven, especially if the spray fan was poorly set.
Read the bubbles up close
Stand closer and inspect the bubble structure on a lower door or rocker panel. Tight, creamy bubbles usually signal better density. Very large bubbles often point to over-aeration or weak concentration. Dry-looking foam with crusty edges can mean too much product for the available water flow.
Foam should leave the panel cleaner, not just whiter.
The best detailers don't chase one perfect visual. They compare cling, bubble texture, and rinse behavior together. That gives you a practical read on foam thickness that translates into safer washing.
Troubleshooting Common Foam Thickness Issues
When foam goes wrong, people tend to blame the soap first. Sometimes that's right. Often it isn't. The setup is a system, and one weak point anywhere in that chain can flatten the result.
Watery foam that slides off
If the foam runs down the paint almost as soon as it lands, check the bottle mix first. Then check whether the cannon is drawing solution properly. A loose pickup tube, poor seal at the bottle neck, or a partially blocked internal filter can all make the foam look underpowered.
Try this order:
- Verify the mix: Start with your known baseline, not a random pour.
- Inspect the pickup tube: Make sure it's seated and submerged properly.
- Clean the filter and orifice: Dried soap residue chokes performance fast.
- Test on a cool panel: Heat exaggerates runoff.
Sputtering or inconsistent spray
A sputtering cannon usually points to interrupted flow. That can come from debris, a bad connection, or air entering where it shouldn't. If the spray pulses, don't keep tuning the knob. Fix the interruption first.
Common culprits include a dirty orifice, a misthreaded bottle, or inconsistent hose pressure. Even a small clog can change the spray note and destroy foam thickness.
Good one day, poor the next
People perceive the cannon as unreliable. In practice, wash conditions changed.
A different water source, colder soap, hot body panels, or a new shampoo can all change the outcome. Thick soaps can pour differently depending on temperature. Water quality can flatten some products. Residue left in the cannon from the previous wash can also skew the next one.
When foam is too thick
This gets overlooked because many users think they've finally won. But foam that lands as heavy paste and doesn't rinse cleanly can reduce cleaning efficiency. It sticks, but it doesn't flow. Dirt needs suspension and release, not burial under excess product.
Use these corrections:
- Back down concentration slightly: Small changes are usually enough.
- Open the flow a touch: More balanced water can improve texture.
- Widen the fan pattern: A broader spread can prevent overloading one area.
- Rinse a test spot early: If residue remains, the mix is too heavy for the setup.
The best fix is almost never a dramatic change. It's one careful adjustment followed by another test.
Optimizing Your SwiftJet Foam Gun for Peak Performance
A hose-fed foam gun works differently from a pressure washer foam cannon, so your expectations need to match the tool. The upside is speed, simplicity, and easy setup. The key is using that simplicity well.
The biggest advantage with a foam gun like this is control. You can work panel by panel, keep coverage tight, and avoid wasting product on the driveway. That matters when you want consistent foam thickness without overapplying solution.
Use the tool like a detailer, not like a sprinkler
Start with strong household water flow and a properly mixed bottle. Then pay attention to how the foam lands. You want an even layer, not random splatter. Adjustable foam thickness matters because different soaps and surfaces respond differently, and the ability to tune that output is one of the most useful features in any wash tool.
For practical setup details, the official SwiftJet setup instructions are the best place to confirm assembly and adjustment.
Where a foam gun fits best
A foam gun makes the most sense for maintenance washes, mobile use, and anyone who wants less setup friction. It also suits people who care about observation more than brute force. You can read cling, runoff, and rinse behavior just as well with a garden-hose tool if your process is disciplined.
If you're comparing your own results with professional services, browsing local Perth car detailing options can help you benchmark what a fully dialed exterior wash should look like in terms of finish quality and pre-wash technique.
Dial in the process first. The tool performs better when the user pays attention.
If you want a faster way to put these foam thickness principles into practice at home, SwiftJet gives you a simple hose-connected setup with adjustable output and easy control at the trigger. It's a practical option for anyone who wants richer foam, quicker wash prep, and a more consistent pre-wash without dragging out a full pressure washer rig.
