

You've got the foam gun out of the box, the car is sitting there dusty, and you want that first wash to feel easy instead of fiddly. That's usually where people either get hooked on foam washing or get disappointed by watery suds, leaks, and a bottle of soap they already regret buying.
Good setup instructions fix that before you even pull the trigger. A foam gun is simple, but the small details matter. The seal has to sit right. The soap has to mix right. The spray pattern has to match the panel you're covering. Once you understand why each step matters, the whole thing becomes predictable.
Unleash the Perfect Wash with Your SwiftJet
A first wash usually starts the same way. You connect everything fast, fill the bottle by instinct, spray a test patch, and wonder why the foam doesn't look anything like the thick blanket you expected. Most of the time, the problem isn't the tool. It's the setup.
That's why good setup instructions should feel more like a friend walking you through the first use than a folded manual with tiny diagrams. You want to know what each part does, what a correct fit feels like, and which shortcuts make performance worse.
The same logic shows up in other gear-heavy routines too. If you've ever looked through expert royal camp kitchen advice from Barrons, you've seen the same principle at work. Setup matters because it determines how smoothly everything else goes once you start using the equipment.
Get the first five minutes right, and the wash gets easier, cleaner, and a lot less frustrating.
From Box to Built Unboxing Your SwiftJet
When you unbox a foam gun, don't rush straight to the hose. Lay every piece out first. That quick check saves time because most early problems come from something simple, like a connector not seated fully or a missing seal.
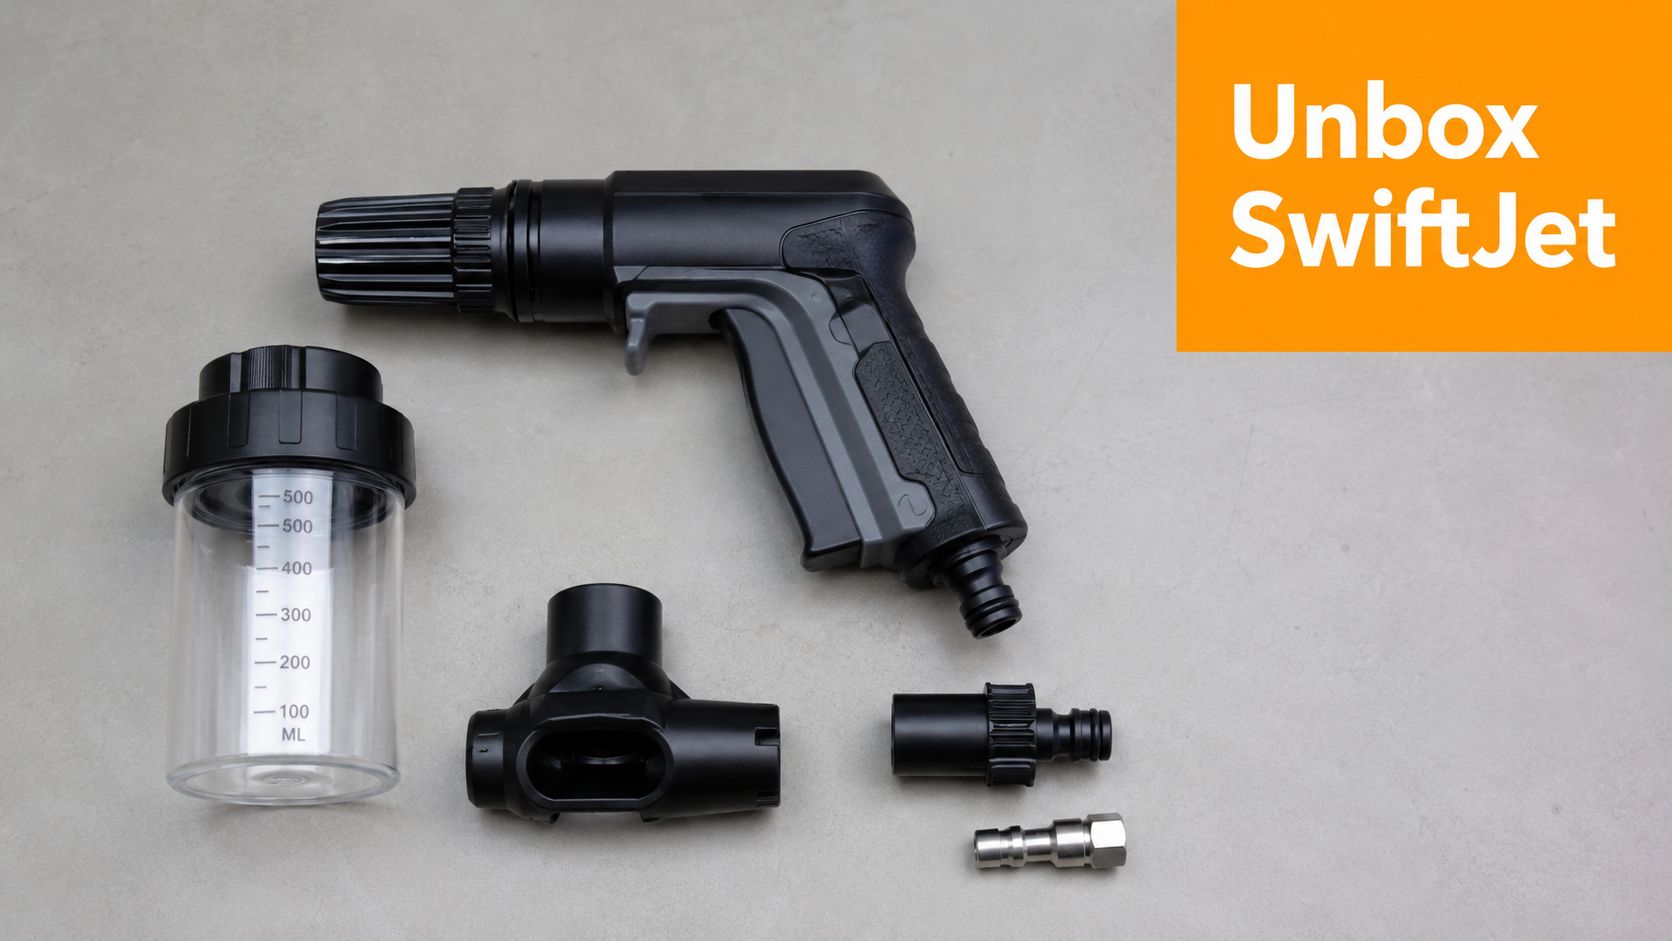
Check the parts before assembly
You're looking for the main gun body, the soap reservoir bottle, the front nozzle piece, and any included accessory such as a wash mitt. Put them on a clean surface where you can inspect the connection points.
The first part I always check is the O-ring inside the connector where the bottle threads on. If that seal is pinched, twisted, missing, or sitting half out of its groove, you'll usually get one of two problems. Either the gun leaks, or it pulls air and the foam turns inconsistent.
Practical rule: If a threaded connection feels crunchy or crooked, back it off and start again. Don't force plastic threads.
Build it in the right order
Thread the bottle onto the gun body until it's snug. Tight is good. Overtight isn't. If you crank it down too hard, you can stress the threads or flatten the seal more than needed.
Then attach the front nozzle and make sure it locks in place properly. You want that positive seated feel, not a loose fit that looks attached from a distance but shifts when handled.
A simple way to think about assembly is this:
- Bottle connection: Creates the sealed path that lets the gun draw soap mixture consistently.
- Nozzle connection: Shapes how the water and soap exit the gun.
- Trigger and grip: Give you control over when product flows and how steadily you can move across panels.
If you move carts, buckets, and wash gear around your driveway often, it helps to organize things before you begin. Even something outside car care, like a Lounge Wagon review, reminds you how much easier setup gets when your gear is laid out instead of piled together.
What proper assembly should feel like
A correctly assembled foam gun feels balanced in the hand and solid at each joint. Nothing should wobble. Nothing should drip before the water is connected. If a part needs force to fit, pause and check alignment.
That's the true start of professional-looking results. Not foam. Fit.
Hose Connection and Soap Mixing Secrets
A foam gun can be assembled perfectly and still disappoint if the hose feed is weak or the mix in the bottle is off. This is the point where first-time users usually lose foam quality, and the reason is simple. A foam gun needs steady water flow to pull solution consistently, and it needs a clean soap mix to build foam at the nozzle instead of inside the bottle.
Connect the hose so water flow stays consistent
Thread the garden hose onto the inlet by hand and watch the first turn closely. If the fitting starts at an angle, back it off and start again. A crooked connection creates small leaks, but the bigger problem is unstable pressure. That inconsistency shows up as sputtering, thin foam, or a spray pattern that changes mid-panel.
If you are not sure whether the problem is the hose, the gun, or an adapter mismatch, check these common hose connector types and fitting sizes.
After the hose is attached, turn the water on slowly and inspect each joint. You want a dry connection and a steady feed. Foam guns work by mixing moving water with soap solution. If pressure is bleeding off at the connection, the gun has less force to draw product from the bottle.
Mix soap to build usable foam
Start with the soap maker's dilution, not guesswork. For many car wash soaps, 1:8 is a solid starting point for a foam gun setup, as shown in Waxit's foam cannon mixing guide. That ratio usually gives you enough surfactant to cling and soften grime without loading the bottle so heavily that rinsing becomes slow or residue gets left behind.
How you combine the mix matters too. Fill to the recommended ratio, then swirl the bottle gently instead of shaking it. Shaking creates foam in the reservoir before the gun ever sprays, which wastes product and can weaken the consistency of the foam coming out of the nozzle.
Swirl the mixture to combine it. Save the foam for the paint.
SwiftJet Soap Mixing Ratios
| Wash Type | Soap to Water Ratio | Example (32oz Bottle) |
|---|---|---|
| Maintenance wash | 1:8 | 1 part soap, 8 parts water |
| Stronger cleaning | Product-specified dilution | Follow the soap label, then top with water |
| Delicate finish wash | Product-specified dilution | Use the maker's lighter recommended mix |
A few small habits make the gun easier to tune:
- Add water first if your soap is concentrated and heavy: It reduces the chance of thick soap settling at the bottom near the pickup tube.
- Leave some headspace in the bottle: The solution needs room to move when you swirl it.
- Use car wash soap made for painted surfaces: Household detergents can strip protection and often foam badly for the wrong reason. Big bubbles look active, but they usually clean worse and rinse slower.
Good foam starts before you pull the trigger. Stable water flow and the right mix give the SwiftJet a predictable feed, which makes every later adjustment easier.
Applying Foam Like a Pro from Day One
You can spot a first-time foam gun user fast. They bury the car in thick suds, stand back, and assume the foam is doing all the cleaning. Good results come from laying down a controlled, wet layer that loosens grit and gives you a safer contact wash.
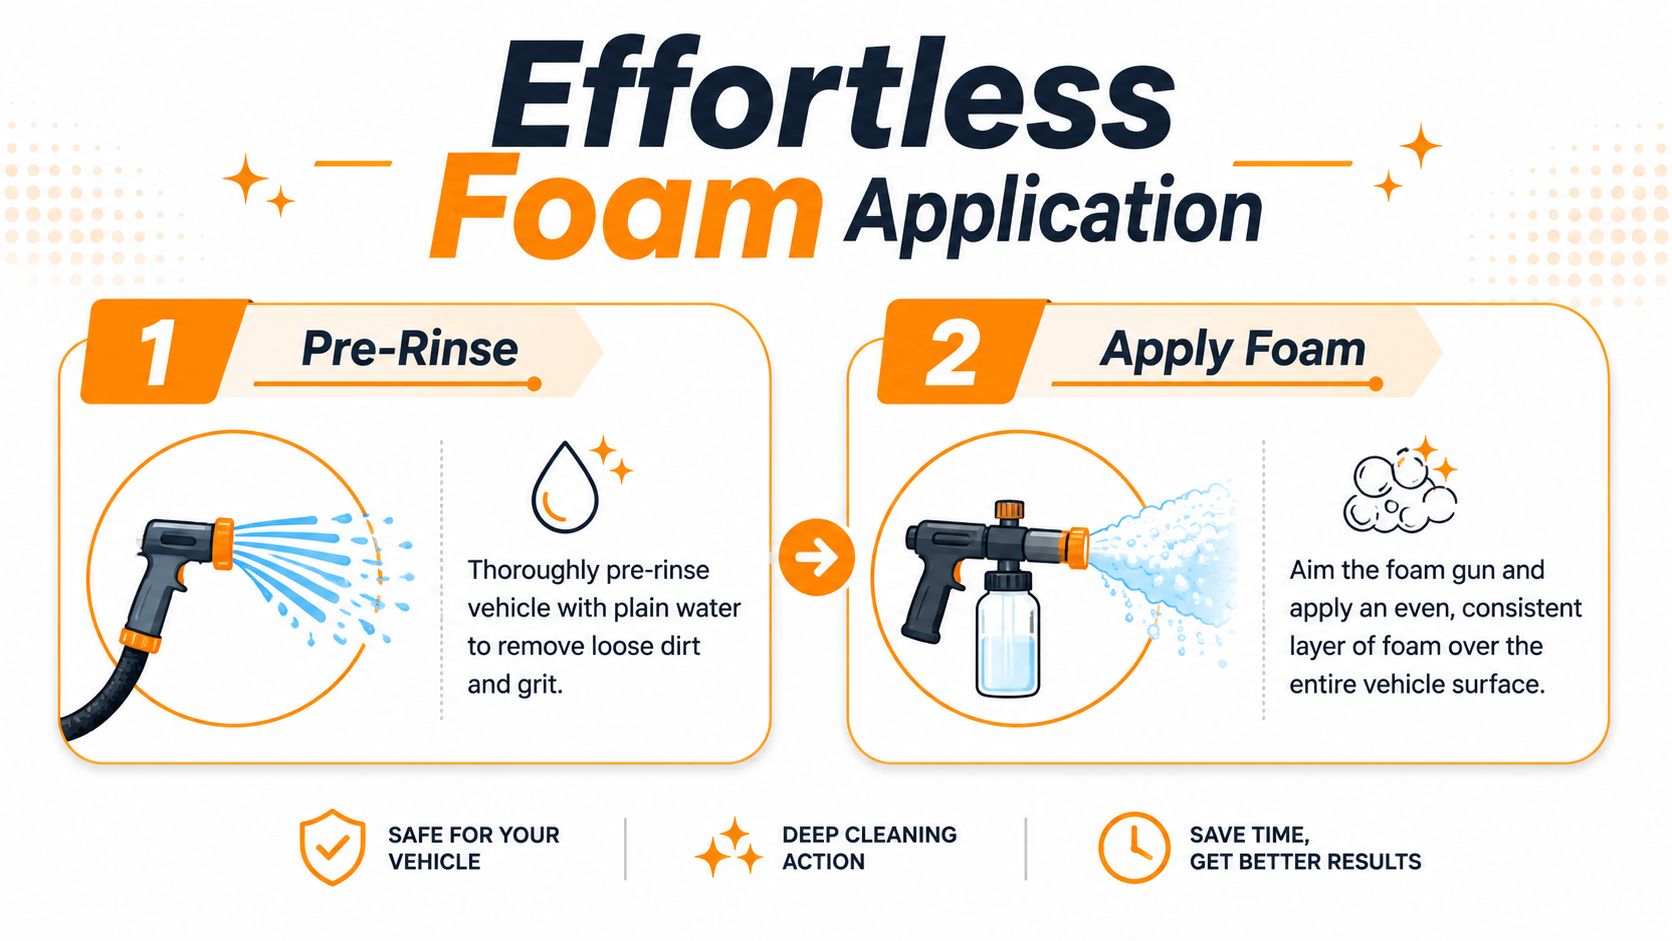
Build a wet surface first
Start with a plain-water rinse. That first pass removes loose grit, cools warm panels, and gives the foam something to spread across instead of grabbing a dry surface and sliding off too fast. On a hot panel, even a good soap mix can flash off before it has time to soften road film.
Then dial in the spray pattern before you soap the whole car. A wider fan gives more even coverage on doors, hoods, and roofs. A tighter pattern puts more product into mirrors, rocker panels, and other dirty areas where you want extra dwell. If you want a quick visual before you begin, this written foam gun application guide shows the basic motion clearly.
Lay foam with a purpose
Work from the top down and keep the gun moving at a steady pace. The reason is simple. Foam clings for a moment, then gravity starts pulling that solution down the panel. Starting high lets the runoff re-wet lower sections instead of leaving the upper panels dry while you chase the bottom half.
Overlap each pass slightly, about a third of the fan width. That closes up thin spots and gives you a more uniform blanket of soap. Random, sweeping passes usually leave dry edges, and those dry edges are where dirt keeps sticking.
A simple routine works well:
- Rinse the vehicle first: Remove loose debris and cool the surface.
- Foam the roof and glass: Let runoff start feeding the rest of the vehicle.
- Cover upper panels, then lower panels: Keep the fan consistent instead of flicking your wrist.
- Let the foam dwell briefly: Give it time to soften grime, especially on the lower doors and rear end.
- Rinse or move to a contact wash before it dries: Wet foam keeps working. Dry soap just leaves residue.
A short visual helps if this is your first time using one:
Judge the foam by behavior, not by thickness
The best foam is not always the puffiest foam. What you want is a layer that hangs on long enough to wet the dirt, loosen traffic film, and rinse clean without fighting you. Big, airy bubbles look dramatic but often collapse fast and carry less cleaning solution across the paint.
Good foam should spread evenly and stay wet for a short dwell period. If it runs off immediately, the mix may be too thin, the spray setting may be too open, or your water flow may be outpacing the soap draw. If it comes out in heavy clumps, open the pattern a bit or back off the soap setting so the layer can level out across the panel.
One practical habit from detailing applies here too. Don't let product sit where moisture and residue can linger longer than they should. The same basic logic behind how people prevent mold in bladders applies to wash tools. Clean solution works better, and leftover residue always creates extra work later.
A foam gun like SwiftJet connects to a standard garden hose and is built to put down a controllable soap layer. In real use, the pro move is simple. Chase even coverage, wet dwell, and rinse timing, not maximum drama.
Keeping Your Foam Gun Clean and Ready
A foam gun can work great on wash one and disappoint you on wash three if you put it away dirty. Soap residue dries inside small passages fast, especially around the pickup path and nozzle.
Flush it before storage
When you're done washing, empty the remaining soap mixture. Fill the bottle with plain water, reconnect it, and run the gun briefly so clean water passes through the internals.
That rinse does more than clean the bottle. It clears the path where soap likes to dry and harden. If you skip it, the next wash often starts with sputtering, weak output, or uneven spray.
Dry the outside and store it simply
Wipe the body, bottle, and threads down before storing. Then keep it somewhere cool and dry, away from constant sun and heat. You don't need a complicated storage system. You just need to avoid leaving soap in it.
If you've ever read about how outdoor and hydration gear is maintained, the logic is the same as advice on how to prevent mold in bladders. Anything that traps moisture and residue gets harder to clean later.
A good post-wash routine looks like this:
- Empty the bottle: Don't store leftover mix between washes.
- Run clean water through the gun: Flush residue from the internal path.
- Wipe threads and seals: Clean connection points before buildup dries.
- Store it dry: That protects the bottle, fittings, and seals over time.
For long-term consistency, the most useful habit is simple maintenance, not constant adjustment. This kind of basic performance optimization advice matters more than people think because a clean sprayer behaves predictably.
Solving Common Foam Gun Problems
The usual first wash goes like this. You hook everything up, pull the trigger, and instead of thick foam, you get weak suds, a drip at the bottle, or a spray that coughs and spits. In almost every case, the problem comes from one of three places: water flow, sealing, or dried soap in the fluid path.
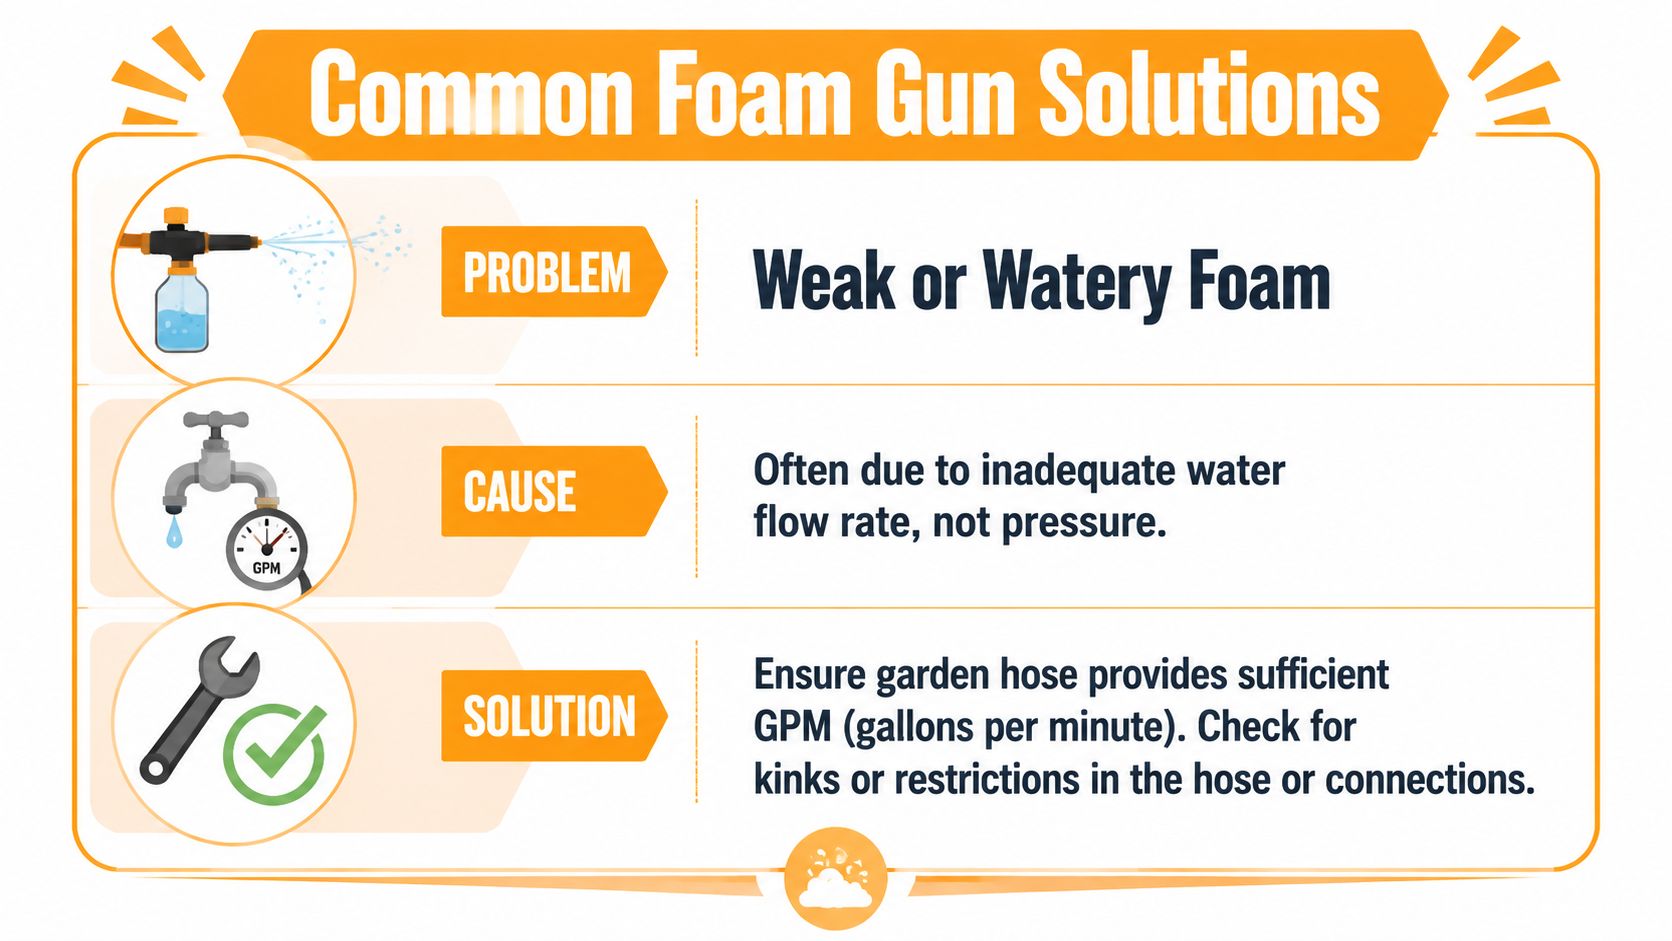
Weak or watery foam
Start with flow. Foam guns need enough water moving through the head to pull soap properly and whip air into the mix. If flow drops, the gun still sprays, but the foam gets loose and watery because the siphon effect is weaker.
Check the simple restrictions first. A kinked hose, a spigot that is only half open, a narrow shutoff fitting, or a long lightweight hose can all choke flow before water ever reaches the gun. If your SwiftJet suddenly makes disappointing foam after working fine before, one of those bottlenecks is usually the reason.
Then look at your soap mix. If the ratio is too lean, the gun cannot build a stable foam blanket no matter how good the hose supply is. If the ratio is too rich, you waste soap and can still end up with heavy, wet foam that slides off fast. Good foam is not just thick. It should cling long enough to soften grime.
Leaks around the bottle or hose
Leaks almost always come down to the seal being out of place or the threads not sitting square. Start with the O-ring. If it is pinched, dry, cracked, or missing, water will find that gap immediately.
Next, check the threads on the bottle and hose connection. Cross-threading is common because plastic threads can feel snug before they are seated correctly. Back the connection off, line it up cleanly, and tighten it by hand without forcing it. A small leak here does more than make a mess. It also changes how consistently the gun draws soap.
Sputtering or inconsistent spray
A sputtering spray usually means the gun is pulling air where it should be pulling liquid, or soap residue has narrowed the passage enough to disrupt flow. That is why this problem often shows up after storage, especially if any mix was left inside to dry.
Run clean water through the unit first. If the spray still pulses, remove the bottle and inspect the pickup area and nozzle for dried soap film. Warm water loosens most residue. A soft brush or cloth is safer than anything sharp, because the opening size affects how the gun mixes water, air, and soap.
If the spray starts strong and then fades, check whether the bottle cap is fully seated and the pickup tube is connected properly inside. Small air leaks create inconsistent draw, and inconsistent draw shows up at the nozzle right away.
A foam gun that behaves predictably is usually a foam gun with correct flow, clean internals, and intact seals. Troubleshooting gets much faster once you know why each of those parts matters.
Frequently Asked Questions
Can I use dish soap instead of car wash soap
I wouldn't. Dish soap is built for kitchen grease, not automotive finishes. A proper car wash soap is the safer choice because it's made to clean paint without being unnecessarily harsh, and it behaves better through a foam sprayer.
What if the gun doesn't fit my hose
Most foam guns are designed around standard garden hose threading. If your hose setup uses a different quick-connect system or a non-standard fitting, you'll likely need a simple adapter. Check the connection style before assuming the gun is defective.
Why isn't the foam as thick as the videos
Usually it comes down to setup, not luck. Check your water flow, your soap dilution, the control setting on the gun, and whether you mixed the bottle by swirling instead of shaking. Thick foam is the result of several small things working together.
Do I need to wash by hand after foaming
Yes. Foam helps loosen grime and reduces how hard you need to scrub, but it doesn't replace a proper contact wash when the vehicle is dirty. Think of foam as the step that makes the hand wash safer and easier.
What happens if I store it with soap inside
That's when clogs start. Soap dries in the pickup path and nozzle, then the next wash starts with weak output or sputtering. A quick water flush after each use saves you a lot of troubleshooting later.
If you want a foam gun that connects to a garden hose and keeps the process simple for home washing, take a look at SwiftJet. It's a straightforward option for DIY car care, and once your setup instructions are dialed in, you'll get a much smoother first wash and a more consistent routine every time after that.
