

People start with the wrong test. They fill a foam sprayer, open the valve all the way, and judge the result by whether the vehicle looks buried under shaving-cream foam. That shortcut misses the variables that decide whether foam spray for cleaning works: formula chemistry, water temperature, pressure, nozzle behavior, and seal integrity.
A thick blanket can look impressive and still clean poorly. A medium, wet foam that clings, loosens road film, and rinses away cleanly can outperform it while using less product and creating less residue. After hundreds of wash days, the pattern is consistent: the best setup isn't the one that makes the biggest cloud. It's the one that gives the cleaner enough contact time without drying, streaking, or forcing you to scrub grit across the paint.
Why Foam Thickness Is Not What You Think
Thicker foam doesn't automatically mean a better clean. Foam volume mostly tells you how much air has been incorporated into the water and detergent mixture. It doesn't, by itself, measure the formula's ability to break down traffic film, suspend grit, or release oily contamination.
Independent formulation guidance makes the same distinction. Foam volume itself doesn't determine cleaning power. The formula, dilution, and application conditions matter more, while bubbles mainly help with coverage and dwell time through the relationship between foam formulation and packaging performance.

What actually cleans the panel
A useful wash has three working parts:
- Surfactant chemistry helps water spread and interact with oily or dirty material.
- Dwell time gives that chemistry time to loosen contamination.
- Mechanical action from a mitt or brush removes what remains after rinsing.
Foam supports the second part. It holds cleaner on a vertical panel longer than a watery spray, but it isn't a substitute for the right chemical blend or careful contact washing. On a dusty vehicle, excessive foam can even become counterproductive if it dries into a film before you rinse it.
The target is wet, active, slow-moving foam, not stiff peaks. On a warm bonnet, dense dry foam can flash quickly. Medium-density foam often flows gradually down the panel, keeping the surface lubricated and giving the detergent a useful working window.
Why settings change the appearance
Pressure can make foam look more dramatic while reducing how long it stays usable. More air may produce larger, lighter bubbles, while a different water temperature or concentration can make the same product look dense and creamy. That doesn't mean the cleaner is working harder.
Water temperature deserves attention. Cold water can produce weaker expansion and poorer mixing, while warmer water may improve flow and solubility. Hot water on vehicle paint is still a bad shortcut, especially under direct sun, because it accelerates drying.
Practical rule: Judge foam by its behavior on a vertical panel. If it clings while remaining wet and rinses without a stubborn film, it's doing its job.
Control matters more than spectacle. A guide to controlling foam gun flow rate can help you understand why a consistent spray pattern is more valuable than just maximizing lather.
Choosing the Right Foam Soap and Dilution Ratio
A label that says “foaming car wash” doesn't tell you enough. Two products can create similar-looking suds while behaving very differently on clear coat, ceramic protection, matte film, rubber trim, or heavily soiled lower panels.
Start with the vehicle's condition and the surface finish. pH-neutral soap is the sensible default for routine maintenance because it can clean road film without aggressively attacking existing protection. An alkaline formula has more value when the vehicle carries oily traffic film, winter grime, or neglected buildup, but stronger chemistry increases the need for careful dilution, testing, and rinsing.
Surfactant blends also change the character of the foam. Ingredients such as sodium lauryl sulfate and cocamidopropyl betaine can contribute to foaming and wetting, but the ingredient list alone doesn't tell you how the finished product will behave in your applicator or your water. The formula's concentration, supporting ingredients, and compatibility with local water all matter.
Start with a measured mix
The ratios below are practical starting points, not universal laws. Follow the product label first, then adjust based on how the foam remains wet, how easily it rinses, and whether it leaves residue.
| Scenario | Dilution Ratio | Soap Type | Notes |
|---|---|---|---|
| Maintenance wash | 1:10 | pH-neutral car shampoo | A balanced starting point for lightly soiled, protected vehicles |
| Heavy grime | 1:5 | Purpose-made alkaline or high-cleaning foam soap | Use only when the surface and product label allow it |
| Delicate surfaces | 1:15 | Mild, pH-neutral formula | Prioritize gentle chemistry and low mechanical pressure |
Measure by volume with a marked bottle. Eyeballing a glug of soap creates inconsistent results, making it impossible to tell whether thin foam came from the formula, the water, or the applicator.
More soap isn't a guaranteed fix
Over-concentrating a product can make foam cling aggressively, leave a sticky film, or require extra rinsing. It also wastes chemical without solving an air leak, blocked filter, weak pressure supply, or unsuitable nozzle.
Hard water adds another complication. Dissolved minerals can interfere with surfactant performance and leave a film that looks like poor rinsing. If the same product works well at one location and poorly at another, compare water quality before changing the soap repeatedly.
For a more focused comparison of product characteristics and use cases, review this guide to the best foam soap for cars. Choose the formula that matches the soil and finish, not the one that produces the tallest foam.
Setting Up Your Foam Gun for Maximum Performance
A foam gun rarely fails all at once. It usually loses performance through small restrictions or leaks. A flattened O-ring, loose fitting, damaged pickup tube, or clogged mesh filter can turn a reliable sprayer into a watery garden nozzle.
Begin with the connection points. Remove the bottle, inspect each O-ring for flattening or cracks, and make sure the quick-connect fitting seats fully. If a threaded joint leaks air, use suitable thread seal tape where the fitting design allows it. Don't overtighten plastic threads, because distortion can create the leak you're trying to eliminate.
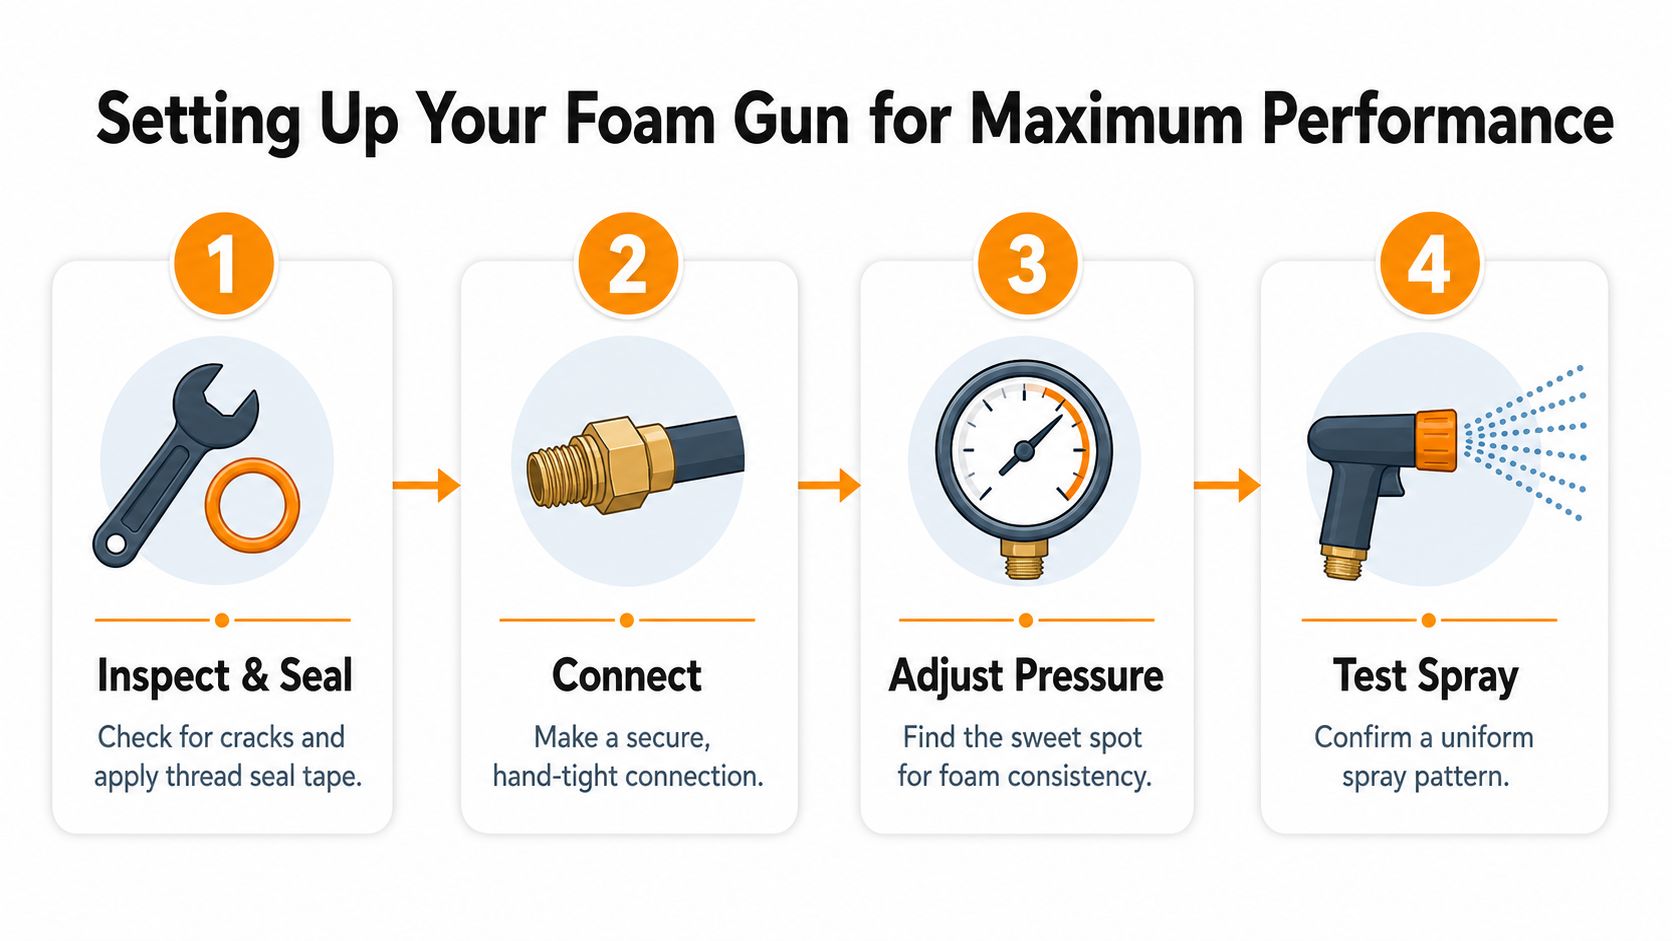
Build the setup in order
- Connect the water source securely. A garden-hose foam gun needs a firm, leak-free connection. A pressure-washer foam cannon needs the correct fitting and a washer capable of supplying the applicator properly.
- Check the pickup system. The tube must reach the solution and remain clear. A filter packed with dried soap restricts chemical draw.
- Set the air intake and fan controls. Fully opening the air intake isn't always best. Partially closing it can produce a denser, wetter pattern, depending on the gun.
- Choose the spray pattern. A wider fan is useful for broad panels. A narrower pattern helps around grilles, wheel arches, and tight trim, but it demands more careful distance control.
For pressure-washer systems, many users find a working range around 1,200 to 1,900 PSI, while pressures above 2,000 PSI can strip foam from the surface before it clings. These figures come from the supplied setup guidance, so confirm your equipment's own requirements before adjusting.
Use a vertical-panel test
Spray one clean section of a door or fender. Watch whether the pattern is uniform, then observe how the foam moves. The supplied target is two to four minutes before sliding, but the useful sign is that the foam remains wet and active rather than drying into peaks.
Thin foam points toward air loss, poor chemical pickup, an unsuitable mixture, or inadequate pressure. Sputtering suggests interrupted water flow, a blocked filter, or a mismatch between the washer's output and the applicator's orifice. If you work with several attachments, a dependable quick-disconnect fitting makes it easier to isolate the gun from the hose and test each component.
The same principle applies beyond vehicle washing. For readers comparing spray application equipment in facility environments, this overview of electrostatic disinfection from Facility Management Insights is useful because it also emphasizes equipment setup, coverage, and controlled delivery.
Application Technique and Dwell Time Strategies
A wash day usually goes wrong at the bottom of the vehicle first. Lower doors, rocker panels, bumpers, and the rear hatch collect the heaviest grit, oily road film, and mud. If you begin at the roof and let dirty foam run across cleaner upper panels, you can move contamination into areas that didn't need it.
Start with a rinse if loose grit is heavy, then apply foam from the lower panels upward. Keep the nozzle roughly two to three feet from the surface, overlap each pass, and move steadily rather than stopping to build a thick patch in one place.
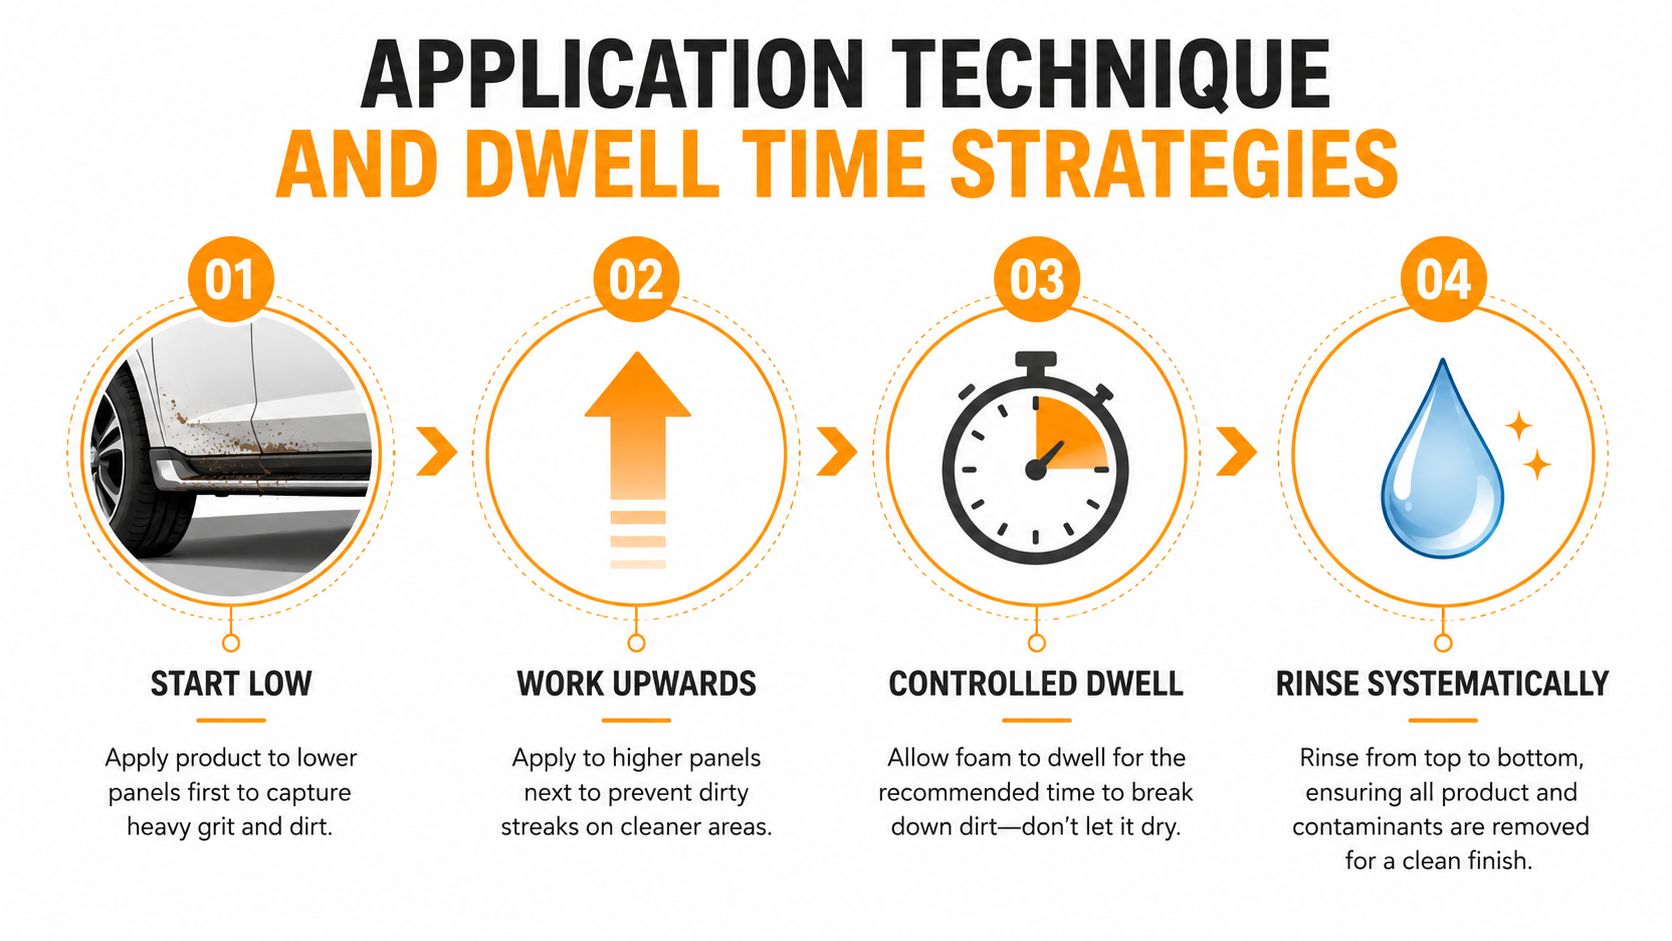
Read the weather before you spray
On a shaded vehicle in mild conditions, foam may remain useful for several minutes. Direct sun, warm panels, wind, and low humidity shorten that window sharply. You might get three minutes of safe dwell in one location and as much as eight minutes in another, but never treat those figures as a timer that overrides the surface.
Keep the foam wet. If it begins to dry, rinse that zone immediately rather than adding more product. On an RV, work in manageable sections, such as one side panel at a time. A large vehicle can dry unevenly, especially around roof edges and exposed front surfaces.
Foam should loosen contamination, not become another layer you have to scrub off.
Flat doors accept a broad fan pattern. Fender flares, grilles, mirrors, and textured bumpers need slower passes and a narrower pattern so the cleaner reaches recesses without blasting into seals. Truck bed liners, canvas awnings, and camping equipment also need a different approach. Use lower pressure, allow the foam to enter the texture, and avoid forcing dirt deeper into fabric or porous material.
Rinse from the top down with a broad, lower-pressure fan. The rinse should carry loosened material away from areas you've already cleaned. Drying matters just as much. A clean microfiber drying towel or controlled air removes remaining water before mineral spots form, and it prevents you from dragging softened debris across the finish.
Troubleshooting Common Foam Spray Problems
Thin foam isn't a diagnosis. It's a symptom. Start at the applicator, then work backward through the water supply, pickup tube, fitting, and formula.
A common failure is a clogged pickup filter. Dried soap restricts chemical flow, so the sprayer draws mostly water and air. Another is a tiny leak at a quick-connect fitting. The connection may look secure while still admitting enough air to disrupt the mixture. Cold storage can also separate some soaps, so inspect the solution and mix it according to the label before increasing concentration.
Match the symptom to the cause
| Symptom | Root Cause | Fix |
|---|---|---|
| Thin, watery foam | Clogged pickup filter or air leak | Clean the filter, inspect O-rings, and reseat every fitting |
| Sputtering or pulsing spray | Unstable water supply or pressure and orifice mismatch | Check hose flow, remove restrictions, and use a compatible nozzle |
| Foam clings but won't rinse | Excess concentration or water incompatibility | Dilute to the label range and test a smaller area |
| Soap isn't being drawn | Pickup tube is blocked, short, or out of the solution | Clear the tube and confirm it reaches the liquid |
| Nozzle drips after shutdown | Worn O-ring or check valve | Replace the sealing component and flush residual soap |
Temperature changes the result
Very cold water can reduce foam expansion and make a product appear weak. The supplied guidance identifies water below 50°F as a major problem for expansion. Don't respond by dumping in more soap. Use water at a moderate temperature when the equipment and surface allow it, keep the product stored properly, and make sure the tube and filter are clear.
If foam suddenly changes after you move locations, compare water pressure, water hardness, and temperature before blaming the formula. If it changes after the gun sits unused, inspect for crystallized residue and damaged seals.
The repair order matters. Fix leaks before changing dilution, clear restrictions before increasing pressure, and test the soap in a clean container if you suspect separation. Otherwise, you can mask the original fault and create a second one through over-concentration.
Maintenance Safety and Surface-Specific Tips
A foam sprayer needs a short maintenance routine after every wash. Flush it with clean water, release pressure before disconnecting, inspect the O-ring and mesh filter, and store the unit upright so leftover soap doesn't settle and crystallize inside the pickup tube.
Protect yourself as carefully as the vehicle. Wear eye protection when spraying overhead, keep foam away from hot brake rotors, and never mix ammonia-based and bleach-based formulas. For broader handling and storage practices, this guide to cleaning supply safety is a useful reference.
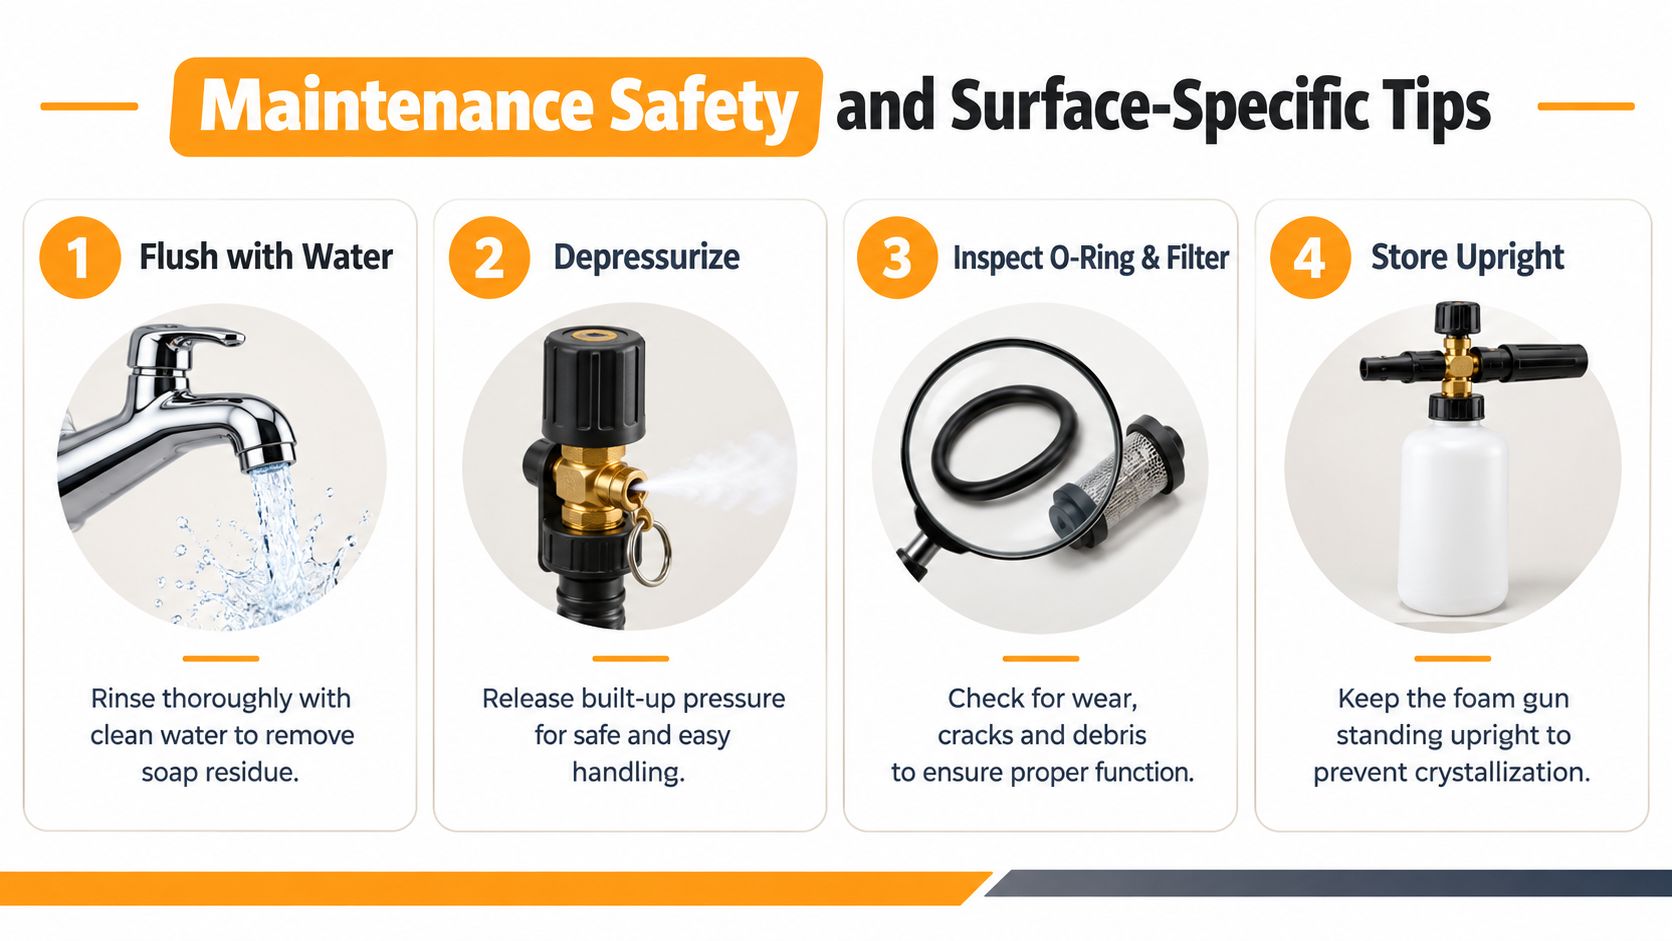
Match the foam to the surface
- Clear-coated paint: Use a compatible pH-neutral foam for routine washing, then follow with gentle mechanical contact.
- Matte wraps: Choose a dedicated matte-safe formula. Gloss-enhancing additives can alter the intended appearance.
- Ceramic coatings: Use products approved for coated surfaces so you don't leave a masking residue.
- RV gel coat: Use controlled dwell and conservative concentration, especially on older finishes where oxidation streaks may appear.
- Camping gear: Choose fragrance-free, biodegradable foam and low pressure for tent fabric, sleeping-bag shells, and DWR-treated materials.
Environmental care belongs in the same checklist. Contain runoff near storm drains where local rules require it, and choose phosphate-free soaps for off-grid or sensitive washing locations. A clean vehicle isn't a good result if contaminated runoff reaches a waterway.
SwiftJet offers a hose-connected foam gun that mixes soap, water, and air for vehicle and outdoor-equipment cleaning, with an on/off trigger for controlled application. If you want a portable foam spray for cleaning cars, trucks, RVs, and camping gear, visit SwiftJet and choose the setup that fits your wash routine.
