

Harder scrubbing doesn't produce a cleaner car. It often drags loosened grit across the clear coat, pushes grime into trim, and turns a simple wash into avoidable paint correction. The safer sequence is to loosen contamination first, isolate the dirtiest areas, control water and chemicals, then dry without dragging particles across the finish.
These DIY car cleaning hacks are organized by cleaning area and decision point, not by random household shortcuts. You'll find practical methods for the exterior, interior, wheels, glass, and odor control, with guidance on substitutes, purpose-built tools, timing, cost, safety, finish quality, and troubleshooting. A sock stretched over a cup can help with a grimy cup holder, but vinegar, paper towels, magic erasers, and harsh brushes aren't universal solutions for modern screens, matte trim, coated leather, or protected paint.
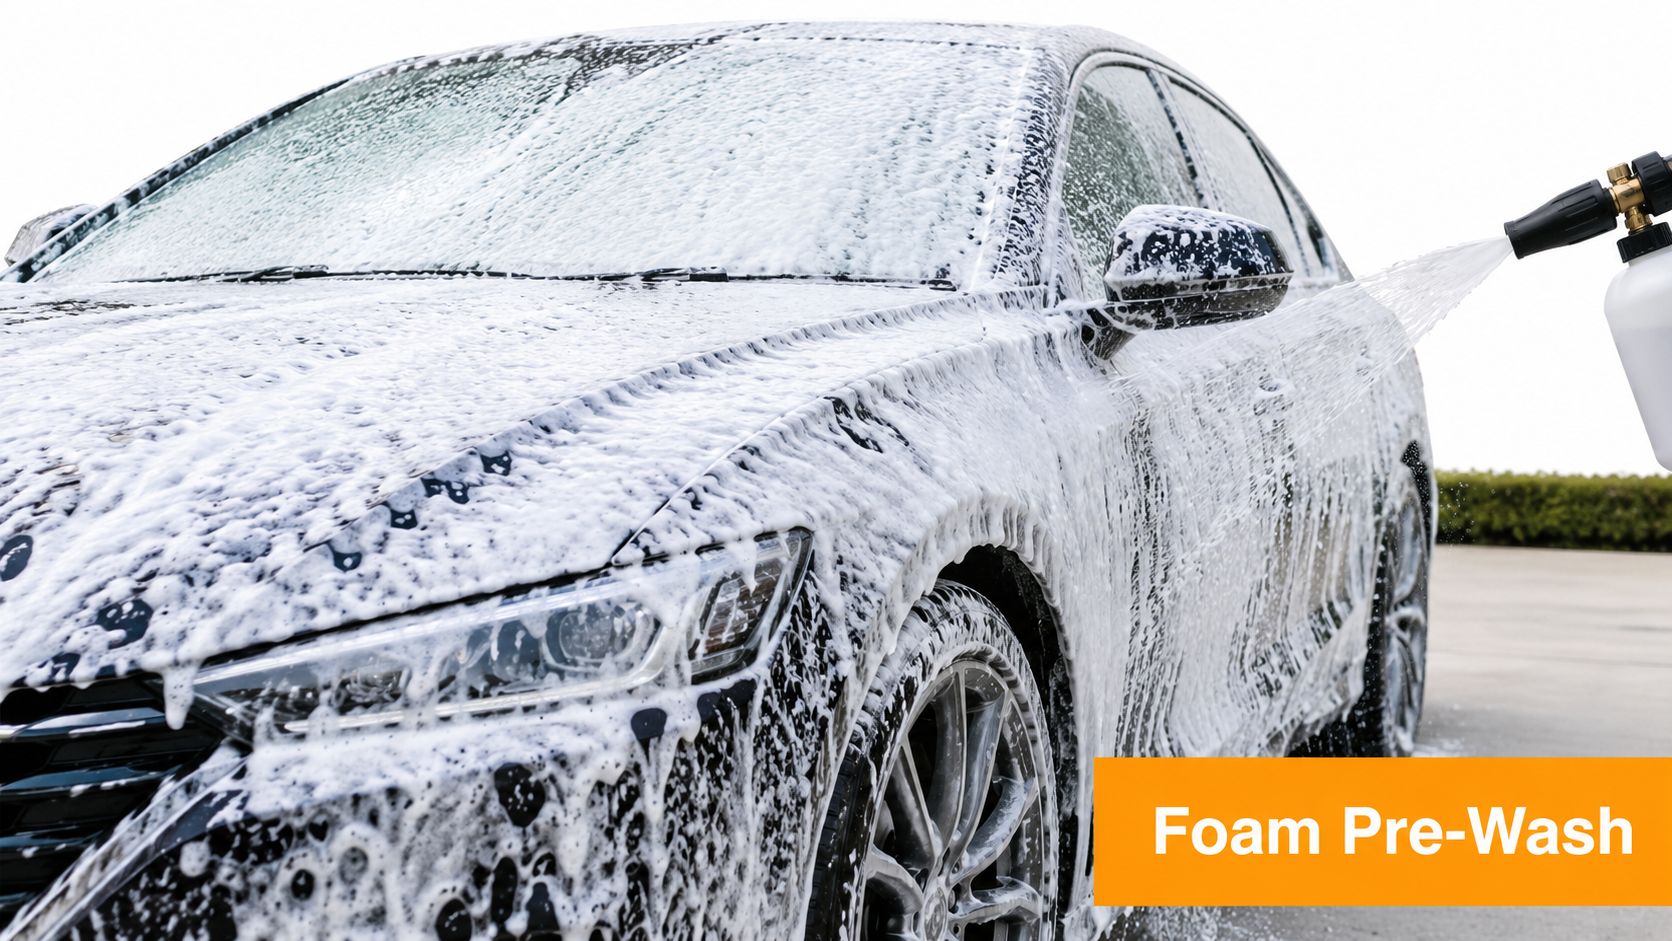
For exterior pre-washing, the SwiftJet Car Wash Foam Gun is one relevant garden-hose option. It connects to a standard hose, applies thick foam that clings to vertical surfaces, uses an on/off trigger, and includes a microfiber wash mitt. Use it to loosen dirt before contact washing, not as a replacement for careful technique.
1. Foam Cannon Pre-Wash Method for Maximum Cleaning Power
A foam pre-wash is the best first move when the exterior has road film, dust, bugs, or muddy residue. Spray the vehicle from top to bottom with a car-safe soap solution, let the foam dwell briefly, then rinse before your mitt touches the paint. The foam won't remove every bonded contaminant, but it can soften loose grime and reduce the amount of abrasive material left for the contact wash.
The SwiftJet gun is designed for garden-hose use and produces clinging foam, so it suits homeowners who want coverage without a pressure washer. Follow the soap manufacturer's dilution instructions rather than assuming one ratio works for every formula. More foam isn't automatically more cleaning power, and excessive concentration can leave residue.
Steps, timing, and finish control
- Work in shade: Keep the panels cool enough that the solution won't dry before rinsing.
- Cover from top to bottom: Start with the roof and glass, then move down to the dirtiest lower panels.
- Allow short dwell time: Give the foam a few minutes to soften grime, but rinse immediately if it begins drying.
- Rinse thoroughly: Use the trigger to stop flow between sections and avoid wasting water.
- Inspect before contact washing: If grit remains, repeat the rinse or use a gentler pre-treatment.
For the complete technique, follow this foam cannon car-washing guide. The key troubleshooting rule is simple. If the foam slides off instantly, adjust the product dilution or surface temperature. If it dries in place, rinse it off and reduce dwell time.
The method works best as a pre-wash, not a promise of touch-free perfection.
2. Two-Bucket Wash Method With Foam Cannon Integration
Foam loosens contamination, but a careful contact wash still needs clean water management. Use one bucket for car soap and another for rinsing the mitt. Dip into the wash bucket only after flushing the mitt in the rinse bucket, then clean one small panel at a time.
Add grit guards if your buckets accept them. They help keep particles at the bottom instead of letting them return to the mitt, although they don't make a dirty bucket safe to use indefinitely. Replace the water when it becomes visibly dirty, especially if you're washing a heavily soiled vehicle.
A controlled contact sequence
Start with the foam pre-wash, rinse from the roof downward, and then begin with the cleanest upper panels. Use straight, light passes rather than circular scrubbing. Rinse the mitt after each panel or whenever it feels gritty. Save rocker panels, bumpers, and the area behind the wheels for last.
Practical rule: If the mitt touches a lower, visibly dirty panel, rinse it before it goes back into the wash solution.
The included SwiftJet microfiber wash mitt can be used for the contact stage, but it should stay dedicated to painted surfaces. Don't use the same mitt on tires, wheel faces, exhaust tips, or the engine bay. Those areas carry contaminants that you don't want transferred to clear coat.
A household substitute is two clean buckets and a separate microfiber mitt. The purpose-built upgrade is a pair of buckets with grit guards and enough dedicated mitts to separate paint from wheels. If you notice new haze or fine swirls after washing, the likely causes are excessive pressure, a contaminated mitt, a dry panel, or washing in the wrong order. More soap won't fix any of those problems.
3. Waterless Wash Spot-Cleaning Technique for Quick Touch-Ups
A waterless wash is useful when contamination is light and you need to clean a small area between full washes. Keep a waterless wash product and several clean microfiber cloths in the vehicle for bird droppings, fresh dust, or a small spill on an exterior panel. Don't use this method on heavy mud, sand, or gritty road film. Those particles need rinsing before wiping.
Work in sections smaller than a door panel if the product dries quickly. Fold the cloth into multiple sides, use one side for the first pass, then turn to a clean side for the next pass. Reserve a second cloth for buffing. A single dirty towel spreads contamination instead of removing it.
Where this method makes sense
Travelers, campers, and RV owners may not have convenient access to a hose, but a waterless product can handle light surface dust. It also works for a quick cleanup before a meeting or after a short drive through a dusty area. Test the product on an inconspicuous section first, especially if the vehicle has matte paint, a delicate wrap, or a coating with specific maintenance instructions.
The cost is usually lower than a full professional visit, but the trade-off is limited cleaning capacity. Waterless products don't replace a proper wash when the lower panels are visibly dirty or the surface feels gritty.
Use waterless cleaning to remove light contamination, not to negotiate with heavy dirt.
If streaking appears, you're probably using too much product, too little product, or a towel that's already loaded with residue. Reapply lightly, turn to a clean towel side, and stop if the panel still feels gritty. Pair occasional waterless touch-ups with a full foam-and-rinse wash when the vehicle needs broader cleaning.
4. pH-Balanced Soap Selection for Paint Protection
Dish soap is a poor default for vehicle washing. It isn't formulated for automotive clear coats, waxes, trim, or coatings, and its degreasing behavior can remove protective products faster than a dedicated car soap. Choose a product labeled pH-balanced, pH-neutral, or safe for wax, then follow its dilution instructions.
Meguiar's, Chemical Guys, and Turtle Wax Premium all offer car-wash products with formulas intended for vehicle care. The brand matters less than the label, the instructions, and whether the product suits your finish. A ceramic-coated vehicle may have different maintenance guidance from the coating manufacturer, so check that before adding an aggressive cleaner.
Match the chemistry to the job
Use a mild car soap for routine paint washing. Save stronger cleaners for specific contamination and apply them only where appropriate. Don't pour a concentrated wheel cleaner into a foam gun used for painted panels, and don't assume thick foam means the chemical is safe.
Store soap in a cool, shaded place and close the container after use. Product separation or an unusual odor can signal that the formula has degraded. If a test area becomes hazy, sticky, or unusually dry, rinse immediately and stop using that product on the vehicle.
A pH-balanced soap won't compensate for a dirty mitt or careless drying. It reduces chemical risk, while pre-washing, clean tools, and gentle contact reduce mechanical risk. You need both.
5. Microfiber Cloth Technique for Scratch-Free Drying
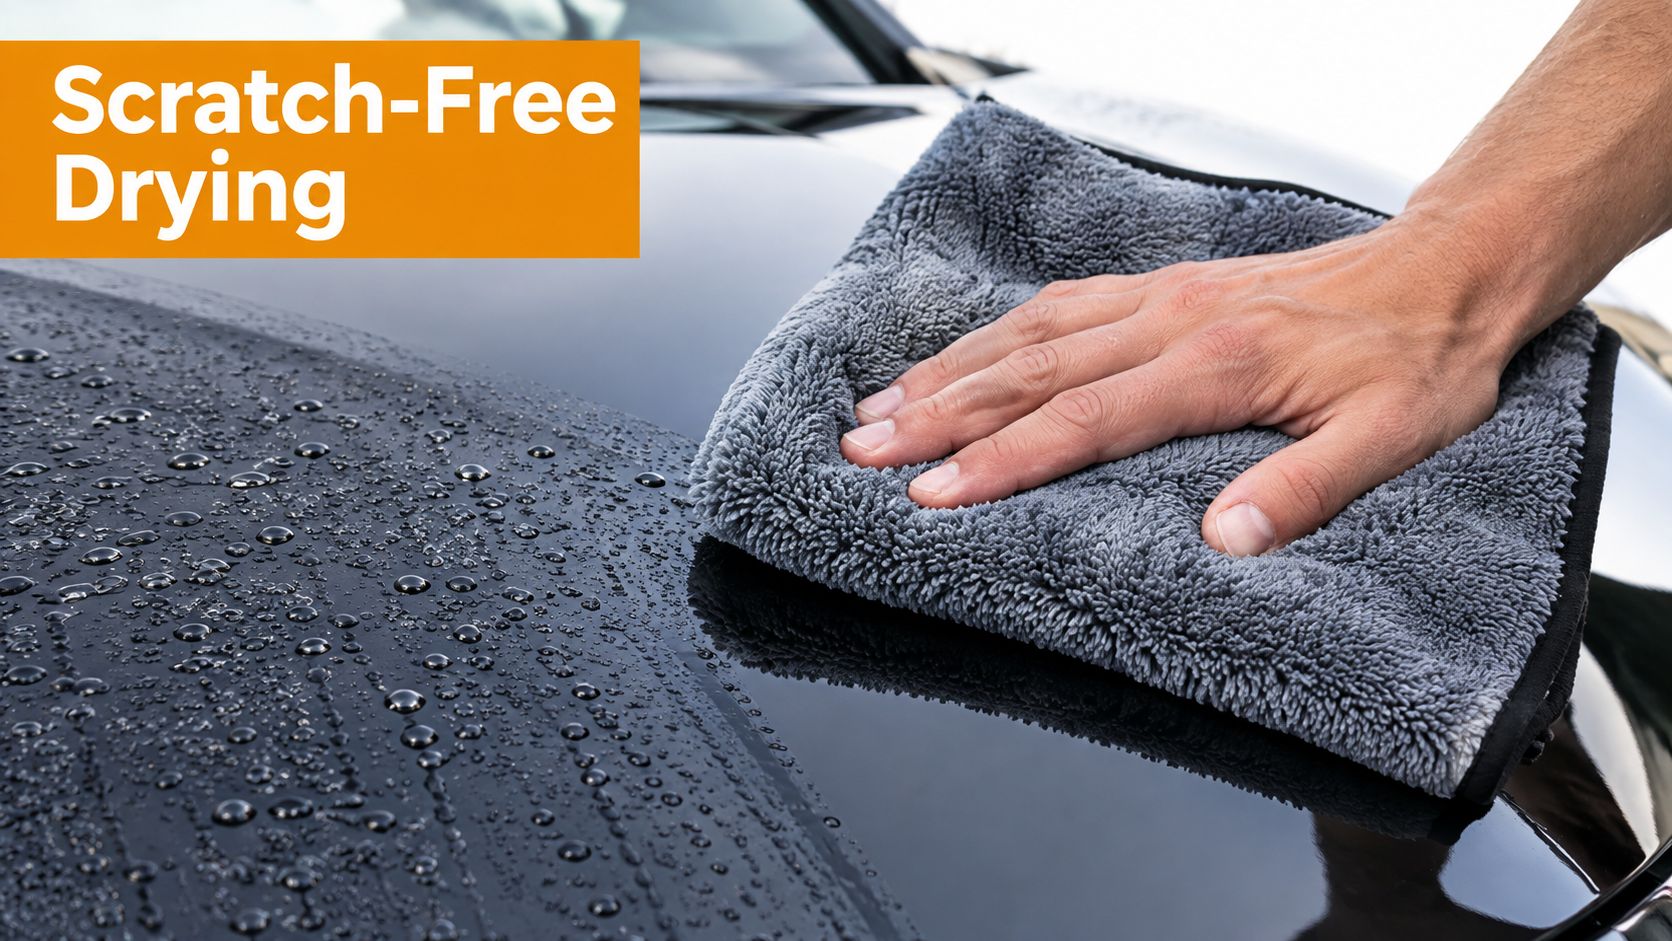
Drying is where many otherwise careful washes go wrong. Water spots form as droplets evaporate, but rubbing a damp panel with a saturated or dirty towel can create its own marks. Use dedicated microfiber drying towels, keep them separate from wash mitts, and press or glide lightly rather than grinding the fabric into the paint.
Start at the roof and work downward. Fold the towel so a fresh surface meets each section, and switch towels when one becomes wet or contaminated. A large drying towel can cover broad panels, while smaller towels help around mirrors, badges, grilles, and trim.
Make the towels part of the system
Wash microfiber separately from cotton and don't use fabric softener or dryer sheets. Those products can coat the fibers and reduce absorbency. Air-dry the towels or use a gentle, low-heat setting according to the care instructions.
For more guidance on selecting and maintaining them, see this microfiber towel cleaning guide. Branded embroidered microfiber towels can work for non-paint tasks, but inspect embroidery and edges before using them on delicate clear coat.
Drying fix: If the towel drags, stop. Add a little lubrication from a compatible drying aid or switch to a clean, more absorbent towel.
Don't use paper towels for paint drying. They can leave lint, have rough edges, and encourage pressure when they fail to absorb water. Keep separate cloths for glass, wheels, interior surfaces, and paint.
6. Wheel and Tire Cleaning Isolation Technique
Wheels and tires collect brake dust, tar, oily road film, and other contamination that shouldn't return to freshly washed paint. Clean them as a separate process with separate brushes, buckets, and towels. Many detailers prefer doing wheels first so splashes are removed during the body wash, while others clean wheels last to keep strong chemicals away from finished panels. Either order can work if you prevent runoff and cross-contamination.
For a cautious home routine, pre-rinse the wheels, apply a wheel-safe cleaner, agitate with dedicated tools, and rinse completely. Use a stronger alkaline or acidic product only when its label says it's suitable for that wheel's finish. Painted, polished, chrome, and coated wheels can react differently.
Keep the tools isolated
- Use dedicated brushes: A soft wheel brush and a separate tire brush prevent grit from moving between surfaces.
- Read dilution instructions: Never guess the strength of a wheel cleaner, especially on bare metal or delicate finishes.
- Rinse every crevice: Chemical residue can dry behind spokes, around lug nuts, or in tire lettering.
- Dress only clean rubber: Apply tire dressing to a dry tire sidewall and keep it off brake components and tread.
The SwiftJet foam gun can help pre-soak suitable wheel surfaces, but don't fill it with an unapproved chemical. Foam is a delivery method, not a safety rating. If overspray reaches the body, rinse it before it dries. If a wheel changes color or develops a cloudy patch, stop, rinse thoroughly, and seek product-specific guidance.
7. Pressure and Flow Rate Control for Paint Safety
Pressure washers remove dirt quickly, but a narrow, concentrated stream can damage loose trim, aged clear coat, weather seals, decals, or sensitive gaps. A garden hose with a suitable foam attachment is often easier to control for routine home washing. Whatever equipment you use, keep the nozzle moving and begin at a conservative distance.
Aim at an angle rather than straight into seams. Avoid spraying directly into window seals, badges, door-handle gaps, sensors, charging ports, and damaged paint. You don't need maximum force to remove contamination that you've already softened with foam.
Adjust by observation
Start farther away, test a small inconspicuous area, and move closer only if the surface remains stable and the cleaning result isn't sufficient. Stop if paint lifts, trim moves, a seal leaks, or water enters a component. Never hold a nozzle on one spot while trying to remove a stubborn mark.
The SwiftJet trigger lets you control foam and water flow from the handle, which can make section-by-section work more manageable. This car-wash pressure guidance explains why control matters more than picking the strongest setting.
If the rinse leaves dirt behind, improve the pre-wash or use a suitable mitt. Increasing pressure should be the last adjustment, not the first.
8. Regular Maintenance Wash Schedule for Long-Term Paint Protection
A car is easier to clean when contaminants haven't dried, bonded, or etched into the surface. Bird droppings, tree sap, road salt, pollen, and industrial fallout deserve prompt attention. Remove fresh deposits as soon as practical with the correct product and a lubricated microfiber towel, rather than waiting for the next complete wash.
Your schedule should follow use and exposure, not a rigid calendar. A daily commuter parked beneath trees needs different attention from a weekend vehicle kept in a garage. Salt, coastal air, construction dust, and frequent highway driving all justify closer inspection.
Build a routine you can maintain
Use a phone reminder for the next wash after each completed one. On light-dirt weeks, a waterless spot clean may be enough for isolated marks. When the lower panels feel gritty or show visible film, use a full pre-rinse, foam application, contact wash, and controlled dry.
A full wash also gives you a chance to inspect paint chips, rubber seals, wiper blades, and wheel finishes. Catching a loose trim piece or exposed chip early is safer than blasting it with water and discovering a larger problem later.
If you don't have the time, compare the effort of supplies, setup, washing, drying, and cleanup with a professional service. A paid wash becomes more sensible when the vehicle is heavily soiled, you lack a safe washing area, or the finish needs correction rather than routine cleaning.
9. Clay Bar Treatment for Deep Contaminant Removal Between Major Details
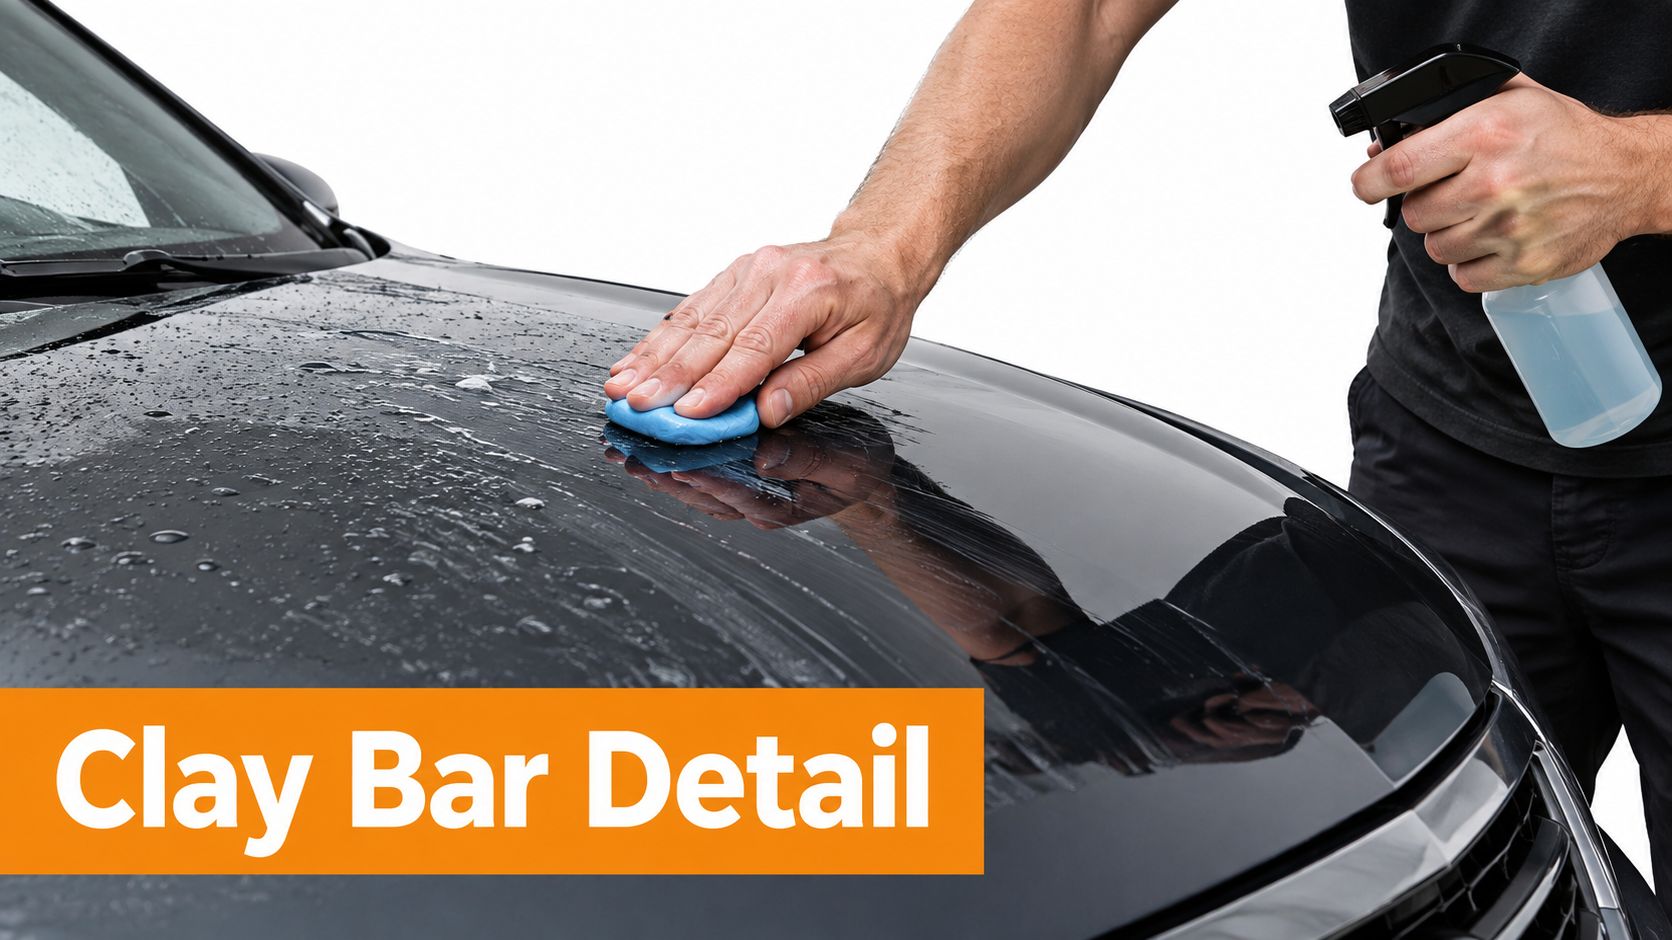
A foam wash removes loose grime, but it won't always remove bonded particles that leave paint feeling rough after drying. A clay bar or synthetic clay mitt can lift embedded contamination when used with plenty of lubricant. It doesn't polish scratches away, and it shouldn't be used as a substitute for washing.
Start with a complete wash and rinse. Divide the paint into small sections, mist the lubricant generously, and move the clay with light pressure. If the surface begins to drag, stop and add more lubricant. Fold or knead the clay to expose a clean working face as it collects residue.
Know when to stop
A smooth section and a rough section can help you judge progress by touch, but don't keep working after the surface feels clean. Excessive passes add risk without improving the result. If the clay falls onto the ground, discard it. Grit picked up from the floor can scratch the next panel.
Clay treatment is useful before applying wax or another compatible protectant because it leaves a cleaner, smoother surface. Follow the product instructions for the protection step, and check compatibility if the vehicle has a ceramic coating, paint protection film, or vinyl wrap.
If you see marring after claying, the usual causes are insufficient lubricant, too much pressure, a contaminated clay face, or working on an inadequately washed panel. Stop, wash the area, and assess the finish under good lighting before continuing.
10. Seasonal Preparation and Storage Techniques for Vehicle Protection
Seasonal protection begins with the cleaning decision that fits the weather. Before winter, remove grime, rinse accessible underbody areas, and apply a protectant compatible with the vehicle's finish. In spring, remove salt residue and inspect lower panels, wheel arches, and drain points. Summer requires prompt removal of insect residue and tree sap, particularly after sun exposure has warmed the surface.
Fall debris needs attention before moisture binds leaves, pollen, and sap into a sticky layer. Clear the cowl, door jambs, sunroof drains, and hood gaps. Do not cover a dirty or wet vehicle. A cover can hold contamination against the finish and increase the work required later.
Match preparation to storage
For extended storage, wash and dry the vehicle fully, clean the interior, and choose a breathable cover suited to the storage environment. Check beneath the cover periodically. Outdoor winter storage may require extra cold-weather precautions. See the Solana EV winter cart guide for additional winter storage considerations.
A seasonal deep clean can combine a foam pre-wash for heavy grime, a careful contact wash, separate wheel cleaning, clay treatment where needed, interior vacuuming, glass cleaning, and material-specific protection. Use each product only on compatible surfaces. Wax for painted panels should not be applied to a matte dashboard, screen, or rubber seal.
Rinse winter salt from the underbody thoroughly, while avoiding forceful spray near vulnerable electrical connections. Rust, peeling paint, or damaged coating requires inspection rather than more cleaning. A clean surface exposes problems clearly, but cleaning cannot repair corrosion.
10-Point DIY Car Cleaning Hacks Comparison
| Method | 🔄 Implementation complexity | ⚡ Resource requirements | ⭐ Expected outcomes | 📊 Ideal use cases | 💡 Key advantages & tip |
|---|---|---|---|---|---|
| Foam Cannon Pre-Wash Method for Maximum Cleaning Power | Moderate, foam cannon setup and correct soap ratios | Foam cannon, pressure source/hose, pH-balanced shampoo | ⭐⭐⭐⭐, loosens grime, reduces contact abrasion | DIY enthusiasts, professional detailers, RV owners | Minimizes swirl marks; tip: start 1:10 ratio, let foam dwell 3–5 min |
| Two-Bucket Wash Method with Foam Cannon Integration | Moderate, two-bucket routine plus foam pre-wash | Two buckets, grit guards, microfiber mitts, foam cannon | ⭐⭐⭐⭐, reduces recontamination and paint damage | Paint-conscious owners, detail shops, mobile detailers | Prevents grit transfer; tip: use grit guards and change rinse water regularly |
| Waterless Wash Spot-Cleaning Technique for Quick Touch-ups | Low, spray-and-wipe spot cleaning | Waterless wash product, 2+ quality microfiber cloths | ⭐⭐⭐, good for light dirt; conserves water | Travelers, water-restricted areas, busy professionals | Conserves water for touch-ups; tip: use two cloths and work small sections |
| pH-Balanced Soap Selection for Paint Protection | Low, product selection and concentration testing | Premium pH-neutral soaps, foam ratio adjustments | ⭐⭐⭐⭐, protects clear coat and preserves coatings | Luxury/exotic owners, long-term maintainers | Protects coatings; tip: choose "pH-balanced" and test foam density |
| Microfiber Cloth Technique for Scratch-Free Drying | Low, correct drying technique with a short learning curve | Multiple high-GSM microfiber drying cloths, proper laundering | ⭐⭐⭐⭐, eliminates water spots and reduces swirls | Show-car enthusiasts, detail-oriented owners, pros | Prevents water spots; tip: press/dab don't rub, avoid fabric softener |
| Wheel and Tire Cleaning Isolation Technique | Moderate, separate workflow and chemical handling | Dedicated wheel cleaner, brushes, separate cloths, foam application | ⭐⭐⭐⭐, effectively removes brake dust and tar | Performance cars, high-mileage vehicles, professional detailers | Prevents body contamination; tip: clean wheels last and use separate tools |
| Pressure and Flow Rate Control for Paint Safety | Moderate, requires PSI knowledge and nozzle technique | Adjustable pressure washer or controlled flow device, training | ⭐⭐⭐⭐, prevents pressure-related paint/trim damage | First-time pressure washers, paint-conscious owners, contractors | Protects clear coat; tip: start 2–3 ft back, 40–45° angle, keep nozzle moving |
| Regular Maintenance Wash Schedule for Long-Term Paint Protection | Low, discipline to follow a schedule | Routine wash supplies (foam gun optional), calendar reminders | ⭐⭐⭐⭐⭐, most cost-effective long-term protection | Fleet managers, resale-focused owners, long-term keepers | Prevents long-term deterioration; tip: set reminders and adapt by climate |
| Clay Bar Treatment for Deep Contaminant Removal Between Major Details | Moderate, careful manual technique and time investment | Clay bar kit, lubricant, time (1–3 hours) | ⭐⭐⭐⭐, removes embedded contaminants, smooths paint | Show cars, pre-coating prep, detail enthusiasts | Improves polish/wax adhesion; tip: clay after foam wash, follow with wax |
| Seasonal Preparation and Storage Techniques for Vehicle Protection | Moderate, multi-step seasonal planning | Seasonal products (waxes, undercarriage cleaners), storage covers, time | ⭐⭐⭐⭐, prevents season-specific damage and extends lifespan | Collectors, cold-climate owners, RV/seasonal vehicle users | Mitigates seasonal risks; tip: deep-clean pre-season and document maintenance |
Build a Cleaning Routine That Protects the Finish
The best routine isn't the one with the most products. It's the one that consistently separates loose dirt from contact tools, uses the mildest effective chemistry, and stops before a small cleaning job becomes surface damage.
Start with a pH-balanced car soap and a cool, shaded work area. Pre-rinse the exterior, then apply foam to loosen road film before you touch the paint. Use the two-bucket method for the contact wash, keep the wash mitt away from wheels and tires, and clean from the least dirty areas toward the dirtiest ones. If a panel remains gritty after rinsing, don't scrub harder. Improve the pre-wash or isolate that contamination for a later treatment.
Dry with dedicated microfiber towels. Press and glide gently, turn to a clean towel side often, and wash the towels without fabric softener. Separate cloths for paint, glass, interior surfaces, and wheels make the system easier to manage. If you need supplies for non-paint tasks, even polishing silver easily requires the same basic principle, use a material and cleaner suited to the surface rather than a universal shortcut.
Use waterless cleaning for light, localized contamination only. If the vehicle is muddy, sandy, or heavily filmed, rinse and wash conventionally. Use clay treatment when washing no longer restores a smooth surface, and follow it with compatible protection. Seasonal preparation matters when the vehicle faces salt, sap, pollen, heat, or extended storage.
The interior needs the same restraint. Vacuum crumbs and grit before wiping, use a soft detailing brush around vents and buttons, and apply cleaner to a cloth rather than spraying directly onto an infotainment display. Consumer guidance warns that dirty cloths can scratch paint, household cleaners can damage vehicle surfaces, and sprayed cleaner can harm anti-glare or anti-fingerprint screen coatings. That makes paper towels, magic erasers, vinegar, and random household brushes poor default choices for modern interiors.
If a product reacts badly, stop, rinse or wipe it away as appropriate, and test it on an inconspicuous area before continuing. If dirt is heavy, don't use a waterless method. If a wheel cleaner reaches paint, rinse immediately. If a towel drags, change it instead of applying more pressure.
A garden-hose foam tool such as the SwiftJet Car Wash Foam Gun can make the exterior pre-wash easier by applying clinging foam before the contact stage. It doesn't replace safe dilution, separate wheel tools, careful rinsing, or gentle drying. It gives you a practical way to add controlled pre-washing to a home routine.
SwiftJet offers a garden-hose foam gun with an on/off trigger and a microfiber wash mitt, making it relevant for DIY car cleaning, travel vehicles, and routine exterior pre-washes. Visit SwiftJet to review the foam gun and decide whether it fits your washing setup.
