

Winter leaves a mess in more than your driveway. By the time the weather turns, your car has usually taken a beating from salt, slush, brake dust, and whatever the roads threw at it all season. If you already have spring cleaning on your mind at home, your vehicle should be part of that ritual too, because it's another space you use every day and one that collects grime fast.
The best spring cleaning tips for cars aren't about chasing a perfect showroom fantasy. They're about using the right order, the right tools, and enough restraint to clean safely instead of grinding dirt into the finish. A proper wash can make a tired car feel fresh again, and it also protects the paint, wheels, and trim from avoidable wear. For readers who want a smarter wash routine, safe car washing methods are worth understanding before you start.
Professional detailers don't start by scrubbing. They start by removing loose contamination, because every grain of grit left on the surface can become an abrasive once the mitt touches the paint. That same logic works at home with a hose, a foam gun, and a little patience.
1. Pre-Rinse Your Vehicle Thoroughly Before Foam Application
Start with water, not soap. A full pre-rinse knocks off loose dust, salt residue, and winter debris before you ever touch the paint with a mitt or foam. That matters because spring cleanup is usually a deep-clean job, not a quick rinse, and high-traffic household spaces like kitchens and bathrooms get special attention for the same reason, because people focus first on the areas that collect the most grime Ipsos spring cleaning findings.
A good pre-rinse follows a simple pattern. Work from the roof down, then hit the glass, doors, lower panels, wheel wells, and tires. Keep the pressure moderate, because you want to dislodge contamination, not force water into bad seals or blast dirt around into the paint.
Practical rule: if you can still see chunks, streaks, or dried road film after the rinse, the foam is going to work harder than it should.
Real-world detailers use this step because it saves time later. RV travelers do the same after campsite dust, and fleet managers lean on pre-rinsing when they need to wash several vehicles in a row. You can also pre-rinse the night before if the car is crusted with frozen-on residue or packed wheel-well grime, then finish the wash when the surface has softened a bit. Tires deserve their own rinse too, because they collect more brake dust and road residue than the body panels do.
The goal here is simple. Remove everything loose first so your cleaning solution can focus on the contaminants that need to be lifted.
2. Invest in a High-Quality Foam Gun for Superior Cleaning Power
A foam gun changes a spring wash at home from a quick spray-down into a proper deep-clean step. It lays down thick suds that cling to the surface, soften winter film, and give the cleaner time to work before a mitt ever touches the paint. The SwiftJet Car Wash Foam Gun is built for that kind of cleanup, and it connects to a standard garden hose, which keeps the setup straightforward for home use.
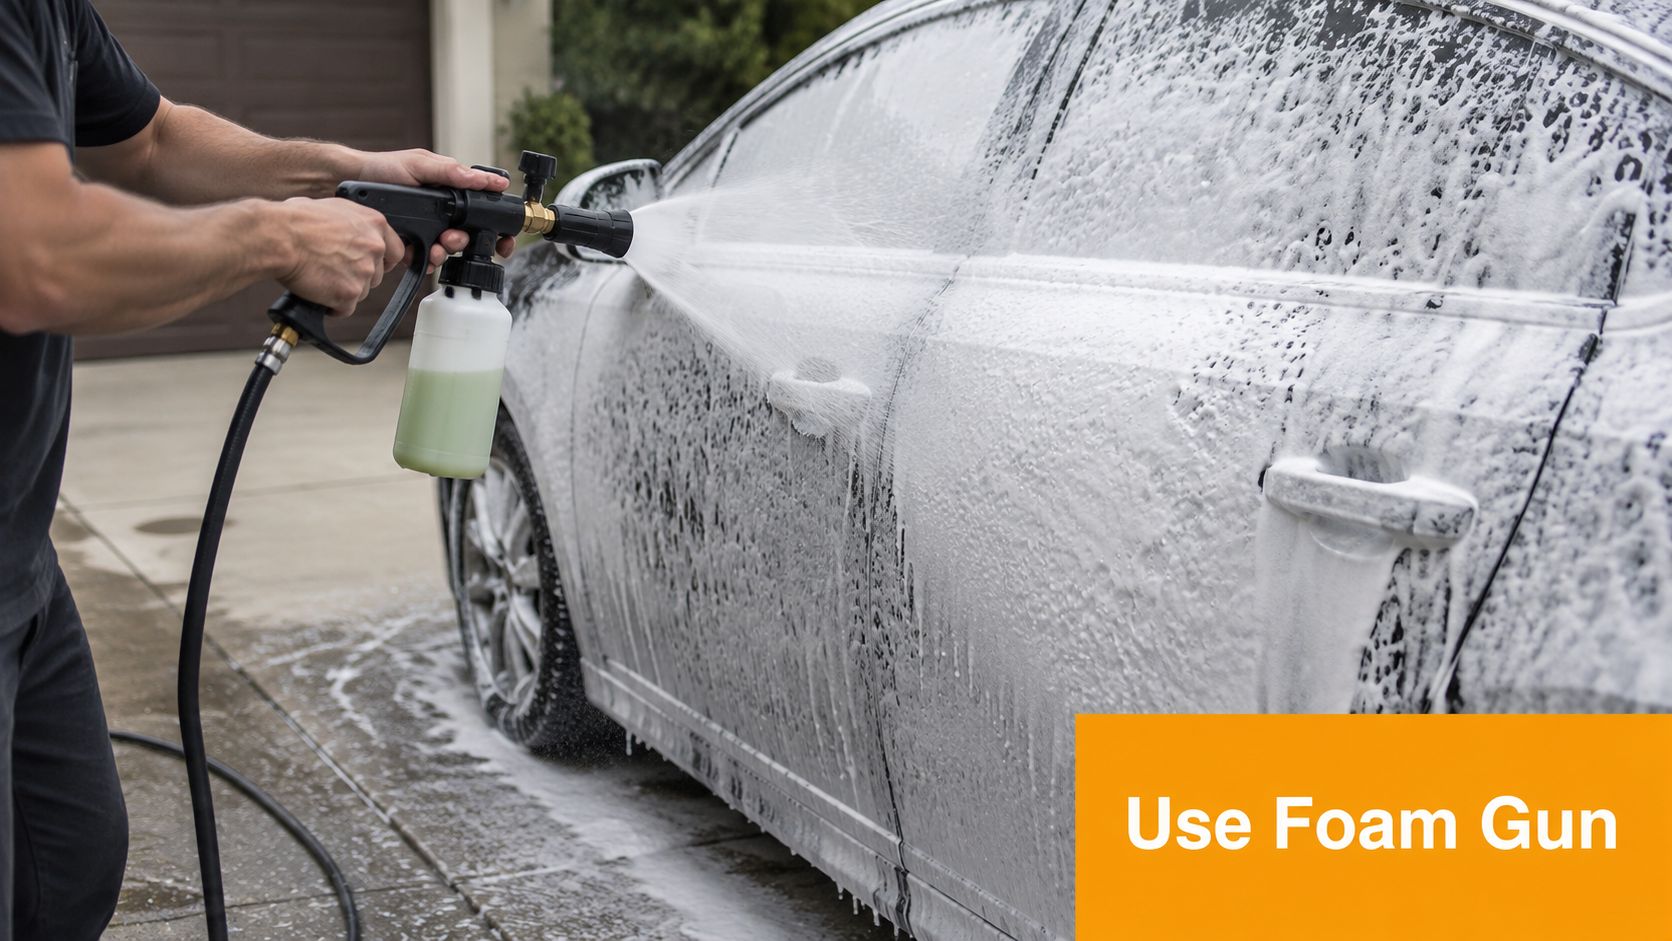
Foam earns its place because it buys contact time. Soap that hangs on the surface can soften grime more evenly than a fast splash and rinse, especially after a winter of salt, slush, and road film. It also gives you better control during a home wash, since you can coat one section at a time instead of rushing around the car while the first panel dries out.
A few practical choices help the tool perform better and make the wash easier to manage:
- Pick a finish you'll enjoy using: orange, blue, or black can all look good in a garage, and a tool that looks tidy is more likely to get used regularly.
- Use the included microfiber wash mitt: that keeps your kit compact and gives you a safer touch point for the paint after the foam has done its work.
- Store it dry after the season: damp storage can leave buildup in the fittings and make the next wash less pleasant.
A good foam gun also fits the broader spring-cleaning mindset. The car is another part of the house that has collected winter grime, and a professional-style tool helps a home user treat it with the same care as floors, windows, or counters. It is a simple upgrade, but it changes the way you approach the job. When the right tool is easy to use and easy to keep ready, the wash gets done more carefully every time.
3. Use the Two-Bucket Method for Contamination-Free Washing
The two-bucket method sounds fussy until you've seen what happens when one dirty mitt goes straight back into the soap bucket. Then it makes perfect sense. One bucket holds your wash solution, the other holds clean rinse water, and the rinse bucket is where dirt gets stripped off the mitt before the next pass. That simple separation helps keep grit from circling back across your paint.
Why It Works Better Than One Bucket
Spring washing is a lot like spring cleaning inside the home, where the dirtiest zones are handled first so debris doesn't get spread around. The same logic applies outside. If you're moving from rocker panels to doors to the hood without rinsing the mitt, you're basically dragging winter residue from the dirtiest areas right across the clean ones.
The mitt should come back to the paint clean, not just wet.
A good setup includes grit guards at the bottom of both buckets, because they help trap sediment where it belongs. Warm water can also help the soap suspend dirt better, which matters when the vehicle still has cold-weather film stuck to it. If you're washing a larger truck or SUV, changing the rinse water halfway through keeps the process honest.
This is the method detailers lean on for a reason. It reduces swirl marks, protects the finish, and pairs naturally with foam pre-treatment. Used together, the foam softens the grime and the buckets keep the removal process controlled. That's the kind of routine that makes sense for anyone who wants a safer spring reset without taking the car to a shop.
4. Clean Wheels and Tires Separately from Body Paint
Wheels are their own project, not an afterthought. Brake dust, tar, and road grime build up differently than the dirt on painted panels, so they need their own tools and their own cleaner. If you wash wheels with the same mitt you use on the doors, you're carrying the roughest contamination straight into the rest of the job.
Start with the wheels before the body. That keeps grime from splashing onto freshly washed paint, and it lets you attack the dirtiest area while your wash gear is still fresh. Use a separate wheel brush, a dedicated microfiber towel, and a cleaner made for wheel surfaces so you don't create more problems than you solve.
Here's the order that usually works best:
- Rinse the wheel first: loosen dust and surface grit before applying product.
- Let the cleaner dwell briefly: give it time to break up the buildup instead of scrubbing too early.
- Use a dedicated brush: one brush for wheels only, never for paint.
- Dry wheels separately: a different towel keeps brake dust away from the body panels.
Tires often need a little extra attention because they trap more heavy grime than the wheel face itself. Don't rush this part. A clean wheel arch and fresh-looking tire sidewall do a lot for the overall impression of the car, and they make the rest of the exterior look cleaner even before you get to the paint.
Professional detailers know this because the wheel area is where winter shows up first. If the wheels still look neglected, the whole wash feels unfinished.
5. Apply Foam Pre-Treatment and Allow Proper Dwell Time
Foam only helps if you give it time to work. Spray-and-rinse habits don't cut it in spring, especially when the car has dried winter film, tree sap, or stubborn road residue stuck to it. Thick foam needs a few minutes on the panel so the cleaning agents can loosen contaminants before you touch the surface.
The right approach is patient but not sloppy. Apply foam from the top down, let it sit while it stays wet, and then move through the wash in sections. If the surface is hot or the sun is beating down, foam dries too quickly and loses the benefit of dwell time, so a shaded wash spot is always better.
For a more detailed breakdown of foam coverage and contact time, the SwiftJet foam gun guide explains why foam works best when it can cling instead of sliding off immediately.
What Good Dwell Time Looks Like
Light spring grime usually needs a short soak. Heavier winter buildup needs longer. The point isn't to let soap dry on the car, it's to let it loosen the dirt enough that your mitt doesn't have to fight every speck on its own.
Keep the foam wet. If it starts drying on the panel, reapply before you scrub.
Many home washes go wrong. People foam the car, get distracted, and then return to a half-dried layer that's less effective and harder to rinse. The better habit is to work one section at a time so the foam stays active while you move through the wash.
A properly timed foam stage saves effort later. It also reduces the amount of pressure you need on the paint, which is exactly what you want after a rough season on the road.
6. Utilize Microfiber Technology for Streak-Free, Paint-Safe Washing
Microfiber earns its place in a spring cleaning kit because it helps you clean without punishing the surface. The fibers are designed to grab and lift dirt instead of pushing it around, which is why they're so useful on paint, glass, trim, and drying jobs. The SwiftJet kit includes a microfiber wash mitt, and that kind of included tool matters because it keeps the wash process safer from the start.
The difference shows up fast in hand feel and finish. A cotton rag can drag. A worn sponge can hold grime against the paint. Microfiber gives you more control, more absorption, and a cleaner rinse between passes.
A few habits make microfiber work the way it should:
- Wash the mitt separately: keep it away from household laundry and never use fabric softener.
- Use gentle motions: straight passes or light overlapping strokes are safer than aggressive scrubbing.
- Dry with separate towels: one towel for paint, another for glass, and another for jambs is a cleaner setup.
- Store only when fully dry: damp fibers can pick up odors and lose performance.
For a closer look at why soft, structured fibers matter, the microfiber cleaning guide is worth a read.
This is also where paint safety becomes practical, not theoretical. Once dirt is loosened by foam and water, microfiber gives it a place to go. That's a much better outcome than grinding a speck of winter grit in circles across the clear coat.
The goal isn't just a shiny finish. It's a wash process that doesn't undo the very paint protection you're trying to preserve.
7. Remove Winter Contaminants and Perform Paint Decontamination
A normal wash won't remove everything that winter leaves behind. Road salt residue, embedded brake dust, sap, and other stuck-on contaminants can cling to the clear coat even after a thorough soap-and-water routine. That's when decontamination earns its keep.
Clay bars and iron-removal products are the tools that go deeper. They're not for every weekly wash, but after winter they can make a huge difference in how smooth the paint feels and how well any protection layer bonds afterward. Use them after the car has been fully washed and dried, then work in small sections so you can control the process.
Where Decontamination Helps Most
- Lower panels and rear bumpers: these areas usually collect more road spray.
- Behind the wheels: brake dust and grime tend to hide here.
- Hoods and roofs parked outdoors: airborne fallout settles where it can grab hold.
- Flat painted surfaces: embedded contamination becomes more noticeable under bright light.
A clay bar should glide, not fight. If it drags heavily, you need more lubricant or a cleaner section. Keep folding the clay to expose a fresh surface, because a dirty piece of clay can do the same damage you're trying to avoid.
This stage is especially valuable if you plan to add wax, sealant, or ceramic protection afterward. Once the surface feels clean and smooth, those products have a much better base to bond to. That's why detailers don't skip decontamination during spring.
Use this step when the paint still feels rough after washing. That roughness is often the sign that the contaminants are still there, just hidden from plain sight.
8. Dry Your Vehicle Properly to Prevent Water Spots and Streaks
Drying is not just the last step, it's one of the most important. Water left to evaporate on its own can leave mineral deposits behind, and those spots are a frustrating way to ruin an otherwise careful wash. The fix is simple, dry the vehicle quickly and gently with clean microfiber towels.
The trick is to blot or pat instead of grinding the towel across the paint. Start at the top, work downward, and fold the towel often so you're always using a clean face. If the towel gets damp and starts to smear, switch to a fresh one.
For a deeper look at why spots form and why they stick, water spot prevention explains the basics clearly.
A few drying habits make the finish better:
- Use more than one towel: one saturated towel can't safely finish the whole car.
- Hit the door jambs last: those areas drip after the main panels are done.
- Dry glass separately: clean windows need a towel that hasn't already picked up paint residue.
- Work before evaporation starts: the sooner the water is removed, the fewer marks are left behind.
This is one of those steps that separates a rushed wash from a polished result. The paint can look clean and still feel unfinished if water spots are left behind. A good drying routine locks in the effort you already put in with foam, mitt, and rinse water.
If the goal is a spring reset that looks finished, don't treat drying like cleanup duty. Treat it like part of the final presentation.
9. Apply Protective Coatings After Spring Deep Cleaning
Once the car is clean, decontaminated, and dry, protect it. That's the right time for wax, sealant, or ceramic coating, because the surface is ready and free of the winter buildup that can interfere with adhesion. Spring is a practical season for this work, since the weather is warming up but the car still needs defense against road grime, UV exposure, and general daily wear.
The product you choose depends on how much time you want to spend and how long you want the protection to last. Wax is easier and usually more forgiving. Sealants are often favored by people who want a stronger synthetic barrier. Ceramic coatings are the more involved option and are best handled carefully, especially if you're new to application.
Work in shade whenever you can. Hot panels make product harder to spread evenly and can leave streaks or high spots that are annoying to correct later. Apply thin coats, let the product cure the way the instructions say, and buff with clean microfiber towels.
A clean surface is the real foundation. Protection only works well if it's laid on top of properly prepared paint.
The spring wash becomes more than a rinse. It turns into a reset for the months ahead, giving you a base that can resist grime and make future washes easier. A good coating doesn't replace washing, but it absolutely improves the payback you get from every wash afterward.
10. Establish a Spring Cleaning Schedule and Maintenance Program
The smartest spring cleaning tip for a car is the one that keeps the car from getting neglected again. A one-time deep clean feels great, but a simple schedule is what keeps the result alive through pollen season, road trips, and muddy weekends. If you use your vehicle every day, regular maintenance matters more than the occasional heroic wash.
Spring is already a time when people are cleaning more broadly at home, and that same rhythm works for vehicles too. The evidence from spring-cleaning surveys shows the habit is still near-universal, with annual deep cleaning remaining common across households American Cleaning Institute survey coverage, and that kind of repeat behavior is exactly why a recurring car-care plan makes sense. The most effective routine is the one you'll repeat.
A workable schedule might look like this:
- Weekly quick wash: use foam and a rinse to stay ahead of dust and pollen.
- Monthly deeper clean: bring back the two-bucket method and inspect the wheels closely.
- Seasonal decontamination: handle embedded grime before it becomes stubborn.
- Protection refresh: reapply wax or sealant as needed after the paint has been corrected and cleaned.
Documenting the date, weather, and condition of the wash helps too, because you'll start noticing patterns. If your car gets hammered after rain, pollen, or a camping trip, adjust the timing instead of waiting until the mess becomes obvious.
The best spring cleaning routine isn't a single marathon. It's a rhythm that keeps the car looking cared for all year long.
10-Point Spring Car Cleaning Comparison
| Item | 🔄 Implementation Complexity | ⚡ Resource Requirements | ⭐ Expected Outcomes | 📊 Ideal Use Cases | 💡 Key Advantages / Tips |
|---|---|---|---|---|---|
| Pre-Rinse Your Vehicle Thoroughly Before Foam Application | Low, simple rinse routine (5–10 min) | Garden hose with moderate pressure | Removes loose dirt; reduces scratching | Every vehicle before foaming; fleets, RVs | Protects paint; top-to-bottom rinsing; focus wheel wells |
| Invest in a High-Quality Foam Gun for Superior Cleaning Power | Moderate, one-time setup, simple operation | Foam gun, compatible soap, garden hose | Thick clingy foam; better dirt suspension; water efficient | DIY detailers, mobile pros, multi-vehicle owners | Faster professional results; use trigger control; register for warranty |
| Use the Two-Bucket Method for Contamination-Free Washing | Moderate, requires disciplined protocol | 2× 5‑gal buckets, grit guards, microfiber mitt | Minimizes swirl marks; prevents cross-contamination | Professional detailers, luxury cars, careful DIY | Economical; use grit guards; change rinse water mid-clean |
| Clean Wheels and Tires Separately from Body Paint | Moderate, separate phase and tools | Wheel cleaner, dedicated brushes, extra bucket | Better wheel restoration; protects clear coat | Vehicles with heavy brake dust; fleets; RVs | Use dedicated brush; clean/rinse wheels first; avoid contaminating wash solution |
| Apply Foam Pre-Treatment and Allow Proper Dwell Time | Low–Moderate, timing and monitoring required | Foam gun, cleaning solution; 5–15 min dwell | Chemical breakdown of grime; less scrubbing required | Post-winter cleaning; heavy-contamination jobs | Apply top→bottom; keep foam wet; avoid direct sun |
| Utilize Microfiber Technology for Streak-Free, Paint-Safe Washing | Low, straightforward but technique-sensitive | Microfiber mitts/towels, proper laundering supplies | Paint-safe, streak-free finish; reduced swirls | All users; pairs with two-bucket method | Rinse mitt often; air-dry; no fabric softener |
| Remove Winter Contaminants and Perform Paint Decontamination | High, technical process, care required | Clay bar, iron remover, lubricants, time | Removes embedded fallout; preps paint for coatings | After harsh winters; before waxing/coating | Work in small sections; keep clay lubricated; follow with conditioner |
| Dry Your Vehicle Properly to Prevent Water Spots and Streaks | Low–Moderate, technique and timing matter | Multiple microfiber drying towels, drying aid | Prevents water spots; delivers showroom finish | Every wash; pre-coating step | Pat dry top→bottom; use 2–3 towels; apply drying aid |
| Apply Protective Coatings After Spring Deep Cleaning | Moderate–High, skill and cure time needed | Wax/sealant/ceramic products, applicators, controlled shade | Long-term protection, enhanced gloss, easier future washes | Post-decontamination; seasonal protection | Apply thin coats, follow cure times, work in shade |
| Establish a Spring Cleaning Schedule and Maintenance Program | Moderate, planning and consistency required | Time allocation, documentation, routine supplies | Consistent care; extended paint life; fewer major cleans | Fleet managers, RV travelers, enthusiasts | Weekly quick washes, monthly two-bucket, document dates; enroll VIP program |
Beyond the Wash, Maintaining Your Vehicle's Shine All Year
Spring cleaning your vehicle is more than a seasonal chore. It's a practical reset that removes winter damage, protects your paint, and makes every drive feel better. When you use the right sequence, rinse first, foam second, wash safely, decontaminate where needed, and finish with protection, you're not just cleaning the car. You're preserving it.
That same mindset works whether you drive a commuter sedan, a pickup, a family SUV, or an RV. The vehicle becomes another part of the home environment, another surface that deserves attention after a hard season. The best results come from tools and habits that are simple enough to repeat, because consistency beats occasional perfection every time.
A foam gun makes that routine more realistic for home use. It gives you better coverage, better dwell time, and a more controlled wash without turning the job into a hassle. Paired with microfiber, a two-bucket setup, and a little discipline around drying and protection, it's one of the easiest ways to turn a basic wash into a professional-style spring refresh.
The payoff is visible and practical. Cleaner paint, safer washing, better-looking wheels, and less time spent fighting winter residue all season long. If you keep the routine going, the car never gets a chance to look neglected for long.
SwiftJet makes it easy to bring professional-style spring cleaning home, with a foam gun that connects to a standard garden hose, includes a free microfiber wash mitt, and gives you precise control while you wash. If you're ready to clean your car like another room in the house and keep it looking better all year, visit SwiftJet and see how the right tools can simplify every wash.
