
Using a pressure washer is hands-down one of the fastest ways to get that showroom shine, but you have to know what you're doing to avoid some seriously expensive mistakes. It all comes down to a simple formula: the right pressure (1200-1900 PSI), the right nozzle (a 40-degree wide-angle tip), and the right distance from your paint.
Nail that combination, and you'll lift away dirt and grime like a pro. Get it wrong, and you could be looking at a damaged clear coat before you know it.
The Essentials of Pressure Washing Your Car Safely
I get it. Pointing a high-powered stream of water at your pride and joy can be a little nerve-wracking. We’ve all heard the horror stories about stripped paint and ruined decals. But the good news is that pressure washing is perfectly safe—as long as you respect the tool and your car's finish.
It really just boils down to three things: pressure, nozzle, and distance. Pushing the limits on any of these is where people get into trouble.
Understanding PSI and Its Impact
PSI, or Pounds per Square Inch, is all about the force of the water. That 3000 PSI beast that's amazing for your concrete driveway? It's way, way too aggressive for your car's paint job. For cars, the sweet spot is between 1200 and 1900 PSI.
This range has enough muscle to knock off mud and road grime without blasting water into sensitive seals or turning a tiny rock chip into a giant patch of peeling paint. If you're in the market for a new machine, take a look at our guide on the best pressure washers for cars to find one that stays within these safe limits.
To make things simple, here’s a quick-reference table with the ideal settings for a safe and effective wash.
Safe Pressure Washer Settings for Cars
This table breaks down exactly what you need to keep your car’s paint looking great.
| Setting / Equipment | Recommended Specification | Reasoning |
|---|---|---|
| Pressure (PSI) | 1200-1900 PSI | Strong enough to clean effectively but gentle enough to avoid damaging the clear coat or sensitive parts. |
| Nozzle Type | 40-Degree (White Tip) | Creates a wide, fan-like spray that distributes pressure evenly, preventing concentrated, damaging force. |
| Distance | 18-24 inches from the surface | Provides a crucial buffer, reducing the direct impact of the water and protecting delicate areas. |
| Flow Rate (GPM) | 1.4-1.6 GPM (Gallons Per Minute) | Ensures sufficient water flow to rinse away soap and debris without relying on excessive pressure. |
Stick to these guidelines, and you’ll be washing with confidence, not crossing your fingers and hoping for the best.
Your Go-To Nozzle: The 40-Degree Tip
Pressure washer nozzles determine the shape of the water spray. A narrow, pinpoint stream (like a 0-degree red tip) acts more like a water laser—great for stripping paint, terrible for washing cars.
For automotive use, the 40-degree white nozzle is the only one you should be reaching for. It gives you a wide, sweeping spray that cleans a large area gently. Think of it like painting with water; you want broad, even strokes, not a sharp, cutting line.
A common mistake I’ve seen is people grabbing a 25-degree (green) or even a 15-degree (yellow) nozzle, thinking it'll clean faster. It might blast off bugs quicker, but it dramatically increases the risk of etching the clear coat, especially on older paint or resprayed panels. Just stick with the white tip.
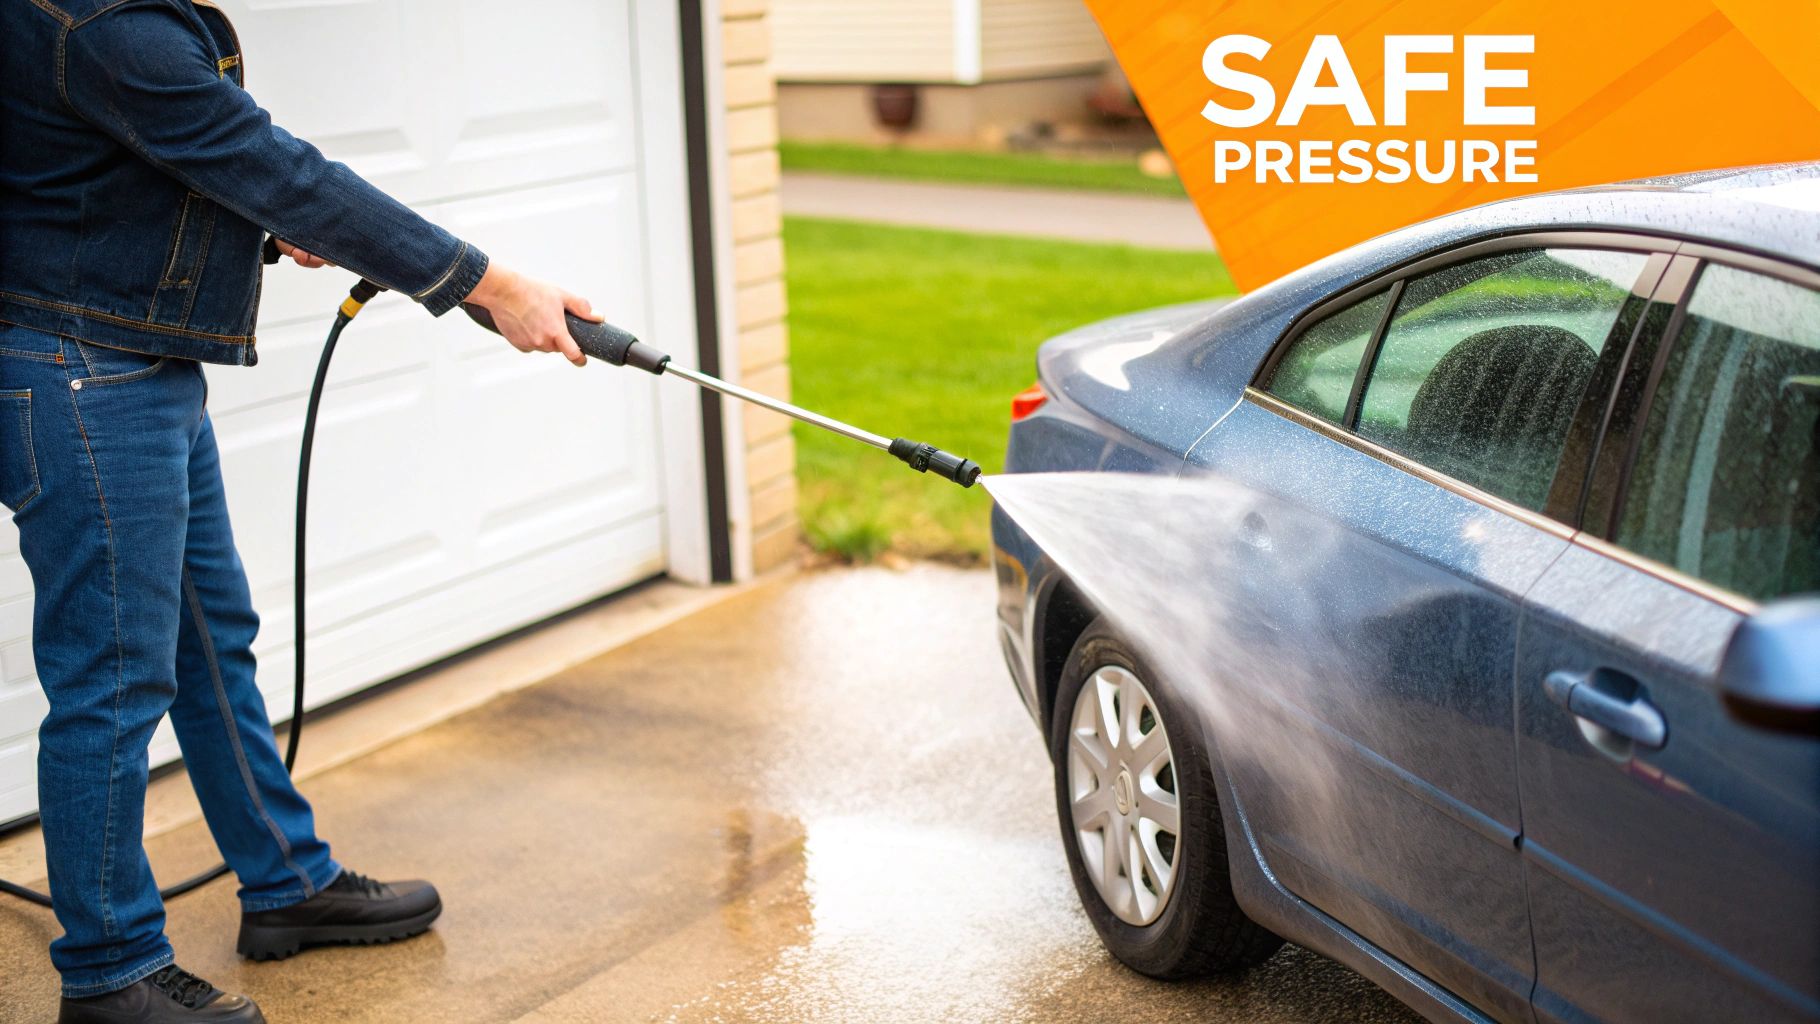
The Critical Role of Distance
Finally, distance is your ultimate safety net. You need to keep that nozzle tip at least 18 to 24 inches away from the car's surface. Always. Getting any closer dramatically increases the effective pressure on the paint, even if your machine's PSI is set correctly.
This is especially critical when you're working around delicate parts of the car:
- Emblems and Decals: The adhesive can be lifted right off.
- Plastic Trim: Unpainted plastics can be permanently scarred by too much pressure.
- Rubber Seals: Forcing water past window and door seals is a recipe for interior leaks.
The global car wash market is projected to grow by USD 4.81 billion between 2025 and 2029, showing just how much people care about keeping their vehicles clean. But with that comes a risk—some studies show that up to 30% of DIY washes result in new swirl marks from using high-PSI methods incorrectly. This is where foam-based systems like the SwiftJet offer a much safer approach. By using thick foam to do the heavy lifting, you reduce the need for high pressure and better protect your clear coat.
Preparing Your Car for a Flawless Wash
A truly professional wash doesn’t start the moment you pull the trigger on your pressure washer. It actually begins with a smart pre-wash routine. Rushing this initial stage is a surefire way to end up with frustrating water spots, missed grime, and maybe even a few new scratches for your trouble. The secret to that flawless, detailer-quality clean lies in what you do before the main wash.
First thing's first: pick your spot. You should always, always wash your car in the shade and out of direct sunlight. If the sun is beating down on your car's panels, the heat will make water and soap evaporate way too quickly, leaving behind ugly mineral deposits and a stubborn film of soap scum.
Getting Your Toolkit Ready
Before a single drop of water hits your car, get all your gear lined up and ready to go. There’s nothing worse than scrambling for a towel or more soap mid-wash while suds are drying on your paint.
Here’s a quick checklist of what I always have on hand:
- Two Buckets with Grit Guards: This isn't just a fancy trick for pro detailers; it's your single best defense against creating swirl marks.
- A Good pH-Neutral Car Soap: Steer clear of dish soap or harsh household cleaners. They’re notorious for stripping away the wax and sealant you want to protect.
- Quality Microfiber Towels: You’ll want a few separate towels for washing, drying, and tackling grimy areas like the wheels.
- Foam Cannon or a Garden Hose Foamer: A tool like the SwiftJet Foam Gun is perfect for getting that critical pre-soak done right.
A flawless prep also means making sure all your car’s important components are clean and clear. You can find some great tips for how to clean your backup camera lens to keep it functioning safely. After all, a clean car is a safe car, and that means having clear visibility from every angle.
The Magic of the Pre-Soak
Now for the part where the magic really starts. Before you ever touch the car with a wash mitt, your goal is to loosen and lift as much dirt as you possibly can. The most effective way to do this is by covering the dry car in a thick blanket of foam.
Whether you're using a foam cannon with your pressure washer or a garden hose foamer, blanketing the vehicle in a rich lather does more than just look cool. That foam has a job to do. It clings to the surface, gets in between the dirt particles and your paint, and starts breaking everything down. This pre-soaking process lets the soap do the heavy lifting chemically, dissolving road film, grime, and bug splatters.
Let the foam sit for a few minutes—just don't let it dry—and then rinse it all off. You'll be amazed at how much gunk just slides right off before you've even made contact. This one step massively reduces the risk of you grinding all that abrasive grit into your clear coat later on.
The whole point of the pre-soak is to lubricate the surface and get rid of dirt without any physical scrubbing. You’re letting the chemistry do the hard work to protect your paint's finish.
Why the Two-Bucket Method Is a Must
Once you’ve pre-soaked and rinsed, it's time for the "contact wash." This is where the two-bucket method becomes absolutely non-negotiable if you care about keeping your paint scratch-free. It’s a dead-simple system that prevents you from dragging dirt all over your car.
Here’s how it works:
- The Soap Bucket: This one is filled with your pH-neutral car soap and water.
- The Rinse Bucket: This one has nothing but clean water in it.
The process is simple. You dip your wash mitt into the soap bucket, wash a small section of the car (like a single door panel), and then, before going back for more soap, you dunk and swish the mitt around in the rinse bucket. The grit guard at the bottom will trap all the dirt you just picked up.
This little bit of discipline ensures your soap bucket stays clean, and you're always touching your car with a fresh, lubricated mitt. That's the real key to a swirl-free finish.
Mastering Your Pressure Washing Technique
Now that your car is prepped and your gear is ready, it's time for the main event. The secret here isn't about speed; it's about a methodical, controlled approach. Finesse is everything when you're pointing a pressure washer at your car's paint. A little bit of good technique goes a long way toward getting that perfect, swirl-free shine while keeping your vehicle safe.
The number one rule for washing any vehicle is to work from the top down. Gravity can be your best friend or your worst enemy. If you start with the lower panels, all the gunk from the roof and windows will just stream down and mess up the areas you’ve already cleaned. Start with the roof, then move to the glass, hood, trunk, upper sides, and save the dirtiest lower sections for last.
The Art of the Sweep
How you move the pressure washer wand is just as critical as the PSI you've dialed in. You never want to hold the spray in one spot or make jerky, unpredictable movements. Instead, think of it like using a can of spray paint—you want smooth, overlapping, and consistent sweeping motions.
Keep a steady distance of about 18-24 inches from the surface. A great way to get a feel for this is to keep your arm slightly bent and locked at the elbow, using your whole body to guide the wand instead of just flicking your wrist. This simple adjustment helps maintain that crucial safety buffer between the high-pressure stream and your paint.
Adjusting Your Angle and Approach
The angle of your spray makes a huge difference. Pointing the nozzle straight on at a 90-degree angle concentrates all that force into one tiny, powerful spot, which is exactly what can cause damage.
Instead, hold the wand so the water hits the car at a 45-degree angle. This technique gets the water underneath the dirt and lifts it away gently, rather than just blasting it head-on. This angled approach is especially important when you're rinsing away thick foam or heavy, caked-on grime.
This simple workflow is the foundation of a safe and effective wash.
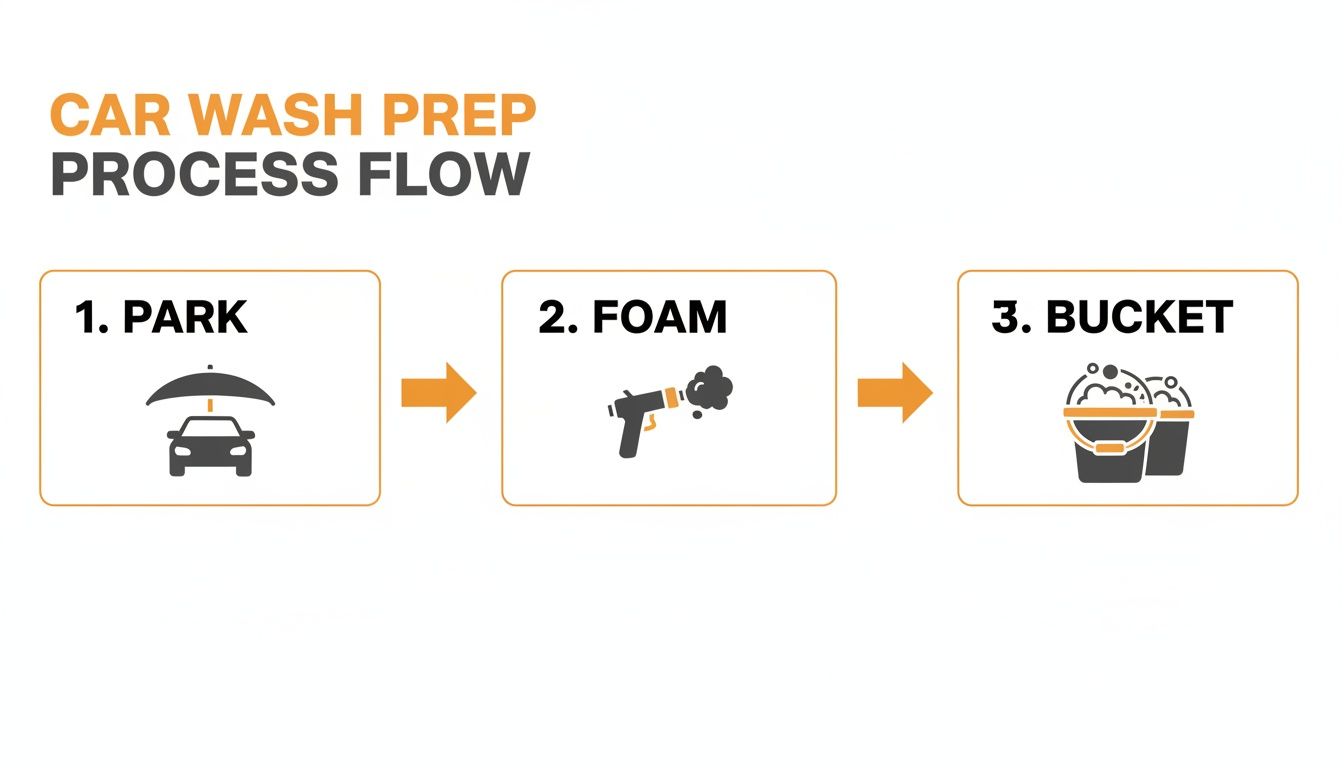
As the diagram shows, the core steps—parking in the shade, applying a good layer of foam, and using the two-bucket system—are what set you up for a successful pressure wash.
Tackling Different Areas of Your Car
Not every part of your car needs the same treatment. You wouldn't use the same aggressive technique on a delicate emblem as you would on a muddy wheel well. Here’s how to adapt your approach for different zones:
- Body Panels: Stick with your standard 45-degree angle and smooth, sweeping passes. Keep the wand moving at a steady pace to clean evenly without dwelling on any single spot.
- Wheel Wells & Undercarriage: These are some of the only spots where it's okay to get a bit closer, maybe around 12 inches, to blast away built-up mud and road salt. Just be careful around suspension components and avoid spraying directly at any visible wiring.
- Wheels & Tires: Give them a thorough rinse to knock off loose brake dust. Be sure to avoid aiming the high-pressure stream directly at the tire's valve stem or any stick-on wheel weights, as you can easily dislodge them.
- Glass & Trim: Back off a little when you're washing around windows, rubber seals, and plastic trim. Forcing high-pressure water past these seals is a common mistake that can lead to frustrating leaks inside your car.
My pro tip for stubborn bug guts and road tar: Let the pre-soak foam sit on those spots for an extra minute or two. If they're still hanging on after the first rinse, I'll grab a dedicated bug and tar remover before the contact wash, rather than getting closer with the pressure washer and risking damage to the paint.
The All-Important Final Rinse
After you’ve done your contact wash with the two-bucket method, the final rinse is your last chance to guarantee a spotless finish. The goal is to get every last bit of soap off the surface. Leftover soap residue is the number one cause of streaks and water spots after the car dries.
Once again, work from the top down. Use those same smooth, sweeping motions and a 45-degree angle to help the water "sheet" off the panels, pulling any remaining suds with it. Pay extra attention to panel gaps, mirrors, and trim pieces where suds love to hide. I always do one final, slightly slower pass over the whole car just to be sure I haven't missed a spot.
Once you’re positive all the soap is gone, you’re ready to start drying. A proper rinse is what sets you up for that perfect, streak-free shine. If you want to dive deeper into the technical side, our guide on the ideal PSI to wash a car has more detailed info on matching pressure to the task. Getting this technique down means every time you wash your car, the results will be stunning and, most importantly, completely safe.
Common Mistakes That Can Ruin Your Paint
Even if you’ve got all the right gear and the best intentions, it’s frighteningly easy to make a costly mistake with a pressure washer. A few seconds of carelessness can cause damage that’ll cost hundreds, if not thousands, to fix.
Think of this section as your field guide to what not to do. These aren't just hypotheticals—they're real-world blunders I’ve seen turn a simple car wash into an emergency trip to the body shop.
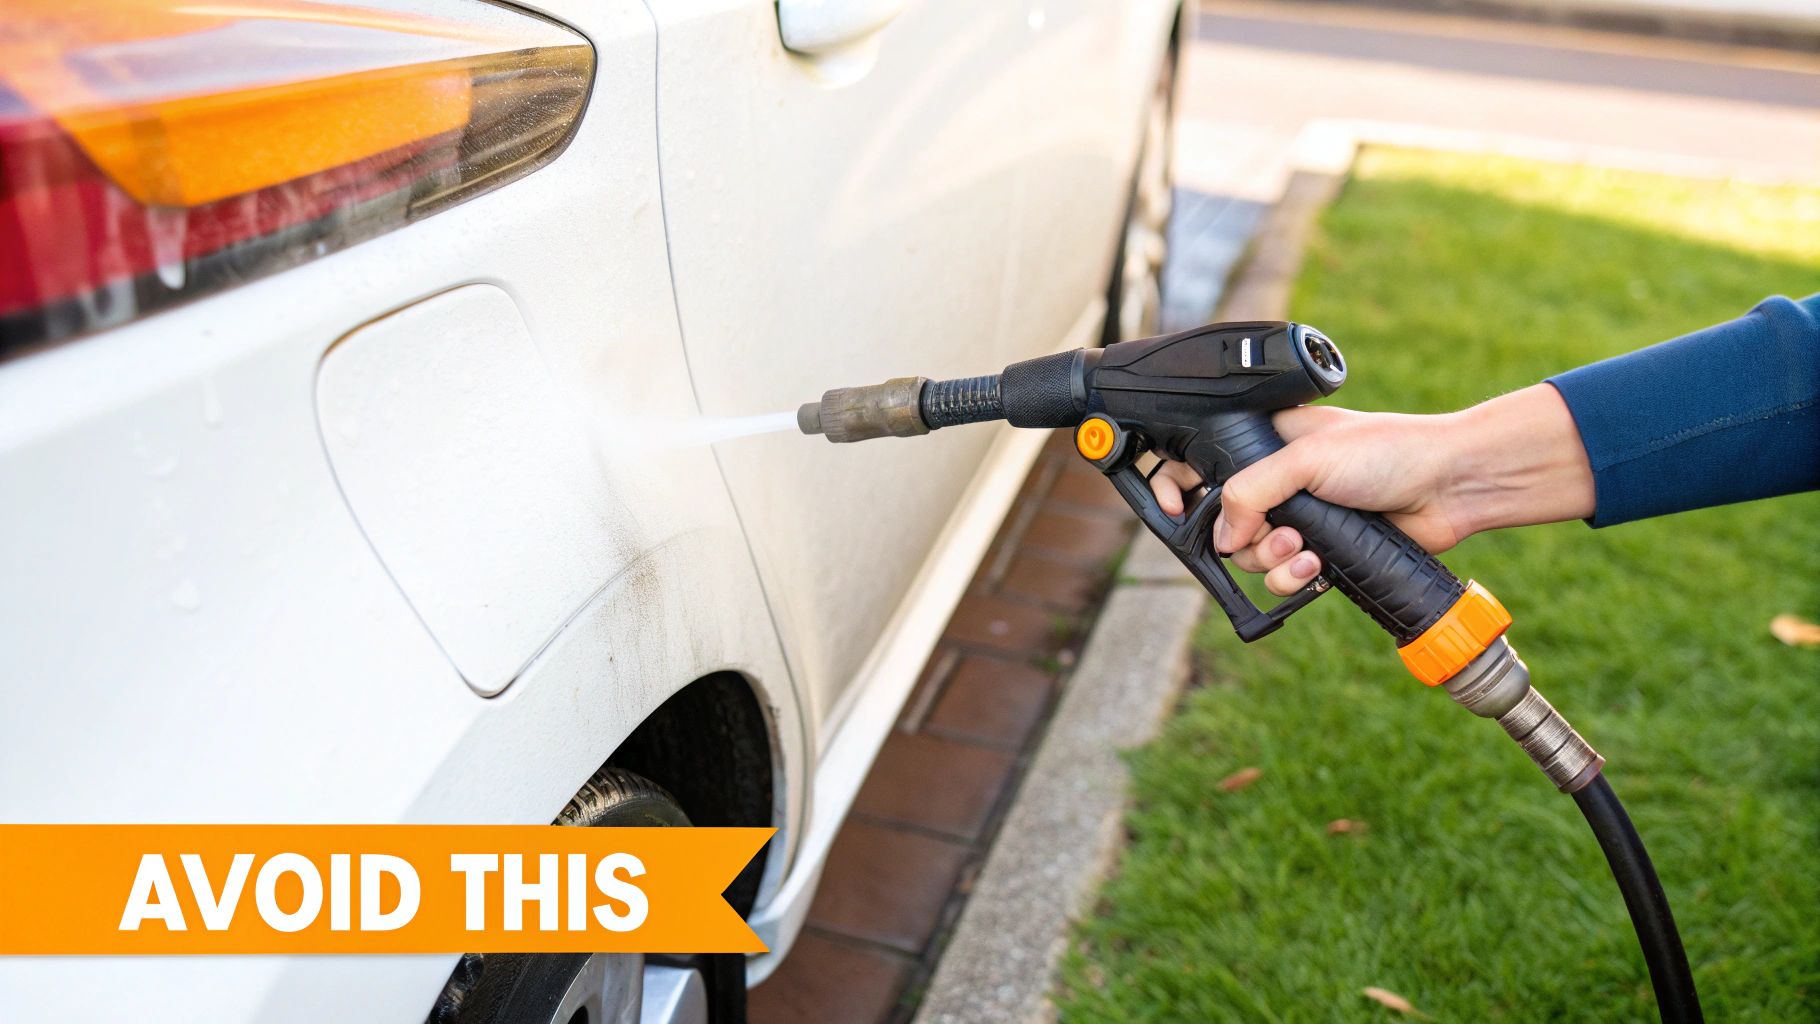
Using the Wrong Nozzle and Getting Too Close
This is, without a doubt, the number one mistake that destroys paint jobs. Every pressure washer includes a set of color-coded nozzles, and picking the wrong one is like trying to do surgery with a sledgehammer.
- The Red 0-Degree Nozzle: Just leave this one in the box. It shoots a single, pinpoint jet of water with enough force to etch concrete. It will absolutely strip, chip, and gouge your car's paint in a split second.
- The Yellow 15-Degree Nozzle: While it has a wider fan, this tip is still far too aggressive for automotive paint. It's notorious for shredding plastic trim, lifting decals, and damaging delicate finishes.
- Getting Too Close: Even with the correct 40-degree white nozzle, inching closer than the recommended 18-24 inches dramatically amps up the force hitting the paint. This is how you accidentally peel away your clear coat or force water past seals and into sensitive electronics.
Here's my rule of thumb: If you feel like you have to get closer than a foot to blast something off, you need a better soap or a dedicated bug-and-tar remover—not more brute force.
Targeting Vulnerable Areas Directly
Your car’s surface isn't a uniform sheet of metal. Some areas are far more delicate and can’t handle a direct hit from a high-pressure stream. Aiming the wand carelessly at these spots is just asking for trouble.
A focused blast can easily catch the edge of a paint protection film (PPF) and start to peel it back, ruining an expensive installation. It can also force water past window seals, leading to foggy headlights or a damp, musty interior. Rock chips are another landmine; a direct hit can get under the paint and turn a tiny speck into a huge, peeling patch.
Forgetting Basic Equipment Checks
Before you even pull the trigger, a quick five-second check of your gear can save you from a world of hurt. Make sure all your hose connections are hand-tight to prevent a sudden leak that kills your pressure mid-wash.
Most importantly, give the nozzle a little tug to ensure it’s seated securely in the wand. A loose nozzle can vibrate erratically or, in a worst-case scenario, shoot out like a projectile, damaging your car or worse. It’s a simple step, but one that’s easy to forget when you’re in a hurry.
Choosing the Wrong Cleaning Agent
Never, ever use dish soap in your foam cannon or wash bucket. It's a classic mistake. While dish soap is amazing at cutting through grease on your dinner plates, it’s incredibly harsh on automotive surfaces. It contains aggressive detergents that will strip away every last bit of wax, sealant, or ceramic coating you have.
Using it is like washing your hair with laundry detergent—sure, it gets it "clean," but it also removes all the protective oils. Always stick to a quality, pH-neutral car soap specifically formulated to clean effectively without compromising your car’s protective layers.
Interestingly, the way people wash their cars has changed a lot. In the mid-1990s, only about 48% of drivers in the U.S. washed their cars at home. That figure has flipped, with nearly 80% now preferring professional washes. This shift highlights a great opportunity for enthusiasts who want pro-level results without the risk. Using smarter tools like the SwiftJet Car Wash Foam Gun, which connects to a standard garden hose, lets you get a deep clean without the potential dangers of high pressure. You can explore more about these market trends to see how the industry is evolving.
Gentler Alternatives for a Perfect Shine
Look, pressure washing a car is incredibly effective, but I get it—it’s not for everyone. The thought of blasting your paint with high-pressure water can be nerve-wracking, especially if you're new to detailing or you're the proud owner of a classic car with delicate paintwork.
The good news is, you don't need all that force to get a brilliant, swirl-free shine. There are some fantastic alternatives out there that deliver professional results by focusing on safety and lubrication, giving you total peace of mind.
The Rise of the Garden Hose Foam Gun
One of the best tools to come along in recent years is the garden hose foam gun, and a great example is the SwiftJet. This isn't some complicated piece of machinery. It's a simple, brilliant attachment that hooks right up to your standard garden hose, takes your favorite car soap, and churns out a thick, satisfying layer of foam.
The biggest advantage here is pretty clear: zero risk of high-pressure damage. You get that same thick, clingy foam that professional detailers use to pre-soak a car, but without any of the danger. The foam gets to work immediately, lifting and loosening dirt from the surface and wrapping it in a cushion of suds. This lubrication is the key to preventing scratches when you finally start washing by hand.
This approach is perfect for a few scenarios I see all the time:
- New Detailers: It’s a foolproof way to start washing your car like a pro without a huge investment or a scary learning curve.
- Classic Car Owners: If you’ve got single-stage paint or delicate vintage trim, you can wash with absolute confidence.
- Areas with Water Restrictions: These foamers are surprisingly efficient, using far less water than an open hose or a thirsty pressure washer.
If you're exploring ways to protect your vehicle's finish, it's worth looking into various gentle vehicle exterior cleaning methods, as the principles often apply to everything from a sports car to an RV.
Comparing Methods Side-by-Side
To really see where each tool shines, let's put a pressure washer and a garden hose foamer like the SwiftJet head-to-head. Both can get you a clean car, but they get there in very different ways.
Pressure Washer vs. SwiftJet Foam Gun
This table breaks down the key differences between the two most popular DIY foaming methods. While one offers raw power, the other champions safety and accessibility.
| Feature | Pressure Washer | SwiftJet Foam Gun |
|---|---|---|
| Pressure Risk | High (Requires careful technique) | None (Uses standard hose pressure) |
| Setup Cost | Moderate to High | Low |
| Ease of Use | Moderate (Learning curve) | Very Easy (Plug and play) |
| Portability | Limited (Requires power source) | High (Works with any hose) |
| Foam Quality | Excellent (With foam cannon attachment) | Excellent (Produces thick, clinging foam) |
As you can see, a pressure washer definitely has its place, especially for heavy-duty cleaning. But for routine, safe, and easy washing, the SwiftJet offers a much more forgiving path to that professional-level foam wash. The science behind how a foam cannon for a pressure washer works is similar—it's all about mixing air, water, and soap—but the delivery system makes all the difference in safety.
Other Modern Washing Techniques
Foam guns aren't the only game in town. A couple of other modern techniques have become incredibly popular, especially for people who can't do a traditional wash at home.
Rinseless Wash: This is a fantastic option if you live in an apartment or need to wash your car in the garage during winter. You mix a super-concentrated, high-lubricity solution in a bucket of water. Using a plush microfiber towel, you gently wash one panel at a time and immediately dry it with a separate, clean towel. No hose needed.
Waterless Wash: Just like it sounds, this method uses no water at all. You spray a special formula directly onto the car's surface, which lifts and encapsulates light dust and grime. Then, you carefully wipe it away with a microfiber towel. This is strictly for cars that are only lightly dusty—think fingerprints and pollen. Don't try this on a mud-caked vehicle unless you want to scratch your paint.
The secret to all these gentle methods is lubrication. Whether you're using thick foam, a rinseless wash solution, or a slick waterless spray, the goal is always the same: create a slippery barrier between the dirt and your paint to prevent swirls and scratches.
There's also a growing focus on sustainability in car care. A powerful pressure washer can use 5-10 gallons of water per minute, which really adds up. Tools like the SwiftJet help cut that way down by creating a rich lather with the simple pressure from your garden hose, often reducing total water consumption by 40-60%. It’s an easy way to get a great result while being more mindful of your water usage.
Got Questions? We've Got Answers
Even with the best guide, you're bound to have a few questions. That's totally normal. Every car, pressure washer, and garage setup is a little different. Let's tackle some of the most common things people ask when they're getting ready to pressure wash their car.
Think of this as your final checklist before you pull the trigger, giving you that extra bit of confidence to get the job done right.
Can I Really Use a Pressure Washer on My Car's Engine Bay?
You can, but this isn't a job you rush. Caution is the name of the game here. You'll want to use the absolute lowest pressure setting you have and stick with the widest fan nozzle—that’s the 40-degree white tip. A concentrated, high-pressure stream has no place under the hood.
Before you even think about spraying water, make sure the engine is completely cool. Then, take a few minutes to protect the sensitive bits. I always grab a few plastic bags and some tape to cover up:
- The alternator
- Any exposed air intake or filter
- The fuse box
- ECUs and any obvious wiring clusters
When you start washing, use gentle, sweeping motions and keep your distance. Your goal is just to rinse away the surface dust and grime, not to deep clean every crevice. After you're done, pull off the plastic and let everything air dry thoroughly before you even think about starting the car.
Is It Safe to Pressure Wash a Car with a Ceramic Coating?
Definitely. In fact, it's one of the best ways to take care of one. A professionally applied and fully cured ceramic coating is tough as nails, bonding directly to your car's clear coat. As long as you stick to the right technique—keeping the pressure between 1200-1900 PSI, using a 40-degree nozzle, and maintaining a good distance—you won't do any harm.
A pressure washer actually helps your coating do its job better. The coating's slick, water-hating surface lets dirt slide right off. A quick rinse with the pressure washer lifts away all that loose grime without you ever having to scrub it, which is exactly what you want for keeping that coating in prime condition for years to come.
A gentle pressure wash is the perfect partner for a ceramic coating. It clears away the gunk that can clog the coating's pores, ensuring its water-beading magic keeps working wash after wash.
What PSI Is Actually Too High for Washing a Car?
Once you push past 2000 PSI, you're officially in the danger zone. Anything higher dramatically increases your risk of peeling up the clear coat, chipping paint, or blasting the emblems right off your car. Delicate rubber seals and plastic trim don't stand a chance, either.
For just about any car washing task you can think of, the sweet spot is somewhere between 1200-1900 PSI. That’s plenty of power to knock off stubborn road grime and bug guts without being destructive. It's no accident that most electric pressure washers sold to homeowners operate right in this range—they're built with your car's paint in mind.
How Often Should I Be Pressure Washing My Car?
This really comes down to where you live and how you drive. There’s no one-size-fits-all answer.
For most people just driving to and from work, giving the car a good wash every two weeks is a solid routine. It’s enough to keep nasty stuff like bird droppings, bug splatter, and road salt from sitting on your paint for too long and causing real damage.
Now, if your car lives a harder life—maybe you're dealing with salted roads all winter, park under a messy tree, or live near an industrial area—you'll want to bump that up to a weekly wash. The real secret to long-lasting paint is getting those contaminants off before they have a chance to bond. Consistency is everything.
Ready to get that perfect, sudsy clean without worrying about high pressure? The SwiftJet Car Wash Foam Gun hooks up to any garden hose, blanketing your car in the thick, protective foam you need for a pro-level wash at home. Discover the SwiftJet difference today.