

You pull the trigger, expect a tight spray or a thick blanket of foam, and instead get spitting, weak output, or a pattern that shoots sideways. That usually sends people looking for a stronger soap, a new washer, or a replacement tip.
Most of the time, the nozzle is the primary problem.
Nozzle cleaning gets treated like a small maintenance chore. It isn't. A dirty or worn nozzle changes pressure, flow, spray shape, and chemical delivery. In a car wash setup, that means weaker foam, uneven rinse coverage, and more time circling the same panel. At home, it means a hose nozzle that never quite feels right again. In a shop, it means wasted water, wasted chemicals, and tools that wear out sooner than they should.
Why a Clean Nozzle Is Your Best Cleaning Tool
A nozzle doesn't need to be fully blocked to work badly. A little mineral scale, dried soap, grit, or chemical residue is enough to distort the spray pattern and kill consistency. That's why a setup can still “work” while delivering poor results.
Its importance is often not fully appreciated. The global cleaning nozzles market was valued at USD 291.9 million in 2023 and is projected to reach USD 419.5 million by 2031, with a 4.71% CAGR from 2024 to 2031, according to Kings Research on the cleaning nozzles market. That same analysis notes that neglecting nozzle maintenance can cost industries thousands of dollars annually due to reduced performance.
At the garage level, the cost shows up differently. You use more soap to chase the same foam. You hold the wand closer because pressure feels weak. You assume the product is underperforming when the tip is partly restricted.
What a dirty nozzle changes
- Spray shape: The fan pattern gets uneven, narrow, or streaky.
- Flow feel: Water pulses instead of staying smooth.
- Foam quality: Suds come out watery, patchy, or collapse quickly.
- Cleaning speed: You make extra passes because coverage isn't even.
- Tool life: Residue and misuse lead to more aggressive cleaning, which can damage the nozzle itself.
Practical rule: If the spray pattern changed suddenly, start with nozzle cleaning before you blame the machine, soap, or water source.
A clean nozzle gives you control. That's the difference between washing efficiently and fighting your gear every time you use it.
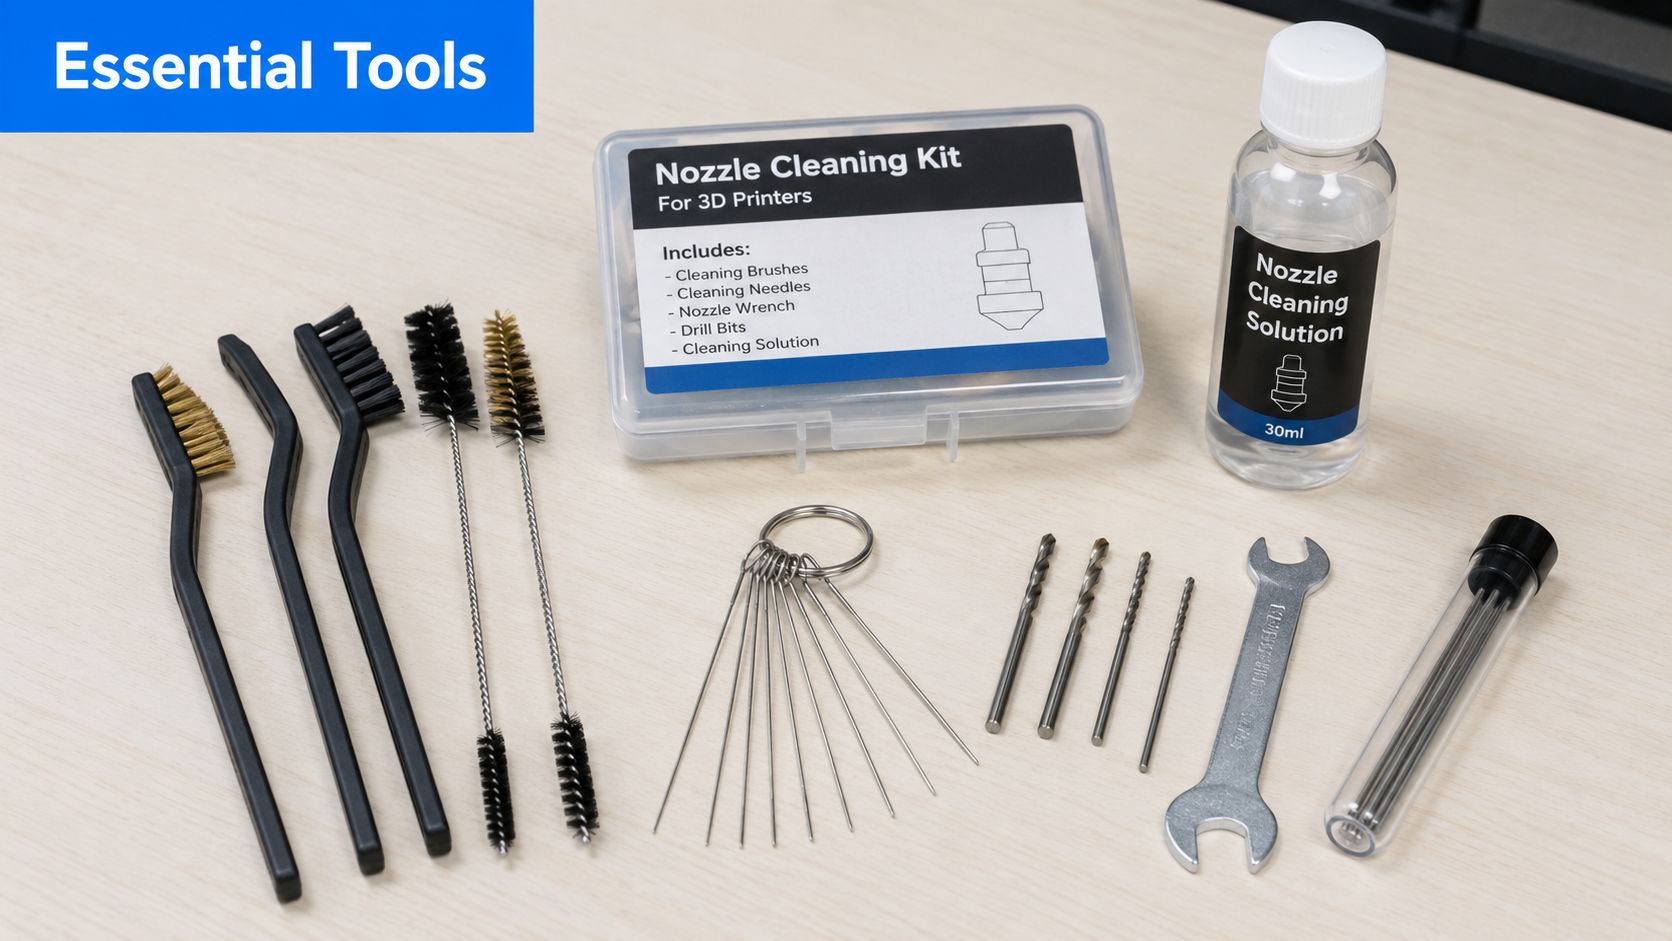
Your Essential Nozzle Cleaning and Maintenance Kit
Most nozzle damage happens during cleaning, not during use. People get impatient, grab a paper clip, a finish nail, a pocket knife, or a wire brush, then wonder why the spray pattern never comes back.
Industry guidance is clear on this point. Lechler's nozzle maintenance guidance recommends using plastic bristle brushes and wooden or plastic probes only, and avoiding wire brushes and metal knives because they can damage the orifice shape. The same guidance recommends soaking clogged nozzles in a non-corrosive cleaning chemical to soften and dissolve buildup before you try to clear it mechanically.
What belongs in a real kit
You don't need a huge toolbox. You need the right few items.
- Soft nylon or plastic-bristle brush: Good for exterior residue, threads, and caps.
- Wooden toothpicks or plastic picks: Useful for gentle clearing around openings without reshaping the tip.
- Small container or cup for soaking: Glass or chemical-safe plastic works well.
- Non-corrosive cleaning solution: Use something mild enough that it won't attack coatings, seals, or plastic parts.
- Microfiber towels: For drying parts and spotting leftover residue.
- Compressed air or a squeeze bottle: Helpful for flushing loosened debris out of channels.
- Gloves and eye protection: Smart whenever you're handling cleaning agents or pressurized parts.
What to keep out of your hand
These are the common tool mistakes that ruin nozzles fast:
- Wire brushes: They scrape metal and coatings.
- Metal picks and needles: They can enlarge or distort the orifice.
- Utility knives: They nick edges and create permanent spray problems.
- Strong unknown solvents: They may clean residue, but they can also damage seals and coated tips.
If you're dealing with a brass hose-end sprayer, it also helps to know what material you're cleaning and what finish you're trying to preserve. This quick guide to a brass water hose nozzle is useful for understanding why softer cleaning methods matter.
Use the least aggressive method that will actually remove the blockage. Once you change the nozzle opening, you don't clean your way back from that.
Restoring Your SwiftJet Foam Cannon Nozzle
Foam cannon nozzles clog differently from plain spray tips. The problem usually isn't just at the visible opening. Soap residue, hard water deposits, and dried concentrate collect inside narrow internal passages where a quick wipe does nothing.
That hidden buildup is a major reason foam cannons “randomly” stop performing. Nitro Industrial reports that 68% of foam cannon failures in the last 12 months stem from internal channel residue buildup that requires specialized back-flushing or ultrasonic cleaning, not just surface wiping.
Start with the simplest diagnosis
Before taking anything apart, check the obvious:
- Rinse with plain water first. If the foam gun sat with soap in it, flush the bottle and nozzle with clean water.
- Look at the spray shape. A weak fan, pulsing output, or poor foam texture usually points to internal restriction.
- Inspect the pickup and connection points. Dried soap can crust around threads, seals, and small openings.
If the unit still sprays poorly after a plain-water flush, then it's time to clean deeper.
How to clean the nozzle the right way
A foam cannon benefits from careful disassembly, not force.
- Remove the bottle and empty any leftover soap solution.
- Disconnect the sprayer from the hose.
- Unscrew the front nozzle components carefully and keep parts laid out in order.
- Inspect the visible opening, mesh areas, and any mixing passages for residue or white mineral film.
- Soak removable parts in a mild, non-corrosive cleaning solution long enough to soften buildup.
- Use a plastic-bristle brush or wooden/plastic probe to loosen softened residue.
- Flush water through the nozzle in the reverse direction when possible. Back-flushing often pushes debris out faster than poking from the front.
- Rinse every part thoroughly before reassembly.
The biggest mistake with foam cannons is cleaning only what you can see. The failure often sits deeper in the internal path.
Where foam cannons usually clog
Foam guns and cannons tend to trap contamination in a few predictable places:
| Area | Common buildup | What it causes |
|---|---|---|
| Front nozzle opening | Dried soap and grit | Misshapen spray |
| Internal channels | Soap residue and mineral film | Weak foam output |
| Mesh or filter sections | Sediment and hardened concentrate | Restricted flow |
| Threaded joints | Crusty detergent residue | Leaks or uneven draw |
If you're unsure how your unit comes apart, check the manufacturer's foam gun setup instructions before forcing any threaded section.
A quick visual walkthrough helps if you've never cleaned one of these before:
What works and what usually doesn't
Some methods look productive but don't solve the underlying issue.
Usually works
- Soaking removable parts before scrubbing
- Reverse flushing with clean water
- Gentle brushing of threads and caps
- Repeating the rinse cycle until flow feels consistent again
Usually doesn't work
- Wiping the outside and calling it done
- Jamming metal tools into the tip
- Using very hot, harsh cleaner on unknown materials
- Reassembling while residue is still inside the passages
If a foam cannon still underperforms after thorough cleaning, the problem may be wear, a damaged seal, or an internal part that needs replacement rather than more scraping.
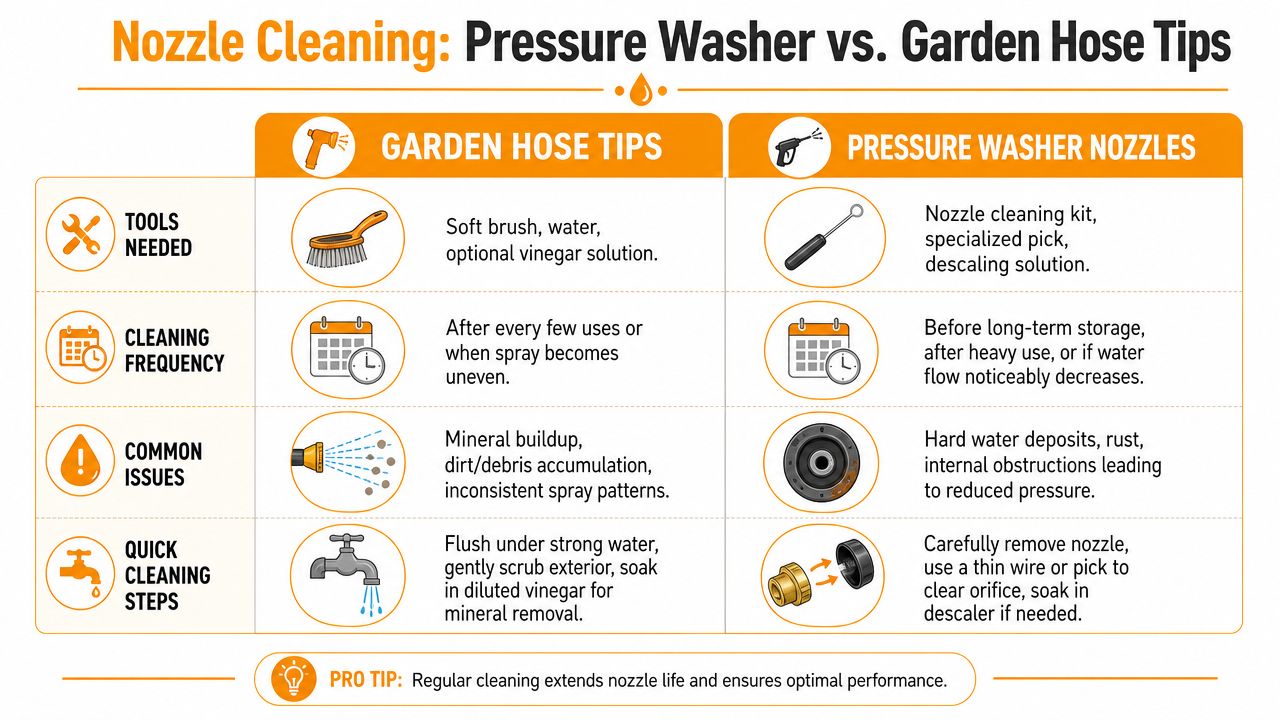
Cleaning Standard Pressure Washer and Garden Hose Tips
A garden hose nozzle and a pressure washer tip may both spray water, but they don't behave the same under dirt, scale, or wear. Cleaning them the same way is how people turn a small clog into a ruined spray pattern.
Garden hose tips are simpler
Most hose nozzles fail from a short list of problems: grit in the head, mineral deposits around the selector, or dried residue from sitting wet. They're usually easy to restore.
A practical routine looks like this:
- Flush first: Run strong water through the nozzle before disassembly.
- Brush exterior deposits: Clean around the face, selector ring, and threads with a soft brush.
- Soak if mineral scale is visible: A mild soaking solution can loosen white crust and soap film.
- Rinse and cycle through settings: Work every spray mode after reassembly to clear loosened debris.
If the nozzle body is cracked or the selector won't seat properly anymore, cleaning won't fix it. Replace the nozzle and move on.
Pressure washer tips need more precision
Pressure washer nozzles depend on a very specific opening size. Dultmeier's guide to high-pressure cleaning nozzles notes that nozzles are sized by flow capacity at 4,000 PSI, and a #4 nozzle flows 4 GPM at that pressure. The same guide explains that when a nozzle wears, its flow rate increases, which means it's operating over capacity and should be replaced to maintain cleaning efficiency.
That matters because a clogged nozzle and a worn nozzle can feel similar at first. Both clean badly. The fix is different.
Quick comparison of what to do
| Nozzle type | Typical issue | Best first move | When to replace |
|---|---|---|---|
| Garden hose tip | Mineral scale or debris | Flush and soft-brush clean | Crack, leak, or damaged selector |
| Pressure washer tip | Orifice blockage | Remove and clean carefully | Spray stays distorted after cleaning |
| Pressure washer tip | Orifice wear | Inspect flow behavior | Replace once wear is obvious |
Pressure also changes the job. Dultmeier notes that different tasks need different levels, from 2,000 PSI for machinery cleaning to 10,000 PSI for surface preparation, which is another reason nozzle condition matters so much at the tip itself.
The safest cleaning sequence for pressure tips
- Shut the machine down fully and relieve pressure.
- Remove the tip.
- Rinse from the back side if possible.
- Clear debris carefully with a non-damaging tool.
- Soak if scale is stubborn.
- Reinstall and test the pattern on a safe surface.
If you're pairing a pressure washer setup with foam application, this guide on a pressure washer foam nozzle helps clarify how those attachments differ from basic spray tips.
A pressure washer tip that looks clean but sprays oddly may be worn, not clogged. More cleaning won't put missing material back.
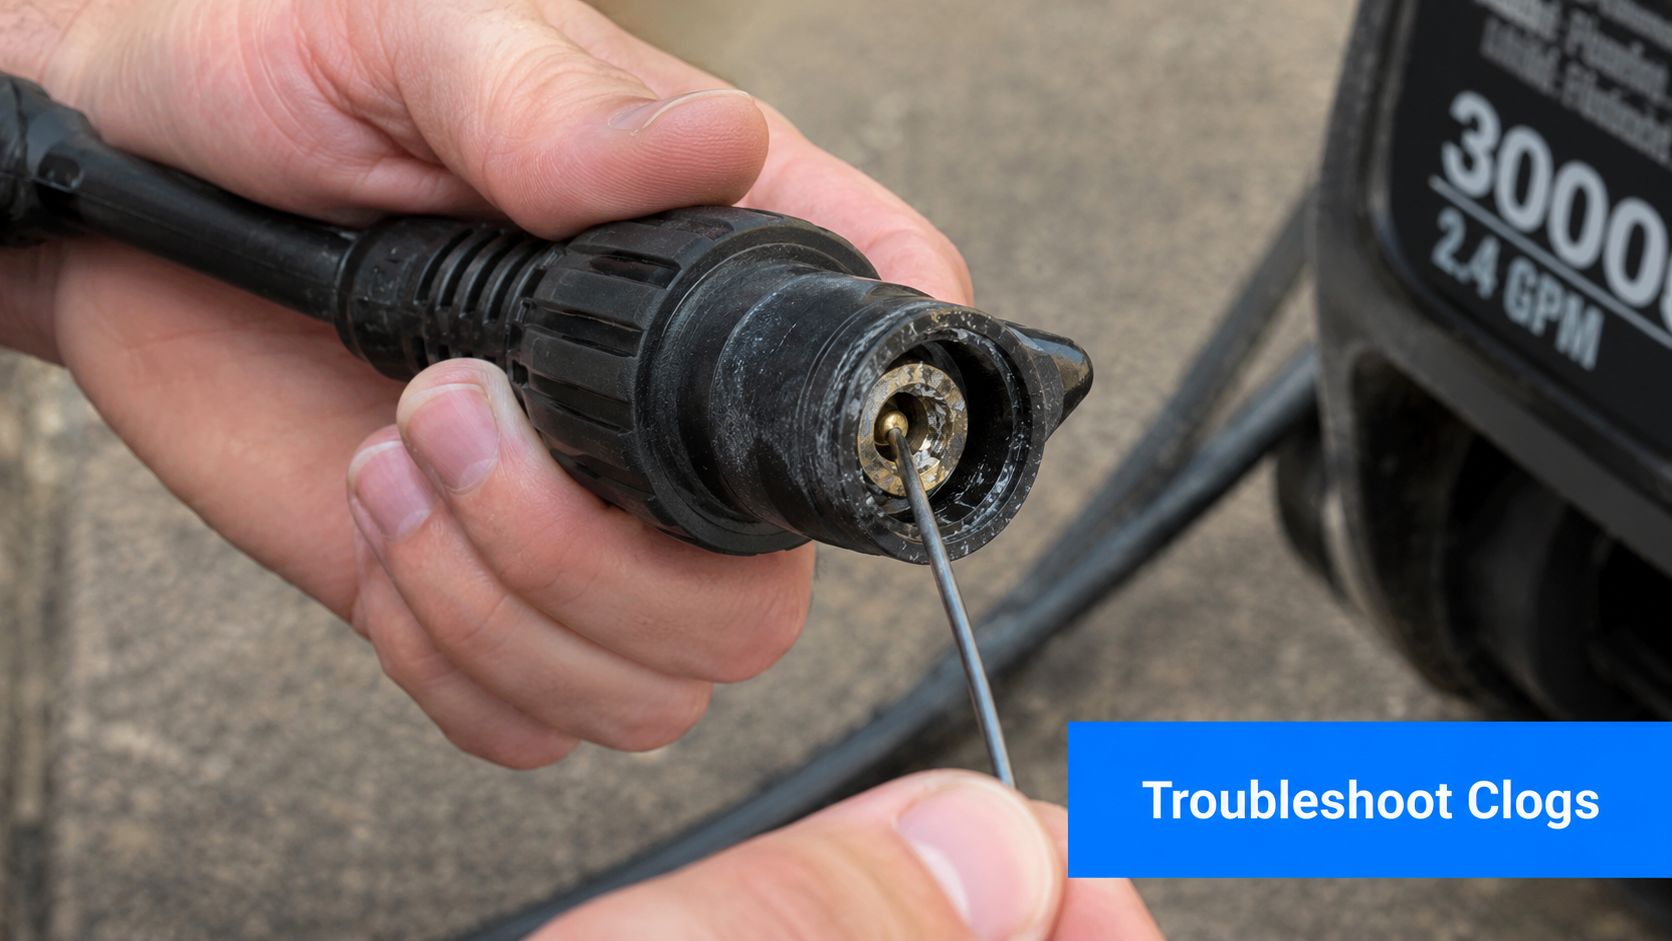
Troubleshooting Stubborn Clogs and Spray Issues
A quick poke and rinse works for light debris. It doesn't solve every nozzle problem. Some nozzles lose performance because the buildup is buried deeper. Others fail because the cleaner used on them was the wrong one.
That's the part many guides skip.
Industry data cited here says 42% of nozzle tip degradation in consumer-grade cleaning tools comes from chemical incompatibility rather than physical wear, with spray angle drift exceeding 15% after exposure to common acidic cleaners. In plain terms, the cleaner itself can warp performance even when the nozzle doesn't look obviously damaged.
Match the symptom to the cause
When a nozzle still acts up after a basic cleaning, narrow it down by behavior.
- Erratic spray pattern: Often means partial blockage, edge damage, or chemical attack on the tip.
- Weak output with normal supply pressure: Usually points to internal residue, filter restriction, or scale.
- Foam turns thin and watery: Check for soap residue in internal channels, not just the front opening.
- Sideways spray or split fan: Suspect a damaged orifice, not just dirt.
What to try next
These methods are more useful than random scrubbing:
- Longer soak with a mild cleaner: Good for dried soap and light mineral deposits.
- Back-flushing: Push clean water through the nozzle opposite the normal flow direction.
- Compressed air used carefully: Useful after soaking to move loosened debris out of hidden passages.
- Ultrasonic cleaning: Best for parts with narrow internal geometry where brushing can't reach.
If the nozzle got worse right after you used a stronger cleaner, stop cleaning and inspect for material damage. That's often not a clog anymore.
When the issue isn't really the nozzle
Sometimes the symptom starts at the nozzle but the clog sits farther upstream. Hose sediment, hard-water scale, or plumbing debris can keep feeding contamination back into the tip.
If you're dealing with repeated clogging from the water side, especially in fixtures and shower-style outlets, this guide on when to call a plumber for clogs is a useful reality check. It helps separate a nozzle issue from a deeper flow problem in the line.
A simple diagnostic checklist
| Symptom | Most likely cause | Best response |
|---|---|---|
| Spray sputters | Trapped debris or air | Flush, then back-flush |
| Spray angle changed | Orifice damage or chemical incompatibility | Inspect and replace if needed |
| Low pressure at tip | Scale or internal restriction | Soak, flush, inspect filters |
| Repeated clogging | Contaminated water supply | Add filtration and inspect upstream |
A nozzle that keeps failing after careful cleaning is usually telling you something useful. Either the material is damaged, or the contamination source hasn't been fixed.
Preventative Maintenance for Flawless Nozzle Performance
Most nozzle cleaning jobs are avoidable. Not all of them, but most. The best setups stay reliable because the owner does a few small things every time, not because they wait for a total blockage.
That approach scales from home use to industrial use. Spraying Systems notes that neglecting spray nozzles can cost industries thousands of dollars annually, and it also points out that reducing pressure can slow liquid velocity and reduce wear. The lesson at home is simple. Run only as much pressure as the task needs, and your nozzles tend to last longer.
The habits that prevent most problems
These are the habits worth keeping:
- Flush after every use: Run clean water through the nozzle after soap, detergent, or chemical use.
- Empty the bottle or chamber: Don't store product sitting inside a foam sprayer.
- Dry before storage: Residue hardens faster in trapped moisture.
- Inspect the pattern early: A slight spray change is easier to fix than a full blockage.
- Use cleaner water when possible: Sediment is hard on small passages.
Smart storage matters
A nozzle put away dirty gets harder to clean every day it sits. A nozzle stored wet in freezing conditions can crack or distort. Keep tools dry, out of direct weather, and free of leftover chemical concentrate.
For people who wash vehicles often, an in-line filter is one of the most practical upgrades you can make. It won't solve every problem, but it cuts down the grit and sediment that start many clogs.
Five minutes of cleanup after a wash is cheaper than replacing nozzles and redoing bad work later.
Replace parts before they waste your time
Cleaning is maintenance. It isn't magic. If a nozzle has visible damage, persistent leaks, or a spray pattern that never returns after proper care, replacement is the better choice.
Use this rule of thumb:
- Clean when the problem is residue or minor blockage.
- Troubleshoot when the issue keeps coming back.
- Replace when wear or material damage is obvious.
A clean nozzle saves water, improves control, and keeps your wash process predictable. That's what you're really after every time you pull the trigger.
If you want a faster, cleaner hose-end wash setup for cars, trucks, RVs, and home gear, take a look at SwiftJet. It's built to make foam application simple, and with regular nozzle cleaning and a quick post-wash flush, you'll keep that performance consistent much longer.
