

You're standing in front of a large coach with a bucket ready, the ladder still folded, and daylight disappearing. The first panel looks manageable, but the roof edge, slide-outs, awning housing, window seals, and road film underneath the coach tell a different story. On an RV, a wash that works perfectly on a sedan can leave you with smeared grime, missed sections, flooded channels, and water spots before you reach the other side.
A foam cannon RV wash helps because it delivers soap across tall, broad panels before you put a mitt against them. It isn't a magic shortcut, and it won't replace a controlled pre-rinse, careful rinsing, and thorough drying. Used properly, it becomes one part of a low-water process that gives soap time to work while helping you avoid the uncontrolled runoff produced by an open hose.
Why an RV Needs a Different Washing Strategy
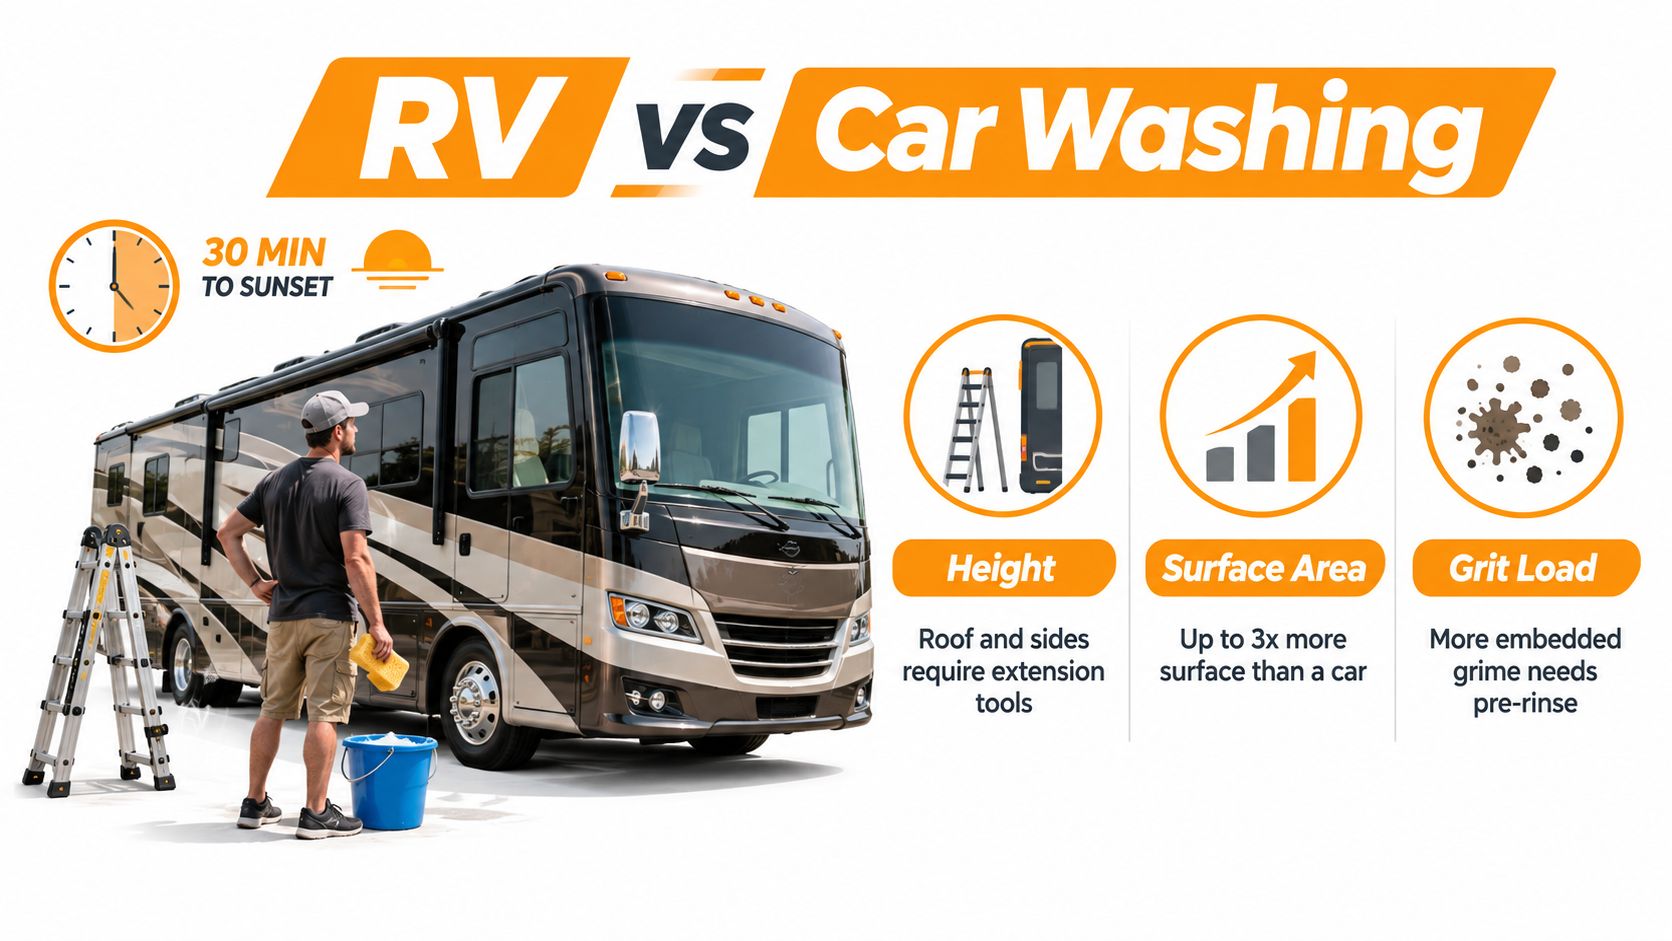
The scale changes everything. A 35-foot Class A coach has tall fiberglass or aluminum sections, deep lower skirts, roof equipment, slide-outs, and narrow trim channels that collect more road film than a typical passenger vehicle. Hand-wiping a dirty vertical wall too early often turns loose grit into a damp smear, then drags that contamination across the finish when the mitt makes contact.
The panels also create a timing problem. A sidewall can start drying while you're still working around the front cap, especially in sun or wind. A foam cannon gives the wash solution a chance to cling across surfaces you can't comfortably reach with a short brush, but the foam still needs shade, suitable dwell, and an immediate rinse before it dries.
Scale changes water control
The U.S. EPA reports that self-service vehicle washing averages 15.0 gallons per vehicle, while conveyor washes range from 30 to 34 gallons in some studies and reach about 75.0 gallons by manufacturer estimates. Home washing without an automatic shutoff nozzle can use about 100 gallons, while a running hose can reach 150 to 200 gallons per vehicle, according to the EPA vehicle-washing water-use guidance.
Those figures don't mean every foam cannon wash uses a fixed amount. They show why a targeted workflow matters more on a large RV. You want the spray directed at the coach, not bouncing off panels into the driveway, and you want the soap to loosen contamination before contact washing.
Practical rule: Treat the cannon as a soap-delivery tool, not as the entire wash system.
Overspray causes many of the complaints I hear from RV owners. A wide fan can push foam into slide-out bulb seals, roof vents, refrigerator access panels, awning tracks, and window gaskets. For broader guidance on choosing a gentler exterior-cleaning method around building materials, this stucco roof driveway cleaning guide offers useful context on why surface and pressure selection matter.
Gear, Water Source, and Pre-Wash Prep
Start with the water supply, because a cannon can't create dense foam if the washer or pump can't feed it consistently. A practical operating range from independent detailing guidance is 1,800 to 2,500 PSI and 1.4 to 2.0 GPM, while some setups produce creamy foam at 1,500 to 1,800 PSI with smaller orifices and richer mixes. The relevant foam cannon PSI and GPM guidance explains why output and dilution have to be tuned together.
An electric pressure washer suits most driveway maintenance work because it's easier to move around the coach and simpler to control. A gas unit can supply more flow, but that extra output may make the foam too wet unless you adjust the soap mixture. A garden-hose foam gun can handle a quick maintenance wash when the RV is lightly dirty, though it generally produces wetter foam than a pressure-washer cannon. SwiftJet's guide to connecting a foam cannon to a garden hose is useful when a pressure washer isn't part of your setup.
Prepare the coach before connecting the hose
Close every window, roof vent, and access hatch. Retract the awning, secure loose exterior items, and cover or avoid directing spray at antenna mounts, shore-power inlets, speakers, and other openings. Brush loose leaves and heavy debris away from the roof edge before applying soap, since foam won't safely remove larger particles that can scratch or lodge in channels.
Stage the equipment before water starts flowing. Run the hose along the side of the RV rather than across your walking path, keep electrical connections away from standing water, and position extension poles where you can reach the upper sidewalls without leaning a ladder against the coach.
| Item | Minimum Spec | Why It Matters on an RV |
|---|---|---|
| Pressure washer | A setup within the practical foam-cannon output range | Provides the flow needed to atomize soap and reach tall panels |
| Foam cannon | Adjustable soap draw and fan pattern | Lets you tune cling and coverage for broad sidewalls |
| Water source | Consistent supply from a city hose, portable tank and 12V pump, or wet bay | Prevents sputtering and uneven foam application |
| RV-safe soap | Product designed for vehicle finishes and compatible protection | Reduces the chance of unnecessarily weakening wax, sealants, or sensitive materials |
| Extension pole and soft brush | Long enough to reach upper panels | Limits ladder use and keeps contact tools controlled |
| Hose and cord layout | Clear route around the coach | Prevents trips, pulled fittings, and accidental contact with wet electrical equipment |
Dialing In Dilution and Foam Thickness
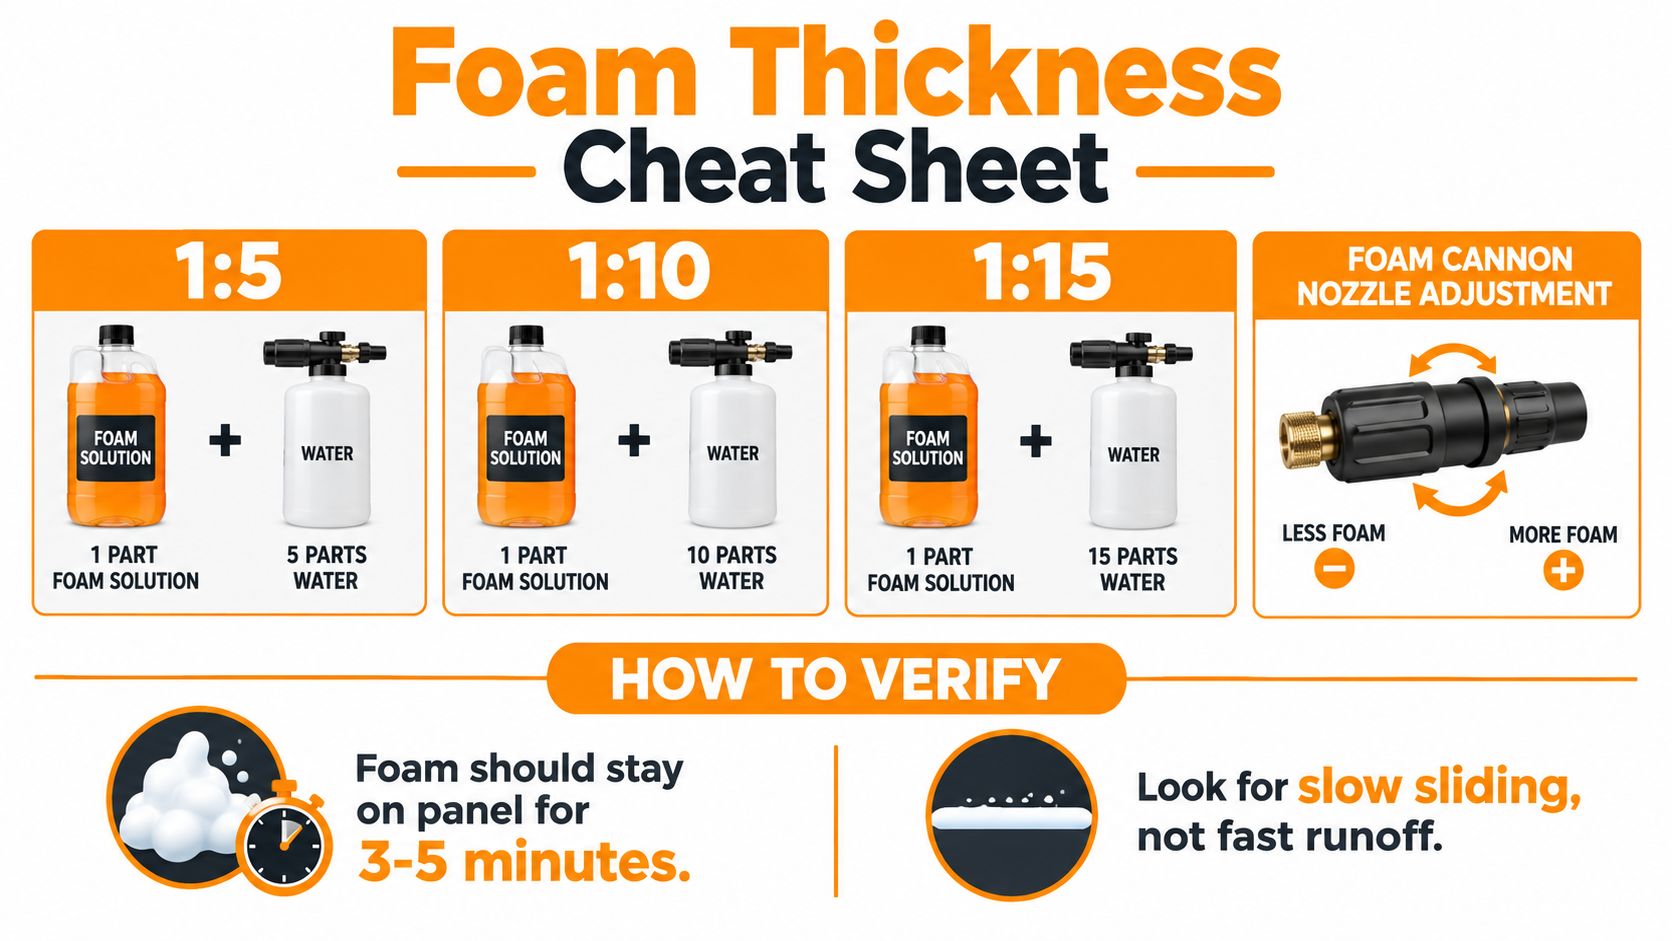
Don't choose a soap ratio by copying a bottle setting from another washer. The cannon's injector, orifice, water hardness, temperature, pump output, and soap all change the result. Industry guidance commonly places reservoir mixes around 1:5 to 1:10 soap-to-water, while injector dilution can be stronger, often 10:1 to 20:1, depending on the cannon design, as described in this foam-thickness adjustment guide.
Fill the reservoir with clean water first, then add the soap slowly to limit unnecessary agitation. Begin with the leaner end of the product's recommended range and spray a test area on a shaded window or sidewall. The target isn't the biggest pile of bubbles. You're looking for a uniform blanket that clings, slides gradually, and leaves enough lubrication to loosen traffic film.
Calibrate by measuring actual draw
Mark the level on the bottle, spray into a bucket, and observe how much solution the cannon consumes during a fixed test. This simple check tells you whether the machine is drawing product as expected instead of forcing you to guess from dial positions. Adjust the soap ratio in small increments, then test again.
Foam that falls away immediately can indicate a weak water supply, a partially blocked orifice, insufficient soap, or a formula that isn't designed for the cannon. Foam that looks wet and runs in sheets may need a richer mixture, a smaller orifice, or less water flow. Clean the cannon filter and nozzle before changing several variables at once.
The right appearance is closer to shaving cream than bath bubbles. It should cling to vertical RV panels without drying into a film.
A foam solution's chemistry also matters. Research on foaming systems reported that increasing concentration from 1.5% to 3% reduced bacterial counts, demonstrating that concentration can materially affect cleaning-related results, as documented in this foam chemistry study. That finding doesn't establish a universal RV soap ratio, but it supports a practical point: dilution affects performance, and more foam isn't automatically better if the mixture dries before rinsing.
The Foam Cannon Wash Workflow on an RV
Wash in the shade whenever possible, and divide the coach into manageable zones. A mobile detailer can't safely foam the entire rig, walk away, and expect the product to behave uniformly. Wind, panel temperature, and sun exposure vary across a 40-foot coach, so work where you can rinse before the foam dries.
Start low, then apply foam low to high
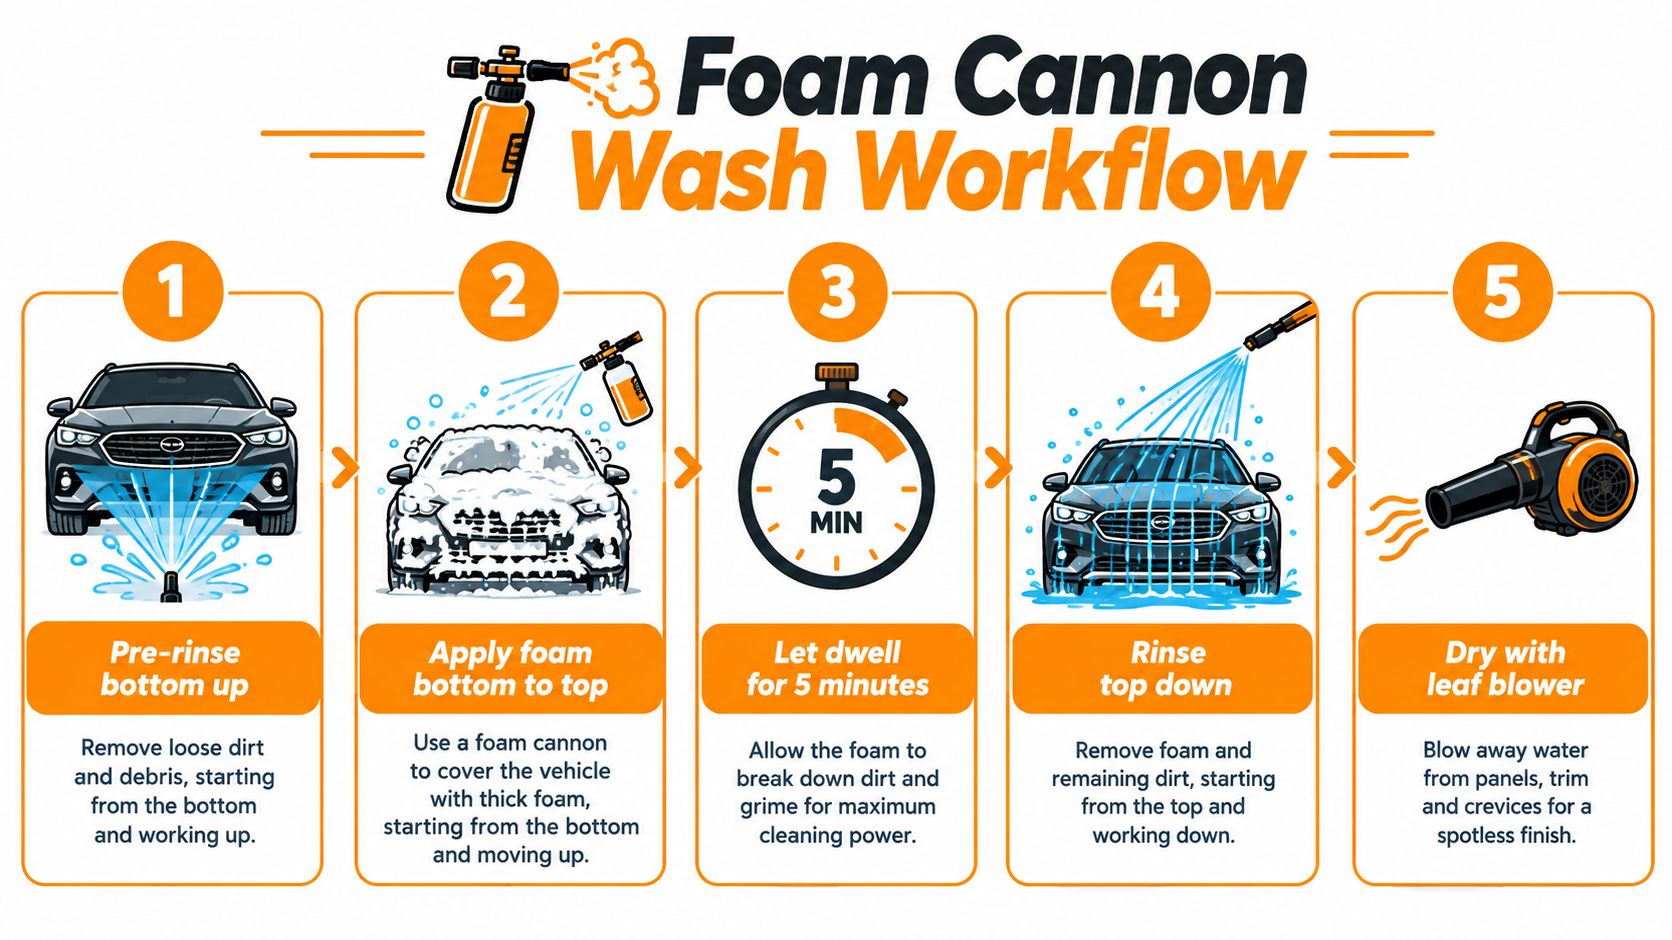
Use a wide fan for the pre-rinse and keep the spray moving. Begin at the lower panels to lift loose grit away from the areas most likely to receive runoff, then work upward. The goal is to remove loose contamination before soap and contact tools touch the finish.
Apply foam from the bottom upward. This gives the lower sections a chance to receive product without allowing the first runoff to strip the soap from the top before you've covered the coach. Keep the nozzle far enough away to avoid forcing water into seams, seals, and access panels. RV-focused guidance recommends an initial distance of about 3 to 5 feet and a 40-degree nozzle for the final rinse, as outlined in Simple Green's RV exterior-washing guidance.
Allow a short dwell while watching the surface. A field example in independent RV guidance describes washing a full 45-foot coach with about 14 gallons of water, illustrating how targeted, low-flow methods can compare favorably with uncontrolled home washing ranges. The same principle applies here: dwell should do useful work before you add more water or contact.
Rinse from the roof down
Rinse top to bottom with a broad fan, using distance rather than pressure to move contamination off the panel. Work in overlapping passes, and pay special attention to roof edges, slide-out tops, awning housings, wheel arches, and lower trim where dirty water collects.
If a section dries, stop and re-foam it before rinsing. Don't chase dried foam with a stronger stream. Bug-splattered areas may need a second application, while awnings and wheels should be treated according to their material and product instructions rather than flooded with overspray.
This APEX NANO showroom shine resource provides additional foam-cannon context for people refining their finish routine.
The sequence is easier to remember when you keep the phases separate. Pre-rinse removes loose grit, foam supplies dwell and lubrication, the final rinse carries contamination downward, and drying prevents mineral residue from becoming the last thing left on the coach.
Protecting Slide-Outs, Seals, Decals, and Roof Materials
The most vulnerable parts of an RV aren't always the painted sidewalls. Water intrusion and finish damage usually begin where materials meet, move, or flex. Slide-outs, roof vents, refrigerator access panels, window gaskets, decals, and awning channels all need a lighter touch than a broad fiberglass panel.
Aim at slide-out seals from an angle rather than straight on. A roughly 45-degree approach helps carry foam and rinse water across the gasket instead of driving it directly into the bulb seal. Keep surface pressure below 1,200 PSI around these areas, avoid blasting the seal's edge, and use a wider fan rather than a concentrated stream.
Choose the method by surface
Foam first around decals, then inspect the film edges before using any mitt. If an edge is lifting, don't brush across it. A plush microfiber mitt may be appropriate only when the decal is fully adhered and the surface still needs gentle contact cleaning.
| RV Surface | Max Pressure at Surface | Safe Soap Type |
|---|---|---|
| Fiberglass sidewall | Moderate pressure with a wide fan | RV-safe vehicle soap, preferably gentle and compatible with existing protection |
| Aluminum trim | Low to moderate pressure | Mild, non-aggressive vehicle soap |
| Slide-out bulb seals | Below 1,200 PSI | Gentle RV-safe soap, kept away from direct seal impact |
| Vinyl decals | Low pressure and broad spray | Mild soap with no abrasive agitation |
| TPO or fiberglass roof | Controlled pressure with a wide fan | Material-compatible RV wash soap |
| EPDM rubber roof | Gentle pressure | Dedicated rubber-roof cleaner where required |
Roof material differences matter. TPO and fiberglass generally tolerate a standard foam-and-rinse approach when used carefully, while EPDM rubber may need a dedicated cleaner and gentler pressure. Aluminum trim can react poorly to highly alkaline soap, especially if the product dries on the surface.
If you find torn seals, separated trim, or water entering a slide-out channel, washing isn't the repair. This RV slide-out repair resource can help you identify when the problem needs inspection. After washing, dry the channels, inspect butyl-tape areas, and check roof penetrations instead of assuming a clean exterior means a watertight coach.
Drying Tall Panels and Roofs Without Spotting
A foam wash can look excellent at the rinse stage and still fail during drying. Large RV panels hold water in trim, window channels, awning tracks, roof edges, and slide-out seams. If that water evaporates in place, it can leave mineral spotting even when the soap and rinse were handled correctly.
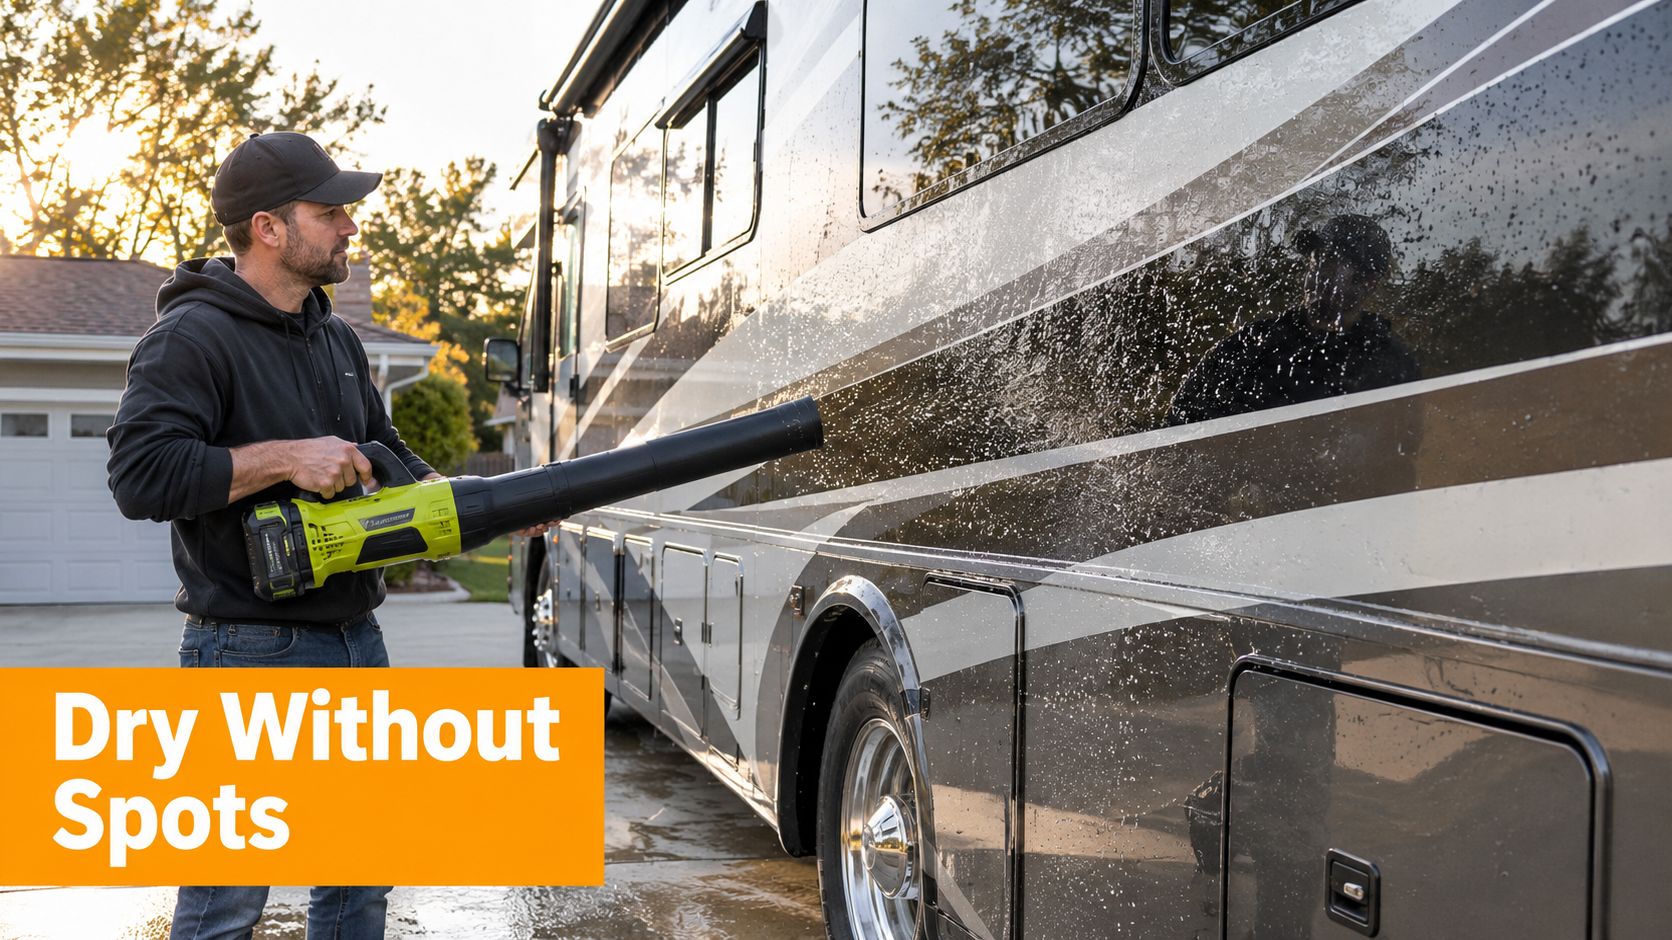
Start with forced air. A leaf blower on a 12 to 18-foot extension can push water from roof edges and seams before a towel touches the surface. Work from the highest accessible area downward, and keep the airflow moving so you're displacing water rather than concentrating it at one opening.
Use towels only after the heavy water leaves
Follow the blower with a large twisted-pile microfiber drying towel. A towel rated at 600 GSM or higher gives you a useful starting point for absorbing water from broad panels, but technique matters more than the label. Lay it flat, pull in straight lines from the top down, and replace it when it stops gliding freely.
Don't buff wet RV panels in circles. Circular movement increases the chance that remaining grit will travel across the finish, while straight overlapping pulls give you a clear path and make missed water easier to spot.
Dry the roof in sections so water doesn't collect and run toward the front cap after you've already finished it. Blow out awning tracks, the lower edges of slide-outs, mirror mounts, and window channels before the final towel pass.
Hard-water management deserves attention during the rinse and dry stages. A DI water system guide for vehicle washing explains how deionized water can reduce the mineral residue that creates spotting. If you don't use treated water, shorten the time between final rinse and drying, especially on warm or windy days.
Common Foam Cannon Mistakes and Final Checklist
Most failed RV foam washes don't come from a defective cannon. They come from using a car-wash sequence on a coach that has more height, more seams, and more places for water to hide.
- Spraying directly into seals: Angle the fan across slide-out gaskets and window channels instead of driving water into them.
- Chasing foam: Apply an even layer, allow controlled dwell, and re-foam any section that begins drying.
- Overloading the bottle with soap: Start within the product's recommended dilution range, then adjust after testing actual draw and cling.
- Rinsing upward: Use the upward pre-rinse only to lift loose lower-panel grit. Make the final rinse travel from the roof down.
- Skipping the dry: Use forced air around seams and channels, then finish panels with a clean, absorbent microfiber towel.
- Brushing loose decals: Inspect film edges first. If an edge is lifting, avoid contact and arrange repair.
- Ignoring roof material: Match the soap and pressure to TPO, fiberglass, EPDM, or aluminum rather than treating every surface alike.
A field example cited in RV guidance shows that a controlled wash can use about 14 gallons on a 45-foot coach, while EPA data places uncontrolled home washing at about 100 gallons without an automatic shutoff nozzle and as much as 150 to 200 gallons with a running hose. The practical lesson is simple: direct the water, let chemistry and dwell do their share, and don't confuse more pressure with better cleaning.
Screenshot this checklist
Before washing
- Confirm the coach is shaded or the panels are cool.
- Close windows, vents, hatches, and exterior access panels.
- Retract the awning and secure loose items.
- Inspect decals, slide-out seals, roof edges, and trim.
- Clear hose and cord paths around the coach.
During washing
- Test the foam on a small shaded section.
- Start with a controlled dilution and adjust gradually.
- Pre-rinse with a wide fan.
- Apply foam from bottom to top.
- Let it dwell without drying.
- Rinse from top to bottom.
- Re-foam dry sections instead of increasing pressure.
After washing
- Blow water from roof edges, channels, seals, and awning tracks.
- Dry panels in straight top-down passes.
- Inspect slide-out tops, decal edges, roof penetrations, and lower trim.
- Check for spotting before putting the coach away.
A foam cannon makes the wash more manageable, but the finish stays healthy because you control the entire process around it.
SwiftJet offers a garden-hose foam gun that applies soap foam to vehicles, including RVs, and includes adjustable spray settings plus a rinse setting for users who don't want to set up a pressure washer. Visit SwiftJet to compare that option with your current hose, drying tools, and low-water RV wash routine.
