

You've watched the house turn green beneath the windows, so you rent a pressure washer and point the wand at the siding. The first pass looks promising. Then water pushes beneath a lap, streaks appear where the spray overlapped, and stubborn algae remains in shaded corners. More pressure usually creates more risk, not a cleaner finish.
A foam cannon house wash follows a different order. You apply detergent evenly, give it time to loosen organic grime, and rinse with controlled pressure before deciding whether any spot needs light agitation. Used properly, the foam cannon is a pre-wash tool, not a substitute for judgment, surface inspection, or safe rinsing.
Why Foam Beats Spraying for Home Exteriors
A typical failed wash starts with a narrow spray stream aimed directly at dirty siding. The operator moves close to the wall, increases pressure when the grime resists, and works in overlapping passes. That approach can remove loose dirt, but it also concentrates force at seams, window edges, vents, and damaged coating.
Foam changes the job from force-first cleaning to chemistry-first cleaning. A thick detergent layer clings to a vertical surface instead of falling away immediately. As it sits, the solution can soften algae, mildew, road film, and ordinary grime before the rinse removes the loosened material.
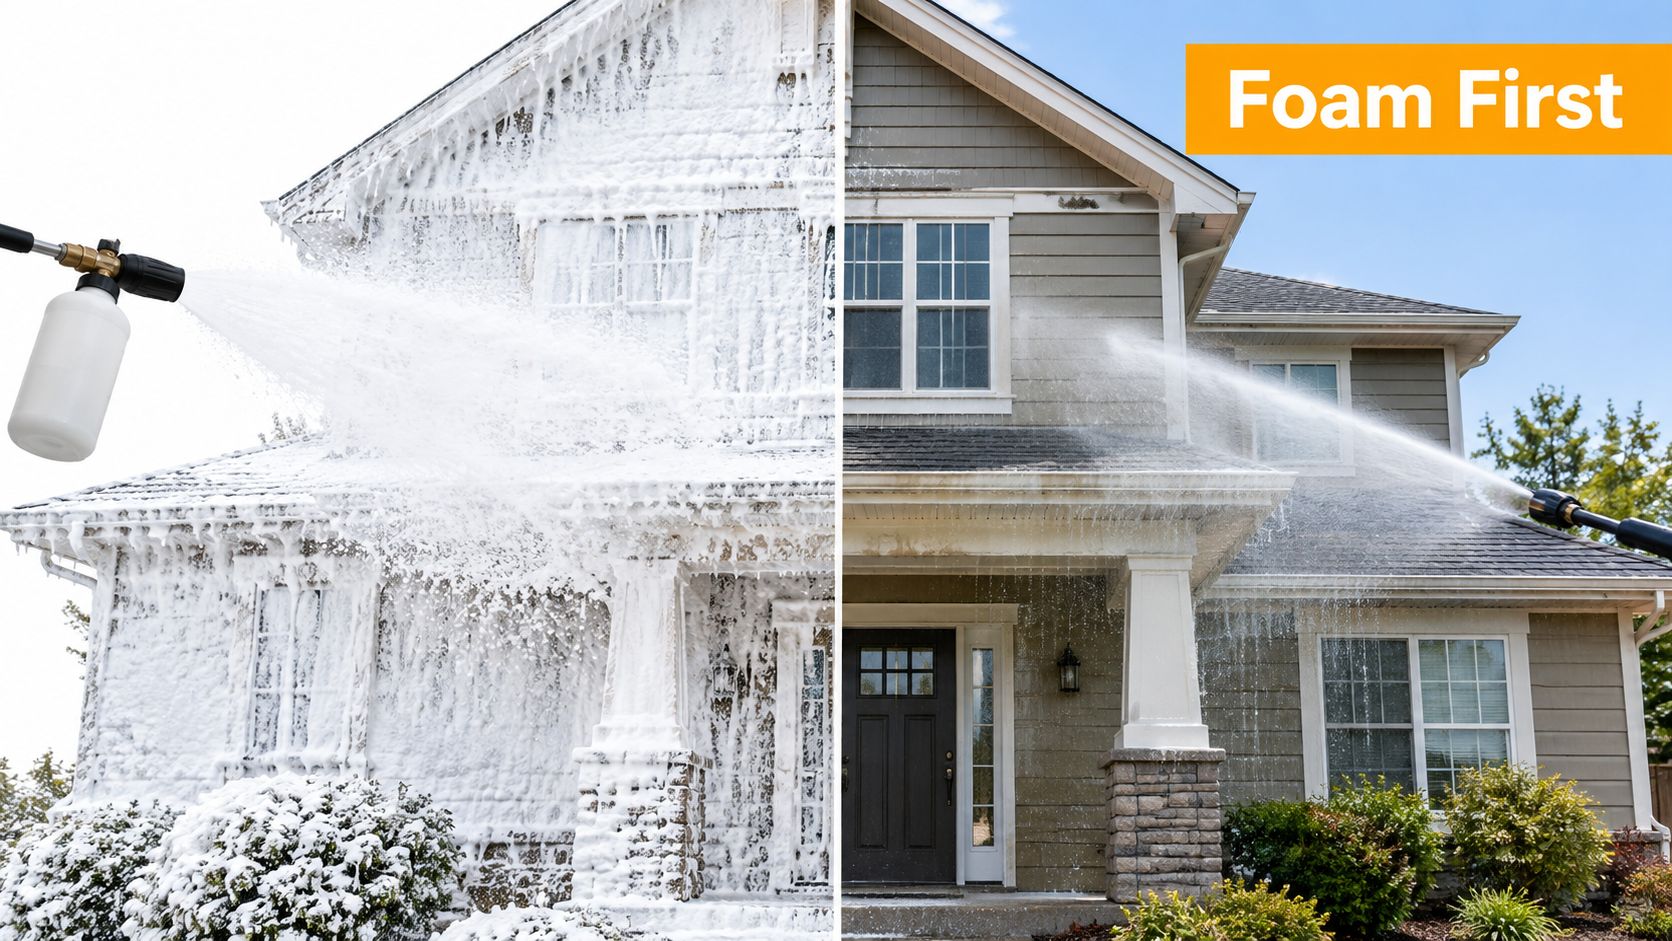
Cling matters more than dramatic foam
The useful feature isn't the visual cloud. It's contact time. A thin spray wets the wall and runs down quickly, while a shaving-cream-like layer remains attached long enough for the detergent to work. Neutral house-wash guidance recommends applying detergent evenly, allowing about 5 to 10 minutes of dwell time, then rinsing before agitation, as described in this safe foam-cannon house-washing guide.
That dwell period also helps reveal the condition of the surface. Areas that lighten during the dwell may only need rinsing. Dark growth that remains bonded may require a compatible treatment or careful follow-up, not a stronger blast from the wand.
Practical rule: If the foam disappears instantly, fix the mixture, coverage, or surface conditions before increasing pressure.
Where direct spraying goes wrong
Vertical siding creates several hazards that flat concrete doesn't. Water can enter behind overlapping panels, travel around poorly sealed trim, or reach electrical fixtures and wall penetrations. Older paint, chalking finishes, brittle caulk, and cracked siding can fail under a concentrated stream even when the operator believes the pressure is moderate.
The method is also easier to control section by section. A two-story, 2,000-square-foot home may need about 15 to 30 minutes for chemical application and roughly 1.5 to 3 hours for preparation, washing, rinsing, and cleanup in practical residential use, according to the same independent guide. That time includes setup and careful handling, which is why foam is best understood as a way to improve coverage and reduce unnecessary mechanical cleaning, not as a shortcut that eliminates the rest of the work.
For adjacent hardscape, oil, rust, and stubborn discoloration need their own approach. A useful companion resource is this Ventura County Roof Cleaners house washing guide, especially when a broader exterior-cleaning project includes surfaces that shouldn't receive the same treatment as siding.
Gathering the Right Tools and Pressure Settings
A foam cannon can't make an unsuitable pressure washer safe. Before connecting anything, inspect the siding, paint, seals, windows, vents, light fixtures, and outdoor outlets. Look for loose panels, open joints, cracked caulk, peeling paint, and existing water damage. Mark those areas mentally or with removable tape so you don't treat them like sound siding.
The technical setup has three jobs. It must deliver enough water for the cannon to draw and atomize detergent, spread a broad pattern, and let you rinse without forcing water into the structure. A narrow high-pressure tip may clean aggressively, but it gives you little margin around vulnerable details.
Match pressure to the surface
Modern house-wash guidance places many residential tasks in the 1,300 to 3,000 PSI range, while 1,300 to 2,000 PSI is often considered sufficient for vinyl siding, according to this foam-cannon house-washing equipment overview. Treat that as an operating context, not permission to use the highest available setting. The safe result depends on the machine, nozzle, distance, spray angle, siding condition, and operator control.
Start at the lower end for a test area. Keep the wand moving, use a broad fan pattern, and work far enough away that the spray doesn't strike one point continuously. If the surface changes color, flexes, lifts, or shows water entering behind a seam, stop immediately and reassess.
A cannon designed for one machine may perform poorly on another. Check the connector, water flow requirements, chemical pickup system, and reservoir capacity before you fill the bottle. A helpful reference for understanding nozzle selection and foam-cannon connections is this guide to a pressure washer foam nozzle.
Build a workable kit
You don't need a complicated rig, but you do need control.
- Pressure washer: Use a unit whose pressure and flow suit the cannon and the surface. Confirm its fittings before arriving at the wall.
- Foam cannon: Choose adjustable chemical intake and spray width when possible. The adjustment lets you correct thin foam without changing the entire wash process.
- Wide fan nozzle: Reserve narrow tips for situations where a trained operator has confirmed the surface can handle them. They aren't the default for siding.
- Extension wand: This reduces the temptation to climb unstable ladders or stand directly beneath runoff. Keep both feet secure and avoid reaching beyond your balance.
- Chemical reservoir: Use a clean, clearly labeled container that won't be mistaken for another product. Rinse it after every job.
- Protective equipment: Wear eye protection, gloves, footwear with reliable traction, and clothing that covers exposed skin.
A foam cannon setup can begin around $35 to $140 before the pressure washer, according to the independent setup guide cited above. The low entry cost explains the appeal, but inexpensive equipment doesn't remove the need for surface testing and controlled application.
Mixing the Perfect Detergent Solution
The bottle mixture determines whether foam clings or slides. Many poor results blamed on the cannon come from over-diluted soap, insufficient chemical pickup, or a detergent that isn't intended for exterior washing. If the solution runs off within moments, the wall receives less dwell time and the operator often compensates with pressure.
Start with a clean reservoir and the detergent's label directions. If the product doesn't provide a usable starting point, independent expert guidance commonly begins around a 1:5 to 1:10 soap-to-water ratio, then adjusts for soil load, as outlined in this foam-cannon soap dilution guide. Here, the ratio describes soap to water, not the final concentration sprayed from the cannon.
Adjust by surface condition
For routine maintenance, begin on the lighter side of that range. The goal is enough cling to cover evenly without wasting concentrate or creating excessive runoff. On heavily soiled siding, move toward a stronger mix only after testing a small, inconspicuous area and confirming that the detergent is compatible with the surface.
Don't judge the mixture by the amount of foam inside the bottle. Judge it on the wall. A successful application should form a dense, shaving-cream-like layer that hangs on vertical siding rather than breaking into watery trails. Independent guidance identifies that texture as the practical target because it supports longer contact with algae and grime.
Use this simple adjustment process:
- Fill and test: Mix a conservative starting solution, attach the cannon, and spray a small area in the shade.
- Watch the runoff: If the foam sheds in seconds, increase chemical draw or strengthen the mixture gradually. Check that the cannon is pulling product before changing the ratio.
- Check coverage: A broad, consistent layer is more useful than isolated thick piles. Overlap passes lightly so dry gaps don't remain.
- Observe dwell: The foam should begin to break down while the surface stays wet. If it dries, the weather or application area is working against you.
- Record what worked: Note the detergent, adjustment setting, and conditions for the next maintenance wash.
Avoid common mixing mistakes
Hot sun and wind shorten the safe dwell window. A solution that behaves well on a shaded wall may dry on a sunlit elevation before it has done useful work. Work in manageable sections, and don't coat more wall than you can rinse while it remains wet.
Over-strengthening the mix creates its own problems. More detergent can mean more residue, greater plant exposure, and a harder rinse, while the wrong chemical can discolor finishes or affect painted trim. Foam isn't a substitute for product compatibility, so read the label and follow any required dilution, dwell, and protective instructions.
Never combine cleaning products casually. A foam cannon meters and spreads whatever you pour into it, including a mistake, across a large vertical area. Keep the reservoir labeled, use fresh water, and stop if the mixture behaves unexpectedly.
Applying Foam and Rinsing Safely
The safest workflow is deliberate and top-down. Begin with a walkaround, remove loose objects, close windows, and identify outlets, vents, cameras, and delicate landscaping. Rinse loose dust from the surface if needed, then choose a shaded or cooler elevation where the detergent won't dry prematurely.
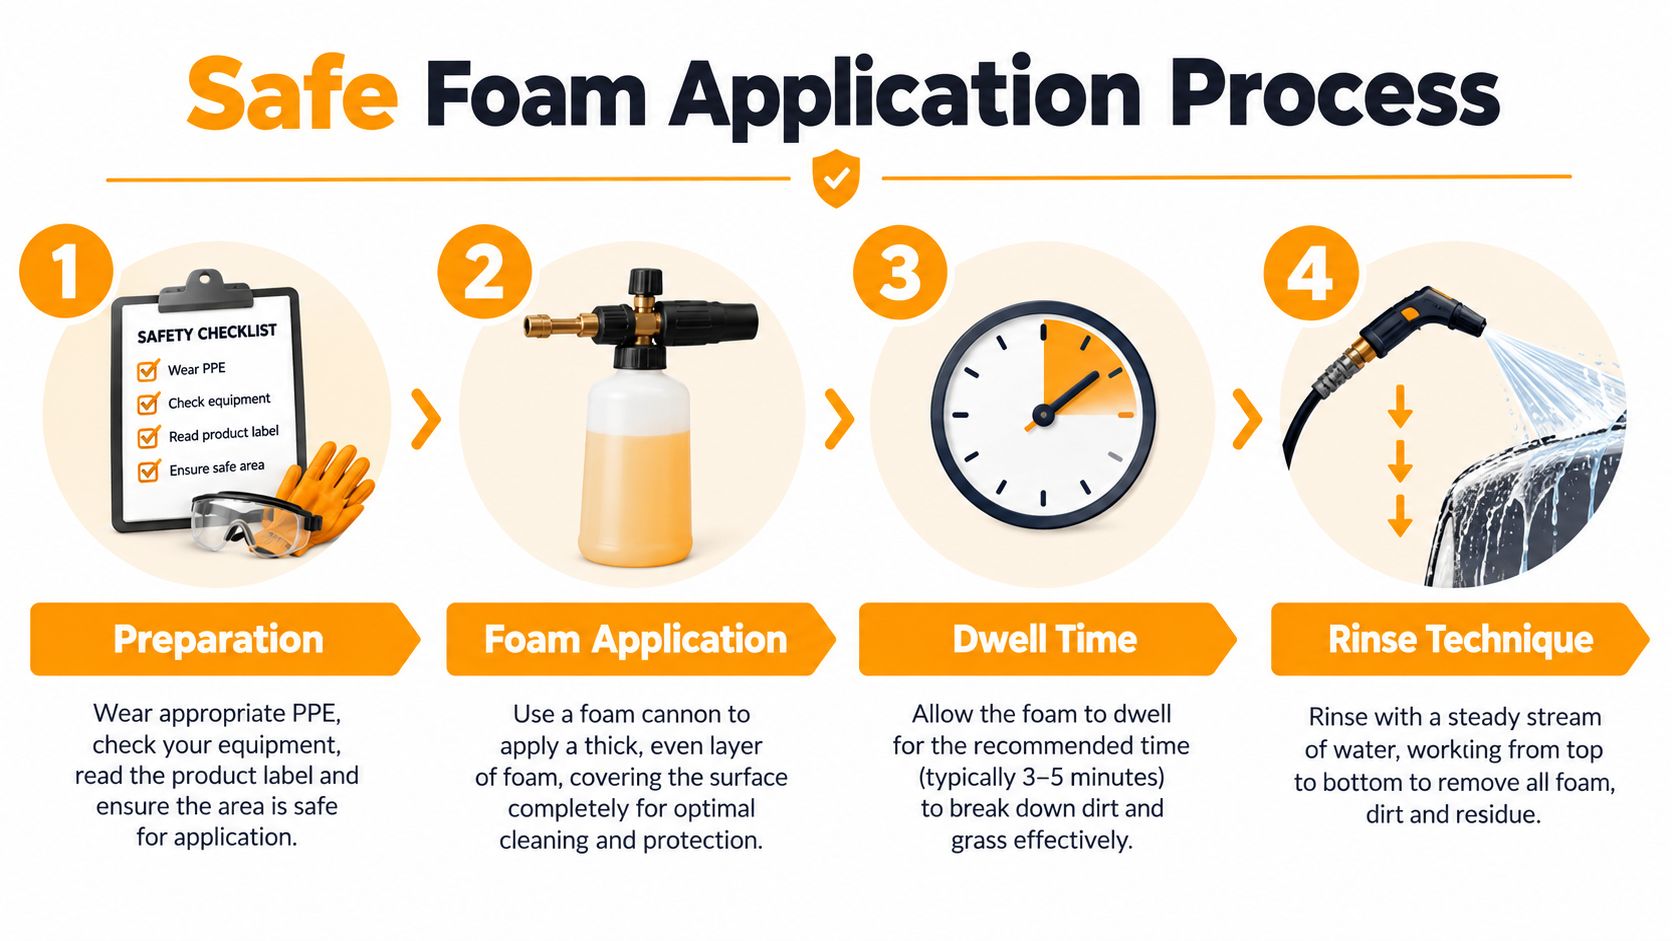
Apply in controlled sections
Hold the cannon so the fan reaches the wall evenly. Start at the upper portion of the section and work across in steady overlapping passes. Keep the nozzle moving, and avoid aiming directly into seams, vents, window channels, door gaps, or damaged caulk.
The top-down pattern matters because runoff should travel over areas that have already received detergent. If you begin at the bottom, fresh chemical and dirty water can flow over untreated lower sections, making it harder to see whether the wash is even. Keep an eye on gutters, trim, and roof edges, where foam can collect and drip unexpectedly.
Treat each elevation according to its exposure. A shaded north-facing wall may hold organic growth and stay wet longer, while a sun-facing wall can dry rapidly. Wind also carries mist and runoff toward windows, neighboring property, vehicles, and garden beds, so pause when conditions make control difficult.
Foam should dwell while wet, not while dry. Once the layer begins drying, rinse that section rather than trying to extend the wait.
Allow about 5 to 10 minutes of dwell time when conditions and the product label support it, as stated in the independent house-wash guidance linked earlier. Don't treat that range as a timer you must force in every environment. The correct stopping point is before the product dries, with the label's instructions taking priority.
This video provides a visual reference for the general sequence and handling of foam application:
Rinse without driving water inward
Switch to a suitable fan spray and begin at the top of the same section. Keep the wand angled so water travels down and away from laps, joints, and openings. A sweeping rinse is safer than holding the stream against one spot.
Maintain a consistent distance and let the water do the work. Move closer only after testing the surface and confirming that the spray isn't lifting paint, flexing siding, or forcing water beneath panels. Around windows, reduce aggression and direct the rinse away from the frame rather than into it.
Rinse until detergent residue and loosened soil have left the wall. Check from several angles because leftover foam can hide streaks, especially beneath trim and along horizontal seams. If a mark remains after a complete rinse, don't immediately increase pressure. It may be embedded growth, oxidation, staining, or surface damage rather than removable dirt.
Hardscape runoff deserves attention too. Detergent and loosened organic material can settle on pavers, concrete, and nearby walls. For a separate approach to discoloration on masonry surfaces, consult this Prescott paver stain removal guide, rather than applying siding-cleaning assumptions to pavers.
If you're working with a garden hose foam sprayer instead of a pressure-washer cannon, connection and flow characteristics differ. This guide on connecting a foam cannon to a garden hose can help you verify the hardware before you begin, but the same surface principles still apply: controlled coverage, wet dwell, and a gentle directional rinse.
Protecting Your Landscape and Final Checks
A clean wall isn't a successful job if detergent damages the planting bed or runoff enters a place it shouldn't. Before applying foam, wet nearby foliage with clean water so leaves and soil aren't dry when incidental spray reaches them. Cover or move delicate items, keep chemical runoff away from ponds and drains where possible, and rinse affected hard surfaces promptly.
Windows should be shut firmly, not merely pulled closed. Check basement entries, pet doors, outdoor sockets, light fixtures, and ventilation openings. If a fixture or penetration is poorly sealed, skip direct spray and clean around it with a safer method.
Use the final inspection as a diagnostic
Inspect the house after the rinse has cleared the visual distraction of foam. Walk the elevation in changing light, looking beneath eaves, behind downspouts, around corners, under windows, and along the lower edges of siding. These areas often receive uneven coverage because the operator naturally focuses on the broad center of the wall.
A practical inspection sequence looks like this:
- Look for residue: White haze, slippery film, or lingering bubbles indicate that rinsing needs more attention.
- Look for missed growth: Persistent green or dark patches may need targeted treatment, not a stronger general spray.
- Check sensitive details: Examine caulk, paint edges, vents, and seams for lifting, movement, or trapped water.
- Review runoff: Make sure foam and dirty water haven't collected against doors, foundation openings, or plant beds.
- Confirm drying conditions: Leave windows and vulnerable areas undisturbed until you know water hasn't entered the structure.
If algae remains on siding, avoid scrubbing aggressively while grit or loosened contamination is still present. Use the surface-specific guidance in this algae removal guide for siding, and follow the cleaning product's safety instructions rather than improvising a stronger mixture.
Clean the equipment before storage
Rinse the foam cannon reservoir, pickup tube, fittings, and nozzle with clean water. Detergent residue can dry inside small passages and affect chemical draw during the next wash. Disconnect the system according to the manufacturer's instructions, release pressure safely, and store hoses and accessories where freezing, heat, and direct sunlight won't degrade them.
The environmental part of the job continues after the wall looks clean. Collect empty containers, prevent concentrated product from entering soil, and don't leave runoff sitting on painted or porous surfaces. A measured foam application, wet dwell, controlled rinse, and careful inspection reduce both chemical waste and the temptation to repeat the wash with unnecessary pressure.
The result you want isn't the most dramatic foam display. It's an exterior that looks even, a structure that stayed dry inside, landscaping that remained protected, and equipment ready for the next controlled wash.
SwiftJet offers a garden-hose foam gun for applying clinging vehicle-wash foam, with an on/off trigger and a microfiber wash mitt included. If you want a compact option for smaller exterior-cleaning tasks, visit SwiftJet and compare the setup with the pressure-washer method described above.
