

A Saturday wash can go wrong before the first panel is finished. The car looks clean after the rinse, but the hood shows faint arcs, the roof still has streaks, and the side panels catch the light with a hazy pattern of micro-swirls. You may blame the soap or the paint, yet the usual problem is simpler: grit has become trapped in the wash medium and is being dragged across the surface.
A car cleaning sponge with a handle can help in one narrow but useful way. It changes your grip, extends your reach, and keeps your knuckles away from the bodywork. That matters on roof centres, tall vans, SUVs, and the far side of a wide hood, where people tend to stretch, pinch the sponge tightly, or lean against the paint for support.
The handle doesn't make a sponge automatically paint-safe. It only gives you better control over position and pressure. You still need pre-rinse, foam lubrication, two-bucket discipline, straight-line passes, and frequent rinsing. Used that way, the tool earns a place in the wash kit. Used as a direct replacement for a clean microfiber mitt, it often creates more risk than convenience.
Why a Car Cleaning Sponge With Handle Changes Your Wash
The handle changes the mechanics of contact. With a loose sponge or mitt, your fingers often compress the material against the panel, especially when you reach across a roof. That pinch force can press contamination into the face and make the loaded fibres or foam slide instead of gliding freely.
A handled tool lets your palm sit over a broader grip while the sponge follows the direction of your arm. Your knuckles stay above the paint, your wrist can remain more neutral, and you can reach the middle of a roof without placing your chest or forearm against a freshly washed panel. The benefit is most noticeable on high surfaces, not because the handle cleans better by itself, but because it makes a relaxed stroke easier to maintain.
Practical rule: Use the handle to improve reach, not to increase pressure.
The old sponge-and-bucket method remains part of the history of vehicle cleaning. Early auto-wash operations used sponges, chamois, and manual inspection before mechanized systems became common, while later conveyor systems added sprinklers, brushes, and dryers. That evolution is documented in this history of car washing and manual cleaning tools. The lesson for today's DIY detailer is straightforward. A handheld tool can be useful even when the safest process still depends on careful dirt management.
Where the handle earns its place
Use a handled sponge for the roof centre, upper windshield area, broad hood sections, and high side panels where reaching forces you to lean or stretch. It can also help RV owners and fleet workers who repeat the same tall-panel movements across large vehicles.
A mitt still wins when you need close feedback from the surface, careful work around delicate trim, or a flexible tool that can fold into tight contours. The mitt also gives you a better sense of how much contamination remains on the panel. Neither tool forgives a dirty wash medium. Rinse the sponge after each panel, keep wheel grime separate, and stop if the face feels rough.
Choosing the Right Sponge and Handle for the Job
A paint-safe sponge shouldn't feel like a household cleaning block. Look for a soft, resilient face that compresses under light contact and releases water when rinsed. Stiff foam, sharp seams, exposed fasteners, and a rough mould line are warning signs. A metal handle without a protected end is another poor choice because it can mark paint if the tool twists or drops.
Cell structure affects how the sponge behaves. Open-cell foam generally holds more wash solution and feels more compliant, while closed-cell foam resists water absorption and can keep contamination closer to the contact surface. That doesn't make one structure universally safe. If grit stays between the sponge and paint, either design can cause marring.
Handle shape matters as much as length. A fixed short handle gives control around the hood and glass. A longer or extendable grip improves reach on roofs, but it also gives you more turning force, so a careless push can apply more force than you realise. Choose soft rubber, textured plastic, or moulded TPR that remains secure with wet hands and gloves. Avoid a slick grip that makes you clench harder, particularly in cold weather.
For a broader comparison of surface safety and tool choice, this guide to a microfiber wash mitt versus a sponge is a useful reference point.
Match the tool to the surface
- Paint: Choose a soft, clean sponge or microfiber mitt. A mitt remains the safer default for delicate or heavily contaminated paint because it conforms to the panel and offers more flexible movement.
- Wheels: Use a dedicated wheel sponge or brush. Brake dust must never migrate into the paint-washing tool.
- Glass: A handled sponge can work well on broad glass, provided the face is clean and free of grit.
- Badges and mirror caps: Use a small, flexible mitt or detailing brush. A long handle can catch on edges and make precise pressure harder to judge.
Never use a melamine “magic” eraser on painted panels. Its abrasive action can dull or damage clear coat. Also reject any sponge with a tacky surface that grabs rather than slides, since sticking encourages you to push harder.
Sponge and handle feature comparison
| Sponge Type | Foam Density | Cell Structure | Handle Grip | Best Use |
|---|---|---|---|---|
| Soft open-cell foam | Compliant and absorbent | Holds wash solution readily | Textured rubber or TPR | Broad painted panels when rinsed frequently |
| Firm closed-cell foam | Less absorbent | Can keep grit near the contact face | Moulded plastic with a secure grip | Glass or selected non-painted tasks |
| Microfiber-covered sponge | Soft outer face | Foam core supports the cover | Rubberized or textured grip | Paint washing when the cover is clean |
| Small detail sponge | Flexible and compact | Varies by construction | Short fixed grip | Trim, mirror caps, and narrow areas |
| Wheel-only sponge | More resistant to heavy grime | Built for separate use | Easy-clean handle | Wheels and lower, heavily soiled areas |
Preparing the Car and Your Wash Setup
Start with the surface, not the sponge. Park in shade, let hot panels cool, and remove loose grit with a thorough pressure rinse. Work from the roof down so dirty water flows toward areas that haven't yet been cleaned. A sponge should only touch paint after loose contamination has been flushed away and the panel is well lubricated.
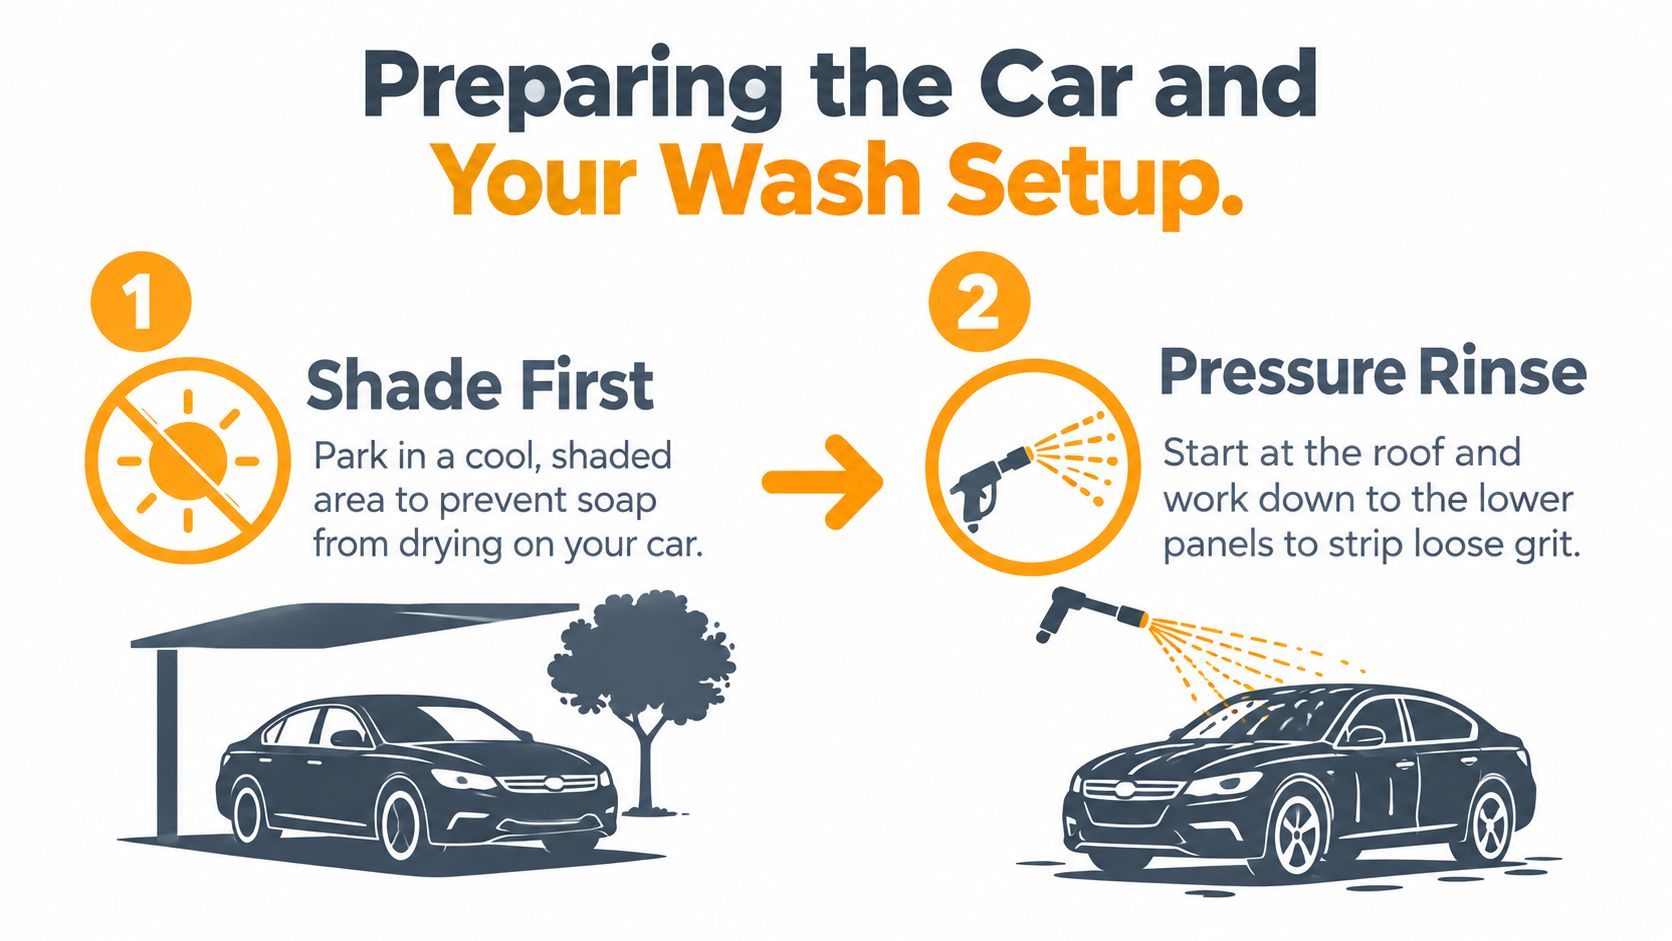
Set up two buckets before you begin. One holds the shampoo solution, and the other holds clean rinse water, ideally with a grit guard. After each panel, agitate the sponge in the rinse bucket, inspect the released debris, and only then reload with shampoo. This two-bucket process limits the amount of contamination that returns to the working solution.
If you use a foam cannon or foam gun, cover the vehicle before contact washing and allow the foam to loosen road film. Follow the soap maker's dilution instructions rather than relying on a universal ratio. A stronger mix isn't automatically safer or more effective, especially if it dries on the panel.
Keep wheels and the lowest, dirtiest bodywork separate. Use a dedicated wheel mitt or brush, and don't place that tool in the paint bucket. Brake dust contains abrasive contamination, so cross-contamination can turn a clean-looking sponge into a source of scratches.
Sunday morning setup checklist
- Shade: The car and panels are cool enough that soap won't dry quickly.
- Rinse: Loose grit has been flushed away from the roof downward.
- Buckets: Shampoo and rinse water are separate, with a grit guard where possible.
- Foam: The pre-wash solution is loaded and ready.
- Drying towel: A clean, plush microfiber towel is within reach.
- Sponge: The handle is secure and the face has no embedded debris, stiff patches, or rough seams.
A good setup makes the contact wash slower in appearance but faster in practice. You won't keep stopping to rescue a drying panel or pick grit from a contaminated sponge.
Washing Technique That Prevents Scratches
Wash from the cleanest area to the dirtiest. Start with the roof, then the glass and upper panels, followed by the hood and upper sides. Leave the lower doors, bumpers, and areas behind the wheels until later because they collect more road film.
Place the sponge flat against the surface and move it in straight lines. Use the sponge's own weight and only enough grip to guide it. Circular motions are tempting because they feel thorough, but they can move an embedded particle repeatedly across the same area. Straight passes make your movement predictable and help you avoid scrubbing a small patch with a contaminated face.
After each panel, return to the rinse bucket. Agitate the sponge below the waterline, inspect the face, and flip it to an unused side before touching another panel. If the face darkens with visible grit, don't just reload it with shampoo. Rinse again, and replace the tool if the debris doesn't release.
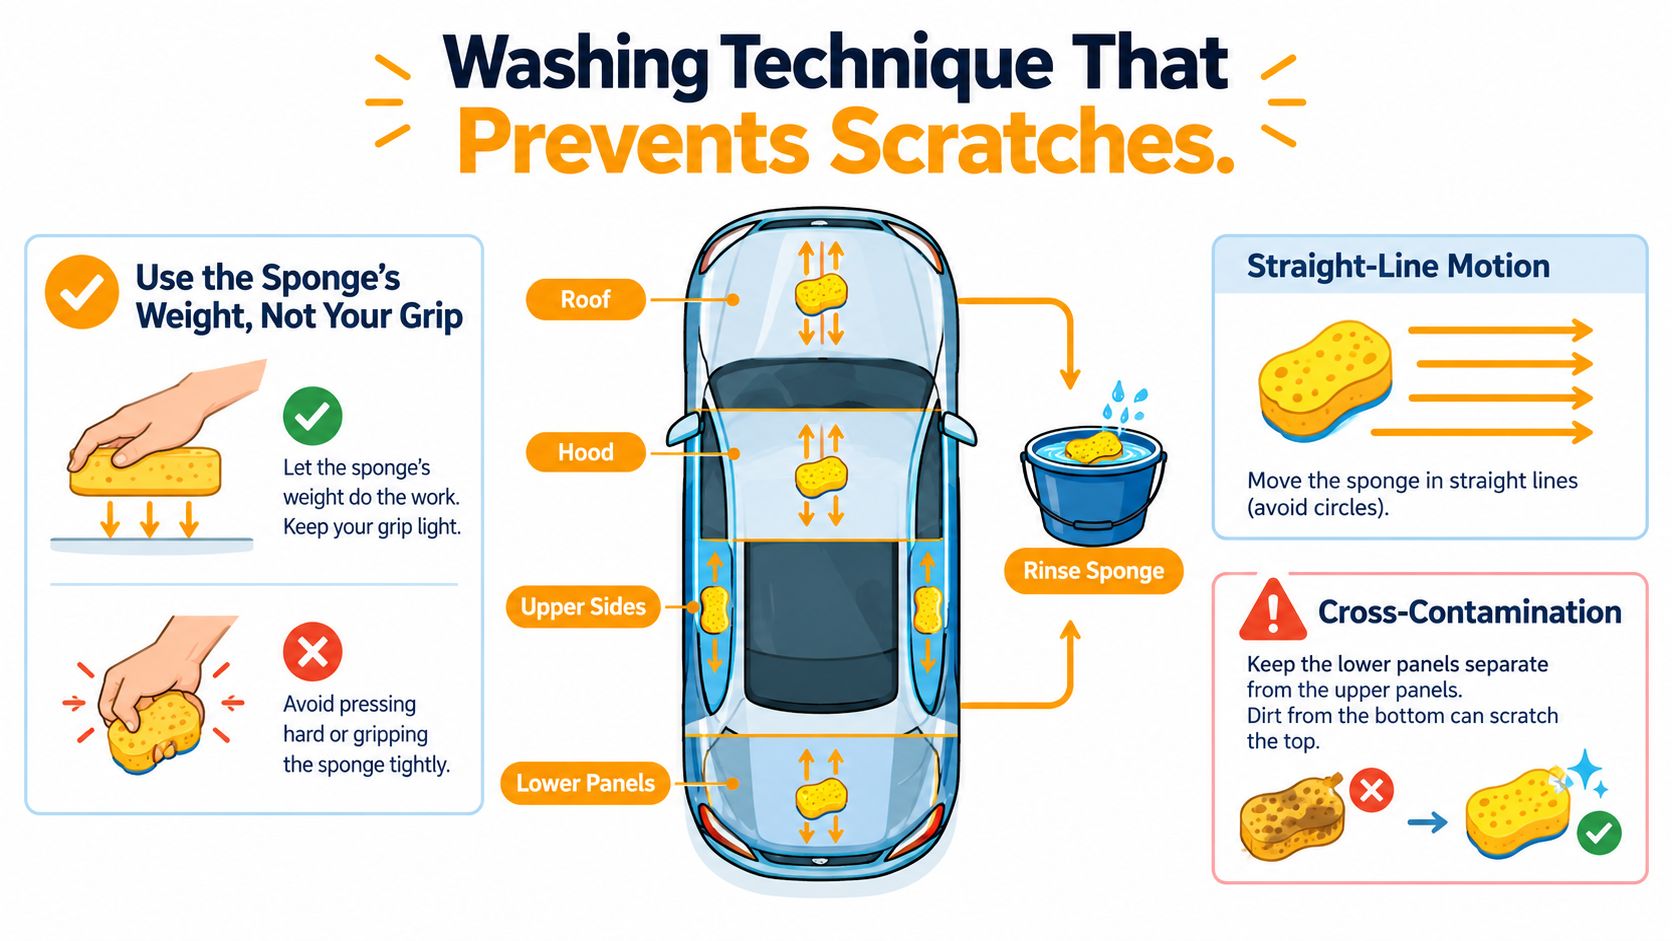
Pressure check: If the sponge stops gliding, your first response should be more lubrication or a rinse, not a firmer grip.
Treat door jambs, the fuel filler area, emblems, and panel gaps as separate dirty zones. Grit hides in those recesses and can transfer to the face when you work around them. Use a dedicated small tool for them, or wash them after the main paint surfaces with a separate sponge.
Never re-wipe a drying panel with a used face. Water spots are frustrating, but dragging a contaminated sponge over partially drying paint is a poor way to solve them. Rinse the panel or use a clean drying towel instead. For more context on why technique and contamination matter, see this practical discussion of car washes and paint damage.
A useful bucket car wash process follows the same basic discipline. Keep the wash medium lubricated, separate clean and dirty water, and treat every panel as a controlled contact operation rather than a scrubbing exercise.
Pairing the Sponge With a Foam Cannon Like SwiftJet
Foam and a handled sponge work as one lubrication system. The foam pass softens and surrounds loose road grime, while the sponge provides the controlled mechanical contact that removes what remains. Separating those jobs reduces the temptation to use the sponge dry or to press harder when a panel still feels dirty.
Connect the foam gun to the garden hose or compatible water supply, select the foam setting, and adjust dilution according to the product instructions. Aim for foam that clings long enough to cover the panel without drying. Coverage matters more than an impressive layer of bubbles. If the foam runs off immediately, it has less time to loosen contamination. If it sits too long and dries, it becomes another residue to remove.
Apply foam from the roof down, allow it to dwell while you prepare the sponge, then rinse away the loosened grime. Don't treat dwell time as permission to let the product dry. On a coated vehicle, use a wash solution that preserves the coating's behaviour. On bare paint, choose a compatible shampoo and follow its dilution guidance rather than assuming more soap creates more safety.
The contact pass
Rinse the sponge before it reaches the paint, then keep the panel wet as you work. The handle is especially helpful on the roof and broad hood because it allows you to guide the sponge with a relaxed arm instead of pinching it against the surface. Use straight passes and return to the rinse bucket after each panel.
A foam gun such as SwiftJet connects to a standard garden hose and is supplied with a microfiber wash mitt, so it can support either a handled sponge approach or a mitt-first approach depending on the panel and contamination. Its professional result washing guidance is most useful when treated as a process, not as a promise that foam alone removes every particle.
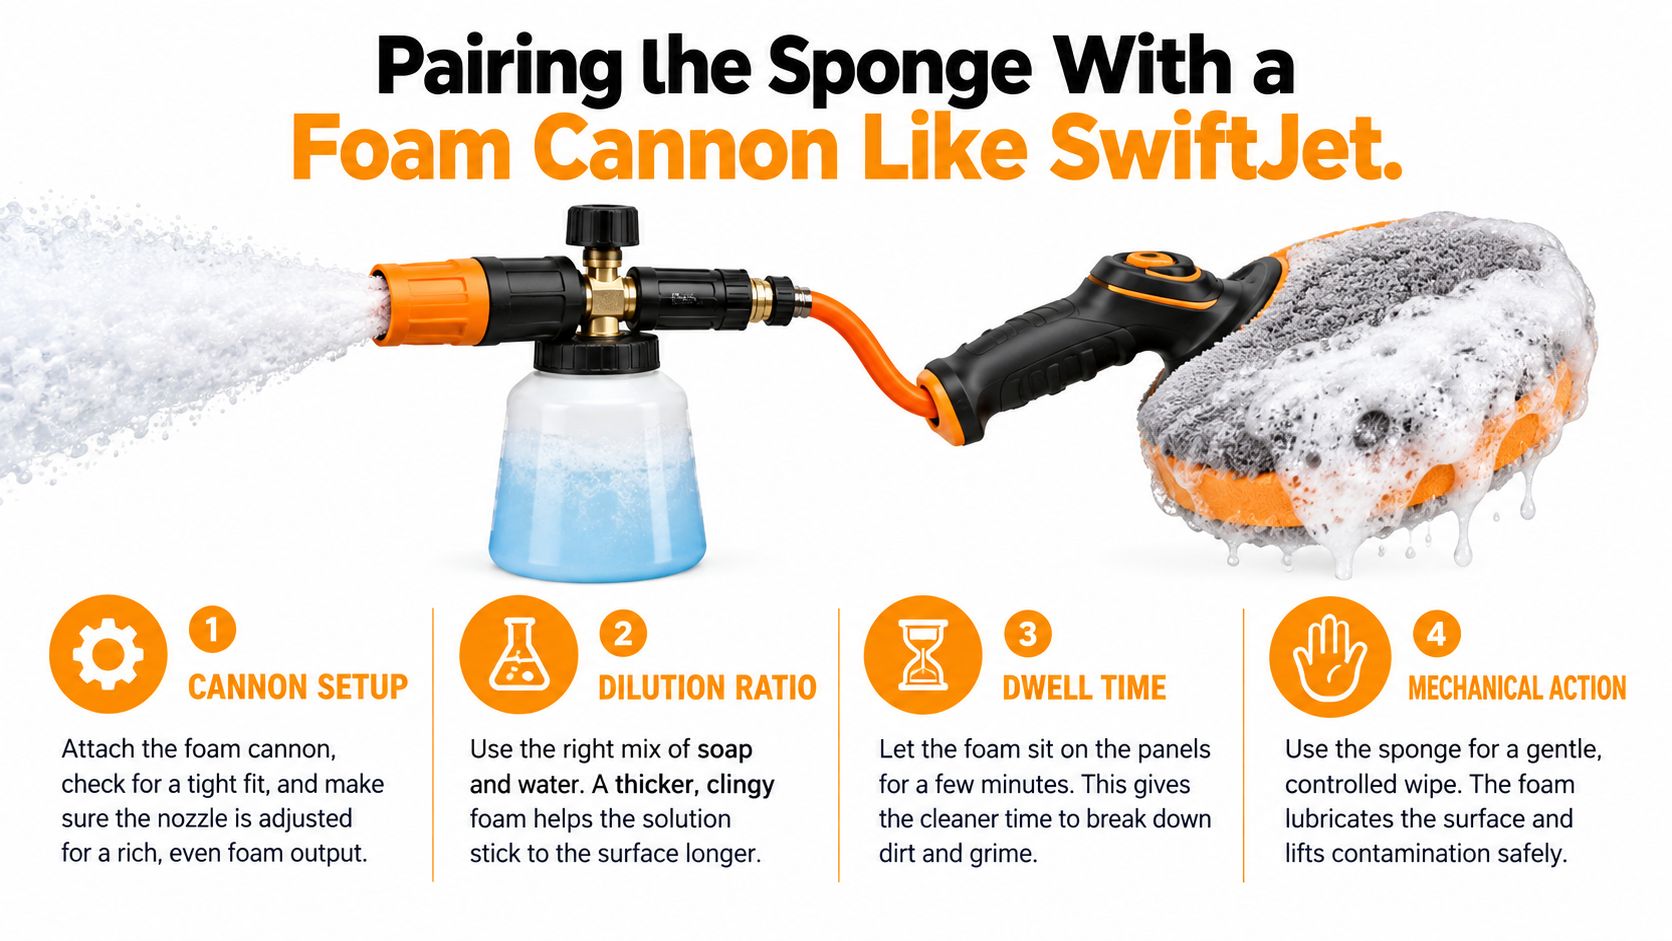
Skip the foam gun when winter temperatures make water freeze on the vehicle or when you can't control runoff safely. In those conditions, use a suitable sheltered wash area or postpone the contact wash. The tool combination is valuable only when you can keep the panels wet, the sponge clean, and the working area safe.
Cleaning, Drying, and Storing the Sponge
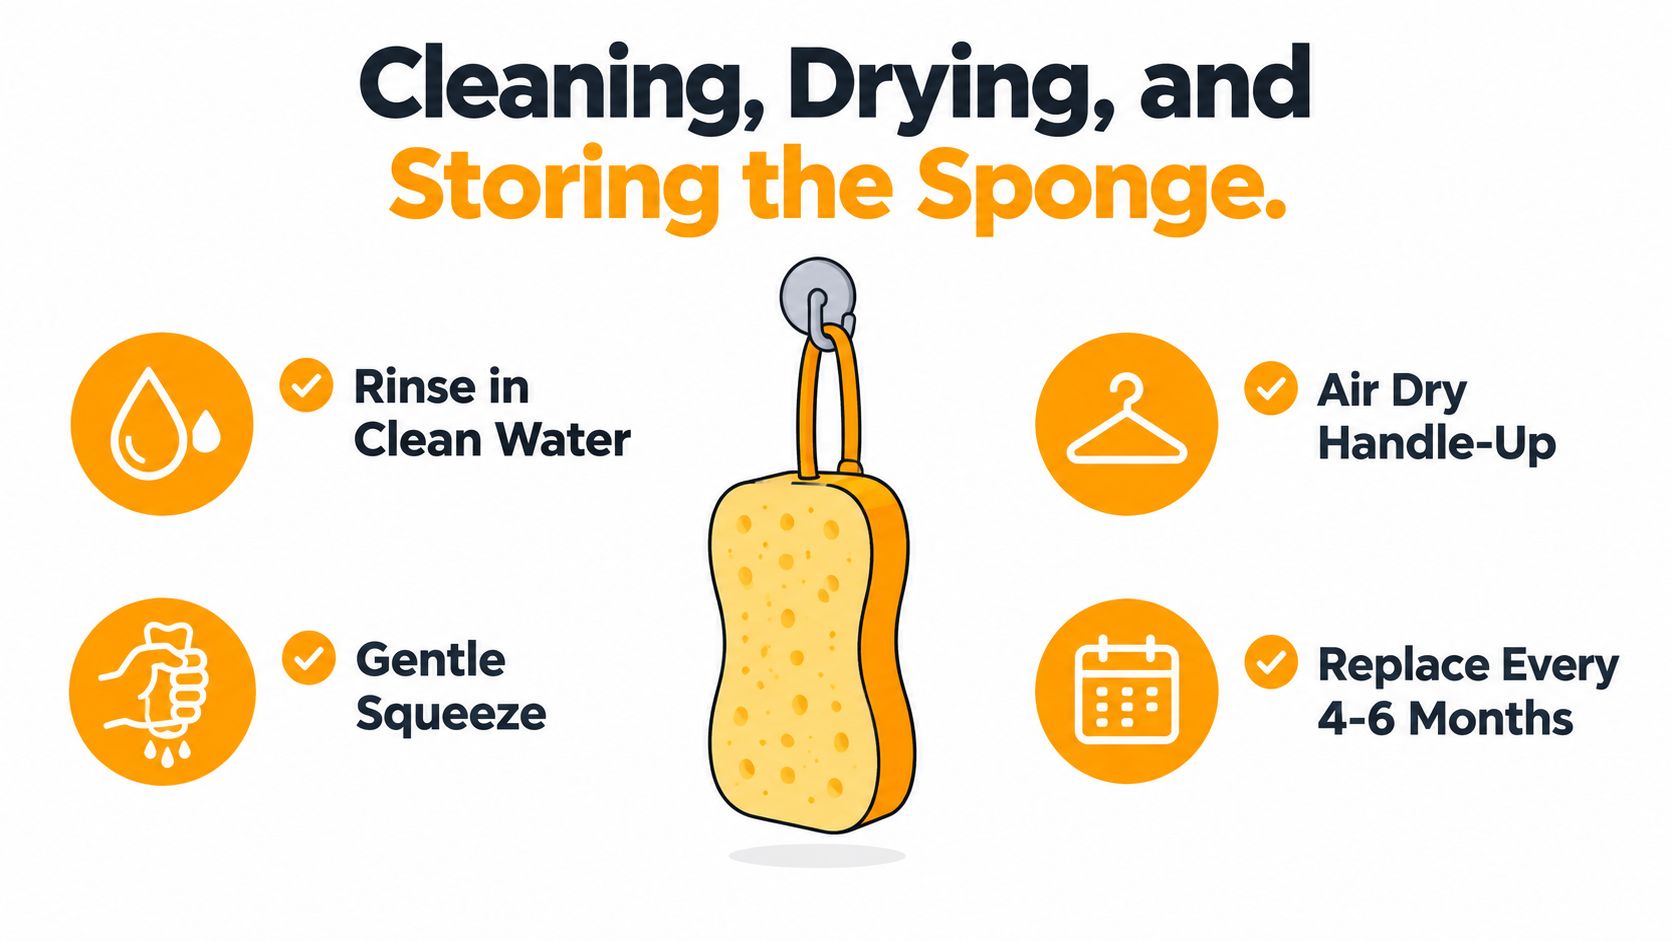
Maintenance starts immediately after the last panel. Rinse the sponge in clean water until the runoff is free of visible debris, then inspect the face and the seam around the handle. A bucket that looks clear doesn't prove the sponge is clean, so squeeze and release it repeatedly while watching for grit or dark residue.
Don't wring the sponge aggressively. Twisting can deform the foam, loosen a bonded cover, or stress the handle connection. Press out excess water gently, then hang the tool handle-up in a ventilated place so water can escape instead of collecting inside the cells.
Know when the face is finished
Replace the sponge when cleaning no longer releases embedded grit or when the face changes from smooth to stiff. Other warning signs include flattened cells, darkened patches that remain after thorough rinsing, and a tacky texture that grabs the paint instead of gliding over it.
The correct replacement schedule depends on the sponge material, vehicle contamination, storage conditions, and how carefully you rinse it. Don't follow a calendar blindly. A lightly used tool may remain serviceable longer than a neglected one, while a sponge used on gritty lower panels may be unsafe after a short period.
Keep the sponge off the garage floor and away from oils, solvents, and wheel-cleaning chemicals. Never seal it in a plastic bag while damp. Trapped moisture creates odour and encourages biological growth, while a dirty storage surface can transfer fresh contamination back onto the face.
Microfiber-covered sponges deserve the same inspection. A soft cover can hide debris in its pile, so run your fingers across it after drying and retire it if the fibres feel harsh or loaded. Clean appearance is useful, but surface feel and debris release are better safety checks.
Pro Tips and a Final Scratch-Free Checklist
Three habits put swirl marks on otherwise clean paint: pressing too hard, skipping the foam pre-wash, and dragging a contaminated sponge over a dry panel. A softer sponge doesn't forgive those mistakes. It may feel pleasant in your hand, but embedded grit still creates a problem when you push it across clear coat.
Foam lubrication, light pressure, and straight-line movement belong together. Remove one part and the other two lose much of their value. Foam without rinsing leaves contamination in circulation. Light pressure without lubrication still drags grit. Straight passes with a dirty face still create defects.
A checklist for the next wash
- Rinse first: Flush loose grit from the roof downward before any sponge touches paint.
- Foam the vehicle: Cover the panels with a suitable pre-wash solution and prevent it from drying.
- Prepare two buckets: Keep shampoo separate from rinse water, and use a grit guard where available.
- Work top to bottom: Wash the roof and upper panels before the lower, dirtier areas.
- Use straight passes: Guide the sponge with its own weight and avoid circular scrubbing.
- Flip and rinse: Clean the sponge after every panel and change faces when contamination appears.
- Separate wheel tools: Keep brake dust and lower-body grime away from the paint sponge.
- Dry carefully: Use a clean plush microfiber towel rather than re-wiping a drying panel with the sponge.
- Inspect under lighting: Look across the paint from different angles before you put the car away.
Don't ask whether the sponge looks clean after one dunk. Ask whether grit released, whether the panel stayed lubricated, and whether the face still feels smooth.
Two habits are especially easy to adopt. Wash in shade whenever possible, particularly when the panel is warm, and replace the sponge as soon as its face stiffens or discolours in a way that rinsing won't correct. A worn sponge can behave like an abrasive pad, regardless of how convenient its handle feels.
The right conclusion is measured. A car cleaning sponge with a handle is a reach and pressure-management tool for tall or broad surfaces. A microfiber mitt remains the more versatile choice for close, controlled paint washing. Choose the tool by the panel, keep contamination isolated, and let process discipline do more work than product claims.
If you want to add controlled foam to your home wash, visit SwiftJet to explore its garden-hose foam gun and included microfiber wash mitt. Pair the foam pass with a clean handled sponge on high panels, then follow the rinse and pressure rules above for a safer Sunday wash.
