

1000 grit sanding discs are ultra-fine finishing abrasives used primarily for wet sanding paint and clear coats, with FEPA P1000 particles averaging about 18.3 microns and CAMI 1000 particles averaging about 9 microns. The label sounds precise, but “1000 grit” alone doesn't tell you exactly how the disc will cut.
That's the advice many buying guides get wrong. They treat the grit number as a universal measurement, when the grading system, abrasive mineral, backing, coating, and tool can all change the result. A disc that refines a repair cleanly may be too aggressive for a thin clear coat, while another disc carrying the same nominal number may leave a noticeably different scratch pattern.
For an auto detailer, the practical question isn't just whether a disc says 1000. You need to know which standard it follows, what surface you're sanding, how much material you need to remove, and what comes next.
What 1000 Grit Sanding Discs Actually Are
A grit number describes the classification of the abrasive particles, not a universal texture shared by every manufacturer. It is similar to shoe sizing between regions. The number gives you a useful reference, but you still need to know the sizing system before assuming two products will fit the same way.
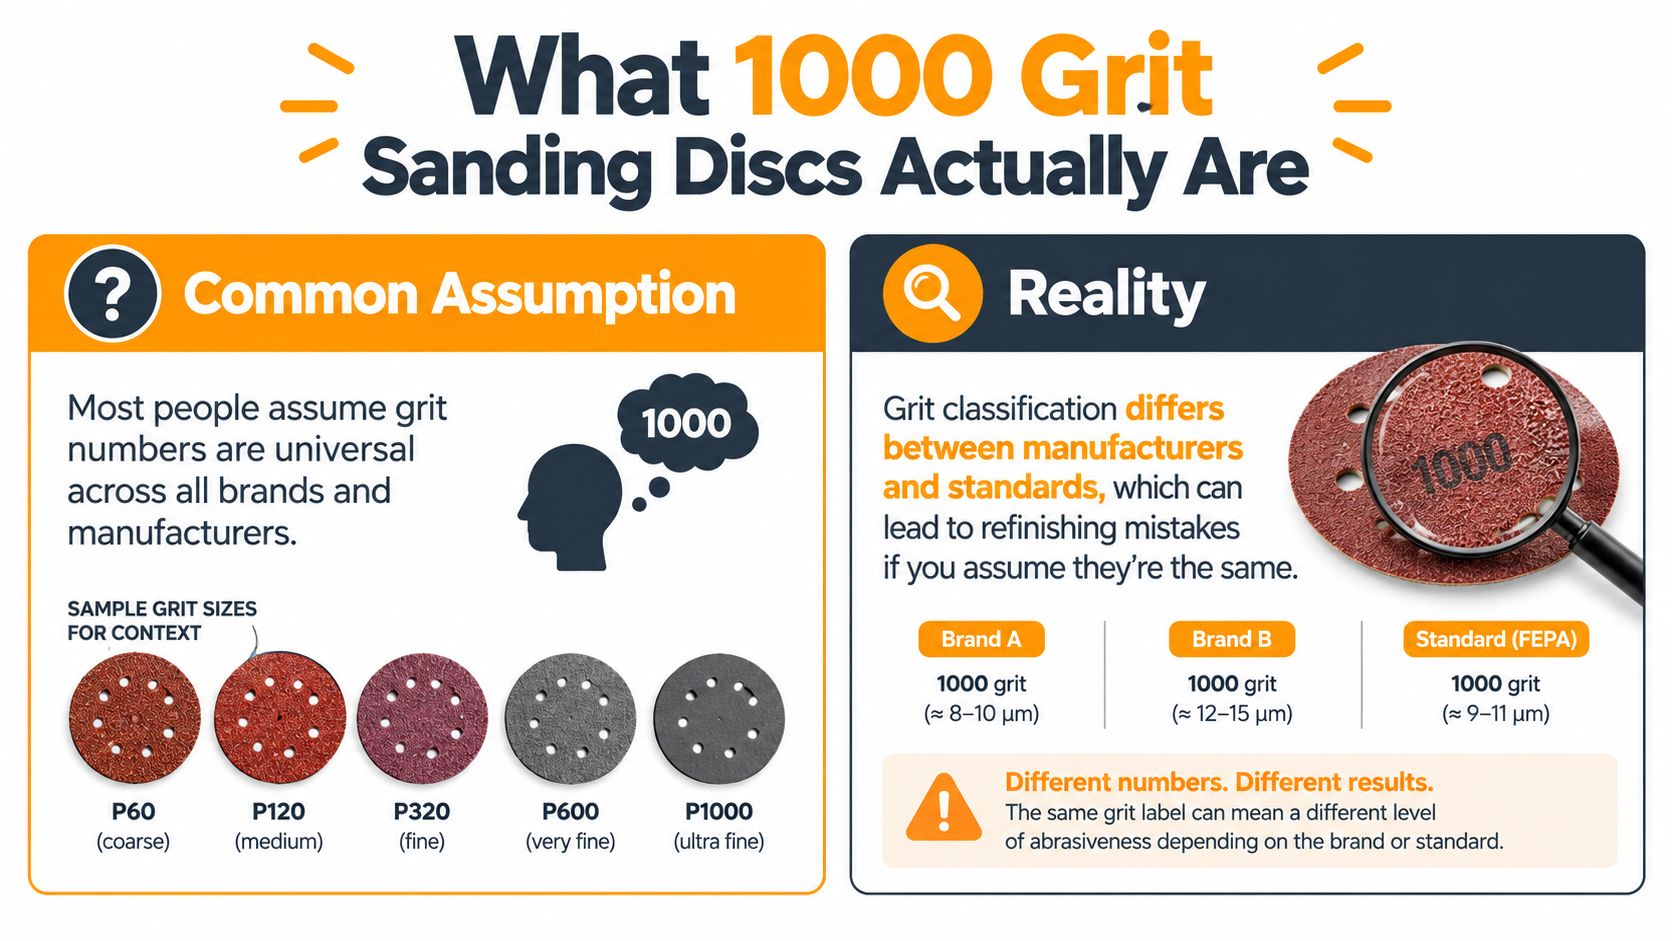
The FEPA and CAMI difference
Under the European FEPA-P system, P1000 has a median abrasive-particle diameter of approximately 18.3 micrometres. Its reported particle distribution spans roughly 33.7 to 12.4 micrometres, because fine microgrits are classified through particle-size measurement rather than treated exactly like coarse grits. The distinction between coarse macrogrits and fine microgrits is described in this FEPA grit reference.
CAMI, also known as the U.S. ANSI grading scale, isn't a direct equivalent. Comparison information places CAMI 1000 at approximately 9 micrometres, while FEPA P1000 remains about 18.3 micrometres. That difference affects how severely the particles scratch, how quickly the disc cuts, and how much refinement the surface needs before polishing.
So, a package marked P1000 gives you more information than one marked only 1000. If you're replacing a disc from an overseas supplier, matching a previous sanding sequence, or trying to reproduce a known finish, check for the prefix and the manufacturer's stated standard.
Practical rule: Never compare the number alone. Compare the grading system, abrasive construction, backing, and intended application.
Why particle size changes the finish
A larger abrasive particle generally creates a deeper scratch and removes material more readily. A smaller particle tends to leave a finer pattern, but that doesn't mean it will always be safer. The actual result also depends on the abrasive mineral, the density of the coating, the pressure applied, and whether debris becomes trapped beneath the disc.
That's why two discs labeled 1000 can behave differently on clear coat, plastic, or painted metal. One may cut quickly but leave marks that take longer to compound. Another may cut more slowly and produce a more uniform surface that's easier to polish.
For repeatable work, write the complete specification into your buying notes. “FEPA P1000, foam-backed, multi-hole disc” is a more useful description than “1000-grit disc.” The more precisely you identify the abrasive, the easier it becomes to reproduce a successful correction.
Abrasive Materials and Disc Construction Differences
Once the grading standard is clear, construction becomes the next decision. The grit number tells you about particle classification, but it doesn't tell you how the disc will feel against a curve, how it will respond to pressure, or how quickly it will load.
Look at four features together: abrasive mineral, backing, hole pattern, and intended sanding method. A fine disc designed for dust extraction and machine sanding may behave poorly when used by hand on a sharp body line. A flexible hand-sanding product may not stay stable enough for aggressive machine work.
Mineral choice affects control
Silicon carbide is commonly chosen when a sharp, clean cutting action matters during fine finishing. Aluminum oxide is often used where a more general-purpose abrasive is needed. Ceramic abrasive products are typically selected for demanding removal and longer working life. These descriptions are useful starting points, not guarantees. The manufacturer's product sheet still matters because the same mineral can perform differently depending on how it's shaped, bonded, and distributed across the disc.
For FEPA P1000, the main point is that the disc belongs in a finishing stage rather than the first attack on a defect. Manufacturer guidance places P1000 in preparation work for waterborne coating systems, while some solvent-based systems may accept P800. The finer abrasive helps reduce the chance that sanding marks will show through the following coating, as outlined in this professional P1000 disc specification.
Backing and extraction change the contact
Paper backing can provide a controlled feel, but it's less forgiving when you're working around a curve or applying uneven hand pressure. Cloth backing usually tolerates more flex and handling. Foam-backed discs conform more readily to curved surfaces and can help maintain contact without forcing the abrasive into a body line.
Machine sanding also makes the hole pattern important. A multi-hole disc paired with suitable extraction allows debris to leave the sanding interface instead of remaining under the disc. That matters because trapped debris can increase loading and disturb the scratch pattern.
When reading a product listing, ask:
- Mineral: Is the product intended for fine finishing, heavy removal, or general preparation?
- Backing: Will it stay controlled on a flat panel, or conform to a curved bumper?
- Interface: Does the tool require a firm backing, or would an interface pad improve contact?
- Extraction: Does the hole pattern match your sander and vacuum system?
A fine abrasive can still create a poor finish if the disc loads, overheats, or flexes unpredictably. Construction is part of the specification, not an afterthought.
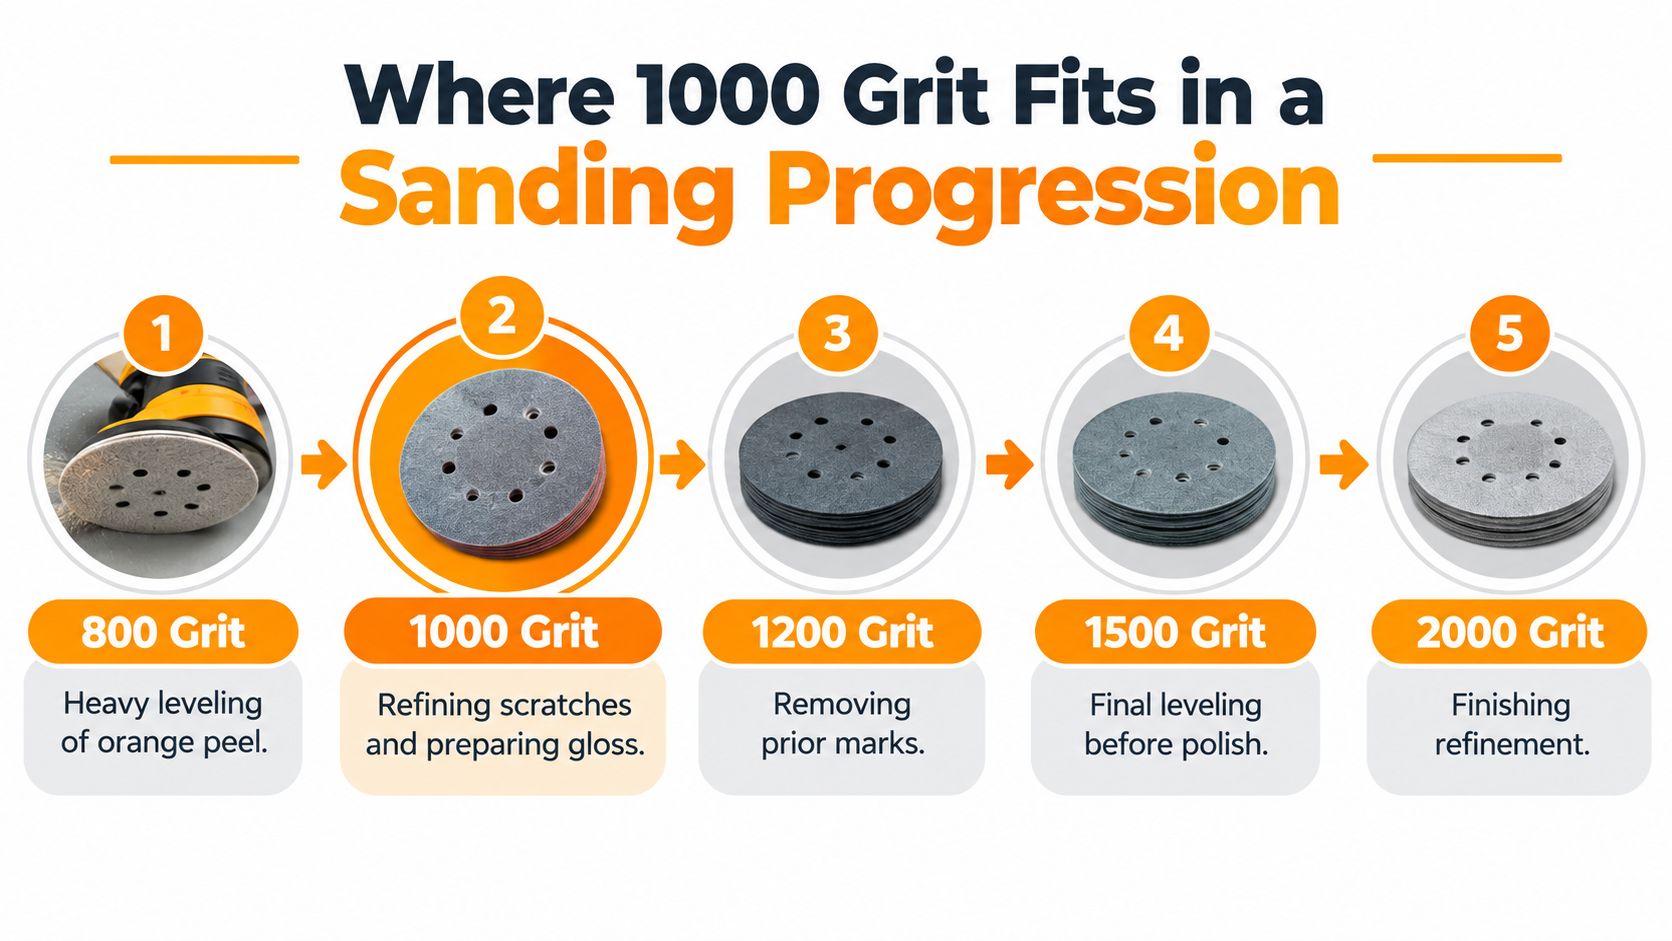
Where 1000 Grit Fits in a Sanding Progression
Sanding works as a progression, not a collection of isolated numbers. Each stage should remove the visible scratch pattern from the previous stage without creating a deeper problem for the next coating or polishing step.
Use it after leveling, not before
If you're correcting a pronounced defect, start with an abrasive capable of leveling that defect. A fine disc will skate over a high spot, polish the surrounding area, and tempt you to keep sanding longer than the clear coat can tolerate.
A sensible sequence is:
- Level the defect with a compatible coarser abrasive. Remove only the material needed to flatten the problem.
- Refine with P1000 where appropriate. Use it to reduce the previous scratch pattern and prepare a more uniform surface.
- Inspect before moving finer. If the earlier marks remain, another controlled refinement pass may be needed.
- Continue toward polishing with a finer abrasive. Don't ask compound to remove scratches that are deeper than your polishing system can reasonably handle.
The exact progression depends on whether you're preparing a repaired panel, refining a coating edge, or correcting cured clear coat. In refinishing, P1000 can be useful around repair transitions and feather-edged boundaries, where controlled finishing matters more than rapid stock removal. In clear-coat correction, it may be unnecessarily aggressive if the defect is minor or the film build is unknown.
Keep the next stage in view
A jump from coarse sanding directly to a fine finish often leaves hidden marks. They may disappear under slurry or compound temporarily, then become visible again after the surface is cleaned and inspected under strong lighting.
The same principle applies outside automotive work. If you're comparing abrasive sequencing across materials, these hardwood floor stripping techniques offer a useful reminder that the first abrasive has a removal job, while later abrasives refine the surface rather than replacing the first stage.
For a closer look at the role of the next fine stage, see this guide to 1200 grit sandpaper. The important lesson is simple: 1000 grit is a middle-stage refinement tool when the surface and coating can safely accept it.
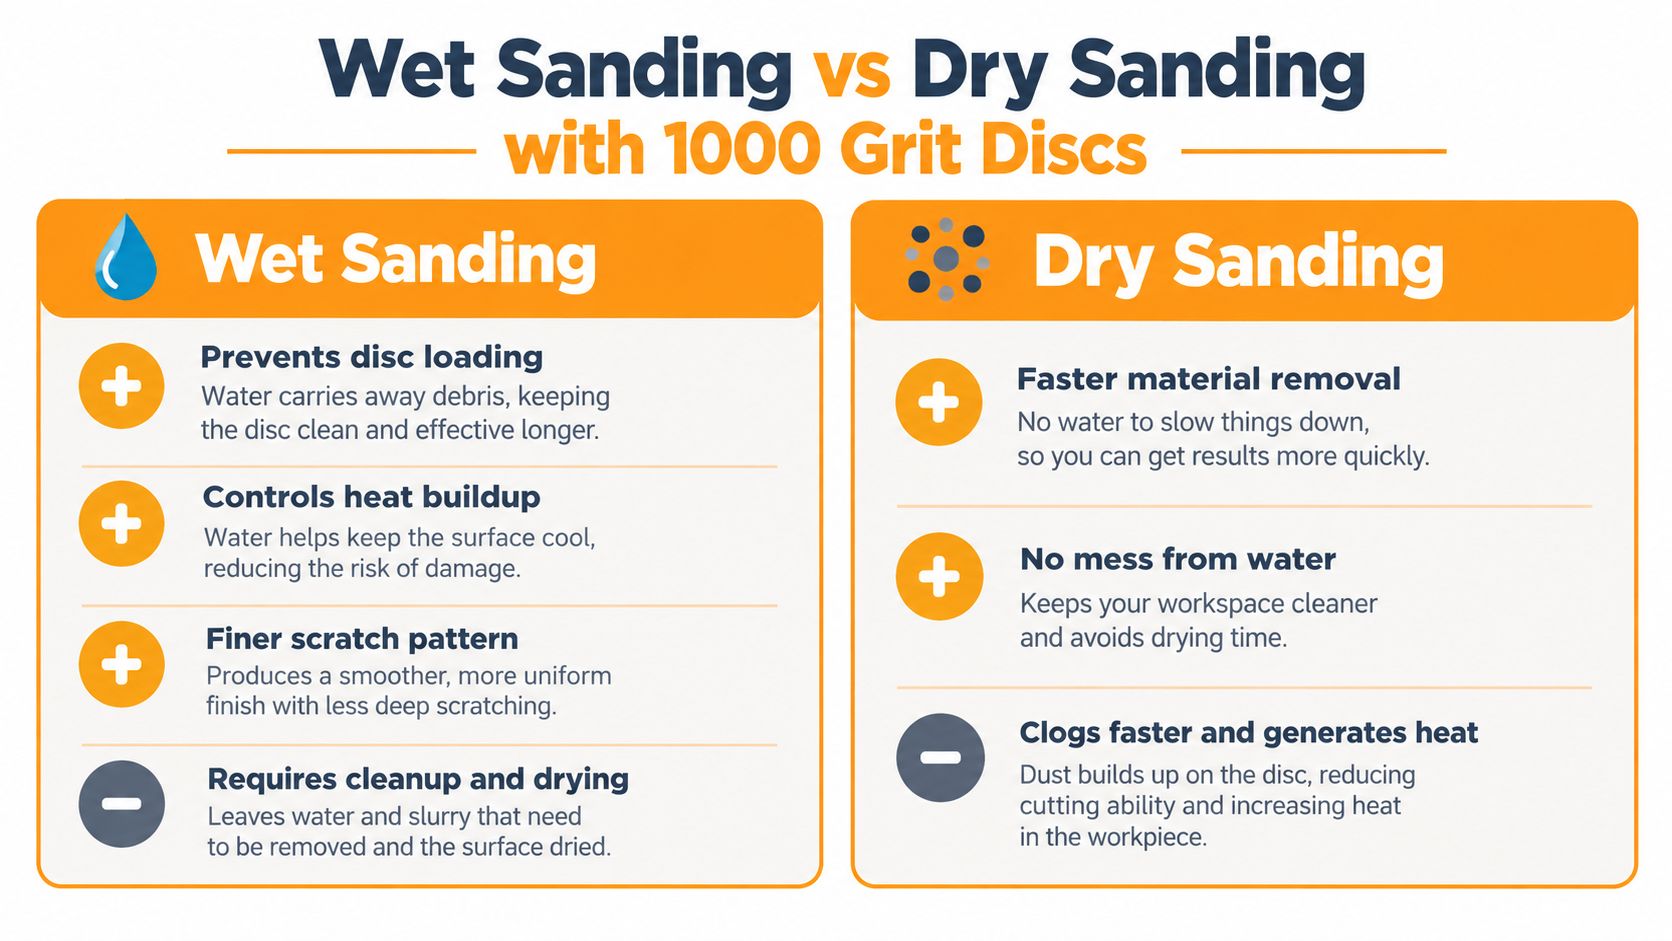
Wet Sanding vs Dry Sanding with 1000 Grit Discs
Wet sanding and dry sanding produce different working conditions, so neither method is automatically correct for every job. Choose according to the substrate, the defect, the visibility you need, and how you'll control debris.
When wet sanding makes sense
Water or suitable lubrication helps carry sanding debris away from the contact area. That can reduce loading, control heat, and support a more even scratch pattern during fine finishing. For paint and clear-coat correction, wet sanding is often chosen because the operator can work gently while keeping airborne dust lower during the sanding pass.
The surface must stay clean. A dirty sponge, contaminated water, or grit carried from an earlier stage can create random deep scratches that have nothing to do with the nominal disc grade. Use clean materials, rinse frequently, and wipe the panel carefully before judging the finish.
Wet sanding also hides the surface while you work. Water can make a panel appear uniformly smooth before it dries, so inspect the dry surface rather than trusting the appearance of the slurry.
When dry sanding is preferable
Dry sanding is often more practical for filler, primer, and preparation work where guide coat visibility and dust extraction help you read the panel. It's quicker to set up and avoids introducing water to materials or areas that need to remain dry.
The trade-off is loading and heat. A clogged disc cuts less efficiently, so users often press harder or stay in one place longer. That combination can produce uneven marks, especially near edges and raised body lines.
Stop and clean the disc when the cut changes. A disc that feels dull or sticky is giving you a process warning, not permission to apply more pressure.
Use the method that preserves control. Wet sanding isn't a substitute for checking the coating, and dry sanding isn't an excuse to ignore extraction or dust protection.
Tool Compatibility and Proper Sanding Technique
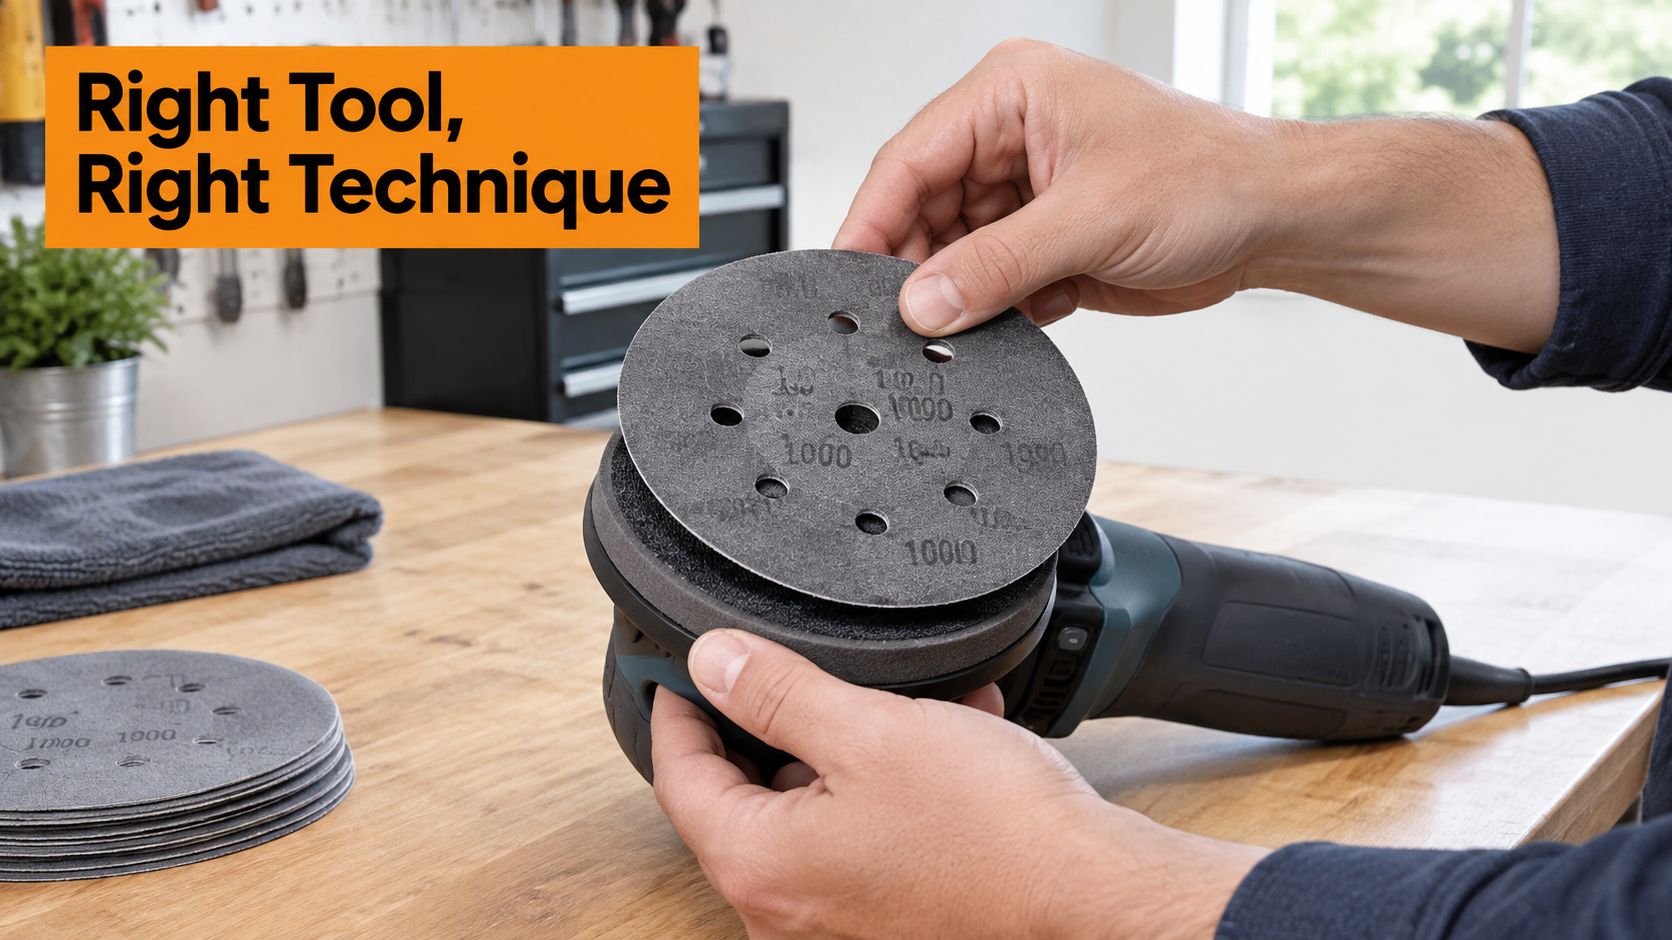
A 1000-grit disc can produce a clean result on a hand block, a dual-action machine, or an orbital sander, but the operator has to change technique for each tool. The abrasive only cuts where the tool maintains controlled contact.
Match the tool to the surface
A hand block gives you direct feedback and helps maintain a straight surface on flat panels. It's particularly useful when you need to protect an edge or refine a small transition without allowing a machine to concentrate pressure in one place.
A dual-action or orbital sander covers broad areas efficiently, but it can still cut through an edge quickly. Keep the pad flat, use moderate pressure, and let the abrasive work instead of forcing it into the coating. On curves, an interface pad can improve conformity, but it also reduces the firmness of the cut, so inspect often.
For machine choices and polishing equipment, this guide to electric polishers for cars provides useful context. A polisher designed for compound and pad work isn't automatically a sanding machine, so check the manufacturer's compatibility guidance before attaching an abrasive disc.
Build a repeatable pass
Start with a clean panel and a fresh disc. Mark or mentally divide the work area, then move in controlled overlapping passes rather than circling one defect until the surrounding surface drops.
Keep the disc moving. Short, steady passes distribute heat and cutting action, while stopping over one spot can deepen the scratch pattern or thin the coating locally. Pause frequently, wipe the surface, and inspect under strong angled light.
Watch for these signals:
- Loading: The abrasive face fills with paint, clear-coat residue, or dust, and the disc stops cutting evenly.
- Heat: The surface or disc becomes noticeably warm, especially when pressure increases.
- Pigtails: Random curved marks may indicate contamination, a clogged disc, poor extraction, or excessive pressure.
- Uneven dulling: A patchy appearance can show that the tool isn't staying flat or the operator is favoring one area.
Use appropriate respiratory and eye protection for dry sanding, and control dust with extraction rather than relying on technique alone. For broader paint-removal safety considerations, removing paint safely in New Zealand is a useful resource, particularly when the coating's composition or condition is uncertain.
Common Mistakes and When to Stop at 1000 Grit
The most expensive mistake is treating P1000 as universally safe. It's fine enough to look gentle in your hand, but the abrasive still removes coating. On a thin clear coat, an edge, or an older repair area, that removal can exceed the margin you have available.
Automotive guidance places P1000 to P1500 in clear-coat correction, while also warning that P1000 and P1200 can be too aggressive for many modern clear coats. When clear-coat thickness is unknown, P1500 to P2000 is a more conservative starting range, according to this automotive sandpaper guidance.
Don't confuse a smooth feel with a safe process
A panel can feel smooth while still carrying deep sanding marks. Water, slurry, polish residue, or a soft microfiber can disguise those marks, especially when you inspect under flat light.
Clean and dry the surface before deciding whether to stop. If the defect has been leveled and the scratch pattern is even, you may be ready to move finer or polish. If random deeper marks remain, refining with a suitable finer stage is usually safer than trying to force them out with compound.
Compound and polish can remove a prepared sanding pattern, but they're not a magic eraser for poor sequencing. This guide to compound for cars can help you choose the next correction stage, but the compound should follow the abrasive process, not compensate for an uncontrolled one.
Use a decision check before sanding
Ask these questions before putting a P1000 disc on the panel:
- What is the substrate? Clear coat, basecoat, primer, filler, and plastic don't offer the same working margin.
- What is the defect? A small nib needs local control. A broad texture problem needs a carefully tested leveling process.
- How thick is the coating? If you don't know, assume the edges and high spots are vulnerable.
- What comes next? If polishing follows, choose a scratch pattern your compound can realistically refine.
- Can you inspect the result? If contamination, wetness, or poor lighting hides the surface, stop and improve the inspection conditions.
Don't use a fine finishing disc to shape filler or remove heavy material. Don't use a coarse correction step on an unknown clear coat because a guide says it works. The correct grade is the one that removes the existing defect while preserving enough coating for the next stage.
Know when to stop at 1000
Stopping at 1000 can make sense when the surface is being prepared for a compatible coating system and the resulting scratch profile meets that system's requirements. It can also make sense as an intermediate refinement before moving to a finer abrasive or polishing stage.
Move finer when the panel is level but the scratches are too prominent for your intended finish. Avoid P1000 when the clear coat is visibly thin, the defect is minor, the area is close to an edge, or a test spot shows that a gentler grade is sufficient.
A successful sanding pass isn't measured by how much material you remove. It's measured by whether you removed the defect without creating a larger correction job.
Inspect each stage, keep the disc clean, protect edges, and let the coating system determine the final preparation requirements. A careful detailer earns speed by avoiding rework, not by choosing the most aggressive disc on the shelf.
SwiftJet offers a garden-hose foam gun for applying thick car-wash foam, with on/off trigger control and a microfiber wash mitt included, which can help clean sanding dust and polishing residue from a vehicle before inspection. Visit SwiftJet to review the foam gun and use it as part of a controlled wash, inspection, and correction workflow.
