

You wash the car, dry it carefully, step back, and then the sun tells the truth. The paint that looked clean in the shade suddenly shows swirl marks, light scratches around the door handles, and a few defects that wax never seemed to hide for long. That's usually the moment people start searching for a compound for cars and wondering whether they need one, or whether they're about to make the paint worse.
That hesitation is healthy.
A compound can fix real defects that a basic cleaner, wax, or mild polish won't touch. But it's also one of the easiest products to misuse, especially if you grab the most aggressive bottle on the shelf and treat every scratch like it needs maximum force. Paint correction isn't just about making the finish look better today. It's about improving the surface while preserving as much clear coat as possible for tomorrow.
Your Guide to Flawless Paint Restoration
A lot of people get to compounding the same way. They wash the car, maybe even clay it, and then notice the hood looks tired under direct light. The color seems flat. Fine swirls cover the top surfaces. There's a scratch near the trunk that catches your eye every time you walk up to the car. At that point, wax feels like a bandage. You want correction, not camouflage.
That's where compound enters the picture. It's a stronger paint-correction product used when the defect has enough depth that lighter products won't level it effectively. Used well, it can turn a dull, marked-up panel into something crisp and reflective. Used carelessly, it can leave haze, micro-marring, or remove more paint than necessary.
Practical rule: The right correction job starts with diagnosis, not product strength.
That matters because many beginners think the goal is to remove every mark they can see. A better goal is to improve the finish safely. Some defects can be corrected. Some can only be softened. Some are too deep to chase without taking an unsafe amount of clear coat off the panel.
Compounds also matter in the bigger automotive world, not just in garage detailing. The global market for PP compound in the automotive industry was valued at USD 19,136 billion in 2024 and is projected to reach USD 29,941 billion by 2033, with a projected 5.1% CAGR for 2025 to 2033 according to Straits Research's PP compound market analysis. That tells you compounding and compounded materials are part of a large, growing category in vehicle manufacturing and care.
If you also enjoy hands-on repair work and want to achieve pro auto body results, it helps to think like a body tech and a detailer at the same time. Clean first. Inspect carefully. Correct only what the paint can safely give you.
What Exactly Is an Automotive Compound
An automotive compound is basically liquid sandpaper with lubrication and control built in. That analogy helps because it keeps you honest. You're not feeding the paint some magic shine lotion. You're using abrasives to remove a very small amount of material so the surface becomes flatter and defects become less visible or disappear.
Industry guidance describes a compound for cars as an engineered abrasive system that combines abrasive particles with lubricants and binders so it can perform progressive material removal, leveling defects like oxidation and scratches before polishing refines the gloss. You can read that definition in this explanation of polishing compound design.

What it's made to do
Think about a scratch in clear coat like a shallow groove in a tabletop finish. You don't “fill” the groove with compound. You reduce the surrounding high spots until the surface is more level. That's why compound works so well on many swirls, oxidation marks, and moderate defects. It changes the surface.
A typical compound relies on a few basic parts:
- Abrasives that do the actual cutting
- Lubricants that help the pad move without dry friction
- Binders and additives that influence working time, feel, and finish quality
That mix is why one compound can cut fast but finish rough, while another cuts more gently and leaves a cleaner surface behind.
Why beginners get confused
The bottle may say “compound,” “cutting compound,” or “rubbing compound,” but the underlying idea is the same. It's a corrective product with more bite than a finishing polish. The exact level of cut depends on the formula, the pad, the machine, and the paint itself.
If you want to see how heavier-cutting products are commonly framed in practice, this guide on heavy cut compound use is a helpful supplement. The key lesson is still simple: stronger isn't automatically smarter.
Compound removes defects by removing material. If you forget that, you'll use too much of it too often.
That one idea explains almost every safety rule in paint correction. It's why detailers inspect first, test first, and only step up aggression when the paint needs it.
Compound vs Polish vs Glaze Explained
Many DIY detailers lose the plot when they hear three product names, see three shiny labels, and assume they all do roughly the same thing. They don't.
A compound corrects. A polish refines. A glaze hides.
Industry guidance defines a compound as the most aggressive type of abrasive product for automotive paint, using larger abrasive particles to remove deeper scratches and defects that polishes can't handle, as described in Dr. Beasley's discussion of polishing compounds.
The simplest way to think about them
If the paint were a piece of wood, compound would be your coarser sanding stage, polish would be your finer sanding and refining stage, and glaze would be the product that makes the wood look richer without changing the underlying shape much.
That's why a glaze can make paint look better for a while but won't fix a defect. It fills or masks. A compound does real correction, but that correction has a cost because it removes material.
Compound vs. Polish vs. Glaze Key Differences
| Product | Primary Purpose | Abrasiveness (Cut) | Best For |
|---|---|---|---|
| Compound | Remove deeper defects through correction | High | Swirl marks, oxidation, scratches, heavier paint defects |
| Polish | Refine the surface after correction and improve gloss | Moderate to low | Haze, light defects, finish refinement after compounding |
| Glaze | Fill minor imperfections and boost visual richness temporarily | Minimal or none | Show-car appearance, hiding light marring before protection |
When each one makes sense
Use a compound when the paint has defects you can clearly see and a mild polish won't make enough difference. Use a polish when the finish only needs refinement, or after a compound leaves slight haze. Use a glaze when correction isn't the goal and you just want a temporary visual improvement.
A common mistake is trying to force a polish to do a compound's job. You can spend a long time working a mild polish on a deeper scratch and get almost nowhere. The opposite mistake is even worse. Reaching for a compound on paint that only needed a light polish wastes clear coat.
If a defect is mild, match it with a mild approach. Correction should fit the problem, not your impatience.
That's the apprentice mindset worth keeping. Every product has a lane. The cleanest work comes from staying in the right one.
How to Prepare Your Car for Compounding
Compounding a dirty panel is like sanding with grit trapped under your paper. You won't just fail to fix the paint. You'll add fresh scratches while you work. That's why prep isn't a side task. It's part of the correction itself.
Before any pad touches paint, the surface should be washed thoroughly, rinsed well, and checked for bonded contamination. Road film, dust, traffic residue, and tiny embedded particles all interfere with correction.
Start with a safe wash
A foam pre-wash helps because it loosens and carries away grime before you make contact with a mitt. One hose-connected option is the SwiftJet Car Wash Foam Gun, which lays foam onto the panel so dirt can soften and release before hand washing.
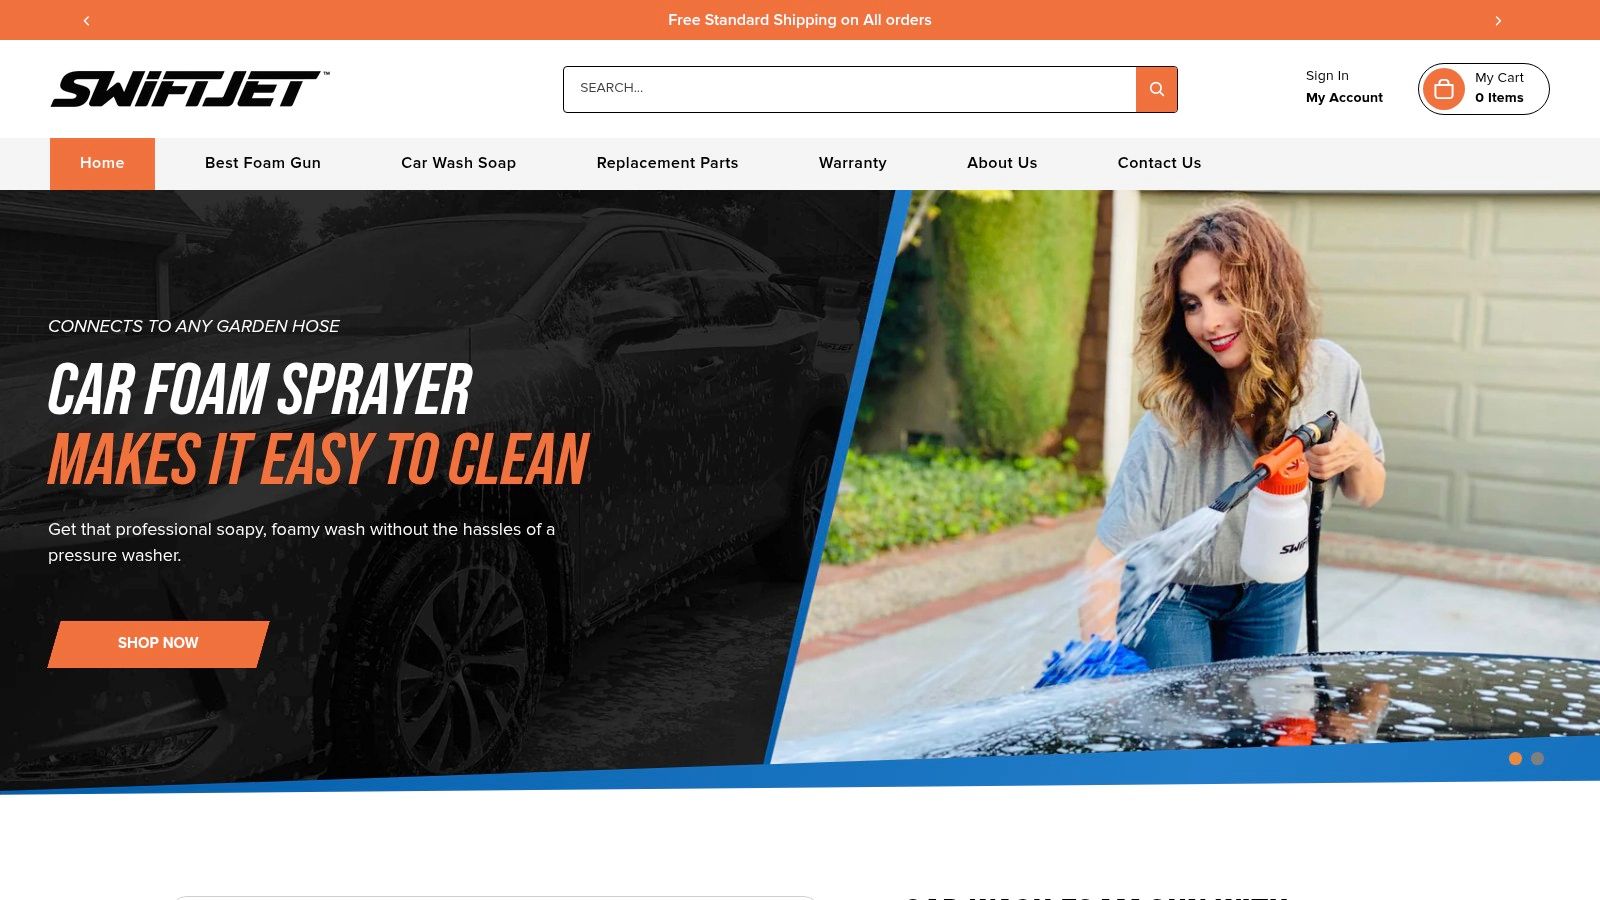
After the foam stage, use the two-bucket method. One bucket holds your wash solution. The other is for rinsing the mitt. That simple separation helps keep removed dirt from going right back onto the paint.
Get the surface truly clean
A proper prep routine usually looks like this:
- Pre-rinse first to knock off loose grime.
- Foam the vehicle and let the foam dwell briefly so it can loosen road film.
- Wash from the top down because lower panels hold the heaviest dirt.
- Rinse the mitt often in the rinse bucket.
- Dry carefully with clean microfiber towels.
- Clay the paint if needed when the surface feels rough after washing.
Run your fingertips lightly across the paint inside a thin plastic bag after drying. If it feels gritty, bonded contamination is still sitting on the surface. Clay removes that contamination so the compound works on paint, not on junk attached to paint.
A clean panel gives you honest feedback. You can see the defects more clearly, the pad stays cleaner, and the abrasives do their intended job instead of grinding debris into the finish.
A Step-by-Step Guide to Applying Compound
Once the car is clean and decontaminated, it's time to correct with discipline. Don't think in terms of “doing the whole car.” Think in terms of one small test section at a time. That habit saves paint.
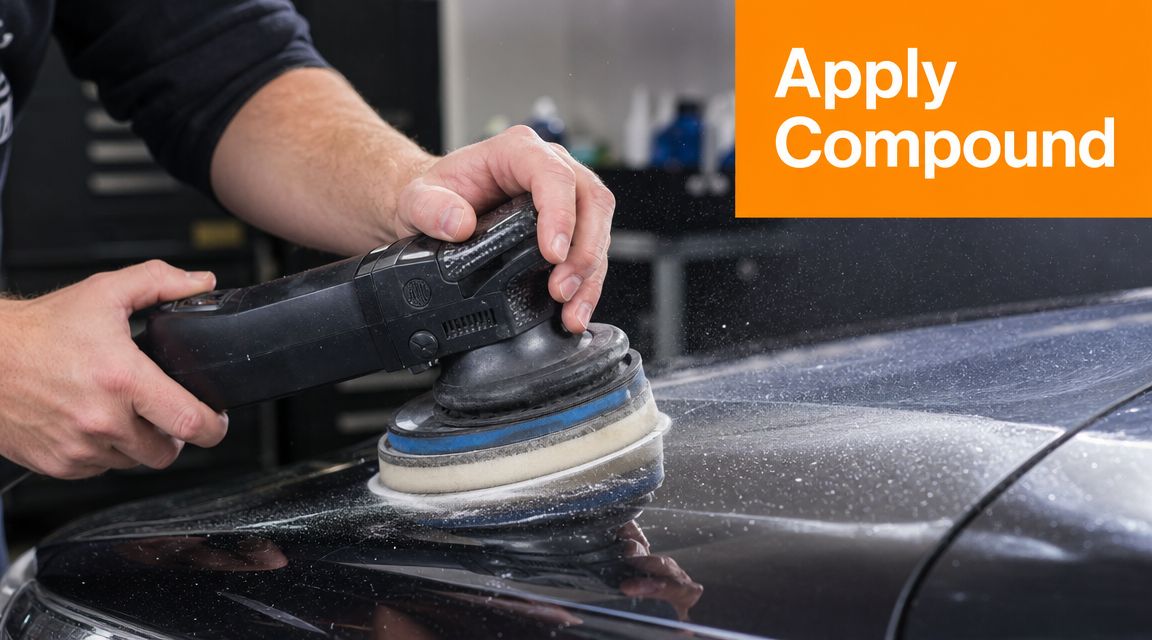
Heavy-cut compounds are meant for significant defects. Some technical data sheets even specify their use after sanding with 1200 to 2000 grit paper, which tells you they're not casual shine products but tools for serious correction. You can see that in this Transtar technical sheet for heavy-cut compound.
Pick the mildest combo that might work
For a beginner, the safest starting point is either hand application on a small isolated defect or a dual-action polisher with a conservative pad and compound pairing. If you're still choosing equipment, this guide to a car buffer polisher gives useful context on the tool side.
Don't start with the harshest pad and strongest compound unless the paint clearly demands it. Paint correction should escalate only when your test spot proves the lighter option isn't enough.
The test spot comes first
Choose a small area with representative defects. A section of the hood or upper door often works well. Then:
- Prime your pad lightly so it isn't dry on the paint.
- Use a small amount of product rather than soaking the pad.
- Work a tight section instead of chasing a large panel.
- Move in overlapping passes in a cross-hatch pattern for even correction.
- Wipe and inspect under strong light before deciding on your next move.
If that test spot removes enough of the defect and leaves a manageable finish, you've found your system. If it barely changes the paint, step up carefully. If it cuts well but leaves too much haze, you may need a better follow-up polish or a less aggressive pad.
Here's a visual overview of machine technique and control:
How to work the section
Keep the machine flat. Don't tilt onto the edge of the pad. Let the abrasives and machine do the work instead of leaning your body weight into the panel. Most beginners use too much product and too much pressure. Both make the job harder.
Watch the residue and the finish. When the product has been worked through its cycle, wipe it off with a clean microfiber towel and inspect. If the paint looks clearer but not perfect, that may already be the right stopping point. Better to leave a deeper defect softened than to chase it recklessly.
Common Compounding Mistakes to Avoid
The biggest mistake is mental, not mechanical. People assume more cut means better results. It often means unnecessary risk.
A compound for cars should be chosen like a surgeon chooses a tool, not like a demolition crew chooses a hammer. If the defect only needs a light correction, aggressive compounding is wasted paint.
Mistakes that create damage fast
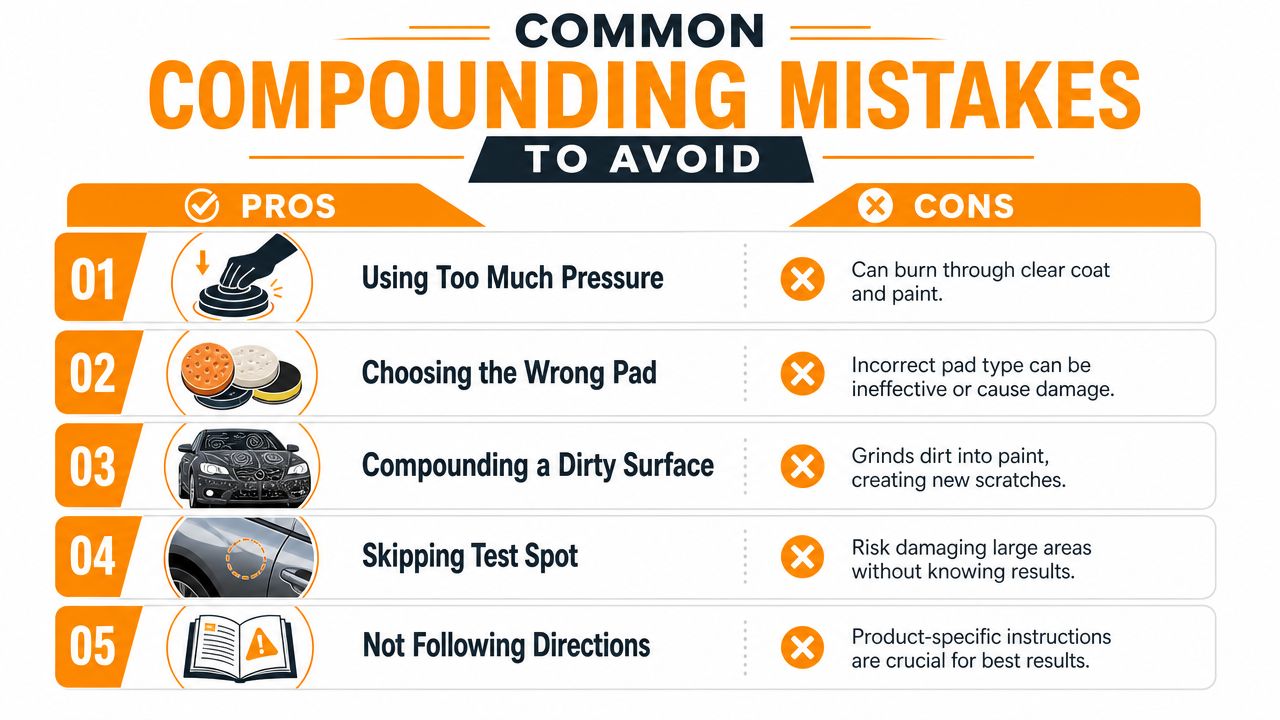
Professional guidance repeatedly stresses a critical risk: removing too much clear coat. It also emphasizes using a test spot and stepping up aggressiveness only if needed, while noting that many consumer guides don't explain when a paint thickness gauge becomes important. That perspective is laid out in Chemical Guys' guide to choosing the right compound or polish.
The common traps look like this:
- Starting too aggressive because the defect looks scary under bright light
- Working on a dirty surface and grinding contamination into the paint
- Skipping the test spot and discovering problems after a whole panel is hazed
- Using too much pressure which increases heat and reduces control
- Compounding in sun or on hot paint where the product behaves poorly
- Repeating passes blindly instead of stopping to inspect
The preservation mindset
Every time you compound, you remove some clear coat. That's the trade. If you treat correction like a one-time attempt to erase every mark, you can leave the paint with less long-term protection and fewer safe correction options later.
A better approach is to improve what's safely improvable. If you want more examples of how scratch-focused compounds are discussed in a DIY context, this piece on buffing compound for car scratches is worth reading alongside a preservation-first mindset.
Some scratches are too deep to remove safely. A skilled detailer knows when to stop.
That judgment is what separates careful correction from accidental damage.
Frequently Asked Questions About Car Compounds
Do you always have to polish after compounding
Usually, yes. Compound corrects defects, but it often leaves the surface less refined than you want for final gloss. A follow-up polish cleans up the finish, improves clarity, and gets the paint ready for protection.
Can you wax or seal directly over compound
You can, but it's usually not the best stopping point. If the compound leaves haze or a slightly dull finish, wax will only lock that look in. Polishing first usually gives a sharper, cleaner result.
Is rubbing compound different from cutting compound
In everyday use, those names often point to the same basic idea: an abrasive product designed for stronger correction than a polish. The exact cut depends on the formula, the pad, and the paint. Read the product's intended use instead of trusting the label alone.
Can you compound by hand
Yes, especially on small defects or tight areas. Hand application is slower and less consistent than machine correction on larger panels, but it can be a good learning method because it forces you to work patiently and inspect often.
Will compound remove every scratch
No. If the scratch is deeper than what's safe to level in the clear coat, compounding may only reduce how visible it is. That's still a good result. Safer improvement beats risky perfection.
What should you do right after compounding
Wipe the panel clean, inspect under good light, and decide whether it needs a refining polish. After polishing, apply your protection of choice so the corrected surface stays clean and easier to maintain.
If you're getting ready to correct paint, start with the wash stage and make it safe. A foam pre-wash tool like SwiftJet can help loosen grime before contact washing, which reduces the chance of adding fresh marring before you ever reach for a compound.
