
Giving your car a proper wash and wax isn't just about making it look good for a weekend drive—it's one of the most important things you can do to protect your investment. This isn't your average drive-thru car wash. We're talking about a deep clean that gets rid of all the abrasive gunk, followed by a protective layer of wax that acts as armor for your paint.
Why a Proper Wash and Wax is a Game Changer
Let's be real, there's a world of difference between a quick rinse with the hose and a dedicated wash and wax. One is a temporary fix, but the other is a genuine investment in your vehicle’s long-term health and appearance. It’s not just about getting that head-turning shine; it’s about creating a durable shield.
Think of that wax layer as sunscreen for your car. It’s on the job 24/7, fighting off all the environmental nastiness that’s trying to ruin your paint.
More Than Just a Shine
A solid wash and wax routine delivers benefits that go way beyond looks. It’s actively working to prevent permanent damage from some of your car's biggest enemies:
- UV Rays: The sun is relentless. Over time, it'll bleach your paint, leaving it looking faded, chalky, and old.
- Acid Rain: Those raindrops aren't as pure as they look. Pollutants in the air mix with rain and can actually etch permanent spots into your clear coat.
- Road Grime: Think about all the salt, tar, and industrial fallout that gets kicked up onto your car. That stuff can bond to your paint and eventually cause rust and corrosion.
This isn't just a weekend hobby for a few enthusiasts; it's serious business. The global car wash industry was valued at a staggering $31 billion back in 2022, which tells you just how much people care about protecting their rides.
Get Professional Results in Your Driveway
The good news is you don't need a professional detailer to get that showroom look. Modern tools have made it incredibly easy to get amazing results at home, turning what used to be a chore into a really satisfying project. Using something like a SwiftJet foam gun, for example, helps lift dirt away from the surface before you ever touch it with a mitt, which is key to a scratch-free wash.
A great wash sets the stage for a great wax. By removing all abrasive contaminants first, you ensure the wax bonds directly to the clear coat for maximum protection and longevity.
It's all about layers of protection. Just as a proper wax job shields your car's paint, applying car window security film can do the same for your glass, rounding out your vehicle's overall defense.
Assembling Your Detailing Toolkit
Getting that showroom-quality wash and wax at home really comes down to having the right gear. You might think any old bucket and sponge will work, but the tools you choose have a massive impact on the final result and, more importantly, the safety of your car's paint. This isn't just a shopping list; it's a system designed to protect your investment.
The absolute cornerstone of a safe wash is the two-bucket method. It's simple: one bucket for your soapy water, and a second one with clean water for rinsing your mitt. This is non-negotiable. It keeps you from dragging the dirt you just removed right back across your paint, which is the number one cause of those dreaded swirl marks.
The Essentials for Washing
Your soap matters just as much as your technique. Always, always grab a pH-neutral car wash soap. Household cleaners like dish soap are way too harsh; they'll strip off any wax you have and can dry out your rubber and plastic trim over time. A proper car soap is engineered to lift dirt gently without damaging the protective layers.
When it's time to apply that soap, a high-quality microfiber wash mitt is your best friend. Its plush fibers are designed to trap and lift dirt particles away from the surface. A traditional sponge, on the other hand, can just push that grit around, creating tiny scratches. It’s a small change that makes a world of difference.
And of course, the real game-changer in a modern car wash is a foam gun. The SwiftJet Car Wash Foam Gun is perfect for this, connecting directly to your garden hose. It covers your car in a thick layer of clinging foam that starts breaking down grime before you even touch the paint. This pre-soak lubricates the surface, allowing most of the dirt to slide right off with a rinse.
I see a lot of people thinking that more suds automatically means a better clean. The truth is, it's the quality of the foam—its ability to cling to the car and safely lift dirt—that gives you a truly scratch-free wash.
Tools for Decontamination and Protection
Once the car is clean, the next phase is making the paint perfectly smooth. A clay bar is the professional’s secret for this. You'll be amazed at what a wash leaves behind. The clay glides over the paint and pulls out embedded gunk like industrial fallout, rail dust, and tree sap, leaving behind a surface that feels like glass. This step is critical for getting your wax to bond properly.
Finally, it’s time to choose your protection. You've generally got two main paths:
- Carnauba Wax: This is the classic choice for enthusiasts. It delivers a deep, warm glow that really makes the paint pop.
- Ceramic or Synthetic Wax: These are the modern workhorses, known for incredible durability and a sharp, glassy shine. They typically outlast carnauba waxes by a long shot.
Your choice really depends on the look you're after and how much time you want to put into maintenance.
To make sure you've got everything covered, here's a quick checklist of the essentials.
Your Wash and Wax Toolkit Checklist
This table is your go-to reference to ensure you're fully equipped before you start. Having everything on hand makes the whole process smoother and more effective.
| Tool/Product | Primary Purpose | SwiftJet Pro Tip |
|---|---|---|
| Two 5-Gallon Buckets | Separates clean and dirty water to prevent scratches. | Use Grit Guards at the bottom of each bucket to trap dirt and keep your mitt clean. |
| pH-Neutral Car Soap | Safely cleans paint without stripping wax or sealant. | Look for a soap designed for foam guns to get the thickest, most effective foam. |
| SwiftJet Foam Gun | Pre-soaks the vehicle to loosen dirt safely. | Adjust the nozzle for a wider or narrower spray pattern depending on the panel you're foaming. |
| Microfiber Wash Mitt | Lifts and traps dirt away from the paint surface. | Have a separate, dedicated mitt for wheels to avoid cross-contamination with brake dust. |
| Clay Bar & Lubricant | Removes embedded contaminants for a smooth finish. | Work in small, 2x2 foot sections and knead the clay often to expose a clean surface. |
| Carnauba or Ceramic Wax | Protects the paint and enhances its shine. | Less is more! Apply a thin, even coat for easier removal and better results. |
| Microfiber Towels | Used for drying and buffing off wax residue. | Use a plush, high-GSM towel for drying and a shorter-pile towel for buffing wax. |
With these tools in your arsenal, you're well on your way to achieving a finish you can be proud of.
If you want to explore even more tools to take your detailing game to the next level, our comprehensive auto detailing equipment list is the perfect resource to build out your collection.
Getting That Perfect Foam Wash Down
Alright, with all your gear laid out, we get to the fun part: covering your car in a thick blanket of cleansing foam. This is where a tool like the SwiftJet foam gun really proves its worth. It turns a chore into something pretty satisfying and, more importantly, it's a super effective first step in the whole wash and wax process. The idea here is to let the foam do the hard work, loosening up all that caked-on grime before you even lay a wash mitt on the paint.
First thing's first, you've got to give the car a good pre-rinse. Just use your regular garden hose nozzle and spray the whole vehicle down, always starting at the top and working your way to the bottom. This quick pass knocks off the loose stuff—dust, pollen, light dirt—and preps the surface for the foam. Think of it as clearing the deck before the real deep cleaning begins.
Dialing In Your Suds
Getting that perfect, thick foam that looks like shaving cream isn't just for show. It has a real job to do. When foam is thick, it clings to the sides of your car longer, giving the soap the extra time it needs to break down and lift away stubborn road film.
For the SwiftJet canister, a great starting point is to pour in about 3-4 ounces of a good pH-neutral car soap. Then, just top it off with water. A little pro tip: gently swirl the canister to mix everything together. If you shake it, you'll have a foamy mess inside the bottle before you even connect it to the hose.
Once it's mixed, attach the canister to the SwiftJet, hook it up to your hose, and you're good to go. The dial on top is your control for the foam's thickness, letting you adjust the soap-to-water ratio as you work. I usually start it on a middle setting and tweak it until I get that rich, clinging foam I'm looking for.
This visual gives you a great overview of the entire process we're following, from the wash we're doing now to the final protective layer.
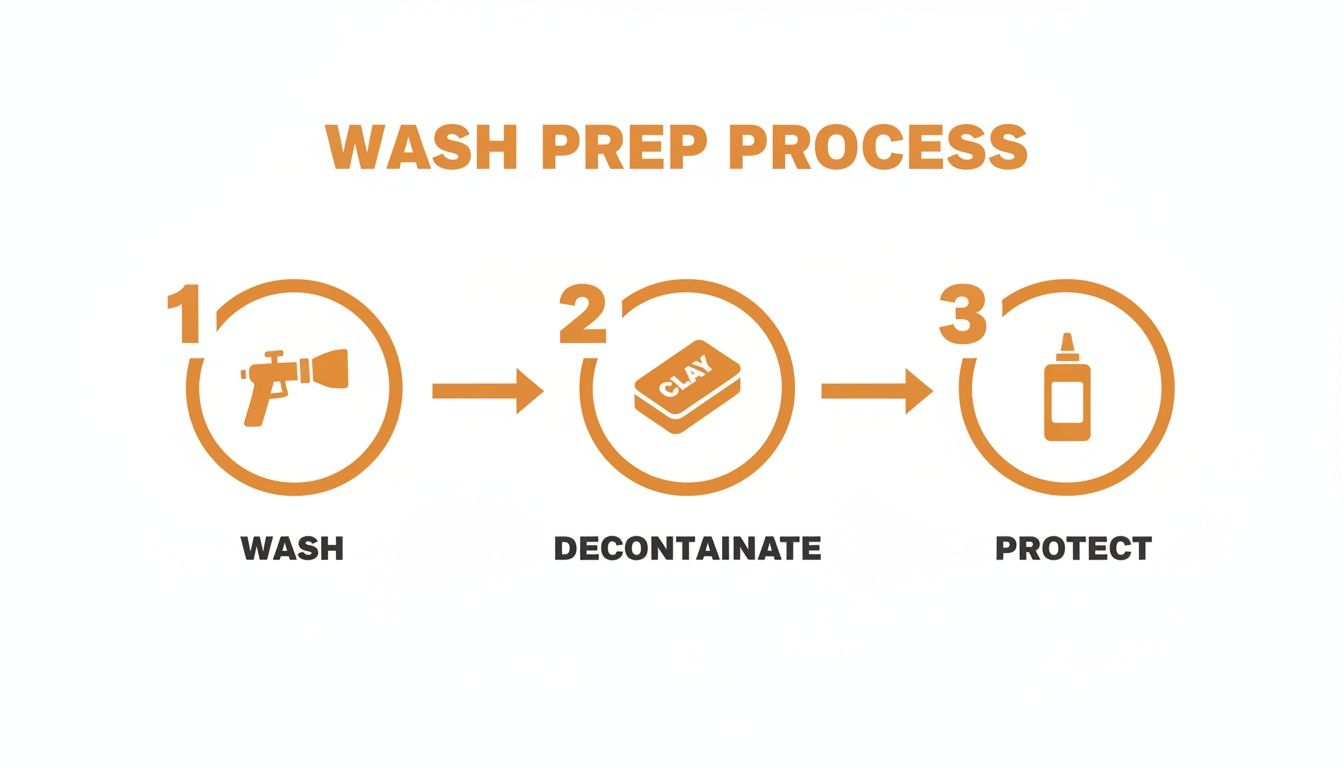
This simple "Wash, Decontaminate, Protect" sequence is the roadmap professional detailers use to get a flawless, long-lasting shine.
Mastering Your Application Technique
Here’s a detailer's secret that honestly makes a world of difference: always start foaming from the bottom of the car and work your way up. It might feel counterintuitive, but this prevents the foam from immediately running down in clean streaks. This method ensures you get even coverage and maximum dwell time where it's needed most—the grimy lower sections.
Try to work in sections, especially if you're washing in the sun or on a warm day. Foaming one side of the car at a time keeps the soap from drying on the paint, which is a one-way ticket to annoying water spots. Remember, the whole point of a foam wash is to add lubrication and make the process safer for your paint.
A good foam wash is all about patience. Let those suds sit and work their magic for a few minutes. You can literally see the dirt start to drip off the paint, which tells you the foam is doing its job. This means less scrubbing for you and a much lower chance of creating swirl marks.
With the US vehicle fleet expected to reach 300 million by 2030 and drivers clocking an astounding 3.3 trillion miles in 2024 alone, the sheer amount of road grime out there is mind-boggling. This is exactly why tools like the SwiftJet are becoming essential for a proper wash; they're built to tackle the heavy contamination that accumulates over all those miles.
The Two-Bucket Contact Wash
After the foam has had a few minutes to dwell, it's time for the contact wash. Grab your microfiber mitt, dunk it in your soap bucket, and start washing the car in gentle, straight lines. Always start from the top and work your way down. Try to avoid scrubbing in circles—that's how most of those pesky micro-scratches and swirl marks get there in the first place.
For the best and safest results, wash the car in this order:
- Roof, Hood, and Trunk: Start with the cleanest, flattest surfaces.
- Upper Door Panels and Windows: Work your way around the car's beltline.
- Lower Doors, Bumpers, and Rocker Panels: Save the dirtiest parts for last.
Don't forget to rinse your mitt in the clean water bucket before putting it back in the soap bucket. This is the heart of the two-bucket method, and it stops you from dragging grit all over your car's finish. As soon as you finish washing a section, rinse it thoroughly before the soap has any chance to dry.
For an even deeper dive, be sure to check out our top tips for a sparkling foaming car wash.
Mastering the Art of Applying Wax
Alright, your car is perfectly clean and bone dry. Now comes the best part of any detail: laying down a fresh coat of wax. This is where all your hard work pays off, locking in that shine with a tough layer of protection that makes your paint look a mile deep. This isn't about muscle; it's about technique, patience, and a light touch.
First things first, check your surroundings. You absolutely have to work on a cool surface, so pull your car into the garage or wait for a shady spot. Trying to wax hot paint in direct sun is a classic mistake. The wax will bake right onto the surface, making it a nightmare to buff off and leaving behind a streaky mess. You need to give the wax time to bond with the clear coat, and that only happens in a cool, controlled environment.
The Panel-by-Panel Approach
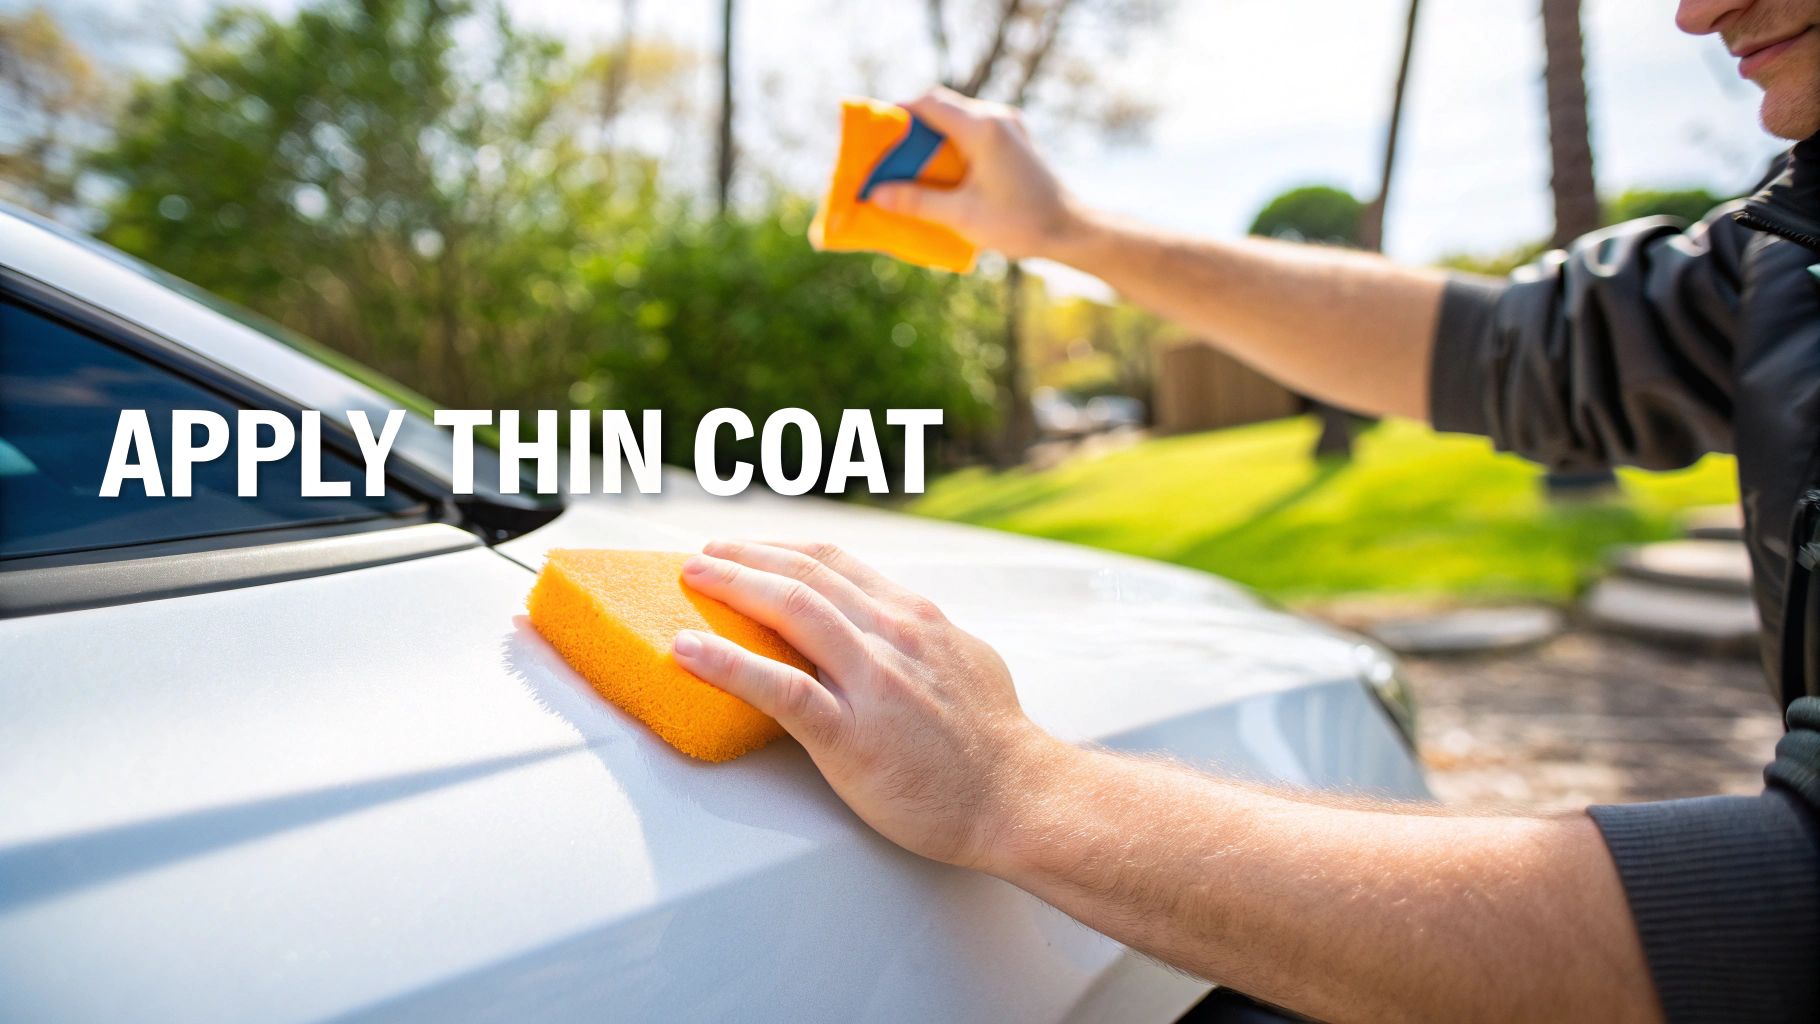
Don't try to be a hero and wax the entire car in one go. The real secret to a perfect finish is breaking the job down into small, manageable sections—think 2x2 feet at a time. This method ensures you can get the wax on thin and even, then get it off at just the right moment before it has a chance to over-dry.
Grab a clean foam applicator pad and put a few pea-sized dabs of wax on it. Here's the golden rule I tell everyone: less is more. Slathering on a thick coat doesn't add more protection. All it does is make the wax incredibly difficult to remove and wastes a ton of product. You’re aiming for a thin, hazy layer that’s almost transparent.
Gently work the wax into the paint. Some people swear by small, overlapping circles, others prefer straight lines. Honestly, the pattern doesn't matter as much as your consistency.
A proper wax application should feel effortless. If you find yourself scrubbing or leaning into the applicator, you’re definitely using too much wax. Let the product do the work for you.
One of the biggest headaches is getting that chalky white wax residue on black plastic trim. To avoid this, you can either be meticulous around the edges or do what the pros do: take a few minutes to tape off the trim with painter's tape. This little prep step saves so much cleanup time and makes the final result look incredibly sharp.
For a deeper dive, our complete guide on how to properly wax a car is packed with more professional tips and tricks.
Knowing When to Buff
So, how long do you wait before wiping it off? This is where the simple "swipe test" is your best friend. Let the wax sit for a few minutes (always check the bottle for the manufacturer's recommended time), then gently swipe your finger across a small spot.
- If it streaks or smears, the wax is still wet. Give it a few more minutes to cure.
- If it swipes perfectly clean, leaving no residue, it has hazed over and is ready to be buffed off.
This test is foolproof. It takes all the guesswork out of the process and ensures you're not fighting with wax that’s too wet or too dry.
The Final Buff for Maximum Gloss
Once the wax has hazed, it's time for the big reveal. Grab a clean, plush microfiber towel and fold it into quarters. Using light pressure, gently buff away the hazy residue. As one side of the towel gets loaded up with wax, just flip it over to a fresh, clean side. This keeps you from accidentally rubbing dried wax back into the paint.
My personal trick is to use a two-towel method. I use the first towel for the initial removal, then I grab a second, completely clean towel for a final, light pass. This second buff picks up any last bit of residue and really brings out a slick, deep shine.
Now, take a step back and look at what you've accomplished. That mirror-like finish is protected and ready to turn heads—well worth the effort.
Common Wash and Wax Mistakes to Avoid
It’s one thing to have all the right gear, but it's another thing to use it correctly. I've seen countless people invest in top-tier products only to make a few simple mistakes that completely undermine their efforts. Getting that flawless, professional-looking finish is often less about what you do, and more about what you don't do.
Let's walk through some of the most common blunders I see people make, so you can sidestep them and get the incredible results you're after.
By far, the biggest mistake is washing your car in direct sunlight or when the paint is hot to the touch. It seems convenient, but a hot surface is your worst enemy. It causes soap and water to evaporate in seconds, leaving behind nasty mineral deposits—what we call water spots. These aren't just ugly; they can actually etch into your clear coat and require a ton of polishing to fix.
Choosing the Wrong Cleaner
I get it, you're in a pinch and the dish soap is right there under the sink. But please, don't do it. This is probably the most destructive shortcut you can take. Dish soaps are loaded with harsh degreasers made to strip caked-on food from last night's dinner. When you use that on your car, it does the exact same thing: it strips away every last bit of wax or sealant, leaving your paint completely exposed.
Always, and I mean always, use a dedicated, pH-neutral car wash soap. It’s designed to gently lift dirt and grime without harming the protective layers you've worked so hard to build up. It’s a simple change that makes a world of difference for the life of your wax.
Mishandling Your Wash Mitt
We’ve all been there. You're scrubbing away, and suddenly your wash mitt slips and hits the ground. Your first instinct might be to just pick it up and keep going. That’s the absolute worst thing you can do. A dropped mitt is now a sandpaper-like weapon, covered in tiny bits of grit and pebbles from your driveway that will leave a trail of scratches all over your paint.
Pro Tip: If you drop your mitt, it's out of the game until it’s been meticulously cleaned. The best move? Have a second, clean mitt ready to go. Spending a few extra dollars on a backup is a tiny price to pay to avoid a massive paint correction bill.
This is the kind of detail that separates a truly great DIY job from a mediocre one. It's no surprise that while nearly 80% of US drivers now use professional car washes, there's a growing appreciation for getting it right at home with tools like the SwiftJet foam gun. By avoiding these simple slip-ups, your home results can easily rival the pros. For more on this trend, check out these professional car wash market insights.
Over-Applying Your Wax
When it comes to wax, less is truly more. A common rookie mistake is to slather it on thick, thinking a heavier coat means better protection. All that really does is make it a nightmare to buff off. You end up with a streaky, hazy mess, and most of that expensive product just gets wiped away as excess.
You're aiming for a thin, even layer. The goal is to apply just enough to create a light haze that’s almost see-through. This allows the wax to cure correctly and makes buffing it off feel practically effortless, leaving you with nothing but a deep, consistent shine.
Answering Your Top Wash and Wax Questions
Alright, you've got the basics down, but there are always a few lingering questions that pop up when you're out in the driveway, hose in hand. Getting these sorted is what separates a good wash from a great one. Let's tackle some of the most common things people ask.
Think of this as the final buff and polish for your car care knowledge—those little details that make all the difference.
How Often Should I Really Be Washing and Waxing My Car?
This is probably the number one question I get. For washing, a good rhythm to get into is about every two weeks. That's frequent enough to stop things like bird droppings, bug splatter, and general road grime from really baking onto your paint and causing damage. Consistency is your best defense.
When it comes to waxing, you can be a bit more strategic. Aim for a fresh coat of wax every three months. This keeps that protective, water-beading layer strong.
Here’s a pro tip I always share: let the water tell you when it's time to wax. After a wash, spray some water on the hood. If you see tight, distinct little beads, your wax is still doing its job. If the water spreads out into big, flat puddles (what we call "sheeting"), that’s your car telling you it’s time for a new coat.
Of course, if your car lives outside in the blazing sun or gets hammered with road salt in the winter, you'll probably want to wax it a bit more often to keep that protective shield up.
Can I Just Use My Regular Car Soap with the SwiftJet Foam Gun?
Yep, you absolutely can. The SwiftJet Foam Gun is built to work with pretty much any liquid car wash soap you can find. That’s one of the best things about it—no need to go hunting for a specific, hard-to-find formula.
However, if you're chasing that super thick, shaving-cream-like foam that clings to the car (and let's be honest, who isn't?), you'll get the best results with a soap made specifically for foam cannons. These soaps are more concentrated and designed to create a much richer lather, which really lets the foam gun shine. Just be sure to check the bottle for the right dilution ratio.
What's the Real Difference Between a Wax and a Paint Sealant?
Great question. It all boils down to what they're made of and how long they last.
Here’s a simple way to think about it:
- Waxes: These are usually made from natural ingredients, like the famous carnauba wax. They're loved for the deep, warm, wet-look shine they produce. The trade-off is that they typically only last a few months.
- Paint Sealants: These are completely synthetic. They're engineered polymers that actually form a chemical bond with your car’s paint. This creates a much tougher, more durable shield that can last for six months or even longer, giving off a sharp, glassy shine.
Honestly, there’s no right or wrong answer here. It’s all about personal preference. Do you love the classic glow of a carnauba wax and don't mind applying it more often? Or do you prefer the long-lasting, high-tech protection and slick finish of a sealant?
Ready to get that perfect, swirl-free shine with that incredibly satisfying foam? The SwiftJet Car Wash Foam Gun hooks up to any garden hose to make washing your car faster, safer, and a whole lot more fun. Get your SwiftJet today and completely change your car wash game!