
If you're serious about keeping your car's paint looking brand new, the two bucket system car wash is non-negotiable. It’s the single most effective way to prevent those frustrating scratches and swirl marks that pop up after a wash. At its core, the method is about separating your clean, soapy water from your dirty rinse water, so you’re never dragging grit back across your paint. This isn't some secret technique; it's what pros rely on for a flawless finish.
Why the Two Bucket System Is a Game-Changer for Your Car's Paint
Have you ever spent a Saturday afternoon washing your car, only to step back and see a fresh web of fine scratches under the sun? That’s the single-bucket method in action.
When you dunk a dirty wash mitt back into your only bucket of suds, you’re contaminating the entire thing. You've just turned your soft wash mitt into something closer to fine-grit sandpaper, grinding all that road grime right back into your car's delicate clear coat. It's a frustrating cycle.
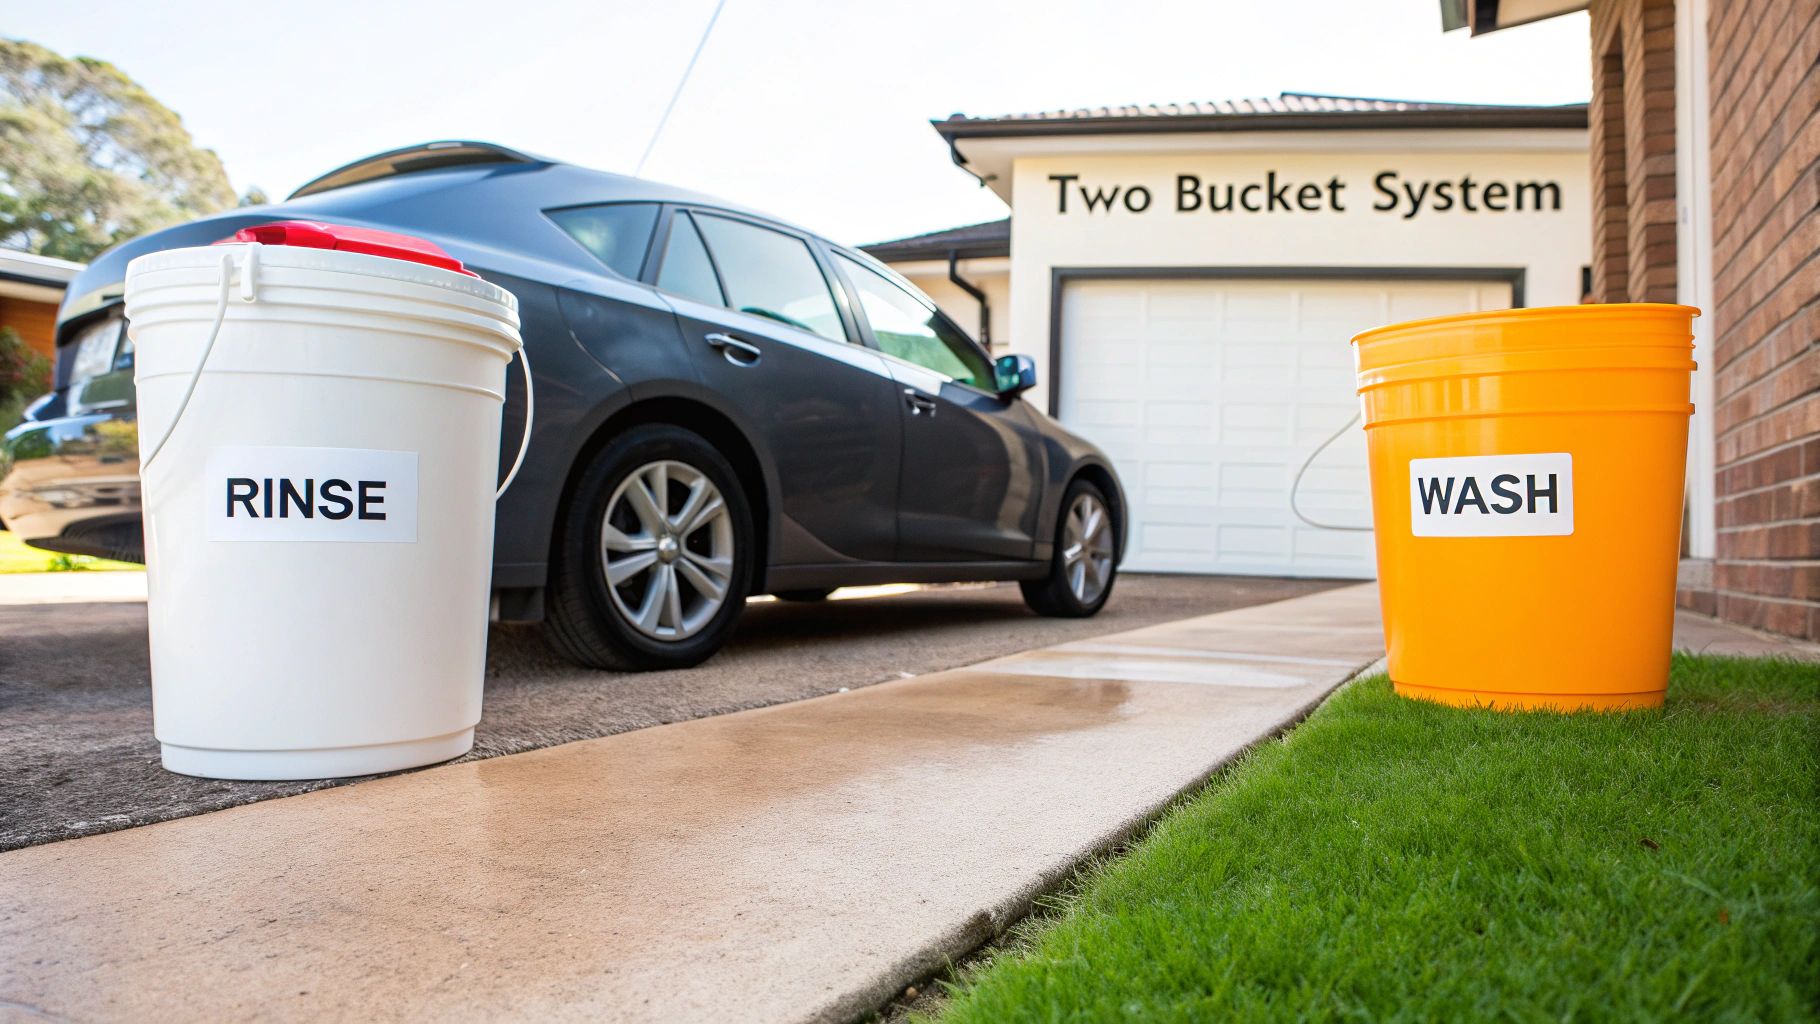
The two-bucket method is the time-tested solution to this exact problem. The idea couldn't be simpler: one bucket for your car shampoo, and a second bucket with plain water just for rinsing your mitt. This simple separation is what makes all the difference.
To make it even clearer, let's look at a quick comparison of the two approaches.
Single Bucket vs Two Bucket Method At a Glance
The table below breaks down the fundamental differences and highlights why switching is a no-brainer for protecting your investment.
| Feature | Single Bucket Method | Two Bucket System |
|---|---|---|
| Water Contamination | High. Dirt from the car goes directly into the soap. | Low. Dirt is isolated in a separate rinse bucket. |
| Risk of Scratches | Very High. Abrasive particles are reapplied to the paint. | Minimal. The wash mitt is cleaned before touching the soap again. |
| Paint Finish | Prone to swirl marks and fine scratches over time. | Preserves a glossy, swirl-free finish. |
| Equipment | 1 bucket, 1 mitt. | 2 buckets (ideally with grit guards), 1 mitt. |
| Professional Use | Rarely used by professional detailers. | The industry standard for a safe, high-quality wash. |
As you can see, the two-bucket system is built from the ground up to protect your paint, not just clean it.
The Core Principle of a Safe Wash
This method forces you into a much safer workflow. You wash a single panel—say, a door or a fender—and then, instead of going straight back for more soap, you rinse the mitt thoroughly in your dedicated rinse bucket.
This is where the magic happens. The grime and grit release from the mitt and sink to the bottom (especially if you have a grit guard in there, which I highly recommend). Only then, with a clean mitt, do you dip back into the soapy water to continue.
This method physically traps harmful contaminants in the rinse bucket. The murky water you're left with is visual proof of all the damaging debris that didn't go back onto your car's finish.
Bucket Size Matters More Than You Think
For the system to really work, you need enough water to properly dilute all that grime you're rinsing off.
From my experience, you want buckets that hold around 15 to 16 liters each. This volume is crucial for giving the dirt a chance to settle away from your mitt and keeping the concentration of grit low. If you try to do this with tiny buckets, you’ll just end up with two buckets of dirty water, defeating the whole purpose.
Protecting your car's paint is especially important in harsh climates. For example, learning how to go about preparing your car for the Arizona summer heat shows just how much environmental factors can impact your vehicle. Adopting smarter washing habits is a huge part of that long-term care.
To get even deeper into the setup and technique, don't forget to check out our complete guide on the 2 bucket car wash.
Gathering the Right Tools for the Job
To really pull off a proper two-bucket car wash, you've got to start with the right gear. Think of it like a chef prepping their station—every tool has a specific purpose, and in our case, that purpose is protecting your car's paint from scratches. This isn't just about buying a bunch of stuff; it's about building a system where every piece works together.

The heart of this method, of course, is two solid buckets. You’ll want to grab ones that hold at least 15-20 liters (around 4-5 gallons) each. That larger size is key because it helps dilute all the dirt you're pulling off the car, keeping your rinse water from turning into a muddy mess halfway through the job.
This detail-oriented approach to washing isn't new. People have been hand-washing cars for over 100 years, but the two-bucket system really took off as our understanding of paint science grew. The fact that it's still the gold standard today, even with all the automated options out there, says a lot. It’s a core practice in a specialized car care market now worth over $10 billion globally. You can find some fascinating history on how car wash tech has changed over at Surfnshine.com.
The Essential Gear List
To get this right, you need a few more things than just the buckets. I consider every item on this list non-negotiable if you want a wash that's both safe and truly effective.
- Two Grit Guards: These simple plastic inserts sit at the bottom of each bucket, and honestly, they're the real heroes here. They create a barrier that traps grit and dirt at the bottom, so your wash mitt can't dredge it back up and drag it all over your paint.
- A Plush Wash Mitt: Please, throw away the old sponges and rags. A high-quality microfiber or lambswool wash mitt is what you need. Their deep, soft fibers are designed to lift dirt particles up and away from the surface instead of just pushing them around.
- pH-Neutral Car Shampoo: Never, ever use dish soap. A proper, pH-neutral car shampoo creates the slick suds you need for lubrication, letting the mitt glide smoothly. More importantly, it cleans without stripping off any wax or sealant you've already applied.
Taking Your Wash to the Next Level
Once you have the basics down, a couple of extra tools can make a huge difference, elevating your results from just "clean" to "professional." While not strictly required for the two-bucket method, they make the whole process safer and way more efficient.
This is where a foam cannon or foam gun, like the SwiftJet, comes into play. Blasting the car with a thick layer of foam and letting it sit for a few minutes gives the soap time to break down and lift the worst of the grime. This pre-wash step means you're dealing with far less dirt when you finally make contact with your mitt.
The less dirt there is on the car when you start washing by hand, the lower your risk of creating those dreaded swirl marks. A good pre-wash is your best line of defense.
Finally, don't forget about drying. A super-absorbent microfiber drying towel is a must-have for a streak-free, lint-free finish. And for the wheels? They're covered in nasty, abrasive brake dust, so always use a separate set of brushes and a dedicated mitt for them. The last thing you want is to cross-contaminate your tools and drag that grit onto your paint.
Your Guide to a Perfect Two-Bucket Wash
Alright, you've got your gear lined up. Now it's time to put it all together and give your car the wash it deserves. This is where technique meets tools to get that flawless, scratch-free shine. We'll go through the whole dance, from setup to final rinse, making sure every move protects your paint.
First things first, let's get the buckets sorted. This simple setup is the foundation of the whole process. Grab your two buckets—it helps to label them "Wash" and "Rinse" so you don't get mixed up in the moment. Drop a grit guard into the bottom of each one. Seriously, don't skip this part; it's the key to trapping all the nasty stuff you're about to pull off your paint.
Fill your "Rinse" bucket with nothing but clean, plain water. For the "Wash" bucket, pour in the right amount of your favorite pH-neutral car shampoo. Then, hit it with a strong jet of water to whip up a nice, thick head of suds. Now you're officially ready to go.
The Pre-Wash: Getting Rid of the Heavy Stuff
Before a wash mitt even thinks about touching your paint, you need to knock off the loose grime. This is the pre-wash, and it's a game-changer.
Use your hose or pressure washer to give the car a solid rinse, blasting away all the loose dirt, dust, and road grit. Don't be shy here. Really focus on the lower parts of the car—the rocker panels, bumpers, and behind the wheels—where most of the gunk collects. This step gets rid of the big, chunky particles that can do the most damage.
Next, it’s time for the SwiftJet foam gun to work its magic. Covering your car in a thick blanket of foam and letting it sit for a few minutes does more than just look cool. The foam gets to work softening, lifting, and encapsulating the more stubborn road film, making it easier to wash away safely. You're basically letting the soap do the heavy lifting so you don’t have to.
This quick visual breaks down the core idea of setting up and using your two buckets.
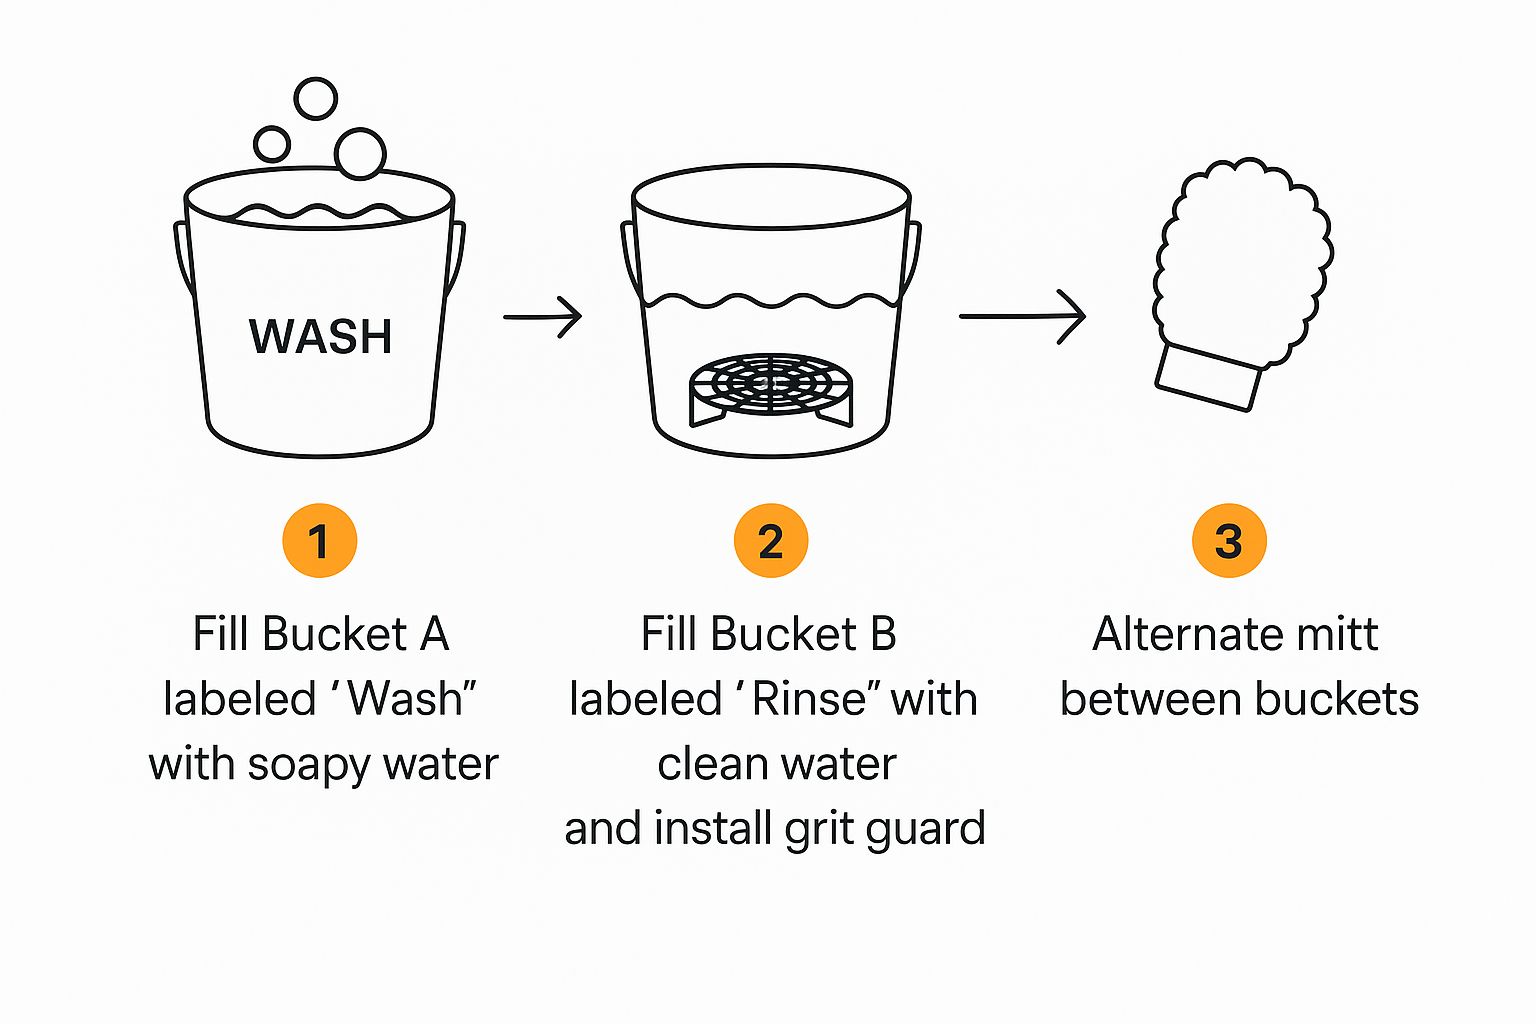
It perfectly illustrates that all-important cycle: clean the mitt in the rinse bucket before you ever load it back up with fresh soap. That's the heart and soul of this method.
The Main Event: The Washing Process
Now for the part you've been waiting for. The golden rule is to always start washing from the top of the car and work your way down. It just makes sense—the roof, hood, and trunk are usually the cleanest parts. Starting there means you aren't dragging the filth from the lower panels all over the car.
Tackle the car in small, manageable sections. Think one panel at a time, like a single door or half the hood. This keeps the soap from drying on the paint before you have a chance to rinse it off, which can lead to nasty water spots.
The rhythm is everything. Dip your mitt in the soapy "Wash" bucket, gently glide it over a single panel in straight lines, and then immediately dunk it into the "Rinse" bucket.
In the rinse bucket, scrub the mitt against the grit guard. You'll actually see the grit and dirt fall out of the fibers and sink to the bottom. This is that magic moment where you stop scratches before they happen. Once your mitt is totally clean, and only then, you can go back to the "Wash" bucket for a fresh load of suds and move on to the next section.
Key Washing Techniques to Remember
How you wash is just as critical as your bucket setup. As you move around the car, keep these tips front and center:
- Work Panel by Panel: This prevents soap from drying out and helps you give each area your full attention. For a big panel like the roof or hood, just split it in half mentally.
- Use Straight-Line Motions: This one is huge. Washing in circles is the number one cause of swirl marks in your paint. Gentle, overlapping, back-and-forth passes are infinitely safer.
- Let the Mitt and Soap Do the Work: You don't need to put a lot of muscle into it. A good quality wash mitt and a slick, sudsy car shampoo are designed to lift dirt with minimal pressure. Just let the mitt glide.
Keep repeating this disciplined cycle—wash, rinse, reload, repeat—until the whole car is sparkling. The final move is a thorough rinse with clean water, washing away every last bit of soap. What you're left with is a surface that isn't just clean, it's been properly cared for.
Level Up Your Wash Game with These Pro Tips
Once you've got the basic rhythm of the two-bucket system car wash down, you can start layering in some small refinements that, trust me, make a massive difference in the final result. These are the little details that separate a decent wash from a professional-grade detail, ensuring every bit of your effort shows in that flawless, mirror-like finish.
The golden rule is always to minimize contact and prevent contamination. A great way to build on this is to adopt a two-mitt approach. It's as simple as it sounds: keep one wash mitt just for the upper, less grimy parts of your car—think roof, windows, hood, and trunk. Then, grab a second, completely separate mitt for the lower, dirtier areas like the rocker panels, bumpers, and the bottom of the doors.
This simple change takes your contamination control to the next level. All that nasty road tar, caked-on mud, and brake dust that clings to the lower parts of your car will never get a chance to scratch up the most visible panels on top.
Work Smarter, Not Harder
Beyond your tools and technique, your environment and timing are a huge part of the equation. You could have the best method in the world, but washing your car under the blazing midday sun is just asking for trouble.
The intense heat makes your soap and water evaporate in seconds. This leaves behind stubborn water spots and soap scum that can be a real pain to get off and can even etch into your paint. I always tell people to wash in the shade if possible, or wait for the cooler parts of the day—early morning or late afternoon are perfect. This gives you the time you need to work properly without racing against the sun.
"Washing in the shade isn't just about staying comfortable; it's about maintaining control. It lets your car shampoo work as intended by staying wet on the surface, which is critical for lubrication and preventing spots."
Making this one adjustment can dramatically improve the clarity and gloss of your finish. It makes the whole job less stressful and way more effective.
Perfecting Your Pre-Wash and Drying Game
A truly great finish starts before you ever lay a mitt on the paint and isn't over until the last drop of water is gone. Fine-tuning these bookend stages is critical. For the pre-wash, your best friend is a foam gun. It lays down a thick blanket of suds that starts breaking down dirt and grime before you begin the contact wash. If you want a full rundown, you can learn more about how to use a foam gun and see just how much it helps.
Now for drying. The goal here is to get every last drop of water off the paint without putting new scratches into it. Here are a few advanced methods I swear by:
- The Blotting Method: Instead of dragging a towel across the paint, lay a large, plush microfiber drying towel over a panel and gently pat or blot the area. This technique is incredibly gentle and soaks up water with almost zero friction.
- The Two-Towel Approach: I use this one all the time. Use one high-quality microfiber towel for an initial pass to soak up about 90% of the water. Then, follow up immediately with a second, completely dry towel to buff away any remaining streaks for that perfect, spot-free shine.
- Touch-Free Drying: For the absolute safest method, nothing beats a leaf blower or a dedicated car dryer. You're using filtered, high-velocity air to blast water out of every nook and cranny—from behind mirrors, around emblems, and off the paint—with zero physical contact. This completely eliminates the risk of towel-induced scratches.
By weaving these pro tips into your routine, you're turning the two-bucket method from a simple cleaning process into a true detailing ritual that actively preserves and enhances your car’s finish.
Common Mistakes and How to Avoid Them
Even the most careful detailers slip up now and then. The real skill is knowing what those common pitfalls are so you can avoid them entirely. When it comes to the two bucket system car wash, a few simple mistakes can completely undermine your efforts, potentially damaging your paint instead of protecting it.
Let's walk through some of the most frequent errors I see and how you can steer clear of them.
Choosing the Wrong Products and Tools
One of the biggest blunders is reaching for the wrong kind of soap. It's tempting to just grab that bottle of dish soap from under the kitchen sink, but that's a classic rookie move. Those soaps are formulated with harsh degreasers that will strip every last bit of wax or sealant right off your paint, leaving it totally exposed. Always, and I mean always, use a dedicated, pH-neutral car shampoo.
Another critical error is cross-contamination, especially with your wash mitt. Your wheels and tires are magnets for the nastiest, most abrasive stuff on the road—brake dust and heavy grime. If you use the same mitt on your wheels and then move to your paint, you're essentially rubbing fine-grit sandpaper all over your clear coat. It's a disaster waiting to happen. Keep a completely separate set of tools—mitts, brushes, buckets—just for your wheels.
The Most Costly Mistake of All
Okay, let's talk about the one mistake that makes every detailer cringe: dropping the wash mitt. The moment that mitt touches the ground, it's game over for that wash pass. It instantly picks up sand, tiny pebbles, and all sorts of sharp debris.
If you pick it up and keep washing, you are guaranteed to be grinding those particles directly into your paint, causing deep scratches and swirl marks. Don't do it. If it drops, stop immediately. You have to either rinse it out with extreme prejudice or, better yet, just grab a fresh, clean mitt. Trust me, the cost of a new mitt is nothing compared to the cost of paint correction. If you've made this mistake before, you might need to look into how to remove swirl marks from car paint.
The "five-second rule" absolutely does not apply here. A dropped mitt is a contaminated mitt. Period. Consider it out of commission until it can be thoroughly cleaned and inspected.
Finally, don't ever skip the grit guards. I've seen people buy the buckets but leave the guards out, thinking they're just an optional accessory. They aren't. They are the entire point of this system. Without that simple plastic grate at the bottom, all the dirt you rinse off your mitt just floats around, waiting to be picked right back up. The grit guard is the barrier that makes the whole two-bucket method actually work.
Troubleshooting Common Washing Issues
Sometimes things just don't go according to plan. Here's a quick guide to help you diagnose and solve some common issues you might run into during your wash.
| Problem | Likely Cause | Solution |
|---|---|---|
| Water spots forming | Washing in direct sunlight or on a hot panel, causing water to evaporate too quickly. | Move the car into the shade or wait for a cooler time of day. Work on one smaller panel at a time and dry it immediately. |
| Soap isn't sudsy enough | Water is too "hard" (high mineral content) or the soap-to-water ratio is too low. | Add a bit more car shampoo to your wash bucket. If you have hard water, consider a water softener or a soap designed for it. |
| New scratches appear after washing | A dropped wash mitt, contaminated water, or improper drying technique (e.g., using a rough towel). | Always use grit guards, have extra mitts on hand, and use a plush microfiber drying towel with a gentle pat-blot motion. |
| Streaks left on glass | Dirty drying towel or residue from the car shampoo. | Use a separate, clean microfiber towel specifically for glass. Follow up with a dedicated glass cleaner if needed. |
Think of this table as your go-to reference. With a little practice, identifying and fixing these problems becomes second nature, leading to a perfect, scratch-free finish every time.
Have Questions About the Two Bucket System? We Have Answers.
It's natural to have a few questions when you're trying a new car washing technique, and the two bucket car wash is no different. Getting the details right from the jump is the key to building confidence and, more importantly, getting that perfect, scratch-free finish. Let's go through some of the most common things people ask.
People often wonder if they can get away without using grit guards. The short answer? Not a chance. The grit guard is the whole point of the system. It’s the simple but brilliant device that traps all the nasty, scratchy debris at the bottom of the bucket, keeping it far away from your soft wash mitt. Without it, you’re just making a dirt soup that you'll re-apply to your paint.
Fine-Tuning Your Technique for a Flawless Wash
"How often do I need to change the water?" That's another big one. For a typical family car with just a week's worth of road grime, one set of buckets will do the job perfectly. But say you're washing a big SUV that just came back from a muddy weekend camping trip. You’ll probably notice that rinse bucket getting pretty gross, pretty fast.
Here's a simple rule of thumb: if you can no longer see the grit guard at the bottom of your rinse bucket, it's time for fresh water. It’s a bit of a judgment call, but your goal is to keep contamination out of the equation.
If you find yourself wondering if the water is too dirty, it is. Don't risk it. Spending two minutes to refill a bucket is a tiny price to pay to protect your car's finish.
What about modern paint protection, like ceramic coatings? Is this method safe? Absolutely yes. In fact, this is the best way to care for a coated vehicle. Coatings are incredibly tough, but they aren't scratch-proof. The gentle approach of the two-bucket wash is exactly what you need to preserve that slick, water-beading surface for the long haul.
Pre-Wash vs. Contact Wash: They're a Team
Finally, let's clear up a common point of confusion: the foam pre-wash and the two-bucket wash aren't an either/or situation. They’re two distinct stages of a complete, professional-level wash.
- Foam Pre-Wash: This is your "no-touch" stage. You're using thick foam from a tool like the SwiftJet to break down and lift the heavy grit and grime before your mitt ever touches the car.
- Two-Bucket Wash: This is your "contact wash" stage. Now you're gently gliding your mitt over the surface to remove the more stubborn road film that the foam couldn't quite get on its own.
Think of it this way: the foam gun does all the dangerous work. By getting rid of the most abrasive particles first, you make the hands-on part with your wash mitt incredibly safe. This simple one-two punch is your best defense against swirl marks.
Ready to step up your car care game? The SwiftJet Foam Gun is the perfect first step, working hand-in-hand with your two-bucket system to deliver that critical pre-wash. Shop the SwiftJet today and see what a truly safe, professional wash feels like.