
So, what exactly is a snow foam cannon? It’s a specialized attachment for your pressure washer designed to spray a super thick, clinging foam all over your vehicle. Think of it as a pre-wash stage that does the heavy lifting for you, loosening up dirt and grime before you ever touch the paint with a wash mitt. This single step is the secret to preventing those dreaded swirl marks and fine scratches.
It's the tool that professional detailers and serious enthusiasts swear by to get that truly flawless, touchless clean right in their own driveway.
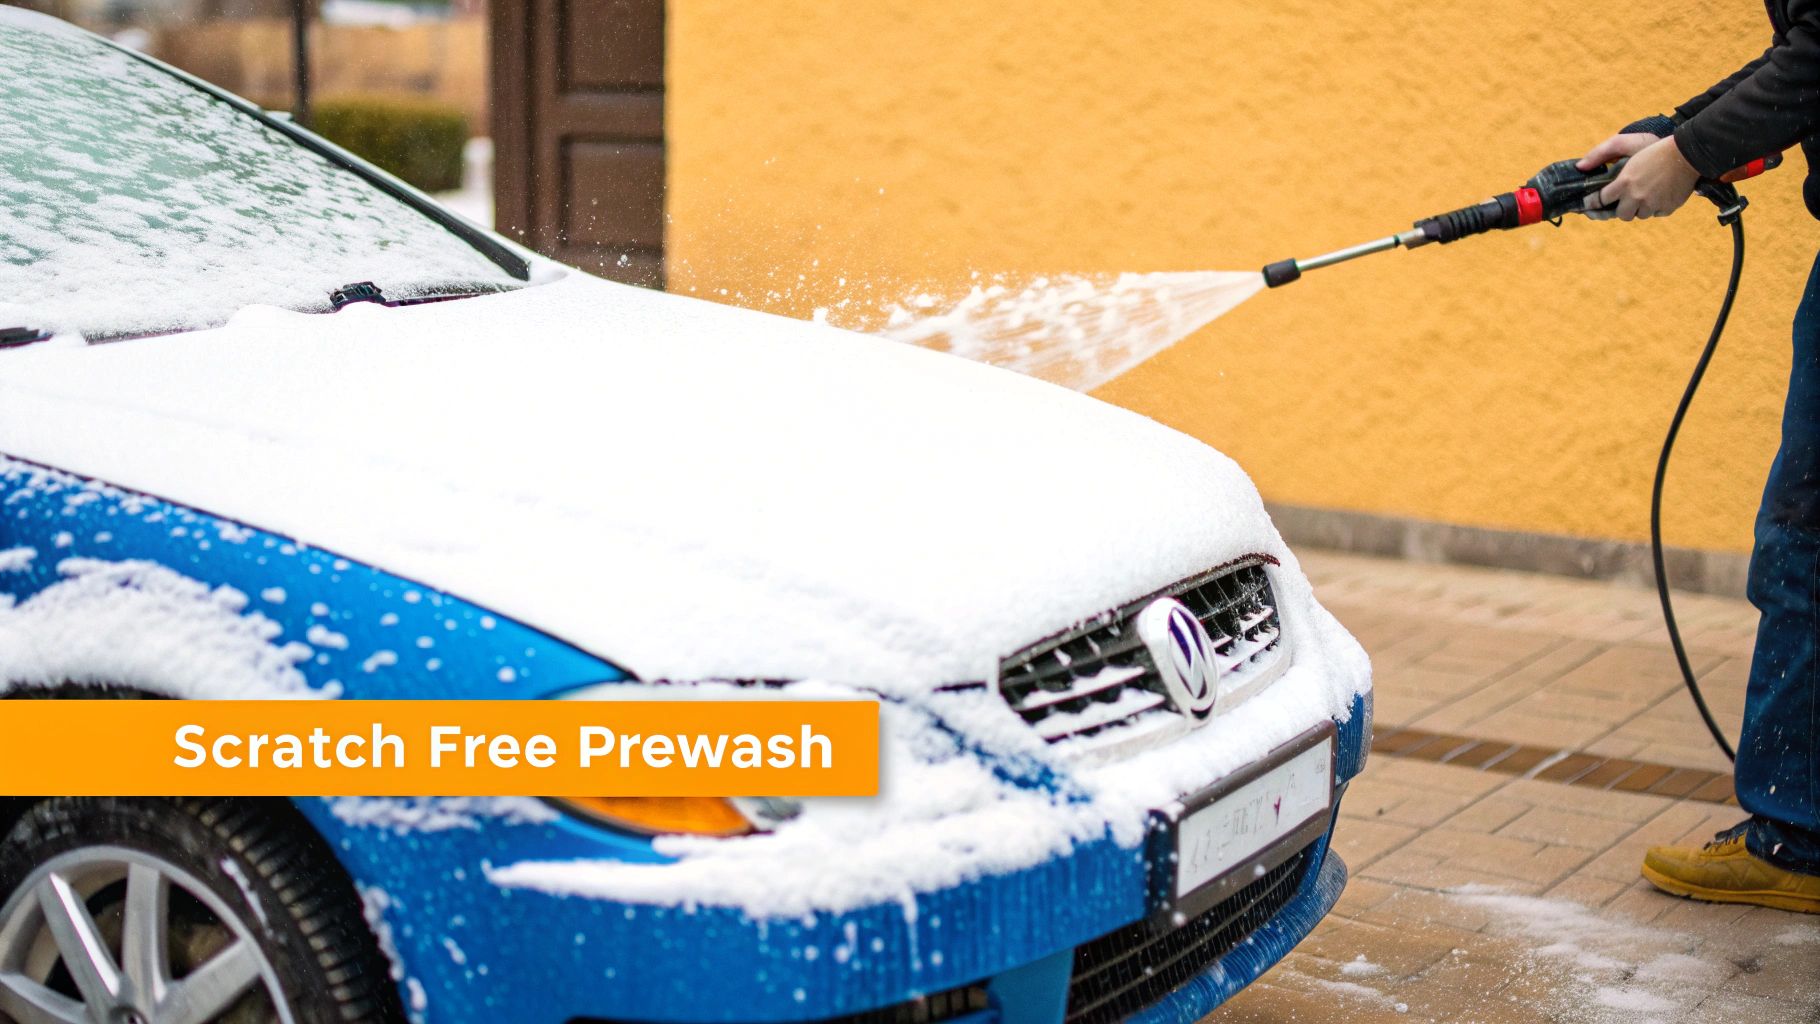
The Secret to a Scratch-Free Pre-Wash
Let's ditch the old-school bucket-and-sponge method for a minute. That approach often just grinds abrasive dirt right into your clear coat. A snow foam cannon completely changes the game. It’s not just about making your car look like it's been hit by a blizzard; it's a critical tool for preserving your vehicle's finish.
The magic is in the foam itself. It’s thick and heavy, so it clings to the surface instead of just running off. As it sits there—what we call "dwelling"—it gets to work, breaking down and encapsulating all the nasty stuff: road grime, dust, pollen, and other debris. This process lifts those harmful particles away from the paint so they can be rinsed off safely.
Essentially, you're removing the vast majority of scratch-causing contaminants before you even begin the contact wash.
Here's a quick look at the primary advantages of incorporating a snow foam pre-wash into your detailing routine.
Key Benefits of Using a Snow Foam Cannon
| Benefit | Impact on Your Vehicle's Finish |
|---|---|
| Scratch Prevention | Safely lifts abrasive dirt and grime away from the paint before a contact wash, dramatically reducing the risk of swirl marks. |
| Deeper Cleaning | The clinging foam dwells on the surface, breaking down stubborn contaminants that a simple rinse would miss. |
| Time Savings | Speeds up the washing process by doing much of the initial cleaning work for you, making the hand wash quicker and easier. |
| Improved Lubrication | The remaining foam provides excellent lubrication for your wash mitt, further minimizing friction and scratch potential. |
By making this small addition to your process, you shift from simply washing your car to actively protecting its finish for the long term.
Understanding the Key Components
To really get the most out of your cannon, you need to know what you're working with. They all share a few core parts that give you total control over the foam.
- Brass Body and Connector: This is the heart of the cannon. It's built tough to handle the high pressure from your washer and provides a solid, leak-free connection to the lance.
- Adjustable Nozzle: Right at the front, you'll find a nozzle you can twist. This lets you shape the spray from a wide, gentle fan for covering large panels to a concentrated jet for hitting specific spots.
- Top Adjustment Dial: This is your foam-control knob. It mixes the air and soap solution, allowing you to dial in the foam's consistency—from a thin, watery solution to a thick, shaving-cream-like foam.
- Soap Reservoir Bottle: The translucent bottle is where you'll mix your favorite snow foam soap with warm water. Most have handy measurement lines printed on the side to make getting your ratios right a breeze.
The core principle is simple: by removing the grit before you scrub, you eliminate the primary cause of paint damage. This pre-wash stage is what separates an average car wash from a professional detail.
Once you get a feel for these adjustments, you’ll be laying down the perfect blanket of foam every single time. It's the foundational step for maintaining that deep, glossy, showroom-quality shine.
Getting Your Foam Cannon and Pressure Washer Dialed In
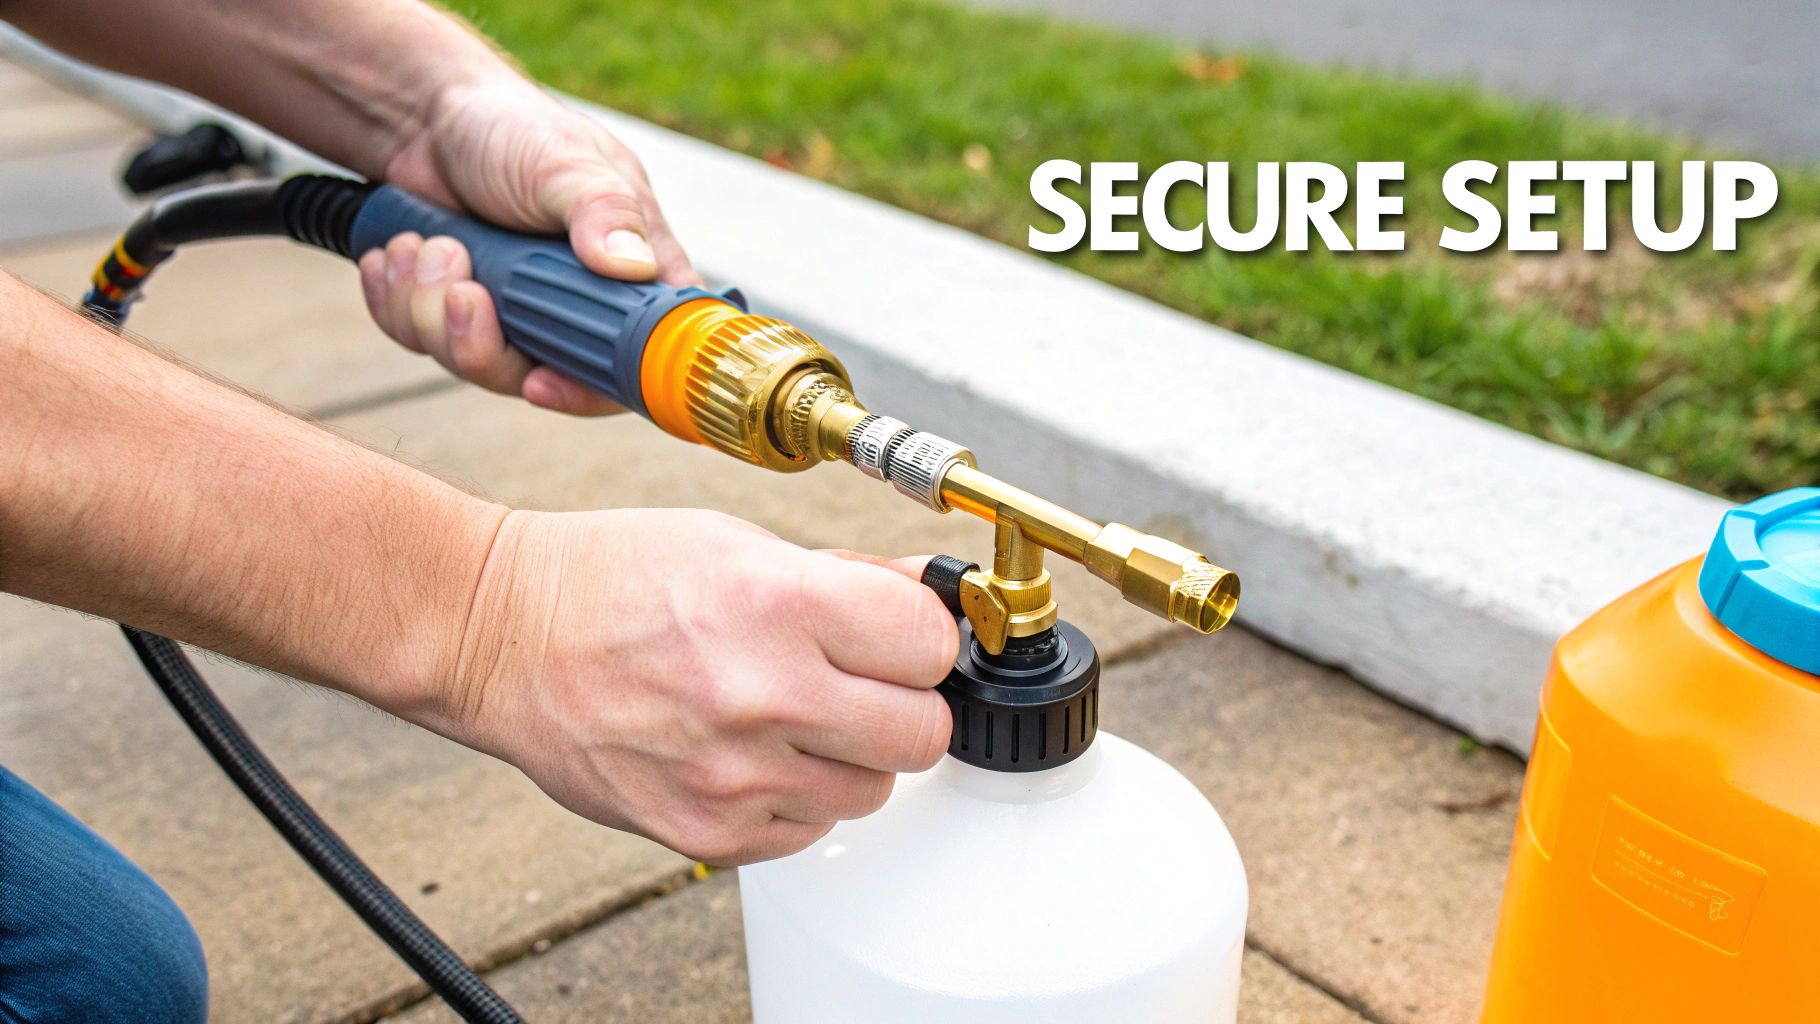
The secret to that satisfying, super-thick blanket of snow foam? It all starts with a rock-solid, leak-free connection between your pressure washer and your snow foam cannon. This is where a lot of people get tripped up right at the start, but I promise it's simple once you know what to look for. Think of it as the foundation for a perfect wash.
It's no wonder these tools are exploding in popularity. The global market for snow foam cannons has been growing at an incredible clip, hitting 22% annual expansion since 2022. Experts predict the market will blow past $2.3 billion by 2025, which just goes to show how many DIY detailers are bringing professional-level tools to their driveways.
Nailing the Connection: It’s All About the Adapter
The single most common stumbling block is the adapter. Pressure washer wands aren't universal, and your foam cannon needs the right fitting to marry up with your specific brand’s lance. The SwiftJet uses the industry-standard ¼” quick-connect, but many popular brands like Kärcher, Nilfisk, or Bosch have their own unique, proprietary connections.
First thing's first: take a look at the end of your pressure washer lance. If you don't see that familiar quick-connect fitting, you'll need a brand-specific adapter. They're easy to find online and are a small price to pay for a setup that actually works.
Once you have the right piece, here’s how to create a watertight seal:
- Check the Threads: Give the male threads on your cannon’s brass body a quick inspection. They should be clean and free of any dings or damage.
- Use PTFE Tape: This is my go-to trick for a guaranteed leak-proof fit. Wrap the threads with PTFE (Teflon) tape two or three times in a clockwise direction. This tiny step saves you from annoying drips that kill your pressure and make a mess.
- Attach the Adapter: Spin the adapter on by hand until it's snug, then give it a final quarter-turn with a wrench. Don't go crazy here—over-tightening can strip the soft brass threads.
A secure, leak-free connection is non-negotiable. That small drip might seem like no big deal, but it's a pressure leak. Lost pressure means weak, runny foam, and that defeats the whole purpose.
Taking a minute to do this prep work makes a world of difference. It guarantees you get consistent, powerful performance every time.
Putting the Cannon Together
With your adapter locked in, assembling the rest of the SwiftJet is a snap. It's a pretty straightforward design, but a couple of small details are crucial for getting that thick, shaving-cream-like foam.
First, grab the clear reservoir bottle. Before adding any soap, screw it firmly onto the bottom of the main brass cannon body. Get it snug, but again, no need to muscle it.
Now for the most overlooked—and most critical—part: the internal pickup tube. This little plastic straw is what pulls the soap solution from the bottle up into the mixing chamber.
Shove the tube firmly onto the small brass nipple on the underside of the cannon. It should feel secure. If this tube is loose or falls off inside the bottle (and trust me, it can happen), the cannon will just suck air. You'll get a pathetic, watery spray instead of foam. I learned that one the hard way, so now I always give the tube a quick check before I start.
If you want to dive deeper into the connection process, check out our complete guide on selecting a foam cannon for your pressure washer.
Once the adapter, bottle, and pickup tube are all set, your cannon is ready for action. The final step is to click it into your pressure washer lance. Listen for that satisfying "click"—that's your cue that you're locked in and ready for the fun part: mixing your soap and blasting your car with an avalanche of cleansing foam.
Mixing Snow Foam Soap for Optimal Thickness
This is where you go from just washing your car to giving it a proper detail. Getting that perfect, thick foam that blankets your vehicle isn't just about having a great snow foam cannon—it's all in how you mix your soap. The soap-to-water ratio is the single most important factor, and honestly, the generic instructions on a soap bottle rarely cut it for real-world conditions like water hardness or how dirty your car actually is.
Let's dial in the perfect mixture for any situation. The goal is a solution potent enough to lift the grime but not so strong that you're just spraying money down the drain.
Start with a Solid Baseline Ratio
For most dedicated snow foam soaps, a 1:10 ratio is an excellent starting point. That’s one part soap concentrate to ten parts warm water. In a standard 32 oz (about 1 liter) cannon bottle, this works out to roughly 3 oz of soap and 30 oz of water.
And yes, use warm water. It's a small detail that makes a big difference. It helps the soap dissolve completely, creating a much smoother, richer foam than you'll get with cold water straight from the tap.
A Tip I Learned the Hard Way: Always add the warm water to the bottle first, then pour in the soap. If you do it the other way around, the force of the water will create a foamy mess inside the bottle, making it impossible to fill properly and throwing your whole ratio off.
This one simple change of order guarantees an accurate mix every single time.
Adjusting Your Mix for the Real World
That 1:10 ratio is your baseline, not a hard-and-fast rule. A few things might require you to tweak the recipe.
Your local water quality plays a surprisingly huge role. If you live in an area with hard water (water with a high mineral content), you've probably noticed that soaps don't lather as well. Those minerals interfere with the foaming agents. To compensate, you may need to bump up the soap a bit, maybe to a 1:8 or 1:9 ratio, to get that thick foam you're after.
On the flip side, if you're just doing a light maintenance wash on a car that's only a little dusty, you can definitely dial it back. A 1:12 or even a 1:15 ratio will probably do the trick, saving you soap and money. The key is to adapt. For a much deeper dive, our comprehensive foam cannon soap ratio guide offers a perfect mix for thick foam.
Foam Soap Mixing Ratios for Different Scenarios
Not all car washes are created equal. Sometimes you need a light touch, and other times you need to bring out the heavy artillery. Knowing how to mix for the job at hand will make your results so much better. The table below gives you a few go-to recipes I use all the time.
| Cleaning Goal | Suggested Soap Ratio (Soap to Water) | Expected Foam Consistency | Best For |
|---|---|---|---|
| Maintenance Wash | 1:15 | Light & Lubricating | Weekly upkeep, removing light dust, preserving existing wax layers. |
| Standard Clean | 1:10 | Thick & Clinging | All-purpose cleaning for moderate road grime and dirt buildup. |
| Aggressive Pre-Soak | 1:8 | Rich & Dense | Stripping old waxes or tackling extremely heavy contamination. |
Here's what those ratios look like in practice:
-
The Gentle Weekly Wash: Perfect for routine cleaning to knock off light dust and pollen. With a 1:15 ratio (2 oz soap in a 32 oz bottle), you get a light, lubricating foam that safely lifts dirt without stripping any wax or sealant you've applied.
-
The All-Purpose Grime Buster: This is your workhorse mix for a moderately dirty car. The 1:10 ratio (3 oz soap in a 32 oz bottle) creates that thick, clinging foam with enough power to break down road film and grime.
-
The Heavy-Duty Stripping Soak: I only break this one out before a full paint correction or when I need to strip off old layers of wax. A 1:8 ratio (4 oz soap in a 32 oz bottle) creates a highly concentrated foam that preps the surface for a fresh start. Use this mix sparingly.
Mastering these simple mixtures is what separates a quick wash from a true detailing process. You'll always have the right tool for the job, protecting your car's finish while getting a spectacular clean.
Getting That Professional Finish: Application and Rinsing
Alright, your SwiftJet is loaded, the soap mix is perfect—now for the really satisfying part. This is where the magic happens and all that prep work pays off, turning a grimy car into a gleaming one. The key to a detailer-quality clean isn't just about the foam; it's about the process.
Following the right sequence separates an okay wash from a great one, ensuring you lift away all the dirt safely without marring your paint. It’s not complicated, but getting the order right is everything. Let's walk through how the pros do it.
First Things First: The Pre-Rinse
Before you even think about spraying foam, grab your pressure washer and give the entire vehicle a solid rinse with plain water. Start at the roof and work your way down, systematically knocking off all the loose stuff. We're talking caked-on mud in the wheel wells, clumps of dirt clinging to the lower panels, and any loose dust or debris.
This might feel like a skippable step, but trust me, it’s not. Blasting away that top layer of grit dramatically lowers the risk of scratching your paint when you eventually make contact with a wash mitt. It takes two minutes and sets you up for a much safer, more effective wash.
Mastering the Art of Foam Application
Here comes the fun part. When you’re ready to lay down that thick blanket of foam, fight the instinct to start at the top. Instead, begin at the bottom of the car and work your way up, panel by panel. Why? This simple trick prevents the foam from immediately cascading down clean panels, which can cause streaking and weaken the foam’s cleaning power on the dirtiest lower sections.
Make sure you cover every single surface—wheels, glass, trim, everything—until the car looks like it's been hit by a blizzard. Your SwiftJet gives you two main adjustments to get this just right:
- The Front Nozzle: A quick twist changes the spray pattern. Go for a wide fan to cover big areas like doors and the roof, then narrow it down to a more focused stream for hitting tricky spots like grilles and inside the wheel arches.
- The Top Dial: This is your foam thickness control. For that super-thick, shaving-cream-like foam, turn it all the way to the “+” (plus) setting. If you're just doing a light maintenance wash and want something a bit runnier, you can dial it back toward the “-” (minus) sign.
The growing obsession with this pre-wash method shows just how much people now care about protecting their paint. It's no surprise the car snow foam market was valued at around $450 million in 2024 and is on track to hit $750 million by 2033. That's a huge number of enthusiasts who get it. If you're interested in the numbers, you can dive deeper into this market trend and its projected 7.2% CAGR in this detailed market research.
Give It Time to Dwell (But Not Dry!)
Once the car is completely covered, you need to let the foam do its thing. This is called "dwell time." During this window, the cleaning agents in the soap get to work, breaking down grime, wrapping it up, and lifting it right off the paint. A good rule of thumb is to let it sit for 5 to 10 minutes.
The absolute golden rule here is to never let the foam dry on the car. Dried foam can leave behind a stubborn soap film that’s a pain to remove and can even cause spotting. Always try to wash in the shade or on a cool, overcast day to keep the sun from ruining your work.
If you see the foam starting to go thin and patchy, especially on a warmer day, that’s your cue to start rinsing.
Agitating the Really Stubborn Grime
On a lightly dirty car, you can often get away with a completely touchless wash where the foam and rinse do all the work. But for vehicles with more serious buildup, a little bit of gentle agitation goes a long way.
Zero in on the car's dirtiest parts, which are almost always:
- The front bumper (caked-on bugs and road film)
- The lower rocker panels (tar and mud spray)
- The area right behind the wheels
- Exhaust tips
Grab a soft-bristled detailing brush and gently work the foam into these specific spots. This little bit of extra help loosens those bonded contaminants that foam alone might struggle with, making sure they wash away cleanly in the final rinse.
This visual guide breaks down the simple three-step process for prepping your foam soap mixture.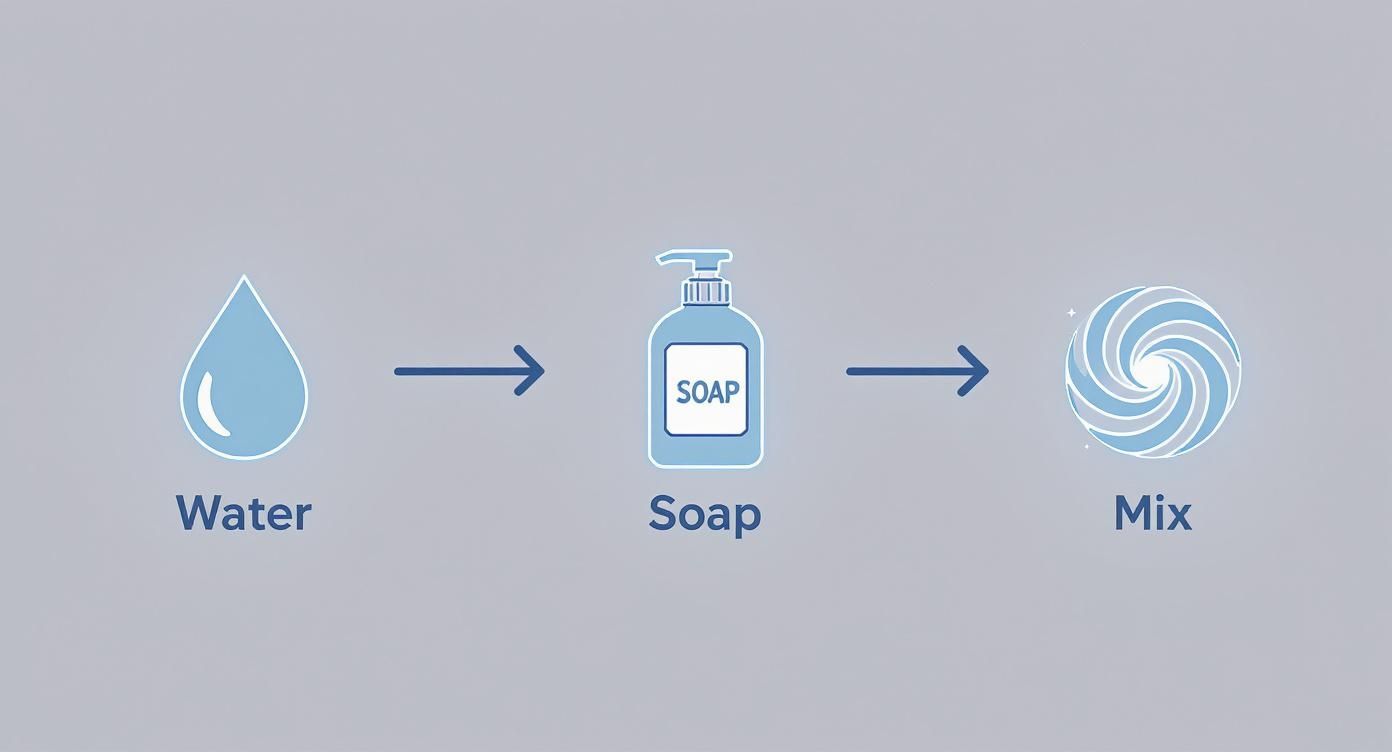
It's as easy as adding water, then your soap, and giving it a gentle swirl to create the perfect solution for your snow foam cannon.
The Final Rinse: Top to Bottom
After the foam has dwelled and you've tackled any stubborn spots, it's time for the final rinse. Now, you’ll do the exact opposite of how you applied the foam. Start rinsing from the roof and work your way down.
This top-down approach lets gravity do the work for you, pulling all the foam and loosened grime down and off the vehicle. Be methodical. A thorough rinse ensures you don’t leave any soapy residue hiding in panel gaps, behind mirrors, or in window seals. Keep going until every last bubble is gone, and you're left with a perfectly clean surface, ready for a contact wash if needed.
Keeping Your Cannon in Top Shape: Maintenance and Troubleshooting
Even the best gear needs a little upkeep, and your snow foam cannon is no exception. If your cannon starts sputtering or producing foam that’s thin and watery, it’s not broken—it’s just telling you it needs a quick clean.
The good news? Keeping your SwiftJet performing like new is incredibly simple and only takes a minute or two after each wash.
The single most important habit to get into is flushing the cannon with plain water after every use. It's a non-negotiable step for long-term performance. Just unscrew the soap bottle, fill it with clean water, and screw it back on. Then, run your pressure washer through it for 30 to 45 seconds.
This quick flush blasts out any leftover soap residue from the internal mesh filter and the tiny orifice nozzle. When soap dries inside these critical parts, it clogs them up and kills your foam quality. A simple rinse prevents that buildup before it ever starts.
Solving Common Foam Cannon Problems
Even with regular care, you might eventually hit a snag. No need to get frustrated—most issues are simple fixes you can handle in minutes. Here’s a quick diagnostic checklist to get you back to spraying thick, sudsy foam.
Problem #1: The Foam is Weak or Watery
This is, without a doubt, the most common issue people face. It almost always boils down to one of three things:
- The Soap Mix: Are you sure your soap-to-water ratio isn't too weak? Try adding another ounce of your favorite snow foam concentrate and see if that thickens things up.
- The Top Dial: That dial on top controls the air and soap mixture. For the thickest foam possible, make sure it’s turned all the way toward the "+" symbol.
- A Clogged Nozzle: If the first two checks don't solve it, a clogged orifice is the prime suspect. This tiny brass nozzle can get blocked by dried soap or hard water mineral deposits over time.
Problem #2: It's Leaking at the Connection Point
A leak where the cannon connects to your pressure washer lance is more than just annoying; it causes a pressure drop that hurts foam production.
- Check the O-Ring: There’s a small rubber O-ring inside the adapter that creates the seal. Pop the fitting off and make sure the ring hasn't fallen out, cracked, or gotten flattened.
- Get a Solid Connection: Wiggle the quick-connect fitting to ensure it's fully seated and locked in. You should hear and feel a solid "click" when it's properly attached.
- Try Plumber's Tape: For a stubborn leak at the threads, a few wraps of PTFE tape (often called Teflon tape) can create a perfect, watertight seal.
Honestly, taking two minutes for that post-wash flush is the best thing you can do for your cannon. It’s pure preventative maintenance that saves you the headache of having to disassemble and deep clean clogged parts down the road.
When It's Time for a Deep Clean
If a simple flush isn’t bringing your foam back to life, it’s time for a deep clean. I usually do this every few months as a preventative measure, but you’ll want to do it sooner if you notice foam quality starting to fade.
Your main target is the tiny orifice nozzle. To get to it, unscrew the main quick-connect adapter from the brass body of the cannon. Inside, you'll see the nozzle. Use a small flathead screwdriver to carefully unscrew it. Be gentle and keep track of it—it's tiny and easy to lose!
Soak the orifice in a 50/50 mix of hot water and vinegar for about 30 minutes to dissolve any gunk. If you see any visible blockages, you can use a small pin or needle to gently clear them out. While it's soaking, you can also access and clean the stainless steel mesh filter, which is typically located right behind the orifice.
Once everything is clean, just reassemble it. Your snow foam cannon should be back to performing just like it did on day one. A little bit of upkeep ensures you get that satisfying, thick foam every single time you wash your car.
Common Questions About Snow Foam Cannons
Once you start using a snow foam cannon, you'll inevitably have questions as you dial in your technique. Getting the right answers is what turns a decent car wash into a great one. Let's walk through some of the most common things people ask, so you can get the most out of your SwiftJet.
These things have absolutely exploded in popularity, and for good reason. In 2023 alone, the global market saw over 20 million foam cannons sold, hitting a value of over $500 million USD. This isn't just some fad; it's a real shift in how we take care of our cars. You can check out more stats on the market's impressive projected 7% annual growth over at marketreportanalytics.com.
Can I Just Use My Regular Car Wash Soap in a Foam Cannon?
Technically, you can, but you're going to be disappointed with the foam. It just won't have that thick, shaving-cream consistency you're looking for.
Snow foam soaps are specifically engineered with surfactants that are designed to whip into a dense, clinging foam under high pressure. Your standard car wash soap will just create a thin, bubbly liquid that sheets right off the paint. That means it won't have the dwell time needed to really break down and lift away the grime. For the best results, always stick with a soap made for a foam cannon.
Do I Still Have to Hand Wash After Using a Foam Cannon?
Yes, absolutely. This is probably the biggest misconception out there. Think of the foam cannon as a phenomenal pre-wash tool, not a replacement for a contact wash.
Its main job is to safely soften and lift the heavy, loose layers of dirt and road film. This makes the next step—the hand wash—so much safer for your paint because you're not grinding that grit into the clear coat. After you rinse off the foam, you still need to grab your wash mitt and use a two-bucket method to get rid of the bonded contaminants that the foam can't touch.
Key Takeaway: The foam cannon does the heavy lifting. The hand wash does the detail work. If you skip the hand wash, you're leaving a thin film of grime behind.
If you're curious about how different foaming tools stack up, we broke it all down in our article covering the key differences between a foam gun and a foam cannon.
What Pressure Washer PSI Do I Need for a Foam Cannon?
Good news: you don't need some fire-breathing, commercial-grade pressure washer. Most of the models you'd buy for home use are more than up to the task.
For the best foam, you'll want a pressure washer that falls within these specs:
- Pressure: 1,100 to 5,000 PSI (pounds per square inch)
- Flow Rate: At least 1.4 GPM (gallons per minute)
It's a common myth that more PSI automatically equals thicker foam. The real magic happens with your soap-to-water ratio and making sure the cannon's internal orifice is clean. Any standard electric or gas pressure washer will have plenty of power to make the SwiftJet sing.
Why Is My Foam So Watery?
This is the number one question we get, and thankfully, it's usually a really simple fix. If your foam is looking more like sad, runny bubbles, just check these three things.
- Check Your Soap Mix. This is almost always the culprit. Your mixture is probably too diluted. Just add another ounce or so of your concentrated snow foam soap to the bottle and try again.
- Adjust the Top Dial. Make sure the knob on top of the cannon is turned all the way towards the "+" symbol for maximum foam. It's easy to bump it or forget to check.
- Clean the Orifice. If the first two don't solve it, you've likely got a small clog from dried soap or hard water minerals inside the cannon's orifice nozzle. A quick disassembly and a rinse (or a poke with a small paperclip) will almost certainly get you back to thick foam.
Ready to transform your car wash with that thick, satisfying blanket of foam? The SwiftJet makes getting a professional, scratch-free pre-wash an absolute breeze. Shop now at swiftjetusa.com and experience the difference for yourself!