
Understanding What You're Really Up Against
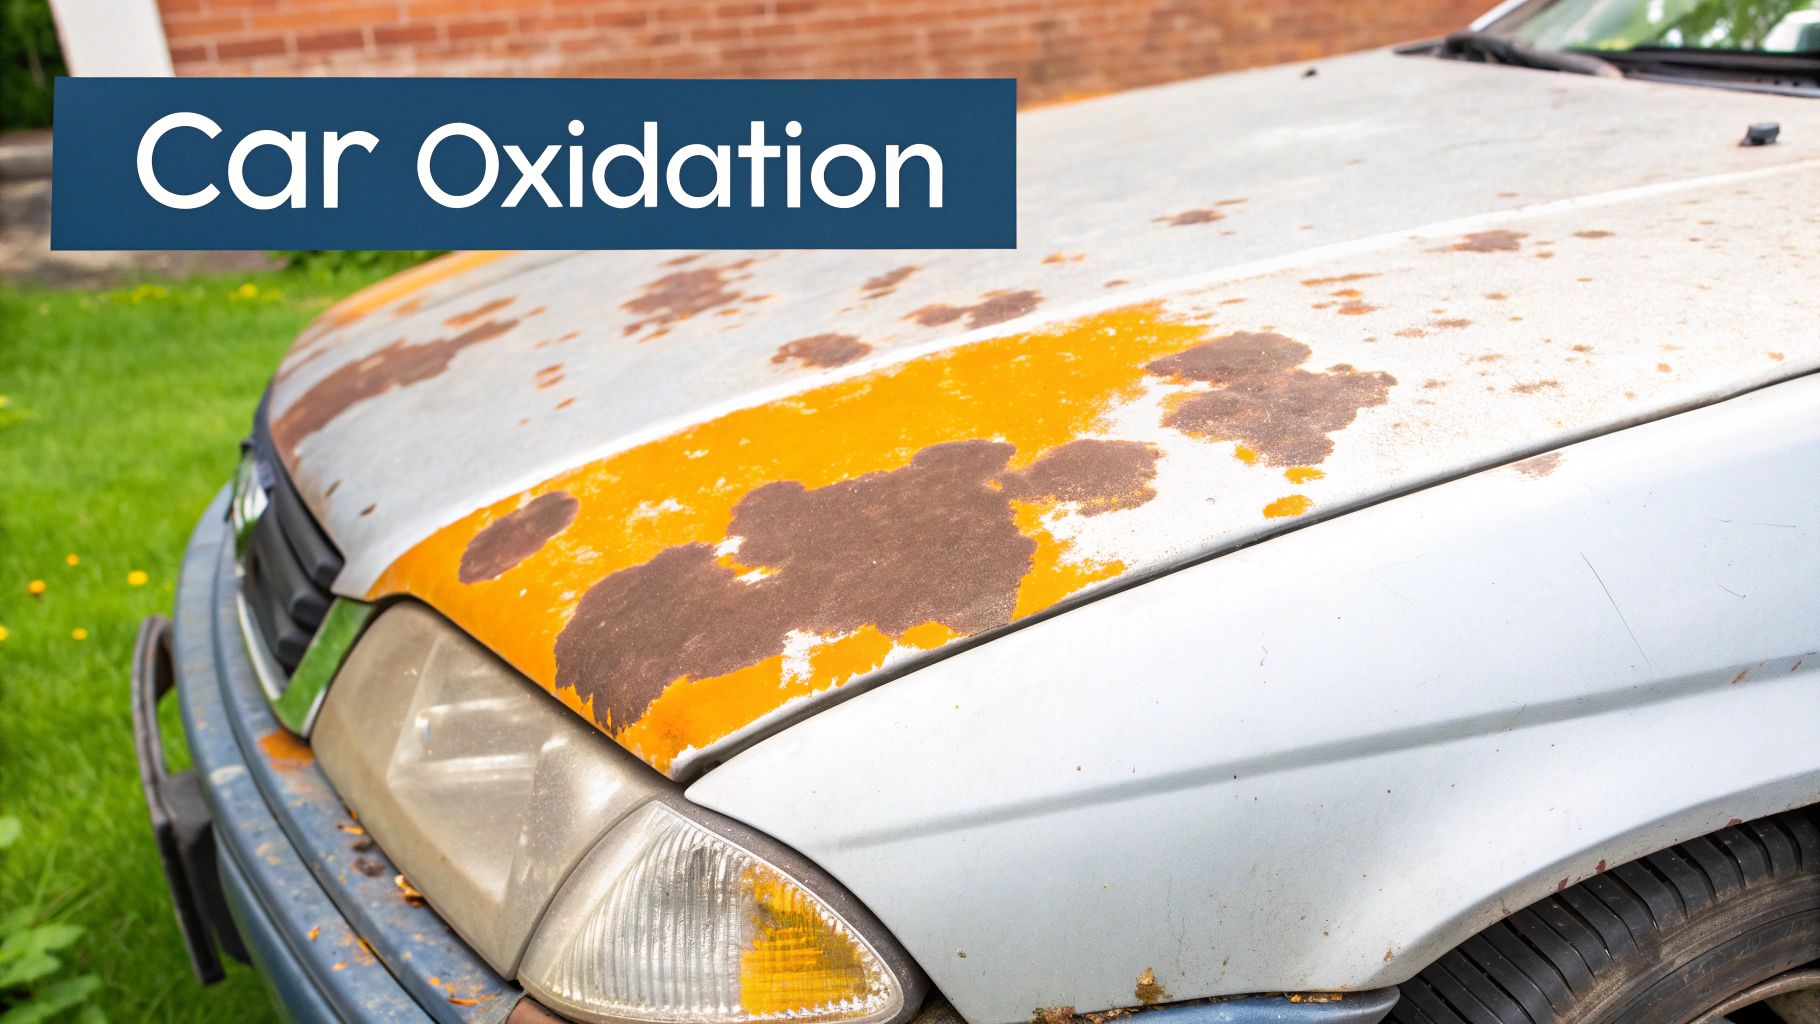 That chalky, faded patch on your car’s hood didn’t just show up one morning. It's the aftermath of a slow, steady attack on your vehicle's most important defense: the clear coat. Your car's paint job is made of several layers. Down deep, you have the primer and the base coat (the color), but the top layer is a transparent clear coat. This is the layer that takes all the punishment from the environment, from harsh UV rays to acid rain and bird droppings. When you hear someone talk about needing to remove car oxidation, what they’re really dealing with is damage to this vital protective layer.
Oxidation is just a fancy term for the clear coat breaking down. Thanks to constant exposure to oxygen and UV radiation, the chemical bonds in the paint start to weaken and fall apart. The outcome? That once-glossy, smooth surface turns porous and rough, which scatters light instead of reflecting it. This is precisely why oxidized paint looks so dull, hazy, and feels chalky. It’s a clear signal that your paint's primary shield has been breached.
The Stages of Paint Oxidation
Not all oxidation is the same, and figuring out what stage you're at is crucial for choosing the right tools and setting your expectations. You can usually sort the damage into a few common scenarios:
- Minor Dulling: The shine is mostly gone, but the color itself still looks okay. This is the earliest stage, where just the very top of the clear coat has started to degrade. It's the easiest fix.
- Chalky Haze: The paint looks noticeably faded and might have a whitish film over it. A classic sign is being able to write your name in the residue with a finger. This means the clear coat damage is more serious, but it’s often still fixable.
- Severe Clear Coat Failure: This is the point of no return. You’ll see the clear coat physically peeling, flaking, or even blistering, which exposes the color coat underneath to the elements. At this stage, no amount of buffing or polishing will work; the panel has to be repainted.
Why Some Cars Suffer More Than Others
Ever notice how a 10-year-old red car can look completely faded while a silver one from the same year still looks great? This isn't your imagination. Single-stage paints, which were common on older or commercial vehicles, and certain colors like red and black are known to oxidize much faster. On top of that, a lack of consistent protection makes things worse. Regular washing and applying a quality wax or sealant is a must. This is why companies put so much effort into preventative solutions; the global market for anti-corrosion coatings, a key player in fighting car oxidation, was valued at around $32.6 billion in 2023. You can read more about the demand for these protective coatings in a detailed market analysis on GlobeNewswire.
Knowing the science helps you tackle the problem the right way. Before you even grab a polisher to remove car oxidation, take a moment to assess the damage so you know exactly what you’re facing. For more on keeping your paint healthy from the start, check out our guide on essential car wash steps to protect your paint.
Building Your Restoration Arsenal That Actually Works
Forget the confusing aisles of products promising miracles in a bottle. When it's time to remove car oxidation, you need a focused, no-nonsense toolkit. Building the right arsenal isn't about buying the most expensive gear; it’s about picking the right tools for your specific level of paint damage. Let’s break down what you actually need to get the job done.
The Abrasives: Compound vs. Polish
Imagine you're smoothing a rough piece of wood. You’d start with coarse sandpaper before moving to finer grits, right? Restoring paint works the same way. In the detailing world, cutting compounds are your coarse sandpaper. They’re packed with more aggressive abrasives designed to slice through that heavy, chalky layer of oxidized paint and level the surface. If your paint looks hazy and feels rough, a compound is your essential first step.
A polish, on the other hand, is your fine-grit sandpaper. It contains much smaller abrasives meant to refine the surface after the heavy lifting is done. It buffs away the tiny scratches left by the compound, which is what brings out that deep, wet-looking gloss. Trying to fix heavy oxidation with only a polish is like trying to shape a block of wood with finishing paper—you’ll work for hours and barely make a dent. A common mistake is grabbing a polish when a compound is needed, which almost always leads to frustration and disappointing results.
Essential Gear for Application and Safety
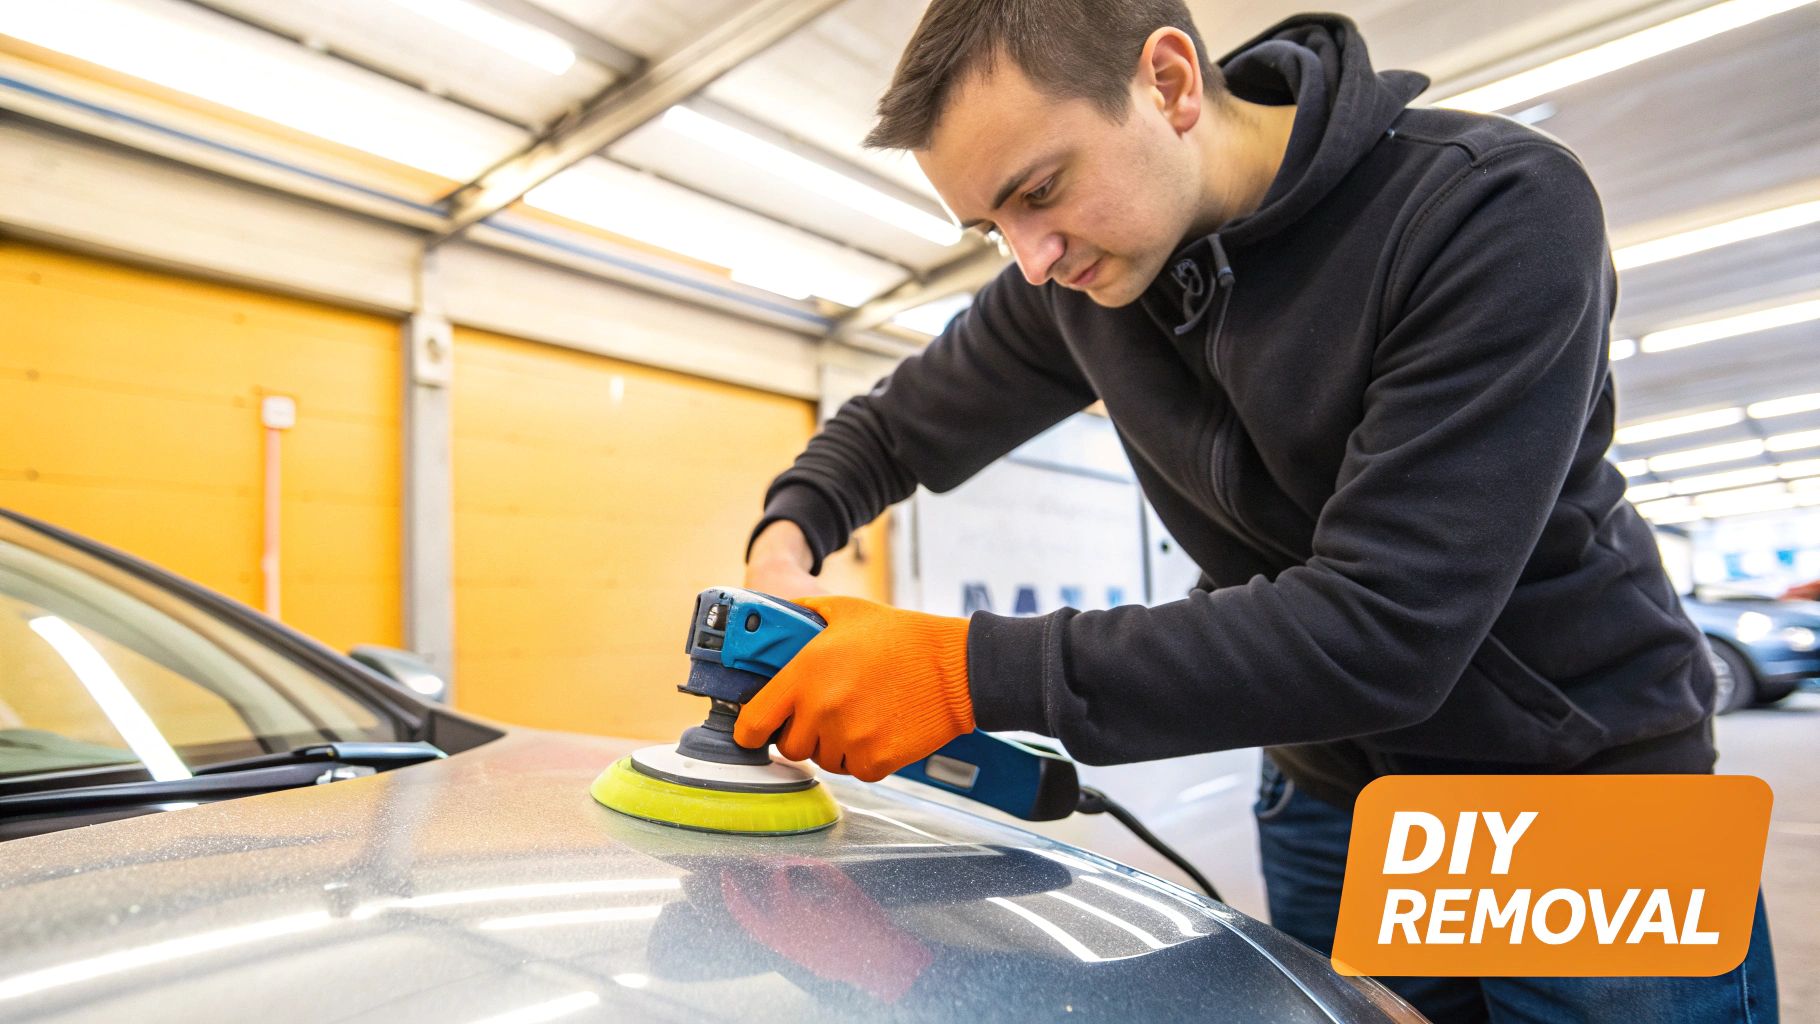
Having the right chemicals is only half the battle. How you apply them is what separates a fantastic finish from a mediocre one. While you can work by hand on a tiny spot, for any job bigger than a side mirror, a machine polisher is a must-have for consistency and efficiency.
- Dual-Action (DA) Polisher: This is the best friend of any DIY detailer. It oscillates in a random pattern, which massively reduces the risk of burning through your clear coat compared to a pro-grade rotary polisher. It’s safe, effective, and gets you professional-looking results without the steep learning curve.
- Pads: You'll need different pads for different products. A more aggressive foam or microfiber cutting pad is paired with your compound, while a soft foam finishing pad is used with your polish.
- Safety Equipment: Don't even think about skipping this. You'll want safety glasses to protect your eyes from product sling, nitrile gloves to keep the chemicals off your hands, and a respirator mask to avoid breathing in the fine dust created by compounds.
- High-Quality Microfiber Towels: Stock up on a pile of clean, plush towels. You’ll need them to gently wipe away residue without scratching the paint you just worked so hard to correct.
To help you decide which products are best for your car's condition, here’s a quick comparison of common oxidation removal options.
| Product Type | Oxidation Level | Application Method | Expected Results | Price Range |
|---|---|---|---|---|
| Cutting Compound | Heavy to Severe | DA Polisher with Cutting Pad | Removes chalky, faded layer; leaves a hazy finish that requires polishing. | $20 - $40 |
| Medium Polish | Light to Moderate | DA Polisher with Polishing Pad | Removes light oxidation and swirls; restores significant gloss. | $15 - $35 |
| Finishing Polish | Very Light/Refining | DA Polisher with Finishing Pad | Removes fine polishing marks; maximizes depth and reflectivity. | $15 - $30 |
| All-in-One (AIO) | Light | Hand or DA Polisher | Cleans, polishes, and seals in one step; a time-saver but less corrective power. | $20 - $45 |
Ultimately, the goal is to use the least aggressive method necessary. Starting with a heavy compound on light oxidation is overkill. Always test a small, inconspicuous spot first to see what works before tackling the whole car.
Of course, before you even think about buffing, a deep clean is non-negotiable. You have to get every speck of dirt off the surface, or you’ll just be grinding it into the paint. To see how a quality foam gun can make your prep wash faster and safer, check out our guide on the top car washer spray gun picks. A perfectly clean car is the only canvas to start this kind of restoration on.
Setting the Stage for Success
It’s tempting to jump right into buffing, but that’s a rookie mistake that almost always leads to a long, frustrating day with disappointing results. The real secret to a stunning paint restoration is all in the prep work. Before any compound gets near your paint, the surface needs to be completely, almost surgically, clean. This is more than a quick wash—we're talking about a full decontamination to lift every bit of embedded dirt.
Creating the Perfect Canvas
Your first task is a proper hand wash. Using a quality foam gun, like the SwiftJet, is a great way to start because it helps lift and soften heavy grime, reducing the chance of scratching the paint as you wash. Once you’ve rinsed and dried the car, it's time for a step many people skip: the clay bar treatment. If you run your hand over the paint (try it with a plastic sandwich bag over your hand to really feel the surface), you'll likely feel tiny, gritty bumps. That's not just dirt; it's bonded contaminants like industrial fallout, tree sap, and road tar that a normal wash won't touch.
If you don't get these contaminants off now, you’ll just be grinding them into the paint when you start polishing. A clay bar, when used with a good lubricant, gently pulls these particles out, leaving the paint surface perfectly smooth. This is an absolutely essential step to remove car oxidation effectively, as it makes sure your polishing pads work on the paint and nothing else.
Your Workspace and Timing Matter
Where and when you decide to tackle this project is just as critical as your technique. Direct sunlight is your enemy. Hot body panels will cause your compounds and polishes to dry out almost instantly, making them tough to work with and much less effective. The ideal spot is a garage or under a canopy on a cool, overcast day. You should aim for an ambient temperature between 60°F and 80°F (15°C and 27°C), which is the sweet spot for most detailing products.
Finally, take a few minutes to protect the parts you don’t want to polish. Grab some automotive masking tape and carefully cover all your plastic trim, rubber seals, and emblems. A DA polisher can easily stain or even burn these surfaces, and getting dried compound out of textured plastic is a real pain. Investing a little time here will save you a huge headache later and is the true mark of a professional-quality job.
The Heart of Restoration: Bringing Your Paint Back to Life
With a perfectly prepped surface, you’re now at the most rewarding stage of the project. This is where the real magic happens, where you’ll physically remove car oxidation and watch the paint transform from chalky and dull to deep and vibrant. True success here comes down to a methodical approach and paying close attention to how your paint responds. This isn't about just slathering on a product and hoping for the best; it's about proper technique.
The secret to a uniform, professional-looking finish is to work in small, manageable sections. I find a 2x2 foot square is the perfect size. This lets you focus your energy, apply even pressure, and fully work the product before it has a chance to dry out. Start by applying a few pea-sized drops of your chosen cutting compound directly onto your cutting pad. Dab the pad on your work area a few times to distribute the product, then turn the polisher on at a low speed to spread it evenly. Once it's spread, you can bump up the speed and start working the area with slow, overlapping passes in a cross-hatch pattern (first side-to-side, then up-and-down).
From Cutting to Refining
Your main goal with this initial compounding step isn't to get a perfect shine just yet. The purpose of the compound is to slice through that dead, oxidized layer of the clear coat. As you work the polisher, you'll feel the compound breaking down, and you should start to see the paint’s true color peeking through the haze. After a few passes, stop the machine, grab a clean microfiber towel, and wipe the residue away. Now, inspect your work with a good light. Is the chalkiness gone? If it is, you're ready to move to the next section. If you still see stubborn oxidation, it’s fine to repeat the process.
This whole procedure really shows you the value of the automotive coatings that protect your vehicle from day one. The global market for these special coatings, which include essential anti-oxidation treatments, was valued at $23.2 billion in 2023 and is expected to reach $33.4 billion by 2030. This growth shows how much the industry is focused on creating tougher, more resistant finishes to prevent the kind of damage you're fixing right now. You can discover more about these automotive coating market trends on Grandviewresearch.com.
Once you've compounded the entire car, all the oxidation should be gone. However, the surface will probably look a bit hazy from the tiny scratches left by the aggressive compound—don't worry, this is completely normal. The next step is to switch to a softer finishing pad and a less abrasive polish. You'll repeat the exact same systematic process: work in small sections with overlapping passes. This final step refines the surface, polishing away the compounding haze and bringing out that deep, wet-looking gloss you've been working so hard for.
This simple workflow shows the path from a damaged surface to a polished one.
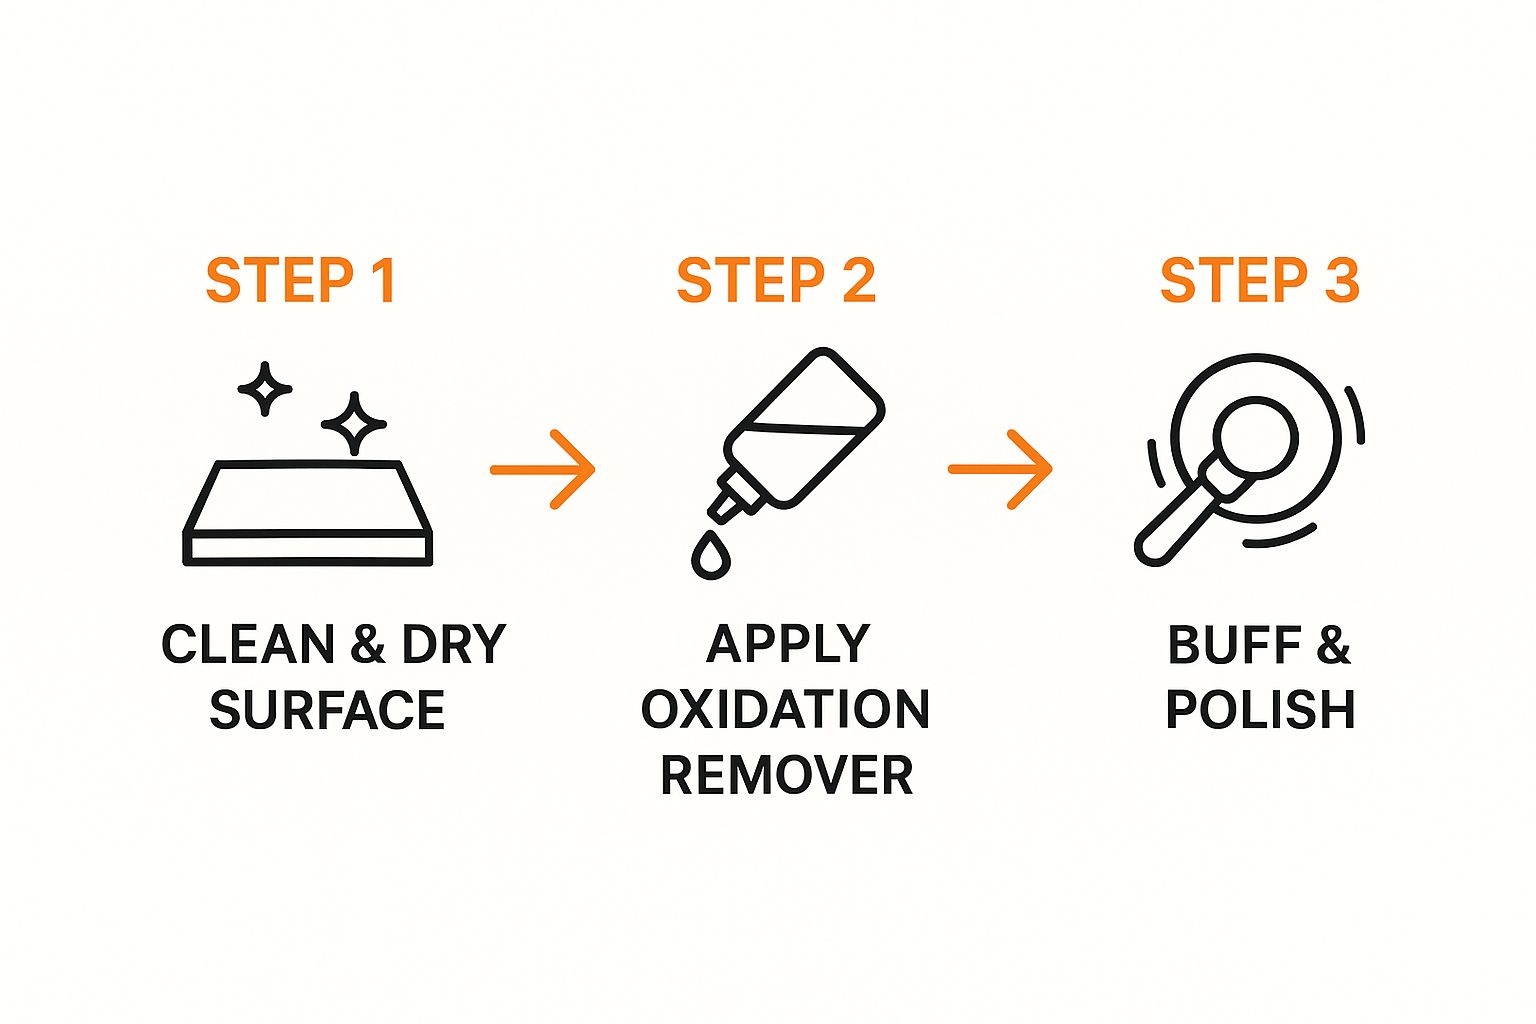
The key takeaway here is that you can't just jump straight to polishing. Proper cleaning and the more aggressive removal step are non-negotiable if you want to achieve a true, lasting restoration.
Creating That Mirror-Like Finish People Notice
Getting the oxidation off is a huge win—it brings your paint back to a healthy, uniform state. But the real "wow" factor, that deep, glossy finish that turns heads, comes from what you do next. The compounding process, while essential, leaves its own subtle mark: a very fine haze of microscopic scratches. I like to compare it to sanding a piece of wood. It's perfectly smooth to the touch, but it isn't glossy yet. Polishing is how you'll transform that smooth surface into a true mirror.
From Correcting to Perfecting the Paint
Polishing is a much gentler art than compounding. Your goal here isn't aggressive correction but delicate refinement. You're smoothing out the tiny imperfections left by the cutting compound, which allows light to reflect cleanly off the surface. You'll need to swap out your aggressive cutting pad for a much softer finishing pad and use a fine-grit polish. The technique is basically the same: work in small, 2x2 foot sections with slow, overlapping passes. Don't press down hard; just guide the machine and let it do its job.
As you polish each section, you'll see a dramatic jump in gloss and clarity. The color of your car will look deeper and richer, and you'll start to see sharp, clear reflections emerging. This is that satisfying moment when all the prep work really pays off. A personal tip, especially for darker colored cars which are notorious for showing every tiny flaw: use a dedicated swirl-finder light between sections. It helps you catch any remaining haze or fine swirls that are nearly invisible under normal garage lighting, ensuring you get a truly flawless finish.
Knowing When You've Achieved Peak Gloss
So, when is it time to put the polisher down? Your car's paint will tell you. When you wipe away the polish residue and the surface looks wet even though it's completely dry, you've nailed it. The reflections should be crisp and free of distortion. This final touch is what separates a good detail from a professional one. It’s what makes your car the one that stands out in a crowded parking lot.
This whole process really underscores how important it is to protect your paint from environmental damage in the first place. On an industrial scale, the science behind preventing this kind of decay is a massive business. The market for oxidation catalysts—used in everything from vehicle emissions control to industrial manufacturing—was valued at $7.36 billion in 2024 and is expected to hit nearly $20 billion by 2033. You can see the full research on the growing oxidation catalyst market to get a sense of how vital this chemistry is. After you remove car oxidation, the final, critical step is to lock in that beautiful shine with a quality sealant or wax.
Protection Strategies That Go the Distance
 After putting in all that effort to remove car oxidation, the last thing you want to do is leave your fresh paint job defenseless. Not protecting it is like training for a marathon and then stopping a mile from the finish line. This final step is what locks in that incredible shine and acts as a shield against the UV rays and road grime that caused the problem in the first place. You've done the hard part; now it's time to choose the right armor to make sure your work lasts.
Modern Protection: Beyond Traditional Wax
Paint protection has come a long way from the old-school carnauba waxes that would disappear after a couple of good rainstorms. While a traditional wax can give you a nice, warm glow, synthetic paint sealants and ceramic coatings offer a level of durability that's in a completely different league. Think of wax as a light jacket, a sealant as a tough raincoat, and a ceramic coating as a permanent suit of armor for your car.
Here's a quick breakdown:
- Synthetic Sealants: These are lab-created polymers that chemically bond with your car's paint. They create a slick, tough shield that can last for several months. I'm a big fan of sealants because they deliver a sharp, mirror-like shine and are generally very easy for anyone to apply. They're a great option for getting long-term protection without the higher cost and effort of a ceramic coating.
- Ceramic Coatings: This is the top-tier choice for paint protection today. A ceramic coating is a liquid polymer that cures into a hard, glass-like layer over your clear coat. These coatings are incredibly hydrophobic (water beads up and flies off), resistant to harsh chemicals, and can protect your paint from UV damage and light scratches for years. The application is more involved and they cost more, but the longevity is simply unmatched.
If you're looking for a middle ground, many companies now offer hybrid products, like ceramic-infused waxes and sealants, that give you better durability than a standard wax. For a deeper look into all these options, we've put together a guide with some pro secrets for lasting brilliance.
Choosing and Maintaining Your Shield
So, how do you pick the right one? It really comes down to your budget, how much time you're willing to spend, and how your car is used. A daily driver that's parked outside 24/7 will get huge benefits from a ceramic coating. On the other hand, a garage-kept classic car might be perfectly happy with a quality sealant applied a few times per year.
To help you decide, let's compare the most common options side-by-side.
| Protection Type | Durability | Cost | Application Difficulty | Maintenance Required |
|---|---|---|---|---|
| Carnauba Wax | A few weeks | Low ($) | Easy | Frequent reapplication |
| Synthetic Sealant | 3-6 months | Moderate ($$) | Easy to Moderate | Reapply a few times a year |
| Hybrid Ceramic Wax | 4-8 months | Moderate ($$) | Easy | Regular washes, reapply twice a year |
| Ceramic Coating | 2-5+ years | High ($$$) | Difficult (Pro recommended) | Proper washing, potential boosters |
As you can see, there's a clear trade-off between cost, effort, and how long the protection will last. A ceramic coating is a significant investment but pays off with years of defense.
No matter what you choose, proper maintenance is what keeps that protection working. Regular, gentle washes with a pH-neutral soap are crucial. This keeps the protective layer clean and functioning at its peak, extending its life and making sure that restored shine stays brilliant for a long, long time.
Maintaining Your Investment Without Losing Your Weekends
After putting in all that effort to remove car oxidation, the last thing you want is to see that dull, chalky film start to reappear. But here’s the good news: protecting your hard work doesn’t mean you have to give up every Saturday to detailing your car. It's all about finding a smart, consistent routine that works for a real person, not a professional detailer with unlimited time.
Smart and Simple Upkeep
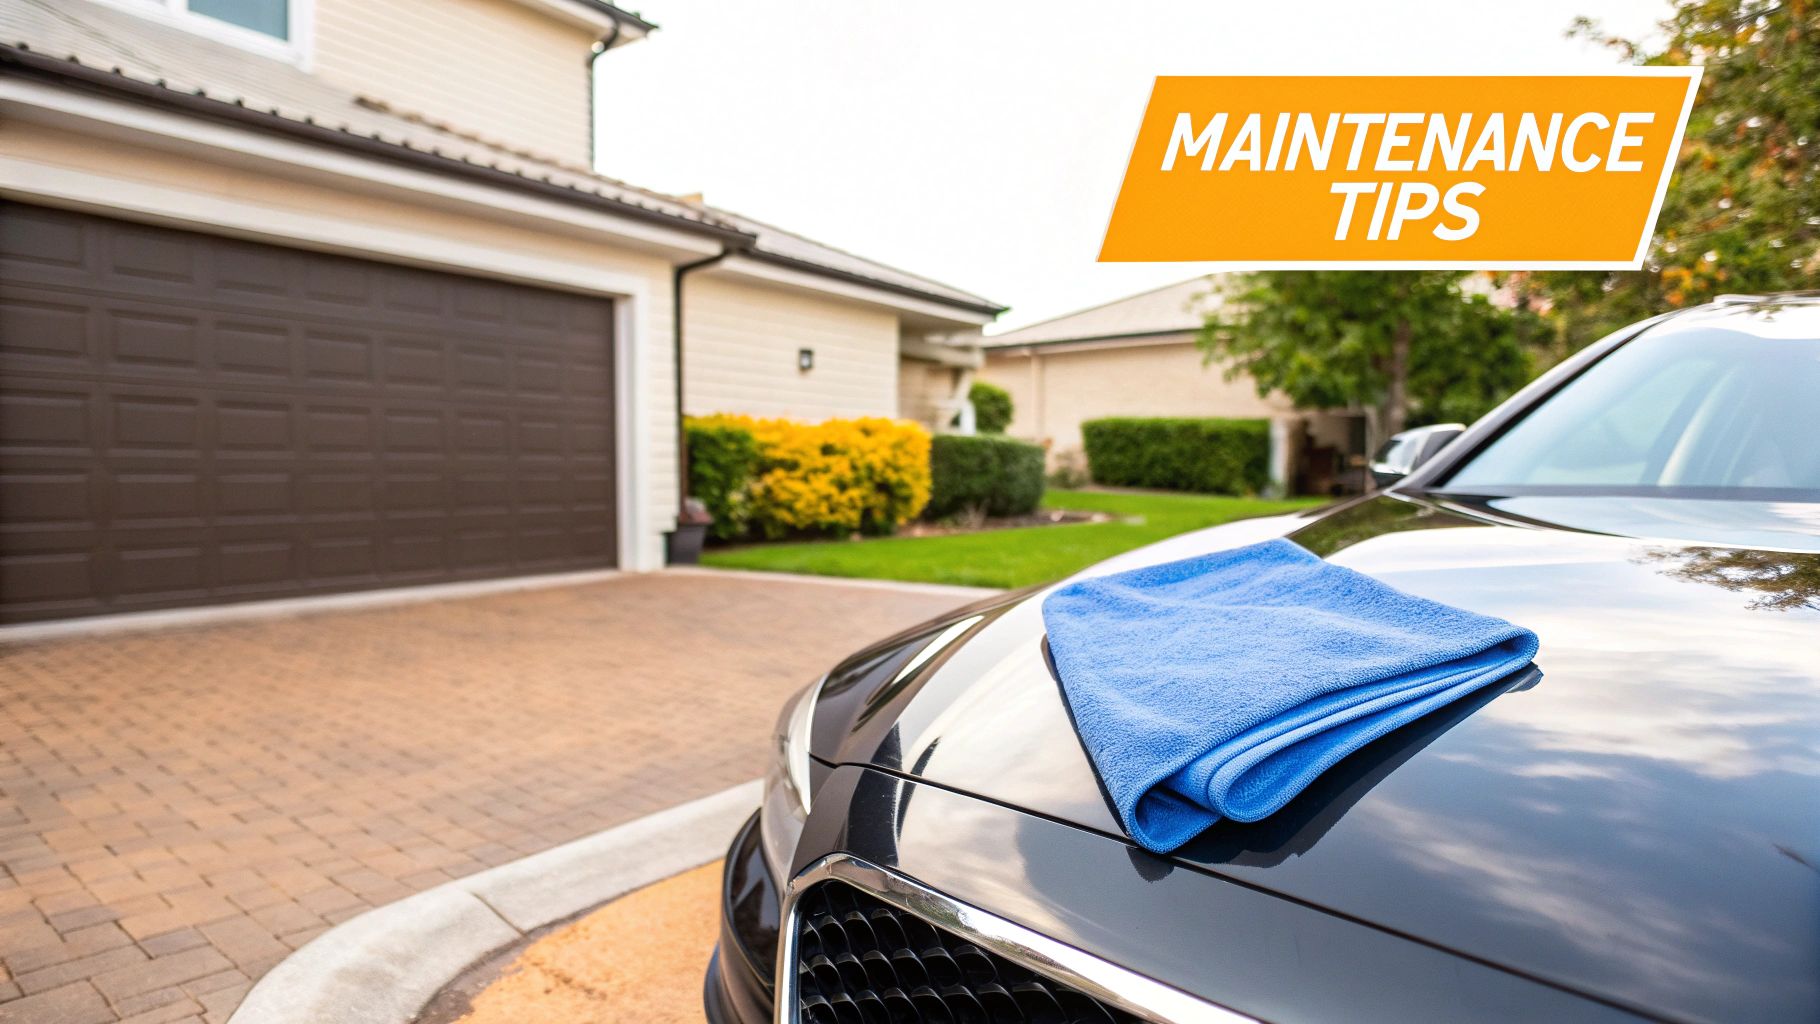
Think of your restored paint job as a fresh start that needs a solid but simple defense plan. A gentle weekly wash is your most important tool. This is where something like a foam gun, especially the SwiftJet, really shines. It lays down a thick blanket of soap that lifts away grit and grime without you having to scrub it into the finish—a key move to prevent new swirls and fine scratches.
About once a month, it's a good idea to refresh your paint's protective barrier. Whether you went with a tough synthetic sealant or a slick hybrid ceramic wax, giving it a quick boost takes less than an hour. This small time investment can add months of protection. A tell-tale sign that it's time for a touch-up is when water stops beading up into tight, little drops. When you see water sheeting off instead of beading, your protective layer is wearing thin.
This is the kind of meticulous work you're trying to preserve with your maintenance routine.
The focus and care shown in this image are exactly why a little bit of regular upkeep is so crucial. You also need to adapt to the seasons. For example, applying an extra coat of sealant before winter hits can give your paint a much-needed shield against corrosive road salt and slush. It's these small, proactive steps that will keep your car looking like you just finished that big restoration project, without making you feel like you live in your garage.
Keep that brilliant shine looking its best with minimal effort. The SwiftJet Foam Gun helps make your weekly washes fast, effective, and safe for your paint, protecting your investment one wash at a time.