
Why Following Proper Car Wash Steps Changed Everything for Me
I used to think washing my car was simple: hose it down, soap it up, rinse it off. Done, right? So wrong. I learned this the hard way when I started noticing tiny scratches all over my paint. It looked like a spiderweb of damage, and it was entirely my fault. Turns out, this is a super common mistake. Lots of people unintentionally damage their cars by washing them incorrectly. It's like brushing your teeth with steel wool – you think you're cleaning, but you're actually just causing more harm.
My expensive lesson? The order you wash your car in is just as important as the products you use. It's like baking a cake. If you just throw all the ingredients in a bowl without following the recipe, you're going to end up with a disaster. Skipping steps in your car wash routine, even ones that seem small like pre-rinsing or using the two-bucket method, can lead to swirl marks, water spots, and even permanent damage. For more tips on keeping your car looking amazing, check out our guide on How to Protect Car Paint: Pro Secrets for Lasting Brilliance.
The Turning Point: From Amateur to Informed
Talking to professional detailers opened my eyes to a whole new world of car washing. It wasn’t just about making my car look good; it was about protecting my investment. They taught me about pre-washing – getting rid of the loose dirt before you even touch the car with a wash mitt. This one simple step drastically reduces the risk of scratching. I also learned about the magic of the two-bucket method, which keeps your wash water clean and prevents you from re-depositing dirt back onto your car.
This change in my approach wasn't about becoming obsessed with washing my car; it was about understanding the why behind each step. For example, using a dedicated wheel cleaner and a separate wash mitt for your wheels prevents brake dust and road grime from getting on your car's paint. It's these little things that add up over time and save you from expensive paint correction later on. And the fact that professional car washing is becoming more and more popular really shows how important proper technique is. The car wash industry is booming! Over 77% of U.S. drivers now use professional car washes, compared to just 48% in the early 2000s. This tells you that people really value convenient and effective car care. You can find out more about the growth of the car wash industry.
My journey from clueless car washer to someone who actually knows what they're doing has made a huge difference. By understanding the logic behind each step, I've not only made my car look better but also protected its value. It’s all about working smarter, not harder, and enjoying the satisfaction of a truly clean car.
Building Your Car Wash Arsenal Without Breaking the Bank
Let’s be honest, building a solid car wash kit can seem daunting, and marketing can make you think you need a ton of expensive gadgets. But after years of washing my own cars and chatting with professional detailers, I've learned that a few key tools are all you really need for a professional-looking clean. You don't need to empty your wallet to get amazing results. One area where quality truly shines is microfiber towels. Choosing the right ones is paramount.
Microfiber Matters: More Than Just a Towel
Think of high-quality microfiber towels as little magnets for dirt and grime. Their microscopic fibers trap dirt particles, preventing those nasty swirls and scratches on your paint. Cheap towels? They can be your paint's worst enemy. I learned this the hard way years ago using an old bath towel – never again! Now, I use specific microfiber towels for washing, drying, and detailing. It's a game-changer for both paint protection and efficiency.
Smart Substitutions: When Household Items Do the Trick
Now, don't get me wrong, you don't need a specialized product for every step. A regular garden hose with a spray nozzle is perfectly fine for rinsing, especially when paired with a foam cannon. I've even used old, soft t-shirts (100% cotton) for applying tire dressing when I'm in a bind. But be careful; some shortcuts just aren't worth it. Using dish soap instead of car wash soap, for example, can strip your wax and leave your paint exposed. Know where to save and where to splurge! If you're curious about wash frequency, check out this helpful guide: How Often Should You Wash Your Car? Complete Care Guide.
Innovation vs. Investment: The Foam Cannon and Filtered Water
A few smart investments can seriously elevate your car washing game. A foam cannon, like the SwiftJet, blankets your car in thick foam, loosening dirt before you even touch it. This dramatically reduces the risk of scratching and makes washing more fun. Filtered water is another great addition. It removes minerals that cause water spots, leaving your car sparkling. Speaking of innovation, the car wash industry is changing rapidly. Did you know that cashless payments now make up a whopping 71.1% of market revenue? It shows how technology is transforming even simple tasks. Learn more about these exciting technological advancements in the car wash industry. Investing wisely and staying informed about the latest trends can truly transform your home car washes.
To help you decide where to invest your money, let's take a look at the tools you might use at home versus what the pros use. The following table breaks down the key differences in cost and performance.
| Tool Type | Home Option | Professional Grade | Cost Difference | Performance Rating |
|---|---|---|---|---|
| Wash Mitt | Basic Microfiber Mitt | Premium Chenille Mitt | $5 - $15 | Home: Good, Professional: Excellent |
| Drying Towel | Standard Microfiber Towel | Plush Microfiber Waffle Weave Towel | $10 - $20 | Home: Fair, Professional: Excellent |
| Soap | Standard Car Wash Soap | pH Neutral Car Wash Soap with Additives | $5 - $15 | Home: Good, Professional: Excellent |
| Foam Cannon | Hand Pump Foam Cannon | Electric Foam Cannon | $30 - $100 | Home: Good, Professional: Excellent |
| Pressure Washer | Electric Pressure Washer | Gas Powered Pressure Washer | $100 - $500+ | Home: Fair, Professional: Excellent |
As you can see, professional-grade tools often offer superior performance, particularly in areas like drying and foam generation. While the initial investment might be higher, the enhanced results and potential for long-term paint protection can make them worthwhile. However, budget-friendly home options can still deliver a great clean with the right technique and care.
Pre-Wash Preparation That Sets You Up For Success
This is where the magic happens—or doesn't. Pre-washing your car might seem like an extra step, but trust me, it's the most crucial part of the entire car washing process. It's the foundation upon which a truly dazzling shine is built. Skip it, and you'll likely end up chasing scratches and swirls later. Think of it like prepping a wall before painting – you wouldn't just slap on the color without cleaning and priming, right? For a deeper dive into car care, check out this resource on vehicle maintenance.
Inspection: Knowing Your Enemy
Before you even think about reaching for your trusty SwiftJet foam gun, take a stroll around your car. Think of it as a reconnaissance mission. What are you up against? Look for those sticky spots – bird droppings, tree sap, stubborn road tar. These are the real enemies, and they can etch into your paintwork if left unattended. Knowing where they are is half the battle.
Environmental Factors: Working with Nature, Not Against It
Even the weather plays a role. Direct sunlight can bake soap onto your car faster than you can rinse it, leaving those dreaded spots. Wind? Forget about it. It's a recipe for tiny scratches as dust and debris get blown onto your wet car. I learned this the hard way after a windy wash day left my freshly waxed finish looking dull and dusty. So, peek at the forecast and pick a cool, shaded spot if you can.
Targeted Solutions: Addressing Specific Problems
Just like you wouldn't use a hammer to tighten a screw, you need the right tools for specific car cleaning problems. Dealing with winter salt residue? A dedicated salt remover before the pre-wash is a game-changer. Caked-on bugs or road grime? A specialized pre-wash solution will work wonders. My personal favorite? A citrus-based pre-wash. It melts bug splatter without stripping your wax or sealant.
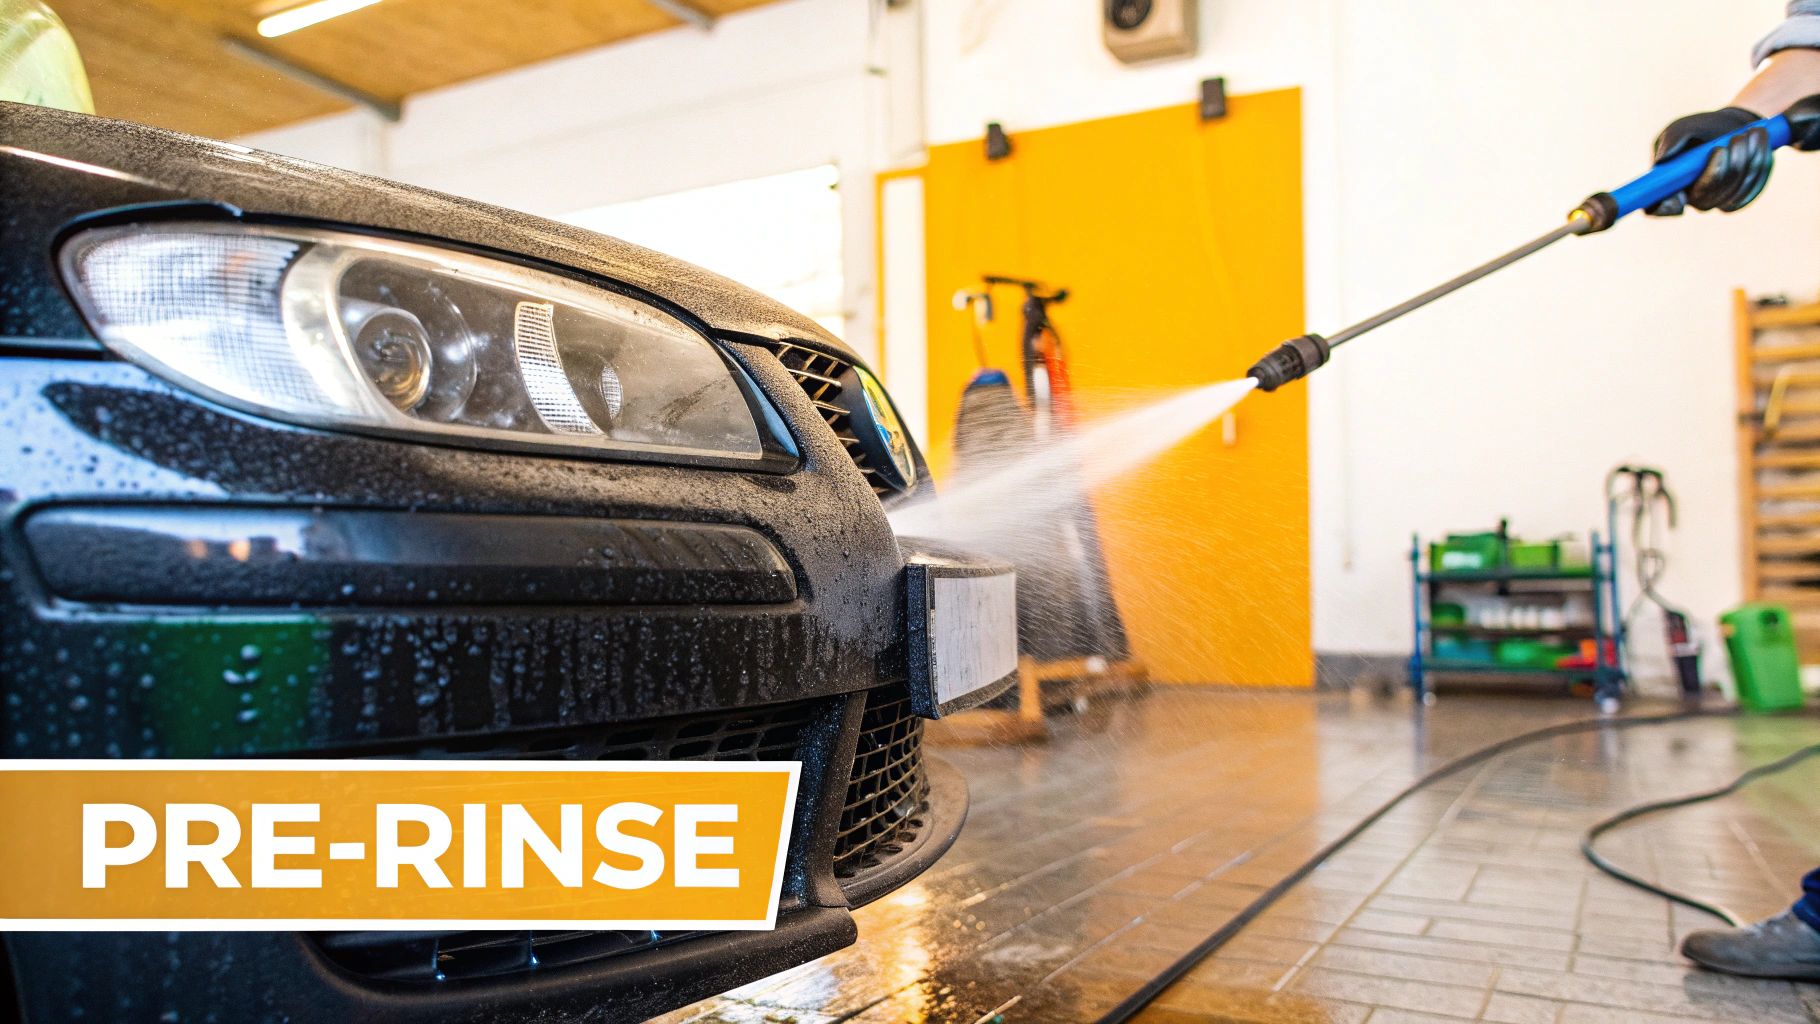
Timing Your Attack: The Pre-Wash Strategy
So, what’s the plan of attack? First, a good rinse with plain water from your hose. This knocks off loose dirt and prevents you from grinding it into the paint during the wash. Next, apply your pre-wash solution from the bottom up. This helps prevent streaking and lets the solution dwell longer on the dirtier lower panels. Let it sit for a few minutes (check the product instructions), but don't let it dry! Finally, rinse everything off thoroughly, this time from top to bottom.
This pre-wash process is like softening up the enemy before the main battle, making the actual wash process smoother, more effective, and much less likely to cause damage. Your paint will thank you.
Mastering Car Wash Steps That Prevent Swirl Marks
So, you’ve prepped your ride, got your gear together, and you’re ready to wash. This is where everything you thought you knew about washing a car might get flipped on its head. The two-bucket method isn’t just for pros showing off—it’s crucial for keeping your paint pristine. I’ve seen firsthand how skipping this simple step leads to those dreaded swirl marks that plague so many cars.
The Two-Bucket System: Your Paint’s Best Friend
Let's break down why two buckets are better than one. One bucket holds your wash solution, the other has clean rinse water. After each pass with your wash mitt, dunk it in the rinse bucket to get rid of the dirt and grime you’ve just picked up. This stops those abrasive particles from scratching your paint, significantly reducing swirl marks. I used to think it was overkill, but honestly, the difference is unbelievable. My paint looks way better since I started doing this.
Strategic Washing: Top to Bottom, Cleanest to Dirtiest
Washing your car isn't just scrubbing—it's strategic. Start with the roof, the cleanest part, and work your way down. This keeps you from spreading dirt from the dirtier lower sections onto the already-clean areas. Same goes for your wheels – wash them last. They’re covered in brake dust and road grime which can easily scratch your paint. I even use separate mitts for the wheels and body, just to be extra careful. Want to explore other washing methods? Check out Top 7 Best Car Washing Techniques for a Showroom Shine.
Refreshing Your Solution: Don’t Be Afraid to Start Over
Your wash solution can only hold so much dirt before it becomes a swirl mark factory. If your rinse bucket looks like chocolate milk, dump it and refill. Don’t be stingy with the fresh water – a few extra gallons can save you a fortune in paint correction down the road. I’ve learned to keep an eye on the rinse water and refresh it as needed, sometimes even multiple times during a single wash.
Tricky Areas: Wheels, Grilles, and Door Jambs
These often-forgotten spots need some extra love. Use a dedicated wheel cleaner and a separate mitt for your wheels. For grilles and door jambs, a detailing brush can work wonders for removing grime without scratching. I learned the hard way that using the same mitt for these areas as the rest of the car is a recipe for scratches.
Rinse and Repeat (Literally): The Infographic Breakdown
Preventing swirl marks isn't just about the products; it’s about the timing and technique. This infographic shows the core car wash steps and how long to spend on each:
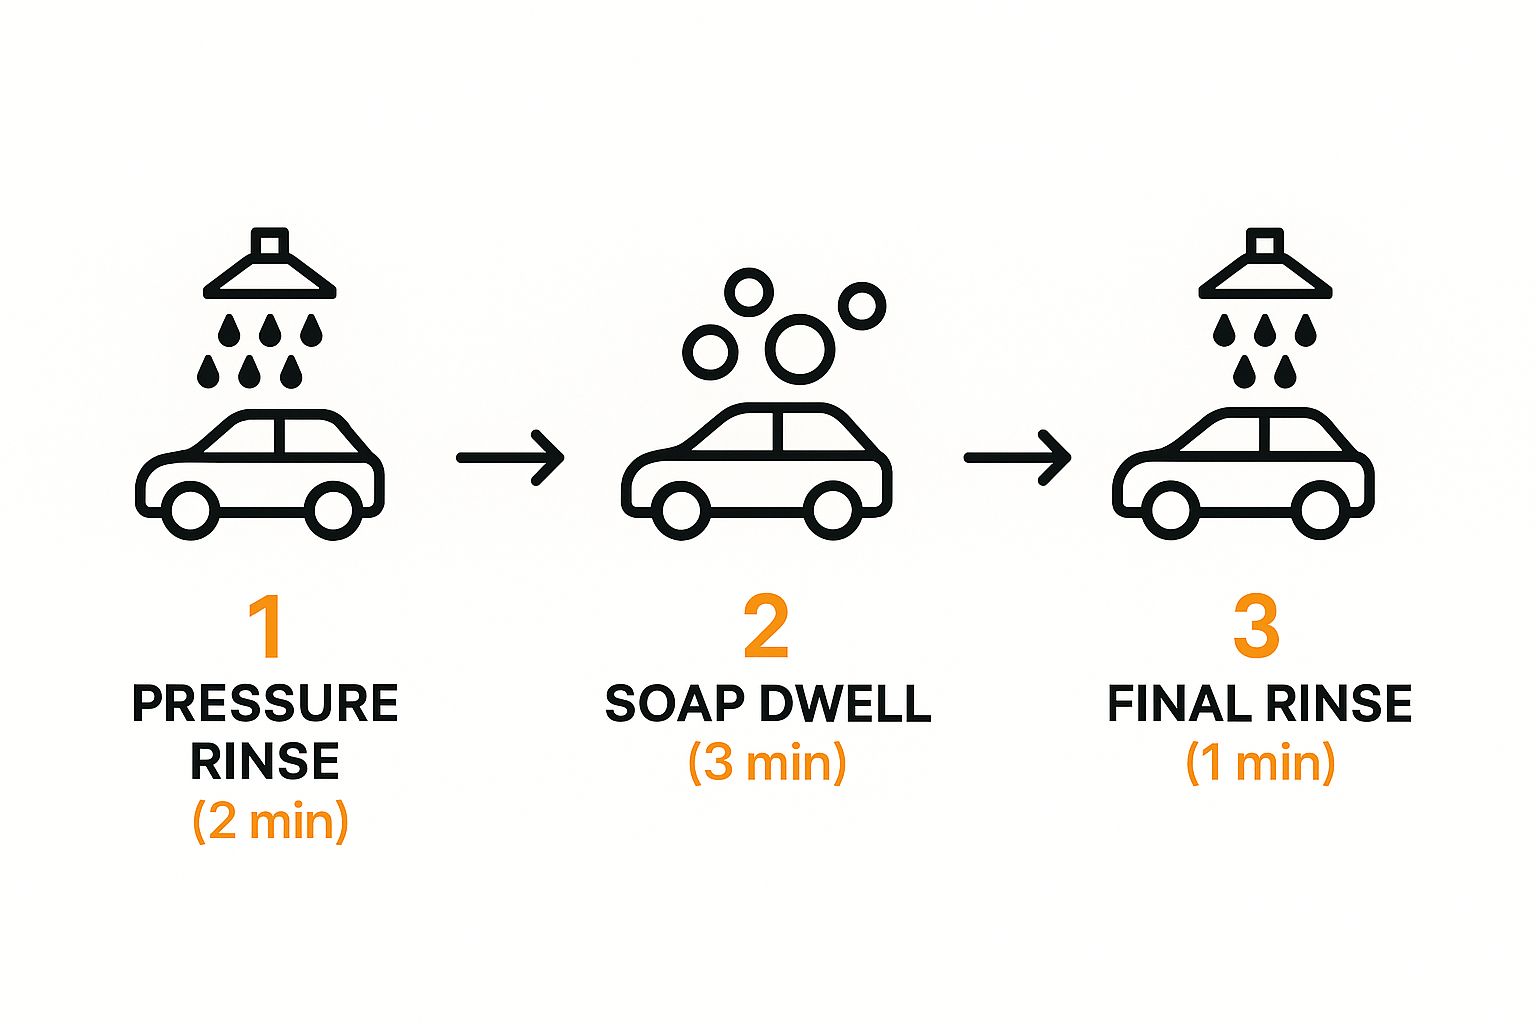
The process is simple: a 2-minute pressure rinse to blast off loose dirt, a 3-minute soap dwell to let the solution do its thing, and a 1-minute final rinse to remove any leftover soap. Sticking to these times ensures a clean car and minimizes water spots and soap residue.
The table below provides a more detailed breakdown of each step, recommended timings, key focus areas, common mistakes to avoid, and tips for achieving optimal results.
Car Wash Step Sequence and Time Allocation Breakdown of each washing step with recommended time allocation and key focus points for optimal results
| Wash Step | Time Required | Key Focus Areas | Common Mistakes | Success Tips |
|---|---|---|---|---|
| Initial Rinse | 2 minutes | Removing loose debris, pre-soaking the car | Rushing this step, insufficient water pressure | Use a pressure washer for best results |
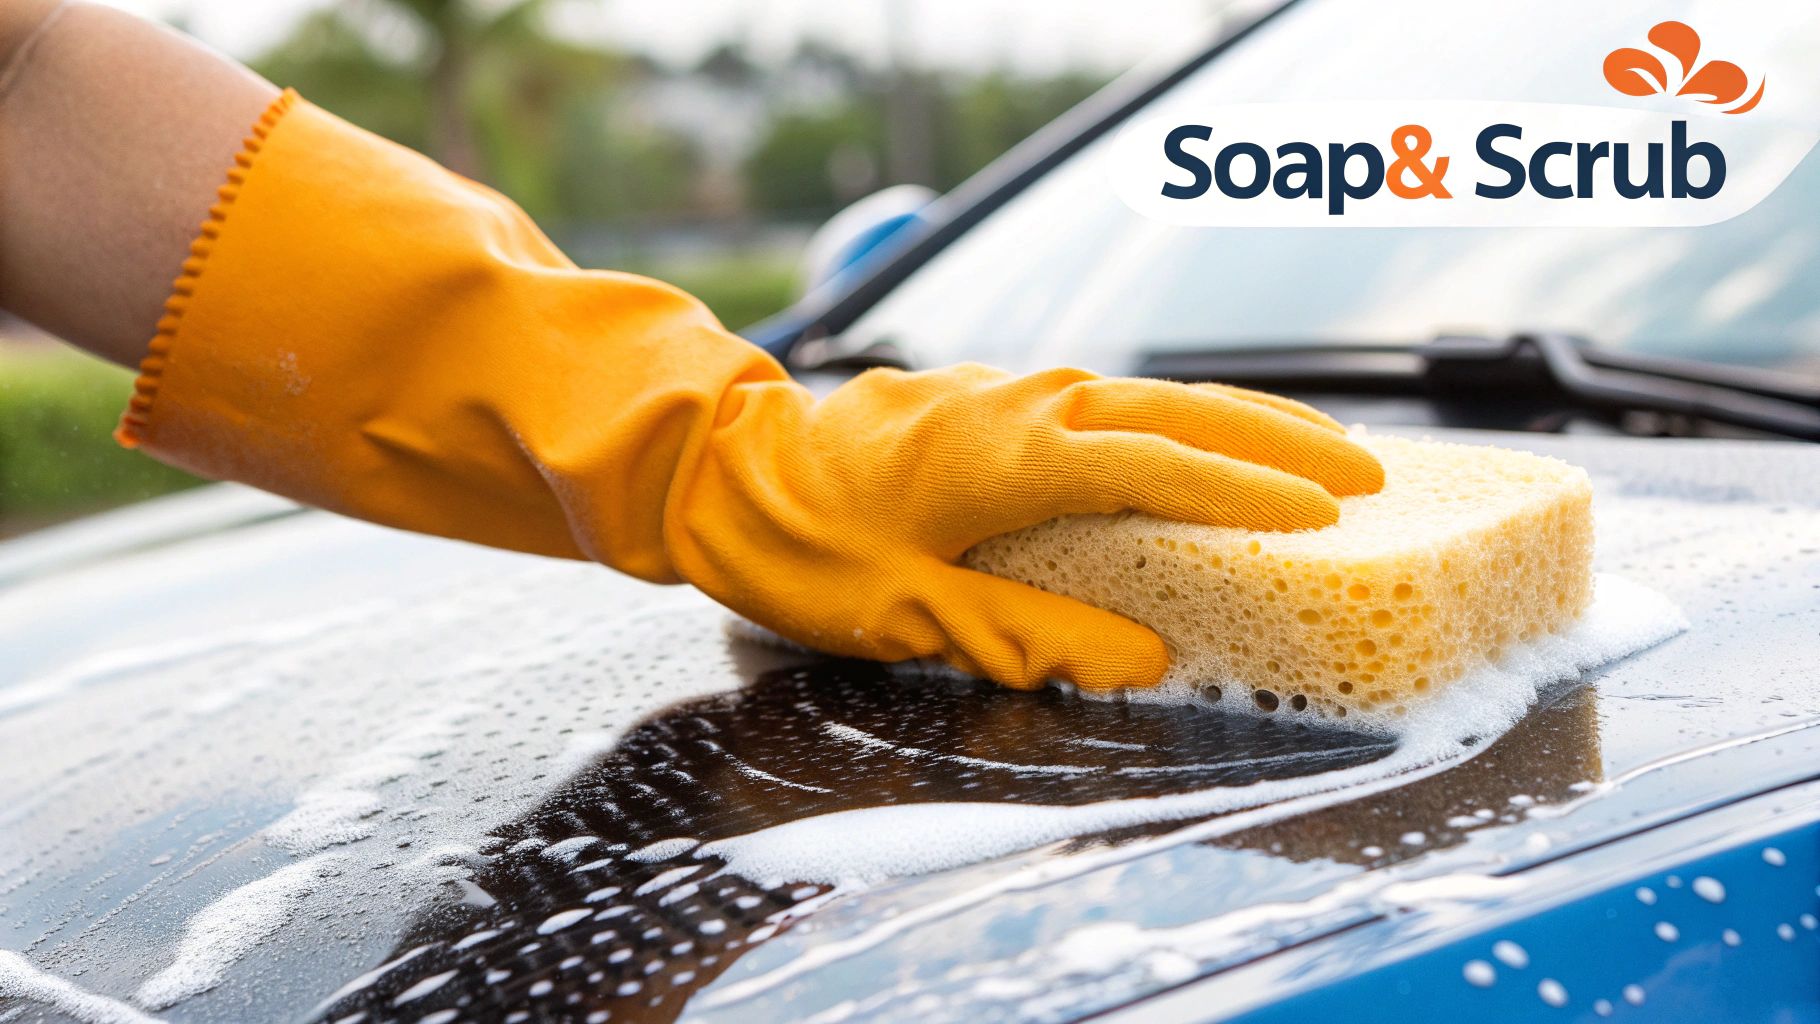
| Soap Application & Dwell | 3 minutes | Ensuring even coverage, allowing the soap to loosen dirt | Not letting the soap dwell long enough, scrubbing too hard | Work in sections, use a quality wash mitt |
| Rinse | 1 minute | Thoroughly rinsing off all soap residue | Not rinsing thoroughly, leaving soap to dry | Rinse from top to bottom |
| Wheel Cleaning | Varies | Removing brake dust and road grime | Using the same mitt as the car body | Use a dedicated wheel cleaner and brush |
| Grille and Door Jamb Cleaning | Varies | Removing stubborn grime from intricate areas | Using abrasive tools that can scratch | Use a detailing brush and appropriate cleaning solution |
| Drying | Varies | Removing all water to prevent water spots | Using a dirty towel, dragging the towel across the paint | Use a clean, high-quality microfiber drying towel |
By following these steps, you’re not just cleaning your car—you're protecting its value and keeping it looking its best.
Drying Techniques That Make or Break Your Results
You've meticulously followed all the car wash steps, from pre-wash to the final rinse, and your car is gleaming…wet. But the job’s not done yet! This is where so many otherwise great car washes go south. Improper drying is a shine killer, leaving water spots, scratches, and streaks that undo all your hard work. Trust me, I've learned this the hard way.
The Science of Drying: Why Technique Trumps Tools
The secret to a perfect finish isn't just the tool you use, it’s how you use it. There's actually a science to drying. Water contains minerals that leave those annoying water spots when they evaporate. It's like leaving a glass of tap water out – you see the residue. Same thing happens on your paint. That’s why speed and technique are so important in this final stage.
Material Matters: From Chamois to Microfiber
The chamois has been around forever, but microfiber drying towels are where it's at now. Microfiber's dense weave traps way more water than a chamois, really minimizing water spots. I made the switch myself, and wow, what a difference! Faster drying time, and my car looks fantastic.
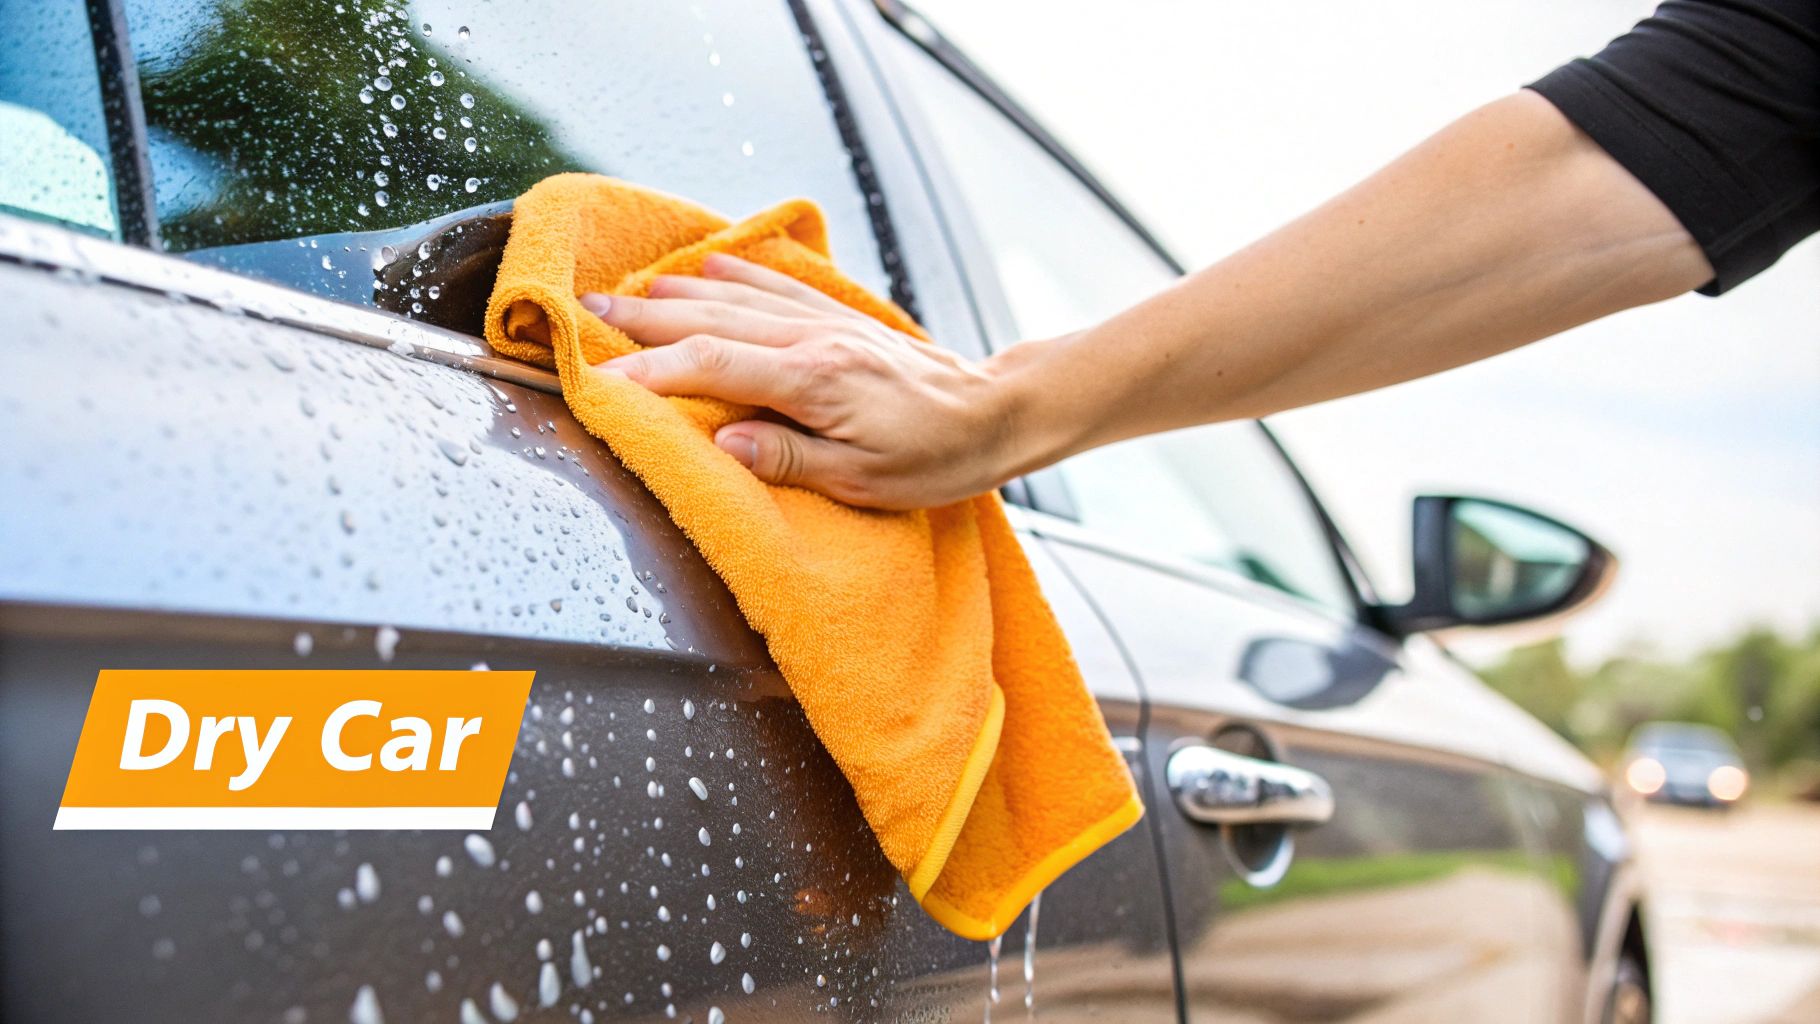
The Drying Dance: Mastering the Streak-Free Finish
No scrubbing or circles! The best technique is a gentle gliding motion. Start at the roof and work down, section by section. Let the towel's weight do the work—no need to press. For an extra-slick finish, use a drying aid (sometimes called a quick detailer). This stuff lubricates the surface and helps lift off any remaining water. I love how it adds a layer of gloss and makes drying so much easier.
Weather Warfare: Adapting to the Elements
Just like washing, weather matters for drying. A hot, sunny day is your enemy. Water evaporates fast, leading to water spots. Shade is your friend! If it’s windy, use several small towels to dry small sections at a time. This keeps dust and debris from sticking to your wet car. I learned this after a windy day wash left my car covered in dust – not fun!
Maintaining the Magic: When to Start Over
Even with the best technique, water spots can happen. Don't worry! A quick detailer can usually handle light spots. But for heavy spots or streaks? Re-wash and dry the area. Trying to fix severe spots later can sometimes make things worse, in my experience. Knowing when to restart is all part of the process.
Troubleshooting When Car Wash Steps Go Wrong
Even with the best car wash plan, things don't always go smoothly. Maybe you rushed a step, or the weather turned sour. It happens. Dealing with setbacks is part of the learning curve. This section covers common car wash mishaps and offers solutions I've learned over years of successes (and, yes, a few spectacular failures).
Water Spots: The Bane of a Clean Car
One of the most annoying things is water spots. Those little mineral deposits that make your freshly washed car look like it just drove through a downpour. I’ve been there. The key is to act fast. A quick detailer (or drying aid) can usually fix light spots. Just spray and wipe with a clean microfiber towel. Stubborn spots might need a dedicated water spot remover. Sometimes, though, you just have to re-wash the area. It’s a pain, I know, but it's better than a spotty finish.
Scratches: Dealing with the Dreaded Swirls
Finding scratches after a wash is a real heartbreaker. If they’re minor swirls, a light polish might do the trick. Deeper scratches? You might need a pro. I once tried to buff out a deeper scratch myself and made it worse. Live and learn, right? Sometimes, it’s best to leave it to the experts. It’s like trying to fix your own plumbing – sometimes you just make a bigger mess.
Seasonal Challenges: Adapting Your Car Wash Steps
Seasons change, and so should your car wash routine. Winter road salt is brutal on your car's finish. Use a dedicated salt remover before your pre-wash in winter conditions. In summer, tree sap and bug splatter need special attention. Knowing which products to use for each season makes all the difference. Think of it like having different weapons in your car wash arsenal for different enemies.
Maintaining Your Car's Finish Between Washes
Keeping your car clean between full washes helps your wax or sealant last longer. A quick detailer and a microfiber towel are your best friends. I usually wipe my car down once a week to remove dust and light dirt. It’s a small thing that makes a big difference. It keeps my car looking good and stops dirt from building up. It’s all about prevention, right? It's no surprise that with the increasing focus on car appearance, the car wash market is projected to reach $43.68 billion by 2029. Learn more about the growing car wash market.
DIY vs. Professional: Knowing When to Call for Backup
Let's be real – sometimes you need a pro. Minor issues like water spots and light scratches are usually easy DIY fixes. But serious problems – deep scratches, dents, or paint damage – are best left to the professionals. Trust me, I've learned the hard way that trying to fix big problems yourself can cost you more in the long run. Knowing when to call in the pros can save you time, money, and a lot of frustration.
Building Sustainable Car Wash Habits That Actually Stick
Keeping your car sparkling clean all the time can feel like a Herculean effort, right? But it doesn't have to be a battle. It's not about chasing perfection every single wash. It's about finding a practical routine that works for you and keeps your car looking consistently good. I've chatted with a lot of car lovers over the years, and the ones with the consistently best-looking cars aren’t necessarily spending their weekends detailing. They're the ones who’ve nailed a sustainable routine.
Creating a Realistic Car Wash Schedule
First, think about how you use your car and the conditions you drive in. Live in a dusty area? Spend a lot of time on gravel roads? These things definitely impact how often you'll need to wash. Maybe a full wash every two weeks is doable, with some quick touch-ups in between. Personally, I've found that a quick rinse and wipe-down with some detail spray keeps my car looking sharp between full washes. It only takes a few minutes, and it stops dirt from building up and becoming a bigger problem later.
Streamlining Your Car Wash Steps for Quick Washes
We all have those days where time is tight. When you’re short on time, it's perfectly fine to streamline your process. A quick pre-wash with a foam gun like the SwiftJet, followed by a wash and rinse, can make a huge difference. You could skip the waxing or polishing for these quicker washes, but never compromise on the pre-wash and the two-bucket method. These are the core steps that prevent swirl marks and protect your paint long-term. It’s all about working smarter, not harder.
Adapting to Seasons and Driving Conditions
Your car wash routine should definitely change with the seasons. Winter brings salt and grime, which means a salt remover becomes a must-have in your pre-wash routine. Summer, on the other hand, brings bugs and tree sap, which require specific cleaning products. Adjusting your routine based on the season ensures you're tackling the specific challenges each one presents. Think of it like changing your wardrobe – you wouldn't wear a winter coat in the summer!
Checklists and Time-Saving Techniques
Having a checklist for different wash scenarios – a full wash, a quick wash, a winter wash – helps you stay organized and efficient. I actually have checklists taped to my garage wall, so I never miss a crucial step. Another great time-saver? Investing in good quality microfiber towels and drying aids. They seriously cut down drying time. It’s a small investment that makes a big difference in how efficiently you can wash your car.
Consistency Over Perfection: The Long-Term Win
Remember, the goal isn’t a perfectly clean car every single time. It’s about consistent care that keeps your car looking great over time. Don't stress if you miss a wash now and then or have to skip a step. The real key is finding a routine that’s sustainable and, dare I say, enjoyable, so you don’t burn out on keeping your car clean. Consistency, not perfection, is what will really make your car shine.
Ready to experience the easy clean of the SwiftJet foam gun? Make washing your car faster, easier, and more enjoyable. Get yours today and change your car washing routine for the better! Check out the SwiftJet Foam Gun here!