
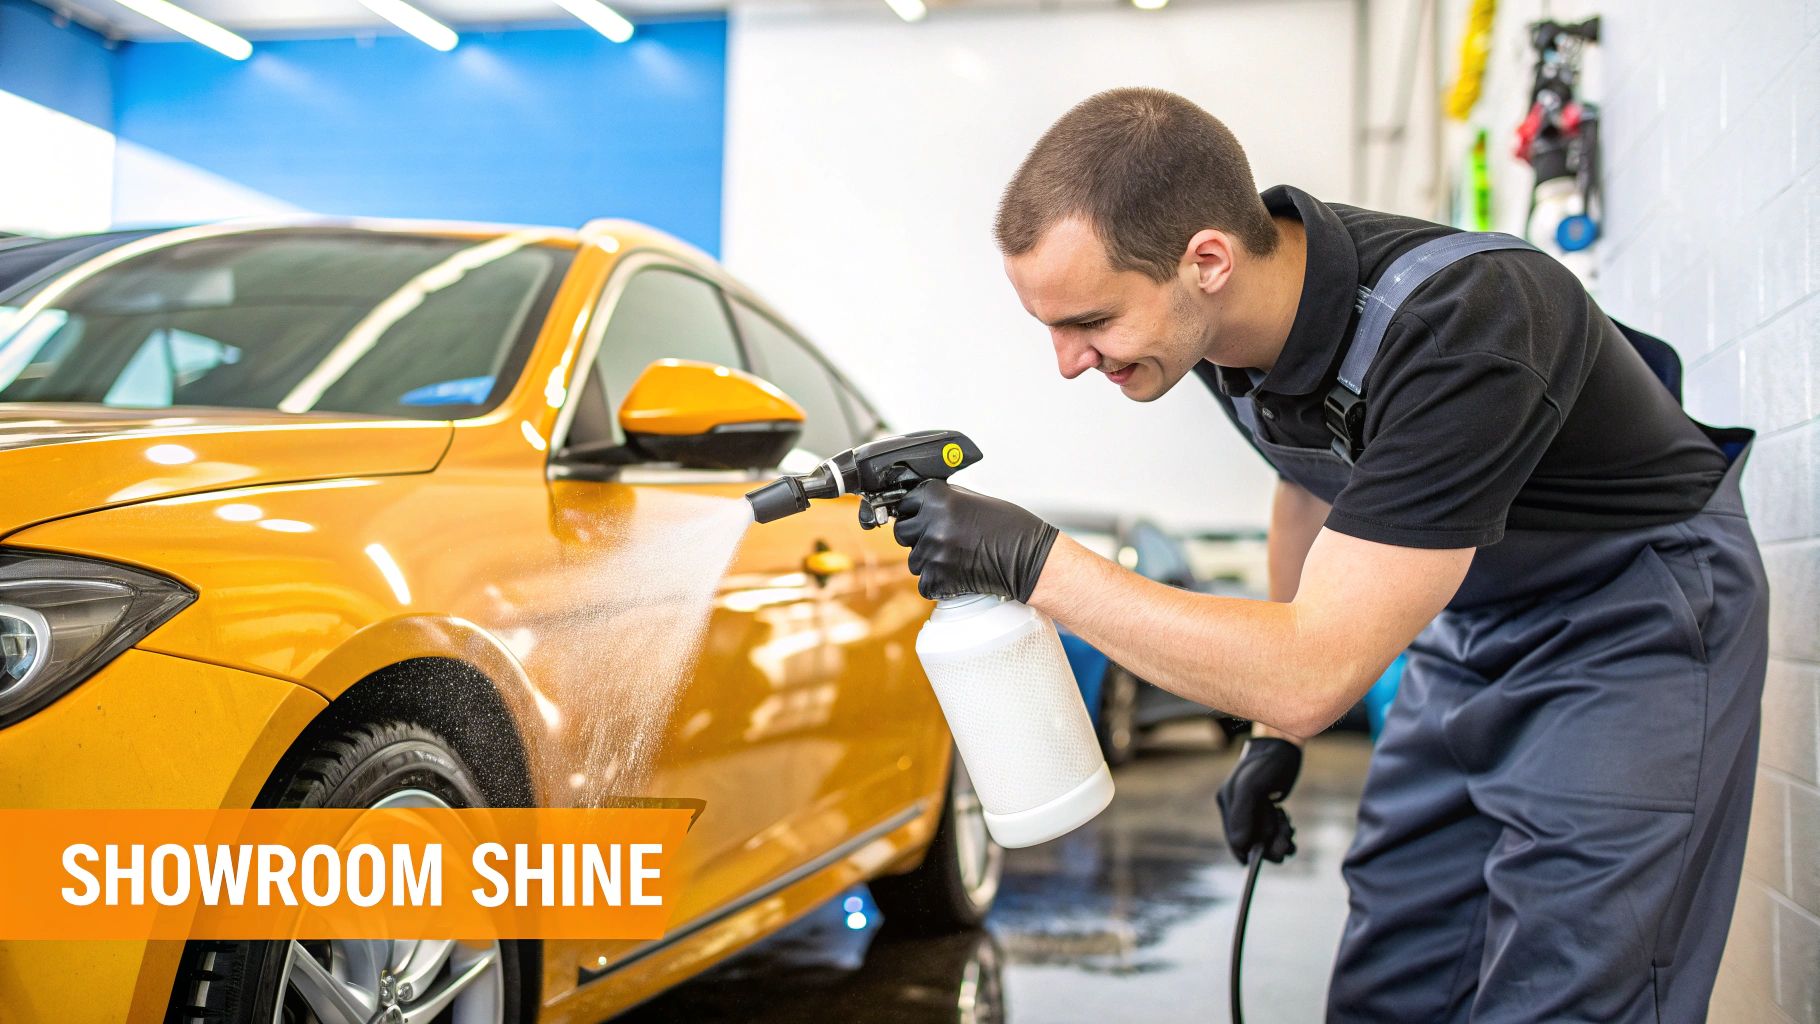
If you're tired of seeing new swirl marks and missed spots every time you leave an automated drive-thru wash, it's time to take matters into your own hands. Using a professional car wash kit at home gives you the ultimate control to achieve that flawless, showroom shine. It's truly the best way to protect your car's finish while getting a clean that's deeper and lasts far longer.
Why a Pro Kit Beats the Drive-Thru Wash, Every Time
Sure, automated car washes are fast, but those giant, spinning brushes can be brutal on your paint. Think about it: they scrub car after car, trapping dirt, sand, and road grime from every vehicle that went before you. Those abrasive bristles essentially act like sandpaper, etching fine scratches and swirl marks into your car’s clear coat.
A professional kit, especially one built around a quality foam cannon like the SwiftJet, uses a much smarter—and safer—method. The whole process kicks off with a thick layer of pre-soak foam that clings to the surface. This foam's job is to gently break down, encapsulate, and lift away grit before you ever touch the paint.
This single step is a game-changer. It dramatically reduces the friction needed to get the car clean, meaning that when you finally go in with a wash mitt, most of the debris that could cause scratches is already sliding off.
The Detailer's Advantage in Your Own Driveway
Using a dedicated kit isn't just about getting your car clean; it's about preserving its value and appearance. Every tool in the SwiftJet kit is there for a reason, all working together to protect your investment.
- Go Scratch-Free: A high-quality foam cannon followed by soft microfiber mitts is the gentlest way to wash. No harsh, dirty brushes here.
- You're in Control: You get to decide the soap-to-water ratio for perfect foam thickness and can focus on problem areas like bug-splattered grilles or grimy rocker panels. Nothing gets missed.
- Protect for the Long Haul: A proper wash removes corrosive contaminants like road salt, bird droppings, and tree sap before they can permanently damage your paint.
This hands-on approach is why so many car owners are ditching the drive-thru. In fact, the global car detailing product market was valued at an incredible USD 14.39 billion in 2024 and is expected to nearly double by 2035. This boom is fueled by people just like you who want better results and are investing in at-home solutions. You can discover more insights about this growing market and the massive shift toward professional-grade car care.
By making this your new routine, you're doing more than just washing your car—you’re performing critical maintenance that keeps it looking amazing for years to come.
Getting started is easy when you have the right gear. Here’s a quick look at what comes in the SwiftJet kit and why each piece is essential.
SwiftJet Kit Components and Their Purpose
| Component | Primary Function | Pro Tip |
|---|---|---|
| SwiftJet Foam Cannon | Creates and applies a thick, clinging foam to pre-soak the vehicle. | For the thickest foam, use warm water in the canister. It helps the soap dissolve and mix more effectively. |
| High-Pressure Nozzle Set (5-Piece) | Provides different spray patterns for rinsing, from a pinpoint jet to a wide fan. | Use the 40-degree (white) nozzle for general rinsing. It has enough power to wash away soap without being harsh on your paint. |
| 1/4" Quick-Connect Adapter | Allows the foam cannon to easily and securely attach to most pressure washer wands. | Give it a firm tug after connecting to ensure it's locked in place. You don't want it flying off mid-wash! |
| Microfiber Wash Mitt | Used for the "contact wash" phase to gently agitate and remove loosened dirt. | Keep two mitts: one for the upper, cleaner parts of the car and another for the lower, dirtier sections to avoid cross-contamination. |
Each component is designed to give you a specific advantage, turning a simple car wash into a full-on detailing session that protects and enhances your vehicle's finish.
Setting the Stage for a Perfect Wash
A truly professional finish starts well before the foam even hits your car. I've seen it time and time again: people invest in a great professional car wash kit but then make one classic mistake that ruins the whole job—washing the car in direct sunlight.
When the sun beats down on your car's panels, they get hot. Really hot. This heat causes your water and soap to evaporate in seconds, leaving behind ugly water spots and a film of soap scum that's a real pain to get off. You end up working twice as hard for a finish that looks worse than when you started.
Choose Your Location Wisely
The best time to wash your car is always in the cooler parts of the day. Think early morning or later in the evening when the sun is low. If you have to tackle the job midday, do yourself a favor and find some shade. A garage, a carport, or even a big, leafy tree will do the trick. Your goal is simple: keep the car's surface cool to the touch from start to finish.
This quick infographic breaks down the key prep steps for getting that flawless, spot-free shine.
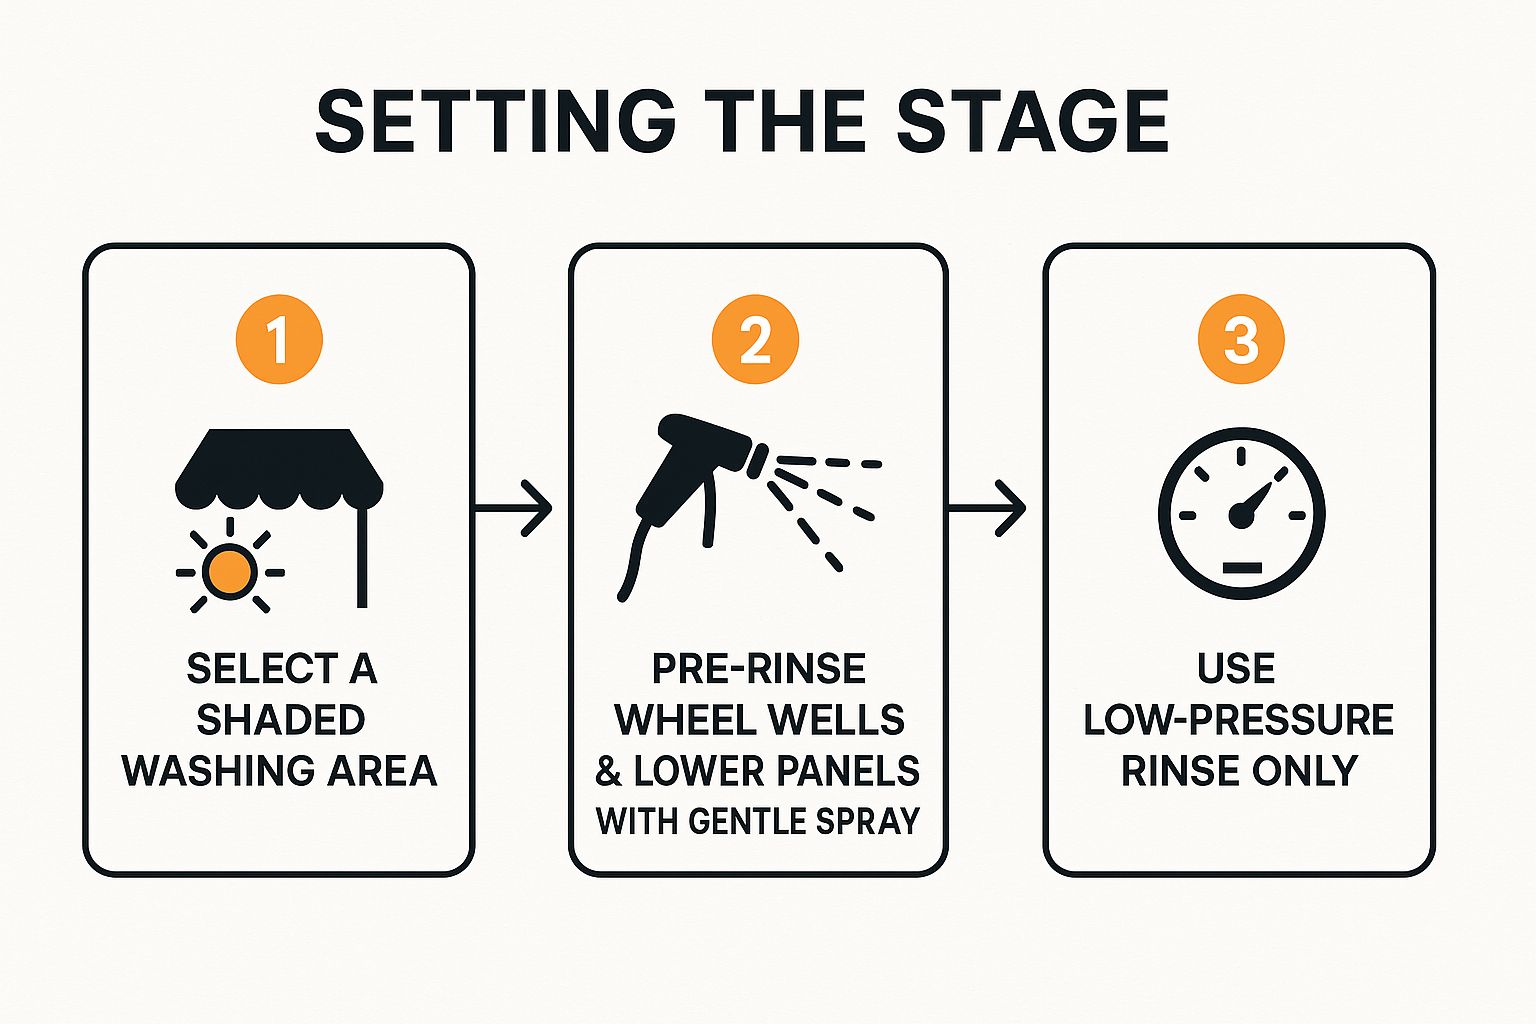
Stick to this order—finding shade, pre-rinsing the grimiest spots, and using gentle water pressure. It makes a world of difference and lets the foam do its job without fighting against dried-on soap.
The All-Important Pre-Rinse
Once your car is out of the sun, it's time for a pre-rinse. We're not trying to pressure-wash the paint off here. The goal is just to knock off all the loose dirt, dust, and grime. This simple step prevents you from grinding that grit into your paint later with your wash mitt.
I always recommend starting with the filthiest parts of the car first.
- Wheel Wells and Lower Panels: This is where all the road grime, salt, and mud collects. Rinsing these areas first stops that gunk from splashing up onto the panels you just cleaned.
- Gentle Pressure is Key: Grab the wide-fan nozzle from your kit. Blasting the car with a high-pressure jet can actually push sharp particles into the clear coat, causing the exact kind of fine scratches you're trying to prevent.
A good pre-rinse honestly does about 50% of the cleaning for you. It gets the heavy lifting out of the way, clearing the surface so the foam can go to work on the more stubborn, bonded-on grime for a much safer wash.
Now that the car is cool, clean, and damp, you've created the perfect canvas. It's time to bring in the foam cannon.
Getting the Most Out of Your Foam Cannon
Alright, your car is prepped and ready. Now for the fun part: laying down a thick, satisfying blanket of foam. This is where your professional car wash kit really comes into its own, turning a weekend chore into a seriously effective cleaning session. But getting that perfect, shaving-cream-like consistency that sticks to every panel takes a little finesse.
The Perfect Soap and Water Mix
The secret to incredible foam isn't just about using more soap—in fact, that's a common mistake that can lead to a runny, watery mess. It all comes down to the soap-to-water ratio inside your cannon's reservoir.
A great starting point is a 1:10 ratio of soap to water. For the SwiftJet's canister, that works out to about three ounces of a good, pH-neutral car soap. Then, just fill the rest of the canister with warm water.
And yes, the water temperature matters. Using warm water is a pro tip that helps the soap dissolve completely, which is the key to creating a much richer and more uniform lather.
Fine-Tuning Your Foam Cannon
With your mixture ready, it's time to dial in the cannon itself. The SwiftJet gives you two key adjustments to get total control over how the foam hits your car. Getting these right is what separates a good wash from a great one.
First, you have the top dial. This controls how much of the soap mixture is pulled from the reservoir. For the thickest foam, turn it all the way clockwise. You can always back it off a bit if you find it's too much.
Next is the nozzle at the front, which adjusts the spray pattern. You have two main options here:
- Wide Fan: Twist the nozzle for a wide, vertical spray. This is your go-to for covering big, flat areas like the roof, hood, and doors quickly and evenly.
- Pinpoint Stream: Tighten the nozzle to get a more concentrated, powerful stream. This is perfect for blasting stubborn grime out of tricky spots like the grille, around emblems, or deep inside your wheel spokes.
A quick tip from experience: always start foaming from the top of the vehicle and work your way down. Gravity will do some of the work for you, pulling the dirt and grime down the panels as the foam slowly drips.
Why Dwell Time Is So Important
Once the car is completely covered, just let the foam sit and do its job. We call this "dwell time," and it's probably the most crucial part of the process. During this time, the active agents in the foam are busy breaking down dirt and lifting those stubborn contaminants away from your paint.
You're aiming for a dwell time of about 3-5 minutes. The trick is to give it enough time to work its magic without letting it dry on the surface. If you see the foam starting to dry—especially on a hot or sunny day—rinse it off immediately. Dried-on soap can leave a residue that's a real pain to remove. You can learn more about how your foam cannon works with your pressure washer in our detailed guide right here: how your foam cannon works with your pressure washer.
This kind of careful, effective cleaning is exactly why so many car owners are investing in professional-grade tools for at-home use. It's a major reason the global car washing service market is expected to reach an incredible USD 35.2 billion by 2035. People simply want better, safer ways to care for their cars. You can read the full analysis on this market growth to see how quality kits are changing the game.
How to Use the Two-Bucket Method and Keep Your Paint Scratch-Free
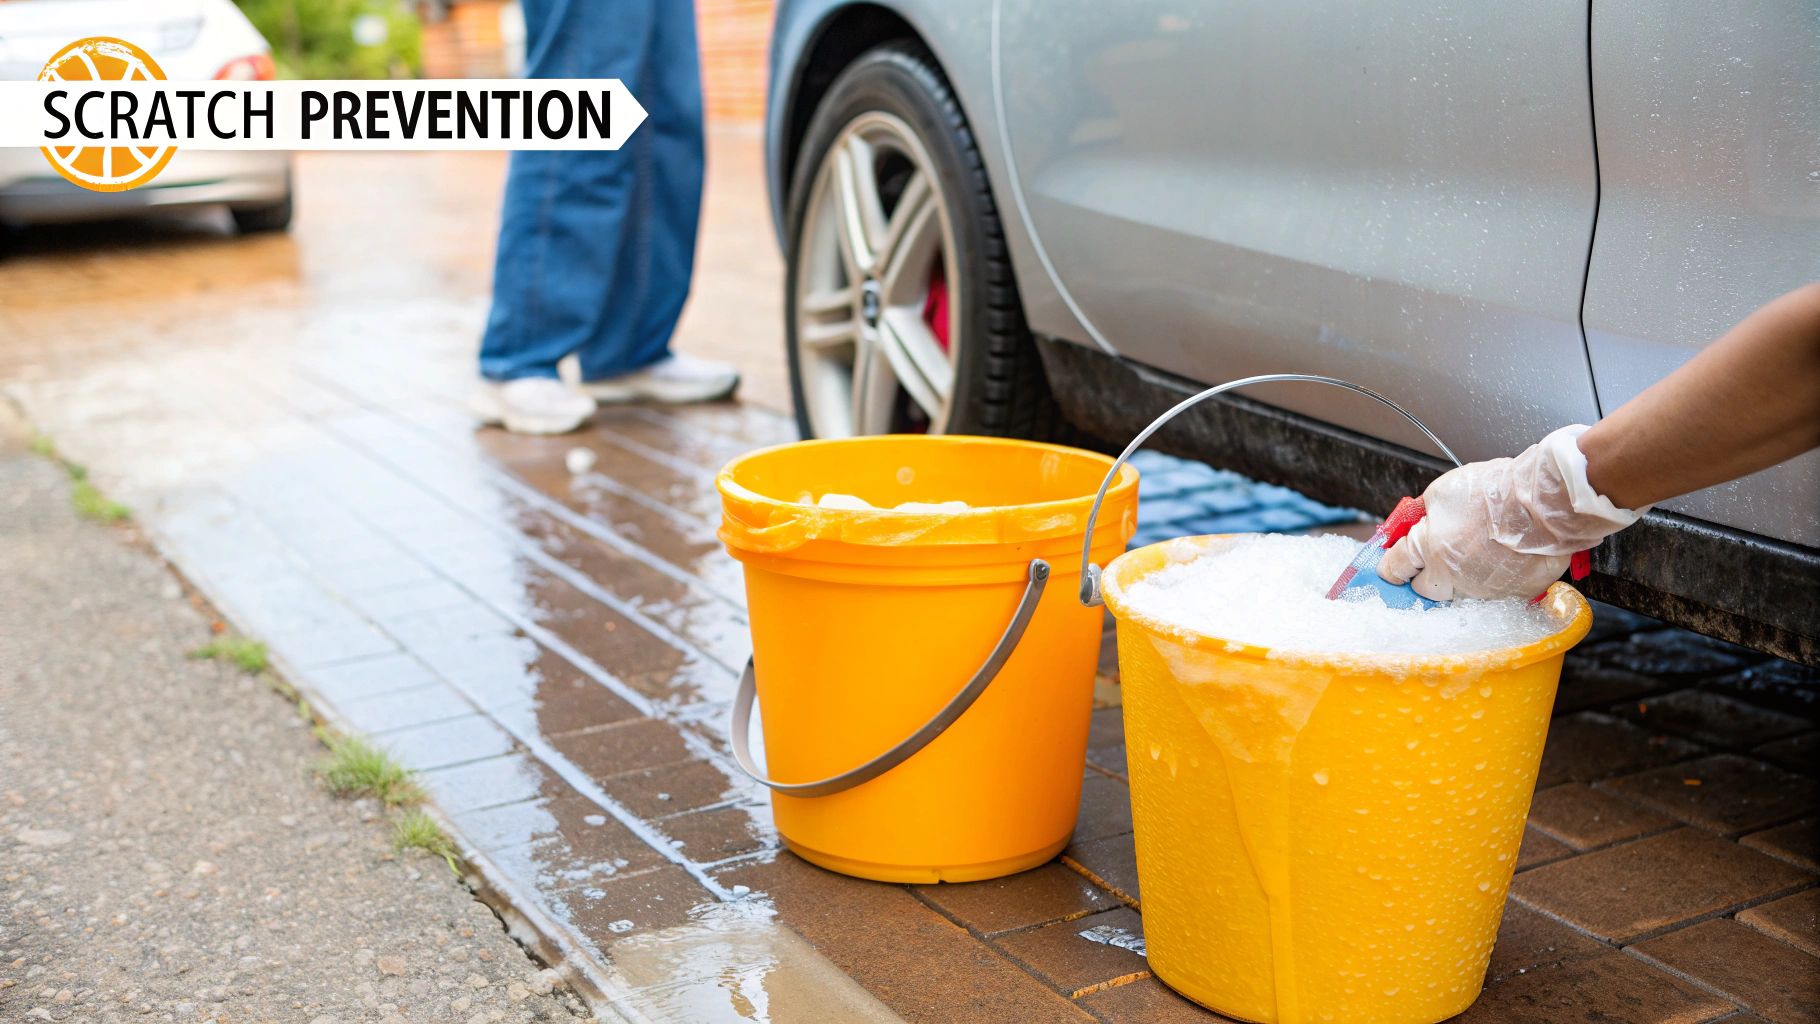
Alright, the foam has done its job lifting the heavy dirt, but now it's time for the contact wash. This is the moment of truth. More paint gets damaged during this step than any other, which is why the two-bucket method is an absolute game-changer and a must-do for anyone using a professional car wash kit.
The beauty of this technique is its simplicity. You just need two buckets, each with a grit guard sitting at the bottom. One bucket gets filled with your car soap solution, and the other is just for clean rinse water.
This simple setup stops you from making the cardinal sin of car washing: redepositing grit and grime right back onto your paint. Instead of dunking a dirty wash mitt back into your soapy water, you'll rinse it in the clean water bucket first.
Getting the Wash Process Right
Here's how you put it into practice. It's a simple rhythm you'll get into quickly.
- Dip your microfiber wash mitt into the soap bucket and load it up with suds.
- Gently wash a single section of the car—think one door, or half of the hood. Don't apply too much pressure.
- Now, before you go back for more soap, plunge the dirty mitt into your rinse bucket.
- Scrub the mitt against the grit guard at the bottom. This will knock all the dirt particles loose, letting them sink safely below the guard.
- With a clean mitt, you can now go back to your soap bucket and repeat the process on the next panel.
This habit is the single most important thing you can do to prevent swirl marks and fine scratches. By ensuring your mitt is always clean before it touches the paint with fresh soap, you're protecting your car's finish and keeping it looking its best for years.
Mastering this is what separates a quick wash from a professional detail. To really dive deep into the technique, check out our full guide on the two-bucket wash method.
Drying and Finishing for a Showroom Shine

The foam has done its job, and the dirt is rinsed away. But don't drop the towel just yet—this next part is where a good wash becomes a great one. The drying and finishing touches are what separate a quick driveway rinse from a professional-level detail.
This is where you prevent those annoying water spots and streaks that can ruin all your hard work. A poor drying method is also one of the top culprits for creating fine scratches and swirl marks in your paint.
Forget about that old bath towel or a harsh squeegee blade; they're notorious for dragging tiny, leftover grit across your finish. Your best friend here is a high-quality, ultra-plush microfiber drying towel.
Instead of rubbing furiously, try the "blot and drag" technique. Lay the towel out flat on a panel, like the hood or roof, and gently pat it down. This absorbs the majority of the water. Then, slowly pull the towel toward you. This approach minimizes friction and safely lifts every drop of moisture off the surface.
Adding That Final Layer of Protection
With your vehicle perfectly dry, it's time for the grand finale: adding a layer of gloss and protection. This isn't just for looks. It creates a slick surface that makes your next wash a whole lot easier.
A quality spray wax or a dedicated paint sealant is exactly what you need.
Work on one panel at a time. Give the area a light mist of the product and immediately use a clean, dry microfiber cloth to spread it evenly. Flip the cloth to a fresh side and gently buff the surface to a brilliant, streak-free shine. You've now got a protective shield against UV rays and road grime.
This level of care is what defines a true enthusiast. It’s a standard that contributes to the U.S. car wash and detailing industry's $14 to $15 billion in annual revenue. More and more car owners are demanding a higher standard of care, and now you can deliver it yourself.
If you want to dive deeper into drying tools, take a look at our guide on the best car drying towels: https://www.swiftjetusa.com/blogs/news/best-car-drying-towels
And while you're thinking about protecting your car's finish, consider enhancing its look and comfort by exploring the benefits of car window tinting.
Tackling Your Top Car Wash Questions
Even with the best gear, you're bound to have questions. That's perfectly normal. Getting the right answers not only helps you get the most out of your professional car wash kit but also prevents those little mistakes that can hurt your car's finish.
Let's dive into a few of the most common questions I hear from fellow car lovers, whether they're just starting out or have been detailing for years.
How Often Should I Really Be Washing My Car?
This is probably the number one question, and the honest answer is: it depends.
For a car you drive every day, a good rule of thumb is a thorough wash every two weeks. This is frequent enough to keep things like road grime, bird droppings, and tree sap from baking onto your paint and causing real damage.
But you have to consider your local conditions. Live somewhere they salt the roads in winter? You’ll want to wash it weekly to fight off rust. Same goes for coastal areas with salty sea air. The key is to be proactive to protect that clear coat.
Can I Just Use Dish Soap in My Foam Cannon?
Please, don't do this. To get that thick, satisfying foam that actually cleans, you need a dedicated car soap made for foam cannons. These soaps are formulated to be pH-neutral and create dense suds that cling to the car, lifting dirt away safely.
A quick word of warning: Dish soap is designed to strip grease and oil. It will do the exact same thing to your car's protective wax or sealant, leaving the paint totally exposed to the elements. Stick to the right stuff.
What’s the Secret to Cleaning Microfiber Towels?
Your towels are what make direct contact with the paint, so keeping them clean is crucial for avoiding scratches. It’s actually pretty simple if you follow a few rules.
- Keep them separate. Wash your microfiber towels in their own load. If you mix them with cotton, they’ll become lint magnets.
- Use a dedicated soap. A microfiber-specific detergent is best, but a gentle, dye-free liquid soap works in a pinch.
- Fabric softener is the enemy. Seriously, never use it. It will completely clog the tiny fibers, making them useless for absorbing water or cleaning effectively.
- Go easy on the heat. Tumble dry on a low-heat setting or, even better, just let them air dry.
Ready to see what a professional-grade wash at home feels like? The SwiftJet professional car wash kit comes with everything you need to nail that perfect, swirl-free shine. Get your SwiftJet kit today and see the difference for yourself!