
If you've ever wanted that satisfying, professional-level clean for your car, a pressure washer is one of the best tools for the job. Done right, it lifts away stubborn dirt and road grime in a way that hand washing just can't compete with. The trick is knowing how to use it safely to protect your paint, which all comes down to the right pressure, nozzle, and technique.
Why a Pressure Washer is Your Go-To Car Cleaning Tool
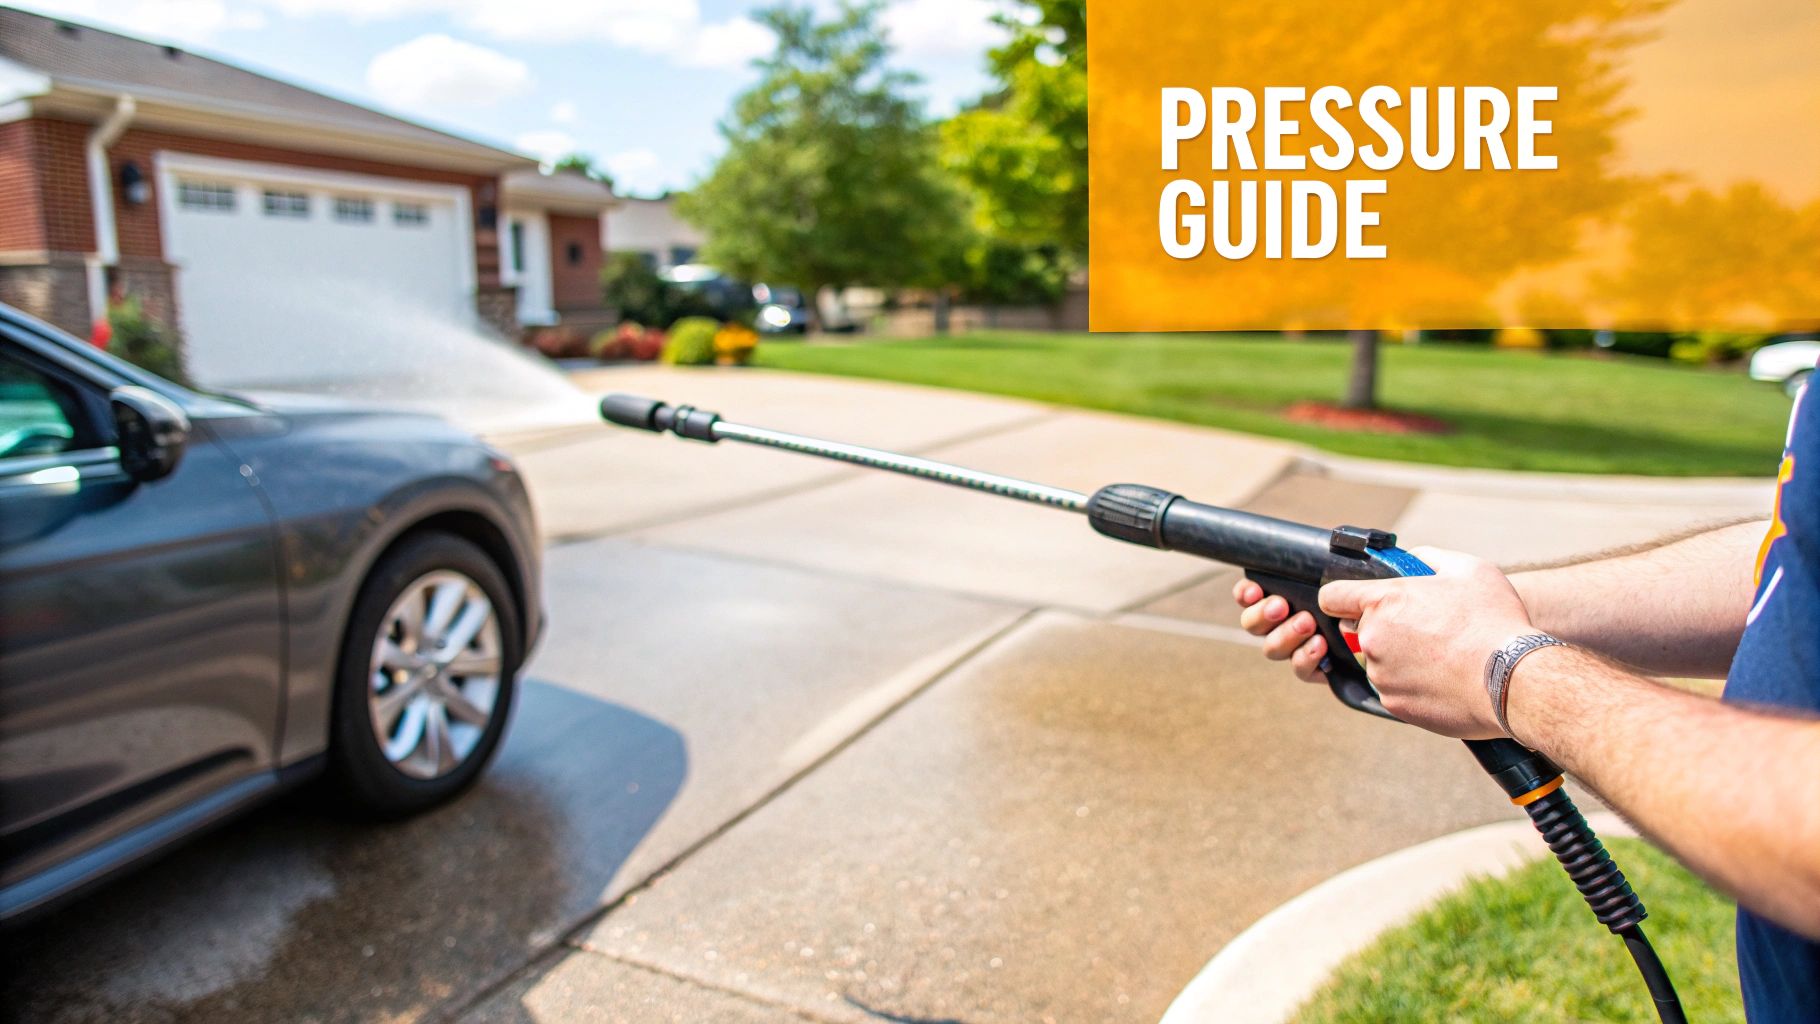
Let's be honest, the idea of blasting a high-pressure stream of water at your car can be a little intimidating. It's a valid concern—using the wrong settings can absolutely cause damage, from stripping wax to chipping paint right off. But once you get the hang of it, a pressure washer is a game-changer for getting a truly scratch-free shine.
The biggest win here is efficiency. A pressure washer can blast away mud, salt, and caked-on road film in just a few minutes. Think about how much time and elbow grease that would take with a traditional bucket and sponge. This isn't just about saving time; it's also about reducing physical contact with your car's paint, which is the number one cause of those dreaded swirl marks and micro-scratches.
Mastering the Basics for a Safe Wash
The secret to a perfect, damage-free pressure wash boils down to three key things: the pressure setting (PSI), your nozzle choice, and how far you stand from the car. Nail these three, and you'll unlock your machine's full potential without any of the risk.
Here’s what I’ve found works best from experience:
- Dial in the Right Pressure (PSI): Keep your machine set between 1200 and 1900 PSI. This range has enough oomph to lift dirt but is gentle enough that it won’t harm your car's clear coat.
- Pick the Right Nozzle: Always go for a wider-angle nozzle. The 40-degree (white) nozzle is my go-to for general rinsing, as it provides a wide, fan-like spray. For tougher grime on rocker panels or wheel wells, the 25-degree (green) nozzle gives you a bit more concentrated power.
- Keep Your Distance: This is crucial. Always maintain a distance of at least one to two feet from the surface. Getting too close is the most common mistake I see, and it’s the fastest way to cause damage.
It's a common myth that more power equals a better clean. When it comes to car detailing, the opposite is usually true. A controlled, lower pressure combined with a quality car soap and the right technique will give you far better—and much safer—results every time.
To help you get started, here's a quick reference table with the ideal settings.
Key Settings for a Safe Car Wash at a Glance
This table breaks down the essential settings and gear you'll need to wash your car safely and effectively with a pressure washer. Think of it as your cheat sheet for a perfect wash.
| Setting / Equipment | Recommended Specification | Why It Matters |
|---|---|---|
| Pressure (PSI) | 1200 - 1900 PSI | Strong enough to clean effectively without stripping wax or damaging your paint. |
| Nozzle Tip | 25° (Green) or 40° (White) | A wider spray pattern disperses pressure, preventing focused damage to the surface. |
| Distance | 1-2 feet (30-60 cm) | Getting too close dramatically increases the force, risking paint chips and damage. |
| Detergent | pH-neutral car-specific soap | Harsh chemicals can damage your car's clear coat and plastic trim. |
| Water Flow (GPM) | 1.4 - 1.6 GPM | Provides sufficient water volume to rinse away suds and dirt efficiently. |
Following these guidelines will help ensure you're cleaning your car effectively while keeping its finish in pristine condition.
This method has become the standard for both enthusiasts at home and professional detailers. With 85.4 million vehicles produced globally in 2022, it's no surprise the pressure washer market is projected to hit USD 4.03 billion by 2030. If you want to dig deeper into this topic, we've put together a comprehensive guide asking can you use a pressure washer on a car that covers all the essential techniques for a successful wash.
Selecting the Right Tools for a Scratch-Free Shine
Getting a professional, scratch-free wash at home is less about brute force and more about finesse and the right gear. The quality of your pressure washer car wash really comes down to the tools you choose—from the machine itself to the attachments that deliver the water and soap. Making smart choices here is the foundation for a perfect finish.
Your journey starts with the pressure washer. The market is flooded with options, but for car cleaning, it almost always boils down to electric versus gas-powered models. While gas units pack a serious punch, all that power can be overkill and even dangerous for your car’s paint.
Electric pressure washers, on the other hand, are what most car enthusiasts and detailers reach for. They're lighter, quieter, and typically operate in that sweet spot of 1200-1900 PSI. That’s more than enough power to blast away grime without the risk of blasting away your clear coat, making them a much safer bet for delicate automotive surfaces.
Choosing Your Pressure Washer
As more people have become vehicle owners, the demand for user-friendly cleaning tools has skyrocketed. The global pressure washer market, valued at around US$2.5 billion in 2025, is expected to climb to US$3.0 billion by 2032. Electric models are a huge driver of this trend, with portable units projected to grow at a 5.2% CAGR, mainly because they’re just so convenient for home and garage use.
When you're picking one out, pay attention to both PSI (pounds per square inch) and GPM (gallons per minute). A higher GPM means more water is flowing, which is a huge help when it comes to rinsing away soap and debris effectively. You’re looking for a model that strikes a good balance between both metrics for an efficient, safe clean.
For a deeper dive, check out our guide on the best pressure washers for cars to find the perfect machine for your needs.
The Critical Role of Nozzles
Once you have your machine, the single most important accessory you’ll use is the nozzle tip. These small, color-coded tips control the angle and force of the water stream, and grabbing the wrong one is a fast track to a very bad day.
Think of nozzles like paintbrushes—some are for broad, gentle strokes, while others create fine, intense lines. When washing a car, you want those broad, gentle strokes.
- 40-Degree (White) Nozzle: This should be your go-to. It creates a wide fan of water that covers a large area with lower impact, making it perfect for the initial rinse and for washing away soap at the end.
- 25-Degree (Green) Nozzle: This one offers a more focused spray. It comes in handy for tackling tougher, caked-on mud in wheel wells, on tires, or on the lower body panels. Just be careful with it on painted surfaces.
Never Use the Red Nozzle: The 0-degree (red) nozzle creates a pinpoint jet of water so powerful it can etch concrete. It will absolutely strip paint, shred tires, and destroy plastic trim. Keep this one far, far away from your vehicle.
Even with the right tools, accidents happen. If you end up with a minor imperfection, you might find a comprehensive guide on how to repair windscreen scratches helpful.
Elevate Your Wash with a Foam Cannon
A simple rinse with water will get the loose stuff off, but a foam cannon is what transforms your pressure washer into a true professional detailing tool. This attachment hooks onto your wand, mixing car soap with water and air to create a thick, clingy foam that blankets your entire vehicle.
This "snow foam" isn't just for show; it serves a vital purpose. The foam clings to the car's surface, giving the cleaning agents in your soap time to break down and encapsulate dirt, road grime, and other gunk. As the foam slowly drips down the car, it pulls that loosened dirt away from the paint.
This pre-wash step dramatically reduces the risk of scratching the surface when you eventually make contact with a wash mitt. A quality foam cannon lets you adjust the foam thickness and spray pattern, giving you total control for a safer, more effective clean every single time.
Your Step-by-Step Guide to the Perfect Pressure Washer Car Wash
Alright, you've got your gear sorted and you know the basic safety rules. Now, let's put it all together. This isn't just a checklist; it's the real-world workflow I use to get a brilliant, scratch-free shine every time. We'll go from setup to final rinse, and I'll explain why each part is so important.
The whole process really comes down to having the right tools for each stage. Think of it as a simple, three-part system.
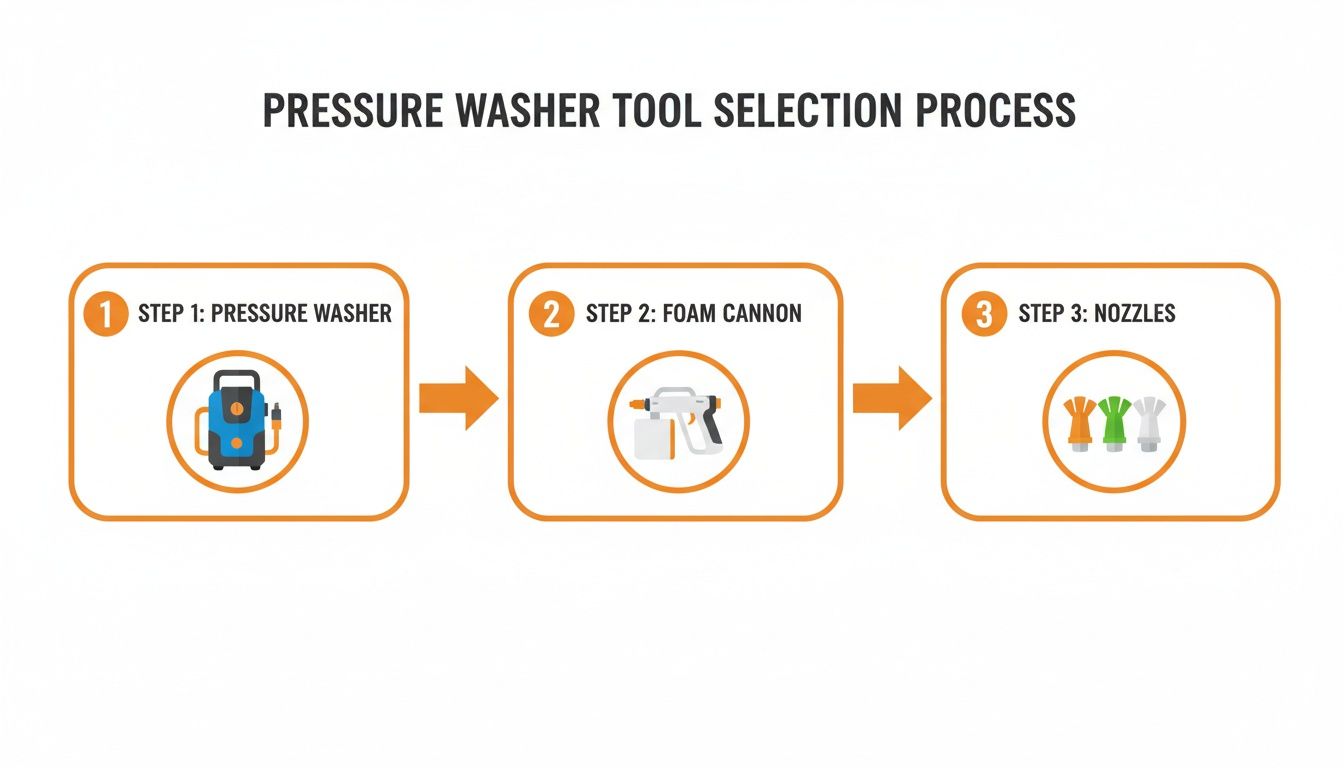
As you can see, the pressure washer provides the power, the foam cannon delivers the soap, and the nozzles control how that power is applied. When they work in harmony, you get a safe and incredibly effective clean.
Setting the Stage for Success
Before you even think about pulling the trigger, consider where you're washing your car. If you can, always find a shady spot. Working in direct sun is a detailer's nightmare—the heat bakes soap and water onto the paint, leaving stubborn spots and streaks that are a real pain to remove later.
Next up, do a quick walk-around. Get up close and look for any paint chips, deep scratches, or bits of trim that feel a little loose. High-pressure water is great at finding weaknesses. It can easily catch the edge of a paint chip and make it worse, or blast water behind trim that isn't secure. Knowing where these problem areas are helps you remember to be gentle when you get to them.
The All-Important Pre-Rinse
This first rinse is probably the most critical step in the whole process. The goal here isn't to make the car spotless; it's to knock off all the heavy, loose stuff. Think of it as removing the sandpaper—the grit, mud, and sand—before you touch the car with a mitt.
Grab your 40-degree (white) nozzle for this. Stand back about two feet from the surface and start rinsing from the roof down. Gravity is your friend here, so let it pull all that grime down and off the car. Give some extra love to the usual suspects:
- Lower Body Panels: The areas behind the wheels and along the rocker panels are magnets for caked-on road film.
- Wheel Wells: Don't be shy here. These spots are often packed with dirt.
- Bumpers: The front is usually covered in bugs, and the back collects exhaust soot and road spray.
This step gets the most abrasive particles out of the way, setting you up for a safe and effective foam bath.
Laying Down a Thick Blanket of Foam
Now for the fun part. A good, thick layer of snow foam is what really does the heavy lifting, breaking down the stubborn grime that’s bonded to your car's paint. This is what separates a quick rinse from a truly deep clean.
Fill your foam cannon with a quality, pH-neutral car soap, following the dilution ratio on the bottle. Snap it onto your pressure washer and start applying the foam from the bottom of the car, working your way up. This might seem backward, but it stops the foam from just sliding off clean panels, giving it more time to dwell on the dirtiest parts of your car first.
Let that foam sit and work its magic for about 5-10 minutes. The key is to never let it dry on the paint. You’ll know it’s working when you see the foam start to turn brownish and pull the grime down the side of the car. That’s a beautiful sight.
The Main Rinse Technique
Once the foam has had time to do its job, it's time to wash it all away, taking all that loosened dirt with it. Switch back to your 40-degree nozzle (or a 25-degree nozzle for the really grimy lower sections, but be careful) and, once again, rinse from the top down.
Consistency is key here. Keep the wand tip a good one to two feet from the paint and use long, overlapping, sweeping motions. Don't just blast one spot; keep it moving to ensure an even rinse without putting too much pressure on any single area.
Pay close attention to your spray angle, especially around delicate bits. You never want to spray directly into panel gaps, window seals, or the grille. Instead, hold the wand at a 45-degree angle to the surface. This encourages the water to sheet off cleanly rather than forcing it into places it doesn't belong, like behind emblems or near sensitive electronics.
Hitting the Often-Missed Spots
A truly clean car is one that’s clean everywhere, not just on the big, easy-to-reach panels. The final rinse is your chance to focus on the areas most people forget.
- Wheel Wells and Undercarriage: These areas get blasted with corrosive road salt and grime. Give them a thorough flush.
- Tires and Wheels: You can switch to the 25-degree nozzle here (carefully!) to clean the tire sidewalls and wheel faces. Just don't get too close, especially if you have painted or delicate clear-coated wheels.
- Door Jambs: Pop the doors open and give the jambs a quick, angled spray to clear out the dust and dirt that always builds up there.
By following this process—from thoughtful prep to a methodical rinse—you can be confident that your pressure washer is a tool for a perfect, swirl-free shine, not a hazard to your car's paint.
Mastering the Art of the Perfect Snow Foam
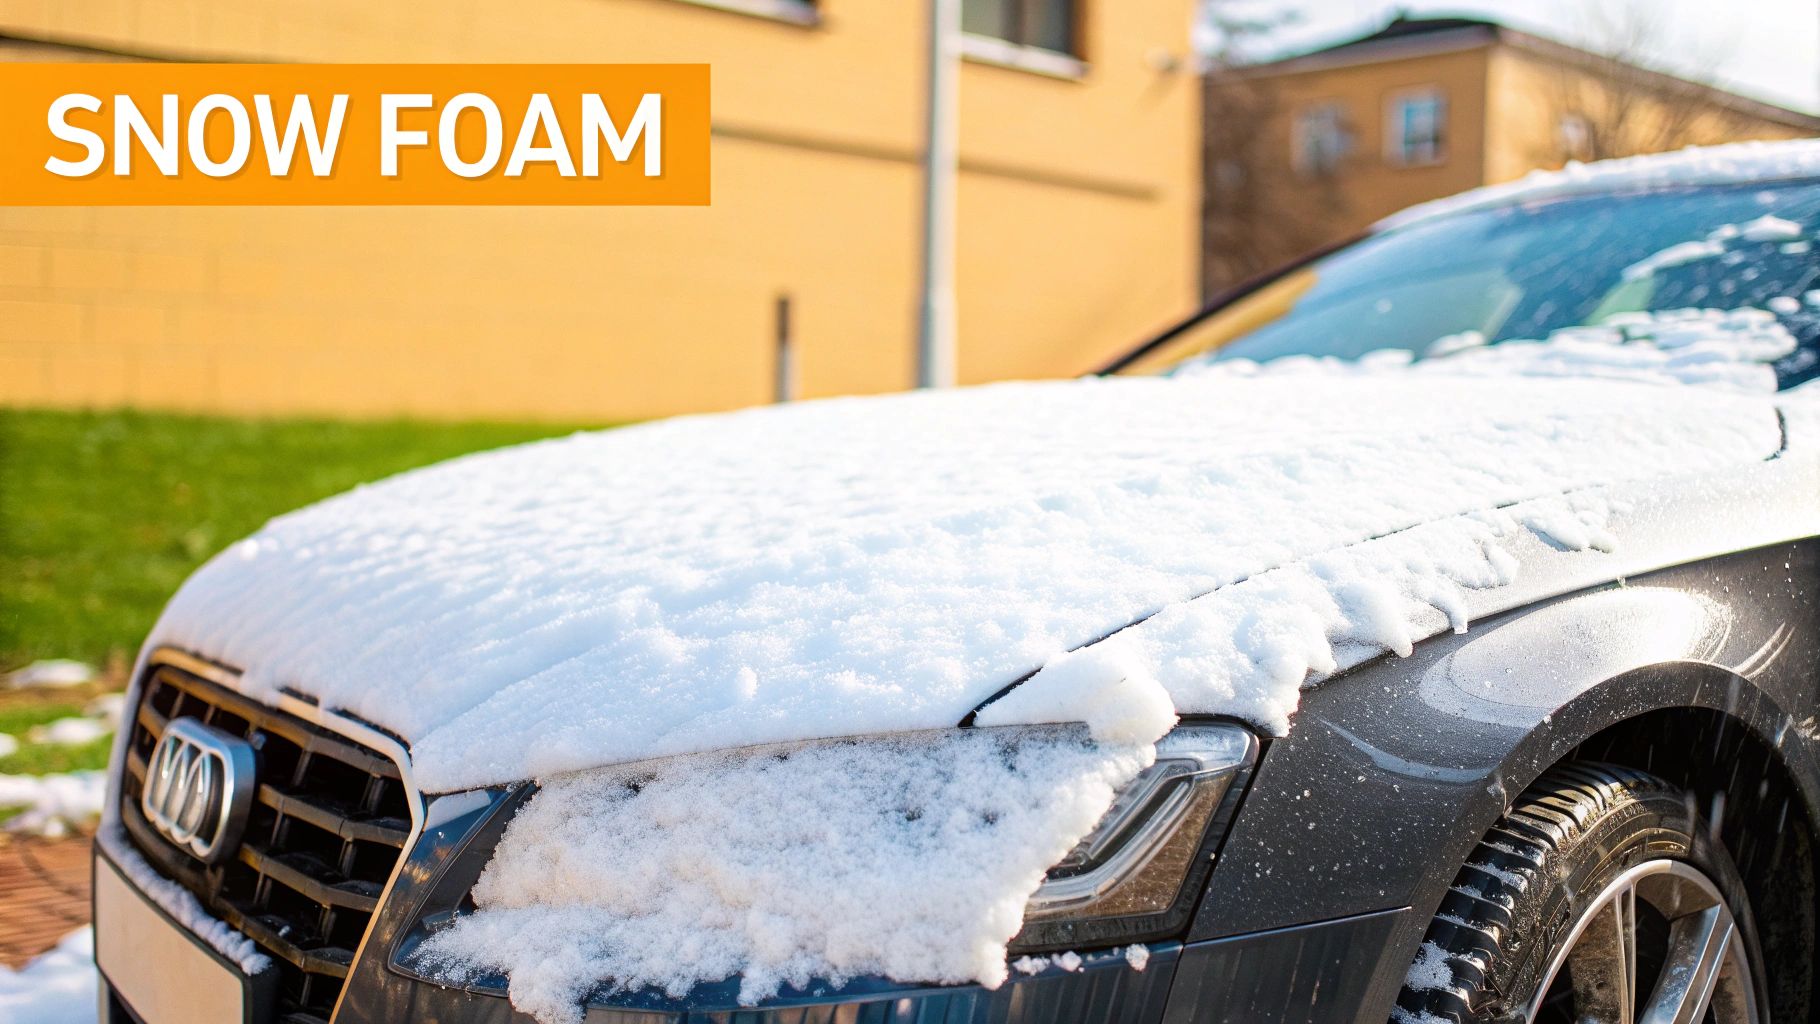
There’s something incredibly satisfying about covering your car in a thick, shaving cream-like layer of foam. But it’s not just for show—this "snow foam" is arguably the most critical part of a safe, scratch-free wash. It's the secret weapon that turns a basic rinse into a deep-cleaning pre-wash, letting the foam do the heavy lifting for you.
So, how does it work? The magic is in the dwell time. When you apply a proper snow foam, it clings to the car's surface, giving the cleaning agents time to break down stubborn road grime and dirt. As the foam sits, it encapsulates all those abrasive little particles, lifting them off the paint. When you finally rinse, the dirt washes away without ever being dragged across your clear coat.
This one step is fundamental to modern car care. For anyone serious about protecting their vehicle's finish, using a high-quality foam cannon is simply non-negotiable.
Why Your Foam Cannon Matters
Let's be clear: not all foam cannons are created equal. The stock attachment that came with your pressure washer might produce some suds, but they're often watery and slide right off. A dedicated tool like the SwiftJet foam gun, on the other hand, is engineered to create that rich, dense foam you need for a proper pre-wash. This is all down to better internal components that masterfully mix soap, water, and air.
The result is a foam that clings stubbornly, maximizing its cleaning power. The difference is night and day. If you want a full breakdown of what makes a great tool, check out our guide on how a snow foam cannon can completely change your car wash game.
The key to perfect snow foam isn't just the soap you use; it’s the tool's ability to aerate the mixture properly. A great foam gun gives you full control over foam thickness and the spray pattern, letting you dial it in perfectly for any car or condition.
It's no surprise that car cleaning is a huge part of the pressure washer industry. The vehicle washing sector is booming, with market projections growing from USD 3.42 billion in 2025 to an estimated USD 4.73 billion by 2033. People everywhere are discovering that high-pressure washers are the best way to scrub down cars, motorcycles, and trucks, which is driving adoption worldwide.
SwiftJet Foam Gun vs. Standard Foam Attachment
To really see what I mean, let’s put a specialized tool head-to-head with a standard, out-of-the-box attachment. The gap in performance makes it obvious why investing in the right gear pays for itself.
| Feature | SwiftJet Foam Gun | Standard Foam Attachment |
|---|---|---|
| Foam Density | Produces thick, clinging foam for maximum dwell time. | Often creates thin, watery suds that run off quickly. |
| Adjustability | Fully adjustable knob for soap mixture and a rotating nozzle for spray pattern. | Limited or no adjustment options, offering minimal control. |
| Build Quality | Constructed with durable brass fittings and a high-quality bottle. | Typically made with cheaper plastics that can crack or fail. |
| Efficiency | Uses soap more efficiently by creating richer foam with less product. | Wastes soap by failing to properly aerate the mixture. |
As you can see, a purpose-built foam cannon isn't just a small upgrade—it's essential for getting professional-level results that truly protect your paint.
Choosing the Right Soap for Your Foam Gun
The final piece of this puzzle is the soap itself. The detergent you choose for your pressure washer car setup needs to match the job you're doing.
- pH-Neutral Soaps: These are your daily drivers for routine washes. They're gentle enough to clean away dirt and grime without stripping off any existing wax or ceramic coatings you've applied.
- Stronger Detergents: Got a car that's absolutely filthy, or are you prepping the surface for a full detail? A more potent, higher-alkaline soap is what you need. It will strip away old waxes and oils, giving you a perfectly clean slate to work with.
Always, and I mean always, follow the manufacturer's dilution ratio for your soap. A common mistake is to add more soap, thinking it will create better foam. In reality, the right ratio combined with a quality foam cannon is what delivers that perfect, thick consistency every single time.
Common Pressure Washing Mistakes to Avoid
Knowing the right way to pressure wash your car is only half the battle. Just as important is knowing which common—and often costly—mistakes to steer clear of. A single misstep with a powerful tool like this can quickly turn a routine wash into an expensive trip to the body shop.
Think of this as your essential "what not to do" checklist. By understanding these common pitfalls, you can approach every wash with confidence, ensuring your vehicle comes out looking pristine, not damaged. These are the errors that separate amateurs from pros, and avoiding them is simple once you know what to look for.
Using the Wrong Nozzle or Getting Too Close
This is, without a doubt, the number one mistake people make, and it’s by far the most destructive. It's tempting to grab a more focused nozzle, like a red or yellow tip, thinking it will blast away stubborn grime faster. In reality, these create a concentrated jet of water powerful enough to etch glass, shred rubber seals, and strip paint right off the panel.
Always start with and stick to the wider-angle nozzles: the 40-degree (white) or 25-degree (green) are your best friends here. Just as crucial is keeping a safe distance. I always tell people to keep the wand tip at least a foot or two away from the surface. Getting any closer dramatically increases the impact force, and that's how paint chipping happens.
Remember, you're not trying to blast the dirt off with sheer force. The real work is done by the soap and foam breaking down the grime. The water is just there to rinse it all away safely.
Targeting Sensitive and Damaged Areas
Your car isn't a solid block of steel; it's a collection of parts, and many of them are surprisingly delicate. High-pressure water can wreck these components if you're not careful.
Be extra cautious when you get to these spots:
- Emblems and Decals: A direct blast can easily get under the edge and peel them right off.
- Rock Chips and Scratches: A high-pressure stream can get underneath a small paint chip and turn a tiny flaw into a large, peeled patch of missing paint. It happens faster than you'd think.
- Rubber Seals and Trim: Aiming directly at window seals or door gaskets can force water into places it shouldn't be, leading to annoying leaks or even electrical gremlins down the road.
- Sensors and Cameras: Modern cars are loaded with parking sensors and driver-assist cameras. A direct hit can easily damage their sensitive electronics.
When you're rinsing these areas, switch to a wider spray angle and back up a bit to lessen the impact.
Choosing the Wrong Type of Soap
Please, never use household dish soap in your foam cannon or pressure washer. It might seem like a good idea because it makes great suds, but dish soap is a powerful degreaser. Its formula is designed to strip grease and oil from your plates, which means it will also strip away every last bit of protective wax or sealant on your car’s paint.
This leaves your clear coat completely exposed to the elements, dulling the finish and accelerating oxidation and fading. Always use a dedicated, pH-neutral car wash soap. These are engineered to lift dirt and grime effectively while being gentle on your paint's protective layers. A good car soap is a small investment that pays off big time in preserving your car's finish.
Got Questions About Pressure Washing Your Car? Let's Get Them Answered.
Even after you've got the basic steps down, a few questions always pop up before you pull the trigger. That’s perfectly normal. Getting the small details right is what separates a decent wash from a fantastic one, and it's how you build the confidence to do the job right every single time.
Let's dive into some of the most common things people ask when they're getting started with a pressure washer. I'll give you the straight-up answers you need to protect your car and get that showroom shine.
What's the Best PSI for Washing a Car?
This is probably the most important question, and for good reason. It's all about finding that sweet spot between having enough power to do the job and not so much that you strip the paint off.
For just about any car, you want to stay in the 1200 to 1900 PSI range. That's plenty of force to blast away road grime and dirt, but it’s gentle enough that you won't damage your clear coat, trim, or any other delicate parts.
If you go much lower than 1200 PSI, you'll probably find yourself getting the nozzle too close to the paint to compensate, which is a big no-no. Crank it up past 1900 PSI, and you're seriously risking permanent damage.
Pro Tip: Pressure is only half the equation. Look for a machine with a good flow rate, somewhere around 1.4 to 1.6 GPM (gallons per minute). More water flow helps carry the dirt away more effectively. When in doubt, always start low and test the pressure on an inconspicuous spot first, like the inside of a wheel well or a lower plastic panel.
Can I Actually Pressure Wash My Engine Bay?
Yes, you can, but you have to be extremely careful. Your engine bay is full of sensitive electronics, sensors, and connectors that really don't like getting blasted with water. First things first: make sure the engine is completely cool. Spraying cold water on a hot engine block can cause thermal shock, which can lead to cracked metal.
Here’s a quick mental checklist before you start:
- Protect the vitals: Grab a few plastic bags and cover up the alternator, air intake, fuse box, and any obvious electrical connections or computer modules.
- Go low and slow: Turn your pressure washer down to its lowest possible pressure setting.
- Go wide: This is a job for your widest-angle nozzle, like a 40-degree tip. You're aiming for a gentle shower, not a concentrated blast.
Never spray directly at any wires or electrical components, even if they're covered. When you're finished, take off the plastic covers and let everything air dry for a good while before you even think about starting the car.
How Often Should I Be Pressure Washing My Car?
This really comes down to where you live and what you put your car through. For most people who are just commuting, a good wash every two weeks is a solid routine. It keeps the everyday buildup from getting a permanent grip on your paint.
That said, sometimes you need to wash it more often.
- Dealing with Winter: If you're in a place where they salt the roads, you should be washing your car weekly, especially focusing on the undercarriage. That salt is incredibly corrosive.
- Environmental Foes: Live somewhere with a ton of pollen, frequent acid rain, or a healthy bird population? You'll want to wash the car more frequently to keep that stuff from etching into your clear coat.
The golden rule is to get things like bird droppings, bug guts, and tree sap off your car as soon as you spot them. The longer that stuff bakes in the sun, the more likely it is to cause lasting damage.
Ready to take the guesswork out of getting that perfect, thick foam? The SwiftJet Car Wash Foam Gun is designed to make your car wash safer and way more effective. See how it can completely change your cleaning game at https://swiftjetusa.com.