

One-step paint correction is a single-stage machine polish that reduces light-to-moderate defects and improves gloss, with an estimated 40% to 80% visible defect reduction rather than guaranteed removal. That range is a working estimate from real detailing work, not a promise that every mark will disappear.
The advice you'll hear most often is to keep polishing until the panel looks perfect under a bright light. That advice treats the clear coat like a resource you can spend without a budget. You can't. Every abrasive pass levels a little of the finish that also blocks UV. A smarter job asks what the paint can safely give up, then stops when the gloss gain is no longer worth the film you're removing.
What One-Step Paint Correction Actually Does
One-step paint correction is a single-stage machine-polishing process. After a wash, decontamination, inspection, and a test spot, you run one carefully chosen pad-and-polish combination. The point is a balance: cut light defects, raise gloss, and leave the clear coat in place.
Think of a wooden tabletop with fine cup rings. You wouldn't sand the whole top with coarse paper three times. You'd make one careful pass with a fine grit, just enough to level the high spots so light reflects evenly. Paint works the same way. Abrasive particles lower the peaks around shallow defects until reflected light looks more uniform. The improvement lasts because you leveled the surface, not because a filler hid the marks.
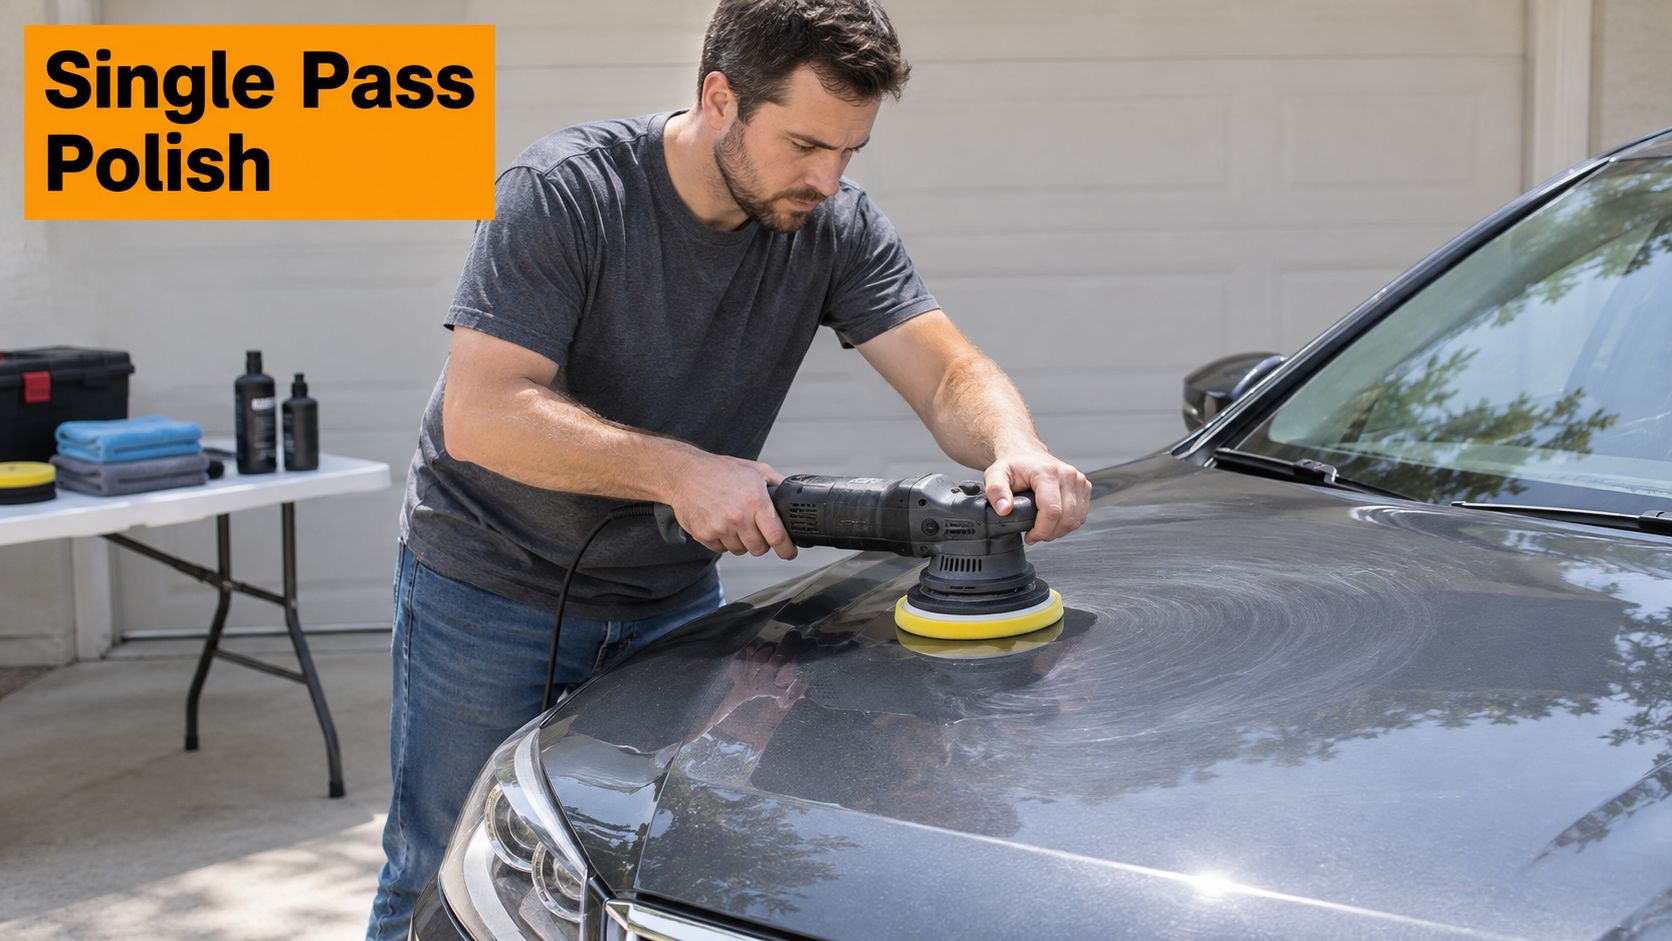
Defects a single stage can touch
The process is aimed at defects that sit in the upper clear coat:
- Wash-induced swirl marks: fine circular scratches from dirty mitts or towels.
- Haze and oxidation: a dull, chalky look from UV and neglected washing.
- Micro-marring: a faint cloudy pattern that softens reflections.
- Shallow surface scratches: marks you can see in raking light but can't feel with a fingernail.
A one-step job is gloss enhancement and light correction. It is not a restoration warranty.
What it cannot repair
Chips, scratches that break through the clear coat, and failing paint are outside the job. Polishing can't put color back into a chip, and it can't rescue clear coat that's already cracking or peeling. If the damage goes through the protective layer, you're looking at touch-up or a body shop, not another pad.
Read the rest of this as a go-or-stop decision. The finish you keep is often safer than the finish you chase.
How One-Step Differs from Multi-Step Correction
A one-step polish is not a shine contest. It is a decision about how much clear coat you can afford to remove for the finish you're aiming for. Multi-step correction starts with a stronger cut, then uses finer polish to refine the surface. One-step combines correction and finishing in one pad-and-polish pairing, so it generally leaves more defects behind.
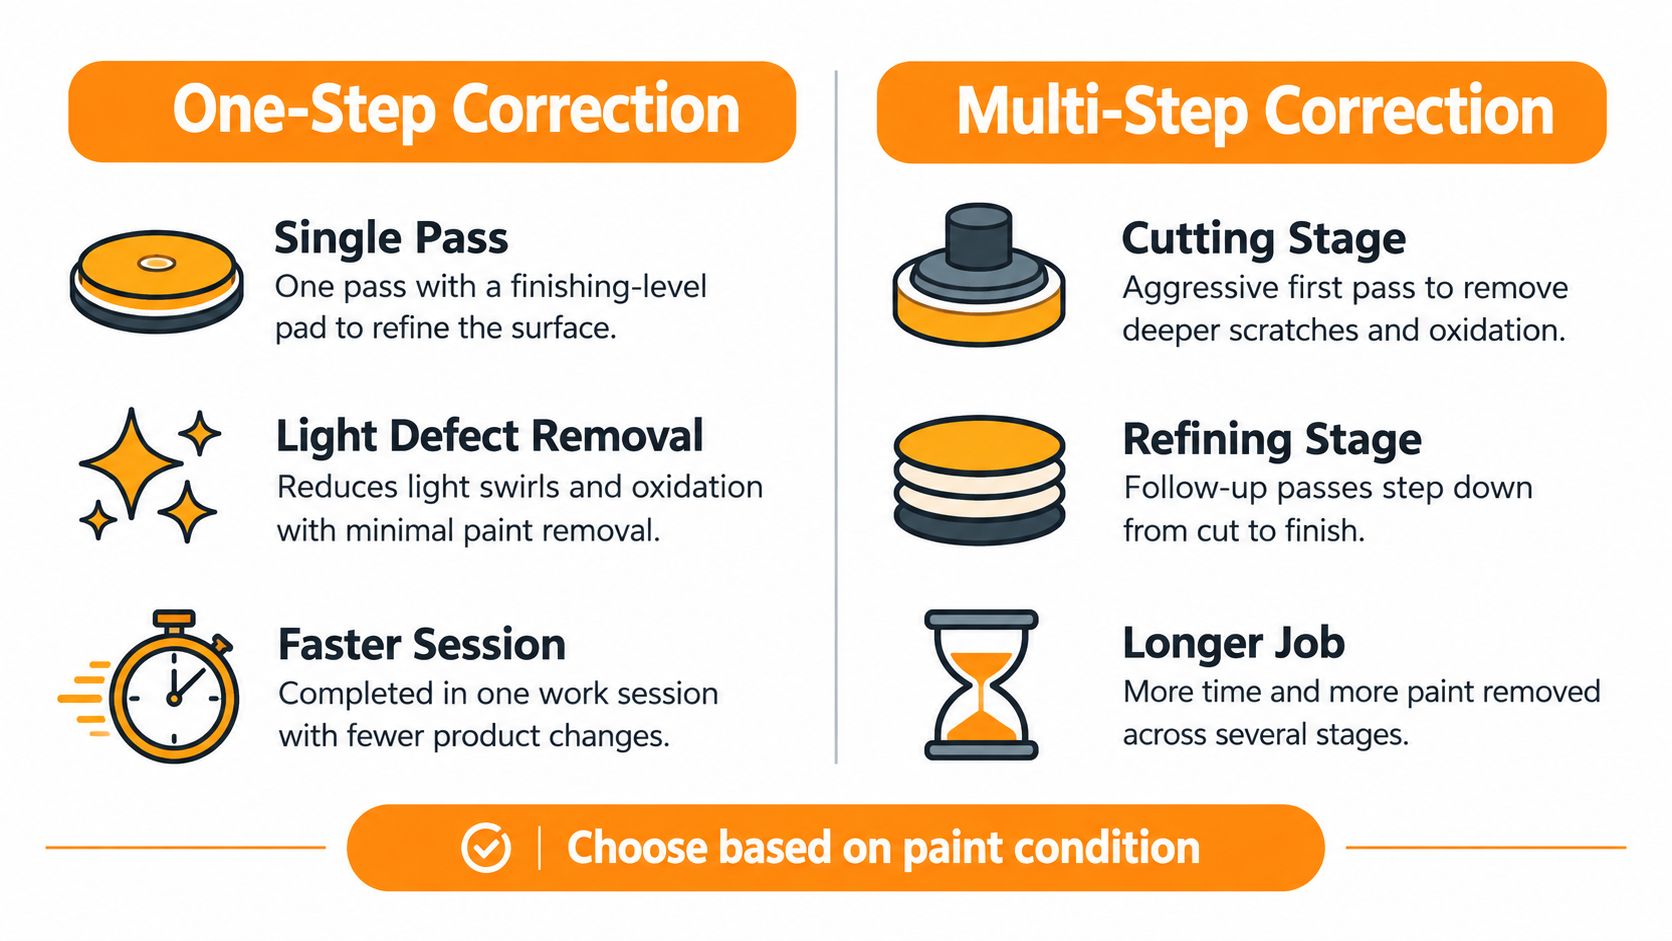
Why stage count spends clear coat
Every polishing pass removes some material. A single aggressive compound-and-cutting-pad pass is sometimes estimated to remove roughly 3–5 microns, but that is not a dependable allowance for your car. A lighter finishing approach removes less, though the amount varies with the pad, polish, pressure, speed, paint hardness, temperature, and number of passes. Chemsol's paint correction guide discusses these variables; a paint-thickness gauge can help identify unusually thin or previously repaired panels before polishing.
Treat clear coat like a limited budget. Each extra stage spends more of it, and the result depends on what the paint can safely give up. Choose the mildest pairing that still reaches the finish you're aiming for. Removing more clear coat to chase a deeper mark is a poor trade if the panel cannot spare it.
Speed, film, and how perfect it can look
| One-step | Multi-step | |
|---|---|---|
| Stages | One pad-and-polish system | Cut, then one or more refining stages |
| Film removed | One system's correction | Accumulates across stages and passes |
| Realistic finish | Strong gloss improvement, with some marks remaining | Can produce a more refined finish, at greater film cost |
| Time | One work session, fewer product changes | More stages and setup |
One-step trades some correction for less time and fewer polishing stages. It will not make deep scratches disappear.
A test spot helps you judge that trade before working across the car. If a moderate polish leaves haze, consider a separate refining stage or accept a less corrected finish. Pressing harder to make a one-step product cut like a compound adds risk without guaranteeing a clearer reflection. The aim is a better-looking panel while preserving as much clear coat as possible.
Checking Paint Depth and Defects Before You Polish
A gauge reading feels like permission. It isn't. A paint-depth gauge measures the combined film of primer, basecoat, and clear coat, not the clear coat by itself. Team Revivify's clear-coat thickness guide notes that total factory readings are commonly cited around 100–150 microns, while the clear layer may be only about 38–50 microns. A "normal" total doesn't prove an aggressive correction is safe, especially on a panel that's been repainted, blended, or polished before.
How to read a panel
Map the panel instead of trusting one beep in the middle.
- Take a grid: several readings across the flat, then near edges and character lines.
- Compare neighbors: a door that reads far below the quarter panel next to it has a history.
- Write down the lowest number: that thin spot sets the budget for the whole panel.
- Treat scatter as a warning: jumpy readings mean bodywork or uneven film. Polish lightly or hand the panel off.
The gauge is a risk tool. Low or inconsistent numbers mean a conservative pad, or no machine at all.
The fingernail test
Wash and decontaminate first, or grit will scratch the panel you're trying to judge. Then inspect under strong, diffuse light. Drag a clean fingernail across a mark.
If the nail catches, the damage may already run through the clear coat. Polishing can't restore missing color. It only thins the paint around the groove, and the groove often comes back into view. If the nail glides and the mark is a light swirl or haze, a one-step test spot is reasonable.
Edge cases most owner guides skip:
- Stone chips need touch-up, not a pad.
- Clear-coat failure (peeling, cracking, a milky sheet) is a refinish problem.
- Repainted or blended panels can hide thin film under a normal-looking total.
- Deep bird-dropping or water-spot etching may sit deeper than a light polish should chase.
- Scratches near sharp edges sit where the film is already thinner and the pad can dig.
Bonded fallout and tar change what you think you're seeing. A plain wash won't show them. A contamination identification check, before you measure or test, keeps you from polishing dirt into the finish.
A visibly imperfect panel can be the safer result. Chasing every mark spends UV protection for a small cosmetic gain.
Choosing Pads, Polishes and Prep Tools
A pad and polish spend some of the clear coat's limited budget, so choose them for the defects you can safely reduce, not for maximum shine. The pad affects how much the polish cuts; the polish affects how it refines the surface. Clean paint matters because grit trapped under the pad can create new marks.
What the pad and polish control
A finishing foam pad with a light or medium one-step polish is a sensible starting pair on a free-spinning random orbital. It refines the surface with less cutting than a firmer foam pad or microfiber cutting pad paired with a heavier compound. The more aggressive pair may remove more defects, but it also removes more clear coat and can leave haze that needs further correction.
Paint color alone cannot tell you which pair will work. Hardness, abrasive behavior, machine action, pad construction, and working time all affect the finish. Test a small, flat area first. If it hazes, try a softer pad or finer polish. More passes are not automatically safer: each pass should earn its share of the clear coat.
Pad condition matters too. A saturated pad can cut unevenly and drag spent abrasive across the paint. Clean it or replace it before moving to another section. This guide to buffing and polishing pads explains how cutting and finishing pads differ.
What the wash controls
Foam washing removes loose dirt, while chemical fallout decontamination is required before polishing to clear bonded iron and other fallout from the paint. If contamination remains under the pad, it can cause marring that you then have to polish away. Slick Finish's paint correction notes also emphasize keeping correction within what the remaining film can support.
A hose-end foam gun is a prewash tool, not a polisher. The SwiftJet Car Wash Foam Gun connects to a garden hose, lays down clinging foam, and has an on/off trigger for pausing the flow. Each one includes a microfiber wash mitt in orange, blue, or black. Foam can help loosen surface grit before a mitt touches the paint, but it does not make a deep scratch safe to polish.
Chemical fallout remover should be used before polishing, following the product directions. If the paint still feels rough after washing and chemical decontamination, a clay alternative can help remove bonded residue. Use it gently and keep the surface lubricated as directed. These steps prepare the paint; they do not make it safe to chase every defect.
Walking Through the One-Step Workflow
A one-step correction is a clear-coat budget decision, not a shine contest. The finish can give up only a limited amount of paint, so let a test spot, not a thickness figure, set the mildest pad-and-polish combination that reaches your goal. Use paint-thickness readings to compare areas and spot possible thin or inconsistent paint, then keep your target conservative. The paint correction reference offers background on correction.
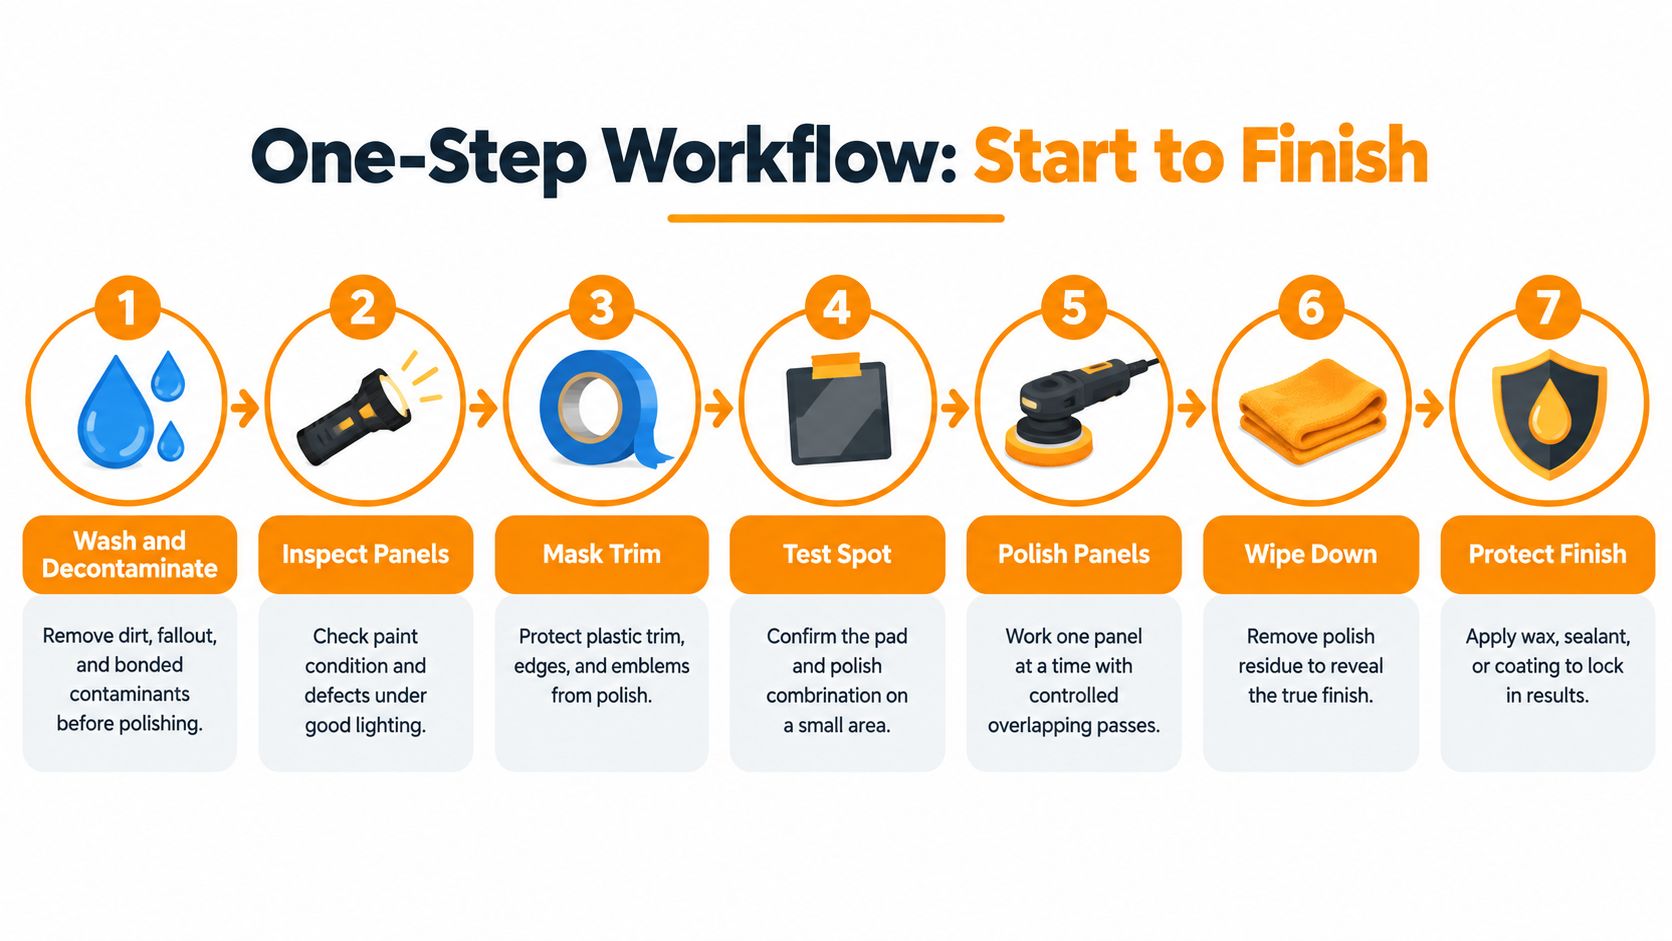
From wash to a proven test spot
Foam-wash, rinse, and decontaminate the vehicle so iron and tar are not trapped under the pad. Dry it with clean towels. Under strong, diffuse light, identify which marks you want to reduce and which you will leave. Check paint thickness across each panel, and mask trim, edges, and emblems to prevent polish stains.
The test spot decides the process. Paint hardness, abrasive behavior, machine movement, pad choice, and working time all affect whether the polish finishes clear or leaves haze. Work a small, flat patch, wipe away residue, then inspect it in the same light. If reflections sharpen without haze, that combination is a reasonable starting point for similar areas. If the finish hazes or defects barely change, adjust the pad or polish, or accept a smaller improvement. Don't carry an untested, more aggressive combination across the car.
A dual-action, free-spinning machine is a practical DIY choice because the pad slows when tilted, reducing the chance of burning an edge. Before applying polish, review how to handle a car buffer polisher.
On the panel
Work a small area at a time, using overlapping passes in a crosshatch pattern. Keep your speed and pressure steady, and let the polish complete its cycle rather than pressing harder. Prime the pad lightly, then clean or replace it when it loads up. Move on only after a wipe-down reveals the actual finish.
Stop when another pass brings little visible improvement. That is the point to protect the clear coat, even if deeper marks remain. Check the panel again under the same light. If the finish is clear, leave it alone; if it needs refinement, use a lighter approach rather than another aggressive round.
After wiping down the panel, apply the wax, sealant, or coating you planned. Protection follows the abrasive work. A glossy surface alone does not confirm that it is ready for a coating.
Realistic Results and Real-World Examples
Published detailing-service benchmarks commonly place one-step correction at about 40% to 80% visible defect reduction. Softer paint may show roughly 50%–80% improvement, while harder finishes may land closer to 40%–60%, depending on hardness, defect depth, previous repairs, pad choice, and technique. Auto This World Detailing treats those figures as estimates, not a universal lab standard. A test section still outranks any range.
Estimated defect reduction by paint hardness
| Paint Type | Estimated Defect Reduction | What Affects the Result |
|---|---|---|
| Softer finishes | Roughly 50%–80% | Defect depth, pad choice, and how easily the clear levels |
| Harder finishes | Closer to 40%–60% | Same variables, plus more resistance to the abrasive |
| Either, after repairs | Often the low end of the range | Thin or inconsistent film, blends, and prior polishing |
The gloss you do gain is durable because the surface was leveled. Fillers wash off. Leveled clear coat doesn't. What you should still expect to see are isolated deeper scratches, chips, and anything the fingernail caught.
Three jobs and where they stop
A daily driver with light wash marks. The owner sees cobwebs in the sun on an otherwise solid factory finish. A mild one-step tightens the reflection so the hood reads as one color instead of a web. A couple of deeper door dings stay. That's a successful job.
A mobile detailer and a repainted fender. Readings jump and the lowest spots sit well under the adjacent door. The detailer runs the same light pair used on the doors, or skips the fender. Forcing the fender to match would spend film the repaint may not have. The car looks clearly better, and one panel stays a step behind.
An RV with oxidized side panels. The goal is gloss on chalky clear, not a show trailer. A single stage can bring back a wetter reflection on panels that measure consistently. Stone chips along the lower rail and any cracked clear stay untouched. Chasing those would thin a large, hard-to-repaint surface for little visual return.
In each case the win is more uniform light and fewer distracting marks. It isn't a bare-metal reset, and it isn't 100% defect removal.
Your Next Step Before Polishing Your Car
Every polishing pass spends clear coat you cannot put back. Set your stopping point before you start, while leaving a scratch alone still feels like an easy decision.
Begin with a wash and decontamination. Then check thickness across each panel, paying attention to low readings and sudden changes. A typical paint gauge measures the coating stack above the metal, so its reading is not a clear-coat allowance. Treat it like a household budget with some expenses still unknown: leave a reserve rather than spending to the limit.
A scratch that catches your fingernail belongs outside your DIY removal goal. The test flags a reason for restraint; it does not measure scratch depth.
Let a test spot set the limit
Choose a small, flat area away from edges and body lines. Use your mildest suitable pad and polish, then remove the residue as directed before inspecting in daylight and with a handheld light. Look for both reduced marks and any new haze.
Accept a modest improvement if getting more would mean repeated passes or added pressure.
If the test leaves haze, pause and reassess the pad, polish and technique before extending that result across a panel. If paint thickness or repair history leaves you uncertain, have an experienced detailer assess it. A test spot shows how the finish responds; it cannot prove how much clear remains.
For your next wash, see the SwiftJet Car Wash Foam Gun and included wash mitt. Use the foam gun to apply your wash solution, rinse away loosened dirt, and follow with careful contact washing using a clean mitt. Foam alone does not remove all bonded contamination. Finish the preparation, inspect the paint, and let the smallest acceptable test result guide how much correction you attempt.
