
That little drop of tree sap might look harmless, but it’s actually a ticking clock for your car's paint job. The secret to getting sap off your car is to tackle it right away while it’s still fresh. Often, all you'll need is some warm, soapy water or a quick wipe with isopropyl alcohol. If you let it sit, it hardens and bonds, and that’s when the real risk of permanent damage begins.
Why You Have to Get Tree Sap Off Your Car—Fast
Parking under a shady tree on a hot day feels like a smart move, right? That is, until you come back to find your car covered in sticky, golden specks. It’s easy to dismiss tree sap as a minor annoyance, but it's one of the most sneaky environmental threats to your car’s finish.
Sap isn't just sugar water. It’s a complex cocktail of acids and organic compounds that start a chemical reaction with your car’s clear coat the second they make contact.
This process gets a serious boost from two things: heat and sunlight. The sun's UV rays act like an oven, baking the sap directly onto the paint and making its grip that much stronger. As it cures, the acids start to etch into the clear coat, which is the transparent layer that protects your actual paint color.
The Science Behind the Damage
Picture your car's clear coat as its skin. Initially, the sap just sits on the surface. But give it a few days, and it will start to seep into that protective layer, creating a tiny, almost invisible pit or stain in the finish.
Leave it for a few weeks, and that etching can go deep enough to hit the color coat underneath.
Once it reaches this point, you can't just wipe it away. The damage is now a permanent flaw in the paint itself. Fixing it often requires a professional paint correction, where a detailer has to compound and polish the clear coat to level out the surface again.
This is exactly why knowing how to remove sap from car quickly is so important for keeping your vehicle looking good and protecting its resale value. What starts as a five-minute cleanup can easily turn into a repair bill worth hundreds of dollars if you ignore it.
It’s Not Just Sap
Your car is constantly battling environmental fallout. Bird droppings, road tar, and industrial pollutants are all working to break down your vehicle's paint over time. This is a big reason why the car detailing services market was valued at a whopping USD 37.41 billion in 2024 and is only expected to grow.
Taking a few proactive steps can make a world of difference. Learning the best way to protect car paint ahead of time is always your best defense against mother nature.
Dealing With Fresh Sap Using Everyday Items
Spotted a glistening drop of tree sap on your car? If it’s still fresh and sticky, you're in luck. Catching it early means you can likely handle it with a few things you already have in the house, turning a potential paint-ruining disaster into a simple cleanup job. Think of this as your quick-response guide.
Your First Line of Defense: Warm, Soapy Water
The easiest and safest first attempt is always a good wash. But before you grab the dish soap from the kitchen sink, stop. While great for greasy plates, dish soap is an aggressive degreaser that will strip away any wax or sealant on your paint, leaving it exposed and vulnerable. You'll want to use a proper, pH-neutral car wash soap instead.
Here's the approach I take:
- Mix your dedicated car soap with some warm water.
- Grab a clean, plush microfiber towel—its soft fibers are key to lifting dirt without causing new scratches.
- Soak the towel and just lay it over the sap. Let it dwell for 5-10 minutes so the warmth and soap can soften the sap's grip.
- Gently dab or blot at the spot. Don't scrub! You're trying to lift the sap, not grind it into the clear coat.
- Once it's gone, give the area a good rinse with clean water to get rid of any soap residue.
This simple infographic shows you exactly why acting fast is so important. What starts as a harmless drop can quickly bake into the paint under the sun, causing much bigger problems.
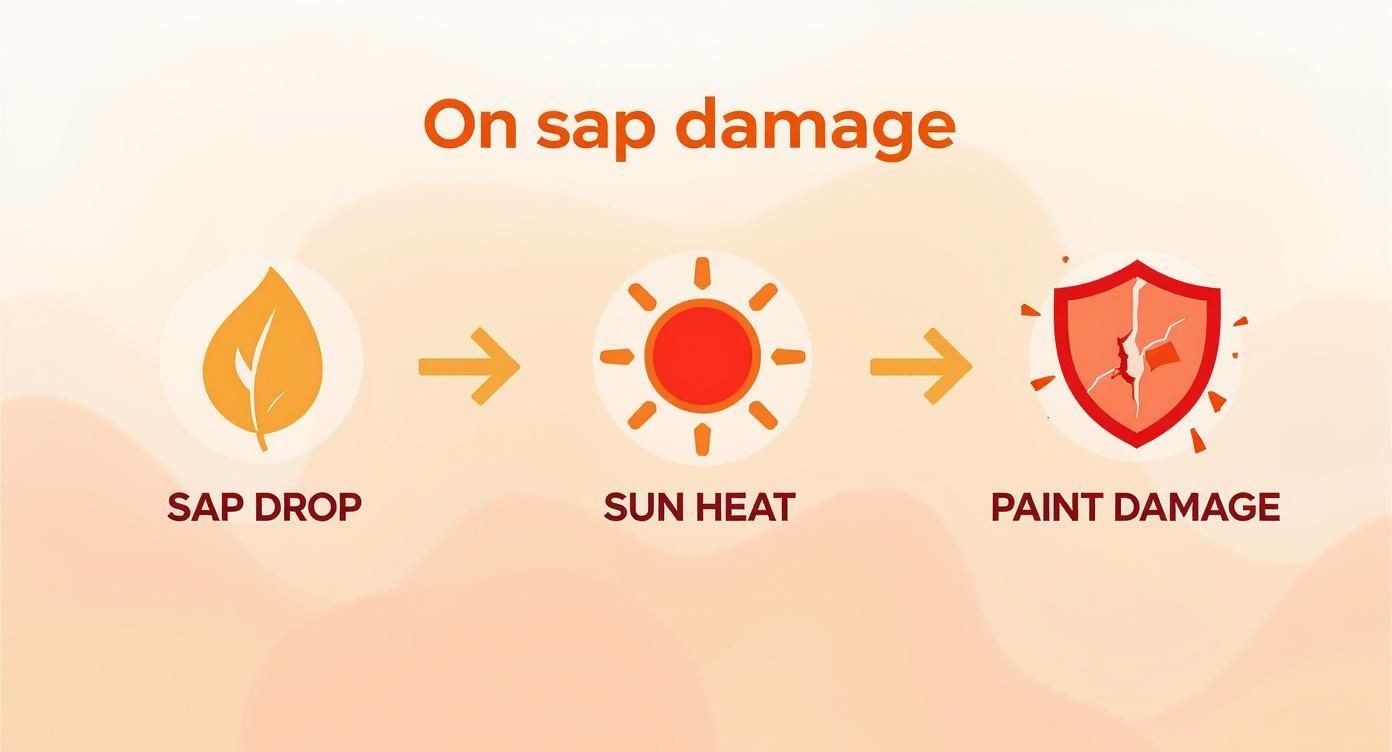
As you can see, time is not on your side. The progression from a simple surface contaminant to permanent, baked-in damage is a reminder to tackle sap as soon as you see it.
Household Sap Removal Methods At A Glance
For a quick reference, here’s a look at some common DIY methods. This should help you choose the right tool for the job based on what you have on hand and how stubborn the sap is.
| Method | Effectiveness on Fresh Sap | Paint Safety Level | Key Precaution |
|---|---|---|---|
| Warm, Soapy Water | Good | High | Use a proper car wash soap, not dish soap. |
| Isopropyl Alcohol | Very High | Medium | Test on a hidden spot first; re-wax the area after. |
| Hand Sanitizer | High | Medium | Choose an alcohol-based, dye-free version. |
| WD-40 | High | Low | Use sparingly; it can degrade clear coats over time. |
Always remember to finish by washing the treated area and applying a layer of wax or sealant to restore protection.
Stepping It Up for Stubborn Sap
If the soapy water didn't quite get the job done, don't worry. Your next best friend is isopropyl (rubbing) alcohol. Its solvent properties are fantastic for breaking down the sticky resins in sap, and it's generally safe for modern clear coats when used correctly.
The key is to apply a small amount to your microfiber cloth, never directly onto the paint.
Pro Tip: Before you start, always test the alcohol on an inconspicuous area first, like inside the doorjamb. This quick check ensures it won't react badly with your car's specific paint finish.
Gently press the dampened cloth onto the sap and hold it there for about 30 seconds. This gives the alcohol time to dissolve the resin. You should feel the sap soften, allowing you to wipe it away with minimal effort.
Afterward, it’s crucial to wash the area with your car soap solution to neutralize any remaining alcohol, and then rinse it clean. If you're looking for a good recipe, this homemade car wash solution guide is a great resource for a gentle final cleanse. Most importantly, finish the job by applying a quick detailer spray or a fresh coat of wax to restore that vital layer of protection you just worked on.
How to Remove Stubborn, Hardened Sap Like a Pro
Fresh, sticky sap is one thing. But what about those hard, amber-colored bumps that have been baking on your paint for days or even weeks? Once sap cures, it essentially becomes a resin that’s chemically bonded to your clear coat. At this point, you'll need to graduate from simple household remedies to more specialized, pro-grade solutions.
The single most important tool you have is patience. Don't even think about scraping or scrubbing aggressively—that’s a surefire way to end up with deep, costly scratches. The real goal is to gently break down the sap's structure without harming the paint underneath.
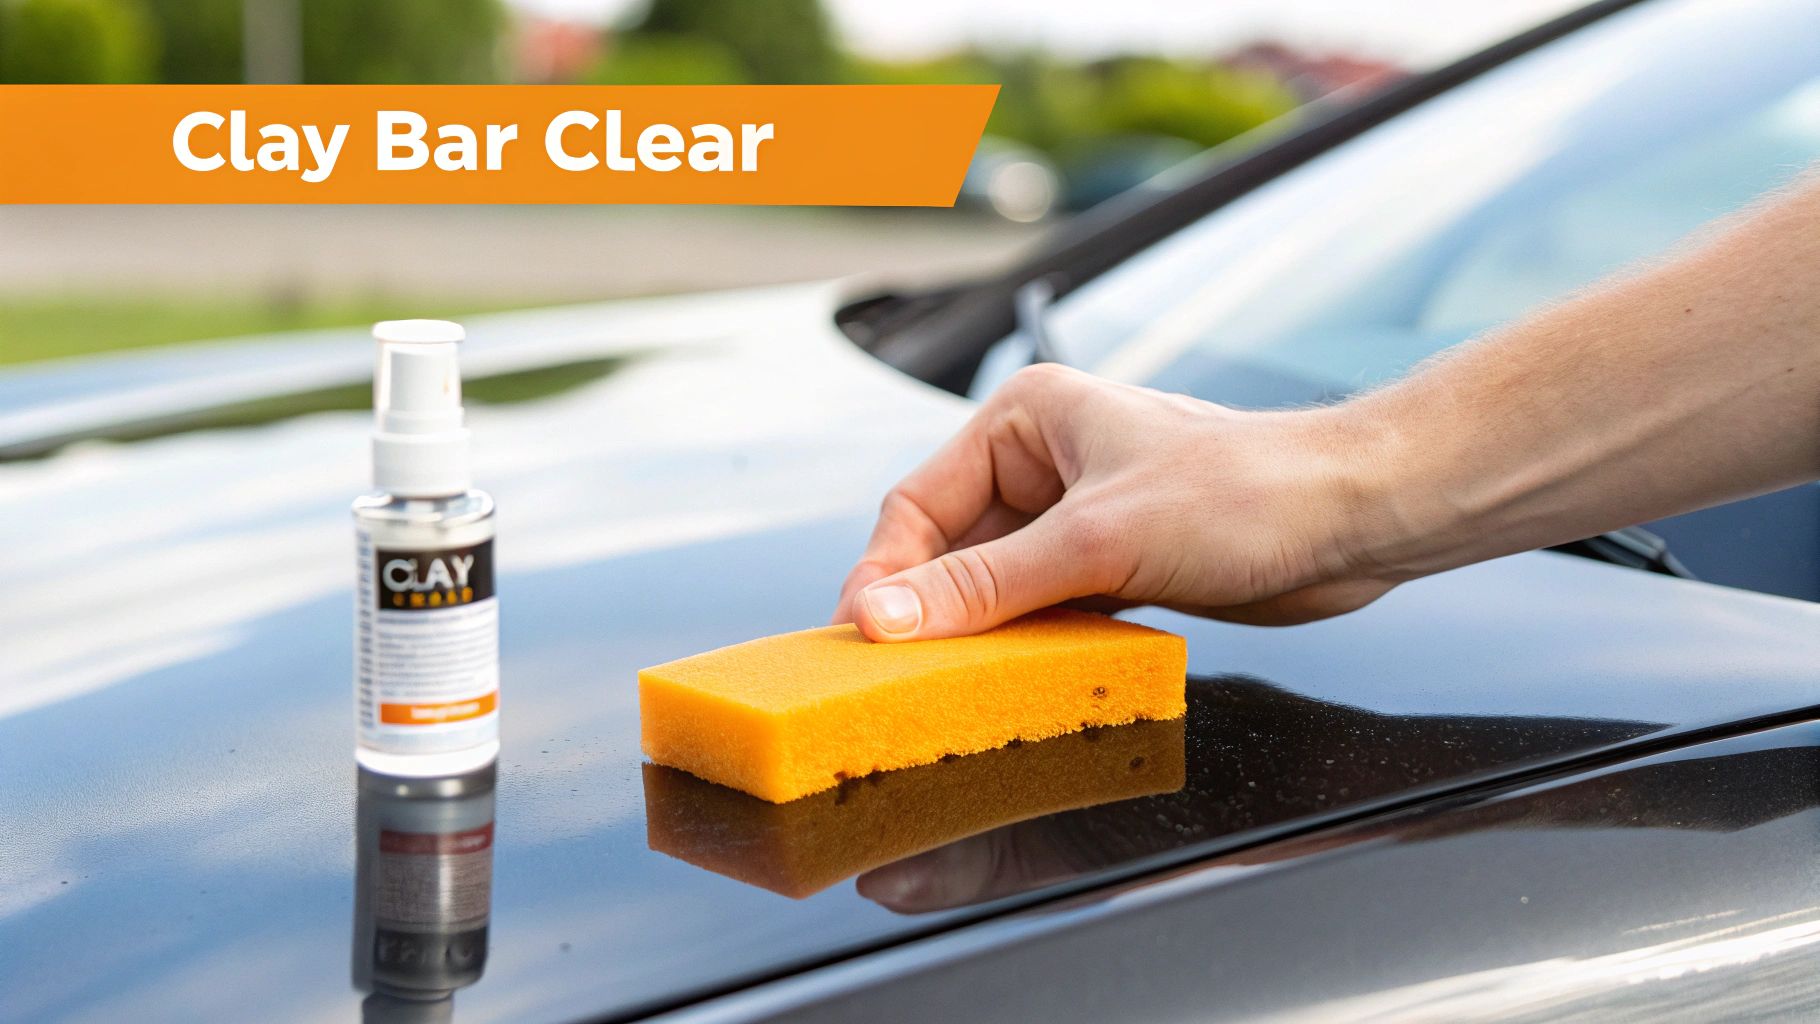
Using a Clay Bar for Embedded Gunk
In any detailer's toolkit, one of the go-to weapons for hardened sap is an automotive clay bar. This isn't a type of soap; it's an engineered resin compound made to grab and lift contaminants that have worked their way into your paint's microscopic pores. It acts like a magnet for anything that doesn't belong.
The secret to using it safely is lubrication. Lots of it.
- Spray the affected area and a small section around it with a quality clay lubricant or a quick detailer spray. You want the surface to be slick.
- With very light pressure, glide the clay bar back and forth over the hardened sap. You'll feel it catch at first, then get smoother as it picks up the sap.
- Keep an eye on the clay. When it looks dirty, just knead and fold it to a clean side and keep going.
This process physically shears the sap right off the surface. If you're new to this technique, our complete guide on how to properly clay bar your car will walk you through getting that glass-smooth finish.
When You Need a Chemical Assist
For sap that’s practically petrified, you might need to bring in the big guns: commercial bug and tar removers. There's a reason the market for specialized car wash detergents is booming—it's projected to grow from USD 2.97 billion in 2024 to USD 4.39 billion by 2035. These products are formulated with specific solvents that can dissolve tough organic gunk like sap and tar without damaging your paint.
Pro Tip: Always test a new chemical on a small, inconspicuous spot first (like a door jamb) to make sure it plays nice with your paint.
Apply the remover to a clean microfiber towel, not directly onto the paint. Then, just lay the towel over the sap and let it sit for the time recommended on the label. This "dwell time" gives the solvents a chance to work their magic. After a few minutes, you should be able to wipe the softened gunk away gently. The principle is similar to what's used in this DIY guide to removing hard water spots—dissolving the deposit is always better than scrubbing it.
No matter which method you use, remember to wash the area with a pH-neutral car soap afterward. This will neutralize any leftover chemicals and get the surface perfectly clean for a new coat of wax or sealant.
Don't Forget to Restore Your Car's Paint Protection
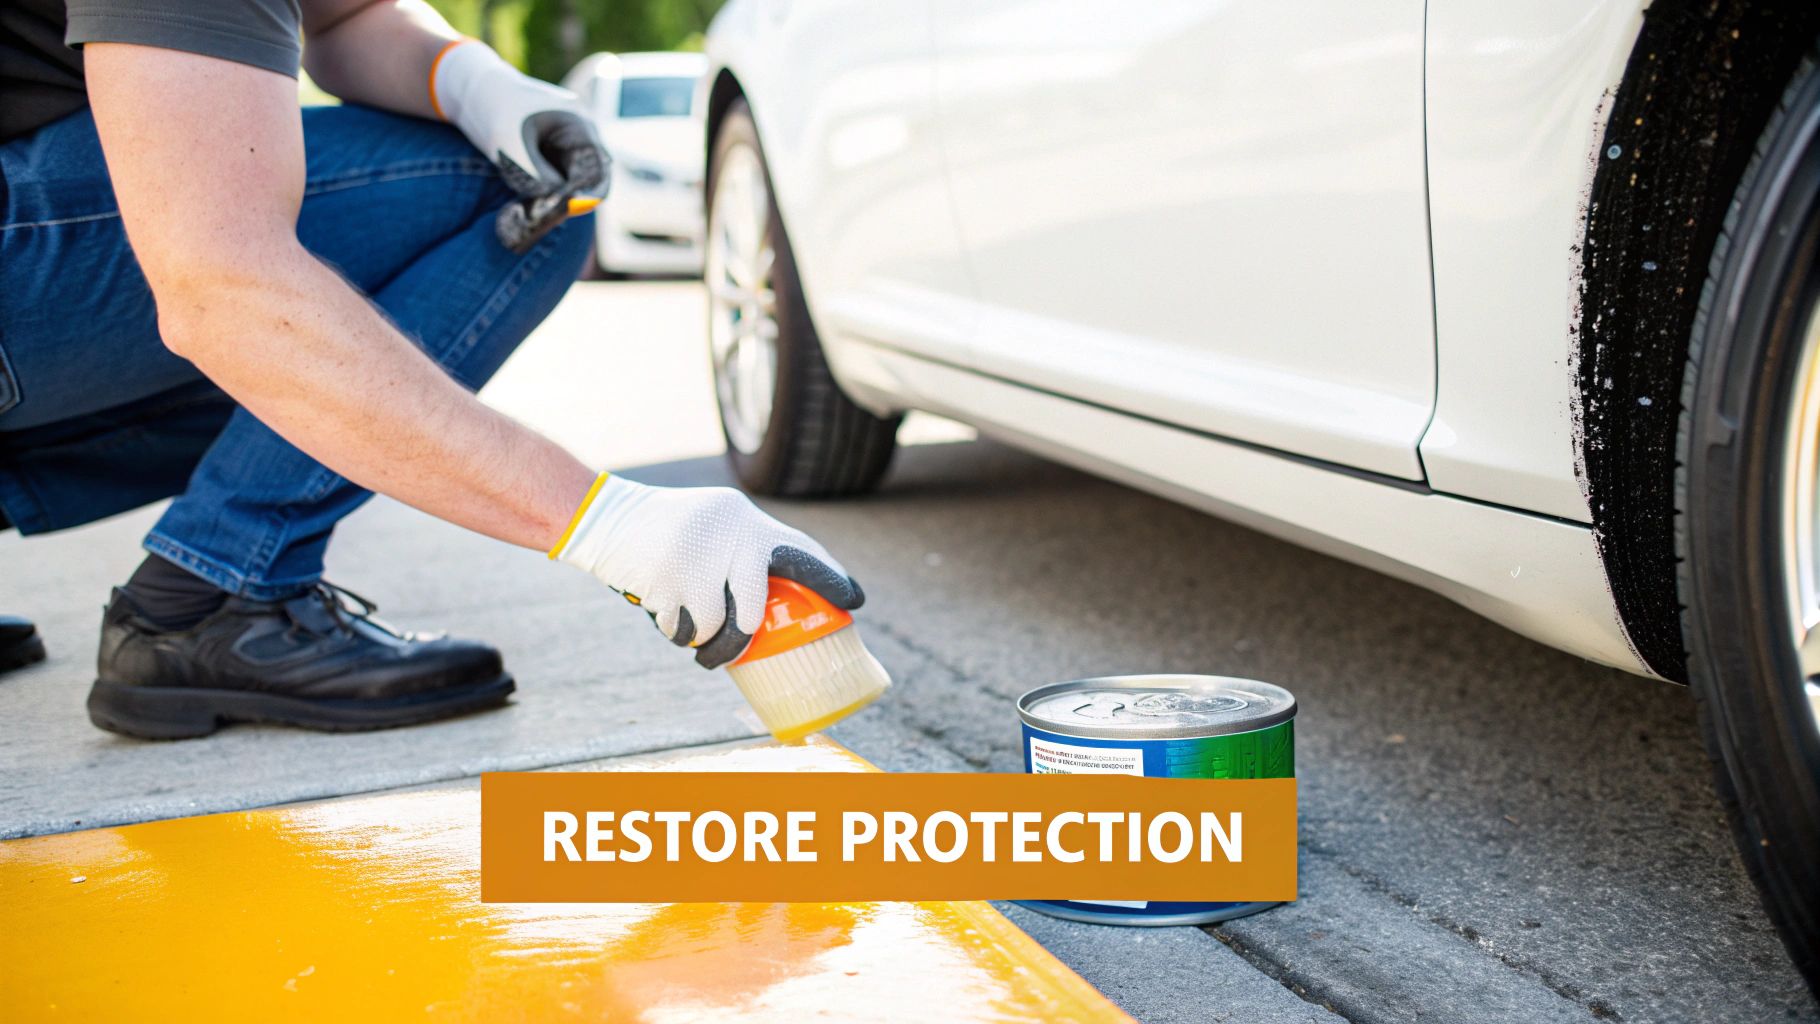
Getting that stubborn sap off is a huge relief, but you’re not quite done yet. Here's a hard truth: any chemical strong enough to dissolve tree sap will also strip away your car's protective wax or sealant right along with it.
That spot you just cleaned is now exposed. It's vulnerable to UV rays, bird droppings, acid rain, and—you guessed it—more tree sap. I always tell people to think of wax as a sacrificial shield. It’s meant to take the abuse so your car's clear coat doesn’t have to. After a targeted cleaning like this, that shield is gone.
Choosing Your New Layer of Defense
Putting that protection back is non-negotiable. You’ve got two main choices here, and what you pick really comes down to the look you want, how long you want it to last, and how much time you want to spend.
-
Carnauba Wax: For car lovers who chase that deep, warm, wet-looking shine, carnauba is the classic. It's a joy to apply, but it's more of a short-term fling. You'll typically get about 6-8 weeks of protection before you need to reapply.
-
Synthetic Sealant: If you're more of a "set it and forget it" type, a modern polymer sealant is your best bet. These create an incredibly slick and durable barrier that can easily last 4-6 months, sometimes even longer. They offer fantastic protection against all sorts of gunk.
No matter what you choose, the goal is the same: make the surface slick. A protected surface is a non-stick surface. Sealing your paint properly means the next time you get sap on your car, it will have a much harder time bonding. Often, you can just wipe it away with a simple quick detailer.
Application is straightforward. Just make sure the spot is completely clean and bone-dry. Take a foam applicator pad and apply a thin, even layer of your wax or sealant. Let it dry to a haze (check the bottle for timing), then buff it off with a clean, soft microfiber towel.
This final step is what locks in all your hard work and keeps your car looking great.
Costly Mistakes to Avoid When Removing Sap
https://www.youtube.com/embed/IyBsiAEO4hI
Knowing the right way to get sap off your car is one thing, but knowing what not to do is arguably even more important. One wrong move can turn a simple five-minute cleanup into a gut-wrenching, expensive trip to the auto body shop.
Your first instinct might be to just scrape or scrub it off. Fight that urge. Grabbing a kitchen sponge, a plastic scraper, or even your fingernail is a terrible idea. Their surfaces are far more abrasive than you think and will leave a nasty web of fine scratches in your car’s clear coat.
It gets worse. Reaching under the sink for aggressive household chemicals is a recipe for disaster. Things like acetone, heavy-duty degreasers, or brake cleaner will absolutely destroy your paint. These solvents are designed to dissolve tough materials, and they won't distinguish between hardened tree sap and your car's protective clear coat, leaving behind permanent cloudy or wrinkled damage.
Common Pitfalls That Damage Paint
Another classic mistake I see all the time is trying to work on a hot car. If your hood is hot enough to fry an egg after sitting in the sun, any cleaner you spray on it will evaporate almost instantly. This not only makes the product useless but can also bake a chemical residue right into the finish.
Always, always work in the shade on a panel that’s cool to the touch. This gives your cleaning solution time to do its job, letting it gently break down the sap so you don't have to resort to aggressive scrubbing.
Finally, a simple but crucial tip: only use a clean microfiber towel. Grabbing that old, dirty rag from the garage floor is just asking for trouble. You'll be grinding all the dirt and grit embedded in the cloth directly into your paint, basically turning it into a piece of sandpaper.
These small details matter. They're part of the bigger picture of vehicle care, which is especially important if you're on the road a lot and want to avoid common vanlife mistakes that can devalue your ride. It’s no surprise that owners take this seriously; the global market for car care products was valued at a massive USD 11.2 billion in 2024.
Got Questions About Getting Sap Off Your Car?
Even after you've got the basics down, a few questions always seem to pop up. Let's tackle some of the most common ones I hear from car owners dealing with this sticky situation.
Is WD-40 Safe to Use for Removing Tree Sap?
I see this one recommended on forums all the time, but honestly, it’s a gamble I wouldn't take. WD-40 is a petroleum-based solvent, which means it can actually soften and, over time, damage your car's clear coat.
It’s much smarter to stick with products that are actually designed for automotive paint. A good bug and tar remover or even a bit of isopropyl alcohol are far safer bets because they're formulated to be tough on gunk but gentle on your finish.
How Do I Stop Tree Sap from Getting on My Car in the First Place?
The best defense is a good offense, and that starts with where you park. If you have the choice, try to avoid parking directly under trees notorious for dripping sap—think pines, maples, and birches.
Of course, that's not always possible. In that case, a high-quality car cover is your best friend.
A solid coat of wax or a ceramic coating also makes a world of difference. It creates a protective, slick barrier on top of your paint. Sap that lands on a protected surface has a much harder time bonding and often wipes right off, saving you a major headache.
Will a Regular Car Wash Get Rid of Tree Sap?
It's tempting to hope a quick trip through the automatic wash will solve the problem, but it almost never works. Those systems are built to handle everyday dirt and road grime, not something as stubborn and sticky as tree sap.
The brushes and soaps just aren't aggressive enough to dissolve hardened sap. You'll need to do a targeted spot treatment before you go through the wash to have any hope of getting it off completely.
For a flawless finish every time, the SwiftJet Car Wash Foam Gun turns a chore into a satisfying experience. It delivers thick, clinging foam that helps lift contaminants safely. Upgrade your wash routine today at swiftjetusa.com.