

Those frustrating white spots that stick around long after you've washed your car aren't just an eyesore—they're a direct assault on your paint's clear coat. We're talking about hard water stains, which are basically concentrated mineral deposits like calcium and magnesium that get baked onto your car’s surface when water evaporates. Figuring out why they stick so aggressively is the key to finally getting them off for good.
Why Hard Water Stains Are Your Car's Worst Enemy
Every car owner knows the pain of seeing those faint, chalky outlines on a freshly cleaned car. They’re the ghosts of water droplets left behind by a rogue sprinkler, a surprise rain shower, or even your own wash bucket. But these spots are a lot more sinister than simple dirt. If you ignore them, they can cause permanent damage to your vehicle’s finish.
At its most basic, "hard water" is just water carrying a heavy load of dissolved minerals, mostly calcium (CaCO₃) and magnesium (MgCO₃). When a drop of this water lands on your car and the H₂O evaporates, those minerals get left behind. That's how a hard water stain is born.
The Science of Stubborn Spots
The real trouble begins when these mineral deposits start bonding with your car's clear coat. Heat acts as a powerful catalyst here. A car sitting in the sun is like an oven, baking those minerals right onto the paint and creating a bond that’s much tougher than a simple surface speck.
This is why we need to talk about the two main types of water spots you'll encounter. Knowing the difference is crucial.
- Type I Mineral Deposits: These are fresh spots that are still sitting on top of the paint. You can often feel them as a rough patch, but they haven't started eating into the clear coat yet. With the right approach, these are fairly easy to remove.
- Type II Chemical Etching: This is the next stage. It happens when those mineral deposits are left to sit and bake on the surface. The minerals can be acidic or alkaline, and they literally start to eat away at the clear coat, creating tiny craters. Once the damage is physically etched into the paint, you’ll need more aggressive methods like polishing to level the surface and fix it.
The stubbornness of water spots comes down to some pretty complex chemistry. Detailers and chemists generally group them into three categories: Type I mineral deposits, Type II chemical etching, and spots caused by other contaminants. A 2021 analysis by professional detailers found that over 90% of vehicles have some level of hard water spotting. It's a battle you can't win unless you know your enemy.
Environmental Factors That Make It Worse
Unfortunately, you're rarely dealing with just pure, clean hard water. Other pollutants in the air and environment can mix with water droplets to create a corrosive cocktail that speeds up the damage. Acid rain, which contains sulfuric and nitric acids, is a major culprit that can drastically accelerate the etching process as it dries on your paint.
Things like industrial fallout, bird droppings, and tree sap can also mix with hard water, creating their own uniquely stubborn and damaging blemishes. This is exactly why acting fast is so important. What starts as a simple mineral spot can quickly morph into a complex chemical problem that's much tougher to solve. If you're curious about the specifics, you can learn more about what causes water spots on cars in our detailed guide.
Now, let's get into the practical side of things. We'll walk through exactly how to remove these hard water stains, from the fresh ones to the deeply etched-in damage.
Getting Your Gear Ready for Battle
Before you even think about scrubbing away at those frustrating water spots, you need to gather the right tools. I can't stress this enough: going in unprepared is the fastest way to turn a minor annoyance into a major paint problem. Think of it like a surgeon laying out their instruments – having everything you need on hand makes the whole process smoother and, more importantly, safer for your car's finish.
The golden rule in detailing is to always start with the least aggressive method. You can always step up your attack, but you can't undo scratches caused by jumping straight to a harsh solution. That's why we always begin with a proper, thorough wash.
The Must-Haves for a Solid Wash and Dry
First things first, you have to get the car clean. You’re not just washing it; you’re prepping the surface. Trying to remove water spots on a dirty car is like sanding your paint with dirt. You'll just grind those abrasive particles into the clear coat and create a web of swirls and scratches.
- A High-Pressure Foam Gun: Honestly, a tool like the SwiftJet Foam Gun is a game-changer. It hooks up to a regular garden hose and blankets your car in thick, clingy foam. This pre-soak is crucial. It lubricates the paint and starts dissolving the grime, so much of it just rinses away without you ever having to touch the car.
- Good Car Shampoo: Stick with a pH-neutral car shampoo. Aggressive soaps or dish detergents will strip away any wax or sealant you have, leaving your paint totally exposed. A quality shampoo creates a slick surface for your wash mitt to glide over.
- Soft Wash Mitts & Microfiber Towels: Grab at least one plush microfiber wash mitt for washing and a separate stack of high-quality, absorbent microfiber towels for drying. Whatever you do, don't let the car air-dry. That's how you got those hard water spots in the first place!
Tools for Decontamination and Spot Removal
Okay, so you washed the car and the spots are still there. Don't panic—this is totally normal for anything but the freshest, lightest spots. Now it’s time to move from general cleaning to a more targeted approach.
Your first move should be a detailing clay bar. This isn’t just a fancy sponge; it’s a specially designed resin compound that actually pulls contaminants out of your paint's pores. Imagine it giving your car a deep-cleansing facial. It gently lifts off the mineral deposits that a wash mitt just slides right over. Just remember to always use it with a good clay lubricant to prevent it from sticking and marring the paint.
If the clay bar doesn't get it all, it's time to bring in the chemicals. A dedicated chemical water spot remover is formulated with mild acids that are specifically designed to dissolve the calcium and magnesium deposits without damaging your clear coat. If you're trying to figure out which one is right for your situation, you can find great info in this guide to the best hard water stain removers, which is particularly helpful for glass.
Here's a pro tip I've learned the hard way: always work in a cool, shaded spot when using chemical removers. If you spray them on a hot panel, they can flash-evaporate, leaving behind their own chemical stains and making your job even harder.
Choosing the Right Method for Your Water Spots
Not sure where to start? This table breaks down the different types of water spots you'll encounter and the best way to tackle them, starting with the gentlest method.
| Stain Severity | Appearance | Recommended Starting Method | Required Tools |
|---|---|---|---|
| Type 1 (Fresh) | Faint outlines, easily wiped away when wet. | Proper Hand Wash & Dry | Quality car shampoo, foam gun, plush microfiber towels. |
| Type 2 (Light) | Visible mineral rings that remain after washing. | Clay Bar Decontamination | Clay bar, clay lubricant, microfiber towels. |
| Type 3 (Heavy) | Stubborn, crusty deposits that feel rough to the touch. | Chemical Water Spot Remover | Dedicated mineral deposit remover, applicator pad, gloves. |
| Type 4 (Etched) | A faint outline of the spot is still visible after cleaning. | Machine Polishing | Dual-action polisher, cutting compound, polishing pad. |
Always diagnose the severity of the stains after a thorough wash. Start with the recommended method for your type of stain and only escalate to the next level if the spots remain.
Polishing Supplies for When Spots Etch the Paint
Sometimes, minerals sit on the paint for so long that they actually eat into the clear coat, leaving a permanent etching. At this point, no chemical or clay bar is going to remove it. The only fix is to physically level the paint surface by polishing away a microscopic layer of the clear coat.
This is a more advanced step and requires a few specific tools:
- Dual-Action Polisher: A machine polisher is a must for getting even, consistent results. For anyone who isn't a seasoned pro, a dual-action (DA) polisher is the safest bet. It's far more forgiving and less likely to burn through your paint than a high-speed rotary polisher.
- Compounds and Polishes: You’ll need a cutting compound to do the heavy lifting of removing the etched layer, followed by a finishing polish to refine the surface and bring back that deep, glossy shine.
- The Right Pads: Make sure to pair your products with the right pads. Use a cutting pad (often made of microfiber or firm foam) with your compound and a much softer finishing pad with your polish.
And finally, don't forget your safety gear. It's non-negotiable. Always wear a pair of nitrile gloves when working with chemicals and put on some eye protection before you fire up that polisher.
With these tools and a bit of knowledge, you’ll be ready to tackle just about any water spot problem that comes your way. If you want to explore this topic even further, our in-depth article on a specialized car water spot remover is a great next read.
Your Guide to Banishing Hard Water Stains
Alright, you've got your supplies ready, so let's get to work. This is where the rubber meets the road—or in our case, where the microfiber meets the paint. I'm going to walk you through the exact methods I use to tackle hard water stains, from the barely-there spots to the truly stubborn ones.
The most important rule in detailing is to always start with the least aggressive method first. You can always step up your attack, but you can't undo damage from going in too hot, too soon.
We’ll start with a proper wash, which is non-negotiable. Then, we'll try a simple vinegar solution for fresh spots. If that doesn't cut it, we'll move on to claying, then dedicated chemical removers. For the worst-case scenarios, we’ll break out the polisher.
This is the basic ladder of escalation we follow in the detailing world. You wash, then you decontaminate, and only if necessary, you polish.
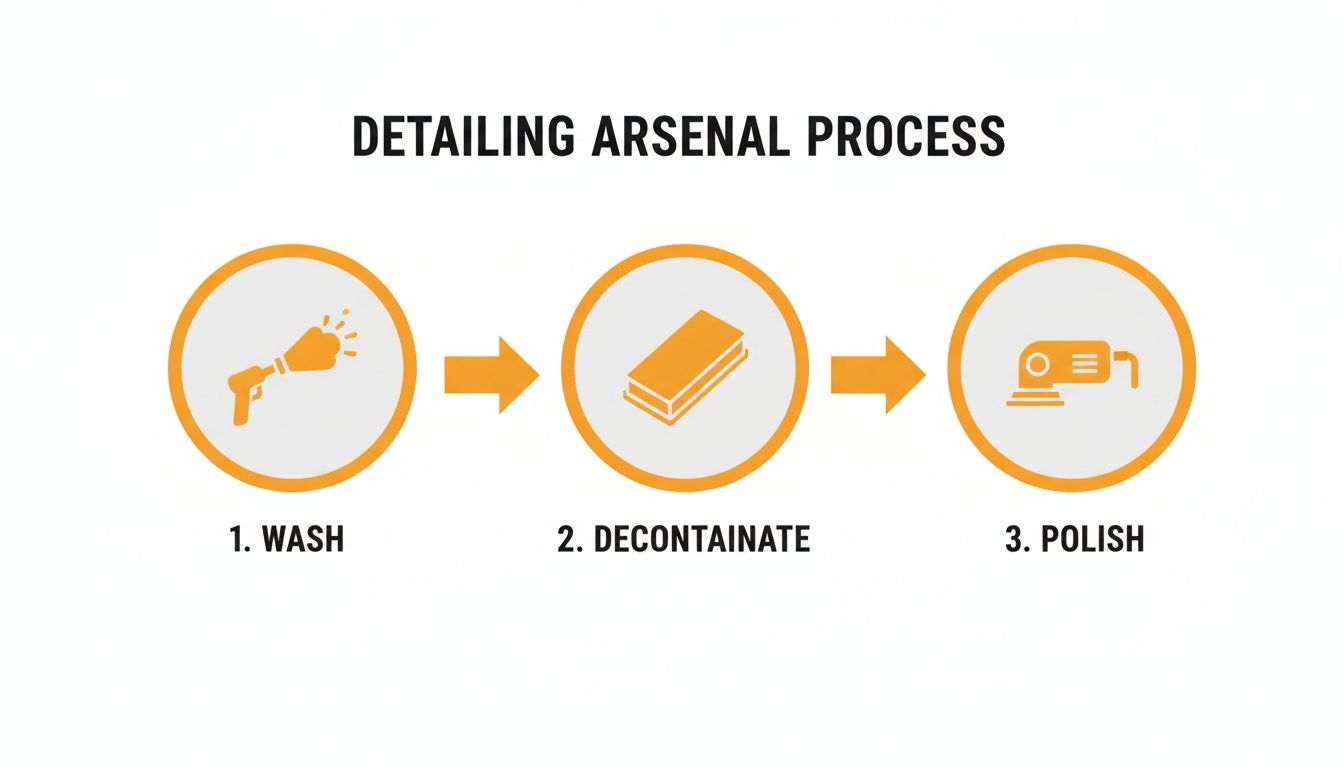
Think of it this way: you wouldn't use sandpaper to clean a dusty table. You start with a simple wipe-down first.
Always Start With a Proper Pre-Wash and Foam Bath
Before you even think about treating a single water spot, the entire car needs a thorough wash. Trying to rub out a spot on a dirty panel is a surefire way to create a swirl-marked nightmare. You’ll just be grinding road grit and dust into your clear coat, causing way more harm than good.
A pre-soak is your best friend. A foam gun like the SwiftJet is perfect for this, covering the car in a thick layer of suds. This foam doesn’t just look cool; it lubricates the surface and starts breaking down dirt, allowing you to rinse the majority of it away before a wash mitt ever touches the paint.
After the pre-soak and rinse, follow up with a proper two-bucket hand wash. Once the car is sparkling clean, dry it completely with a high-quality microfiber towel. Now you can finally see what you're really up against.
The Vinegar Method for Fresh, Light Stains
If you’ve caught the spots early and they look like light, chalky outlines (Type 1), a simple home remedy might be all you need. A 50/50 mix of distilled white vinegar and distilled water is a classic trick because the mild acid in the vinegar can dissolve the alkaline mineral deposits.
Here’s how to do it without causing any issues:
- Mix your 50/50 solution in a spray bottle.
- Make sure the panel is cool and in the shade. Work in small, manageable sections.
- Lightly spray the solution on the spots and let it dwell for 30 to 60 seconds, max.
- Gently wipe the area with a clean microfiber.
- Rinse the section immediately and thoroughly with water to neutralize the acid.
- Dry it and check your work.
Pro Tip: Never, ever let a vinegar solution dry on your paint or glass. While it's a weak acid, letting it bake in the sun can cause its own type of etching. This method is strictly for light, fresh spots.
Using a Clay Bar for Bonded Contaminants
If the vinegar didn't touch the spots, it means the minerals have started to bond to the paint surface. This is when you reach for a clay bar. A clay bar isn't abrasive; it works by grabbing and shearing off anything sitting on top of the paint, including the gritty rings of a hard water spot.
Using a clay bar seems intimidating, but it’s really simple as long as you remember the golden rule: use tons of lubricant. The lube creates a slick barrier that lets the clay glide smoothly. Without it, the clay will grab and skip, potentially marring the paint.
Think of it like trying to slide your hand across a dry window versus one sprayed with Windex. That's the difference lubricant makes.
With the area well-lubed, just glide the clay back and forth with light pressure. You’ll actually feel the surface go from gritty to glass-smooth under your fingertips. After a few passes, wipe the lube residue off and feel the difference.
Escalating to Chemical Water Spot Removers
Still see some spots? Now we bring out the specialized tools. A dedicated chemical water spot remover is the next logical step. These are formulated with a specific blend of light acids and cleaners that are engineered to dissolve calcium and magnesium deposits quickly and safely.
Safety first—always wear nitrile gloves and eye protection. Make sure you’re working in a well-ventilated spot, out of direct sun, and on a cool panel.
Here's the process: apply a small amount of the remover to a microfiber applicator, not directly to the paint. Gently work it into the affected area for the time specified on the bottle, which is usually less than a minute. Don't let it dry on the surface. Immediately neutralize the product by rinsing with plenty of water or using a waterless wash spray.
These products are lifesavers for paint, but they work wonders on glass, too. If your windows are the main problem, we have a whole guide with more tips on how to remove hard water stains from car windows.
Machine Polishing for Severe Etching
If you've gone through all those steps and you can still see the ghostly outline of a water spot, you're officially dealing with etching. The minerals have eaten a tiny divot into the clear coat itself. No amount of cleaning will remove a hole—you have to level the surrounding paint down to the bottom of the defect. This is a job for a machine polisher.
For anyone new to polishing, a dual-action (DA) polisher is the way to go. It's much safer and more forgiving than a pro-grade rotary polisher.
The Polishing Process at a Glance:
- Compound Stage: Start with a cutting compound on a medium-cut pad. This is the heavy-lifting step that will level the clear coat and remove the etched-in spot.
- Polish Stage: Follow up with a finishing polish on a soft finishing pad. This refines the surface, removes any slight haze from compounding, and brings back that deep, wet-looking gloss.
Work in small 2x2 foot sections with light, even pressure. After each pass, wipe the area clean and inspect it with a good light. Once the etch marks are gone, you absolutely must protect your freshly corrected paint with a quality wax, sealant, or ceramic coating.
Keeping Your Car Spotless with Smart Prevention
After all the hard work of claying and polishing away those stubborn mineral deposits, the last thing you want is for them to reappear. Winning the battle against existing hard water stains is one thing, but winning the war means shifting your focus to smart prevention. Honestly, being proactive is the single most effective way to keep your car’s finish looking pristine.
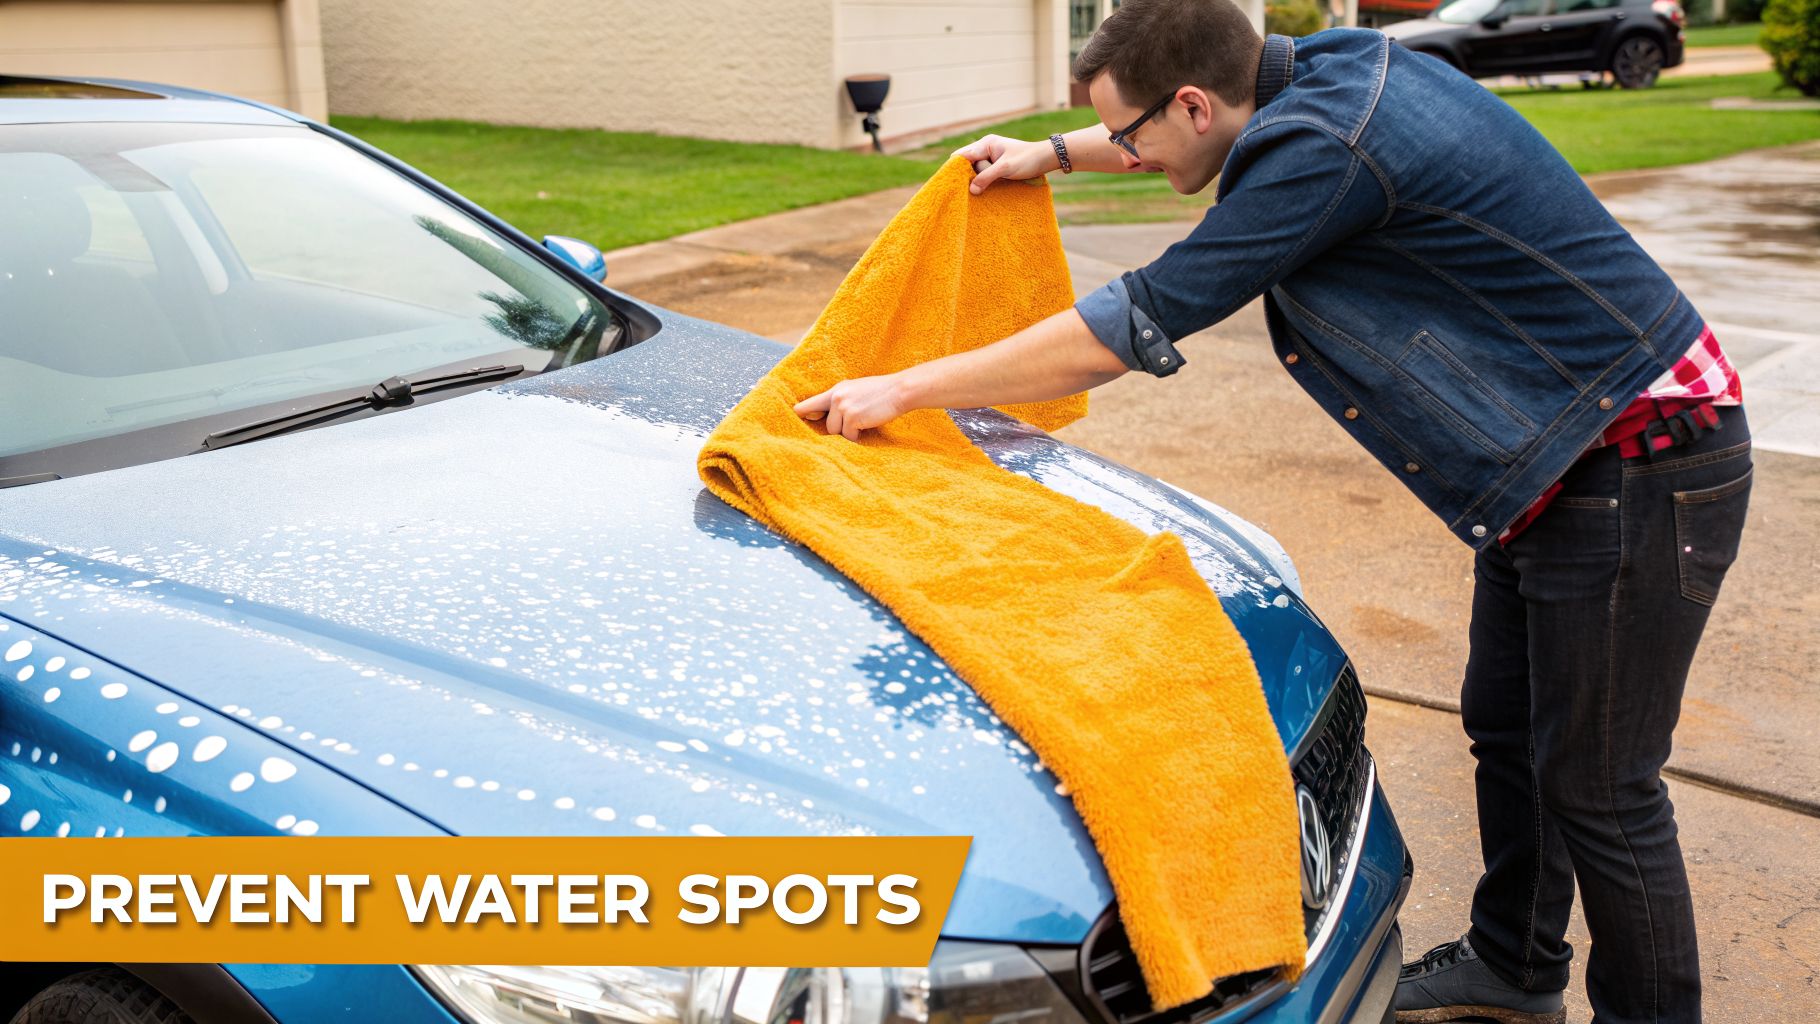
It’ll save you countless hours of correction work down the road. The core principle couldn't be simpler: don’t let water sit on your car.
Master the Fundamentals of Washing and Drying
There’s a reason the two golden rules of car washing are so fundamental. First, always wash your car in the shade or on a cool, overcast day. If you wash in direct sun, the water evaporates almost instantly, leaving behind those concentrated mineral deposits before you even have a chance to grab your towel.
Second, always dry your vehicle completely and immediately after the final rinse. This part is non-negotiable. Letting your car air-dry is basically rolling out the welcome mat for hard water spots, undoing all your effort.
The tools you use here make a massive difference. A high-quality, plush microfiber drying towel is your absolute best friend. These things can absorb several times their weight in water, pulling moisture off the surface quickly and safely. For a truly perfect, spot-free finish, you might even consider a dedicated car dryer. These blow filtered, warm air into every nook and cranny without ever touching the paint.
I’ve seen it a hundred times: a car owner spends hours on paint correction only to let their car air-dry in the driveway, bringing the spots right back. The drying stage is just as critical as the washing stage. A great drying towel isn't a luxury; it's a necessity if you're serious about preventing hard water stains.
Create a Hydrophobic Shield with Long-Term Protection
While proper drying is your first line of defense, the best long-term strategy is making your car’s surface so slick that water can’t stick around. When you apply a durable protective layer, you create a hydrophobic shield that causes water to bead up and roll right off the paint.
You have several excellent options, each offering a different level of durability:
- Wax: A quality carnauba wax gives that deep, warm gloss and good water-beading. It’s a classic choice but has the shortest lifespan, usually lasting just a few weeks to a couple of months.
- Sealant: Synthetic paint sealants create a much stronger, more durable bond with your paint than wax does. A good sealant can give you protection for four to six months or more, with excellent water-beading and a slick finish.
- Ceramic Coating: This is the top tier of long-term paint protection. A ceramic coating forms a semi-permanent, glass-like shell over your clear coat that can last for years. Its extreme hydrophobicity means water, dirt, and mineral deposits have a really tough time sticking, making your car easier to clean and way more resistant to spotting.
Upgrade Your Rinse for the Ultimate Prevention
For those of us who are really dedicated to a spot-free finish, there’s one more move you can make: purifying your water source. Even with a great protective coating, the minerals in your final rinse water can still leave deposits if not dried immediately.
A de-ionized (DI) water filter is a pro-level solution that just attaches to your garden hose. It uses a special resin to strip virtually all minerals—including the calcium and magnesium that cause hard water stains—from the water. When you rinse with de-ionized water, it means that even if a few drops evaporate, there are no minerals left behind to create spots.
This kind of tech gets right to the root of the problem. It’s no surprise that the global market for automotive water spot removers hit $1.27 billion in 2024, as everyone is constantly fighting mineral-rich water. Investing in prevention, like a foam gun for a faster wash or a filtration system, dramatically cuts down on the need for these corrective chemicals.
You can also think about how to prevent hard water damage from the start, similar to how RV owners protect their vehicle’s plumbing. By adopting these habits and tools, you can finally win the war against water spots and enjoy that perfect shine every single time.
Solving Common Water Spot Removal Headaches
It’s one of the most frustrating things in car care. You’ve spent hours washing, claying, maybe even polishing, only to step back and see the faint, ghostly outlines of water spots still mocking you. Before you throw in the towel, just know that this happens to the best of us. Learning how to get rid of hard water stains sometimes means knowing what to do when your first, second, or even third attempt falls short.
More often than not, the problem is your environment. If those pesky spots seem to pop up right after you finish rinsing, your own water source is probably the enemy. With an estimated 85% of the United States having hard water, your garden hose could be undoing all your hard work by blasting a fresh layer of minerals onto the paint.
Dealing With Stubborn Spots That Remain After Polishing
So you've broken out the machine polisher and a good compound, but those stubborn water spot outlines are still etched into the clear coat. This is a tell-tale sign of deeper etching, where the minerals have eaten further into the clear coat than you initially thought. When you hit this wall, you really have two paths forward.
Your first move should be another, more precise polishing pass. Instead of re-polishing the whole panel, zero in on just the affected area. You might need to step up to a slightly more aggressive pad and compound combo than your first attempt. The key is to work in a small section, move the polisher slowly, and check your work frequently. You want to remove the etch, not the entire clear coat.
The second option is wet sanding. This is an advanced technique and I can't stress that enough. It's the last resort for the most severe water spot etching and should only be done if you have significant experience. While wet sanding can level the surface with incredible precision, a moment of inattention can burn through the clear coat, leaving you with a much bigger, more expensive problem. For most weekend warriors, if a second, more aggressive polish doesn't work, it’s probably time to call in a professional detailer.
A critical distinction to make here is between a severe etch you can fix and outright clear coat failure. If the spot looks milky, cracked, or the paint is flaking, stop immediately. Polishing or sanding will only make it worse. That's clear coat failure, and the only fix is a trip to the body shop for a repaint.
Safely Removing Spots from Delicate Surfaces
Hard water spots aren’t just a problem for your shiny paint and glass. They can be a real nightmare on trickier surfaces like textured black plastic trim or modern matte paint finishes. Using the wrong chemical or getting too aggressive here can cause permanent damage, turning a small blemish into a big eyesore.
When working on textured plastic trim:
- Keep polishes and compounds far away. They will get trapped in the texture and leave chalky white stains that are a pain to remove.
- Your best bet is a dedicated water spot remover and a soft-bristled detailing brush.
- Gently work the product into the trim's textured surface to break down the mineral deposits hiding in the crevices.
- Rinse it completely, then apply a quality trim restorer to bring back the deep black color and add a layer of protection.
For matte or satin finishes:
- Never, ever use polishes, waxes, or traditional compounds. These products are designed to fill in imperfections and create gloss. On a matte surface, they will clog the paint's unique microscopic texture, leaving you with a blotchy, uneven sheen that you can’t undo.
- Only use products specifically made for matte paint. Look for a matte-safe water spot remover.
- Apply it with a plush microfiber towel, using gentle, straight-line wiping motions. Do not scrub or apply heavy pressure.
- Rinse the area thoroughly with clean water and pat it dry with a fresh, clean microfiber towel.
Answering Your Hard Water Stain Questions
Even when you think you have the process down, new questions always seem to surface. It happens to everyone. Let's walk through some of the most common questions I hear from both seasoned detailers and weekend warriors trying to get rid of those stubborn hard water spots.
Can a Regular Car Wash Get Rid of These Spots?
Honestly, that's a big "maybe." If you're looking at brand-new mineral spots (what we call Type 1 spots) from a sprinkler or a quick rain shower, a good hand wash might just do the trick. The key is catching them immediately. A thick foam pre-soak, like what you get from a SwiftJet Foam Gun, is perfect for this, as it helps lift and soften those fresh deposits before you even touch the paint.
But for spots that have been sitting for even a short while? A standard wash just isn't going to cut it. Those minerals have already begun to etch into the clear coat. Worse, some automatic car washes that recycle their water can actually make the problem worse by blasting your car with even more mineral-heavy water.
Is It Actually Safe to Use Household Vinegar on My Paint?
I see this DIY tip everywhere. Vinegar's mild acidity can, in theory, break down the alkaline minerals in hard water. For very light, fresh spots, a 50/50 mix of white vinegar and distilled water can sometimes work.
But you have to be incredibly careful. It’s a risky move.
- Never, ever apply it to a hot panel or in direct sunlight.
- Don't let the vinegar solution dry on the surface.
- You must rinse the area thoroughly with plain water the second you're done wiping.
The bottom line is that while vinegar might work in a pinch, it’s not something I’d recommend as a go-to solution. It wasn't designed for automotive paint. A purpose-built, pH-balanced water spot remover is always the safer and more effective bet.
How Can I Tell if My Water Is Hard in the First Place?
This is the most important question for preventing spots from ever forming. If you feel like you're in a constant battle with water spots every time you wash your car, your tap water is almost certainly the culprit. It's a massive issue—an estimated 85% of the United States has hard water.
Water hardness is measured in Parts Per Million (PPM). Your typical city water might hover around 120-200 PPM, but some areas have it much rougher. Las Vegas, for example, can see 270-300 PPM, and I've seen parts of Arizona with water testing over 450 PPM. Knowing this, especially if you wash with a garden hose, is the first step in your prevention strategy. You can learn more about how water quality varies by region on turtlewaxpro.com.
What If the Stains Are on My Plastic Trim or Windows?
Great question, because you can't treat everything the same. Don't even think about using polishes or compounds on your textured black plastic trim. It will just leave a white, chalky residue that's an absolute nightmare to remove. Instead, grab a dedicated water spot remover and a soft brush, gently agitate the area to dissolve the minerals, and then follow up with a good trim restorer to bring back the color.
Glass is a bit more forgiving and can be treated similarly to paint. You can try a vinegar solution, a clay bar, or a specific water spot remover. If the spotting is severe and has started to etch the glass, a dedicated glass polish paired with a polishing pad will usually restore perfect clarity without causing any scratches.
Ultimately, the best way to deal with water spots is to stop them from ever forming. A powerful pre-soak and a quick, efficient rinse are your best weapons. That’s where tools like the SwiftJet Car Wash Foam Gun really make a difference. It helps you wash faster and more effectively, minimizing the time water has to sit and dry on your paint. See how you can improve your wash routine at https://swiftjetusa.com.
