
Don't let bug splatter sit on your car. It's a sure-fire way to ruin your paint. The acidic gunk from those bugs can permanently etch into your clear coat if you're not careful. The trick is to pre-soak the area with a good bug remover, use a soft microfiber towel, and gently lift the grime away—never scrub it.
Why You Need to Clean Bug Splatter Immediately
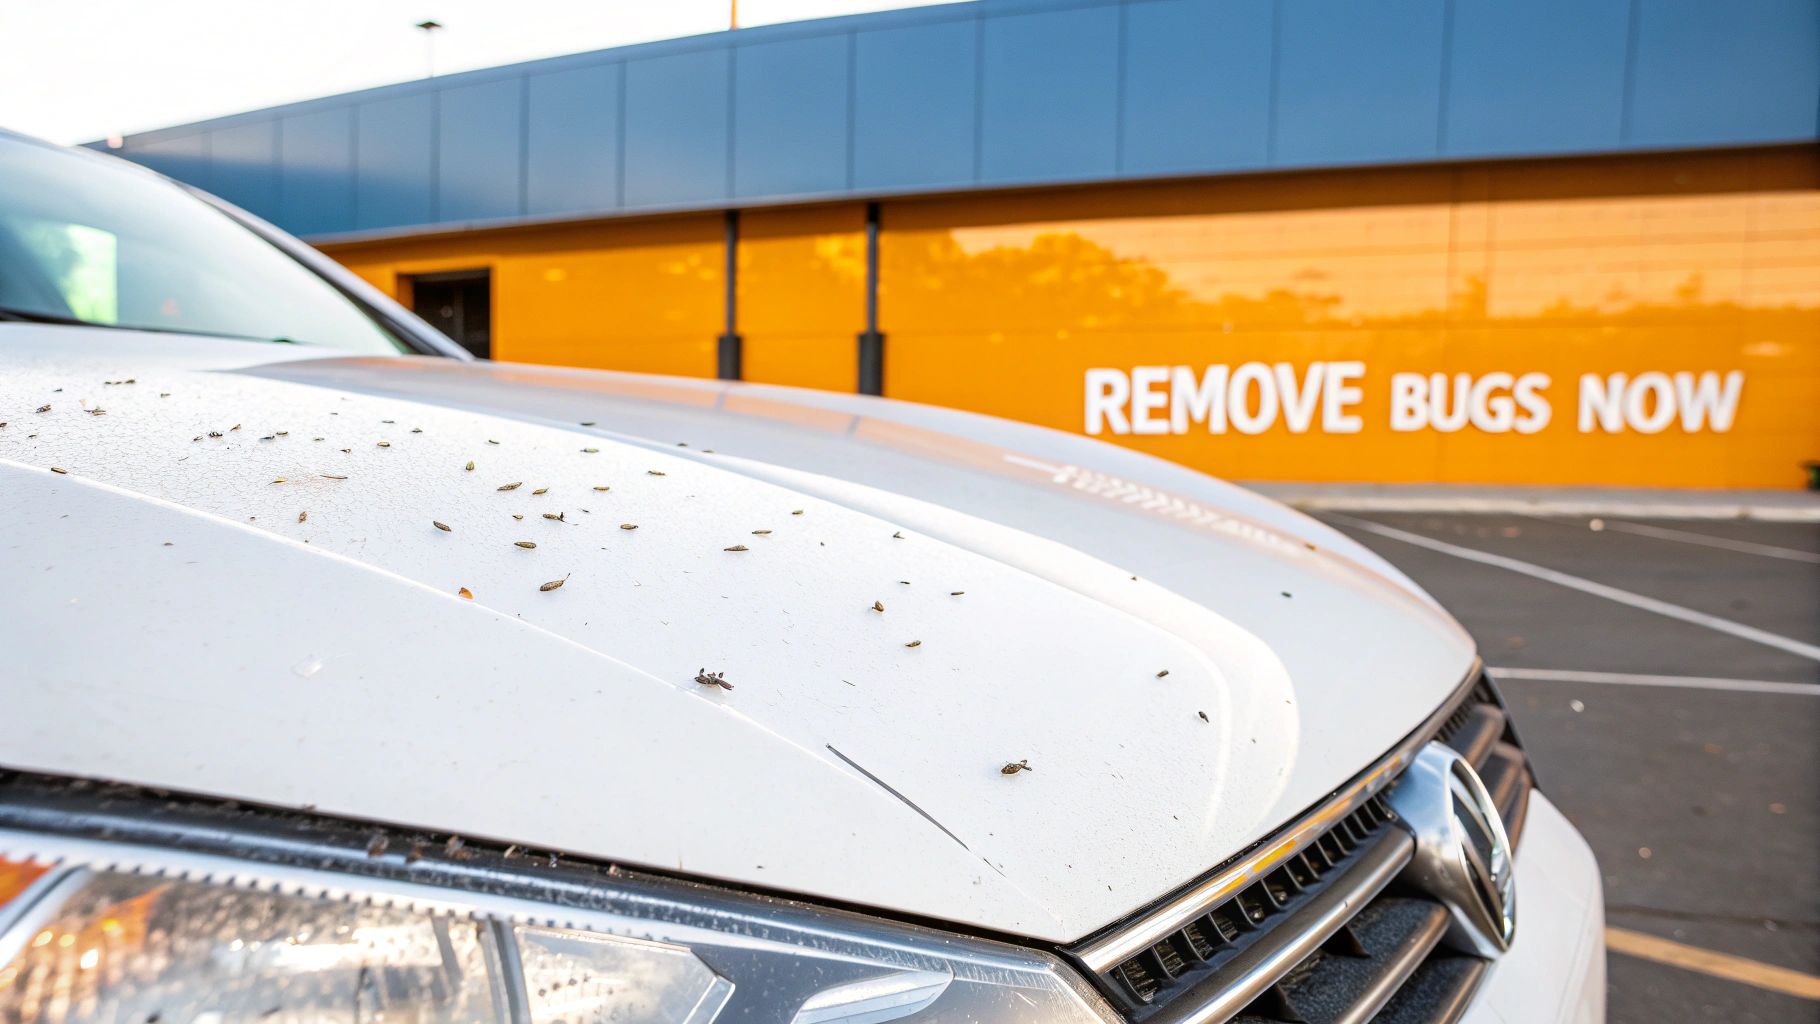
It’s tempting to just ignore that mess of bugs on your bumper and grille, but what seems like a small cosmetic annoyance is actually a serious threat to your vehicle's paint. Inside every bug is a mix of acidic bodily fluids. When this stuff gets baked onto your car's surface by the sun, it starts eating away at the protective clear coat.
Think of it as a slow-motion chemical attack on your paint job. This whole process gets kicked into overdrive by heat and direct sunlight. If your car is sitting out in the sun, you can start to see permanent damage from bug guts in as little as 24 to 48 hours. The result is dull, discolored spots that no amount of regular washing will ever get out.
The Science of Paint Damage
The damage doesn't happen all at once. It's a gradual process that gets worse the longer you wait:
- Initial Splatter: Right after impact, the bug residue is just sitting on the surface of the clear coat.
- Acidic Reaction: Pretty quickly, those enzymes and acids start to soften and weaken the clear coat.
- Permanent Etching: Before you know it, the acids have eaten right into the paint, leaving a permanent mark.
This isn't just an old wives' tale. I’ve seen it happen countless times, and the data backs it up. In fact, up to 40% of car owners have reported noticeable damage from leaving bug splatter on their cars for just a couple of weeks. There's a reason the bug remover section at the auto parts store is always so big.
Pro Tip: Bug guts are surprisingly similar to bird droppings in how they damage paint—both are highly acidic. You have to deal with both of them right away. For similar cleaning tips, check out our guide on https://www.swiftjetusa.com/blogs/news/how-to-remove-bird-droppings.
Summer heat, in particular, turns bug splatter into a serious problem that needs immediate attention. If you want more advice on keeping your car safe during the hottest months, see these tips on how to prepare your car for the Arizona summer heat.
Building Your Bug Removal Arsenal
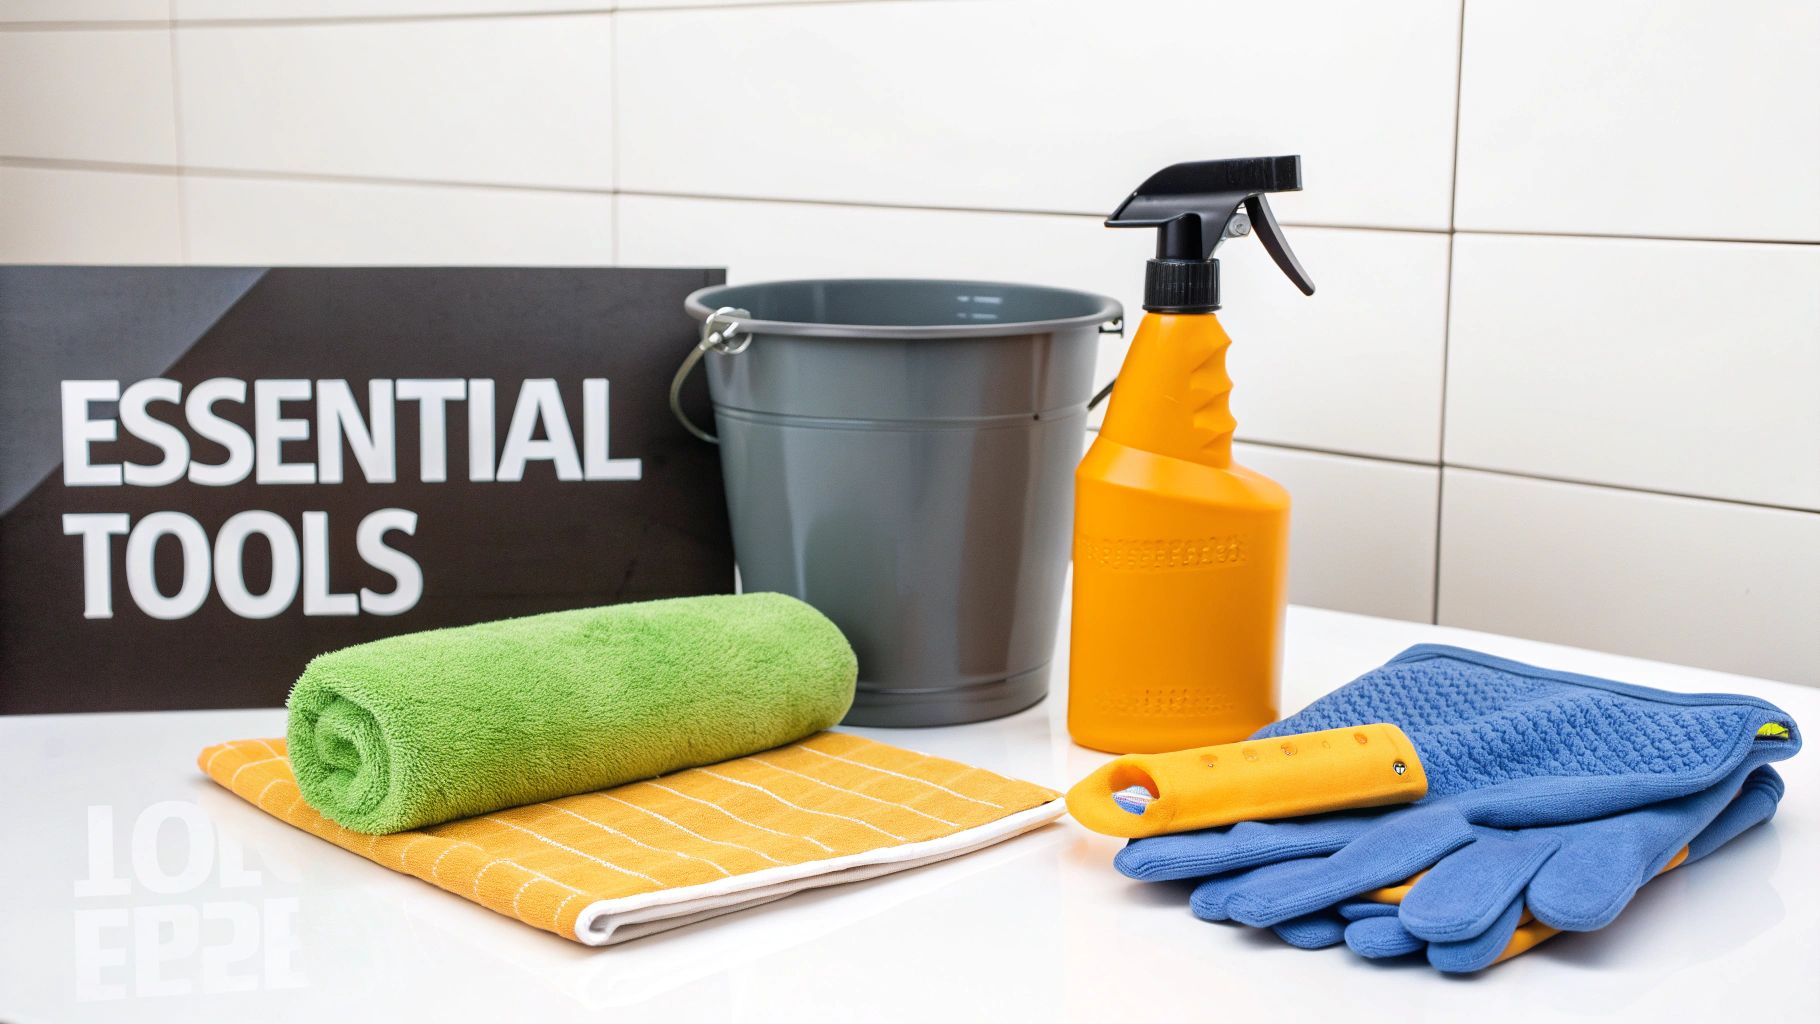
Trying to scrub off bug splatter without the right gear is a recipe for frustration and, even worse, scratched paint. It's like trying to paint a house with a toothbrush. But with the right tools on hand, what seems like a nightmare chore becomes a surprisingly simple process. This isn’t about buying every fancy gadget you see; it’s about putting together a smart, effective kit that gets the job done safely.
The absolute hero of this kit is a dedicated bug and tar remover spray. I can't stress this enough. These aren't just rebranded soaps; they're formulated with specific enzymes that chemically break down the acidic, protein-based mess that makes bug guts so stubborn. Regular car wash soap just can't compete. A good bug remover does the heavy lifting for you, dissolving the residue so you can wipe it away with almost no effort.
Core Cleaning Supplies
Aside from the specialized spray, there are a few essentials you'll need to ensure a scratch-free finish. Each of these items has a crucial job to do in protecting your vehicle's delicate clear coat.
-
Plush Microfiber Towels: Stock up on these. Their incredibly soft, absorbent fibers are designed to lift and trap bug residue and dirt, pulling it away from the surface. Please, never use old t-shirts, bath towels, or paper towels—they're far too abrasive and will leave a web of fine scratches in your paint.
-
Two Buckets with Grit Guards: This isn't just an old-school detailer's trick; it's fundamental to safe washing. One bucket is for your soapy water, the other for clean rinse water. After wiping down a section, you dunk the dirty mitt in the rinse bucket first. The grit guard at the bottom traps the abrasive particles, so when you go back to the soap bucket, your mitt is clean. It's a simple step that makes a world of difference.
Of course, none of this works without a good water source. Having a durable garden hose reel makes the whole process smoother, from the initial rinse to the final spray-down.
Choosing Your Go-To Bug Remover
Picking the right product can feel overwhelming, but it really comes down to what you're dealing with and your personal preference. Here’s a quick breakdown to help you decide.
| Product Type | Best For | How It Works | Potential Risks |
|---|---|---|---|
| Dedicated Bug Remover Spray | Fresh and moderately dried-on bugs; pre-soaking. | Uses enzymes and solvents to dissolve bug proteins chemically. | Some aggressive formulas can strip wax or sealant if left on too long. |
| All-Purpose Cleaner (APC) | Light bug residue on tougher surfaces like grilles and glass. | Strong detergents break down a wide range of grime. | Can be too harsh for paint; always dilute properly and test in a hidden spot. |
| Bug Scrubber Sponge | Gentle physical agitation on pre-soaked areas. | The honeycomb or mesh texture helps lift residue without being abrasive. | Using too much pressure or a dry sponge can easily cause scratches. |
| Detailing Clay Bar | Stubborn, embedded residue that feels rough after washing. | Shears off surface contaminants as it glides over a lubricated surface. | Requires lubrication spray; dropping it on the ground means you have to throw it away. |
Ultimately, a quality dedicated bug remover spray is the most versatile and safest starting point for most situations.
When You Need to Bring in the Heavier Tools
For those bugs that have been baked onto the paint by the sun for weeks, a simple spray-and-wipe might not cut it. This is when you may need to step up your game, but remember to proceed with caution.
A bug sponge or a specialized scrubber made for automotive paint can provide that extra bit of gentle agitation. Look for one with a soft, open-cell or honeycomb texture that won't mar the finish.
For the absolute worst-case scenario—when you wash the car and can still feel a rough, gritty texture—the detailing clay bar is your final answer. When you glide the clay over a properly lubricated surface, it literally pulls the embedded gunk out of the clear coat, leaving it perfectly smooth.
The most important thing to remember is this: let the chemicals do the work, not your elbow grease. Patience is your most valuable tool. The right products mean less scrubbing and a much, much lower risk of scratching your paint.
If you're a DIY enthusiast and curious about what makes these cleaners tick, exploring how to create a simple homemade car wash solution can offer some great insights into cleaning chemistry.
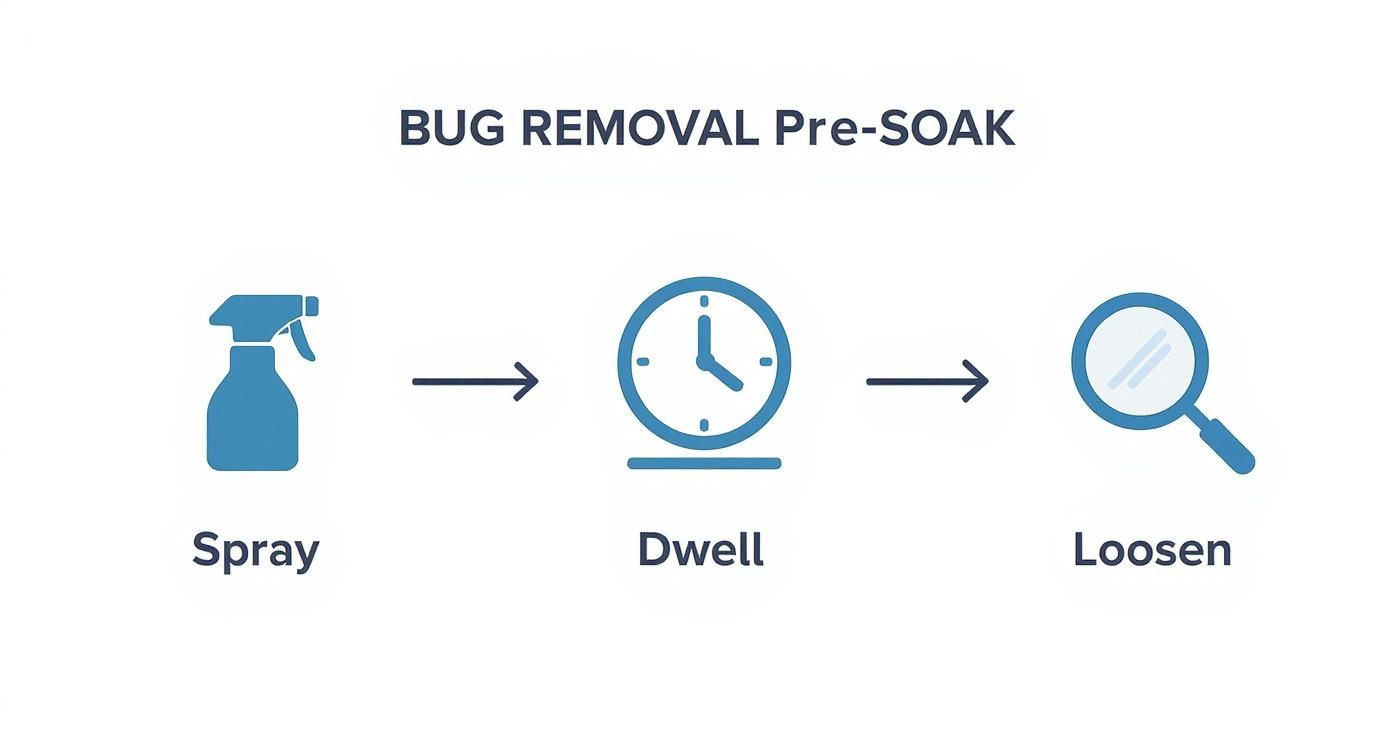
Let Your Cleaner Do the Heavy Lifting: The Pre-Soak
If you want to know the fastest way to scratch your car’s paint, it's scrubbing at baked-on bugs with a sponge. The real secret to getting bugs off your car safely has nothing to do with elbow grease; it’s all about patience and letting the right product do the work for you. This first step, the pre-soak, is what makes the difference between a quick, scratch-free wash and a frustrating afternoon battling stubborn splatter.
The whole point here is to soften and rehydrate those dried-up, crusty bug remains. When you spray a dedicated bug remover or blanket the front end of your car in thick foam from a product like the SwiftJet foam gun, you’re kicking off a chemical reaction. The cleaner gets to work breaking down the acidic proteins that make bug guts stick like glue. Just think of it like soaking a pan with burnt-on food—you let the soap and water do their thing long before you even touch it with a sponge.
Timing and Your Surroundings Matter
Before you even think about spraying your car, take a look around. The classic rookie mistake is trying to pre-soak a hot car sitting in direct sunlight. If the panels are hot, your cleaner and water will evaporate almost instantly, long before they have a chance to work their magic.
This rapid drying doesn't just waste your product; it can leave behind splotchy chemical residues, creating streaks or even etching your clear coat. Always, always work on a surface that’s cool to the touch.
Pro Tip: Your best bet is to wash in a garage, under a carport, or simply wait for the cooler parts of the day. Early morning or late evening works perfectly. This gives your cleaning solution the maximum time to work on the grime without drying out.
Giving the product enough time to do its job is non-negotiable. We call this dwell time. Once you’ve saturated all the bug-splattered areas—the front bumper, grille, headlights, and side mirrors are the usual culprits—just step back and let it sit.
How to Apply Your Pre-Soak for the Best Results
The way you apply your cleaner can make a huge difference. A simple trigger spray bottle of bug remover gets the job done, but a foam gun will give you far better coverage and cling.
-
The Trigger Spray Method: If you're using a standard spray-on bug remover, don't be shy. You want the surface to look genuinely wet, not just lightly misted. Keep an eye on it and re-apply to any spots that start to dry out.
-
The Foam Gun Method: This is where a foam gun like the SwiftJet really shines. The thick, clinging foam sticks to vertical surfaces way better than a runny liquid, which means more contact time for the cleaners to penetrate the bug guts. It’s the best way to get even, consistent coverage over the entire front of your car.
For most quality bug removers, a dwell time of 3 to 5 minutes is the sweet spot. You’ll actually see the bug residue start to soften up and even dissolve and run down the panel. That's your cue that the product is working. Rushing this is the single biggest mistake you can make. Let the chemicals do the work, and the rest of your wash will be infinitely easier and, most importantly, safer for your paint.
Gently Washing Away the Grime for a Flawless Finish
Once your pre-soak has had a few minutes to work its magic, most of that baked-on bug mess will be softened and ready to lift off. Now comes the main event: the wash itself. This is where your technique really matters if you want to avoid scratches and get that perfectly clean, bug-free shine. Remember, the goal here is to gently glide the grime away, not scrub it off.
For a truly safe, scratch-free wash, the gold standard is the two-bucket wash method. This is the exact technique the pros use to keep paint pristine, and it's dead simple to do at home. You’ll have one bucket with your car shampoo and another with just plain water to rinse your wash mitt. This critical separation prevents you from picking up dirt and dragging it right back across your car’s finish. For a full breakdown, check out our guide on the two-bucket car wash method.
Your Step-by-Step Washing Plan
Always start washing from the top of your vehicle and work your way down. Gravity is your friend here. Save the bug-splattered zones—like the front bumper, grille, and mirrors—for the very end.
Dunk a clean, soft wash mitt into your soapy water and let it get fully saturated. Then, gently glide it over the surface in straight, overlapping lines. Let the soap do the heavy lifting; there's no need to apply a ton of pressure.
After you finish a small section (think one door panel or half the hood), immediately rinse your mitt in the plain water bucket. You'll literally see the dirt and bug bits release from the mitt and sink to the bottom. Give it a good wring-out before dipping it back into the clean, soapy water. This single step is a game-changer for protecting your paint.
The simple sequence of spraying, letting it sit, and gently washing is the key to doing this safely.
As you can see, the most important work happens before your wash mitt even touches the paint.
What About the Stubborn Spots?
Even with the best technique, you might run into a few ultra-stubborn bug splatters that just don't want to let go. This is where a lot of people make a crucial mistake: they start scrubbing harder. That's a one-way ticket to scratched paint. Instead, we just need a slightly different tool for the job.
Your best bet is a dedicated bug sponge or a microfiber bug scrubber. These have a special mesh-like texture that provides just enough bite to dislodge baked-on residue without being aggressive.
- Re-hydrate the area: Before you touch it, spray the stubborn spot again with your bug remover and let it dwell for another minute.
- Use a light touch: Gently pass the wet bug sponge over the spot. The texture of the sponge is designed to catch the edges of the residue and lift it away safely.
- Lubrication is key: Make sure the area stays slick with either soapy water or bug remover the entire time you're working on it.
Expert Tip: If a spot still won't come off with a light pass from a bug sponge, it’s a sign that the bug acids have started to etch into the clear coat. Trying to force it off will only cause more damage. At this point, the next step is to use a clay bar after you've finished the wash.
Applying Paint Protection for an Easier Cleanup Next Time
https://www.youtube.com/embed/9dy536CWqQ0
You’ve put in the work to get every last bit of bug splatter off your car’s finish. The surface is spotless, smooth, and gleaming. Don't stop now—this is the perfect time to switch from a reactive mindset to a proactive one.
Applying a layer of protection is the single most effective thing you can do to make the next cleanup dramatically easier.
Think of it like seasoning a cast-iron skillet. A good protective layer—whether it's wax, a sealant, or a ceramic coating—creates a slick, sacrificial barrier between your car’s clear coat and the outside world. This barrier does more than just add shine; it fills in the microscopic pores in your paint. The result is a super-smooth surface that bug guts, road tar, and other grime struggle to stick to.
This preventative approach is catching on. The global market for products like tar and bug removers hit about USD 1.43 billion in 2024, showing just how many drivers are realizing this upkeep is crucial for their vehicle's appearance and longevity. You can dig into the numbers and trends in this detailed industry report.
Choosing Your Protective Shield
When it comes to paint protection, you have a few excellent options. The right choice really comes down to your budget, how much time you want to spend, and the level of durability you’re looking for.
-
Traditional Carnauba Wax: The classic choice, loved by enthusiasts for the deep, warm glow it gives to paint. It’s generally easy to apply by hand and relatively inexpensive, but it's not the most durable. Expect it to last a few weeks to a couple of months at best.
-
Paint Sealant: Think of a sealant as a synthetic, supercharged wax. These are man-made polymers engineered for maximum durability and protection. They create an incredibly slick surface and can last anywhere from four to six months, offering a big step up in longevity over traditional wax.
-
Ceramic Coating: This is the top-tier option if you're serious about long-term protection. A ceramic coating is a liquid polymer that chemically bonds with your car’s factory paint, creating a hard, semi-permanent layer of protection. It offers unmatched hardness, chemical resistance, and crazy hydrophobic properties, meaning water, dirt, and bugs slide right off.
A professional-grade ceramic coating can last for years, not months. While it’s the most expensive option and has a more involved application process, the payoff is years of effortless cleaning and superior defense against bug acids and environmental contaminants.
The Long-Term Benefits of Protection
Ultimately, applying protection after you get the bugs off your car isn't just an extra step—it's an investment in your time and your vehicle's future.
The next time you drive through a swarm of insects, you'll find that a simple rinse or a quick wash is often all it takes to make them disappear. You’ll spend less time scrubbing and more time enjoying a clean vehicle, all while preserving your paint’s health and your car’s value for the long haul.
Got Questions About Getting Bugs Off Your Car? We’ve Got Answers.
Even when you know the basic steps, certain situations can leave you second-guessing your approach. When it comes to bug guts, knowing what works is just as important as knowing what will wreck your paint. Let’s clear up a few of the most common questions we hear from car owners.
Are DIY Hacks Like WD-40 Actually Safe for My Paint?
It's so tempting, right? You see a video of someone using a dryer sheet or a can of WD-40 to wipe bugs away effortlessly. But trust me, these popular "hacks" are a terrible idea for modern car paint. They might look like they work in the short term, but they can cause real damage down the line.
- WD-40: This is a solvent designed to displace water and loosen rusty bolts, not clean paint. It's petroleum-based, which means it will strip off any wax or sealant you have, leaving your clear coat completely vulnerable. To make matters worse, it leaves an oily film that's a magnet for dust and road grime.
- Dryer Sheets: The fibers in a dryer sheet feel soft, but they're surprisingly abrasive on a microscopic level. Rubbing one on your paint, especially if it's not fully soaked, is like taking a very fine piece of sandpaper to your car. You'll create a web of tiny scratches that will dull your finish over time.
Stick with products made for cars. Seriously. The risk of ruining your clear coat just isn't worth the few bucks you might save by grabbing something from under the kitchen sink.
What If I Can Still See Outlines After I Wash the Bugs Off?
This is a classic and frustrating problem. You've washed the car, but you can still see faint, ghostly silhouettes where the bugs were. That's called etching, and it means the acids from the bug guts have started to eat into your clear coat. Don't panic, and definitely don't start scrubbing harder—that will only make it worse.
For minor etching, you can usually fix it yourself. After the car is clean and dry, grab a clay bar and go over the affected spots. This will pull out any lingering contaminants bonded to the surface. Next, use a good quality car polish on the area. The polish has mild abrasives that will gently level the clear coat, effectively erasing the marks.
Now, if you can feel the outline with your fingernail, the etching is more severe. This typically requires a more aggressive polishing compound and a machine polisher to fix. If you're not experienced with paint correction, this is where you call in a professional detailer. It's easy to burn through your paint if you don't know what you're doing.
How Fast Do I Really Need to Clean Bugs Off?
The clock starts ticking the second that bug splatters. On a hot, sunny day, the acidic enzymes can start damaging your clear coat in as little as 24 to 48 hours. The sun basically bakes those corrosive guts right into your car's finish, accelerating the etching process.
This is why speed is your best friend. If you're on a summer road trip, get into the habit of cleaning the front of your car every time you stop for gas. A small bottle of quick detailer or waterless wash and a couple of clean microfiber towels in your trunk is all it takes to prevent serious buildup and permanent paint damage.
Ready to make bug removal easier than ever? The SwiftJet Car Wash Foam Gun creates a thick, clinging foam that dissolves bug residue, minimizing scrubbing and protecting your paint. Get your SwiftJet today and experience a faster, safer wash!