
If you're serious about getting a professional, scratch-free finish on your car at home, a hose end foam gun is one of the best tools you can own. It hooks right up to your garden hose and works its magic by mixing car soap, water, and air into a thick, sudsy foam. This "pre-wash" is the secret to safely lifting away dirt and grime before a wash mitt ever touches your paint.
The Pro's Secret to a Flawless Wash
Ever look at a freshly detailed car and wonder how they achieve that deep, flawless shine? A big piece of that puzzle is the pre-wash foam bath, a step that a good foam gun makes incredibly easy. It's a total game-changer for anyone who wants top-tier results without dropping cash on a pressure washer setup.
The real value here is how it minimizes physical contact with your paint when it's most vulnerable—covered in abrasive dirt. It completely changes the car wash game.
- It Lifts and Surrounds Dirt: The foam doesn't just sit there; it clings to the surface and works its way into every little nook and cranny. This process softens up and surrounds all those nasty, abrasive particles like road grime and dust.
- It Prevents Swirl Marks: By getting the worst of the grit off before you start scrubbing with a mitt, you drastically reduce the risk of creating swirl marks and fine scratches. Those tiny scratches are what make a car’s finish look dull over time.
- It Makes Washing Easier: The foam's "dwell time"—how long it stays on the car—gives your soap more time to work, breaking down stubborn contaminants. This makes the actual hand-washing part much quicker and more effective.
More Than Just a Niche Tool
The rising popularity of foam guns isn't just something detailers are talking about. The market for low-pressure foamers, which includes the hose end car wash foam gun, is booming. Global valuations are expected to hit somewhere between $250 million and $500 million by 2025.
Industry experts are projecting a steady growth rate of 7% to 8% each year through 2033. This is all fueled by a growing number of people getting into automotive detailing, both as a hobby and a profession. It shows just how essential these tools have become.
A foam gun isn’t just about making your car look clean for the weekend. It's a fundamental tool for preserving the quality and integrity of your paint for years to come.
Of course, a great wash is just one part of keeping your vehicle in top shape. For a more holistic view, it's worth checking out a complete car maintenance checklist.
Now, let's get into the nitty-gritty of using your foam gun, from setting it up to mastering the perfect wash.
Your Pre-Wash Checklist and Foam Gun Setup
A little prep work goes a long way. Before you even think about pulling the trigger on that foam gun, taking a few minutes to get organized can make the whole car wash faster, better, and a lot less frustrating. Think of it as your pre-flight checklist.
Trust me, you don't want to be running back to the garage with soapy, wet hands because you forgot your wash mitts. Getting everything laid out first is the secret to a smooth, professional-level wash right in your own driveway.
Assembling Your Car Wash Arsenal
Your core setup is pretty simple, but having these specific items ready and within arm's reach is a game-changer.
- Your Hose End Car Wash Foam Gun: This is the whole rig – spray nozzle, soap canister, and the all-important siphon tube inside.
- A Quality Car Shampoo: Don't just grab dish soap. You need a pH-balanced car soap that cleans without stripping off your car's wax or sealant.
- Clean Wash Mitts: I always use at least two. One for the top half of the car (the cleaner parts) and a separate one for the grimy lower sections and wheels.
- Drying Towels: Nothing beats a stack of high-quality microfiber towels for getting that streak-free, scratch-free finish.
Getting all your gear together is half the battle for a perfect shine. If you're building out your kit, our car wash checklist for a perfect finish has a ton of other great ideas so you won’t miss a thing.
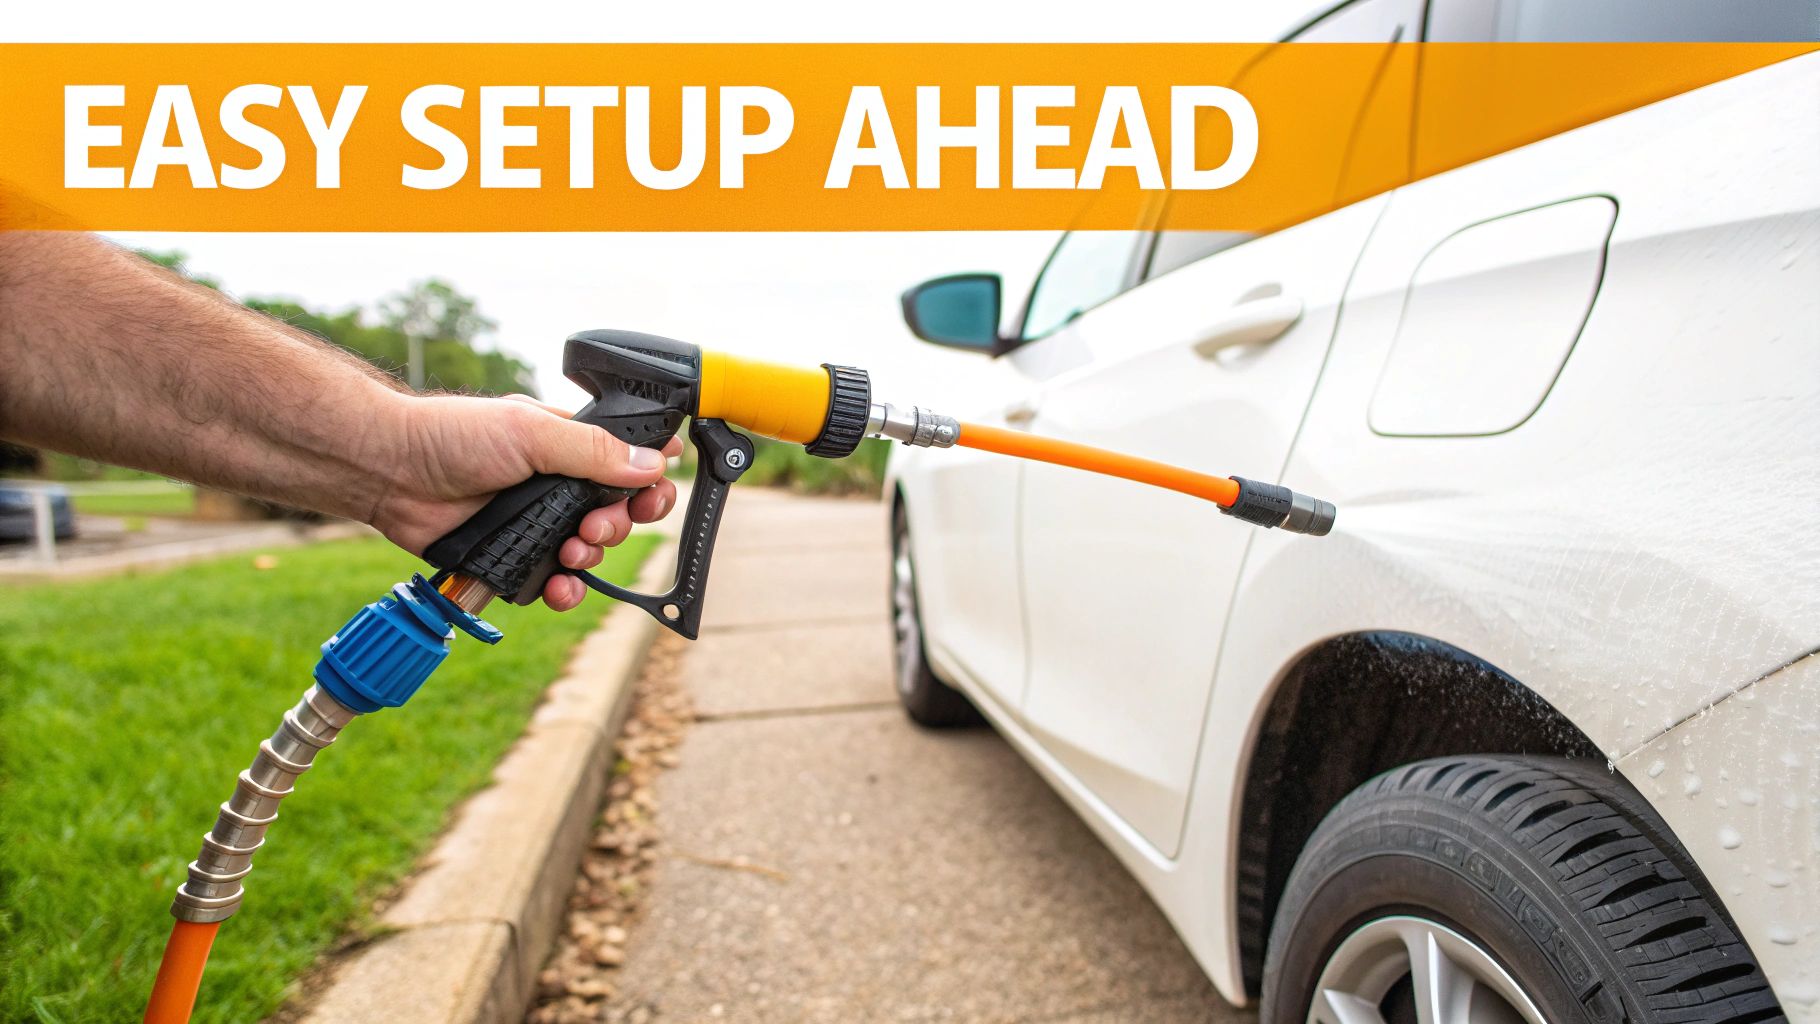
Connecting Your Foam Gun for a Leak-Free Wash
This is where people often run into trouble. A leaky connection is annoying and wastes soap, but it's easy to prevent if you know what to look for. The whole process is simple, but the details matter.
First things first, check the small rubber gasket inside the female end of your garden hose. This little ring is the number one cause of drips and sprays. If it looks cracked, flattened, or it's missing altogether, just pop in a new one. It'll save you a headache.
Now, thread the foam gun’s nozzle onto your hose. You want it snug, but just hand-tight is plenty. Cranking down on it with a wrench can damage the threads or crush that gasket you just checked. If you have a quick-release fitting, just listen for that satisfying click to know it's locked in place.
Pro Tip: Before you even add soap, connect the nozzle to the hose and run some water through it. This quick flush confirms you have a solid, leak-free connection and blows out any gunk that might be hiding in your hose.
Finally, grab the soap canister. Inside the nozzle head, you'll see a small port where the siphon tube needs to be pushed in firmly. If this tube isn't seated correctly, the gun can't pull up the soap, and you'll just be spraying plain water. Once that's in, screw the canister on snugly, and you're officially ready for foam.
Finding the Perfect Soap to Water Ratio
The secret to getting that thick, shaving cream-style foam isn't just about the foam gun itself—it's all in the mix. Getting the dilution of your car wash soap right is what separates a weak, watery mess from a rich lather that actually lifts the dirt off your paint. Honestly, it’s the most important thing you’ll learn when using a hose end car wash foam gun.
First thing's first: step away from the dish soap. I know it seems like a great degreaser, but it's way too harsh for automotive paint. It will strip every last bit of wax or sealant right off your car, leaving the finish unprotected. You absolutely need to use a dedicated, pH-balanced car wash shampoo to keep your vehicle's paint safe and looking its best.
Your Starting Point for Thick Foam
Think of dilution ratios as a starting recipe, not some unbreakable rule. Your goal is to find that perfect balance where the foam is thick enough to cling to the side of your car, giving the cleaning agents enough time to break down all that grime.
For most 32-ounce foam gun canisters, a great place to start is with 2-3 ounces of concentrated car wash soap. Fill the rest of the canister with water, but leave a little space at the top so you can shake it up. For most cars and most soaps, this simple mix will give you some seriously impressive foam right off the bat.
This is a great visual for understanding how all the little details, including your soap mix, contribute to a faster, better car wash.
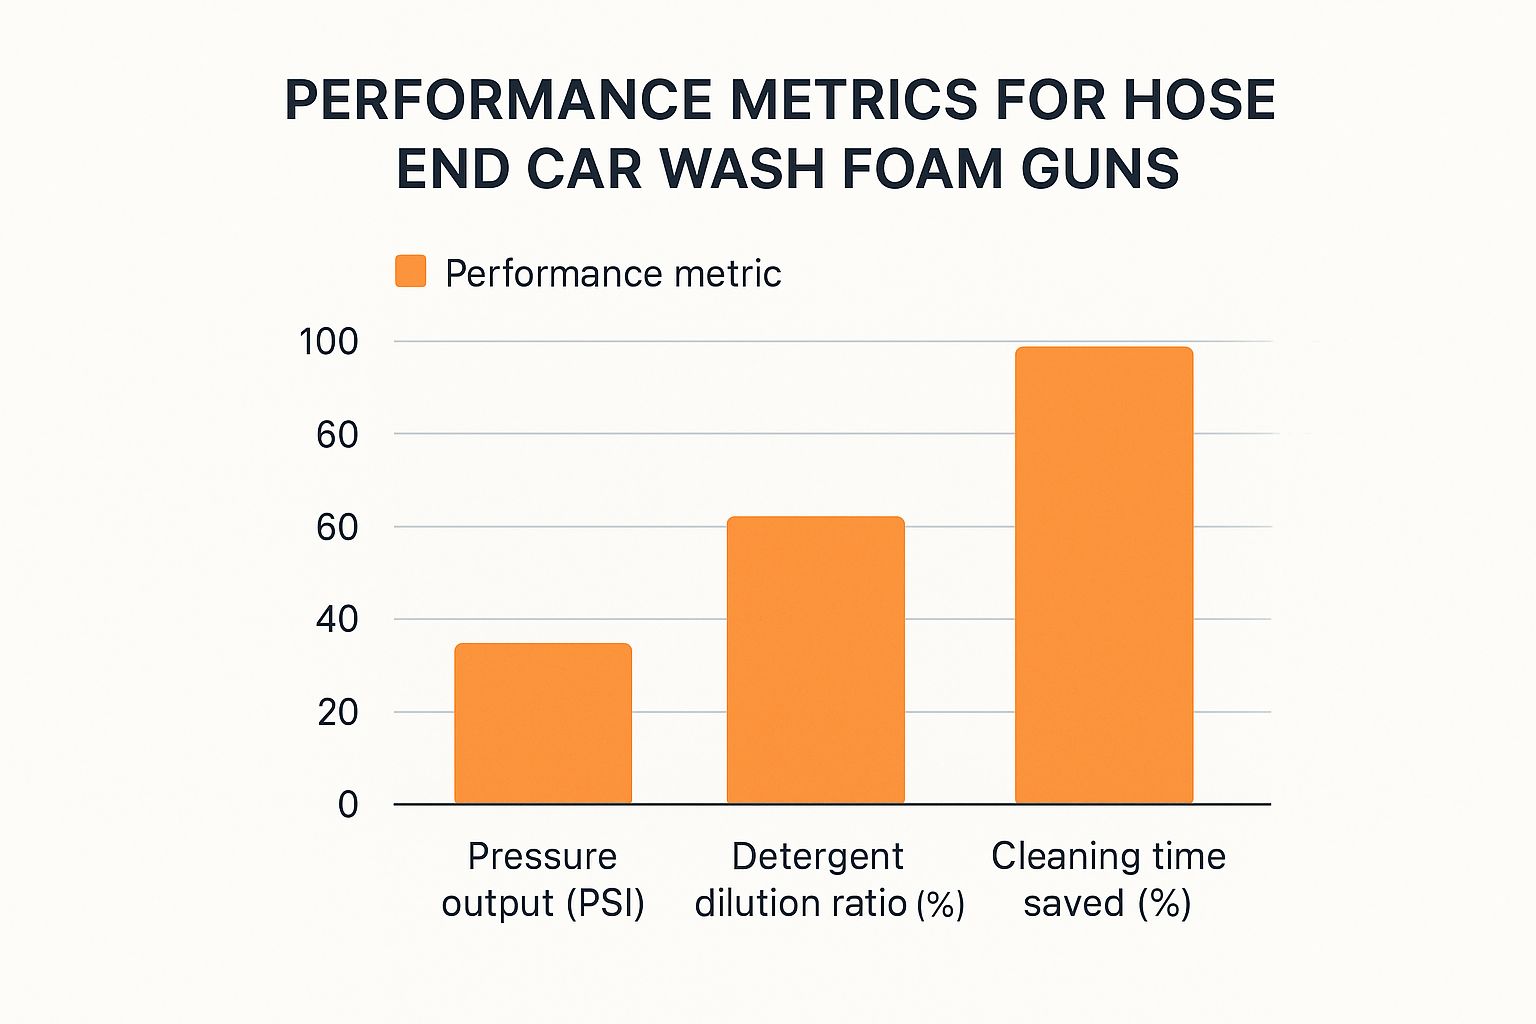
As you can see, getting that detergent dilution right is a big factor in making your wash more efficient. It's a small step that makes a huge difference.
Fine-Tuning Your Soap Solution
Your first attempt might be pretty good, but several things can affect how your foam turns out. This is where a little bit of trial and error comes into play.
- Water Hardness: If you have hard water in your area, you might notice your foam isn't as rich. Those extra minerals get in the way of the soap's sudsing power. The easy fix? Just add an extra half-ounce of soap to your mix to give it a boost.
- Soap Concentration: Not all car shampoos are made the same. The super-concentrated stuff the pros use will need a lot less soap to get going. On the other hand, a thinner, more "ready-to-use" type of soap will likely need a bit more. Always glance at the bottle for the manufacturer's suggestion.
- The Job at Hand: What are you washing? If you're just knocking some light dust off, a thinner foam for a quick pre-rinse is perfectly fine. But if you're tackling a mud-caked truck, you'll want that super-thick, long-dwelling foam to do the heavy lifting.
To make things easier, here’s a quick guide I use to dial in my foam depending on the car's condition.
Foam Gun Soap Dilution Guide
| Desired Foam Consistency | Suggested Soap Amount (in 32oz Canister) | Best Use Case |
|---|---|---|
| Light & Runny | 1-2 ounces | Quick pre-soak for light dust or pollen. |
| Thick & Clingy | 2-3 ounces | The ideal all-purpose foam for a standard weekly wash. |
| Extra-Thick Shaving Cream | 4+ ounces | Tackling heavy dirt, mud, or road grime on very dirty vehicles. |
Think of this table as your cheat sheet. Start with the "Thick & Clingy" ratio and adjust from there based on your results and the day's dirt level.
The perfect foam clings to the car without immediately sliding off. If it’s too runny, you need more soap. If it’s so thick it’s sputtering out of the nozzle, you’ve gone too far and need to add a bit more water.
Don't be afraid to experiment. After your first pass, take a look. If the foam is too watery, just pop the canister off and add another ounce of soap. Give it a gentle swirl and you’re back in business.
While some people get a kick out of creating their own soaps, learning to properly dilute a good quality commercial soap is your fastest route to amazing results. For those who are curious about the chemistry behind it all, understanding the ingredients in a homemade car wash solution can be pretty enlightening. Ultimately, mastering this soap-to-water ratio is the real key to unlocking what your foam gun can do.
Mastering Your Foaming and Washing Technique
Alright, your foam gun is locked and loaded. This is where the real fun begins, but a great wash is about more than just making a soapy mess. It's a methodical process that gets your car truly clean while protecting the paint from scratches. And it starts before you even think about making foam.
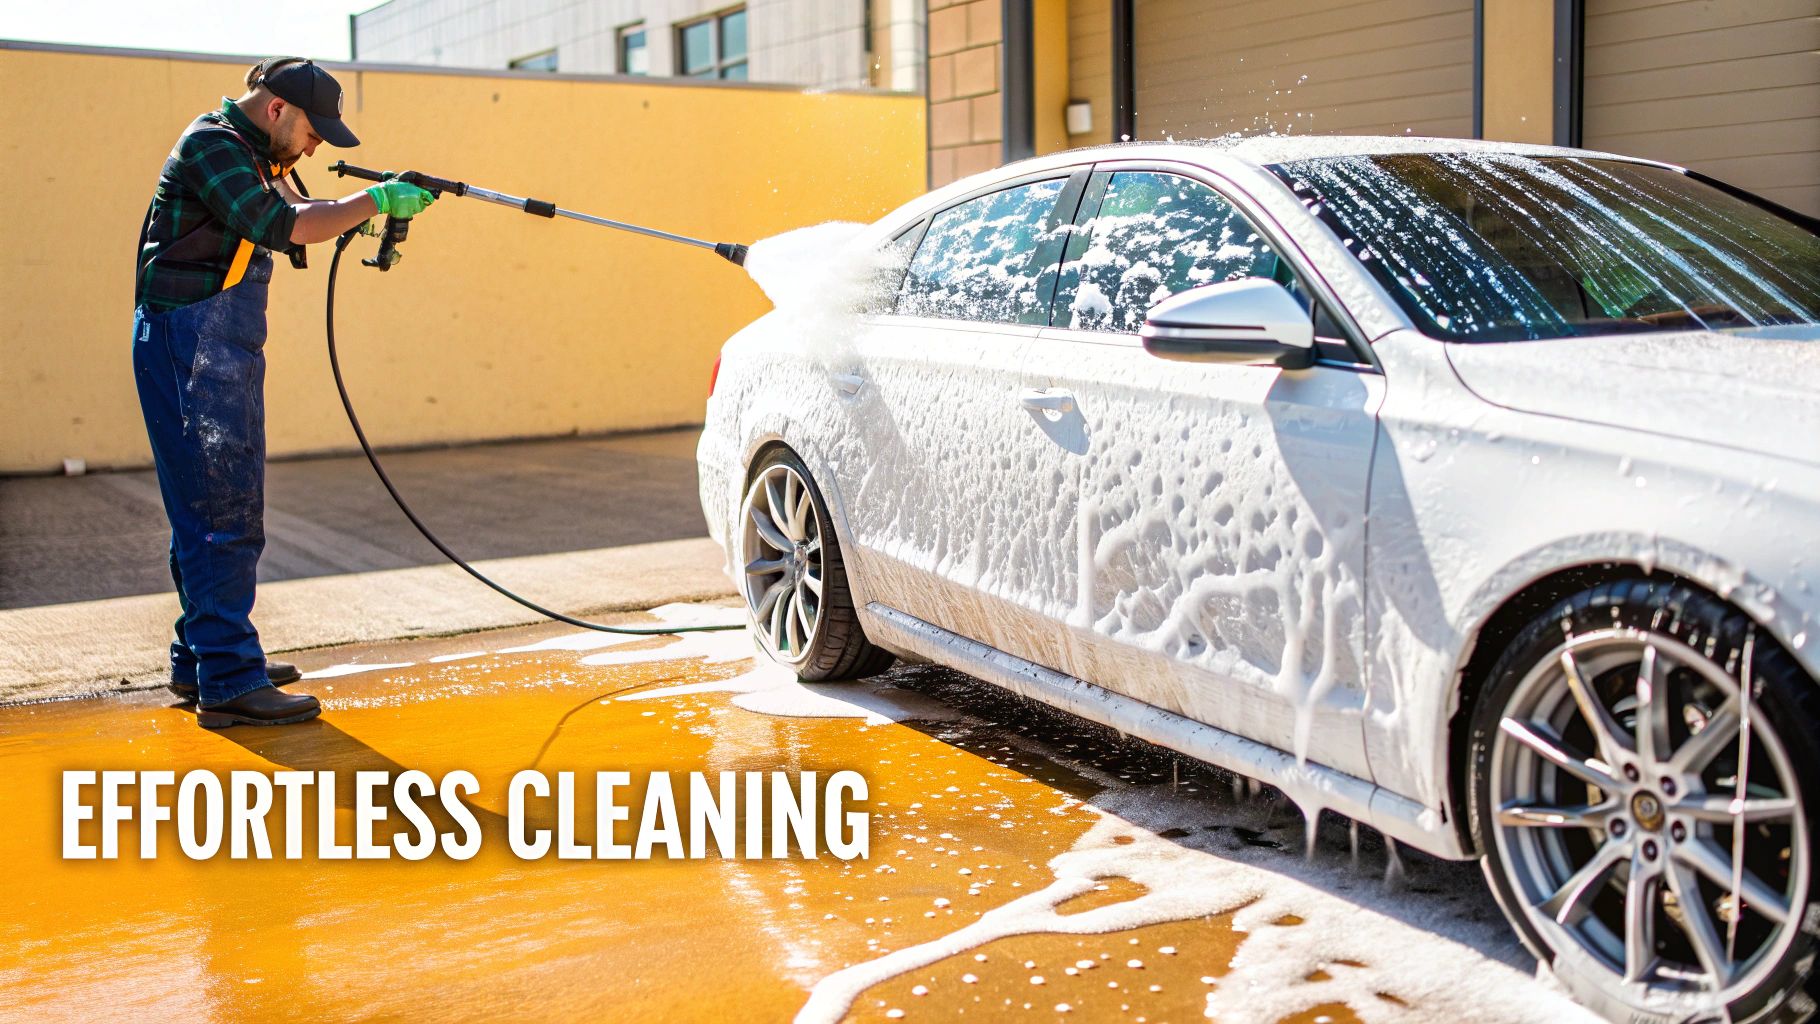
First thing's first: a solid pre-rinse. Just use the regular spray nozzle on your hose to blast off all the loose stuff. We're talking mud, heavy dust, leaves, and that gritty road film. Getting this junk off now makes the foaming stage way more effective.
The Right Way to Lay Down Foam
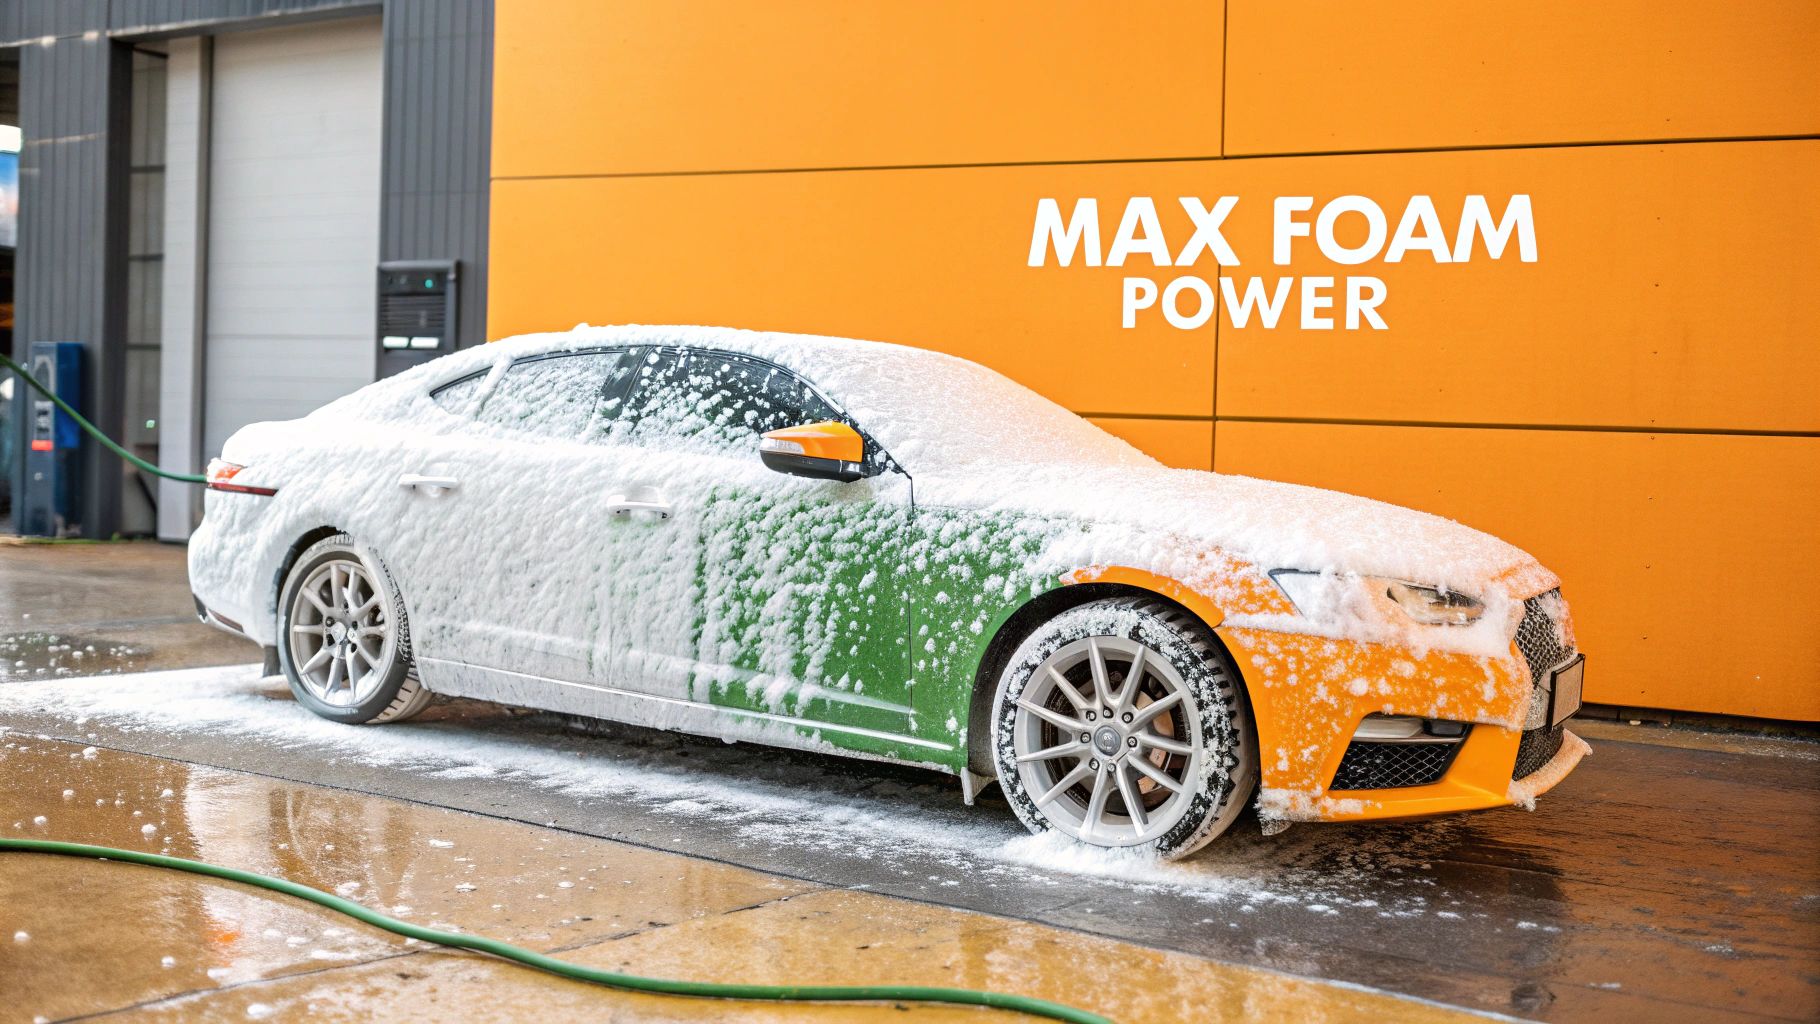
Now you're ready to make it snow. Switch your hose end car wash foam gun to the foam setting and get ready to cover your vehicle. Here’s a pro tip that feels a bit backward until you see it in action: start foaming from the bottom of the car and work your way up.
Why do it this way? If you start at the roof, dirty foam immediately runs down over the lower panels. That means the dirtiest parts of your car are getting pre-soaked with already-contaminated suds. It just creates streaks.
Working from the bottom up ensures every single panel gets a fresh, clean coat of foam. This technique also gives the soap maximum time to work on the grimiest areas—like the rocker panels and behind the wheels—where it’s needed most.
As you move around the car, don't be afraid to adjust the foam thickness with the control dial. I usually lay it on thick and clingy for vertical surfaces like the doors, then dial it back for a slightly lighter coat on the hood and roof.
Let the Foam Do the Heavy Lifting
Once the car is looking like a giant marshmallow, just let it sit. This is the "dwell time," and it's absolutely crucial. The foam isn't just for show; its chemical agents are busy breaking down grime and lifting dirt particles away from the paint surface so they can be rinsed away safely.
The "dwell time" is your best friend in the fight against wash-induced scratches. It lets the soap do the hard work, so you don't have to. Aim for 3-5 minutes of dwell time, but whatever you do, don't let the soap dry on the car. This is especially important if you're washing in the sun.
This simple but incredibly effective process is exactly why these tools have blown up in popularity. The entire market for car wash foam machines, which includes your trusty hose end car wash foam gun, was valued at around USD 1.5 billion globally. It's projected to hit USD 2.8 billion by 2033.
With over 270 million vehicles on the road in the U.S. alone as of 2021, it's no surprise people are looking for better, safer ways to wash at home. If you're a data nerd, you can dive deeper into the car wash equipment market trends to see the numbers.
Bring in the Two-Bucket Method
After the foam has had a few minutes to work its magic, it's time for a gentle hand wash. The two-bucket method is the gold standard for preventing swirl marks and scratches. It's non-negotiable for a perfect finish.
- Bucket Setup: Get two buckets. Fill one with your car wash soap solution (the "wash" bucket) and the other with plain water (the "rinse" bucket). If you have Grit Guards, drop one in the bottom of each.
- Washing Technique: Dunk a clean microfiber wash mitt into your soapy water. Start at the top of the car and wash one panel at a time. Use gentle, straight-line motions—never scrub in circles!
- Rinse the Mitt, Every Time: This is the key. Before you load up with more soap, swish your dirty mitt around in the rinse bucket. This knocks all the collected dirt and grit off, keeping it out of your clean wash water and off your paint.
Following this process means you're only ever touching your car with a clean, soapy mitt.
The Final Rinse
Once you’ve hand-washed the entire vehicle, pop the soap canister off your foam gun. Using just the water nozzle, give the car a thorough final rinse, starting from the top and letting the water sheet downwards.
Gravity is your friend here, pulling all the remaining suds off with it. Pay extra attention to all the nooks and crannies—around mirrors, emblems, and trim—where soap loves to hide. With a perfectly clean, soap-free surface, your car is now ready for drying.
Cleaning and Storing Your Foam Gun Correctly
Getting your car looking pristine is great, but the job isn't quite finished. Just like any tool in your garage, your hose end car wash foam gun needs a bit of care after each use to keep it working like new. A quick post-wash routine is all it takes to prevent clogs and guarantee you get that thick, satisfying foam every time you wash.
Honestly, this little bit of maintenance takes less than two minutes, but it can literally add years to the life of your foam gun. Forgetting to do it is the single biggest reason these tools start to fail and spray watery, weak foam. When soap residue is left to dry inside, it hardens and clogs up the internal mixer, the siphon tube, and the nozzle itself.
The Essential Post-Wash Flush
Cleaning out the foam gun is dead simple. After you've finished washing your car, resist the urge to just disconnect it and toss it in a bucket. There's one crucial step you need to take first.
- Ditch the Leftover Soap: First, unscrew the canister and dump out any remaining car wash solution. A quick swirl with some clean water will get most of the residue out.
- Fill with Plain Water: Now, fill that same canister with clean water right from your garden hose.
- Run It Clean: Screw the water-filled canister back onto the nozzle. With the hose still on, just pull the trigger and spray for a good 30-60 seconds.
This quick flush forces clean water through all the internal parts, washing away any soap that could turn into a stubborn clog later. You'll see the last of the sudsy water turn into a clear stream, and that’s when you know you're done.
I always think of it like cleaning a coffee maker. You wouldn't just leave old grounds in there to get stale and block things up, right? The same logic applies here—a simple flush prevents buildup and keeps everything working smoothly.
Smart Storage for Long-Term Durability
Once flushed, you can disconnect the foam gun from your hose. I'd recommend unscrewing the canister from the nozzle and letting all the pieces air dry completely before you pack them away. This simple step stops any trapped moisture from causing mildew or slowly damaging the rubber seals.
Where you keep your foam gun matters, too. Direct sunlight is the enemy of plastic and rubber parts. Over time, UV rays can make the plastic brittle and cause the seals to dry out and crack, which inevitably leads to leaks.
A cool, dry spot like a garage cabinet or a dedicated storage bin is your best bet. Keeping your gear organized not only protects it but also makes your next wash day that much easier. If you need some inspiration, these smart garage storage ideas can help you get everything in its place. Following these simple habits will protect your investment and make sure your foam gun is always ready to go.
Answering Your Top Foam Gun Questions
Even after you've got the basics down, you're bound to run into a few questions. That's perfectly normal. Knowing how to troubleshoot the common hiccups and really understanding how your foam gun works is what separates a good wash from a great one. Let's dig into some of the most common questions I hear from fellow car enthusiasts.
A big one I get asked is about using dish soap. I get it, it seems like an easy shortcut, right? But please, don't do it. Dish soap is an aggressive degreaser designed to strip everything off your plates—including the wax or sealant that’s protecting your car’s paint. Always, always stick with a quality, pH-balanced car wash soap. It's the only way to protect that finish you've worked so hard on.
Why Is My Foam So Watery?
There's nothing more disappointing than expecting thick, clingy foam and getting a runny, watery mess instead. If this happens, don't worry. It's almost always one of three simple things: your soap mix, water pressure, or a sneaky little clog.
- Your Soap Ratio is Off: This is the culprit 90% of the time. You're probably just not using enough soap concentrate. Before you do anything else, try adding another ounce of soap to the canister. That little bit extra usually does the trick.
- Low Water Pressure: Your foam gun needs decent water flow to work its magic. Double-check that your garden hose isn't kinked and that the spigot is cranked open all the way. Any restriction will kill your foam production.
- A Small Blockage: If you've tried the first two fixes and still have sad-looking foam, you might have some old soap residue gumming up the works. The fix is easy: just run clean water through the gun for a minute or two to flush everything out.
My advice? Always check these three things in that exact order. More often than not, simply tweaking your soap-to-water ratio is all it takes to get back to that thick, satisfying foam that really gets the job done.
Foam Gun vs. Foam Cannon: What's the Real Difference?
This question comes up all the time, and it’s a good one. The distinction is actually pretty simple and boils down to what's powering the suds.
A hose end foam gun is built for convenience. It hooks right up to your standard garden hose, using the water pressure you already have at home. This makes it an awesome, affordable, and super accessible tool for pretty much anyone who loves a clean car.
A foam cannon, on the other hand, is a different beast. It requires a pressure washer to work. That high-pressure blast is what creates the incredibly thick, shaving-cream-like foam you see in videos. While a cannon definitely delivers denser foam, a quality foam gun still produces fantastic results without needing all the extra equipment and setup. If you want to get into the nitty-gritty, we break it all down in our guide comparing the foam cannon vs foam gun.
Ready to transform your car wash routine with thick, satisfying foam? The SwiftJet Foam Gun delivers professional results with the convenience of your garden hose. Shop the SwiftJet Foam Gun today and get a free wash mitt with your order!