

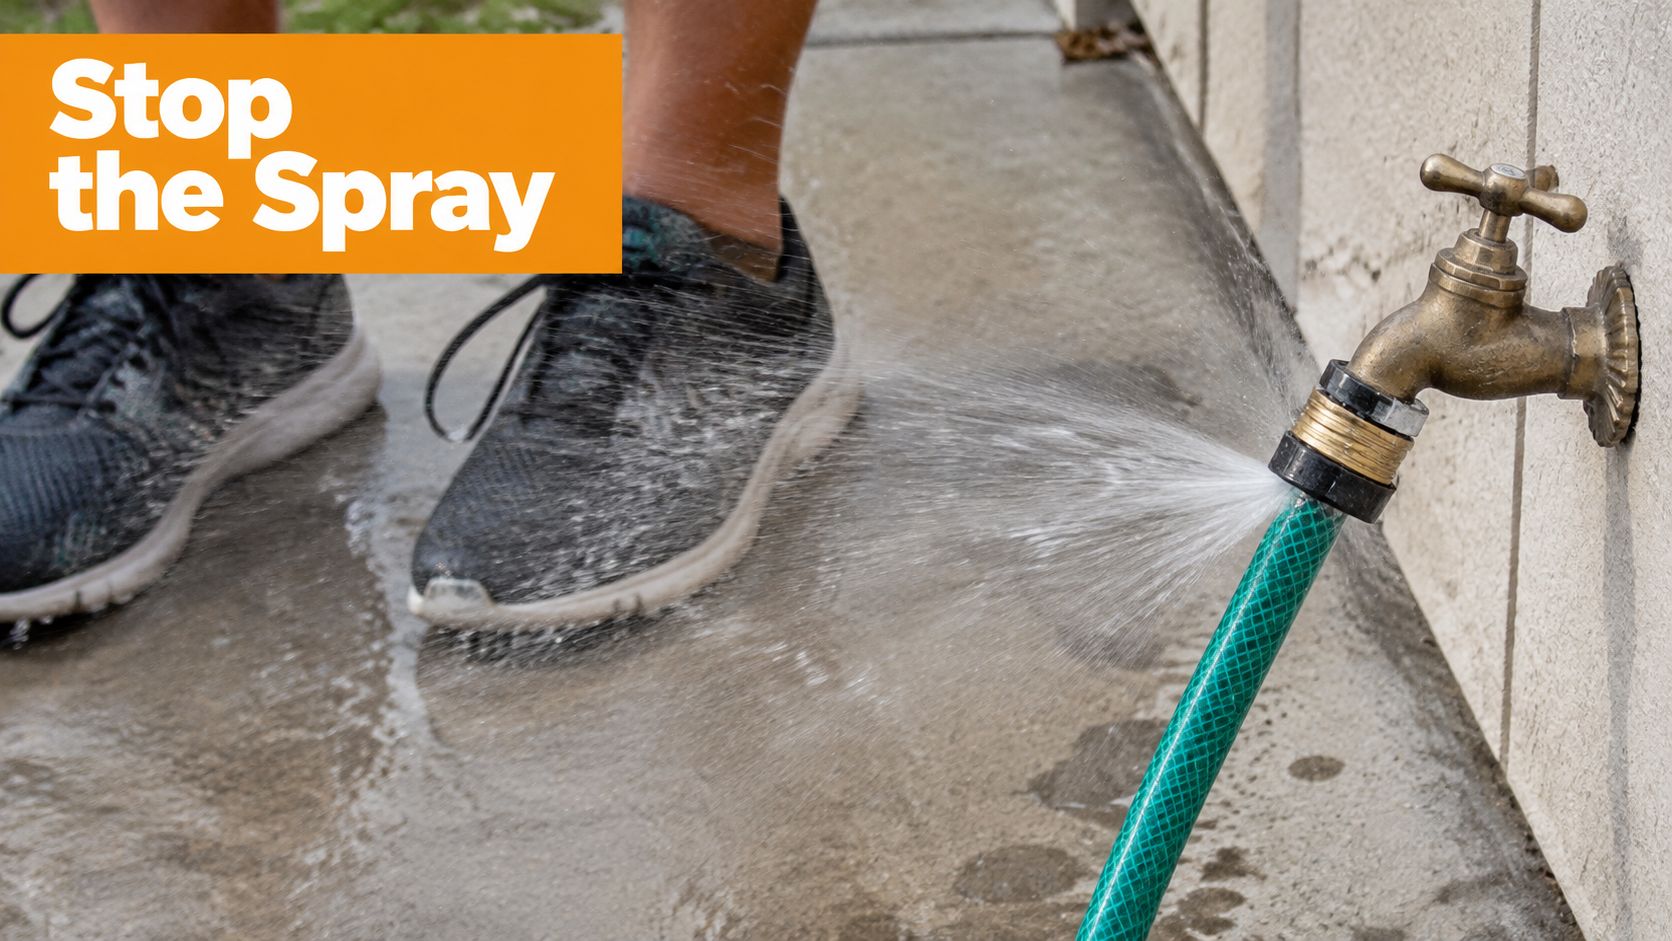
You've just connected a foam gun, sprinkler, or utility nozzle, turned on the spigot, and watched a narrow spray hit your shoes. The hose itself looks fine, so the instinct is to twist the fitting harder. That often makes the problem worse.
Most hose connection leaks start in the connector hardware, not in the hose body. A flattened washer, dirty sealing face, damaged quick-connect O-ring, or fitting that started crooked can let pressurized water escape through a gap too small to notice until the water is running. The good news is that this is usually a targeted repair, not a reason to discard an otherwise serviceable hose.
Why Your Hose Connection Keeps Leaking
A driveway wash makes the problem obvious. You attach the hose to a spigot, connect a foam gun, and open the water. Instead of a clean stream, water beads around the swivel nut or sprays from the joint. The leak may disappear when the water is off, which tempts people to assume the fitting is merely loose.
The connection is often the weak point because several sealing parts meet in a small area. A female hose end normally relies on a flat rubber washer pressed against the faucet face. Quick-connect fittings use small O-rings, while threaded adapters may depend on a seal at the thread interface. If any one of those surfaces is damaged, dirty, misaligned, or missing, household pressure pushes water through the opening.
The U.S. Environmental Protection Agency specifically advises checking a garden hose connection at the spigot and replacing the nylon or rubber washer if it leaks while running. The EPA leak-prevention guidance says household leaks waste more than 1 trillion gallons of water annually nationwide, equivalent to the yearly household water use of more than 11 million homes. It also notes that 10% of homes have leaks wasting 90 gallons or more per day, so a small outdoor leak deserves attention rather than dismissal.
Practical rule: Find the first point where water appears. Water can run along the hose or fitting, so the wettest spot isn't always the actual failure point.
A diagnosis-first approach also helps if your water comes from a private well. For broader maintenance considerations, homeowners may find well water solutions from Alderstone useful when mineral buildup or water quality affects fixtures and outdoor connections. Clean surfaces and a correctly seated washer still matter, whatever the water source.
Historical municipal leak charts show why ignoring a connection can be costly. One chart lists a 1/16-inch leak at 60 psi as capable of losing 74,000 gallons in 3 months, while a 1/8-inch leak can lose 296,000 gallons in the same period. Those figures from a municipal water leak chart put a dripping hose fitting into perspective. The opening is small, but pressure keeps feeding it.
Diagnosing the Four Most Common Leak Sources
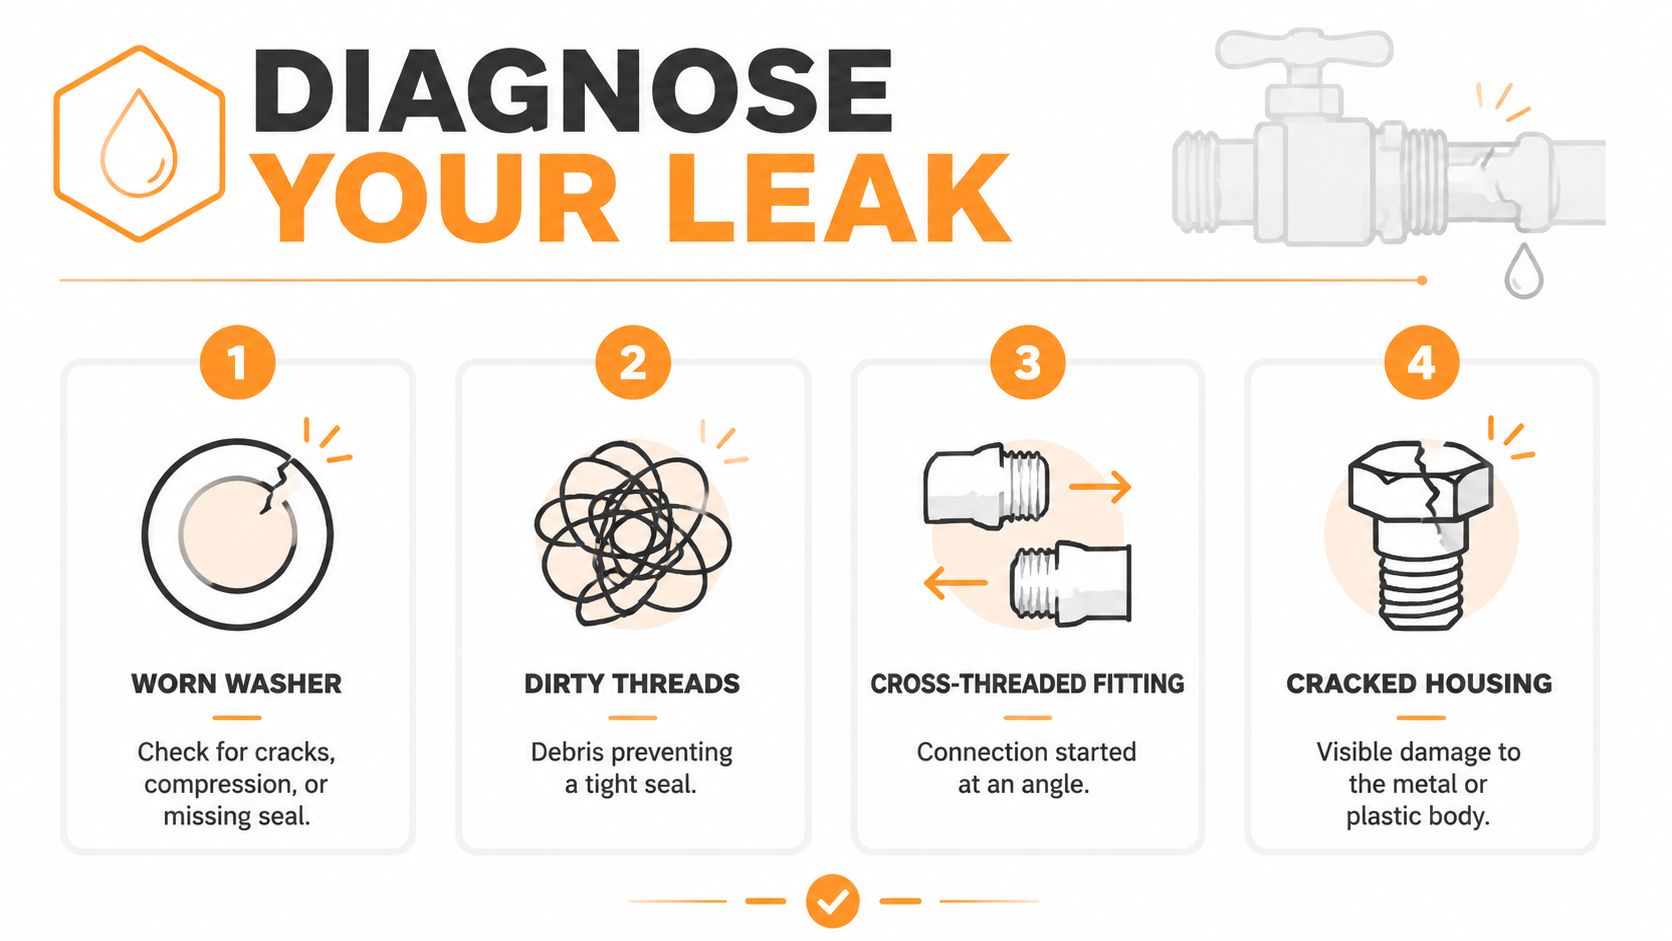
Before reaching for pliers, run your finger or a dry paper towel around the joint while the water is flowing. Identify whether the first moisture appears at the flat washer seat, the threads, the quick-connect body, or a visible crack. That location tells you which part to inspect.
Worn or missing washers
Remove the hose and look inside the female end. The flat rubber washer should sit evenly in its recess, with no cracks, missing sections, hard edges, or severe flattening. If the washer is absent, the connection has no reliable face seal. If it feels stiff or looks compressed, replacing it is more effective than adding force.
This is the first check because the washer normally does the sealing at a hose bib. Thread tape won't repair a missing or distorted washer when water is escaping between the washer and faucet face.
Debris on the sealing face
Sand, grit, soap residue, mineral deposits, and small pieces of old rubber can hold the washer away from the faucet face. You may see a wet crescent on one side of the fitting instead of water emerging evenly around the whole circumference.
Wipe both mating surfaces with a clean cloth. Inspect the washer groove and the faucet face, then check again before applying any sealant. A clean, undamaged washer can leak because debris prevents full contact.
Cross-threaded fittings
A hose nut that starts at an angle may grab the first thread and tighten crookedly. Look for uneven gaps, a nut that sits visibly off-center, or threads that feel rough immediately after engagement. Cross-threading can damage a plastic connector quickly and may prevent the washer from sitting squarely.
Back the nut off, place it straight on the spigot, and turn it backward gently until the threads drop into alignment. Then turn it forward by hand. If it won't start smoothly, stop instead of forcing it.
Quick-connect O-rings and cracked housings
Quick-connect fittings add another failure point. A dry, nicked, flattened, or missing O-ring can leak even when the hose washer is perfect. Inspect the ring for cuts and confirm that it sits in its groove rather than protruding or twisting.
Also check the connector body for hairline cracks, brittle plastic, impact marks, or a split around the threads. The repair guidance for garden hose fittings emphasizes that the connector, rather than the hose body, is often the part that fails.
Overtightening can mimic several of these problems. Excessive force may deform the washer, distort a plastic seat, or damage threads, leaving you with a fitting that leaks whenever pressure returns.
Step-by-Step Repair for a Leaking Hose Connection
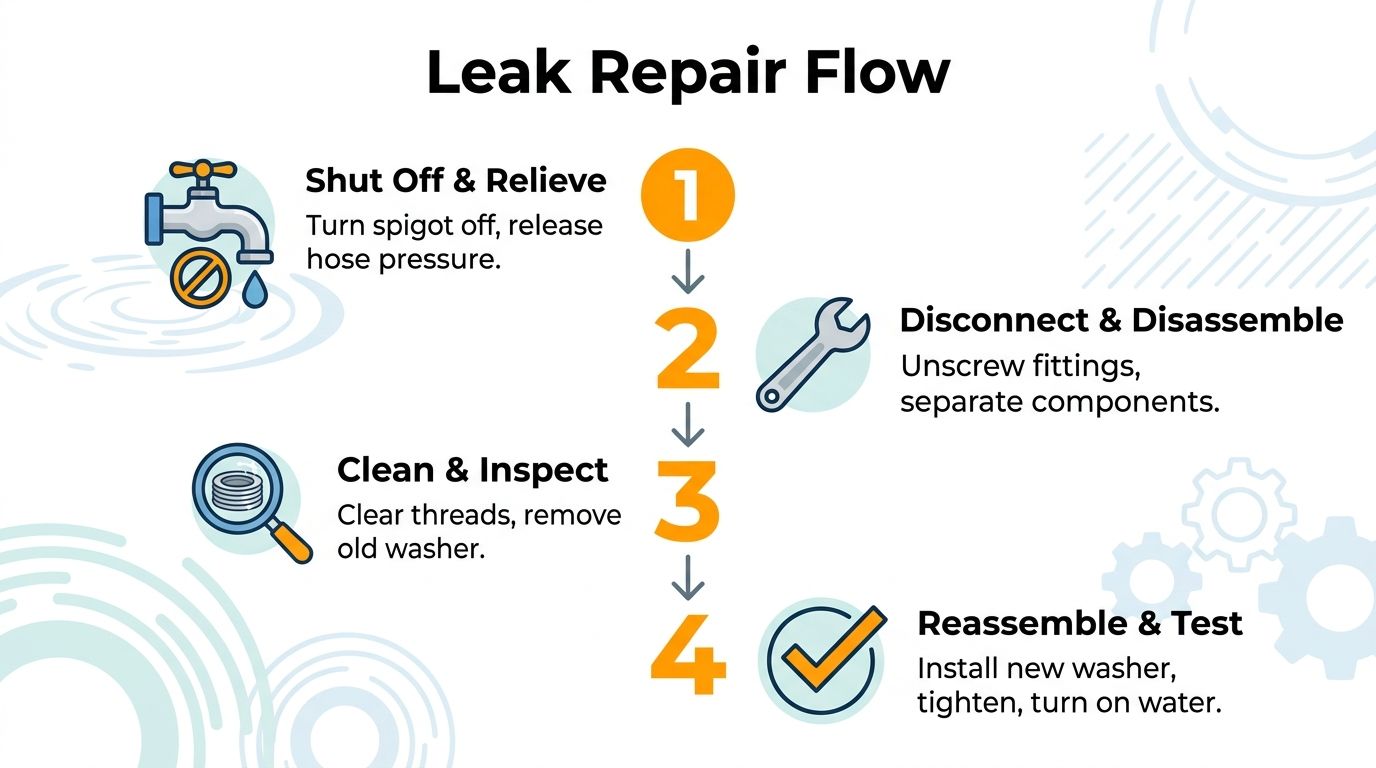
Start with the water off. Open the trigger on the nozzle, foam gun, or sprayer briefly to release trapped pressure, then disconnect the hose without twisting the connector body against the spigot.
1. Disconnect and inspect
Unscrew the female hose end by hand. Remove the old washer with a fingernail or a small blunt pick, taking care not to gouge the rubber seat. If the washer is cracked, flattened, stiff, or missing, install a replacement of the correct size.
For a quick-connect system, inspect the O-ring instead. Don't stretch it over the fitting or substitute a ring that sits loosely in the groove. The seal has to remain stable as the male and female halves lock together.
2. Clean the mating surfaces
Wipe the faucet face, hose-end recess, and connector threads. Use a soft brush for dried debris, but avoid aggressive scraping that can score a sealing surface. Look closely for fragments of rubber, grit, or mineral buildup around the washer seat.
At this stage, inspect the connector body too. A clean surface won't solve a housing that has split under pressure.
3. Reassemble squarely
Seat the new washer flat in the female hose end. Place the nut straight onto the spigot and turn it backward until the thread engagement drops into place, then turn it forward by hand until snug.
Don't start with a wrench. Hand-tightening gives you the feel needed to detect cross-threading, and it reduces the chance of crushing the washer. If the joint still seeps after a proper hand-tight connection, use only modest additional force and reassess the seal instead of continuing to crank.
4. Use PTFE tape only at the thread interface
PTFE tape can help on a threaded metal adapter when water is escaping through the threads. Apply a few turns to clean male threads, keeping the tape away from the open end so loose material doesn't enter the water path. It isn't a replacement for the flat washer on a standard hose bib connection.
This distinction matters with quick-connect systems too. Learn how different connectors seal before adding tape by reviewing this guide to quick-connect fittings. Tape belongs on a threaded interface, while an O-ring or washer belongs in its designated seat.
5. Test under flow
Turn the spigot on and watch the joint for about 15 seconds. Inspect the swivel nut, threads, faucet face, and quick-connect body for the first bead of water. If the fitting stays dry, move the hose gently and repeat the check, since movement can expose a marginal seal.
If water appears, shut the spigot off and return to the diagnostic order: washer condition first, clean surfaces second, thread alignment third, and tape only where the threads are the leak path.
When to Repair and When to Replace the Fitting
A washer replacement is the right repair when the connector body is sound. The threads should be clean enough to engage smoothly, the housing should have no crack, and the seal should sit flat. That repair takes little effort and preserves a hose that may have years of useful service left.
Replacement makes more sense when the body has become the failure. Brittle plastic can split around the threads or quick-connect collar. Brass can become pitted or stripped, especially when a fitting has been repeatedly forced, dropped onto concrete, or exposed to abrasive debris. Temperature swings, direct sunlight, impact, and freeze-thaw exposure can damage the housing even when the hose tube still looks flexible.
| Issue | Repair | Replace |
|---|---|---|
| Flattened, cracked, or missing washer | Install the correct flat washer and retest | Replace the fitting if the washer seat is damaged |
| Dry or damaged quick-connect O-ring | Fit a compatible O-ring and clean its groove | Replace the quick-connect body if the groove or collar is cracked |
| Dirty threads or sealing face | Clean thoroughly and reconnect squarely | Replace if corrosion or pitting prevents smooth engagement |
| Cross-threaded nut with intact threads | Back off, realign, and restart by hand | Replace if threads are stripped or permanently distorted |
| Hairline crack in plastic coupling | Usually not dependable as a permanent repair | Replace the coupling |
| Damaged brass adapter | Minor surface contamination can be cleaned | Replace when threads are stripped, badly pitted, or misshapen |
The trade-off is simple. A washer costs little effort and directly addresses a worn seal. A cracked fitting may appear to stop leaking after tightening, but pressure and movement can reopen the gap, creating a callback on the next wash or watering session.
Before working on a sprinkler-fed hose, shut the supply down properly rather than relying on a nozzle trigger. A practical sprinkler shutoff guide for homeowners can help locate the relevant valve. For connector selection, compare the sealing method and body material in this overview of hose connector types, especially if you're replacing a plastic coupling with a more durable option.
Don't replace the entire hose just because the end fitting leaks. Replace the connector when the connector is compromised, and keep the hose if its body remains intact.
Preventing Future Hose Connection Leaks
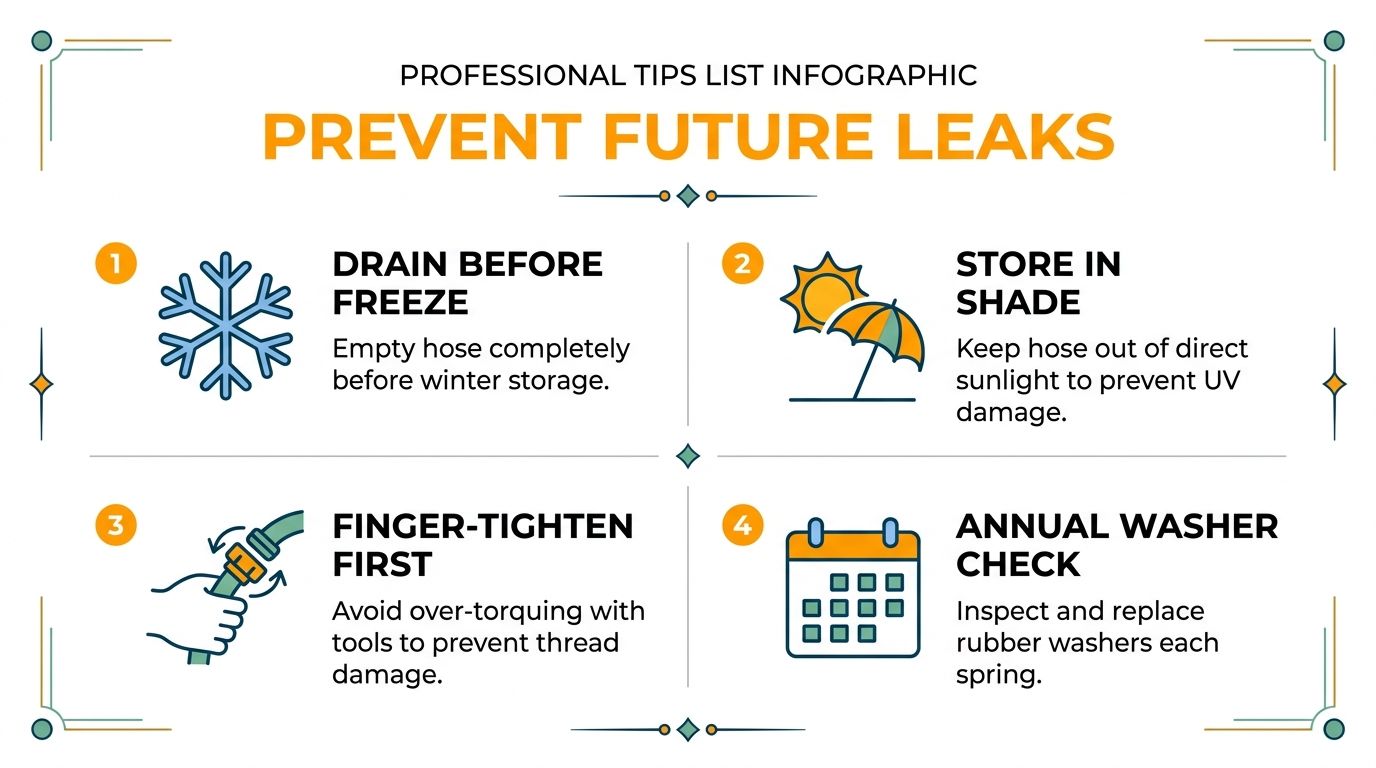
Once the fitting seals, storage becomes the next concern. Water left inside a hose can freeze and expand, stressing couplings and seals. Drain the hose completely before winter storage, disconnect it from the spigot, and keep it protected from direct sunlight when it isn't in use. UV exposure can make plastic and rubber more brittle over time.
Avoid dragging the connector across concrete or letting a heavy nozzle hang from the fitting. Kinks near the end of the hose transfer strain into the coupling, while repeated drops can create small housing fractures that only open when the line is pressurized.
A short seasonal check
At the start of spring and before winter storage, run through this routine:
- Inspect the washer: Look for cracks, flattening, stiffness, or missing material.
- Check quick-connect O-rings: Confirm each ring is seated, flexible, and free of cuts.
- Clean the threads: Remove grit, soap residue, and mineral buildup.
- Examine the housing: Look for brittle plastic, impact marks, and hairline cracks.
- Test under flow: Run water briefly and watch the connection rather than assuming it stayed sealed.
Mobile detailers should rinse soap residue from foam-gun connectors before storage. Hard-water deposits can also interfere with smooth engagement and sealing, so wipe the fitting clean after use. A reinforced hose can reduce stress in demanding setups, but it still needs proper handling and a healthy washer, as the information on a reinforced hose makes clear.
Finger-tighten first every time. Tools are for controlled correction, not for forcing a misaligned nut into place.
When to Call a Professional or Contact Product Support
A replaceable washer or O-ring is a reasonable DIY repair. Stop troubleshooting at that level if the leak comes from the spigot body, the wall connection, or stripped hose-bib threads. Persistent leakage after the hose is removed can indicate a faucet or plumbing problem rather than a hose connection issue.
Call a plumber if you see a pressure drop throughout the property, water around the wall penetration, or a connection that cannot be isolated safely. Contact the manufacturer when a new foam gun or quick-connect system leaks despite correct assembly, especially if the housing appears cracked or a supplied part doesn't fit.
Take clear photos of the leak location, connector threads, washer or O-ring, and product label. Keep the purchase confirmation and note what happens when water is turned on. That information gives product support enough detail to distinguish installation error from a defective component.
If you use a hose-mounted cleaning tool, SwiftJet offers a garden-hose foam gun with an on/off trigger for controlled vehicle washing, along with support and warranty information for its products. Visit SwiftJet to review the foam gun and choose a setup that matches your hose and connector system.
