
Getting a professional, showroom-worthy finish on your car isn't about finding one miracle product. It's about a systematic process. The essential car detailing stages are broken down into five core steps: washing, decontamination, paint correction, protection, and interior detailing. Following this sequence is the secret to achieving incredible results without accidentally scratching your paint.
Your Roadmap to a Showroom Finish
Think of these stages as building blocks. Each step meticulously prepares the surface for the next, and if you skip one or do them out of order, you can actually do more harm than good. Trying to polish a car that hasn't been properly decontaminated, for example, is a surefire way to grind embedded grit right into your clear coat, creating a bigger mess than you started with.
It's a logical progression. First, a thorough wash gets rid of all the loose dirt and grime. Then, decontamination pulls out the stubborn, embedded contaminants that washing alone can't touch. Only when the paint is truly pristine can you move on to paint correction to buff out swirls and fine scratches. Finally, you lock in that beautiful finish with a protective sealant and turn your attention to the interior for that complete, new-car feeling.
It’s this level of meticulous care that car owners are increasingly looking for. The global market for car detailing services was valued at around USD 41.40 billion in 2024 and is expected to climb to USD 58.06 billion by 2030. That’s a huge testament to how much people value a vehicle that’s been properly cared for.
This visual guide breaks down the five core car detailing stages, showing how they flow from one to the next.
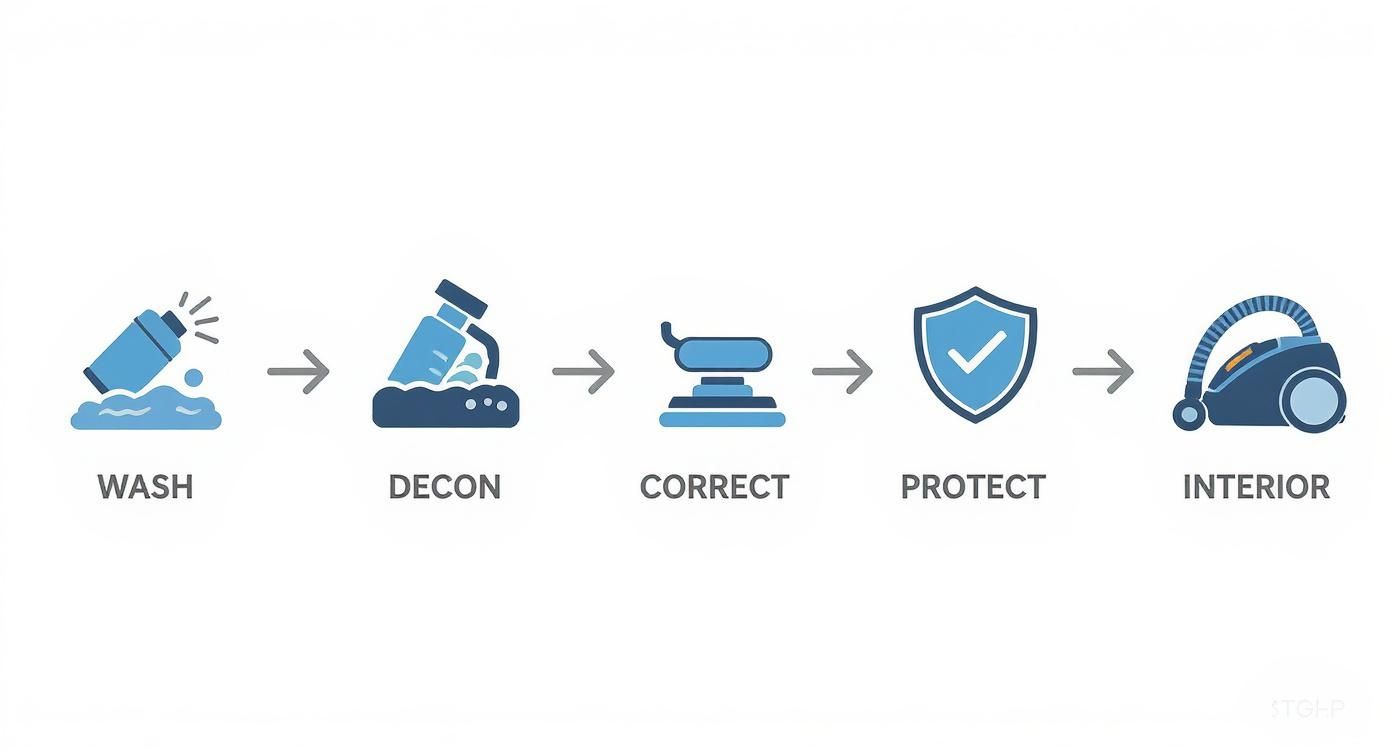
As the infographic shows, each stage is a prerequisite for the next, ensuring you’re building towards a flawless finish, not working against yourself.
To get a clearer picture of this process, here's a quick overview of the five core stages.
The 5 Core Stages of Car Detailing at a Glance
| Stage | Primary Goal | Key Outcome |
|---|---|---|
| Wash | Remove loose dirt, dust, and grime. | A clean surface, free of abrasive particles. |
| Decontamination | Extract embedded contaminants from the paint. | An ultra-smooth, contaminant-free finish. |
| Paint Correction | Remove imperfections like swirls and scratches. | Restored clarity, depth, and gloss to the paint. |
| Protection | Seal the corrected paint from the elements. | A durable, hydrophobic layer that protects the shine. |
| Interior Detailing | Clean and restore all interior surfaces. | A fresh, clean, and well-maintained cabin. |
This table serves as a handy reference, but the real magic is in the execution.
The key takeaway is that order matters immensely. Polishing before decontaminating is like painting a wall before sanding it—you're just sealing in the imperfections.
By following this sequence, you’re not just cleaning your car; you're adopting the same mindset a professional detailer uses. For a more granular breakdown of every task involved, our auto detailing checklist can be a huge help.
Now, let's dive into the specifics of each stage, covering the tools and techniques you'll need to get the job done right.
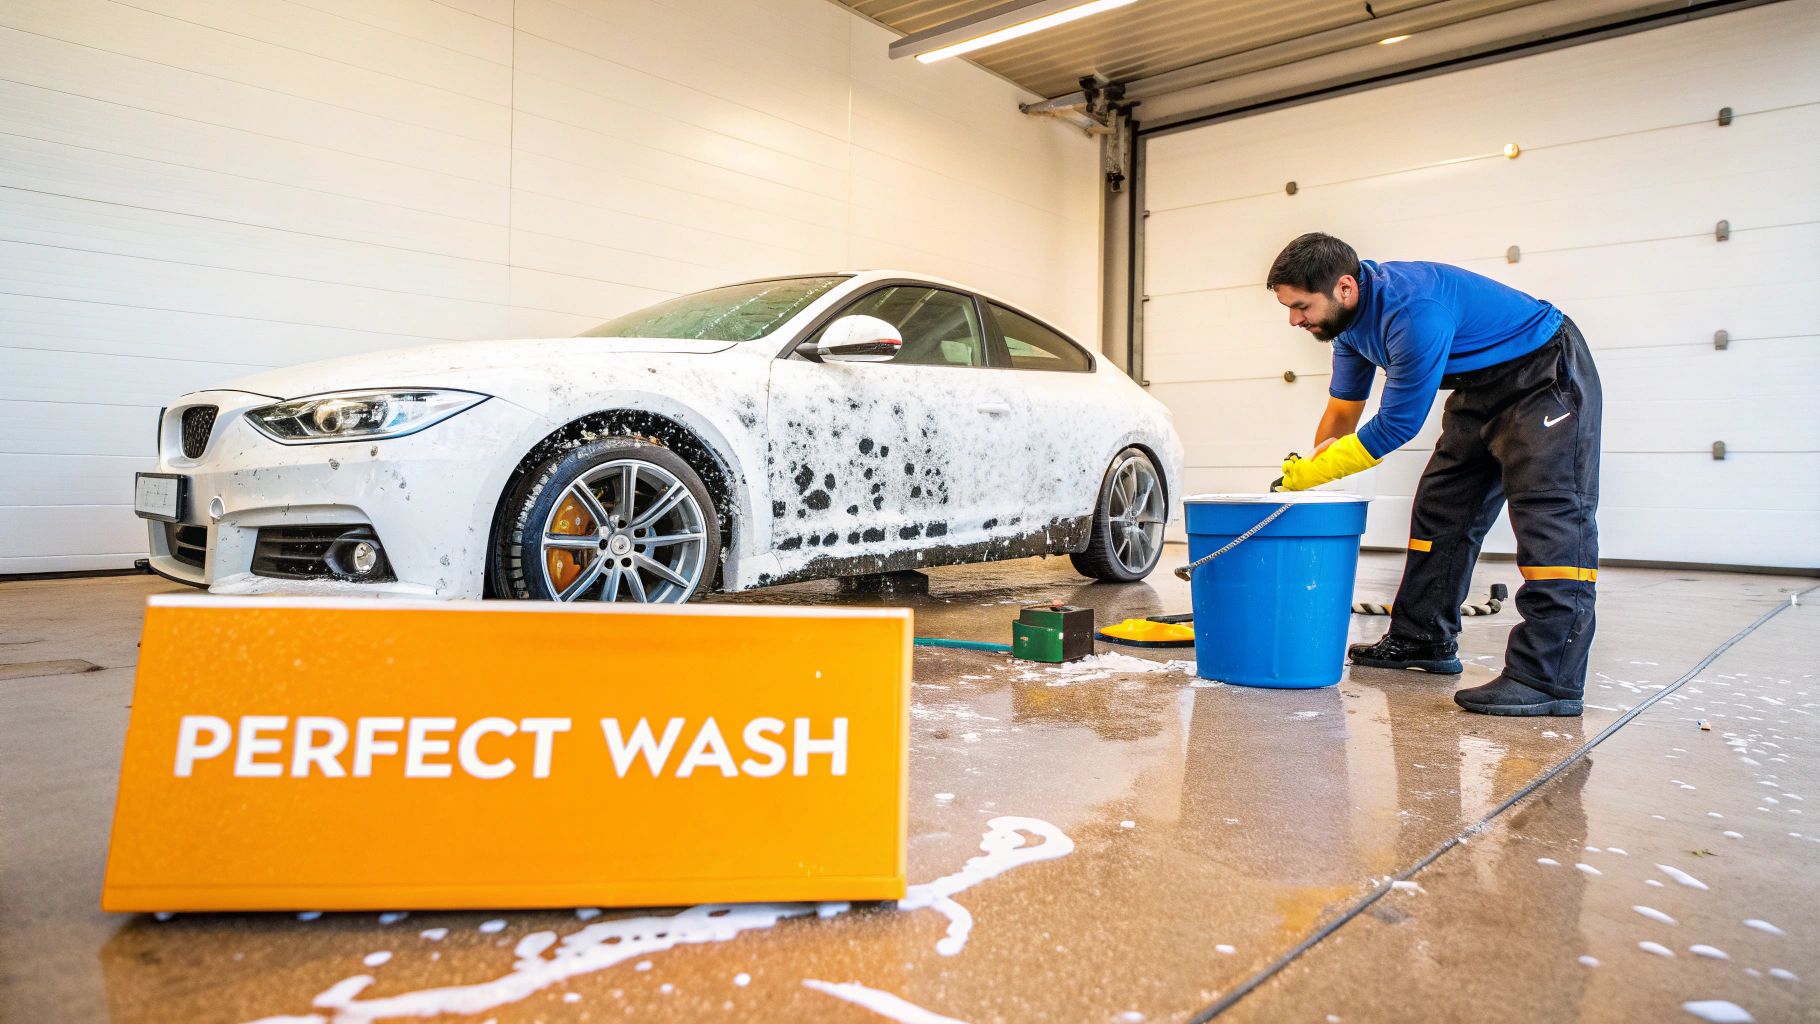
Building the Foundation with a Perfect Wash
Let's start with a hard truth: a sloppy car wash is the reason for 95% of all swirl marks and paint defects. This first step isn't just about getting the dirt off; it's about doing it without causing damage you'll have to spend hours fixing later. Think of it as laying the perfect foundation—everything else we do depends on getting this right.
Before a wash mitt ever touches your car’s paint, we need to pre-wash. This is where you’ll see detailers break out a foam cannon, covering the vehicle in a thick blanket of snow foam. It looks cool, but it serves a critical purpose.
The foam clings to the surface, giving the cleaning agents time to break down and lift away the heavy dirt and road grime. When you rinse it off, most of the abrasive gunk goes with it. This single step dramatically reduces the risk of scratching the paint when you finally make contact.
The Two-Bucket Wash Method
Once the foam has done the heavy lifting, it’s time for the contact wash. The two-bucket wash method is my non-negotiable technique for keeping paint pristine. It’s simple: one bucket holds your pH-neutral car shampoo, and the other has plain water with a grit guard at the bottom.
Here’s how it works in practice:
- Load your mitt: Dunk your plush microfiber wash mitt into the soapy water.
- Wash a small section: Gently clean one panel at a time. I always start from the top and work my way down.
- Rinse the mitt: Here’s the key. Before getting more soap, rinse the dirty mitt in the plain water bucket. Scrub it against the grit guard to dislodge any trapped dirt particles.
- Repeat: Now you can safely go back to the soap bucket and move to the next panel.
This process ensures you’re never dragging grit from a dirty panel across a clean one. It sounds basic, but this is what separates a professional wash from a swirl-inducing nightmare.
Drying Without Damage
How you dry the car is just as important as how you wash it. Please, throw away that old bath towel or chamois. Using the wrong tool here can undo all your careful work in an instant. The goal is to absorb water with as little friction as possible.
The biggest mistake I see beginners make is using the wrong drying material. A high-quality, plush microfiber drying towel is your best friend. It’s designed to soak up a massive amount of water without scratching.
Instead of rubbing, just lay the towel flat on a panel and pat it dry. You can also gently drag it across the surface.
An even better, completely touchless method is to use a dedicated car dryer or even an electric leaf blower. This is fantastic for blasting water out of panel gaps, mirror housings, and trim pieces, which stops those annoying drips that ruin a finished job.
With a flawless wash and dry, you’ve now got a clean canvas, ready for the next crucial stage: decontamination.
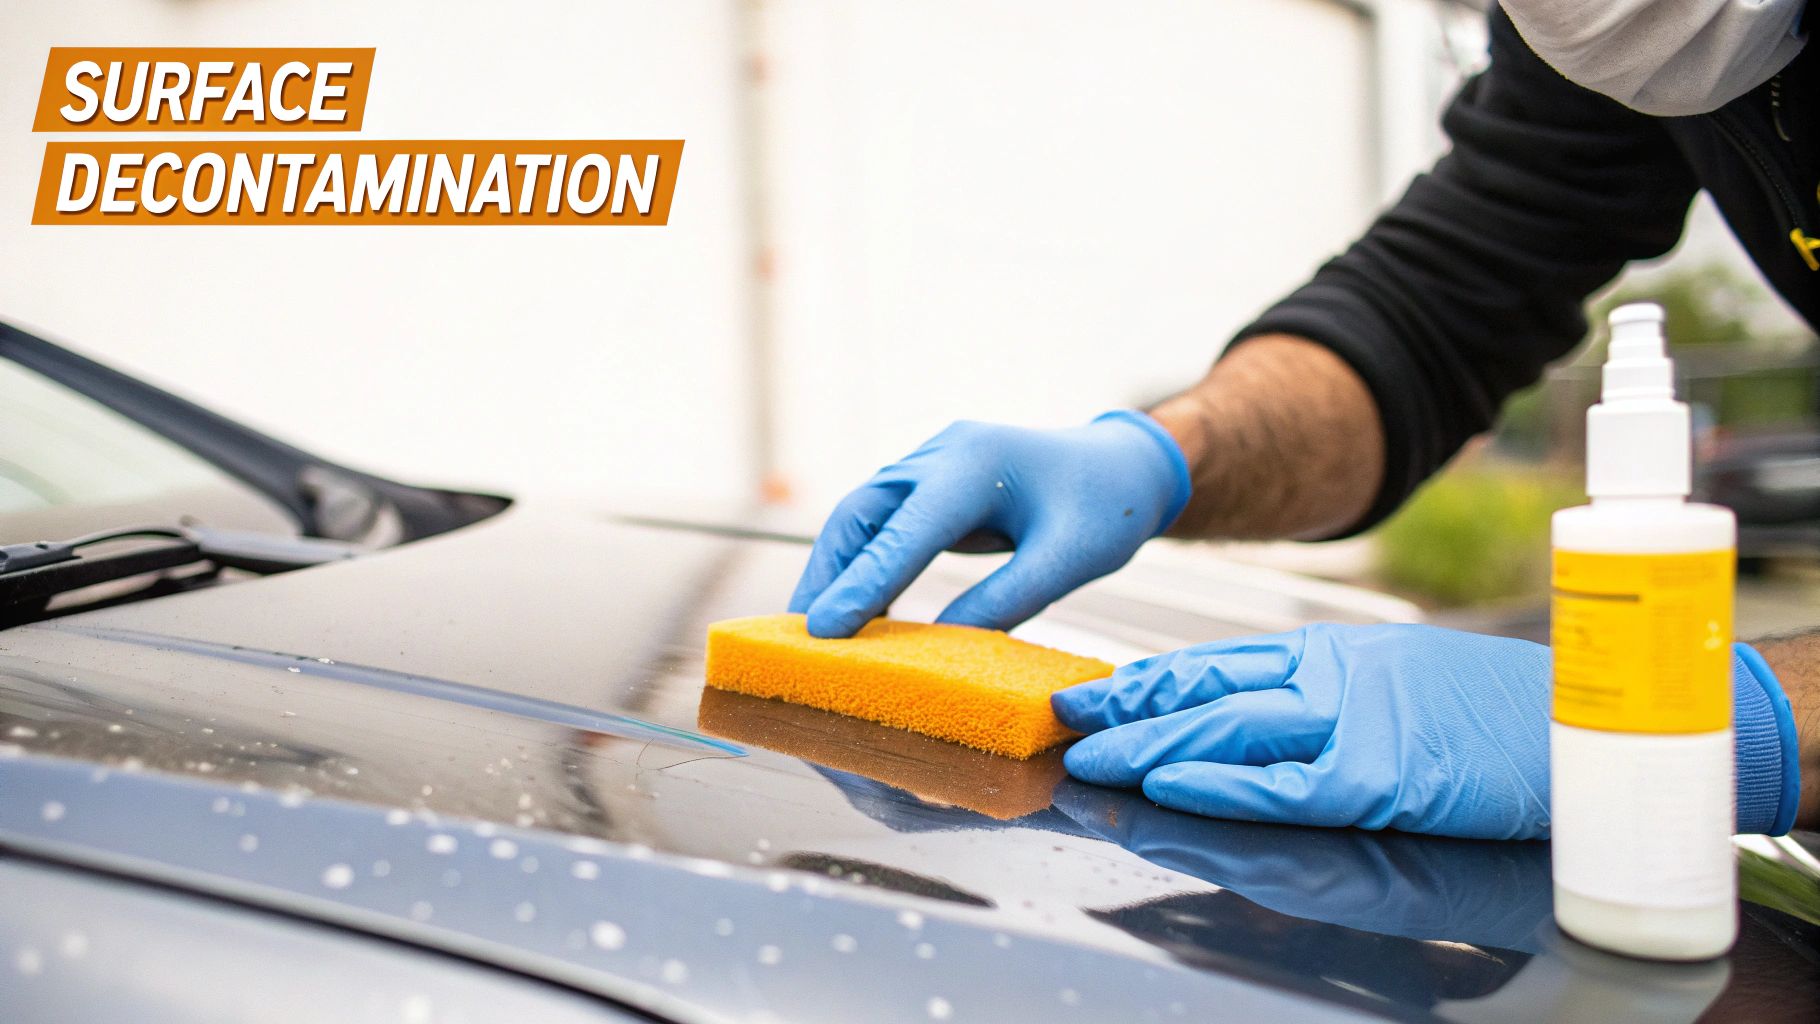
Getting That Silky Smooth Surface
So, you've just finished a fantastic wash, and your car looks spotless. But how does it feel? Go ahead and run your hand over the paint. If it feels gritty or rough instead of perfectly smooth, that's because stubborn contaminants are still bonded to the finish.
This is where the decontamination stage comes in. It's an absolutely critical step that handles the bonded grime—like industrial fallout, road tar, and tree sap—that a normal wash just can't touch. Polishing over these particles is a recipe for disaster; it’s like rubbing fine-grit sandpaper all over your car. Worse, leaving them on can lead to permanent damage over time.
To do this right, we'll use a two-part approach: chemical first, then physical.
First, The Chemical Attack
Before we physically touch the paint again, we’re going to let some specialized chemicals do the heavy lifting. The idea is to dissolve as much of the bonded gunk as possible, which makes the next part of the process much safer and more effective.
- Iron Removers: These products are a game-changer. You simply spray them on, wait a few minutes, and watch for the magic. The liquid will turn a deep, dramatic purple as it reacts with and dissolves the tiny iron particles embedded in your paint. This "bleeding" effect is your visual proof that it's working.
- Tar and Glue Removers: For those stubborn black specks of road tar, especially behind the wheels, a dedicated tar remover is your best friend. Just apply a little to a microfiber towel and gently wipe the spots away.
Always make sure you're in a well-ventilated spot, and rinse these chemicals off completely before they dry on the surface.
Think of it this way: the less work the clay bar has to do, the lower your risk of accidentally scratching the paint. Chemical decontamination isn't optional—it's the safety net for the physical step.
Now, Physical Decontamination with a Clay Bar
With the harshest contaminants dissolved, it’s time to physically lift off whatever is left behind. This is where a detailing clay bar or a modern clay mitt shines. The clay acts like a super-gentle abrasive, grabbing onto and shearing off any remaining particles sticking out from the clear coat.
The technique is simple but requires a gentle touch. You'll need your clay bar and plenty of clay lubricant. Never use plain water; the lubricant is essential to let the clay glide smoothly without scratching or marring the paint.
Work one small section at a time, maybe 2x2 feet.
- Liberally spray the area with your lubricant.
- Gently glide the clay bar back and forth over the surface using very light pressure.
You'll literally feel the surface transform from rough to smooth right under your fingertips. For a full breakdown of the process, check out our guide on how to properly clay bar a car.
As you see the clay get dirty, just fold and knead it to expose a fresh, clean side. And one pro tip: if you ever drop your clay on the ground, throw it away. It’s not worth the risk of grinding trapped dirt into your paint.
Once your car’s surface is completely decontaminated and glass-smooth, you're officially ready for the next phase: paint correction.
Restoring Shine with Paint Correction
This is where the magic really happens. After you’ve thoroughly washed and decontaminated your car, the paint is squeaky clean, but it might still look tired. The culprit? A web of fine scratches, swirl marks, and oxidation that dulls the finish. Paint correction is the art of carefully leveling the clear coat to erase those imperfections, bringing back an incredible amount of depth, clarity, and gloss.
The entire professional detailing process is a system, moving from the exterior wash and clay bar treatment to polishing, protection, and interior deep cleaning. It's a high-value skill; in 2024, the car detailing market generated about USD 1.52 billion from these services alone. To get a handle on how pros achieve that flawless finish, it’s worth learning more about professional Paint Correction.
At its core, this stage is all about controlled abrasion—using a specialized product to smooth out the paint's surface. Your main tools for this job are compounds and polishes.
Compounds vs. Polishes: What's the Difference?
Think of compounds and polishes as liquid sandpaper, each with a different level of "grit." Knowing when to use which one is crucial for getting flawless results without accidentally damaging your paint.
- Compounds: These are the heavy hitters. With a more aggressive abrasive quality, they’re designed to cut through the clear coat more quickly to remove deeper scratches, heavy swirl marks, and serious oxidation. If your paint has visible defects that a light polish won't even touch, you start here.
- Polishes: These contain much finer abrasives. Their job is to refine the surface after compounding or to remove very light imperfections like minor hazing or swirls from washing. Polishing is what really creates that brilliant, mirror-like shine.
For most daily drivers, a good one-step polish is often all you need to restore a ton of gloss and clarity. But for a truly neglected finish, you’ll likely need to start with a compound and follow it up with a polish for that perfect look.
A critical pro tip: always start with the least aggressive method first. You can always take more clear coat off, but you can never put it back. This simple principle will save you from making very costly mistakes.
Perfecting Your Polishing Technique
Whether you're working by hand or with a machine, the goal is the same: work the product until its abrasives break down, leaving behind a smooth, refined finish. I can’t recommend a dual-action (DA) polisher enough for this. It’s incredibly safe for beginners and gives you results that are worlds beyond what you can achieve by hand.
Here's how to get started:
- Do a Test Spot: Before you jump in and polish the whole car, pick a small, out-of-the-way 2x2 foot section. This is your chance to test your polish and pad combination to make sure it’s giving you the results you want without being too harsh.
- Apply Product to the Pad: Squeeze a few small, pea-sized dots of polish directly onto your foam polishing pad.
- Work in a Cross-Hatch Pattern: Start the polisher on a low speed to spread the product evenly. Then, bump up the speed and move the machine slowly across your test section—first up and down, then side to side, overlapping each pass slightly. This ensures you get even coverage.
- Wipe and Inspect: Once the polish starts to look clear, turn off the machine. Grab a clean microfiber towel and wipe away the residue.
The final, crucial step is the IPA wipe-down. Mix isopropyl alcohol and distilled water in a 50/50 solution, spray it on the panel, and wipe it clean. This removes any oils from the polish that might be hiding fine scratches, revealing the true condition of the paint. If the defects are gone, you’ve nailed your process.
For a deeper dive into the nuances of machine polishing, you can find more detail in our comprehensive guide on https://www.swiftjetusa.com/blogs/news/how-to-polish-car-paint.
Locking In Your Hard Work with Protection

You’ve spent hours correcting the paint. It’s now flawless, glossy, and deeper than you thought possible. This is the moment all that hard work pays off, but it’s also when the paint is at its most vulnerable.
This final stage is all about sealing that perfect finish. We’re going to lay down a durable layer to shield your work from everything the world throws at it: UV rays, bird droppings, water spots, and road grime.
Skipping this step would mean your polishing efforts get undone in a matter of weeks. This protective barrier—what we in the business call a Last Step Product (LSP)—is what gives your vehicle that long-lasting shine and makes future washes so much easier. Honestly, it's one of the most satisfying parts of the car detailing stages, as you're quite literally locking in the results.
What you choose for your LSP really comes down to what you’re looking for in terms of durability, appearance, and how much time you want to spend applying it. The three main players are traditional carnauba waxes, modern synthetic sealants, and the heavy-hitter, ceramic coatings.
Waxes, Sealants, and Coatings Explained
Each protection option gives you a different blend of looks and longevity. Let’s break them down.
Carnauba wax is the old-school classic, made from a Brazilian palm tree. Enthusiasts love it for the deep, warm, wet-look glow it gives the paint. It’s a beautiful finish, but it's also the least durable, typically lasting just 4-6 weeks.
Synthetic paint sealants are a big step up. These are chemically engineered polymers that bond directly with your paint. They create a sharper, more reflective shine than wax and offer way better durability, usually lasting 4-6 months.
Finally, you have ceramic coatings, which are the top tier of paint protection. These liquid polymers cure to form a semi-permanent, incredibly hard layer of ceramic on your paint. The result is extreme gloss, fantastic chemical resistance, and that insane water-beading (hydrophobicity) everyone loves. A professionally applied coating can last for 2-5 years, sometimes even longer.
Choosing Your Paint Protection
To help you decide which is best for your needs, here’s a quick comparison of the most common protection options.
| Protection Type | Durability | Appearance | Application Difficulty |
|---|---|---|---|
| Carnauba Wax | Low (4-6 weeks) | Warm, deep gloss | Easy |
| Synthetic Sealant | Medium (4-6 months) | Sharp, reflective shine | Easy to Moderate |
| Ceramic Coating | High (2+ years) | Extreme gloss, slickness | Difficult / Pro-Recommended |
For most people detailing their own car, a high-quality synthetic sealant hits the sweet spot. You get months of solid protection without the unforgiving application process that comes with a full ceramic coating.
My Take: I almost always recommend a good sealant for the DIY detailer. It offers the best blend of performance, ease of use, and value. You get a fantastic look and real-world durability that fits a weekend schedule.
Applying Your Chosen Protection
No matter what you choose, proper application is what separates a great result from a streaky mess. Always work on a cool, clean surface, and stay out of direct sunlight. The key is to apply a very thin, even coat using a foam applicator pad, working one small section at a time.
- For Waxes and Sealants: Less is more. Seriously. Apply a paper-thin layer and let it haze over based on the product’s directions, which is usually around 10-20 minutes. Then, gently buff off the residue with a clean, plush microfiber towel.
- For Coatings: This is a different ballgame. Follow the manufacturer’s instructions to the letter, as the process is far less forgiving. It usually involves a very precise application, a specific window for leveling the product, and then buffing to a high gloss.
This final layer is your vehicle's armor. It’s what ensures the mirror-like shine you just created stays brilliant for months to come, making this one of the most rewarding car detailing stages you'll complete.
Bringing the Inside Up to Par
https://www.youtube.com/embed/S8oM85Csv9Y
With the paint looking like glass, it’s time to turn our attention inward. After all, the cabin is where you actually live in your car, so making it feel brand new is just as critical as that mirror finish on the outside. Skipping this part is like getting a great haircut but forgetting to brush your teeth—it just leaves the whole job feeling half-done.
The golden rule for interiors is simple: work from the top down. It's just common sense. This way, any dust, crumbs, or debris you knock loose will fall onto surfaces you haven't cleaned yet, saving you from re-doing your work. We'll start with the headliner and work our way right down to the floor mats.
Tackling Surfaces from Top to Bottom
Your headliner is surprisingly delicate. You never want to soak it. The trick is to lightly mist a gentle interior cleaner onto a clean microfiber towel—never directly onto the fabric itself—and then carefully blot or wipe away any smudges or spots.
Next, we'll move down to the dashboard, door panels, and center console. These are the high-traffic zones that collect a ton of dust, fingerprints, and daily grime. A quality interior detailer spray that includes UV protection is perfect here; it cleans and protects the plastic and vinyl without leaving a greasy film. For all those tricky spots like air vents, trim gaps, and switchgear, a soft-bristled detailing brush is your best friend. It gets in there and lifts out dust that a towel just can't reach.
A professional detail isn't just about what you see; it's about what you don't. A truly clean interior should have no greasy residue. The goal is an OEM matte finish, not a shiny, dust-attracting mess.
Deep Cleaning Upholstery and Carpets
Now we're ready for the seats and floors, which usually take the most abuse. Start with a thorough vacuum, and I mean thorough. Use your crevice and brush attachments to get deep into the seams, under the seats, and between the console and the seats. For cloth upholstery and carpets, a good fabric cleaner paired with a medium-stiff brush can work miracles on most stains.
If you’re dealing with some serious ground-in dirt, a hot water extractor is the ultimate weapon. It injects a cleaning solution deep into the fabric fibers and then sucks it—along with years of accumulated grime—right back out. And if there are any funky smells lingering, finish up with an odor eliminator that actually destroys the odor-causing bacteria instead of just covering it up.
The growing demand for this level of care has really driven the mobile detailing industry, which is now a huge part of the car detailing stages ecosystem. The Asia-Pacific market, for example, is experiencing the fastest growth in the world thanks to increased vehicle ownership in urban areas. You can dig into the numbers yourself in this car detailing services market research report.
The Finishing Touches
It’s these last few steps that separate a good detail from a great one. They’re the little things that leave a lasting impression and really complete the experience.
- Leather Conditioning: If you've got leather, first wipe the seats down with a dedicated leather cleaner. Follow that up with a high-quality conditioner to feed the leather, keeping it supple and helping to prevent future cracking.
- Streak-Free Glass: I always save the interior glass for last. This ensures you wipe away any overspray from the other cleaners you've used. The two-towel method is non-negotiable here: one towel with glass cleaner to do the cleaning, and a second, completely dry towel to buff it to a perfect, streak-free finish.
- Final Wipe-Down: Grab a fresh, dry microfiber and give all the hard surfaces one final, quick pass to pick up any dust that may have settled.
Following a system like this ensures every single surface inside your car isn't just superficially clean, but truly restored and protected.
Clearing Up Common Car Detailing Questions
Even with the best game plan, you're bound to run into some questions when you're deep in a detailing project. It's totally normal. Let's tackle a few of the most common ones I hear, so you can move forward with confidence and get the kind of results you're after.
How Often Should I Do a Full, In-Depth Detail?
Going through all five stages, especially paint correction, is a serious undertaking. The good news? You only really need to go all-in like that once every one to two years. The main trigger is when you start noticing a build-up of swirl marks and other paint defects that a simple wash and wax won't hide.
The real secret, though, is in the upkeep. Think of it like this: the big detail is the reset button, but maintenance is what keeps it looking great. You'll want to re-apply your favorite wax or sealant every 3-6 months to maintain a strong layer of protection. And, of course, regular, safe washes—ideally every week or two—are non-negotiable to stop new damage from happening.
Does a Brand New Car Really Need to Be Clayed?
I get this one all the time. It feels like a new car should have flawless paint right from the factory, but that's almost never the reality. Before you ever see it, that car has been shipped, stored, and sat on a dealer lot, exposed to everything from industrial fallout to rail dust. All that tiny, bonded grit will stop your fresh wax or sealant from properly sticking to the paint.
Here's a pro tip: always do the "plastic bag test" after you wash, even on a car with zero miles. Just slip a thin plastic sandwich bag over your hand and gently run it across the paint. If you feel any roughness or grittiness, that's your sign that it needs a good clay bar session.
What's the Single Biggest Mistake New Detailers Make?
Without a doubt, the most common and costly mistake is a bad wash and dry technique. It's heartbreaking to see someone spend hours polishing their car to perfection, only to scratch it all up again with a gritty sponge, a single dirty bucket, or an old, crusty towel. This one error completely undermines all your other hard work.
Always, always use the two-bucket wash method. Invest in a few high-quality, plush microfiber towels for drying. Protecting your finish starts the moment you first touch the car with water and soap. Nail the wash process, and you've built the foundation for a truly flawless detail.
Ready to perfect your wash stage? The SwiftJet Car Wash Foam Gun connects to any garden hose to lay down thick, dirt-lifting foam, making your wash safer and more effective. Get yours today at SwiftJet USA and start building a better foundation for your detail.