
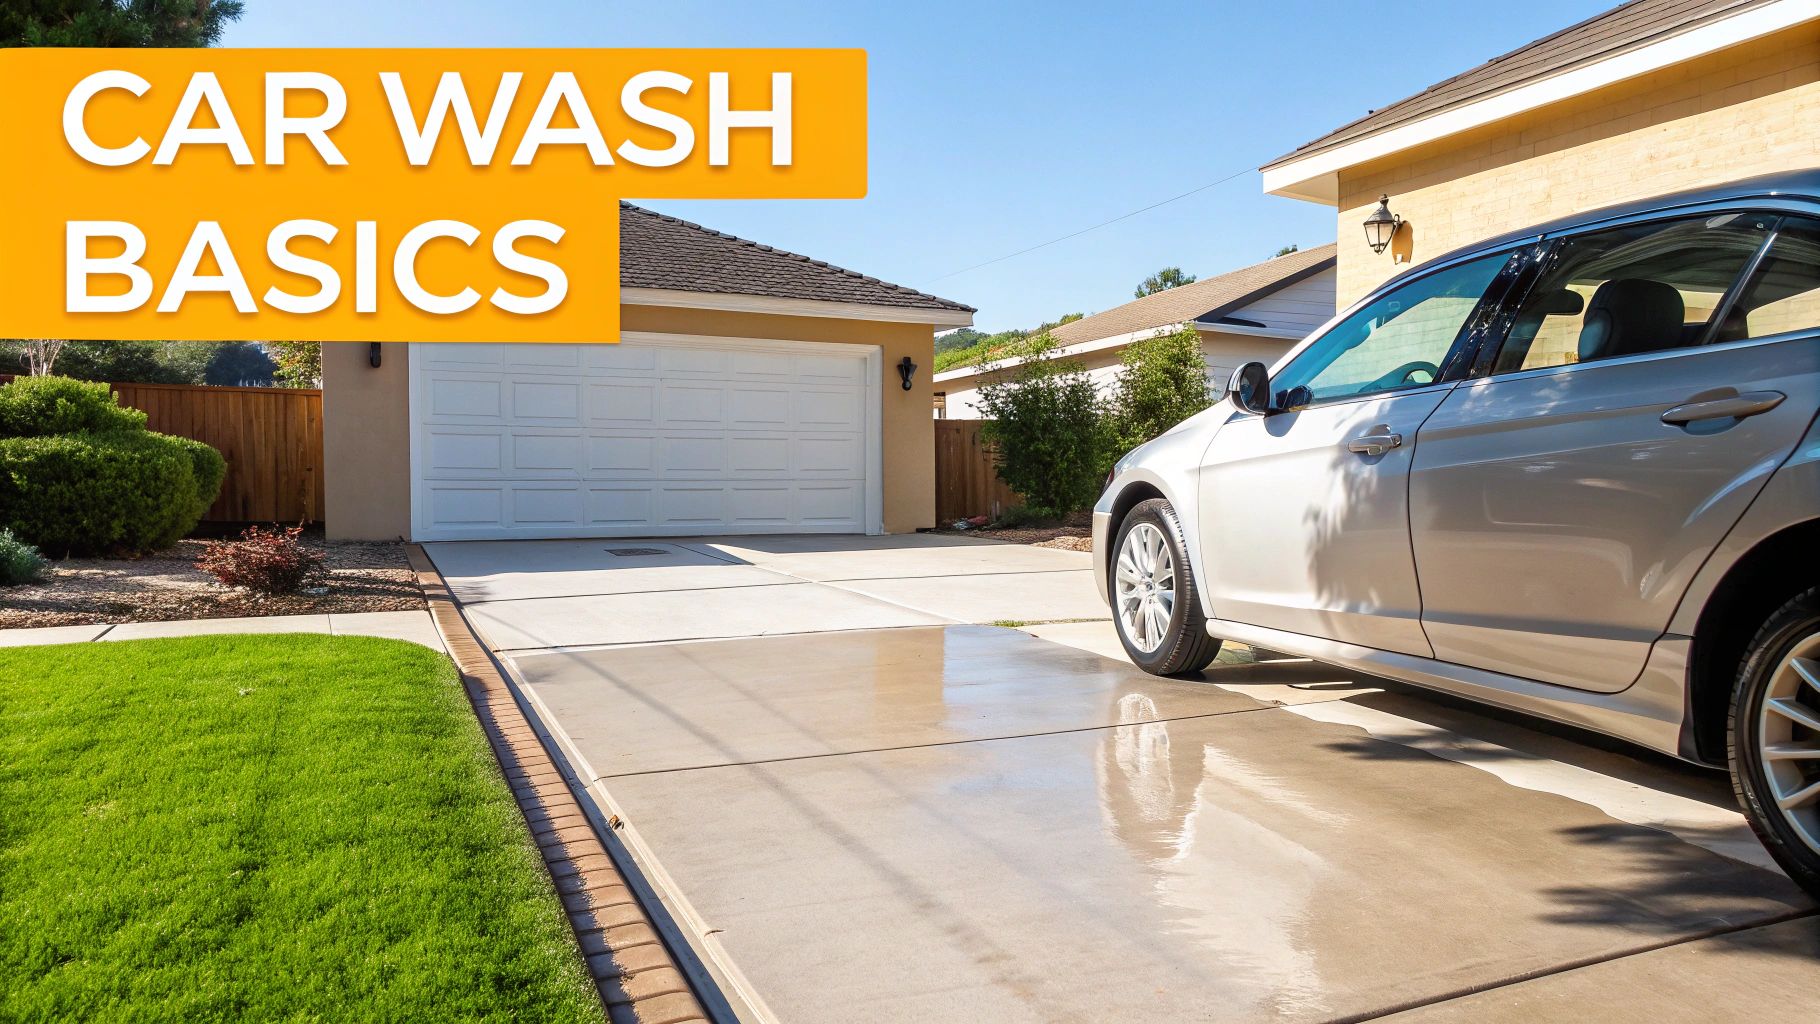
The two-bucket car wash is a straightforward, yet incredibly powerful, technique that will save your car's paint from unnecessary damage. At its core, it’s all about separating your clean, soapy water from your dirty rinse water, which is the secret to preventing the dreaded scratches and swirl marks that plague so many vehicles.
Think of it as the foundation of any safe, professional-level hand wash. It’s a simple change in process that makes a world of difference.
Why This Method is a Non-Negotiable for Your Car's Paint
Let's be real—those fine, web-like scratches on your car's finish didn't just show up out of nowhere. They're almost always the direct result of a poor wash routine, where tiny particles of dirt and grit get dragged across the paint. The single biggest culprit? The old-school single-bucket wash.
When you only use one bucket, every single time you dunk your dirty wash mitt back in for more soap, you're contaminating the entire mix. You're basically turning your clean suds into a gritty, abrasive soup. That grime-filled water then gets reapplied to the next panel, acting like a low-grade sandpaper on your car’s delicate clear coat.
The Simple Brilliance of Separation
The genius of the two-bucket car wash is how simple it is. By just adding a second bucket filled with plain water, you've created a dedicated "rinse station" for your wash mitt. This one change is what fundamentally protects your car’s finish.
The workflow is deliberate and effective. You wash a small section of your car with the soapy mitt, and before you ever think about going back into the soap bucket, you dunk and scrub it in the plain water rinse bucket first. This is your chance to dislodge all the nasty road grime, brake dust, and dirt you just lifted off the paint.
The Unsung Hero: The Grit Guard
What really perfects this system is adding a Grit Guard to the bottom of each bucket. This simple plastic disc is a game-changer, acting as both a washboard for your mitt and a trap for all that harmful debris.
- A Scrubbing Surface: The radial grid gives you a surface to rub your mitt against, knocking loose any trapped particles.
- A Debris Trap: Once the grit is released, it sinks to the bottom of the bucket, below the guard's fins. The water down there is calm, preventing the dirt from getting swirled back up into your mitt.
This setup ensures that both your rinse water and your soap water stay as clean as possible from start to finish.
The two-bucket car wash isn't just a technique; it's a philosophy. It's about respecting your vehicle's finish by acknowledging that every spec of dirt is a potential scratch, and then taking a deliberate step to isolate and remove that threat.
It's no surprise this is the standard for professional detailers and serious car enthusiasts. It dramatically cuts down the risk of marring the paint. When you learn about the professional car wash market, you'll see that methods focusing on paint preservation like this are key.
Two Bucket vs Single Bucket Method At a Glance
The difference in outcomes between these two approaches is night and day. A quick comparison makes it obvious why one is far superior for maintaining your car's paint.
| Feature | Two Bucket Method | Single Bucket Method |
|---|---|---|
| Water Contamination | Kept to a minimum. Dirt is isolated and trapped in the rinse bucket. | High. The single bucket quickly becomes a soup of dirt and grit. |
| Risk of Scratches | Significantly reduced by rinsing the mitt clean before reloading soap. | Extremely high. Gritty water is constantly reapplied to the paintwork. |
| Wash Quality | Stays consistent and safe from the first panel to the last. | Degrades rapidly as the water gets dirtier with each pass. |
| Required Equipment | Two buckets, two Grit Guards, and a quality wash mitt. | One bucket and one wash mitt (a Grit Guard is less effective here). |
Ultimately, the choice comes down to whether you're just getting dirt off your car or actively trying to preserve its finish for the long haul. The two-bucket method is the clear winner for anyone who cares about their paint.
Assembling Your Detailing Arsenal
Getting a truly flawless, showroom-worthy finish on your car isn't about luck; it's about having the right tools for the job. Anyone who’s spent a Saturday afternoon fighting with the wrong gear knows the frustration. This isn't just a shopping list—it's the trusted toolkit I and other detailers rely on for a perfect two-bucket car wash. Knowing why each piece matters is just as important as having it.
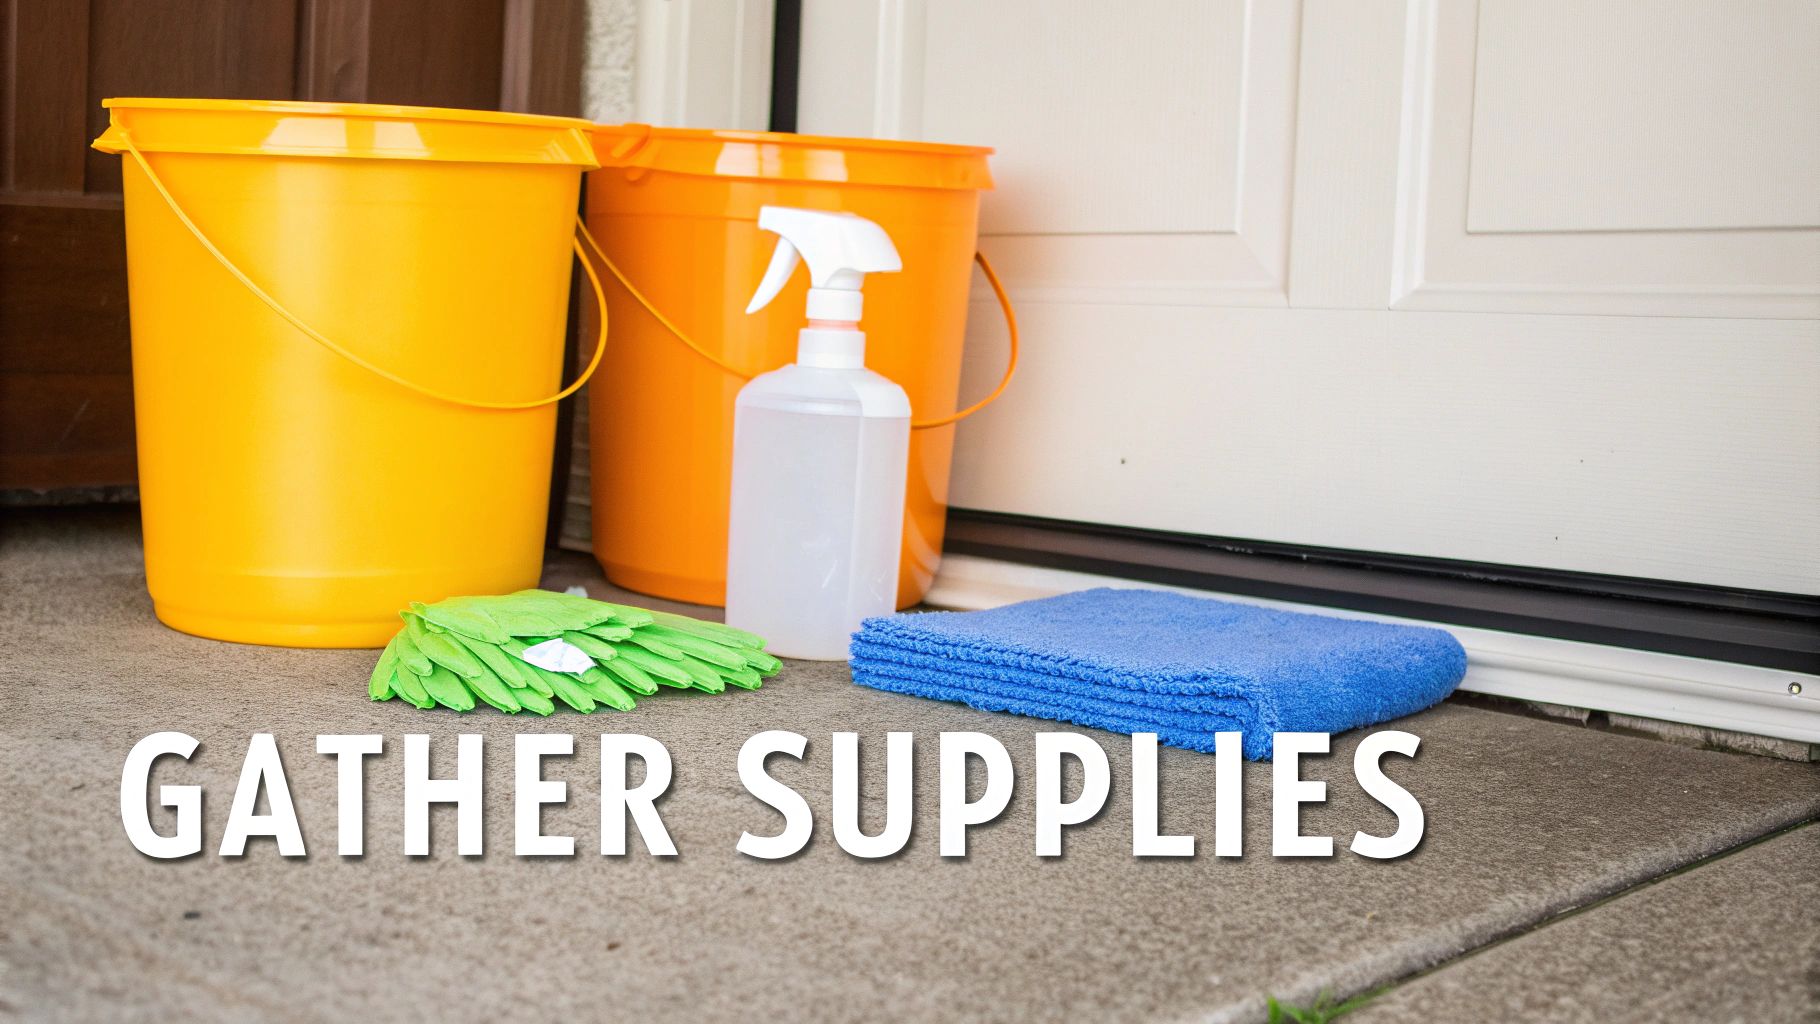
The Foundation: Your Buckets And Guards
The entire two-bucket method hinges on two surprisingly simple items. But don't let their simplicity fool you; their role is critical.
- Two 5-Gallon Buckets: Size really does matter here. If you use smaller buckets, your water gets filthy way too fast, completely defeating the purpose. A 5-gallon capacity gives you plenty of clean, soapy water to work with, keeping the risk of contamination way down.
- Two Grit Guards: Think of these as an insurance policy for your paint. A Grit Guard is a simple plastic insert that sits at the bottom of each bucket. It acts like a washboard, helping release dirt from your mitt while creating a barrier that traps all that grit safely at the bottom. Without them, you're basically just making dirt soup and rubbing it all over your car.
This simple combo is the heart of a safe wash. You’ll have one bucket for your car shampoo (the "Wash" bucket) and a second filled with plain water (the "Rinse" bucket). Keeping them separate is the one rule you can't break.
The Right Soap And Mitt Combination
The tools that actually touch your paint deserve the most attention. Go cheap or use the wrong stuff here, and you’re pretty much guaranteed to leave behind fine scratches and swirl marks.
Your choice of car soap is crucial. Never, ever reach for dish soap. It’s a degreaser designed to strip away grease, which means it will also strip away any wax or sealant you have protecting your paint. You need a dedicated, pH-neutral car shampoo. These formulas are engineered to be slick, providing the lubrication your wash mitt needs to glide across the surface instead of dragging dirt around.
The wash mitt is your direct connection to the paintwork. You've got a couple of great options:
- Microfiber Mitt: These are fantastic. Their soft, dense fibers are perfect for trapping dirt particles deep inside, lifting them safely away from the paint.
- Chenille Mitt: With its long, noodle-like tendrils, this style is also a champ at holding tons of suds and encapsulating grime.
Pro Tip: For maximum safety, I always use two separate wash mitts. I keep one strictly for the upper, cleaner parts of the car—the roof, hood, and windows. The second mitt is for the dirtier lower sections, like the rocker panels and bumpers. This simple habit prevents you from dragging heavy road grime from the bottom of the car all over your more delicate top surfaces.
From Pre-Soak To Final Dry
Once you have the basics down, a few more pieces of gear will take your wash from pretty good to genuinely professional, especially if you add a foam pre-soak to your routine.
The dream team for a pre-wash is a pressure washer paired with a quality foam cannon. The foam cannon attaches right to your pressure washer and lays down a thick blanket of suds over the entire vehicle. This foam clings to the paint, loosening and lifting heavy dirt before you ever touch the car. It's a massive step in preventing swirls. If you're looking to add this to your setup, our ultimate guide to choosing an auto foam gun can help you find the right one.
Finally, how you dry your car is just as important as how you wash it. Throw out those old bath towels and chamois—they can be surprisingly abrasive. Your best friend here is a high-quality, plush microfiber drying towel.
Look for a large, waffle-weave microfiber towel. That waffle pattern creates a massive surface area, allowing it to soak up an incredible amount of water safely and quickly. When you dry, just blot the panels or gently drag the towel across the surface. Never scrub. A gentle touch here ensures you don't ruin all the careful work you just put in.
The Critical Pre-Wash and Foam Soak
If you want to win the fight against swirl marks, it all starts before your wash mitt ever touches the paint. This is the pre-wash stage, and honestly, it’s the most overlooked part of a proper two bucket car wash. The goal here is simple: get as much loose dirt and heavy grime off the car as possible without physically touching it.
Think about it. Your car is coated in a fine layer of abrasive junk—sand, dust, road grit. If you just jump in with a soapy mitt, you're essentially grinding all that contamination into your clear coat. That’s a recipe for scratches. The pre-wash and foam soak are your first line of defense, gently lifting that grime away.
The Initial Rinse Down
First things first, grab your pressure washer or a garden hose with a good jet nozzle and give the car a thorough rinse. The trick is to work from the top down. Gravity is your best friend here.
Start with the roof, then hit the windows, hood, and trunk before moving to the sides. Always save the filthiest parts for last—that means the lower panels, bumpers, and wheel wells. This top-down method prevents you from washing dirt back over areas you’ve just cleaned. Make sure to get into all the nooks and crannies like panel gaps and grilles where dirt loves to hide.
This isn't about getting the car spotless. You're just knocking off the big stuff. This one simple step can remove up to 80% of the loose contaminants that do the most damage during a contact wash. You've just made the entire process infinitely safer for your paint.
Blanketing Your Vehicle in Suds
Now for the fun part: covering the entire car in a thick blanket of foam. A foam cannon attached to your pressure washer is the absolute best tool for this job. This isn't just for looks—that foam is actively working for you, breaking down, surrounding, and lifting the more stubborn dirt off the surface.
You’re letting the soap do the hard work here. The foam lubricates the paint and softens up whatever grime is left, making it much safer to remove later.
Proper Foam Cannon Technique:
- Mix Your Solution: Fill your foam cannon bottle with water first, then add your pH-neutral car shampoo. A solid starting point is usually a 1-to-5 ratio of soap to water, but always double-check the directions on your specific soap.
- Apply from Bottom to Top: This might sound backward, but unlike rinsing, you want to apply foam starting from the bottom of the car and working up. This gives the foam maximum time to cling to the dirtiest lower panels without sliding off too quickly.
- Let It Dwell: Just let the foam sit and do its thing for a few minutes. You’ll literally see it pulling the dirt down as it drips. Whatever you do, do not let it dry on the paint, especially if you're working in the sun.
Once the foam has worked its magic, it's time for another top-to-bottom rinse. You'll be shocked at how much cleaner the car looks already, and you haven't even touched it with a mitt. If you're trying to figure out what tool is right for you, our guide on the 2025 top picks for perfect washes can help you decide.
This careful, touchless approach is exactly why the two bucket method is so popular with both pros and serious enthusiasts. By spending a little extra time on these first steps, you’re not just washing your car—you’re preserving its finish for the long haul.
Time for the Perfect Contact Wash
Alright, your car is pre-washed and dripping with a thick blanket of foam. Now comes the part where technique really matters: the contact wash. This is where we’ll use the two bucket car wash method to gently lift off any remaining grime.
The whole goal here is to avoid dragging dirt across your paint. Think of it as a delicate operation, not a scrub-down. We’ll achieve this by working methodically, one panel at a time, always moving from the top of the car downwards.
The rhythm is simple. Dip your wash mitt into the soapy "Wash" bucket, gently glide it over a section of the car, and then immediately dunk it into the "Rinse" bucket to clean it off. This simple act of separation is the secret sauce to a scratch-free wash.
Your Panel-by-Panel Game Plan
Resist the urge to wash the entire car in one go. Pros work panel by panel for two very good reasons: it keeps the wash mitt clean, and it prevents soap from drying on the paint. You always want to start with the cleanest parts of the vehicle first.
Here's the sequence I always follow:
- The Roof: It's usually the cleanest, flattest area, making it the perfect starting point.
- Glass and Windows: From the roof, I'll move on to all the glass.
- Hood and Trunk: These large, horizontal panels are next on the list.
- Upper Door Panels: Tackle the top half of the doors, working down to any body lines or trim pieces.
Following this top-down order just makes sense. Gravity will pull dirty water down, so you're not contaminating areas you've just cleaned. It’s a small habit that makes a world of difference.
The process itself is a continuous loop, as you can see here.
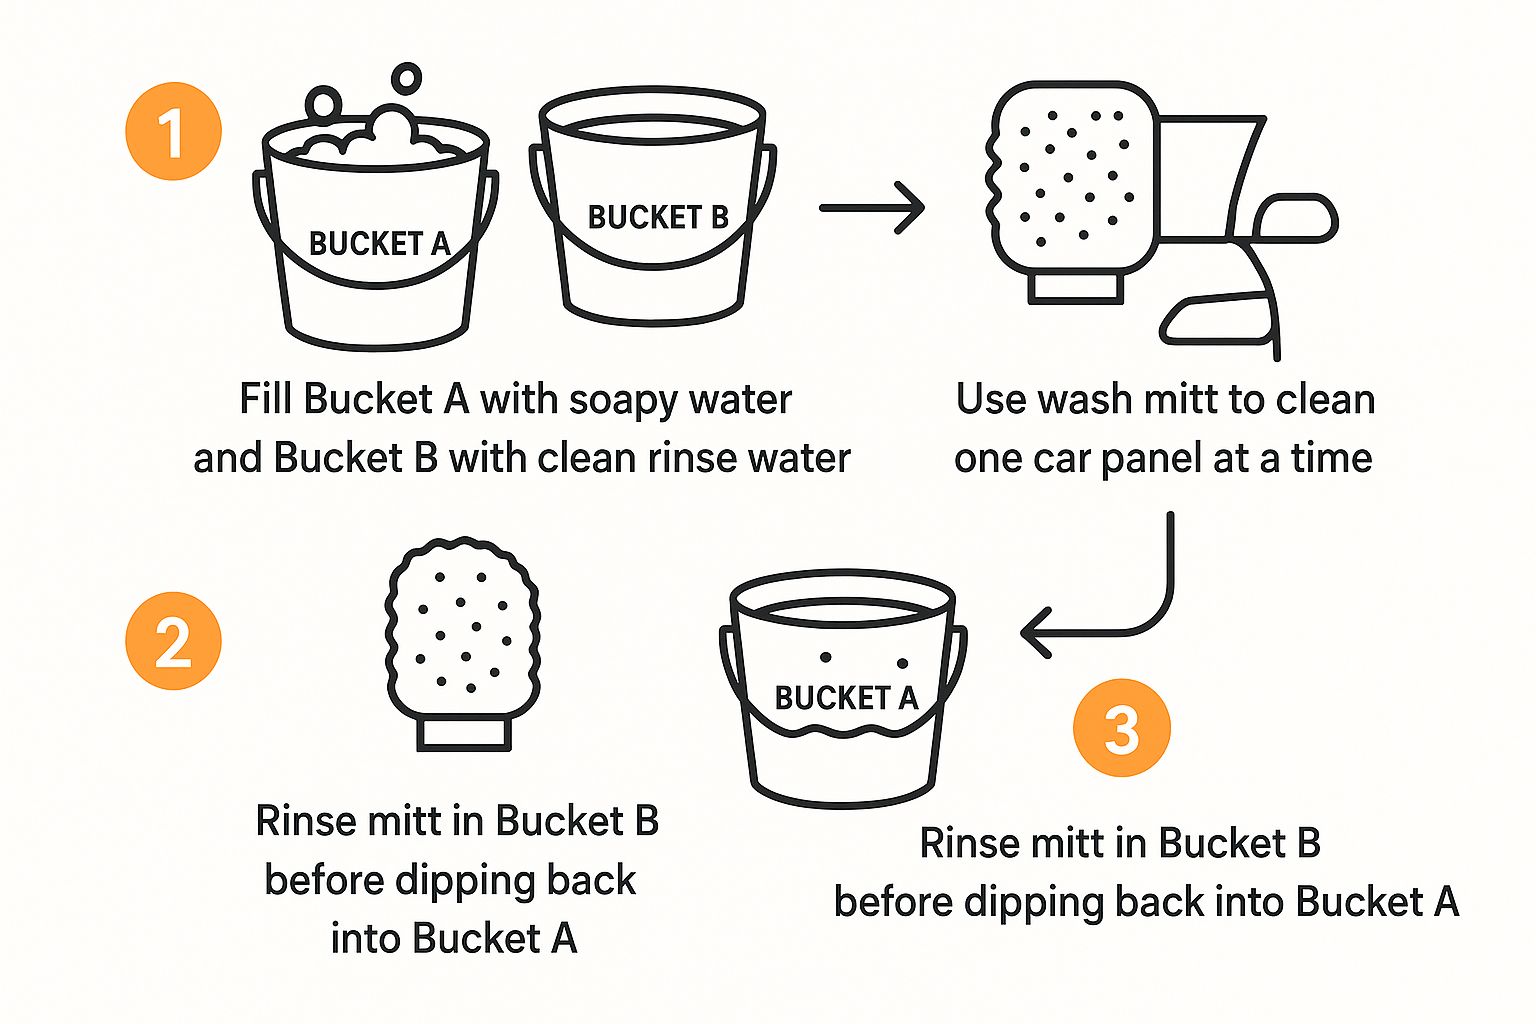
This visual really drives home the critical cycle: load up with soap, wash a panel, and rinse the mitt clean. Sticking to this loop is what keeps your paint safe, every single time.
To make this even clearer, here's a quick summary of the workflow.
Contact Wash Workflow Summary
This table breaks down the sequence of actions you'll repeat for each section of the car. It’s a systematic approach that ensures no step is missed and your paint stays protected.
| Step | Action | Why It Matters |
|---|---|---|
| 1. Load Mitt | Dip your clean wash mitt into the "Wash" bucket with car shampoo. | Starts the process with fresh, uncontaminated suds for maximum lubrication. |
| 2. Wash Panel | Gently glide the mitt over a small section (e.g., half a door) in straight lines. | Minimizes the risk of creating swirl marks compared to circular motions. |
| 3. Rinse Mitt | Plunge the dirty mitt into the "Rinse" bucket and scrub it against the Grit Guard. | Dislodges dirt and traps it at the bottom, preventing it from going back onto the car. |
| 4. Repeat | Reload the now-clean mitt in the "Wash" bucket and move to the next section. | Ensures you are always washing with clean soap and a clean mitt. |
By internalizing this rhythm, you're not just washing your car—you're detailing it safely and effectively.
Mastering Your Mitt Technique
How you move that mitt is just as important as having two buckets. Let the slickness of the car shampoo and the softness of the mitt do the work. You should never have to apply heavy pressure or scrub aggressively.
Always use gentle, straight-line motions. So many people wash in circles, but that's a classic way to instill swirl marks if a piece of grit gets caught in the mitt. Straight-line passes are far less noticeable if any light micro-marring happens. Just let the mitt glide, using only the weight of your arm.
After you finish a small section—say, half the hood or one door panel—it's time to rinse that mitt. This is where the magic of the two-bucket method happens. Dunk the mitt into your "Rinse" bucket and give it a good scrub against the Grit Guard at the bottom. This action pulls all the dirt off the fibers and traps it safely underneath the guard.
A Quick Tip: Take a look at your rinse water after a few panels. See how it's getting cloudy? That's your proof the system is working. Every speck of dirt you see floating in that bucket is a potential scratch you just kept away from your car's finish.
Once the mitt is clean, wring it out a bit and dive back into the "Wash" bucket for a fresh load of suds. This traditional two-bucket hand wash is still the gold standard for a reason; separating wash and rinse water is the most effective way to prevent scratches, a principle central to safe wash systems in the industry.
Save the Dirtiest Areas for Last
Now we get to the grime zones. The lower sections of your car—rocker panels, lower bumpers, and the areas behind the wheels—collect the heaviest road tar, brake dust, and filth. That's precisely why we save them for the very end.
If you took my earlier advice and have a second wash mitt on hand, this is the moment to grab it. Using a completely separate mitt for these grimy parts is the best way to prevent cross-contamination. You’d never want to take a mitt that just cleaned a rocker panel and put it anywhere near your hood.
Even with a dedicated "dirty" mitt, the process doesn't change:
- Wash a small lower section.
- Rinse the mitt thoroughly in the "Rinse" bucket.
- Reload with soap and keep going.
By the time you're done, this rhythm will feel like second nature. You've now safely removed all the dirt from your car, isolating the contaminants every step of the way and protecting that finish you work so hard to maintain.
Rinsing and Drying Without Scratches
You've done the heavy lifting. The car is clean, the grime is gone, and you’ve carefully followed every step of the two-bucket car wash to keep your paint pristine. But don't drop the ball now. This final stage—the rinse and dry—is where a perfect wash can be ruined by ugly water spots and new scratches.
This is the make-or-break moment. A lot of people rush this part, but getting it right is what separates a clean car from a professionally finished one. With a couple of smart techniques, you can get that same flawless result in your own driveway.
The Sheeting Rinse Method
Before you even reach for a towel, you can get most of the water off the car with a simple trick. It's tempting to just blast the car with a high-pressure nozzle, but there’s a much better way called the sheeting rinse.
Just take the nozzle off your garden hose so you have a gentle, open flow of water. Start at the roof and work down, letting the stream of water cascade over the panels.
Because the surface is now super clean and slick, the water's natural surface tension makes it cling together. It will "sheet" off the vehicle in large sections, dragging most of the other water droplets with it. This one simple move can get rid of up to 70% of the water on your car, leaving just a few beads behind. That means way less work for your towel and a much lower chance of water spots forming.
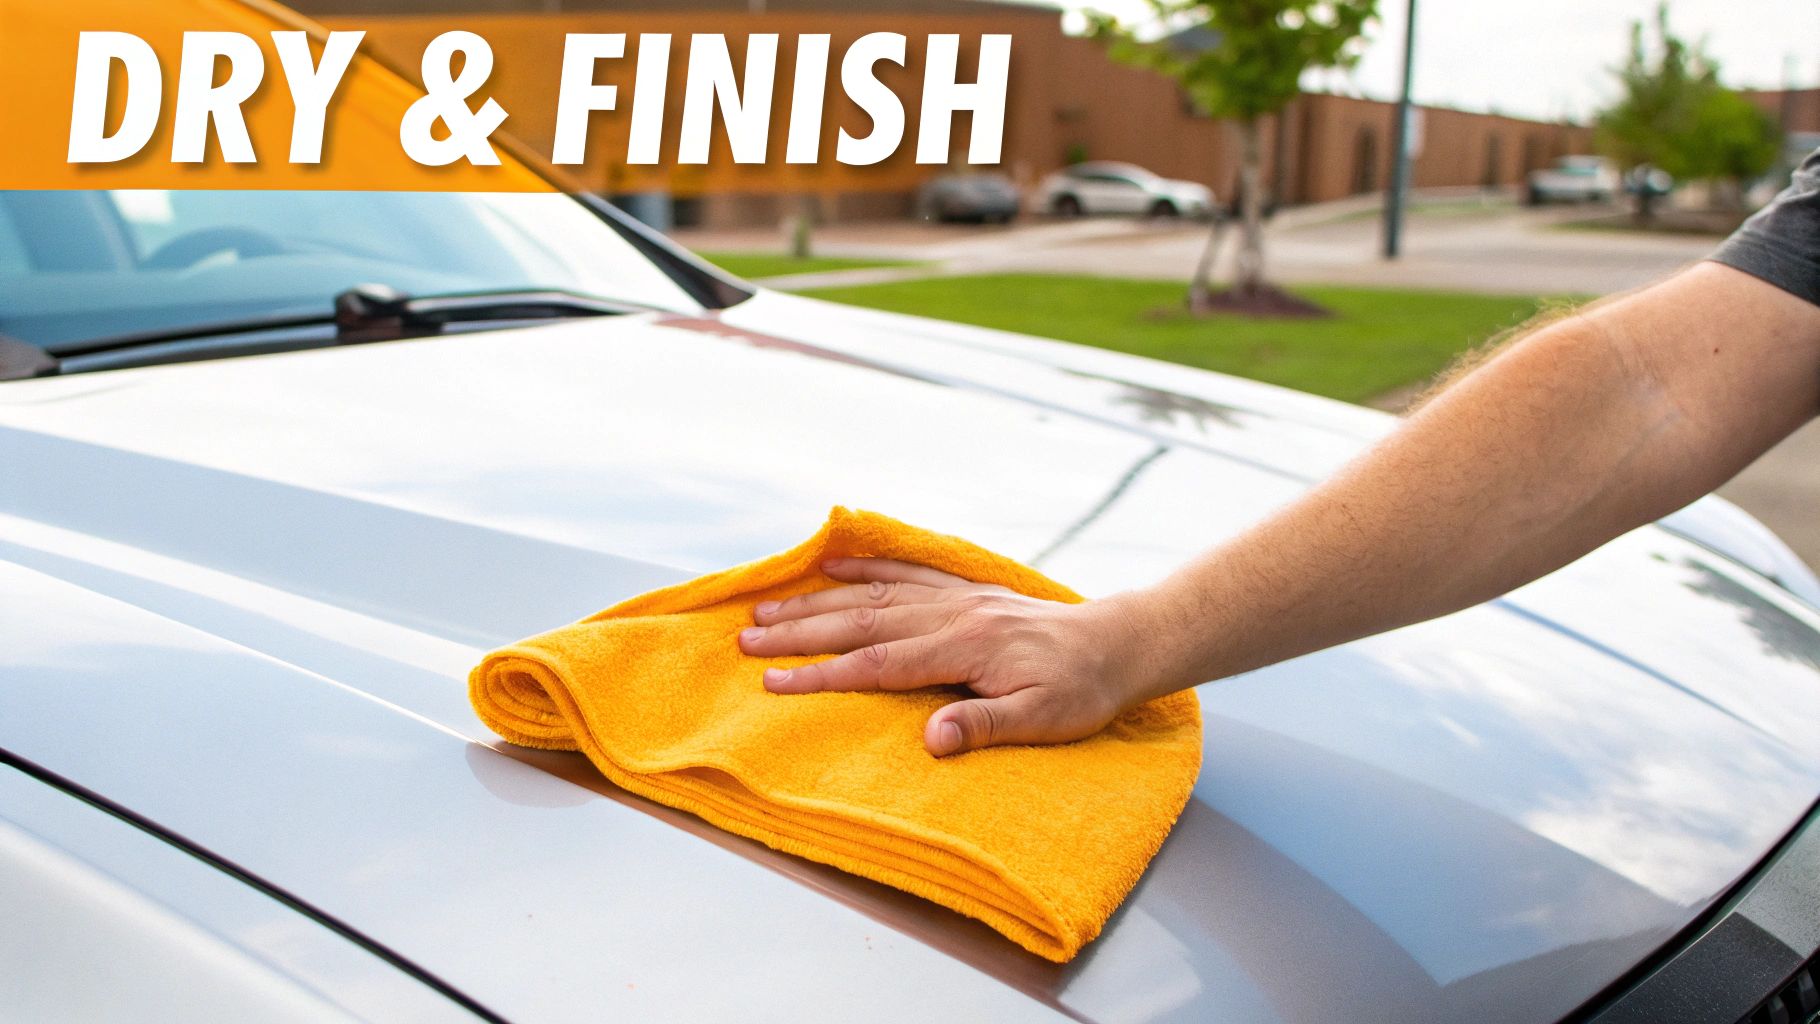
Safe Drying with Microfiber
Now, it's time to handle what's left. Throw out those old bath towels, chamois, or water blades—they're notorious for causing fine scratches. The only tool you should be using is a large, plush microfiber drying towel. Look for one with a waffle-weave or twisted-loop design, as they’re absolute water magnets.
The secret to a scratch-free dry is to stop rubbing or wiping in circles. Instead, try one of these two pro-level techniques:
- The Blotting Method: Fold your towel into a thick, manageable square. Lay it flat on a panel and just pat the area dry. Lift, move to the next wet spot, and repeat. It’s incredibly gentle and the safest bet for delicate paint.
- The Drape and Drag: Unfold the towel and lay it across a flat surface like your hood or roof. Gently grab two corners and pull it straight back towards you. The towel's own weight is enough to absorb every drop as it glides over the paint. No need to press down.
Remember, your goal is absorption, not scrubbing. A good microfiber towel is designed to soak up massive amounts of water on contact. Let the towel do the work, and you'll save your paint from new swirl marks.
Banishing Those Annoying Drips
You're almost there. You've dried every panel, but a new enemy appears: the drip. Water is a master at hiding in mirror casings, door handles, grilles, and behind emblems. A few minutes after you think you're done, it runs down and leaves a frustrating streak.
Forced air is your best friend here. You don’t need fancy detailing gear; a simple electric leaf blower works perfectly.
Set it to low and walk around the car, blowing out all the common water traps:
- Behind and under your side mirrors
- Inside the front grille and lower air dams
- Around all window trim and door seals
- In the gaps of your headlights and taillights
- Around badges and emblems
This final pass blows out all that trapped water for good. No more surprise drips. You’re left with a truly spotless, perfectly dry vehicle that’s ready for wax or sealant. To really master this final step, check out our complete guide on the best way to dry your car after washing for more pro tips.
Got Questions About the Two-Bucket Wash? We've Got Answers.
Even after you’ve got the basics down, a few questions always seem to come up as you get into the rhythm of a proper two-bucket car wash. Getting the small details right is what separates a decent wash from a professional-level one that truly protects your paint. Let's clear up some of the most common sticking points so you can wash with complete confidence.
Nailing these specifics will not only help you perfect your technique but also give you a deeper understanding of why each part of this system is so crucial.
Are Grit Guards Really That Important?
Yes, one hundred percent. If you take away only one thing, let it be this: Grit Guards are the non-negotiable MVPs of this entire process.
Think about it. Having two buckets is great for separating clean and dirty water, but what keeps that dirt from just swirling around in your rinse bucket? The Grit Guard. Without it, every time you dunk your wash mitt, you're essentially just stirring up a murky cocktail of abrasive particles. That grit gets suspended in the water, just waiting to latch back onto your mitt and get dragged across your paint.
A Grit Guard acts as a washboard, letting you scrub the mitt clean against its surface. More importantly, it creates a physical barrier, trapping all that heavy, paint-damaging sediment safely at the bottom.
Skipping the Grit Guard is like buying a top-of-the-line security system but leaving the front door wide open. It undermines the whole point of the method.
Do I Need a Pressure Washer to Do This Right?
Nope, not at all. While a pressure washer and foam cannon duo offer that satisfying, professional-grade pre-wash, they aren't required to execute a safe two-bucket wash. The heart of this method is the safe contact wash, and you can do that perfectly with a regular garden hose.
The key is a good nozzle. A quality, adjustable hose nozzle can produce a stream strong enough to blast away the majority of loose dirt, sand, and grime before your mitt ever touches the paint. You won't get that thick, shaving-cream-like foam, but a thorough pre-rinse is still incredibly effective. The most important steps—washing one panel at a time and meticulously rinsing your mitt in a separate, grit-guarded bucket—stay exactly the same. It's still a massive leap forward from the old single-bucket-and-sponge routine.
How Often Should I Dump and Refill the Water?
For a single car with a typical layer of weekly dust and road film, one fill-up for each bucket is usually all you need. You'll actually see the system working as your rinse water gets progressively murkier—that’s all the dirt that isn't going back onto your car.
That said, there are a couple of situations where fresh water is a must:
- The Seriously Filthy Car: If you're tackling a vehicle caked in mud, post-snowstorm salt, or heavy grime, it's smart to dump your rinse water about halfway through. Once it starts looking like chocolate milk, it's time for a refresh.
- Washing a Second Car: Never, ever use the same water for a second car. That’s just transferring all the grit and grime from the first car directly onto the second. Always start with two fresh, clean buckets.
What’s the Deal with Soap? Can I Just Use Dish Soap?
This is a big one. Please, step away from the kitchen sink. Always use a dedicated, pH-neutral car shampoo. Grabbing the dish soap is one of the most common and damaging mistakes you can make.
Dish soaps are designed to do one thing very well: cut through heavy grease. While that sounds good, they are far too aggressive for automotive paint. They will strip away any wax, sealant, or ceramic coating you have, leaving your clear coat naked and vulnerable to UV rays and contaminants.
A quality car shampoo is engineered for two specific jobs:
- Safe Cleaning: It’s formulated to break down road grime without harming your paint or stripping away its protective layers.
- Serious Lubrication: It creates a super-slick surface, allowing your wash mitt to glide effortlessly. This lubrication is what dramatically reduces the friction that causes swirl marks and fine scratches.
Using the right soap is every bit as important as using two buckets.
Ready to elevate your car wash game? The SwiftJet Car Wash Foam Gun turns any garden hose into a foam-blasting powerhouse, making your pre-wash safer and more effective. Grab yours today and see the difference a thick blanket of suds can make. Get the ultimate clean at https://swiftjetusa.com.