

You finish washing the car, dress the tires, pull out of the driveway, and then see it later. Black specks up the lower doors, residue near the wheel arches, and tires that somehow look both greasy and uneven. That's the moment it becomes clear that tire shine isn't just about the product. It's about control.
A good tire dressing applicator is what separates a clean, professional finish from a mess that needs rework. A rag dumps product where you don't want it. A random sponge soaks up too much, skips over lettering, and drags dressing onto the wheel face. A purpose-built applicator gives you a controlled layer on the sidewall, where it belongs.
The tricky part is that “use an applicator” is still incomplete advice. The right tool changes with the tire and the dressing. A curved foam pad that feels perfect on a low-profile performance tire can become annoying on a tall truck sidewall. A microfiber pad can level a solvent-based dressing nicely, but it's not always the fastest way to work through chunky sidewall texture. Matching tool, product, and tire shape is what keeps sling down and finish quality up.
Achieving a Clean Shine Without the Sling
Tire sling usually comes from one of three mistakes. Too much product, poor leveling, or weak control during application. Most of the time, the applicator is sitting right in the middle of all three problems.
A dedicated tire dressing applicator is made to spread product evenly across the sidewall while helping you stay off the tread. That matters for appearance, but it also matters for safety. Guidance on tire dressing stresses controlled coverage and warns against getting dressing onto the tire footprint because that can reduce traction and create risk, as outlined in AvalonKing's overview of tire dressing basics and controlled application.
If you've ever wondered why a shop finish looks crisp instead of wet and sloppy, this is a big reason why. Dedicated applicators let you work the product into the sidewall texture instead of smearing a thick film on top. That's a major part of the same polished look people chase in retail spaces and show vehicles, the kind of presentation mindset discussed in this piece on the sparkling showroom effect.
What a proper applicator fixes
- Coverage control keeps the dressing on the sidewall instead of the wheel, tread, or driveway.
- Even finish helps you avoid dark patches on smooth rubber and light spots around raised letters.
- Less waste means the product goes onto the tire, not into a rag that never releases it properly.
- Cleaner wheel edges become easier to maintain, especially if you already use the right car wheel cleaning brush during wash prep.
Practical rule: If the tire looks soaking wet right after application, you probably used too much.
The goal isn't maximum gloss in one pass. The goal is a finish that stays where you put it.
Choosing the Right Tool for the Job
You can spot the wrong applicator fast. The dressing loads up in one spot, skips another, kisses the wheel lip, and then slings down the quarter panel on the drive home. A clean result starts with matching the tool to the tire shape and the dressing viscosity, not grabbing whatever foam pad is closest.
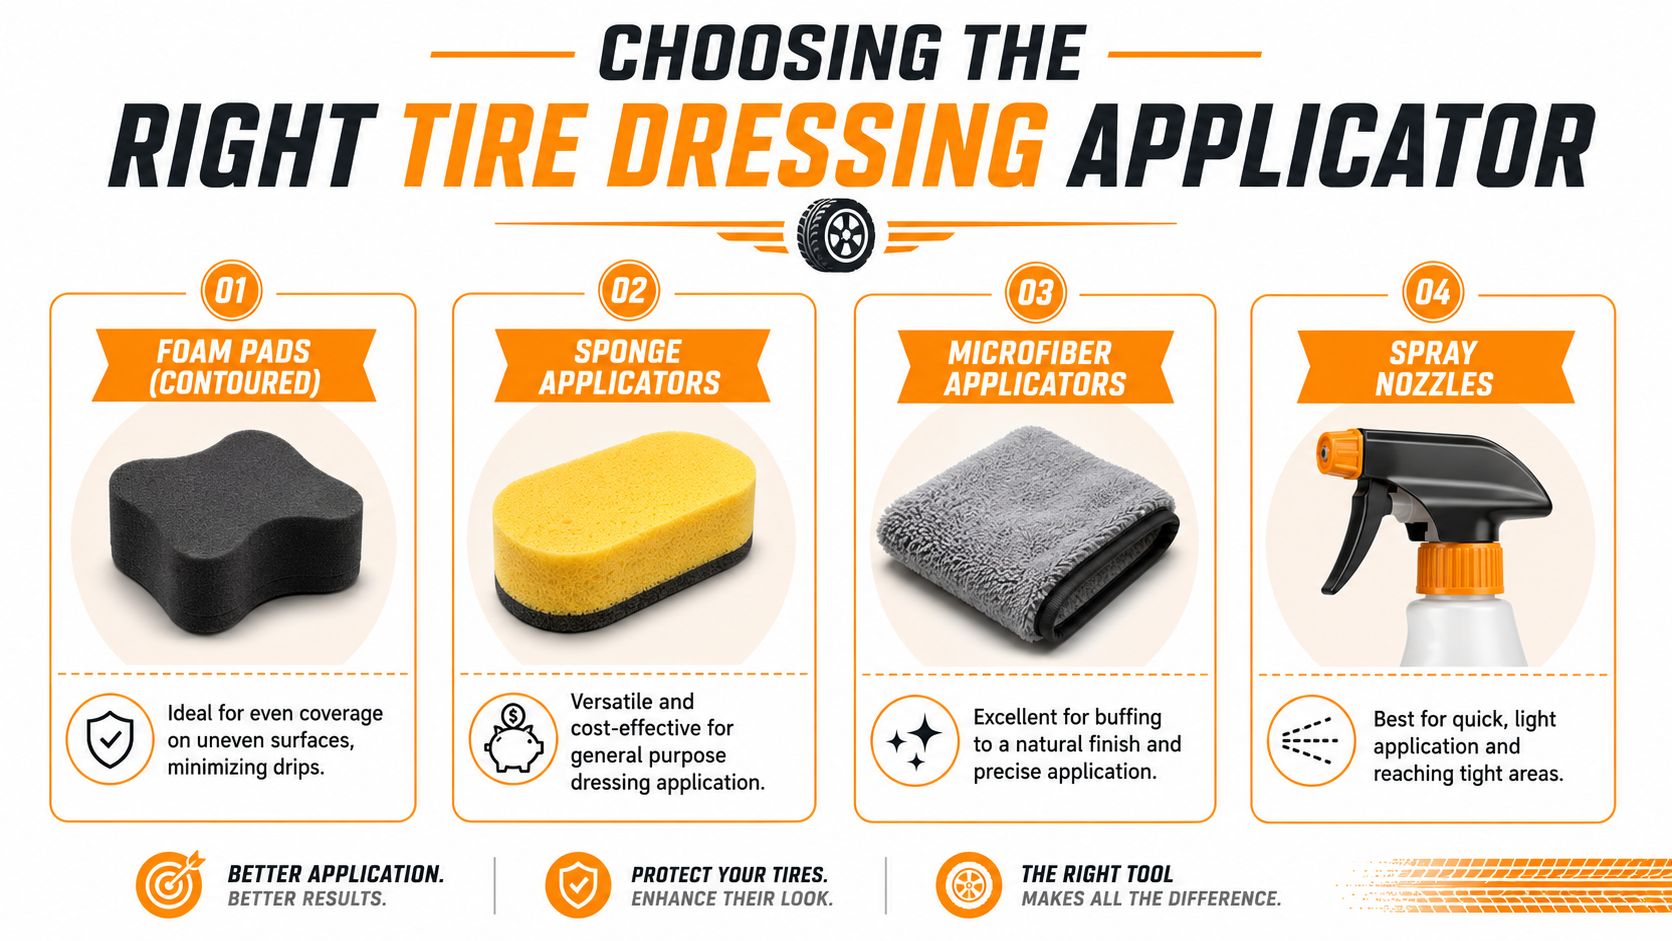
Dedicated applicators have gotten much better than the old sponge-and-rag routine. Some use curved faces for low-profile sidewalls, some use barrier layers to keep product off your hand, and some use angled edges to work around lettering and tight wheel gaps. Detailed Image highlighted one precision dressing applicator with a six-sided design, and that detail matters more than it sounds. Shape affects how well the pad follows the sidewall and how easy it is to stay off the wheel.
Foam pads and contoured foam
Contoured foam is still the safest all-around choice for standard passenger tires. It lays down water-based dressing evenly, carries enough product to avoid constant reloading, and gives good control along the bead and shoulder.
It also shines on low-profile tires.
A curved foam face rides the sidewall better than a flat pad, so you spend less time correcting accidental contact with the rim. On a tight tire-and-wheel package, that control is the difference between a sharp satin finish and dressing smudged onto the wheel edge.
The downside shows up on taller truck and SUV tires. Deep ribs, raised letters, and chunky shoulder lugs can leave small foam pads working only the high spots. You can still get a good finish, but it takes more passes and more attention.
Microfiber applicators
Microfiber works best when edge control matters more than raw coverage speed. It is a good pick around delicate wheel finishes, and it can level thinner dressings nicely on smoother sidewalls.
The trade-off is product retention. Some microfiber pads absorb more dressing than they lay down, especially on the first pass. That can make them feel stingy on textured rubber and wasteful with thicker products.
If you already keep a dedicated microfiber applicator pad for trim or interior work, keep a separate one for tires only. Tire residue migrates fast, and once a pad has been into sidewall grime and silicone dressing, it should not touch paint, trim, or interior surfaces.
Brushes and why they matter on big sidewalls
Brushes make sense on tires that fight back. Large SUV, truck, and off-road sidewalls often have enough texture that a pad skims over details instead of working dressing into them.
That is where a brush earns its place. With a thinner dressing, the bristles can reach recessed lettering, shoulder blocks, and uneven sidewall patterns that leave pads looking patchy. Product descriptions and user feedback in this discussion of applicator types and low-profile fit reflect the same real-world issue. Tire size and sidewall design change which tool behaves best.
Brushes do have a downside. Rush the job or overload the bristles, and they can flick dressing onto the wheel or paint. I only use them with a light hand and a modest amount of product.
Flat sponges and low-cost applicators
Flat sponges are cheap and easy to replace, but they are usually the first tool to cause wheel contamination. Their straight edge does not follow the tire well, so product gets pushed sideways near the bead instead of staying on the sidewall.
They are acceptable for quick maintenance on simple sidewalls. They are a poor choice for low-profile tires, heavily molded sidewalls, or any job where finish quality matters.
Tire Dressing Applicator Comparison
| Applicator Type | Best For | Pros | Cons |
|---|---|---|---|
| Contoured foam pad | Low-profile and standard passenger tires | Even coverage, easy control, good sidewall contact | Slower on tall or heavily textured sidewalls |
| Flat sponge applicator | Basic maintenance on simple sidewalls | Cheap, easy to replace, simple to use | Poor contour fit, easier to touch the wheel |
| Microfiber applicator | Precise work and solvent-based dressing control | Good leveling, softer contact near wheel edge | Can absorb too much product, less effective in deep texture |
| Brush applicator | SUV, truck, and off-road tires with textured sidewalls | Reaches grooves and raised patterns well | Can flick product, easier to get messy if overloaded |
Match the applicator to the sidewall first, then to the dressing. That order prevents sling, keeps the wheel cleaner, and gives a more even finish across very different tire designs.
The Critical First Step Surface Preparation
You can pick the right applicator, load it carefully, and still end up with sling or blotchy shine if the tire was never properly cleaned. I learned that one early on with low-profile tires. The finish looked fine in the bay, then streaked once the car rolled out because old silicone and browning were still sitting in the sidewall texture.
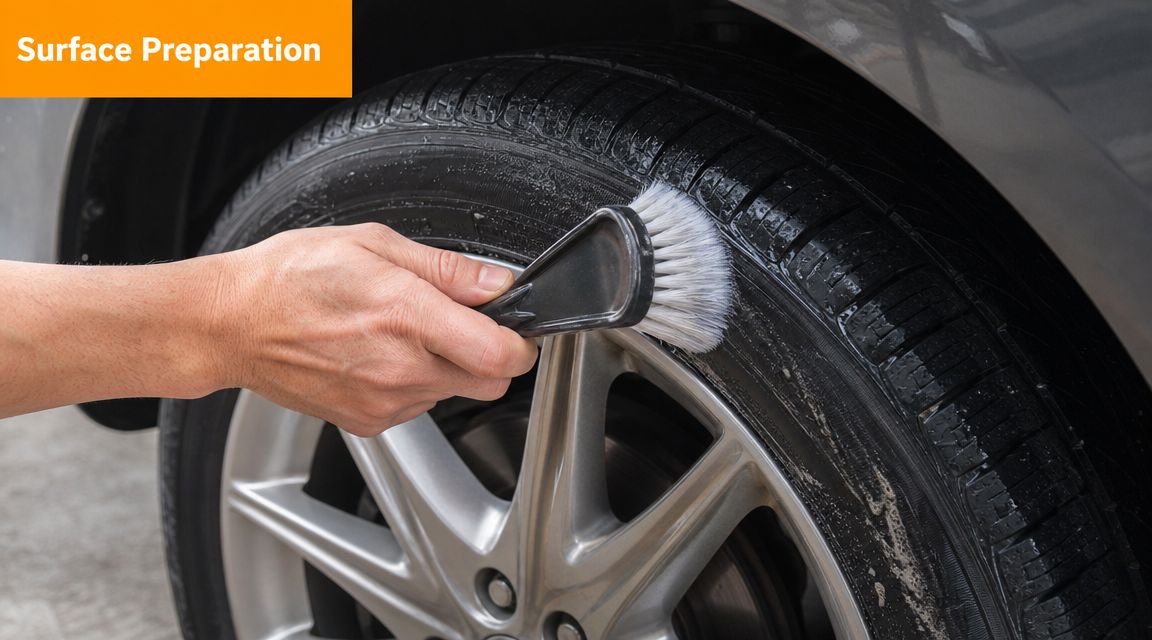
Clean rubber gives the dressing a consistent surface to bond to. Griot's Garage makes the same point in their guide to cleaning tires before applying dressing. If old dressing, road film, or blooming is left behind, the new coat grabs unevenly. That is where satin turns patchy, and where excess product starts creeping toward the wheel edge.
What clean actually looks like
A tire is ready when the sidewall looks even and feels squeaky rather than slick. Raised letters, shoulder blocks, and the area near the bead need extra attention because residue hides there, especially on truck tires and off-road sidewalls with deeper texture.
Smooth passenger tires usually clean faster. Aggressive all-terrain tires do not. Those sidewalls trap old product in the texture, and if you miss it, a foam pad will skate across the high spots while leaving dark, wet pockets in the low spots.
Prep sequence that works
- Rinse the wheel and tire first so loose grit is not dragged across the rubber.
- Clean the wheel and tire as separate jobs because each holds different contamination.
- Use a dedicated tire cleaner on the sidewall and scrub until the residue stops lifting.
- Check the foam and runoff. Brown or gray transfer means the tire is still shedding old contamination.
- Rinse thoroughly and inspect the bead area, lettering, and outer shoulder.
- Dry the sidewall fully with air or a towel before any dressing touches it.
If the wheel is packed with fallout and baked-on grime, handle that first with a dedicated brake dust cleaner. It keeps metallic residue and wheel cleaner overspray from getting mixed into the tire prep stage.
Why drying matters
Water changes how the dressing spreads and how the applicator behaves on the rubber. On a damp sidewall, a contoured foam pad can skip, a microfiber applicator can smear diluted product into the lettering, and a brush can push thin dressing into places you did not want it.
That matters even more when you are matching the applicator to the tire type. A clean, dry low-profile sidewall is easier to dress precisely without touching the wheel. A clean, dry off-road tire lets a brush or denser pad work into the texture without leaving shiny puddles in the recesses.
For anyone trying to master car detailing techniques, this is one of the habits that separates a finish that looks good for ten minutes from one that stays even after the first drive.
A tire can look dark and still be contaminated. The applicator exposes that mistake fast.
Mastering the Application Technique
You see the mistake the first time the car rolls out of the driveway. The tire looks wet in the bay, then the dressing slings onto the quarter panel, dots the wheel face, and dries patchy across the sidewall. That usually comes from using too much product, the wrong applicator for the tire shape, or both.
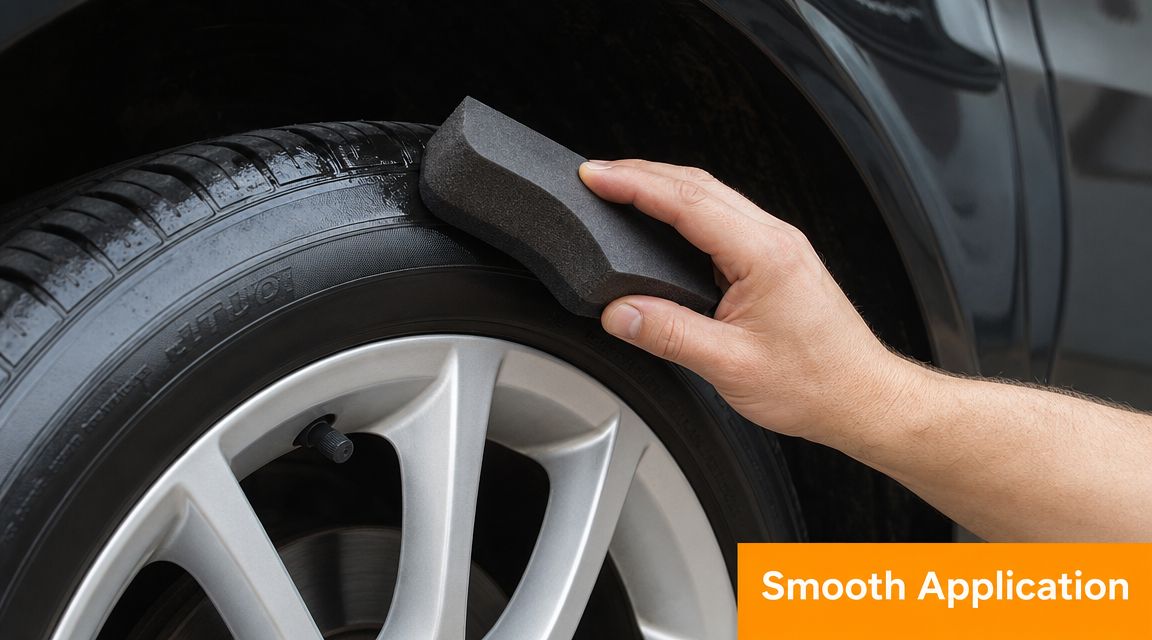
Start with less product than you think
A lightly loaded applicator gives better control, especially near the bead and outer shoulder where sling and wheel smears start. Two thin lines on a foam pad or a small dab on microfiber is usually enough to start. Detailed Image makes the same point in their guide on how to dress tires properly. Coverage and control matter more than trying to force gloss in one pass.
This matters even more when the tire and dressing do not naturally cooperate. A thin water-based dressing on a soft foam pad can disappear fast into a thirsty all-terrain sidewall. A thicker gel on that same pad can overload a low-profile street tire and crowd the wheel edge. Match the amount and applicator face to the job.
Match your motion to the sidewall
Smooth, low-profile tires reward a steady pass that follows the curve of the sidewall. Keep the pad flat, use light pressure, and stay off the rim. On these tires, a contoured foam applicator is usually the cleanest option because it rides the sidewall shape without shoving product into the wheel.
Textured truck tires, raised lettering, and aggressive sidewalls need a different approach. Use a denser pad or a brush-style applicator and work the product into the texture with short overlapping passes. Circular motion helps in deep lettering and lugs. Straight passes usually level better on smoother rubber.
Pressure matters. Too much pressure squeezes product to the edges of the pad, and that is how you end up with shiny buildup in grooves and a greasy line near the bead.
Where good results usually fall apart
The common failures are predictable.
- Overloading the applicator and leaving a wet film sitting on the surface
- Using a wide or floppy pad on a short sidewall, which pushes dressing onto the wheel
- Using a small pad on a heavily textured off-road tire, which skips the recesses and leaves dark and light patches
- Adding more product instead of leveling what is already there
- Driving too soon, before the carrier has had time to settle
Chase an even finish first. Gloss is easy to add. Sling is annoying to clean up.
A lot of broader master car detailing techniques come down to this same habit. Control the tool, control the result.
Let the dressing settle, then inspect it
Once the sidewall is fully covered, give it a short set time before you touch it again. The exact wait depends on the dressing, temperature, and how much product was applied, but the goal stays the same. Let it bond to the rubber and expose any excess sitting on top.
This is the point where uneven application becomes obvious. Raised letters may still look dry. The lower shoulder may look heavier than the rest of the tire. Fix those spots with a light pass from the applicator you already loaded, not a fresh blob of product.
Here's a useful visual reference for the technique in motion:
The final wipe separates a clean finish from a messy one
Use a clean microfiber towel to level the sidewall after that short wait. This is the step that cuts down sling the most, especially with glossier dressings or tires with shallow sidewalls where excess has nowhere to hide.
Wipe lightly. The goal is to remove residue and even out the sheen, not strip the tire back to bare rubber. If the towel comes away heavily wet, too much product went on. If that happens, keep leveling instead of adding more.
A repeatable application rhythm
- Load the applicator lightly and keep product off the edge of the pad.
- Apply one thin coat with overlapping passes that match the tire shape.
- Work textured areas separately so lettering, ribs, and recesses do not stay patchy.
- Let the dressing settle briefly and inspect the finish under good light.
- Level with a microfiber towel to remove excess and reduce sling.
- Add a second thin coat only if the tire needs more depth, then repeat the leveling step if needed.
Thin coats are slower by about a minute. They save much more time than cleaning sling off paint and wheels later.
Cleaning and Storing Your Applicators
A dirty applicator doesn't just look bad on the shelf. It changes how the next job goes. Old product hardens the face, trapped grit scratches wheel edges, and leftover residue can make a fresh dressing apply unevenly.
Clean by product type
If you used a water-based dressing, warm water and a general cleaner usually do the job. Work the cleaner into the foam or microfiber, rinse thoroughly, and repeat until the applicator stops releasing residue.
If you used a solvent-based dressing, the cleanup is usually tougher. You may need a stronger degreasing step to break down what's left in the applicator. Don't assume one quick rinse will clear it out. If the face still feels slick or gummy after washing, it's not clean yet.
Keep tire tools separate
This saves a lot of headaches later.
- Dedicate applicators to tire work only so you don't transfer greasy residue onto trim or paint.
- Keep tire towels separate from paint towels because sidewall grime and brake dust contamination travel easily.
- Retire damaged applicators early if they tear, crumble, or start dropping debris.
Cross-contamination usually doesn't announce itself. It shows up later as mystery smears, staining, or extra cleanup.
Drying and storage habits that help
Let the applicator dry fully before sealing it in a bin or bag. A damp foam pad stored in a closed container is asking for mildew and weird texture changes.
Store tire applicators in a separate, clearly marked container. Keep them away from your polishing pads, interior towels, and wash mitts. That sounds basic, but it's one of the easiest ways to keep your detailing kit from turning into one contaminated pile.
Pro Tips and Common Mistakes to Avoid
Good tire dressing work looks simple because the mistakes were avoided before they had a chance to happen. Most of the ugly results come from a few repeat offenders.
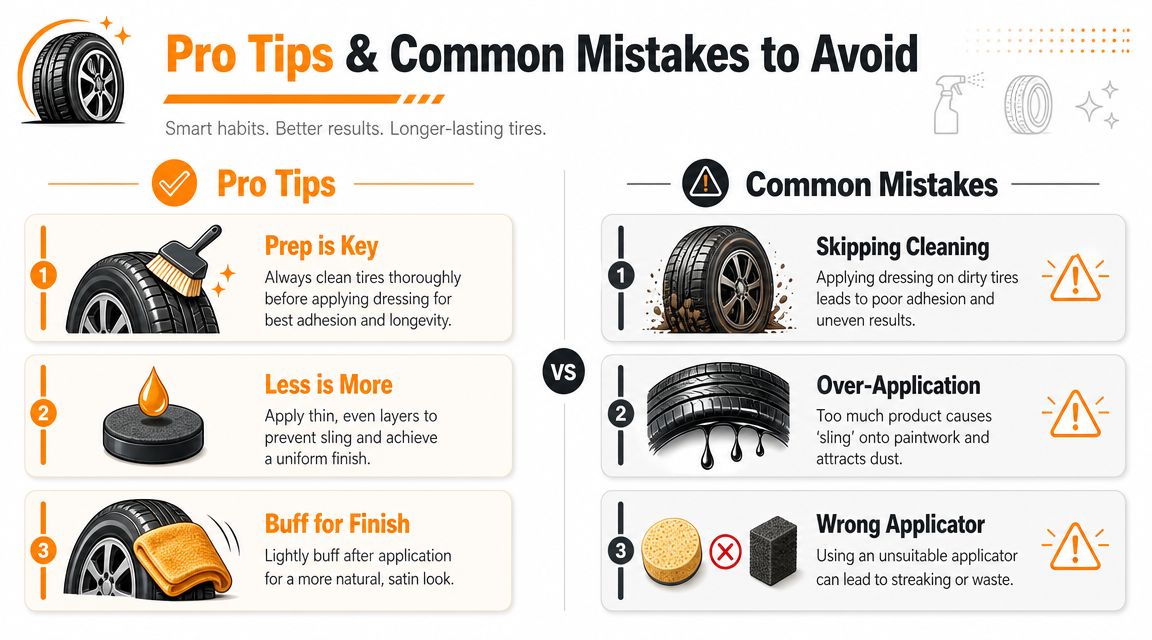
Neutral detailing guidance says to apply product to the applicator first, then work it into the tire, and specifically warns against spraying dressing directly onto the sidewall because it can soil the wheels and create extra cleanup, as discussed in this thread on tire dressing applicators and wheel contamination.
The habits that make the biggest difference
Most important prep tip: A clean sidewall gives the dressing something consistent to bond to.
Most important tool tip: Choose the applicator for the tire shape, not for what looked good on the store shelf.
Most important technique tip: Thin, controlled coats beat one heavy pass every time.
Mistakes that keep causing sling and streaks
-
Applying to a wet tire
Wet rubber dilutes the dressing and makes coverage less predictable. It also encourages over-application because the finish looks weak at first. -
Using one applicator for everything
A tire-only applicator should stay tire-only. If you use the same pad on sidewalls, trim, and wheel-adjacent surfaces, contamination follows. -
Getting product on the tread
The sidewall is the target. Keep dressing off the tire footprint. -
Spraying product directly at the tire
That's one of the easiest ways to dirty the wheel face and force yourself into re-cleaning.
A few working-detailer tricks
Some sidewalls need two light coats because the rubber texture absorbs the first one unevenly. That's normal. What doesn't work is drowning the tire to compensate.
On low-profile tires, a smaller contoured applicator usually gives cleaner edge control near the wheel. On taller truck or off-road tires, a brush or a larger face can save time and reduce awkward hand positions. If the dressing is thin and runny, control your loading carefully or switch to a tool that handles lighter product better.
Final checklist before the car rolls
- Check for excess product with a quick microfiber wipe.
- Look at the bead area for stray dressing near the wheel edge.
- Inspect the tire in good light so patchy spots don't surprise you later.
- Give it curing time before driving off.
The best tire finish usually isn't the glossiest one. It's the one that still looks right after the first drive.
If you want the rest of your wash routine to be as controlled as your tire finish, SwiftJet is worth a look. Its foam gun is built for fast, consistent vehicle washing at home, which makes it easier to start every detailing job with a properly cleaned surface before you ever pick up a tire dressing applicator.
