
Understanding Water Spots: More Than Just Ugly Marks
Let’s be honest, water spots are more than just an eyesore on your car. They’re actually tiny chemical burns etching themselves into your paint. Think of it this way: when water evaporates on a hot car, the minerals left behind act like mini magnifying glasses, intensifying the sun’s rays and scorching your paint. We call this mineral etching, and it's a real pain because it gradually wears away your car’s protective clear coat.
This is why washing your car at midday on a blazing summer day is a terrible idea – you’re practically begging for these microscopic burns. Imagine parking under a sprinkler on a sunny afternoon. As those innocent-looking droplets dry, they turn into concentrated mineral deposits, slowly eating away at your paint. A rainstorm followed by intense sun? Same story.
And get this: even "pure" water can leave marks. It might sound crazy, but even purified water contains trace minerals. These minerals, when concentrated by evaporation, can still etch the surface. Now, I know what you're thinking: "My car gets wet all the time!" You're absolutely right. The issue is the severity of the etching.
Some water spots are just surface deposits – a light film you can easily wipe off. Others, however, dig deep, embedding themselves in the clear coat. These are the stubborn ones that need more attention. Knowing the difference is key to choosing the right removal method and preventing more damage.
Understanding the science behind water spots is essential. It’s not just vanity; it's about protecting your car’s value. It's no wonder the car care market is booming. Globally, it was valued at USD 4.4 billion in 2022 and is projected to hit USD 4.8 billion by 2027, with a CAGR of 1.9%. This growth shows how important water spot removers are within the car care industry, especially considering how much they can ruin a car's look. Discover more insights about the car care market. By learning how to effectively identify and remove these spots, you're not just keeping your car looking sharp; you're protecting a big investment.
Building Your Water Spot Fighting Arsenal
So, you're ready to declare war on those annoying water spots? Great! But trust me, walking into this battle unprepared is a recipe for disaster. Let’s ditch the generic stuff and talk about what really gets the job done.
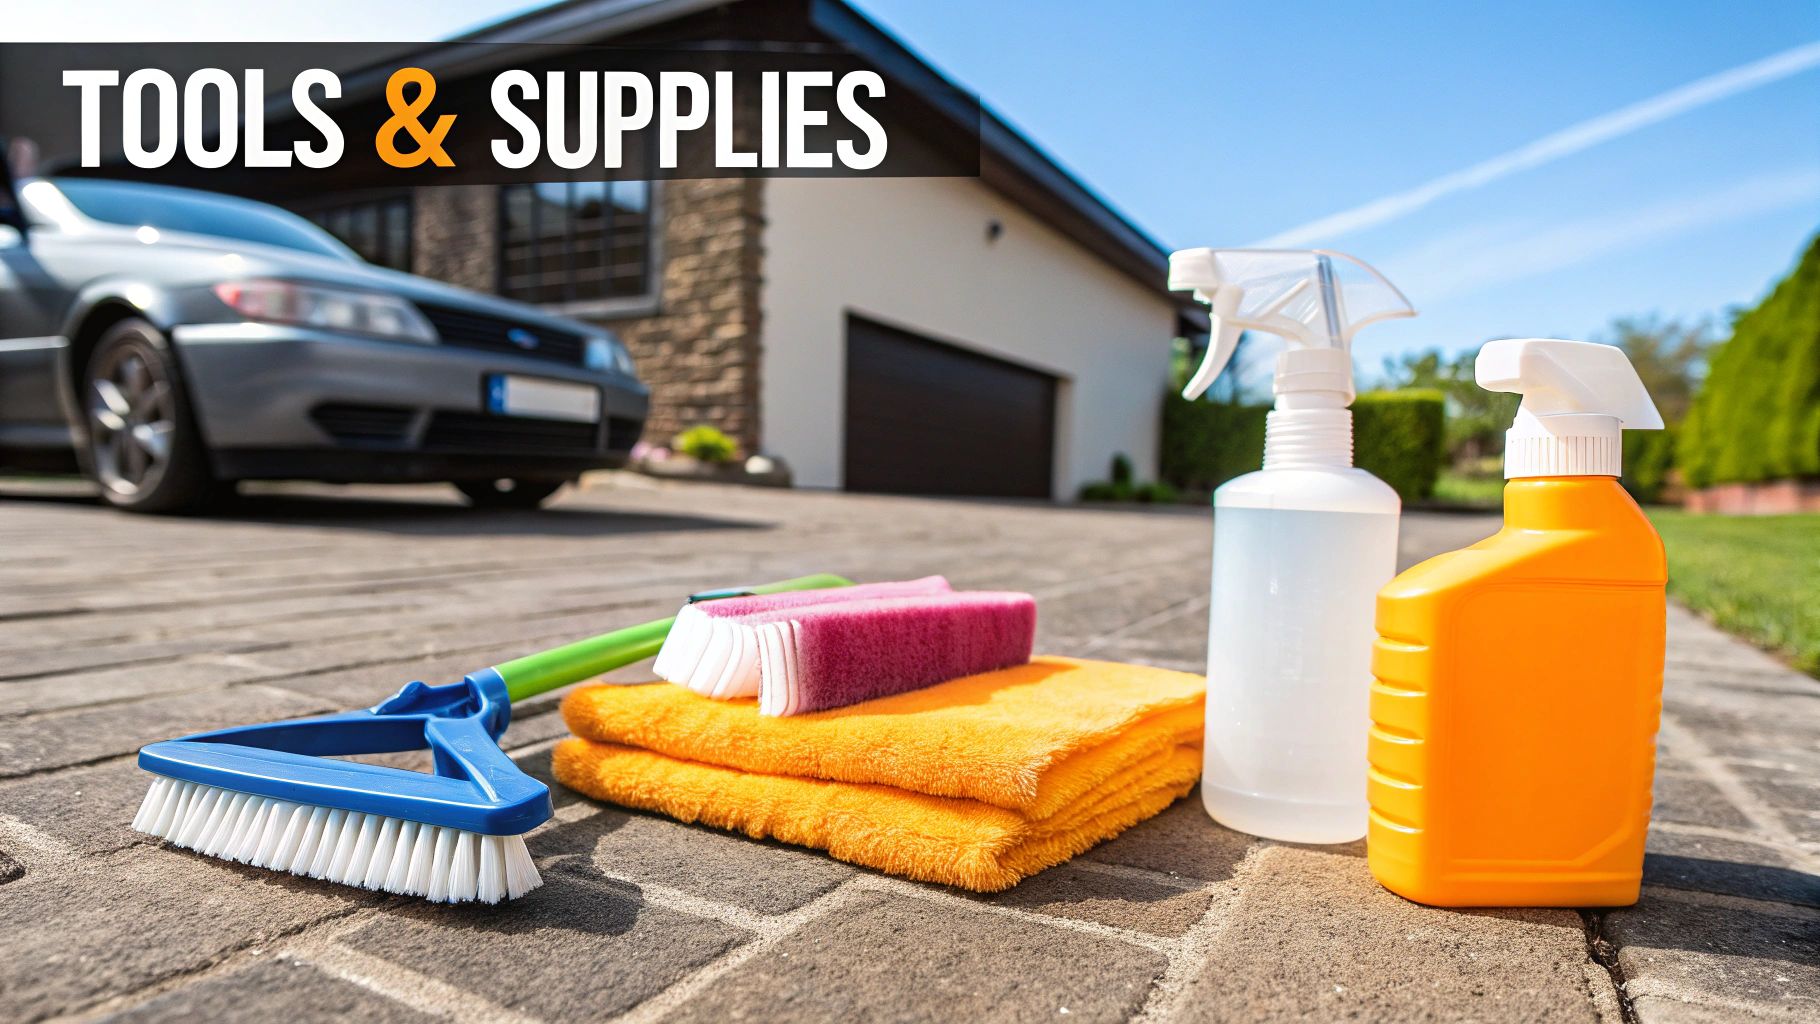
Essential Tools for Removing Water Spots From Car
First things first: microfiber towels. Seriously, I can’t emphasize this enough. Using cheap towels is like attacking your paint with tiny swords – you'll end up with more scratches and swirl marks than you started with. Invest in some high-quality microfiber; they're designed to gently lift and trap dirt, leaving your finish looking smooth and swirl-free.
Let’s move on to clay bars. These aren't your average modeling clay. A clay bar is like a magnet for embedded contaminants, pulling them out of your paint and leaving a perfectly clean surface. They're especially useful for tackling those stubborn water spots that just won't budge with washing alone. Do some research on the different grades available. A fine-grade clay bar is perfect for more delicate finishes, while a medium-grade can handle tougher jobs. From my experience, pairing a good clay bar with a quality lubricant is a total game-changer.
Finally, we have polishing compounds. Think of these as your heavy artillery in the fight against water spots, particularly when etching has set in. You'll find everything from gentle finishing polishes to more aggressive cutting compounds. Knowing which one to use is key – sometimes a budget-friendly option works wonders, while other times, that pricier compound is worth every penny.
Understanding Your Options: Polishers and Traditional Techniques
Now, let's talk about dual-action polishers (Porter Cable is a popular brand). These can seem intimidating, but they’re incredibly effective for removing stubborn water spots and restoring that showroom shine. But, I've spoken with detailers who swear by hand polishing. Why? Sometimes, that hands-on control and feel is preferred, especially on delicate areas. It’s really a matter of preference and what you're working with.
Before we dive into techniques, let's look at the tools you'll need. The table below breaks down the essentials, their effectiveness, cost, and what they're best suited for:
Water Spot Removal Tools Comparison
| Tool/Product | Effectiveness Level | Price Range | Best For | Pros | Cons |
|---|---|---|---|---|---|
| Microfiber Towels | Low-Medium | $5-$30 | Light Spots, Drying | Gentle, minimizes swirls, reusable | Not effective on etched spots |
| Clay Bar | Medium | $10-$40 | Embedded Contaminants | Removes stubborn dirt and debris | Requires lubricant, can be time-consuming |
| Polishing Compound | Medium-High | $15-$75 | Moderate to Severe Spots | Restores shine, removes etching | Can be abrasive if used incorrectly |
| Dual-Action Polisher | High | $100-$300+ | Severe Spots, Correction | Fast, efficient, even correction | Requires practice, can be expensive |
| Waterless Wash | Low | $10-$25 | Light Dust and Grime | Convenient, eco-friendly | Not effective on heavy dirt or water spots |
As you can see, each tool plays a vital role. Choosing the right one depends on the severity of your water spots and your comfort level.
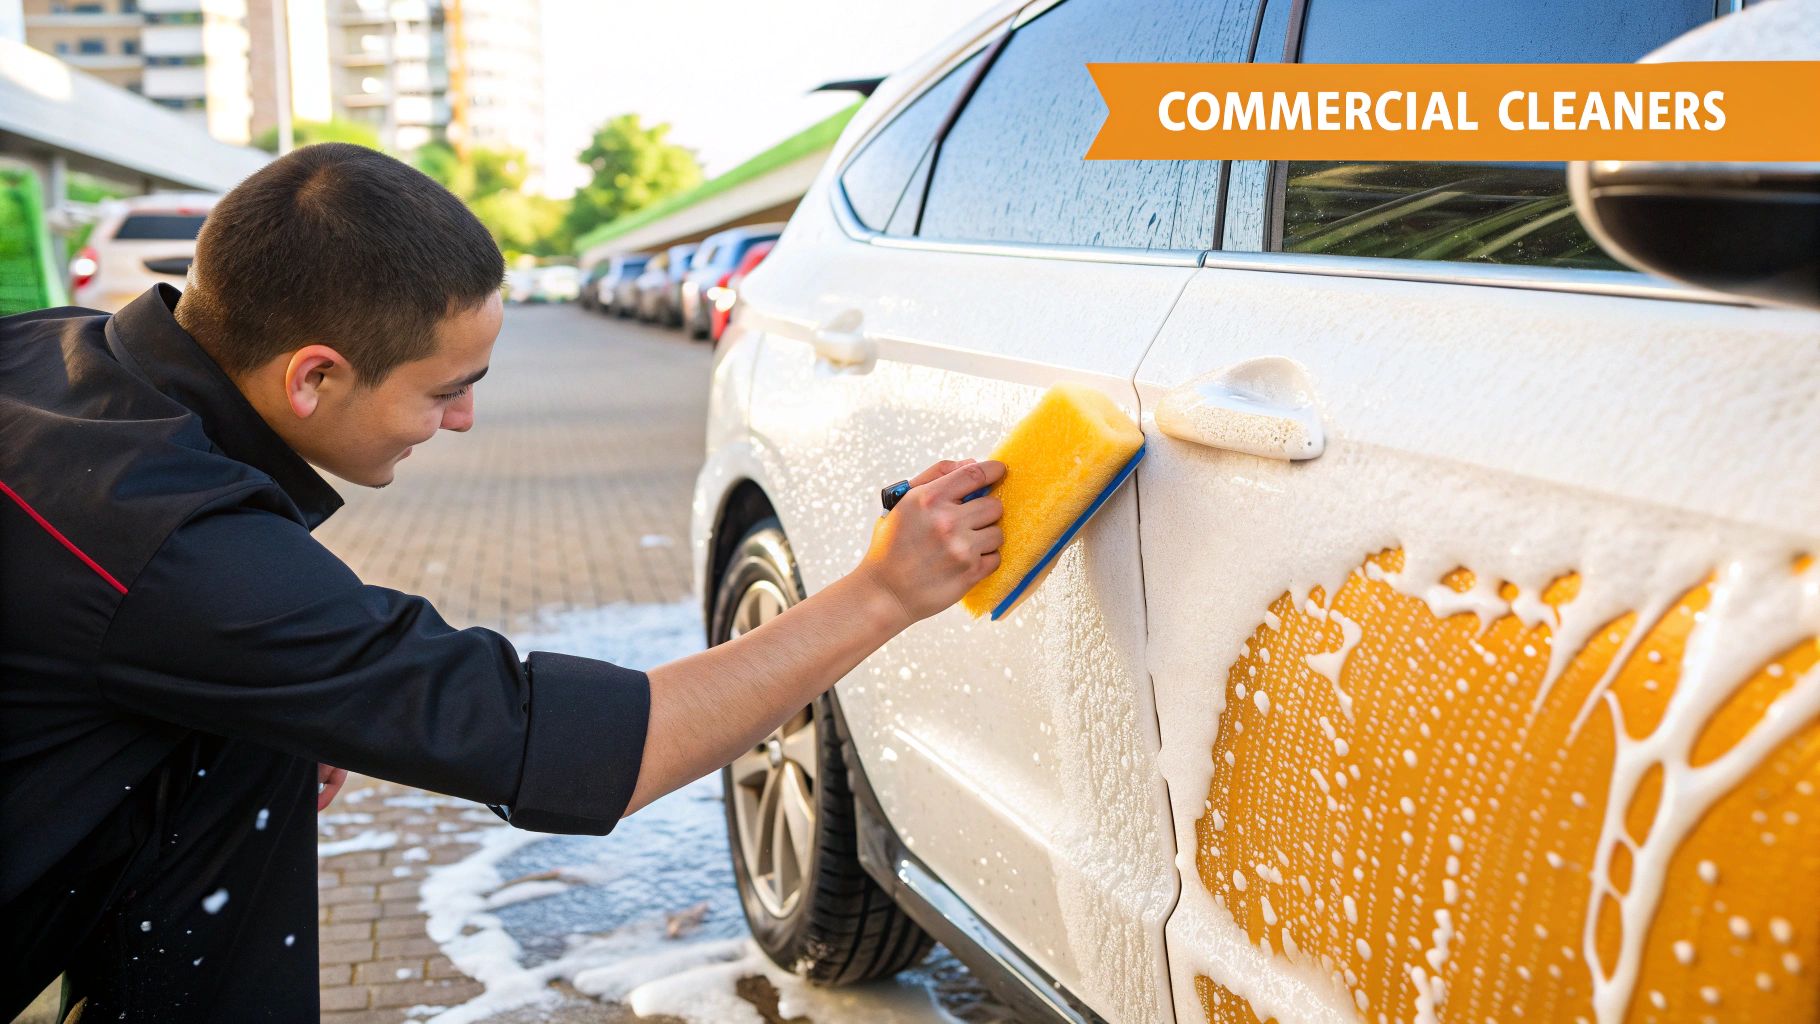
Product Performance: Separating Hype From Reality
I’ve chatted with countless detailing pros, and the message is clear: quality makes a difference. Spending a bit more upfront on good tools will save you a lot of frustration (and money) in the long run. For more car cleaning tips, check out our guide on the top waterless car wash kits for 2025. Removing water spots is a process, not a race. Equip yourself with the right tools, understand their uses, and you'll be well on your way to a flawless finish.
Reading Your Paint: The Assessment That Saves You Money
Before you grab any cleaning supplies, pause. Seriously, take a good look at what you’re dealing with. Just like a doctor diagnoses a patient, you need to understand the issue before you treat it. This is what separates the detailing pros from the amateurs – they know how to tackle water spots without making things worse. And guess what? You can learn these tricks too.
The Fingernail Test: Surface vs. Etching
Believe it or not, one of the most useful tools you have is your fingernail. The fingernail test is simple: lightly run your nail across a water spot. If you can feel it, but your nail doesn't catch, it's likely just surface contamination. That's the best-case scenario! It means the minerals haven't eaten into the clear coat, and they should come off fairly easily. But if your nail catches, it suggests etching. That means the minerals have started to damage your paint, and you'll need a more serious approach.
Lighting: Your Secret Weapon for Spot Detection
Lighting makes all the difference. Bright sunlight can actually hide how bad the water spots really are. Try checking your car in the shade, or under a cloudy sky. You might be surprised by what you see. Different angles and light conditions will reveal hidden spots and the true severity of the damage. From my own experience, a cloudy day or the soft light of early morning/late afternoon is ideal.
The Paper Towel Test: Avoiding Costly Mistakes
Here's a pro tip I picked up from a detailer with years of experience: the paper towel test. Before you start polishing or using strong chemicals, dampen a paper towel with your cleaning solution (like diluted vinegar) and put it on a small, hidden area with water spots. Wait a few minutes and then remove it. If the spots are lighter or gone, you’re good to go. If not, you might need something stronger. This simple test can save you time and prevent you from accidentally damaging your paint with the wrong method.
Real-World Scenarios: Applying Your Knowledge
Picture this: you park under a sprinkler and come back to a car covered in dried water spots. Using the fingernail test, you can quickly figure out if it’s just surface contamination or etching. Or maybe you've seen spots appear after a rainstorm. Ever wonder why some disappear in the sun while others stick around? It all comes down to the mineral content of the water and how long the spots have been there. By understanding this, you can choose the right way to remove them and prevent more from forming.
Sometimes, even after all your hard work, those stubborn spots just won't budge. This is where knowing your limits is important. Sometimes calling a professional is the smartest move; it can save you from permanently damaging your paint and facing a hefty repair bill. By learning these diagnostic techniques, you'll not only remove water spots effectively, but you’ll also save money by choosing the right products and avoiding unnecessary work.
Tackling Common Water Spots Like A Pro
So, you've checked out the water spots on your car. Now it’s time to get them off! The trick is to remove them effectively without messing up your paint. Pros always start with the least aggressive method and work their way up – it's better for your car's finish in the long run.
The Two-Bucket Wash: Your First Line of Defense
Before even thinking about tackling serious spots, a good wash is crucial. I always use the two-bucket method: one with soapy water, the other with clean rinse water. This keeps you from putting the minerals back onto your paint. It might seem small, but it's a game-changer.
Think about doing dishes – you wouldn’t use the same dirty water for everything, right? Your car is the same. After a long drive, especially on dusty roads, your car is coated in grime. One bucket means you’re just swirling that dirt around. The two-bucket method keeps things clean.
Clay Bar Treatment: The Magic Eraser
If a wash doesn't do the trick, it's clay bar time. This isn't Play-Doh – a clay bar is made to pull off stubborn stuff without scratching. You spray a clay lubricant on your car (this helps the bar glide), then gently rub the bar back and forth. You can actually feel it grabbing the dirt! Pretty satisfying. Fold the bar often to keep a clean surface. Rinse and dry when you’re done.
Polishing Compounds: For the Stubborn Spots
For those really dug-in water spots, especially the ones etched into the clear coat, you'll need polishing compounds. They’re like super-fine sandpaper, smoothing away a tiny bit of the clear coat to remove the etching.
There are two types: cutting compounds (stronger) and finishing polishes (gentler). Start with a finishing polish and a soft foam applicator pad. Use small circles, and don't push too hard! If that doesn't work, then try a cutting compound – but be careful, they're more powerful.
This whole process of car detailing is getting super popular. The market was valued at USD 41.40 billion in 2024 and is expected to reach USD 58.06 billion by 2030, with a 5.9% CAGR from 2025 to 2030. Discover more insights about the car detailing market. Shows you how much people care about their cars! And removing water spots is a big part of keeping your car’s value up.
Mastering the Art: Lubrication and Patience
Whether you’re using a clay bar or polishing, lubrication is key. This keeps your paint safe from scratches. Work in small areas, like 2 feet by 2 feet, so you can really focus. Check your progress often. Seeing improvement? Great! If not, try tweaking your technique or product.
Knowing when something's working (or not) is important. If the clay bar glides smoothly, you're good. If it sticks, add more lubricant. When polishing, if the spots are fading, you're on track. If they're not moving, you might need a stronger compound. With these tips and a little patience, you can conquer those water spots and keep your car looking its best.
Advanced Techniques For Stubborn Water Spot Etching
Let's face it, sometimes even after a good wash and clay bar, those stubborn water spots just won't go away. They're like tiny, annoying barnacles clinging to your car's finish. That's when it's time to step up your game with compound polishing. It's a bit more involved, so let's break down how to do it right without messing things up further.
Compound Polishing: A Deeper Dive
Polishing compounds are like super-fine sandpaper for your car's clear coat. You've got two main types: cutting compounds and finishing polishes. Cutting compounds are the heavy hitters, designed to level out more serious etching. Think of them as the rough grit sandpaper. Finishing polishes, on the other hand, are the smoothing agents, refining the paint and bringing back that showroom shine. They're like the fine grit sandpaper.
Picking the right compound is key. I usually start with a finishing polish and a soft foam applicator pad. A little dab'll do ya – apply a small amount to the pad and work it into the water spot area using small, overlapping circles. Easy does it! Don't put too much elbow grease into it; let the compound do the work. Check your progress often. If those spots are being stubborn, you might need a cutting compound. Just remember, cutting compounds remove a tiny layer of clear coat, so use them with caution.
Dual-Action Polishers: Power Tools For Pros (And Careful DIYers)
A dual-action polisher (Porter Cable 7424XP) can make polishing much faster and easier, but it's a bit like learning a new dance. These polishers move in two ways at once – oscillating and rotating – which reduces the chance of burning through the clear coat (unlike those old-school rotary polishers). But even with a dual-action polisher, bad technique can lead to swirl marks or a hazy finish.
Trust me, you'll want to practice on a less noticeable spot before tackling the main areas. Start slow, gradually increasing the speed as you get the hang of it. Keep the polisher moving to avoid hot spots. And always match your polishing pad to the compound you're using.
Heat and Chemicals: Last Resort Options
For those really stubborn spots, some detailers use heat to soften the mineral deposits before polishing. A heat gun or even a hairdryer on a low setting can help loosen things up. But be warned: this is playing with fire (literally!), so proceed with extreme caution to avoid damaging your paint.
Sometimes, chemicals are the only answer. There are specialized products that dissolve mineral deposits, but I consider these a last resort. Follow the instructions carefully, and always test on a hidden area first. These chemicals can be strong stuff.
Troubleshooting: Fixing Oops Moments
Even if you're careful, things can still happen. Polishing haze is a common issue, often from using too much compound or the wrong pad. Swirl marks can also show up if your polisher technique is off or you use abrasive towels. But don't panic! A finishing polish and a soft pad can usually fix minor haze and swirls.
Sometimes, we get a little overzealous. If you see your clear coat thinning or signs of burning, stop immediately. This is when calling a professional might be the best move. Be honest with yourself about your DIY skills. While many water spots can be tackled at home, severe etching often needs professional machine polishing. A good pro can save you time, money, and further damage.
Speaking of prevention, check out our article on How to Avoid Water Spots When Washing Your Car. Trust me, prevention is way easier than fixing etched-in water spots!
To help you choose the right approach, here’s a handy table:
Water Spot Severity and Treatment Methods A detailed breakdown of different water spot types, their characteristics, recommended treatment methods, and expected success rates
| Spot Type | Visual Characteristics | Recommended Method | Success Rate | Time Required | Skill Level |
|---|---|---|---|---|---|
| Light | Faint spots, easily visible in direct sunlight | Wash, dry, and wax | 95% | 30-60 minutes | Beginner |
| Moderate | Clearly visible spots, may feel slightly rough to the touch | Clay bar treatment, finishing polish | 85% | 1-2 hours | Intermediate |
| Heavy | Pronounced spots, feel rough, may appear slightly etched | Cutting compound, dual-action polisher | 70% | 2-4 hours | Advanced |
| Severe | Deep etching, visible even after polishing | Professional machine polishing, potential wet sanding | Varies | Varies | Professional |
This table gives you a general idea of what to expect, but every car is different. Remember to always start with the least aggressive method and work your way up. And when in doubt, don't hesitate to consult a professional!
Prevention Strategies That Actually Work
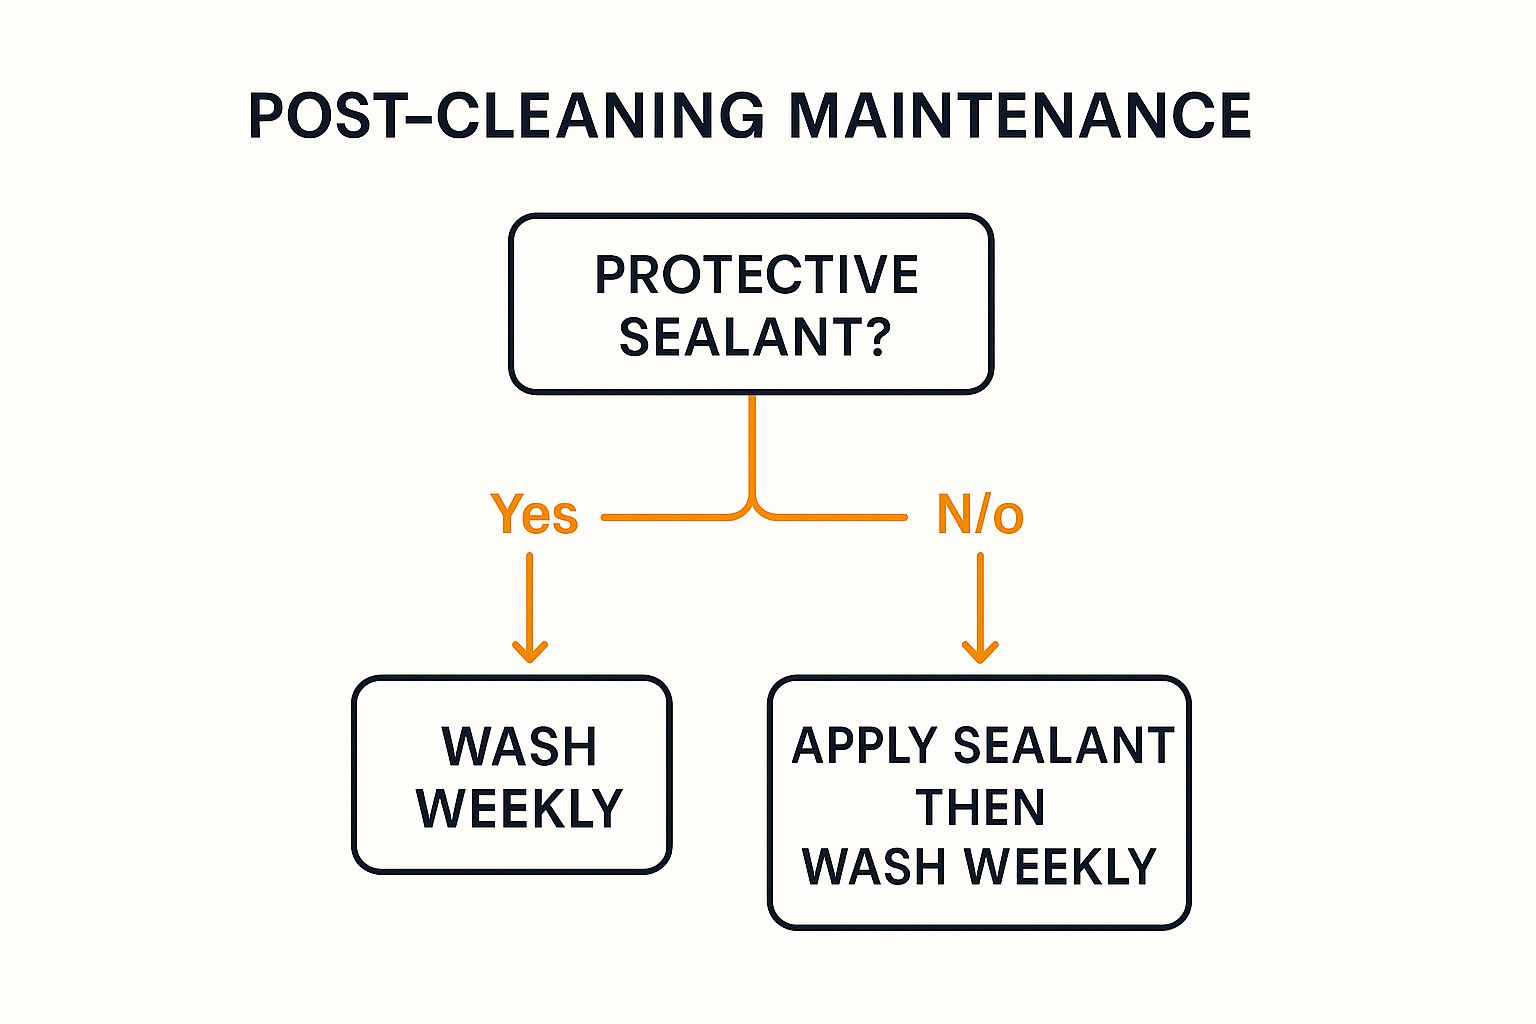
This infographic lays out a simple plan for keeping your car’s finish pristine after a wash. It really highlights how important sealant and regular washing are. Notice how, no matter what, regular washing is key. If you haven't got a sealant on your car yet, that's step one, then get into a weekly wash routine.
Preventing water spots isn’t some huge lifestyle change, it’s just about making a few smart tweaks. One of the easiest? Timing. Washing your car in direct sunlight practically guarantees water spots. The water evaporates too fast, leaving those mineral deposits behind. Try washing early morning or late afternoon, or even on a cloudy day. It’s all about working with the weather, not against it.
Also, think about your water. If you’re in a hard water area (high mineral content), you're more prone to water spots. You might be thinking about those fancy water filtration systems, and while they can definitely help, they can be a bit much. A simpler, more practical solution? Just dry your car really well. This is where a good microfiber drying towel, like the one that comes with the SwiftJet foam gun, is a game-changer. It soaks up the water quickly, so it doesn’t have a chance to evaporate and leave spots.
For even more tips, check out our guide on achieving a water spot-free car wash. Another great preventative measure is using protective coatings. These coatings, like waxes or sealants, act like a shield between your paint and the water. They make it much harder for spots to form. Think of it like rain beading up and rolling off a waxed jacket. This doesn’t mean you can skip drying altogether, but it definitely helps minimize the risk. And if spots do show up, they’ll be a breeze to remove.
Speaking of easy removal, let's talk maintenance schedules. How often you wash your car really depends on your lifestyle and where you live. Live near the coast or somewhere that uses a lot of road salt? You'll need to wash your car more often. Same goes if you park under trees or near sprinklers. Find a routine that works for you. Even a quick rinse and dry after a particularly dusty drive can make a huge difference.
It's interesting to note, the global car wash service market is absolutely booming. It was valued at USD 34.31 billion in 2024 and is projected to reach USD 49.06 billion by 2030, with a CAGR of 6.2% between 2025 and 2030. Professional car washes often include preventative treatments like waxing, which plays a big role in keeping a car looking good. Learn more about the car wash service market here. While professional washes are definitely convenient, knowing how to prevent water spots at home lets you keep your car looking its best between those visits.
In the end, preventing water spots isn't about finding one miracle cure; it's about combining a few smart practices. From timing your wash to knowing your water and using protective coatings, each step helps protect your car in the long run and keep it looking fantastic.
Your Complete Water Spot Success Plan
Let's talk water spots. I know, they’re the bane of every car owner's existence. But don't worry, getting that flawless finish back isn't as hard as you think. Forget the generic advice, this is about creating a plan that actually works for you.
Building Your Personalized Water Spot Attack Strategy
Think about your car's daily life. Parked outside all day? Live in an area with hard water? This is your starting point. It helps you figure out how often you need to wash and what preventative steps make the most sense. Consistent car maintenance is crucial for preventing water spots and keeping your vehicle in great condition. A handy car maintenance checklist can help you stay on top of things.
For instance, if you're constantly battling tree sap or sprinkler spray, a quick rinse and dry a few times a week can work wonders. If hard water is your nemesis, a quality drying towel – like the microfiber mitt you get with the SwiftJet foam gun – is essential.
Emergency Spot Removal: A Quick Guide
We’ve all been there. You parked under a sprinkler or just forgot to dry your car after a wash. Don’t stress! Here's my go-to quick fix for those unexpected water spots:
- Fresh Spots: Usually, a quick detailer spray and a microfiber towel does the trick.
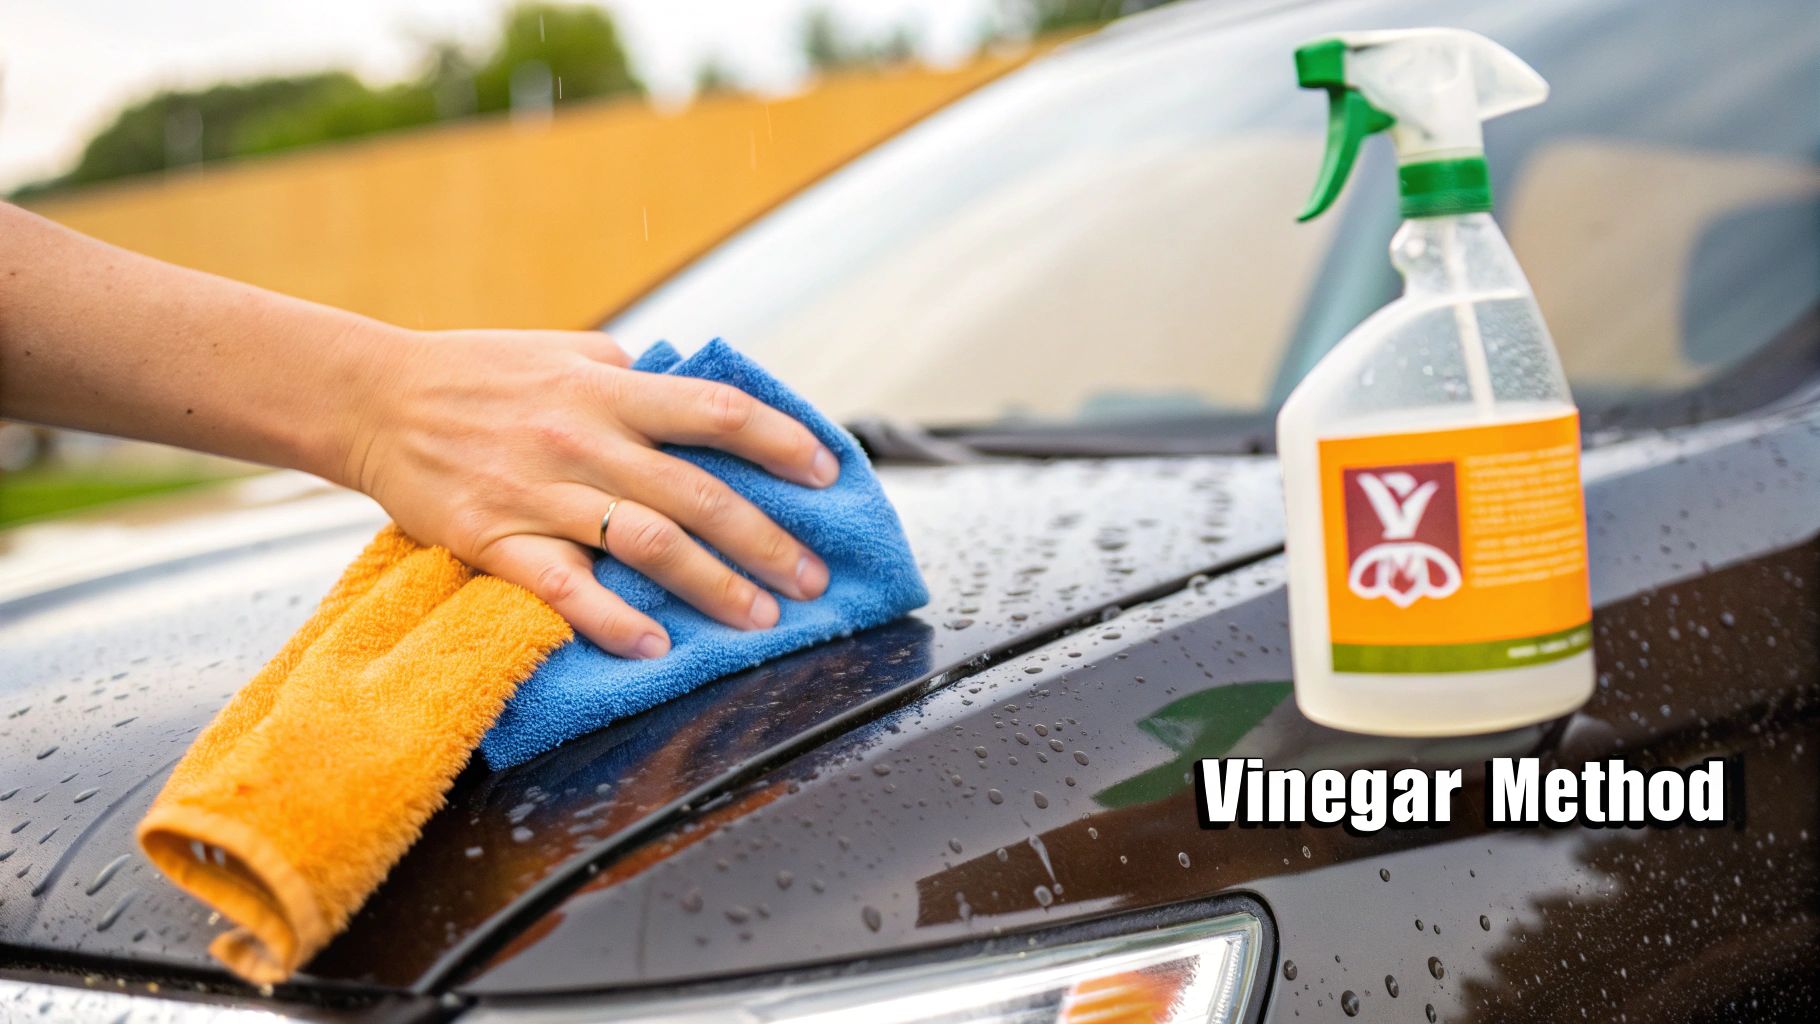
- Mild Spots: A 50/50 distilled white vinegar and water solution is surprisingly effective. Spray it on, wait a few minutes, and wipe clean.
- Stubborn Spots: Bring out the clay bar! Just make sure to use lots of lubricant.
Seasonal Adjustments: Adapting to the Elements
Your water spot strategy should change with the weather. During scorching summers, quick drying is even more important. Wash in the shade or during the cooler parts of the day to avoid those rapid evaporation spots. In winter, road salt and grime mix with water, making spots extra stubborn. Frequent washing and protective coatings become your best defense.
Maintaining Your Results: Long-Term Strategies
Removing water spots is great, but preventing them is even better. Protective coatings, like waxes or sealants, are game-changers. Think of them as a raincoat for your car. It doesn’t mean it won't get wet, but it helps keep the water from really soaking in. This makes a huge difference when it’s time to wipe those spots away. And of course, regular washing is the foundation of any good water spot prevention plan.
Recognizing When Professional Help is Needed
Sometimes, no matter how hard you try, those spots just won't budge. Maybe they've etched into the clear coat, or perhaps you’re not comfortable with more advanced techniques like polishing. It's perfectly okay to call in the pros! A professional detailer can work wonders and get your car's finish looking its absolute best.
Remember, dealing with water spots is about consistency and using the right techniques. Follow these strategies, and you'll not only conquer existing spots but also keep them from coming back.
Ready to ditch the water spots and experience the power of the SwiftJet foam gun? Grab yours at https://swiftjetusa.com and see the difference a truly powerful clean can make!