
Tackling oxidation on your car's paint isn't just about making it look good again; it's about physically removing the damaged, chalky top layer of the clear coat. The idea is to use a cutting compound and polisher to carefully abrade away that faded surface, revealing the fresh, vibrant paint underneath. Once you've restored the original depth and gloss, the job isn't done. You absolutely must apply a quality wax or sealant to protect your hard work from future UV damage.
What Is Car Oxidation and Why Is It Happening?

If your car’s once-brilliant finish now looks dull, faded, or has a chalky film, you're looking at paint oxidation. It helps to think of your car’s paint like skin—it’s made of protective layers. The outermost layer, the clear coat, is its shield against the world. Oxidation is simply the chemical breakdown of that clear coat from constant exposure to oxygen and the sun's ultraviolet (UV) light.
Over time, that relentless exposure literally bakes the oils and resins out of the paint, causing them to degrade. The clear coat essentially gets a "sunburn," losing its transparency and becoming rough. This new porous surface can't reflect light evenly anymore, which is what gives it that classic washed-out, lifeless appearance.
The Primary Culprits Behind Faded Paint
While UV radiation is public enemy number one, a few other environmental factors can speed up the process. Knowing what you're up against helps you not only fix the problem but also keep it from coming back.
The main contributors to paint oxidation are:
- UV Rays: The sun is just brutal. It slowly shatters the molecular bonds in your car's clear coat, weakening its ability to protect the color underneath. This is why you almost always see oxidation start on the flat, horizontal surfaces like the roof, hood, and trunk—they get the most direct sunlight.
- Harsh Weather: Acid rain, road salt in the winter, and even extreme heat-and-cold cycles all chip away at your car's protective finish.
- Environmental Pollutants: Things like industrial fallout, bird droppings, and tree sap are often acidic. If left to sit, they can etch right into the clear coat, creating weak spots.
The fight against this kind of damage has created a massive industry. The global market for antirusting agents, valued at USD 4.77 billion, is expected to nearly double to USD 8.98 billion by 2035. This just goes to show how seriously car owners and professionals are taking the prevention and treatment of oxidation. You can find more insights about the antirusting market on Spherical Insights.
Spotting Early and Advanced Stages
Knowing the difference between mild oxidation and total clear coat failure is critical. If you catch it early, the fix is a thousand times easier.
Pro Tip: Here’s a quick test. Grab a clean microfiber towel and a bit of car polish. Find a small, out-of-the-way spot and gently rub the area. If you see the original color transfer to the towel and the spot on the car looks shiny again, you’re dealing with correctable oxidation. If nothing happens or you see the clear layer flaking, the clear coat has failed.
Mild oxidation just looks like a slight dullness or a loss of that deep, wet-look gloss. The paint might also feel a little rough to the touch. Severe oxidation, on the other hand, leaves a chalky white residue you can wipe off with your finger. If it gets bad enough, you'll see the clear coat start to peel and flake away. At that point, no amount of polishing will save it; a trip to the body shop for a repaint is your only real solution.
Gathering Your Oxidation Removal Toolkit
Jumping into a paint correction project without the right gear is a recipe for frustration. You simply won't get the results you're after. Having the right tools on hand not only makes removing oxidation from your car a smoother process but also ensures you do the job right—safely and effectively.
Think of this as setting up your workstation. You’ll need more than just a bottle of polish. A proper restoration requires specific tools for each stage, from the deep clean all the way to the final protective layer.
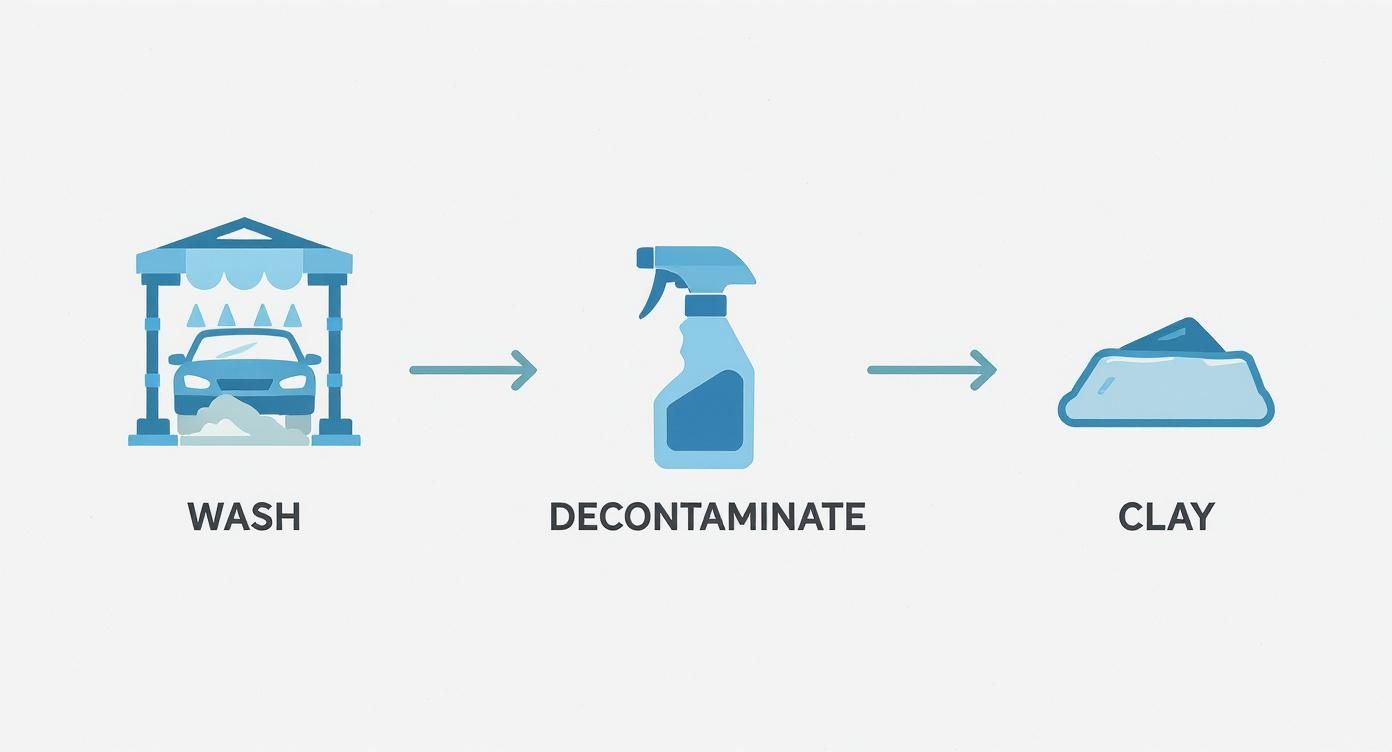
The Essentials for Decontamination
Before you even touch a polisher, the surface has to be surgically clean. Any leftover dirt, grime, or industrial fallout will act like sandpaper under your polishing pad, creating a bigger mess of scratches and swirls. This first step isn't optional; it's the foundation for a great finish.
Your decontamination arsenal should include:
- A Good Car Wash Soap: Stick with a pH-neutral soap. The goal is to lift away surface dirt without being so harsh that it strips any existing wax or sealant.
- Two Wash Buckets with Grit Guards: This is a non-negotiable pro technique. One bucket is for your soapy water, the other for plain rinse water. Rinsing your wash mitt in the clean water bucket before dunking it back in the soap prevents you from dragging abrasive grit right back onto your paint.
- Clay Bar or Clay Mitt: This is your secret weapon for what soap leaves behind. Run your hand over the paint after washing it. Feel that gritty texture? That’s embedded brake dust, rail dust, and other contaminants that a normal wash won't touch. A clay bar safely lifts and pulls those particles out, leaving the surface perfectly smooth and ready for correction.
Compounding and Polishing Supplies
Alright, this is where the real magic happens. The most important thing to understand here is that compounding and polishing are two distinct steps. A compound is aggressive; its job is to cut away the dead, oxidized layer of paint. A polish is much finer, designed to refine the surface afterward, removing any light haze from the compounding and restoring that deep gloss.
Having the right products is a huge part of the battle. The global rust remover market, which includes the kind of specialized formulas that tackle oxidation, is projected to grow to over USD 891 million by 2035. This just goes to show how common this problem is—and how many effective solutions are out there for car owners. You can see more data about the growing rust remover market on Future Market Insights.
For this critical stage, you’ll need:
- Cutting Compound: Look for a medium-to-heavy cut compound. These are specifically designed to tackle oxidation, heavy swirl marks, and even some deeper scratches.
- Finishing Polish: After compounding, you'll use this much less abrasive polish to clean up the finish, remove any haziness, and bring out that incredible, reflective shine.
- Applicator Pads: Grab separate microfiber or foam applicator pads for your compound and polish. You never want to cross-contaminate them.
- High-Quality Microfiber Towels: You can never have enough of these. Get a stack of plush, clean towels ready for wiping away compound and polish residue without scratching your freshly corrected paint.
For a complete rundown of everything you might need for this and other projects, our comprehensive car detailing supplies list covers all the bases.
Prepping Your Car for a Perfect Finish
If you jump straight to polishing an oxidized car, you’re basically just grinding dirt and grime deeper into the paint. It's like trying to paint a wall without cleaning it first—a recipe for a mess. Any professional detailer will tell you that a flawless, glossy finish isn't just about the polishing; it's born from meticulous preparation. Before you even think about how to remove oxidation from car paint, you need a perfectly clean canvas to work with.
This isn't just a quick rinse. We're talking about a deep, multi-stage cleaning that gets rid of everything from loose dirt to bonded industrial fallout. If you skip these crucial steps, your polishing pad will just pick up all those abrasive bits and drag them across the paint. You'll end up with more swirls and scratches than you started with.
The Foundation: A Proper Two-Bucket Wash
Your first line of defense is a thorough, safe hand wash. This is where the two-bucket method is absolutely non-negotiable. One bucket holds your pH-neutral car soap solution, and the other is just for rinsing. Make sure both have a Grit Guard at the bottom—a simple plastic insert that traps dirt and stops it from getting swirled back into your wash mitt.
Here’s why it's so important: after washing just one panel, your wash mitt is loaded with abrasive particles. If you dunk it straight back into the soap, you've contaminated the whole bucket. Instead, you rinse the mitt in the clean water bucket first, scrubbing it against the Grit Guard to knock all the dirt loose. Then you reload it with fresh suds. It's a simple technique that dramatically cuts down the risk of inflicting new scratches.
For an even safer wash, a foam gun like the SwiftJet can be a real game-changer. It blankets the vehicle in a thick layer of foam that clings to the surface, breaking down and lifting dirt away before you even have to touch it. This pre-soak means there's less grit to manually scrub off, making the whole process much gentler on your car's delicate clear coat.
Chemical Decontamination: Removing What You Can't See
Even after a good wash, your car might look clean, but it's still covered in invisible gunk. The most common culprits are tiny iron particles from brake dust and industrial fallout. These little specks embed themselves in the clear coat, start to rust, and create those tiny orange dots that give oxidation a foothold.
This is where an iron remover spray is your best friend. Just spray it onto the cool, dry paint and give it a few minutes. The chemical formula reacts with any iron particles, dissolving them into a liquid that usually turns a dramatic purple or red.
It's incredibly satisfying to watch the paint "bleed" like this. It’s visual proof that you're getting rid of harmful contaminants that a normal wash could never touch. Once you rinse it all away, you're left with a much cleaner surface, ready for the next step.
Mechanical Decontamination: The Clay Bar Treatment
Even after a wash and an iron treatment, run your hand over the paint. It'll probably still feel a little rough. That gritty texture is from leftover bonded contaminants like tree sap, road tar, and paint overspray. The final decontamination step is to physically pull them off with a clay bar or a clay mitt.
Think of a clay bar as a magnet for everything stuck to your paint. You’ll need a dedicated clay lubricant (or a good quick detailer spray) to create a slick surface for the clay to glide on.
- Start by misting a small, 2x2 foot section of the car with your lubricant.
- Gently glide the flattened clay bar back and forth over the area with light pressure. You'll actually feel and hear it picking up contaminants.
- Keep going until it glides smoothly and silently across the surface.
- Wipe the section dry with a clean microfiber towel and feel the difference—it should be as smooth as glass.
- Remember to fold the clay bar often to expose a clean surface. The last thing you want is to drag the grit you just removed across another part of the paint.
Getting the surface this clean is essential for a professional result. It’s the exact same principle high-end dealerships use to create that sparkling showroom effect that makes brand-new cars look so irresistible.
This deep-cleaning process doesn't just apply to paint. If you're tackling faded plastic lenses, for example, proper prep is just as critical. Our detailed guide on how to clean car headlights walks through how crucial that initial cleaning is for restoring clarity.
Once your entire vehicle is washed, decontaminated, and fully dried, you are finally ready to begin the paint correction process.
Mastering the Art of Compounding and Polishing
With the surface of your car perfectly clean, you're ready for the real magic: paint correction. This is where we physically slice away that dull, chalky layer of oxidation to bring back the deep, rich color hiding just beneath the surface. It's the most rewarding part of the whole process.
Whether you're working by hand or with a machine, the idea is the same. We're using abrasives to gently level the paint. Think of it like sanding a piece of furniture—you start with a more aggressive grit to remove the old, damaged finish and then switch to finer grits to make it perfectly smooth. Compounding is our heavy-lifter, and polishing is the final, refining touch.
The prep work you just did—washing, decontaminating, and claying—is the foundation for a great result. You can't skip these steps.
Each of those stages is designed to pull a different kind of gunk off your paint, giving you a truly bare surface to work on.
The Hand Polishing Method
Don't have a fancy machine? No problem. Working by hand is a fantastic way to remove oxidation from car paint. It takes a bit more elbow grease and patience, but the connection you feel with your car is second to none, and the results can be stunning. The secret here is consistency.
You’re trying to fully break down the tiny abrasives in the compound. They’re designed to cut away the dead paint, but they need steady, even pressure to work their magic.
Here's how I approach it:
- Divide and Conquer: Never try to tackle an entire panel at once. Break it down into small, manageable 2x2 foot sections. Focus on perfecting one small area before moving on.
- A Little Goes a Long Way: Squeeze just a few pea-sized drops of cutting compound onto a microfiber or foam applicator pad.
- Work it In: Using firm and consistent pressure, work the compound into the paint. You can use overlapping circles or a cross-hatch pattern (up-and-down, then side-to-side).
- Watch for the Change: As you work the product, you’ll see it go from a hazy, milky film to a thin, clear layer. That's your cue! It means the abrasives have done their job.
- Wipe and Inspect: Grab a clean, plush microfiber towel and wipe away the residue. Get a good light on it. That chalky oxidation should be gone, leaving behind a much deeper color that might look slightly hazy. That's what polish is for.
Repeat this across the entire car, panel by panel. Once you're done compounding, switch to a fresh, clean applicator pad and a finishing polish to bring out that incredible gloss and clarity.
Using a Dual-Action Polisher
If you're dealing with anything more than light oxidation, a dual-action (DA) polisher is your best friend. These machines are incredibly safe, even for total beginners. The pad spins and oscillates in a random pattern, which keeps heat from building up in one spot and practically eliminates the risk of burning through your paint.
Good technique is what separates a pro finish from a mess of holograms and buffer trails.
Expert Tip: My number one rule is to always start with the least aggressive combo that gets the job done. Before going all-in, find a small, hidden spot and test a finishing polish with a soft pad. If that's not enough to cut the oxidation, then you can step up to a more aggressive compound and cutting pad.
Here's how to get set up for a flawless result:
- Choose Your Weapon: Grab a medium-cutting foam or microfiber pad and pair it with your compound. Before you start, "prime" the pad by dabbing 3-4 small dots of product around the edge.
- Get Your Speed Right: Start the polisher on a low speed (2-3) and spread the product over your 2x2 foot section. Once it's spread evenly, crank the speed up to a medium setting (4-5) to start the actual correction work.
- Stay Flat, Stay Moving: This is critical. Always keep the pad flat against the paint surface, and always keep the machine moving. Let the tool do the work; apply just enough downward pressure to keep the pad stable.
- The Cross-Hatch: Work in a systematic pattern. Make 2-3 slow, overlapping passes from left to right, then follow up with 2-3 passes from top to bottom. This ensures even coverage.
- Check Your Work: Turn the machine off before lifting it from the paint. Wipe the residue away and inspect the area closely. The oxidation should be gone. If you see a few stubborn spots, it's okay to make another pass.
After you've compounded the entire vehicle, swap out your cutting pad for a soft finishing pad and your compound for a fine polish. Repeat the same process, maybe on a slightly faster speed setting, to refine the paint and bring out a dripping-wet shine. For a deeper dive into machine technique, our guide on how to polish car paint has even more tips.
Restoring Cloudy Headlights
Guess what? The same exact logic for removing oxidation from paint applies to your foggy headlights. Most modern headlights are polycarbonate plastic, and they come from the factory with a UV-protective coating. Over time, that coating breaks down, which is what causes that ugly yellow, cloudy look. This is more than just an eyesore—it’s a serious safety issue that kills your nighttime visibility.
If your headlights are just a little hazy, a quick pass with compound and polish might be all they need. But for heavily yellowed and pitted lenses, you'll need to get a bit more aggressive and start with wet sanding to strip off the failed factory coating first.
A full headlight restoration usually looks like this:
- Sanding (for heavy oxidation): Start with a lower grit sandpaper like 800-grit, keeping the lens wet. Work your way up to finer grits, like 1500-grit and then 3000-grit, to remove the sanding marks from the previous step.
- Compounding: Using a small foam pad (by hand or on a drill), use a cutting compound to buff out the fine 3000-grit sanding scratches.
- Polishing: Follow up with a finishing polish on a clean pad to restore perfect, crystal clarity to the plastic.
- Protecting: Do not skip this step. You must apply a new layer of UV-protective sealant specifically made for headlights. If you don't, all your hard work will be undone, and they'll be yellow again in a few short months.
Bringing headlights back to life is one of the most satisfying DIY jobs out there. It makes a massive difference in both the look and the safety of your vehicle.
Locking In Your Hard Work with Lasting Protection

You’ve spent hours compounding and polishing, and the results are stunning. The color is rich, the reflections are crisp, and that chalky, faded look is finally gone. But don't pop the metaphorical champagne just yet. If you stop now, all that effort could be wasted in a few short months.
Think of your freshly corrected paint as a clean slate—it’s now completely exposed to the sun and elements that caused the oxidation in the first place. Applying a layer of protection isn't just a good idea; it's the critical final step to remove oxidation from car paint for good. This protective barrier acts as a sacrificial shield, taking the hit from UV rays, acid rain, and road grime so your clear coat doesn’t have to.
Choosing Your Shield: Waxes, Sealants, and Coatings
When it comes to protection, you have three main options. Each one offers a different balance of durability, appearance, and application effort. There’s no single "best" choice—it all comes down to what's right for your car, your budget, and how often you want to be out in the driveway.
- Carnauba Wax: This is the old-school classic, beloved by car show enthusiasts for the warm, deep glow it gives the paint. It's generally the easiest to apply but offers the shortest lifespan, usually lasting just 1-3 months. It’s a great pick if you genuinely enjoy the process of waxing your car regularly.
- Synthetic Paint Sealant: Think of this as the modern evolution of wax. These are engineered polymers that create a slick, durable bond with your paint. They deliver a sharp, glassy shine and last much longer, typically 4-6 months or more.
- Ceramic Coating: This is the top tier of modern paint protection. Ceramic coatings are liquid polymers that cure into a hard, glass-like shell over your paintwork. They provide incredible resistance to chemicals, UV damage, and light scratches. Their durability is measured in years, not months, but the application process is much more involved.
Pro Tips for a Flawless Application
Just picking the right product isn't enough; how you apply it makes all the difference. A rushed job can leave you with high spots, streaks, and uneven coverage, which not only looks bad but also compromises the protection.
Key Insight: Before you apply any protectant, do a final wipe-down with an isopropyl alcohol (IPA) solution. A mix of 15-25% IPA and distilled water in a spray bottle is perfect. Just lightly mist a panel and gently wipe with a clean microfiber towel. This step is essential because it removes any leftover polishing oils, allowing the sealant or coating to bond directly and securely to the paint.
With your surface perfectly prepped, here are a few rules of thumb for a perfect finish:
- Work in the Shade: Never apply wax, sealant, or coatings in direct sunlight or to a hot panel. Heat messes with the curing process and can make the product incredibly difficult to buff off without streaking.
- Thin is In: The most common mistake is slathering on way too much product. A little goes a long way. You want a thin, even layer—if you can barely see it on the surface, you’re probably doing it right.
- Follow Cure Times: Every product has a specific cure or "hazing" time before you buff it off. Read the instructions. Wiping it off too soon or leaving it on too long is a surefire way to get a blotchy, frustrating result.
Protecting a car from environmental damage is a serious business. The global market for automotive rust protection systems—which addresses the same core problem of degradation—was valued at USD 1.99 billion and is expected to hit USD 3.39 billion by 2033. This growth highlights how seriously owners are taking long-term vehicle care. You can find more details on the rise of automotive rust protection on Business Research Insights. By choosing and applying the right protection, you're making a smart investment in your car's health and value.
Got Questions About Car Oxidation? You're Not Alone.
Even after laying out the whole process, you're bound to have a few questions swirling around. Taking on a project like this for the first time always does. Let's tackle some of the most common hang-ups I hear from people when they decide to remove oxidation from car paint, so you can move forward with confidence.
Can I Just Use Polish for Heavy Oxidation?
I get this one a lot. It's tempting to grab a bottle of polish and hope for the best, but for truly oxidized paint, a polish just doesn't have the necessary bite. A finishing polish is all about refinement—its tiny abrasives are designed to smooth out the surface and boost gloss, not perform major surgery.
To cut through that dead, chalky layer, you need the right tool for the job: a cutting compound. Think of compound as the workhorse and polish as the show horse. The compound's more aggressive nature is what actually removes the damaged paint, clearing the way for the polish to do its job. Trying to use only polish on a heavily oxidized panel is like trying to chop down a tree with a butter knife—you'll be there all day and get nowhere.
How Do I Know if My Clear Coat Has Failed?
This is probably the most important question to answer before you even touch the paint. Knowing the difference between fixable oxidation and a lost cause is crucial. Oxidation is chalky and faded, but the surface is still intact. Clear coat failure is a whole different beast.
The dead giveaway for clear coat failure is peeling. You'll see the top layer of paint flaking off, sometimes in big, ugly sheets, like a nasty sunburn. The surface will be rough and uneven, and you can literally feel the edge where the clear coat has lifted off the color underneath.
If you see this kind of peeling or flaking, stop. No amount of compound or polish in the world can bring it back. The clear coat is gone. At this point, the only real fix is a trip to a body shop for a full sand and repaint.
How Often Should I Protect My Car to Prevent Oxidation?
An ounce of prevention is worth a pound of cure, right? How often you need to re-apply protection really boils down to two things: the product you’re using and the environment your car lives in.
Here's a quick rundown of what you can expect:
- Traditional Carnauba Wax: Delivers that deep, warm glow but is the least durable. Expect it to last 1 to 3 months.
- Synthetic Paint Sealant: These offer a sharper, glass-like shine and much better durability, typically holding up for 4 to 6 months.
- Ceramic Coating: This is the top dog for long-term defense. A properly applied ceramic coating can shield your paint for 2 to 5 years with the right maintenance.
Keep in mind, if your car bakes in the sun all day, you'll be on the lower end of those estimates. A simple habit is to reapply your wax or sealant with the changing of the seasons.
Is a Machine Polisher Safe for a Beginner?
Absolutely, as long as you get the right kind. A dual-action (DA) polisher (sometimes called a random orbital) is one of the safest power tools you can put on your paint. Forget the horror stories you've heard about rotary polishers—those are for seasoned pros and can burn through paint in seconds.
A DA polisher's head both spins and oscillates in a random pattern. This unique movement keeps heat from building up in one spot, which makes it nearly impossible to damage your paint. Just start on a low speed, use a light-duty pad, and always keep the machine moving. If you're nervous, grab an old hood from a junkyard or find an inconspicuous spot on your car (like the lower part of a door) to practice on. A few minutes of practice is a huge confidence booster.
Want to make your prep work a breeze? The SwiftJet Car Wash Foam Gun turns your garden hose into a foam cannon, blanketing your car in thick suds that lift away dirt and grime. It’s the perfect way to get a safer, scratch-free wash before you start polishing. See how SwiftJet can up your detailing game.