
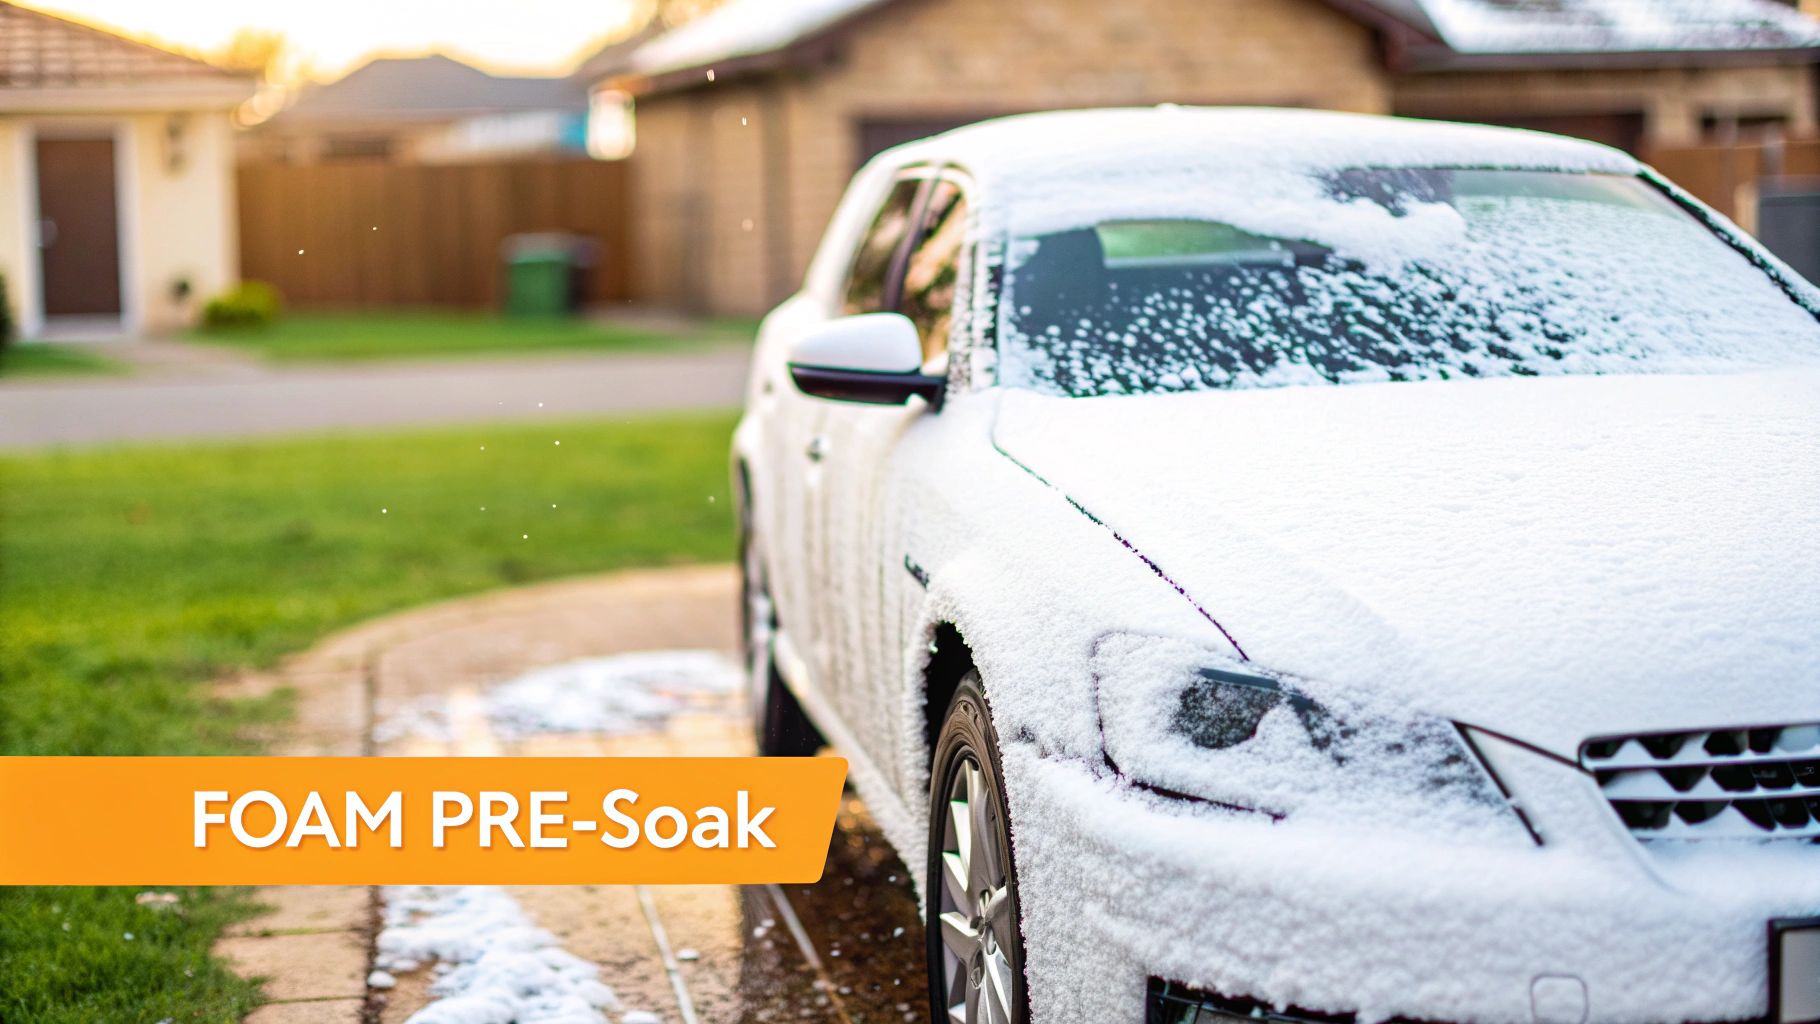
A pressure washer foamer, which you'll often hear called a foam cannon, is a purpose-built attachment for your pressure washer. Its one job is to take car wash soap and a high-pressure water stream and whip them into an incredibly thick, clinging foam. Think of it as the ultimate pre-soak tool, blanketing your vehicle in rich suds that do most of the heavy lifting before you ever have to touch the paint.
What Is a Pressure Washer Foamer and Why It Matters
Imagine trying to wipe a dusty table with a dry paper towel. You’re not really cleaning it; you're just pushing the dust around and likely scratching the surface. Now, what if you sprayed that same table with a cleaner that lifted the dust off the surface, letting you wipe it away cleanly? That’s the exact principle a pressure washer foamer applies to your car.
This isn't just about creating an impressive, Instagram-worthy mountain of suds. It’s about a smarter, safer way to wash your vehicle. The thick foam clings to vertical surfaces, giving the cleaning agents in your soap crucial "dwell time" to get to work.
This extended contact time allows the foam to gently break down, lift, and encapsulate abrasive particles like dirt, road grime, and salt. When you rinse the foam away, you're also rinsing away the majority of the dirt that causes scratches.
This pre-wash stage is the professional detailer's secret weapon for preventing the fine swirl marks and micro-scratches that are the all-too-common result of old-school bucket-and-sponge washing.
The Science of a Scratch-Free Wash
Every single time you drag a gritty wash mitt across your car's paint, you're running the risk of creating microscopic scratches. They might be invisible at first, but over time, these tiny imperfections accumulate, dulling your car’s finish and robbing it of its shine. A pressure washer foamer drastically reduces this risk by minimizing the amount of manual scrubbing you need to do.
It also provides incredible lubrication for the surfaces you do need to clean with a mitt. It's a true game-changer for both weekend warriors and professional detailers.
- Lifts Heavy Contaminants: The foam gets into the nooks and crannies, loosening the tough grime that would otherwise take some serious elbow grease.
- Reduces Surface Friction: When you finally do a contact wash, your mitt glides over a highly lubricated layer of foam, not a gritty, scratch-prone surface.
- Improves Efficiency: You’ll get the job done faster because the foam does a huge chunk of the cleaning work for you.
- Enhances Safety: By removing the abrasive dirt before you touch the car, you're preserving your vehicle's clear coat and protecting its value.
A Growing Trend in Vehicle Care
The desire to get professional-level results at home has sent the pressure washer market soaring. It turns out a lot of people are chasing that showroom shine! According to a report from Straits Research, the global pressure washer market, which includes accessories like the pressure washer foamer, reached USD 3.28 billion in 2024 and is projected to hit USD 4.73 billion by 2033. This growth is heavily driven by the vehicle washing industry, where foamers are now seen as essential for cleaning cars, trucks, and RVs safely and effectively.
Ultimately, using a foamer is more than just another step in a car wash. It's a fundamental shift in how you care for your vehicle—elevating your routine from a simple chore to a protective maintenance practice that keeps your car looking its best for years.
How a Foamer Turns Soap Into Thick Suds

Ever wondered how that little attachment transforms a splash of soap and water into a thick, shaving-cream-like blanket of foam? It's not magic, but it is some seriously clever physics happening in the blink of an eye.
At the core of every pressure washer foamer is a scientific principle called the Venturi effect. If you’ve ever blown over the top of a straw in a drink and watched the liquid rise, you've seen this in action. The fast-moving air you create lowers the pressure, pulling the liquid up. A foam cannon does the exact same thing, just with a lot more force.
Water from your pressure washer shoots through a very narrow opening—an orifice—inside the foamer. Squeezing the water through this tight spot makes it speed up dramatically, creating a vacuum that sucks the soap solution right out of the canister and injects it into the high-speed water stream.
The Secret Ingredient for Thick Foam
But just mixing soap and water isn’t what creates that super-thick, clinging foam. The real hero is a small, easy-to-miss part tucked inside the foamer’s brass body: the mesh agitator disc.
Think of this tightly woven stainless steel mesh as a tiny, super-powered whisk. When the high-velocity mix of soap, water, and air smashes through it, the mesh violently churns and aerates the solution. This is the moment that whips everything into the dense, rich foam we're all after. The finer the mesh, the thicker the suds.
The Venturi effect pulls in the soap, and the mesh disc whips it into a frenzy. This one-two punch is what creates foam that low-pressure systems just can't compete with. It’s a bit of controlled chaos, all designed for maximum suds.
This whole process shows just how much the little parts inside your foamer matter. The size of that tiny orifice and the condition of the mesh filter have a direct impact on the quality of the foam you get.
How Components Influence Foam Quality
Knowing what each part does helps you troubleshoot problems and pick the right gear. When it comes to performance, two components are the most important.
- Orifice Size: This tiny opening is the gatekeeper for water flow and pressure. A smaller orifice boosts the water velocity, which often means thicker foam. However, it must be correctly matched to your pressure washer's GPM (gallons per minute) to work properly.
- Mesh Filter: This is the most common culprit when your foam starts looking weak and watery. Over time, soap scum and hard water minerals can clog the mesh, preventing it from aerating the soap mix effectively. That’s why a little maintenance goes a long way.
Finding the sweet spot between your soap mixture, your pressure washer’s output, and your foamer's internal parts is the key to perfect foam. To dive deeper, check out our detailed guide on finding the perfect foam cannon soap ratio. Once you understand the science, you're well on your way to laying down a perfect, dirt-lifting blanket of foam every single time.
Choosing Your Foam Tool: Pressure Foamer vs. Garden Hose Gun
Not every foam tool is built the same, and picking the right one comes down to what you're working with, what you want to achieve, and just how dirty your car is. The first big choice on your foam washing journey is deciding between a heavy-duty pressure washer foamer and a super-convenient garden hose foam gun.
Think of it like choosing between a sledgehammer and a finishing hammer. Both get a job done, but you wouldn't use the sledgehammer for delicate trim work. In the same way, a pressure washer foamer is your heavy hitter—the tool you grab for maximum cleaning power.
On the other hand, a garden hose foam gun, like the SwiftJet, is all about convenience and accessibility. It's the perfect answer for routine maintenance washes or for anyone who simply doesn't own a pressure washer.
Foam Quality and Cleaning Power
The biggest difference you'll see right away is the quality of the foam itself. This isn't just for show; the thickness of the foam has a direct impact on how well it cleans.
A pressure washer foamer—often called a foam cannon—harnesses the raw power of a pressure washer, typically running between 1,000 to 3,000 PSI. This intense force violently mixes air, water, and soap, creating an incredibly thick, dense foam that looks and feels a lot like shaving cream.
This thick foam clings to the side of your car, giving the soap maximum "dwell time" to break down stubborn road grime, bug guts, and caked-on mud. The high pressure creates a far more effective cleaning solution right from the start.
In contrast, a garden hose foam gun works with your home's standard water pressure, which is usually only around 40 to 60 PSI. It still produces a good amount of sudsy foam, but it's going to be wetter and runnier than what a real foam cannon can deliver. It’s fantastic for lifting light dust and dirt but might not have the muscle for a heavily soiled vehicle. For a deeper look at how they stack up, you can explore our complete foam gun vs. foam cannon comparison.
Equipment and Convenience
What you already have in your garage is often the deciding factor here. A pressure washer foamer is an accessory, meaning it needs a pretty significant piece of equipment to work. If you already own a pressure washer, a foam cannon is a relatively cheap and incredibly powerful upgrade.
But if you don't have a pressure washer and aren't planning to buy one, a garden hose gun is the obvious choice. Tools like the SwiftJet are designed for pure plug-and-play simplicity. They attach directly to any standard garden hose, no electricity or extra machinery needed. This makes them unbelievably easy to grab for a quick wash.
This convenience is actually driving a huge trend in the car care world. The portable segment of pressure washer accessories, including high-performance foam guns that connect to a hose, is projected to grow at a 5.2% CAGR—the highest of any category—from 2025 to 2030. It's a game-changer for DIY enthusiasts and even pros who need effective tools without lugging around a heavy unit.
Choosing Your Foam Tool: Pressure Foamer vs. Garden Hose Gun
So, which one should you get? Let's figure it out with a quick comparison.
| Feature | Pressure Washer Foamer | Garden Hose Foam Gun (e.g., SwiftJet) |
|---|---|---|
| Foam Quality | Thick, shaving-cream-like foam | Wetter, sudsy foam |
| Cleaning Power | Excellent for heavy grime and deep cleaning | Great for light dirt and routine maintenance washes |
| Water Pressure | Requires 1,000-3,000 PSI from a pressure washer | Uses standard household pressure (40-60 PSI) |
| Equipment Needed | A pressure washer is mandatory | Just a standard garden hose |
| Setup Time | Longer (set up pressure washer, connect hoses, etc.) | Very fast (screw on and go) |
| Best For | Dedicated detailers, heavily soiled vehicles | Quick washes, beginners, homes without a pressure washer |
Ultimately, the best tool is the one that fits your life and your needs.
Making the Right Choice for Your Needs
Still on the fence? Here’s how to pick based on your situation:
-
For the Dedicated Detailer: If you're serious about getting a perfect, scratch-free finish and often deal with heavy grime, the pressure washer foamer is a must-have. Its thick foam provides the best pre-soak possible.
-
For Convenient Maintenance: If your car stays pretty clean and you just need a fast, safe way to wash off the weekly dust, a garden hose foam gun is perfect. It's much quicker to set up and ideal for routine upkeep.
-
For Renters or Those with Limited Space: Living in an apartment or don't have outdoor power outlets? A garden hose foam gun gives you a practical way to get a quality foam wash without the logistical headache of a pressure washer.
-
For Delicate Surfaces: When washing a vintage car with sensitive paint or cleaning around RV decals, the gentler stream from a garden hose gun can be a safer bet, avoiding any potential damage from high pressure.
How to Use Your Foamer for a Perfect Wash
Getting the hang of a pressure washer foamer is surprisingly easy, and trust me, once you do, you’ll wonder how you ever managed with just a bucket and sponge. Let's walk through the whole process, from mixing your soap to laying down that perfect, thick blanket of suds. I'll break it all down so you can get professional-level results right from the start.
First, it’s good to have a clear picture of why this method is so different from using a regular garden hose. The high pressure is the real game-changer here.

As you can see, a garden hose foam gun is fine for a quick wash, but a pressure washer setup is what creates that thick, clingy foam you need to really break down the grime without scratching your paint.
Step 1: Get Your Soap Solution Right
The secret to amazing foam starts with the right soap mix. Always check the bottle for the manufacturer's recommended dilution ratio—different soaps have different potencies.
Here’s a common rookie mistake: dumping the soap in first. If you do that, you'll have a canister full of bubbles before you even add the water, which messes up your mix.
- Water First, Always: Start by filling the foamer's canister with the right amount of clean, warm water. A little warmth helps the soap dissolve better, which leads to richer foam.
- Add the Soap: Now, pour in the correct amount of a good-quality foam cannon soap. If you’re ever in doubt and can't find instructions, a 1-part soap to 10-parts water ratio is a solid place to start.
- Mix Gently: Screw the lid on and give the canister a gentle swirl. Don't shake it like a cocktail—that just creates foam inside the bottle, which you don't want yet.
Step 2: Connect and Adjust Your Foamer
With your soap ready, it's time to hook up the pressure washer foamer and dial it in. Make sure your pressure washer is off and unplugged before attaching any accessories.
Connect the foam cannon to your pressure washer wand. You’re listening for a solid "click" from the quick-connect fitting to know it's locked in place.
Safety First: After connecting the cannon, give it a firm tug. If it’s not fully seated, the intense pressure can turn it into a projectile. A secure connection is absolutely critical for a safe wash.
Once it's on, you have two key adjustments to master.
- The Front Nozzle: This controls your spray pattern. Twist it one way for a tight, focused stream of foam, and the other way for a wide fan spray. For covering big areas like doors and roofs, a wide fan is your best friend.
- The Top Dial: This little knob is your foam thickness controller. Turn it towards the "+" symbol to pull more soap into the water stream, giving you that super-thick, shaving-cream-like foam. Turn it towards the "–" symbol for a thinner, runnier consistency. For most jobs, you’ll want to set this to max foam.
Step 3: Apply the Foam and Let It Work
This is the fun part. Before you start foaming, give the vehicle a quick pre-rinse with just water. Use a 40-degree nozzle tip to gently knock off any loose dirt and grit. This lets the foam focus on the tougher, stuck-on grime.
When you’re ready to apply the suds, use this pro-level technique to avoid streaks.
- Start Low, Go High: Begin spraying the foam onto the vehicle's lower sections and work your way up. This simple trick prevents the soap from running down a dry panel and causing streaks. It also gives the dirtiest parts of the car (the rockers and bumpers) the most time to soak.
- Get Full Coverage: Overlap your passes to lay down a thick, even blanket of foam across the entire car. Don't skimp on the wheels, tires, and fender wells!
- Let It Dwell: Now, step back and let the foam do its thing for about 5-10 minutes. This "dwell time" is where the magic happens—the cleaning agents are busy breaking down dirt and lifting it off the surface. Just be sure you don’t let the foam dry, especially in the sun, as it can leave stubborn spots behind.
Step 4: Rinse for a Spotless Finish
Once the foam has worked its magic, it's time to rinse it all away. Switch your pressure washer back to the 40-degree nozzle for a safe but effective rinse.
Just like with the application, your technique here matters.
- Top-Down Rinse: This time, you'll do the opposite of the application. Start rinsing at the roof and let gravity help you wash all the soap and grime down and off the car.
- Rinse Thoroughly: Make sure you hit all the nooks and crannies—around mirrors, in the grille, and along trim pieces where soap loves to hide. A meticulous rinse is the key to a truly spot-free finish.
After a thorough rinse, you're ready to dry the car with a plush microfiber towel or an air blower. By following these steps, you’ll get a safer, more effective, and seriously impressive wash every single time.
Selecting the Right Foamer and Soap Combination
You can have the best technique in the world, but the quality of your foam wash really comes down to your tools and your soap. Pairing a great pressure washer foamer with the wrong soap is like putting regular gas in a Ferrari—it just won’t perform the way it was designed to.
Let’s walk through how to pick a foamer and soap that work together, so you can get that perfect, thick foam every single time.
When you’re shopping for a foamer, it's tempting to just grab the cheapest one on the shelf. Don't do it. A little investment now pays off big time in durability and performance.
Look closely at the fittings and internal parts—that's where quality really shows. You want to see solid brass bodies and stainless steel connectors, not plastic. Brass holds up against corrosion from harsh soap chemicals and constant water exposure, meaning it'll last you more than a single season.
This detail might seem small, but it's the difference between a leaky, frustrating tool and one that connects securely to your pressure washer wand year after year.
Choosing the Right Pressure Washer Foamer
Beyond build materials, a few other features make a huge difference in how easy the foamer is to use and whether it will even work with your setup. Thinking about these now will save you a headache later.
- Canister Size: Most foamers come with a 1-liter (about 34 oz) bottle. For a standard car or SUV, that’s usually plenty to get the job done without a refill. If you're washing a big truck or an RV, you might want something larger, but just remember that a bigger bottle filled with water and soap gets pretty heavy.
- Wide-Mouth Bottle: This is a simple but brilliant feature. Look for a foamer with a wide opening on the bottle. It makes pouring in soap and water so much easier and cleaner than trying to hit a tiny target.
- Compatibility Check: This is non-negotiable. Your foamer’s internal orifice has to be matched to your pressure washer's GPM (gallons per minute) and PSI ratings. The wrong size can give you weak, watery foam or, even worse, put a strain on your pressure washer's pump. Always check the manufacturer’s recommendations.
Finding the Perfect Soap
Now for the other half of the equation: the soap. Not all car wash soaps are the same, and using one specifically designed for a pressure washer foamer is the secret to getting that thick, shaving-cream-like foam.
Your average car soap is meant to get sudsy in a bucket of water. It just doesn't have the right concentration of surfactants to create thick foam when blasted through a cannon. Soaps made for foamers, on the other hand, are engineered to do exactly that.
For a deep dive into our top picks, you can check out our guide to the best car wash soap for a foam cannon.
Key Soap Characteristics to Consider
As you're looking at different soaps, keep these three things in mind. They’re key to getting a great clean without accidentally damaging your car's finish.
- pH-Neutral Formulas: Always, always go for a pH-neutral soap. Anything too acidic or alkaline can be aggressive, stripping away wax, sealants, or ceramic coatings you’ve worked so hard to apply. A pH-neutral formula is tough on grime but gentle on your car's protection.
- Viscosity Matters: The thickness of the soap concentrate actually plays a role in how well it foams. The right viscosity allows the foamer to easily siphon the liquid and whip it into a dense foam that sticks to the vehicle's surface, giving it time to break down dirt.
- No Added Waxes: Steer clear of "wash and wax" products for your foam cannon. Those extra additives can build up and clog the delicate mesh filter inside the foamer, which will kill your foam quality over time. Save the waxing for a separate step after the wash is done.
By choosing your foamer and soap carefully, you aren't just buying products—you're building a system where every part works in harmony to give you a safer, better, and more satisfying wash.
Keeping Your Foamer in Top Condition
Think of your pressure washer foamer like any other quality tool in your garage. A little bit of care goes a long way, ensuring it delivers that thick, satisfying foam for years to come. Taking a few minutes after each wash will protect your investment and guarantee it's ready to go next time.
The single most important maintenance step is also the easiest, and it takes less than a minute. After every single use, you absolutely have to flush the foamer with clean water.
The number one killer of foam cannons is dried soap scum. When soap residue hardens inside the delicate mesh filter, it chokes the system, leading to the weak, watery foam that everyone hates. Flushing the unit every time stops this from ever happening.
It’s simple. Just dump out any leftover soap solution, fill the canister with clean water, and run it through your pressure washer until the spray is completely clear. This quick rinse is all it takes to keep the internal mesh filter and orifice free from clogs.
Troubleshooting Common Foamer Problems
Even with the best care, you might occasionally run into an issue. Don't worry—most problems have a simple fix. If your foam is looking thin, watery, or just isn't sticking, one of these is almost always the reason why.
- Clogged Mesh Filter: This is the usual suspect. Soap scum and hard water minerals build up and block the fine mesh filter, which is what helps create the foam in the first place.
- Wrong Soap-to-Water Ratio: If your mixture is too diluted, you'll never get thick foam. Always start with the soap manufacturer’s recommended ratio for a foam cannon and adjust from there.
- Mismatched Orifice Size: That tiny brass orifice inside has a big job. It needs to be matched to your pressure washer's GPM and PSI. An orifice that's too large for your machine won't build enough pressure, resulting in weak, soupy foam.
How to Deep Clean the Mesh Filter
If a good flush doesn't bring your foam back to life, it's time to give that mesh filter a deep clean. It's a quick and painless process.
- Take it Apart: First, safely disconnect the foamer from your pressure washer wand. Most foamers come apart easily by removing a small pin or unscrewing the front nozzle, giving you access to the internals.
- Find the Filter: Carefully pull out the small, cylindrical mesh filter. If it’s clogged, you'll probably see a white, chalky film of soap and mineral buildup.
- Give it a Soak: Drop the filter into a cup of warm water or, for tougher jobs, a 50/50 mix of white vinegar and water. Let it soak for 10-15 minutes to dissolve all that gunk.
- Rinse and Reassemble: Rinse the filter thoroughly under clean water until it looks brand new. Pop it back into place, reassemble your foamer, and you're good to go.
Stick to these simple habits, and your pressure washer foamer will stay in peak condition, ready to blanket your vehicle in a thick layer of foam every single time.
Your Pressure Washer Foamer Questions, Answered
Jumping into the world of foam cannons can feel like learning a new language. You've got the gear, but a few questions always pop up when you're aiming for that perfect, thick foam. Let's clear up some of the most common ones so you can wash with confidence.
Can I Just Use My Regular Car Soap in a Foam Cannon?
You could, but you’d be pretty disappointed with the results. Think of it this way: you wouldn't use dish soap in a dishwasher. Soaps made specifically for a pressure washer foamer are engineered with the right thickness and high-sudsing agents to create that super-thick, clingy foam we're all after.
Your standard bucket-wash soap is just too thin. It’ll come out looking like sad, bubbly water and run right off your car. That means it has no "dwell time" to actually loosen up the dirt. If you want that satisfying, shaving-cream-like blanket of foam, stick with a dedicated foam cannon soap.
Is a Foam Cannon Going to Strip or Damage My Car's Paint?
Nope, it's actually the opposite. Using a foam cannon is one of the safest things you can do for your paint. The whole point is to cover the car in a thick layer of lubrication that lifts and encapsulates dirt before you ever touch the surface with a wash mitt. This dramatically reduces the risk of creating swirl marks and fine scratches.
Any real danger comes from the pressure washer itself, not the foamer attachment.
The key is to be smart with your pressure washer. Never use a narrow, high-impact nozzle (like the red 0-degree tip). Stick with a wide-angle tip, like the white 40-degree, and keep the wand a safe distance from the surface. That’s how you get a powerful clean without any risk.
What's the Difference Between a Foam Cannon and the Soap Tank on My Pressure Washer?
It's a night-and-day difference in how they work and the foam they produce. The built-in soap tank on most pressure washers is a low-pressure system. It just sort of dribbles soap into the water stream, giving you a slightly soapy rinse but nothing close to actual foam.
A real foam cannon is a high-tech attachment. It harnesses the high-pressure water stream and forces it through a chamber where it violently mixes with soap and air. This mixture is then blasted through a steel mesh filter, which is what whips it up into that incredibly dense, rich foam that sticks to your car.
How Often Do I Need to Clean the Little Filter Inside?
You don't need to break it down for a deep clean after every single wash, but there's one simple habit that makes all the difference. After you're done foaming, run plain water through your pressure washer foamer for about 30 seconds. This quick flush prevents leftover soap from drying and gunking up the internal mesh filter.
If you ever notice your foam looking a little weak or watery, that’s the foamer telling you it's time for a proper cleaning. Just take it apart and give that mesh filter a good rinse under warm water. Any hardened soap residue will dissolve, and you'll be back to producing perfect foam.
Ready to transform your car wash routine with thick, clinging foam? The SwiftJet Car Wash Foam Gun makes achieving a professional clean at home easier than ever. Click here to get yours today!