
Why Regular RV Washing Preserves Your Investment
Washing your RV isn't just about aesthetics; it's a fundamental aspect of preserving its value. Much like regular home maintenance, a small amount of effort upfront can prevent significant costs later. Neglecting your RV's exterior can lead to a series of issues that negatively impact its lifespan and resale value.
Protecting Against the Elements
One of the most significant threats to your RV's exterior is UV deterioration. The sun's harmful UV rays can fade the paint, cause seals to crack, and damage decals. Regular washing removes dirt and grime, mitigating these damaging effects.
Furthermore, environmental factors such as road salt, acid rain, and tree sap can corrode the RV's surfaces. Washing provides a protective barrier, preventing these contaminants from adhering and causing damage. Learn more about RV maintenance in this helpful article: How to master your RV maintenance schedule.
Preventing Structural Damage
Beyond cosmetic concerns, regular washing plays a vital role in preventing structural weakening. Moisture trapped between dirt and the RV's surface can lead to rust and corrosion, particularly in vulnerable areas like the roof and undercarriage.
Over time, this can compromise the structural integrity of your RV, resulting in expensive repairs. For instance, neglected roof seals can cause water to penetrate the interior, leading to wood rot and mold growth.
Wash Frequency
Washing an RV regularly is essential for maintaining its appearance and structural soundness. The ideal washing frequency depends on environmental conditions and usage. Many RV owners wash their vehicles approximately once a month.
However, this can vary. Factors such as frequent travel through dusty or insect-prone areas may necessitate more frequent washing. In areas with high pollution or harsh weather, more regular cleaning is recommended to prevent damage to the paint and other components. For more information on washing frequency, check out this resource: How often should you wash your RV exterior?. This proactive approach to maintenance helps ensure the longevity of your RV.
Maintaining Resale Value
A well-maintained RV retains its value significantly better than a neglected one. Implementing a structured cleaning schedule can result in resale values up to 30% higher than the average. This demonstrates that regular washing is not just a maintenance cost, but rather an investment in your RV's future resale value. By keeping your RV clean, you protect your investment and ensure the best possible return when it’s time to sell or trade it in. For additional tips, see: Tips for RV owners.
Pro-Level Tools That Transform Your RV Washing Results
Washing an RV is a bigger job than washing a car. A bucket and sponge just won't cut it. Investing in the right tools can significantly improve your washing efficiency and protect your RV’s finish. This means less scrubbing for you, and more time on the road. Let’s explore the key differences between basic and professional-grade equipment, and learn how they impact your washing results.
Choosing the Right Brush
Many RV owners start with a regular car wash brush. Unfortunately, these often scratch an RV’s more delicate surface. Professional detailers often choose extendable brush systems with soft bristles designed for RVs. These specialized brushes offer better reach for high areas, minimizing the risk of scratches. This is especially helpful for taller RVs where reaching the roof can be tricky.
The Power of Water Filtration
Hard water can leave spots and streaks on your RV after a wash. A water filtration system is a simple solution. These filters remove minerals and impurities from your water, leaving your RV with a spot-free shine. This small step makes a big difference in the final look of your RV. If you live in an area with hard water, a filtration system is a worthwhile investment.
Pressure Washing: Finding the Right Balance
Pressure washers can be incredibly effective for cleaning RVs. However, too much pressure can damage seals and decals. Finding the right balance is key. Most experts recommend a pressure washer with 1200-1500 PSI for safe and effective RV washing. This provides enough power to remove dirt without harming your RV.
Time-Saving Accessories
Certain accessories can drastically reduce your washing time and improve your results. For example, a foam cannon quickly coats your entire RV in thick foam. This loosens dirt and grime before you even start scrubbing. How to master RV maintenance and discover helpful tools offers some great advice on this topic. A dedicated RV wash mitt offers superior cleaning power and reduces scratches. Professional detailers report that these tools can save up to 40% on washing time.
Eco-Friendly Options
For environmentally conscious RV owners, plenty of eco-friendly cleaning products deliver excellent results. These biodegradable soaps and cleaners are gentle on the environment and just as effective as traditional cleaning solutions. Keep your RV clean without harming the planet.
Building Your Washing Arsenal Strategically
Building a professional-grade RV washing kit doesn't have to be expensive. Start with the essentials, such as a good brush and a water filtration system. Add accessories as your budget allows. Prioritizing quality over quantity protects your RV’s finish and maximizes your investment. This approach allows you to customize your kit to your needs and budget.
To help you choose the best tools, take a look at the comparison table below.
RV Washing Tools Comparison This table compares essential tools and supplies for RV washing, highlighting their specific uses, benefits, and considerations.
| Tool/Supply | Best Used For | Pros | Cons | Approximate Cost |
|---|---|---|---|---|
| Extendable Brush System | Washing RV exterior | Reaches high areas, soft bristles prevent scratches | Can be more expensive than standard brushes | $50 - $150 |
| Standard Car Wash Brush | Washing RV exterior (with caution) | Less expensive | Can scratch RV surface | $10 - $30 |
| Water Filtration System | Pre-wash water treatment | Removes minerals, prevents water spots | Requires initial investment | $30 - $100 |
| Pressure Washer (1200-1500 PSI) | Removing stubborn dirt and grime | Powerful cleaning | Can damage RV if pressure is too high | $100 - $300 |
| Foam Cannon | Pre-wash treatment | Loosens dirt, reduces scrubbing time | Requires pressure washer | $30 - $70 |
| RV Wash Mitt | Washing RV exterior | Superior cleaning, scratch-free | Can be more expensive than standard sponges | $15 - $30 |
| Biodegradable Soap | Washing RV exterior | Environmentally friendly | Can be more expensive than traditional soap | $10 - $20 |
By understanding the pros and cons of each tool, you can make informed decisions about which ones are right for you. Building your kit strategically ensures that you have the right tools for the job and helps maintain the beauty of your RV for years to come.
The Perfect RV Wash: Step-by-Step System That Works
A clean RV is a happy RV. But washing an RV is more than just a quick spray; it's a detailed process that protects your investment and keeps it looking its best. This guide will walk you through a system used by professional detailers to achieve a spotless, streak-free finish.
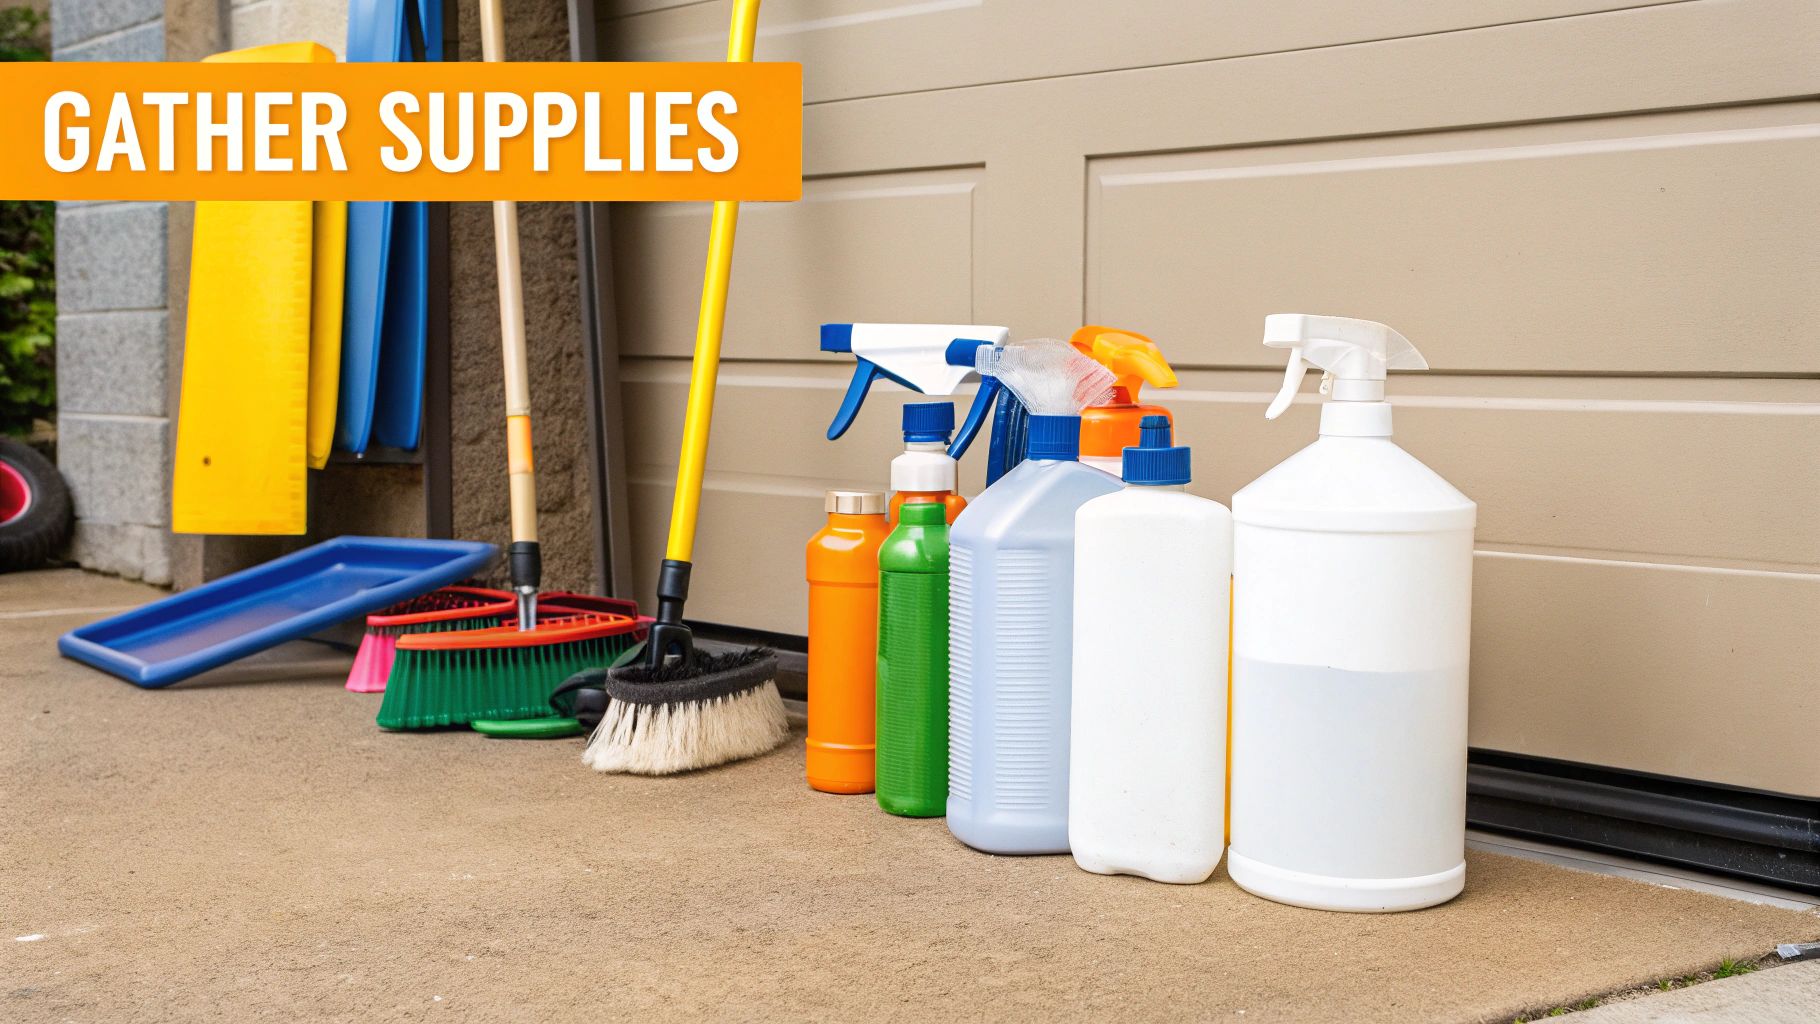
Preparation Is Key
Before you even think about grabbing the hose, preparing your RV and workspace is essential. Park your RV on a level surface, preferably out of direct sunlight. This prevents the soap from drying too quickly, which can leave unsightly streaks. Gather your supplies: a quality RV wash soap (avoiding car wash soaps which can strip protective coatings), a wash mitt or soft-bristled brush, a water source with a hose and adjustable nozzle, and several microfiber drying towels. Consider protecting sensitive components like vents and electrical connections with tape or plastic bags.
The Initial Rinse
The first step in any RV wash is a thorough rinse. Start at the top of the RV and work your way down, removing loose dirt, dust, and debris. This pre-wash prevents scratching during the washing process. Washing an RV involves several steps to ensure a safe and effective clean. The top-to-bottom rinse removes loose particles and helps prevent streaks. Inspect the RV for stubborn contaminants like bird droppings or tree sap, which may require specific treatments. Learn more about RV washing techniques: Washing Your RV.
Soap and Scrub
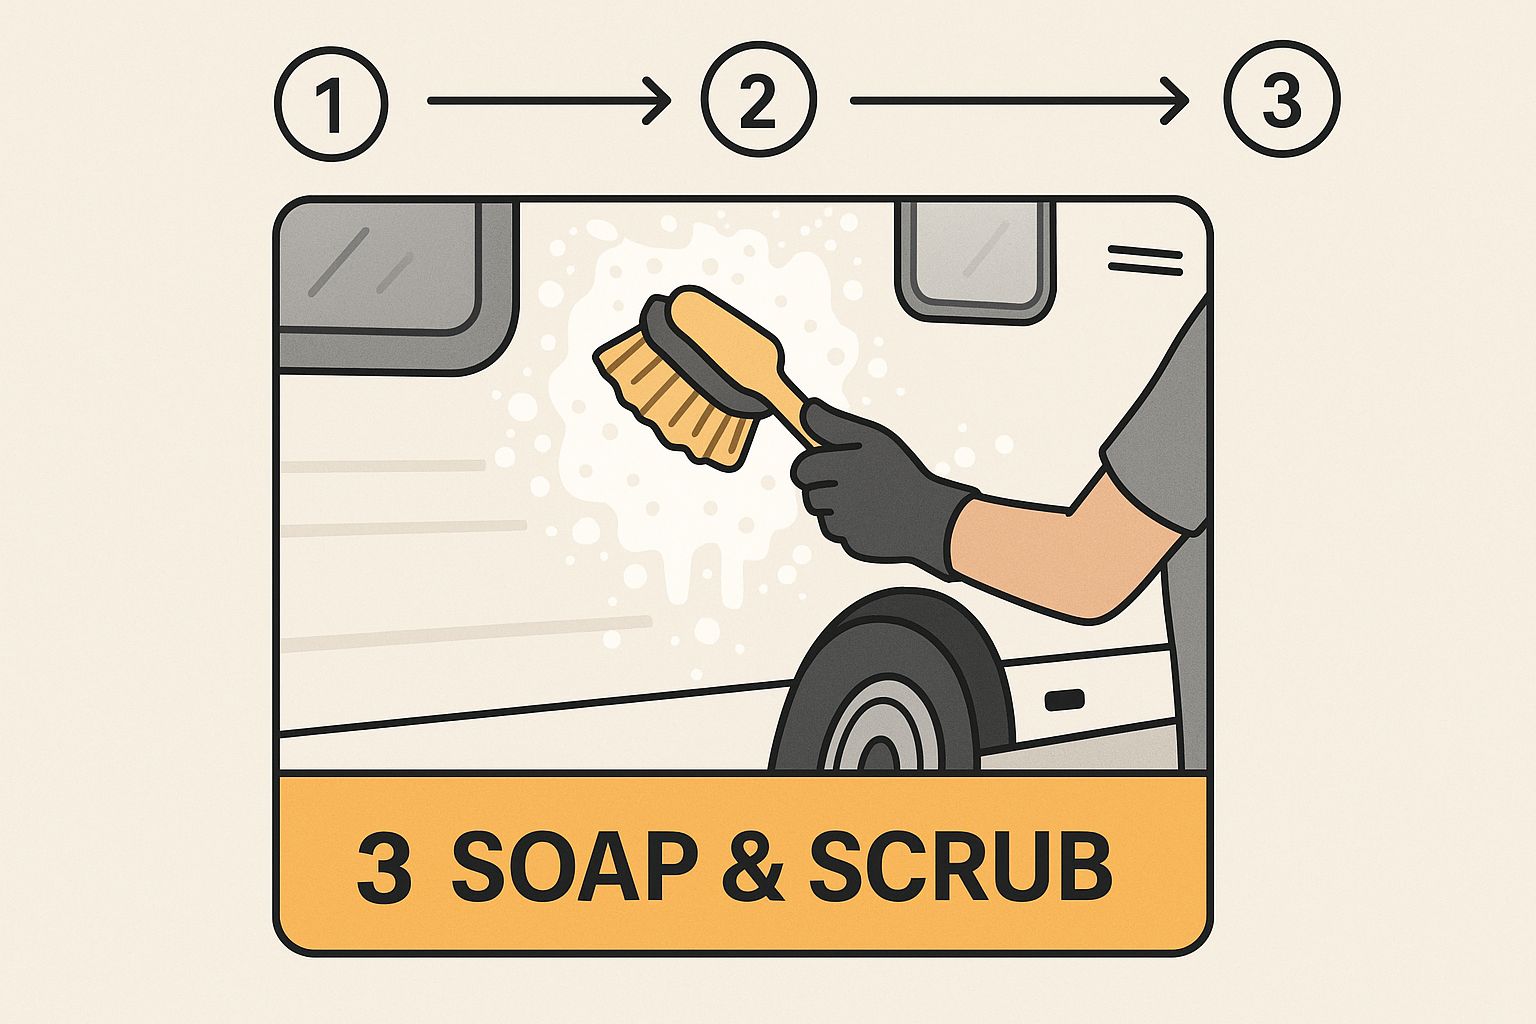
Using the correct tools and techniques when cleaning your RV’s exterior is crucial. A quality wash mitt and the right RV soap will ensure a thorough clean without damaging the finish.
Now apply the soap. Use a dedicated RV wash soap. Apply the soap with your wash mitt or brush, working in sections from top to bottom. For stubborn dirt, allow the soap to dwell for a few minutes, but don’t let it dry completely. This process breaks down the grime, making it easier to rinse away.
The Final Rinse
After scrubbing, rinse the RV. Start at the top and work down, ensuring all soap residue is removed. For a truly spot-free finish, consider using a water deionizer or filtered water. This is especially helpful in areas with hard water.
Drying and Detailing
After rinsing, dry the RV immediately with microfiber towels to prevent water spots. This is where some effort is required. For those hard-to-reach spots, an extendable water blade can be helpful. Once dry, consider adding a protective layer of wax or sealant. Tools like the SwiftJet Car Wash Foam Gun can significantly speed up the pre-wash and soap application process, resulting in a more efficient wash. The thick foam helps loosen and lift dirt, reducing scrubbing time. This is a valuable tool for RV owners wanting a professional-grade clean. For more information visit, SwiftJet.
Addressing Specific Areas
Certain RV areas require special attention. Slide-outs should be cleaned and lubricated regularly. Rooftop accessories, such as air conditioners and solar panels, need careful cleaning to avoid damage. Consult your owner’s manual for specific cleaning instructions.
Different RVs, Different Approaches
Washing techniques can vary based on RV type. For Class A motorhomes, you might need a ladder and extendable brush for the roof. Travel trailers might require less intensive cleaning depending on size and construction.
By following this system, you can achieve a professional-level clean, protecting your RV and keeping it looking great. Regular washing not only maintains the beauty of your RV but also preserves its value, making it an essential aspect of RV ownership.
Material-Specific Cleaning That Prevents Costly Damage
Your RV's exterior is a mix of different materials, each requiring specific cleaning methods. Using the wrong product or technique can lead to costly damage. This guide helps you clean each material correctly, preserving your RV's condition and value.
Fiberglass and Painted Aluminum
Fiberglass and painted aluminum are common, durable RV materials. However, they require specific care. Avoid harsh chemicals and abrasive cleaners, which can damage the finish and lead to oxidation and fading. Instead, use a dedicated RV wash soap applied with a soft wash mitt or brush. For tougher stains, check your RV manufacturer's recommendations. Learn more about proper RV maintenance.
Diamond Plate
Diamond plate, often used for bumpers and trim, can be cleaned with mild detergent and water. Avoid abrasive cleaners and steel wool, as these can scratch the surface. After washing, a specialized metal polish can add shine.
Awning Fabrics
Awning fabrics require gentle cleaning to prevent damage. Use a mild soap specifically designed for awning material. Avoid harsh scrubbing, opting for gentle wiping motions. Thoroughly rinse and allow the awning to dry completely before retracting it to prevent mildew.
Rubber Roofs
Rubber roofs are durable but require special care. Certain products can damage the rubber membrane. Avoid petroleum-based cleaners, which can break down the rubber. A specialized rubber roof cleaner or a mild detergent solution is recommended. Regular cleaning prevents black streaks and extends the roof's lifespan.
Vinyl Graphics
Vinyl graphics add a personal touch but are easily damaged by harsh chemicals and abrasive tools. Use a soft cloth or sponge and a mild cleaning solution when washing around graphics. Avoid high-pressure washing directly on them. This gentle approach preserves their vibrancy and longevity.
Chemical Interactions and Deterioration
Understanding how cleaning products interact with your RV's materials is crucial. Using the wrong product can lead to damage. For example, bleach can corrode aluminum. Always test any cleaning product in an inconspicuous area before applying it to the entire RV.
Revitalizing Aging Materials
Over time, RV exteriors can show signs of aging like oxidation, fading, and chalking. Addressing these issues early is important. Specialized products, such as oxidation removers, can restore the shine to faded surfaces. Consult with RV maintenance experts for guidance specific to your situation.
Protecting Vulnerable Transition Points
Transition points, where different materials meet, are particularly vulnerable to damage. These areas trap moisture and dirt, which accelerates deterioration. Pay extra attention to these spots during washing and drying. Using sealants can provide additional protection.
Preserving Factory Finishes
Maintaining your RV's factory finish is key to preserving its value. Using the right cleaning products and techniques protects the original coatings and prevents premature aging. This saves you money on repairs and maintains your RV's appearance. Understanding the needs of each material ensures your RV stays in excellent condition for years to come, enhancing your RV lifestyle. For stubborn stains like tree sap or black streaks, consult this guide. Proper fuel tank maintenance is also important; consider this guide on marine fuel tank cleaning.
To summarize the best cleaning practices for your RV's exterior, refer to the table below:
RV Surface Cleaning Guide: This table outlines proper cleaning methods and products for different RV exterior surfaces to prevent damage and ensure effective cleaning.
| Surface Type | Recommended Cleaning Products | Cleaning Method | What to Avoid | Protection After Cleaning |
|---|---|---|---|---|
| Fiberglass | RV Wash Soap | Wash with a soft mitt or brush, rinse thoroughly | Abrasive cleaners, harsh chemicals | RV Wax or Sealant |
| Painted Aluminum | RV Wash Soap | Wash with a soft mitt or brush, rinse thoroughly | Abrasive cleaners, bleach | RV Wax or Sealant |
| Diamond Plate | Mild detergent and water | Wash with a soft cloth or brush, rinse thoroughly | Abrasive cleaners, steel wool | Metal polish |
| Awning Fabric | Awning cleaner | Gentle wiping motion, rinse thoroughly | Harsh scrubbing, bleach | Water repellent spray |
| Rubber Roof | Rubber roof cleaner or mild detergent | Gentle scrubbing, rinse thoroughly | Petroleum-based cleaners | Rubber roof sealant |
| Vinyl Graphics | Mild detergent and water | Wash with a soft cloth or sponge | High-pressure washing, harsh chemicals | UV protectant spray |
By following these guidelines, you can keep your RV looking its best and protect its value over time.
Conquering Stubborn Stains: Techniques That Actually Work

Keeping your RV exterior clean can be a challenge, especially when dealing with stubborn stains. Beyond a regular wash, specific techniques are needed to tackle these persistent marks. This section explores proven methods for removing tough stains, restoring your RV's shine, and protecting it from future damage. Understanding the stain type and your RV's exterior material is crucial for effective cleaning.
Identifying the Culprit: Common RV Stains
Before attempting to remove a stain, identifying its source is the first step. Knowing the cause helps you choose the right cleaning strategy and prevents exacerbating the problem. Common RV stains include tree sap, black streaks, mineral deposits, oxidation, and insect residue. Each requires a different approach.
Tree Sap Removal: Dissolving the Sticky Mess
Tree sap is notoriously difficult to remove. Avoid scraping, which can damage your RV’s finish. Instead, opt for a dedicated tree sap remover or a product like WD-40. Apply it to the sap, let it sit for a few minutes to soften, and then gently wipe clean.
Banishing Black Streaks: A Targeted Approach
Black streaks, often caused by rain runoff, detract from your RV’s appearance. Specifically designed black streak removers effectively lift these stains without harming the surface. Apply the product as directed, typically using a soft cloth or brush, and rinse thoroughly. A pre-rinse with a low-pressure sprayer is recommended to prevent further embedding of contaminants. Learn more about RV washing techniques here. This helps maintain your RV's appearance and value over time.
Mineral Deposits: Combating Hard Water Stains
Hard water often leaves behind mineral deposits that appear as white or cloudy spots. A simple vinegar and water solution can dissolve these deposits. Apply the solution, let it sit briefly, and then gently scrub with a soft brush before rinsing.
Oxidation Restoration: Bringing Back the Shine
Oxidation is a common problem, particularly with older RVs, dulling the exterior finish. Oxidation removers are formulated to restore shine and protect against further damage. Follow the product instructions carefully, as application methods may vary.
Insect Residue Removal: A Gentle Approach
Insect residue can be surprisingly persistent. Soaking the affected area with soapy water softens the residue, making it easier to remove. A bug sponge or a soft brush can then be used for gentle cleaning, avoiding harsh scrubbing that might scratch the surface.
Preventing Recurrence: Protective Measures
After removing stains, preventing their return is important. Regular washing and waxing, or applying a protective sealant, creates a barrier against future stains. This also helps maintain your RV's pristine appearance. Proper fuel tank maintenance is also essential. Check out this guide on marine fuel tank cleaning for more information.
When to Call a Professional
Some stains might require professional attention. Deep scratches, severe oxidation, or extensive damage are best handled by an RV detailer. Their expertise and tools can effectively restore your RV's finish without causing further harm.
On-the-Road Washing: Maintaining Cleanliness While Traveling
Keeping your RV clean on the road presents unique challenges. Unlike washing at home, you're dealing with limited water access, campground regulations, and diverse environmental conditions. This section offers practical on-the-road RV washing solutions from experienced RVers and campground operators.
Campground Rules and Regulations
Before washing your RV at a campground, understand their specific rules. Some campgrounds prohibit washing, while others have designated areas or require biodegradable soaps. Check the campground's website or the check-in office for this information. Knowing the rules beforehand helps avoid fines or conflicts.
Water Conservation Techniques
Many campgrounds, especially in dry climates, have strict water restrictions. Water conservation is crucial, even when washing is allowed. A waterless wash system is a great option, minimizing water usage while providing a clean finish. These systems usually involve spraying a cleaning solution on the RV and wiping it down with microfiber towels.
Portable Washing Systems for RVers
For a more traditional wash, portable washing systems offer a convenient solution. These typically include a bucket, a hose with an adjustable nozzle, a wash mitt, and biodegradable soap. Some systems also have a small water pump for drawing water from a larger container, further conserving water. For a deeper clean, consider a SwiftJet Car Wash Foam Gun to coat your RV in thick foam, loosening dirt and grime before scrubbing. This reduces scrubbing time and conserves water. Learn more at SwiftJet.
Spot-Cleaning for Extended Trips
Between washes, spot-cleaning is vital for maintaining your RV’s appearance. Keep a spray bottle of cleaning solution and microfiber towels handy to address dirt, bugs, and bird droppings before they stain. This reduces the need for frequent full washes.
Navigating Regional Regulations
Washing regulations vary by region. Some areas restrict certain cleaning products due to environmental concerns. Research local regulations before you travel to ensure compliance and avoid unintentional violations.
Commercial RV Wash Facilities
While DIY washing is often preferred, sometimes a commercial RV wash is necessary. When choosing a facility, consider the services, pricing, and customer reviews. Prioritize facilities using eco-friendly products and touchless washes to minimize scratches. Knowing your options helps you make informed decisions.
Dealing with Challenging Environments
Certain environments, like salty coastal areas or dusty deserts, pose extra cleaning challenges. For coastal salt exposure, frequent rinsing with fresh water helps prevent corrosion. In desert conditions, a California water blade can effectively remove dust and debris without scratching. Adapting your washing techniques to the environment keeps your RV clean and protected, no matter your destination. By following these tips, you can maintain a clean RV throughout your travels, ensuring enjoyable and hassle-free adventures.
Beyond Clean: Protection Systems That Extend Washing Results
Washing your RV is essential, but protecting that clean surface is what truly preserves its beauty and extends its lifespan. Just like you wouldn't leave your car unprotected after a wash, your RV needs a shield against the elements. This added protection minimizes future washes and keeps your RV's finish looking its best. Think of it as a two-part system: clean and protect. This approach yields the best long-term results.
Understanding Your Protection Options
Several options exist for protecting your RV’s exterior, each offering varying degrees of durability and protection. Understanding the key differences helps you choose the best fit for your needs and budget.
-
Waxes: Waxes offer a glossy finish and basic protection against UV rays and environmental contaminants. They are the most affordable option but offer the shortest protection, typically lasting a few weeks.
-
Sealants: Sealants provide enhanced protection compared to waxes, creating a stronger bond with the RV’s surface. They typically last several months, offering better defense against UV rays, water spots, and grime.
-
Ceramic Coatings: Ceramic coatings offer the highest level of protection, forming a durable, hydrophobic layer that repels dirt and water. They can last for years with proper maintenance, offering superior resistance to scratches, UV damage, and chemical stains.
-
Film Protections: Paint protection film (PPF) acts as a physical barrier against scratches, chips, and road debris. While not a traditional “wash protection,” PPF plays a vital role in preserving the underlying paint, reducing the need for touch-ups and repairs. For more information on RV protection, you can explore this resource: How to master RV protection.
Application Techniques and Best Practices
Proper application is crucial for maximizing the effectiveness of any protection system. Always follow the manufacturer’s instructions carefully. General best practices include applying the product in a cool, shaded area, working in small sections, and using clean microfiber applicators.
Season-Specific Considerations
Different climates demand different protection strategies. In harsh winter conditions, a sealant or ceramic coating provides added defense against road salt and freezing temperatures. In sunny climates, UV protection is paramount. Choosing the right protection for your climate helps maintain your RV’s finish year-round.
Layered Protection Systems
For the best protection, consider combining products. For example, applying a sealant over a ceramic coating can further enhance hydrophobic properties and durability. This creates a layered defense system, maximizing protection and minimizing maintenance.
Cost-Benefit Analysis: Long-Term Value
While ceramic coatings and film protections have higher upfront costs, their longevity and superior protection often provide greater long-term value. They reduce the frequency of washing and waxing, saving you time and money down the road. Consider your RV usage and budget when choosing a protection system.
The frequency of car washing underscores the demand for vehicle care. Studies advise car owners to wash their vehicles at least twice a month due to driving frequency and environmental factors. You can learn more here: Learn more about car wash frequency. When washing your RV on the go, ensure the area is safe and appropriate. A drone pre-flight checklist offers a helpful analogy for preparation and safety.
Maintaining and Reapplying Protection
Regularly inspect your RV’s exterior for signs of wear on the protective coating. Water beading is a good indicator of protection. When water stops beading, it’s time to reapply. Between applications, using a pH-neutral RV wash soap helps maintain the protective layer.
Investing in a protection system after washing your RV is a wise decision. It extends the life of your RV’s finish, reduces maintenance time, and preserves its value. Choosing the right system for your needs and budget ensures your RV looks its best for years to come.
Upgrade Your Wash Routine with the SwiftJet Car Wash Foam Gun!
Transform your RV washing experience with the SwiftJet Car Wash Foam Gun. This powerful tool connects to any garden hose, delivering thick, clinging foam that effortlessly lifts dirt and grime. Its easy-to-use design and superior foam generation make washing your RV faster and more effective. Plus, receive a free microfiber wash mitt with every purchase! Visit SwiftJet today and experience the difference!