
If you've ever wondered how detailers get that perfect, scratch-free shine, the secret often starts before a wash mitt ever touches the paint. Using a car wash foam gun for a pre-soak is that secret. It's all about lifting the heavy, gritty stuff off your car before you start scrubbing.
This first step blankets your vehicle in thick, lubricating foam, which drastically cuts down the risk of creating swirl marks. Think of it as giving the dirt and grime a soft pillow to ride on as it comes off your paint.
Your Quick Guide to a Flawless Foam Wash
Before we get our hands dirty, let's walk through the big picture. Understanding the 'why' behind each part of the process is just as important as the 'how.' A proper foam gun wash is more than just spraying soapy water; it's a smart, systematic way to clean your car safely and get a much better result.
The whole point is to let the foam do the initial hard work for you. When you cover your car in a rich layer of suds, you’re giving the cleaning agents time to get in there, break down the grime, and lift it away from the surface. This makes the next phase—the actual contact wash—way gentler on your car's delicate clear coat.
Key Takeaway: The foam gun's main job is to pre-treat the vehicle. This pre-soak step minimizes the aggressive scrubbing that causes most fine scratches and swirls in your paint.
To get you started, here’s a quick overview of what the entire process looks like.
Foam Gun Process at a Glance
This table breaks down the key stages of a foam gun wash. It's a handy reference to keep in mind as you work, ensuring you don't miss a beat.
| Stage | Objective | Key Action |
|---|---|---|
| Preparation | Set up for success. | Gather your foam gun, a good car soap, and clean microfiber mitts. |
| Application | Loosen and lift dirt. | Mix the soap solution and apply a thick, even layer of foam from the bottom up. |
| Contact Wash | Gently remove remaining grime. | Wash the pre-soaked surface with a clean mitt, using minimal pressure. |
| Rinse & Dry | Achieve a spot-free finish. | Thoroughly rinse all soap from the vehicle and dry it completely. |
Each stage builds on the last, leading to a safer, more effective car wash that protects your investment and keeps your car looking its best.
Assembling Your Car Detailing Toolkit
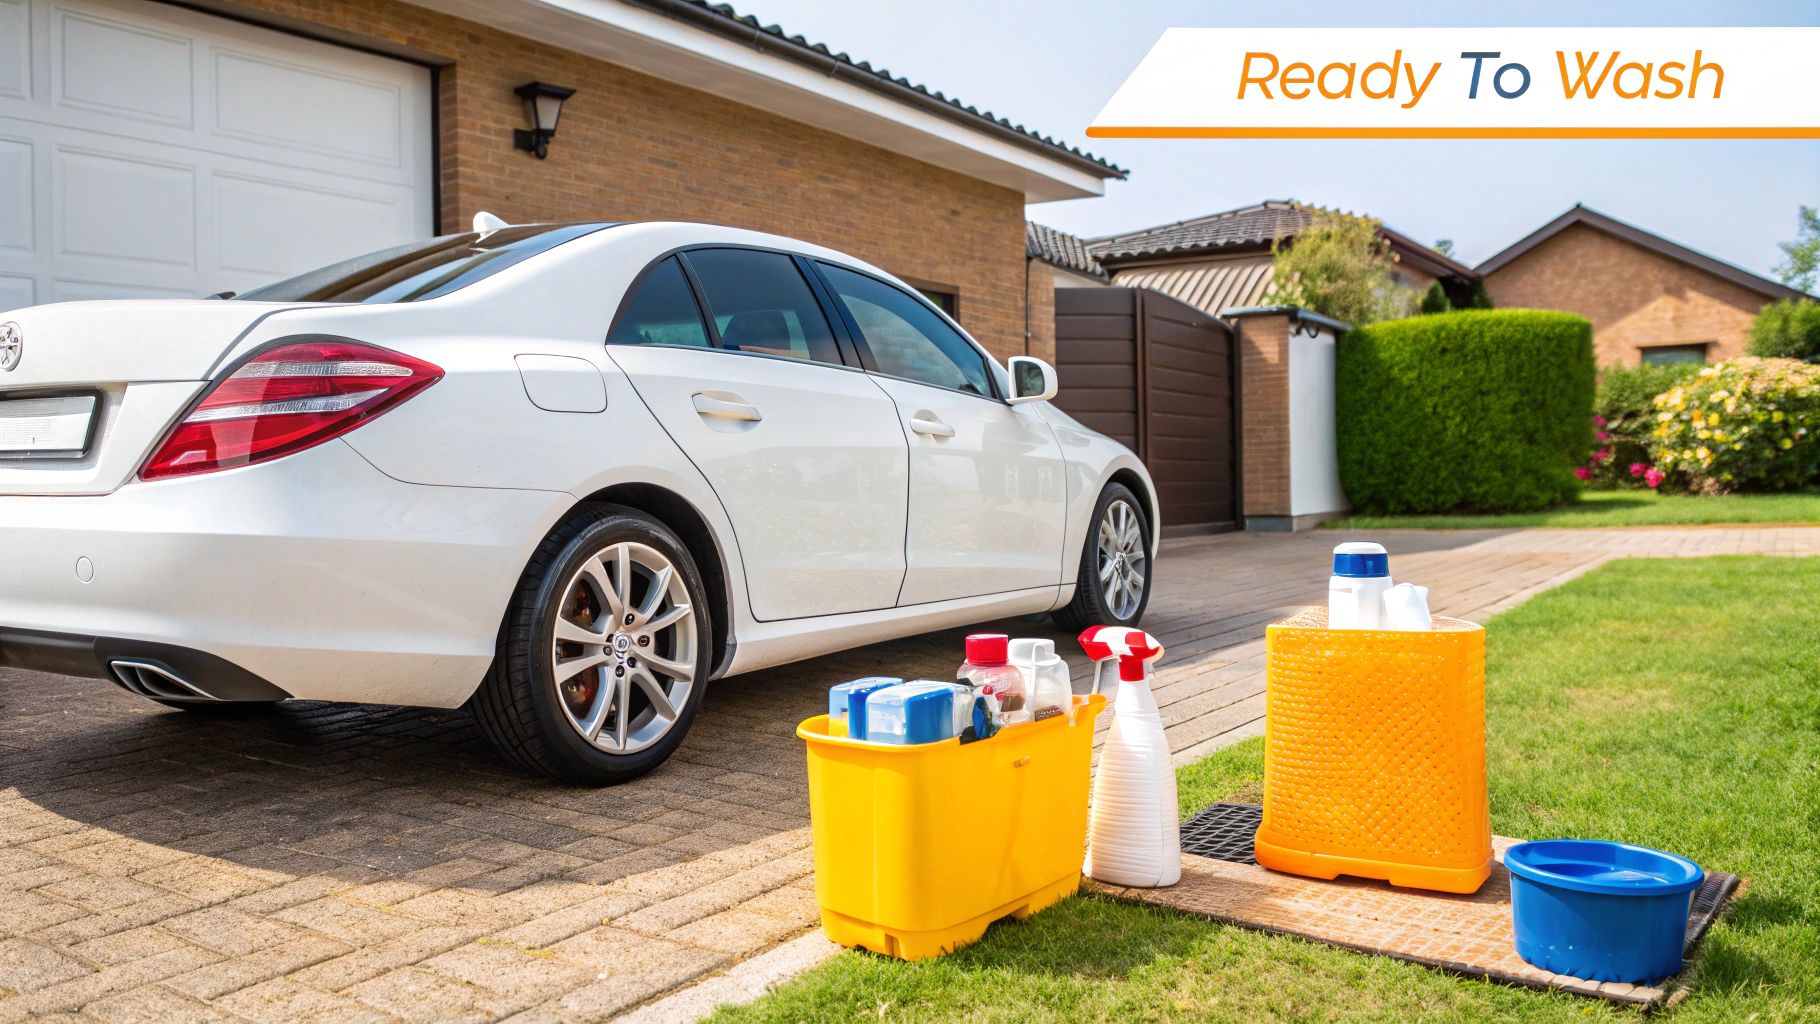
Before you can lay down that satisfying blanket of thick foam, you need to get your gear in order. A truly great wash relies on more than just the SwiftJet foam gun; it's about having the right supporting cast of tools to protect your car’s delicate finish. Getting your supplies sorted is the first real step in learning how to use a car wash foam gun the way the pros do.
The most important choice you'll make, right after the gun itself, is your soap. Make sure you grab a dedicated, pH-neutral car wash soap. It's a common mistake to reach for dish soap, but those harsh detergents will strip away your car's protective wax and sealants, leaving the paint vulnerable. A proper car soap is designed to lift dirt gently without damaging that crucial clear coat.
Essential Washing and Drying Gear
Next up is your best defense against dreaded swirl marks: the two-bucket method. It’s a simple technique that makes a world of difference. All you need are two buckets, preferably with grit guards placed in the bottom to trap dirt and keep it from getting back onto your paint.
- Bucket One (The Wash Solution): This is where you’ll mix your car soap and water. You'll dip your clean wash mitt in here to load it up with fresh suds.
- Bucket Two (The Rinse Water): This one just gets plain water. After washing a section of your car, you'll dunk and agitate the dirty mitt in this bucket before ever putting it back into your soapy water.
Following this process means you aren’t just rubbing the same grit and grime all over your car. A quality microfiber wash mitt is also key here—it’s designed to pull dirt deep into its fibers, unlike old-school sponges that just push abrasives around on the surface.
For a deeper dive into selecting the right equipment, our guide on how different tools can perfect your car cleaning routine provides even more detail.
The Finishing Touches
Finally, don't drop the ball when it comes to drying. A soft, ultra-absorbent microfiber drying towel is non-negotiable for a flawless finish. It’ll soak up water in a hurry without leaving lint or causing the fine scratches that can dull your paint over time.
Getting your toolkit right from the beginning makes the whole foam washing process smoother, safer, and a lot more effective for your car.
Getting the Perfect Foam Gun Setup
The difference between a blanket of thick, dirt-lifting foam and a runny, watery mess really comes down to how you set things up. Taking a few minutes to get the prep work right is what turns your SwiftJet from a simple sprayer into a serious cleaning tool.
Dialing in Your Soap Mixture
Your first move—and honestly, the most important one—is mixing the soap and water in the canister. There's no magic formula here, as the perfect ratio depends on your specific car soap and even the hardness of your local water.
I always recommend starting with a 1:10 ratio of soap to water. Think of it as your baseline. From there, you'll need to experiment a little.
Is your foam too thin and sliding right off the paint? Add a bit more soap concentrate next time. Is it so thick it's struggling to spray? You've gone too far—dial back the soap. You're looking for that sweet spot where the foam clings to the side of your car without instantly dripping off.
Assembling for a Leak-Free Wash
Once you've got your soap solution ready, go ahead and screw the canister onto the SwiftJet spray nozzle. Make sure you get the threads aligned correctly to create a tight seal. Trust me, there's nothing more annoying than soapy water dripping all over your hands while you're trying to wash your car.
With the canister secure, connect the whole unit to your standard garden hose, and you're almost ready to go.
This quick visual breaks down the core steps for getting the foam gun prepped for action.
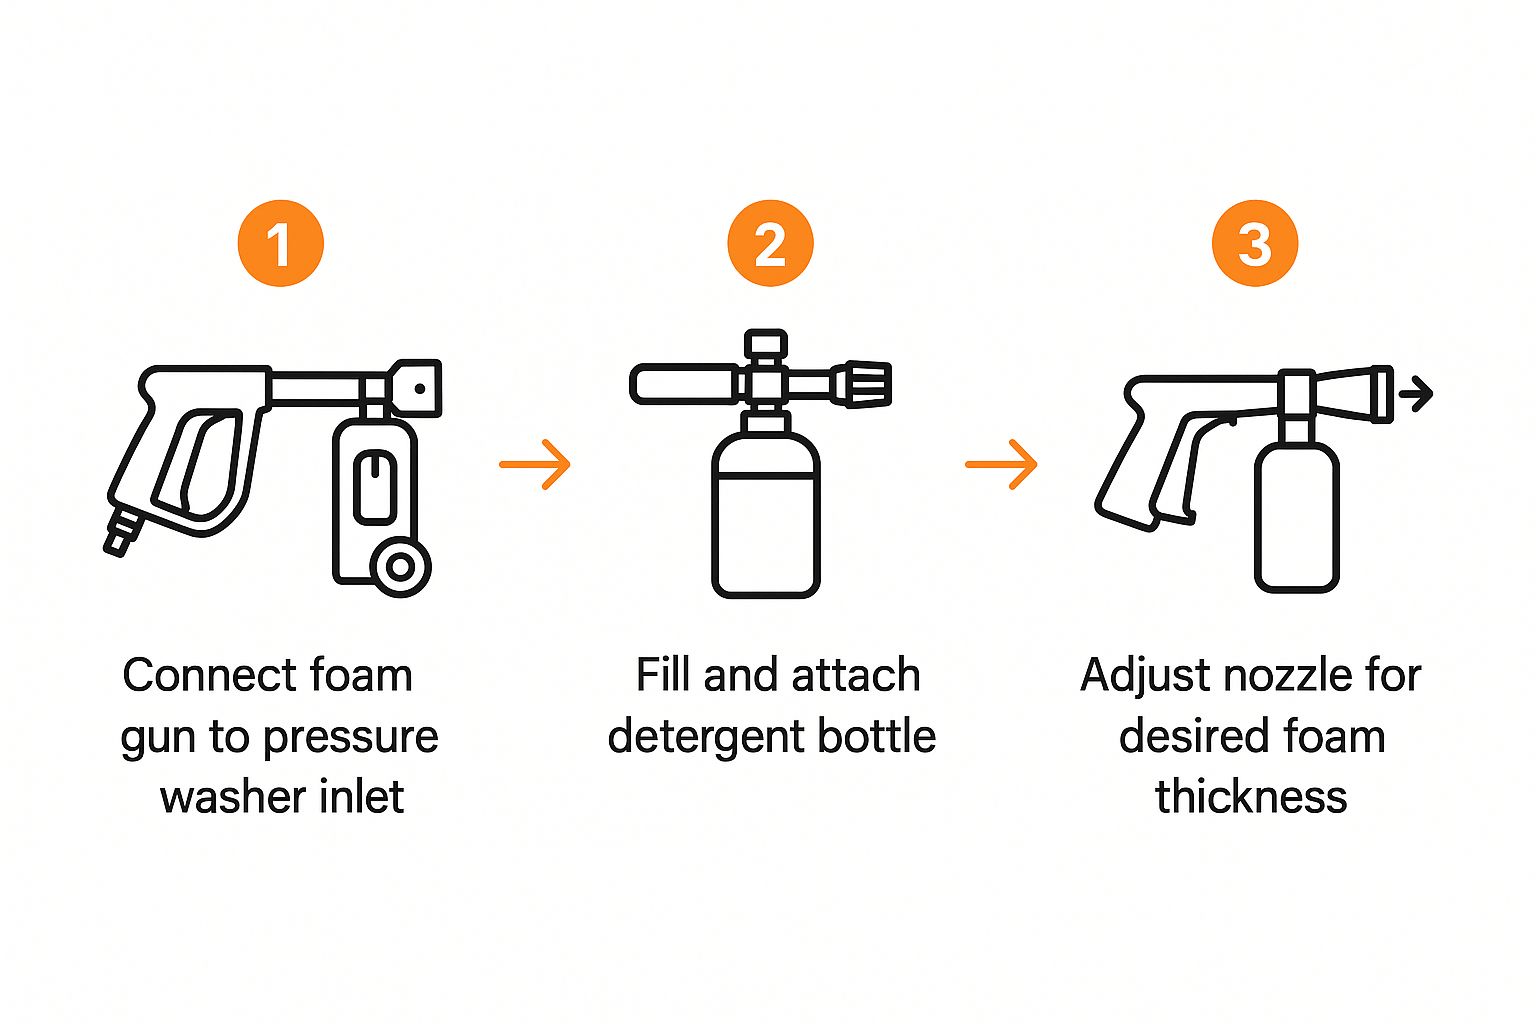
As you can see, it’s a simple process of connecting, filling, and adjusting to get that perfect, sudsy output.
Fine-Tuning the Foam Thickness
The last piece of the puzzle is the adjustment dial right on top of the foam gun. This little dial is your key to controlling the final foam consistency. It regulates how much water mixes with your soap solution as it sprays, directly impacting how thick or thin the foam is.
Pro Tip: Turn the dial towards the '+' symbol for a richer, denser foam. Move it towards the '-' for a more watery spray that’s good for a light rinse. Most pros I know, myself included, crank it all the way to the thickest setting for maximum cleaning power.
It's no surprise these tools are getting so popular. The market is expected to grow from $1.21 billion in 2024 to $1.85 billion by 2031. That massive jump is happening because adjustable nozzles like the one on the SwiftJet give you precise control, which is something detailers and enthusiasts have wanted for a long time. You can read more about the growing popularity of adjustable foam guns on accio.com to see why everyone's getting on board.
Getting Your Foam Technique Just Right
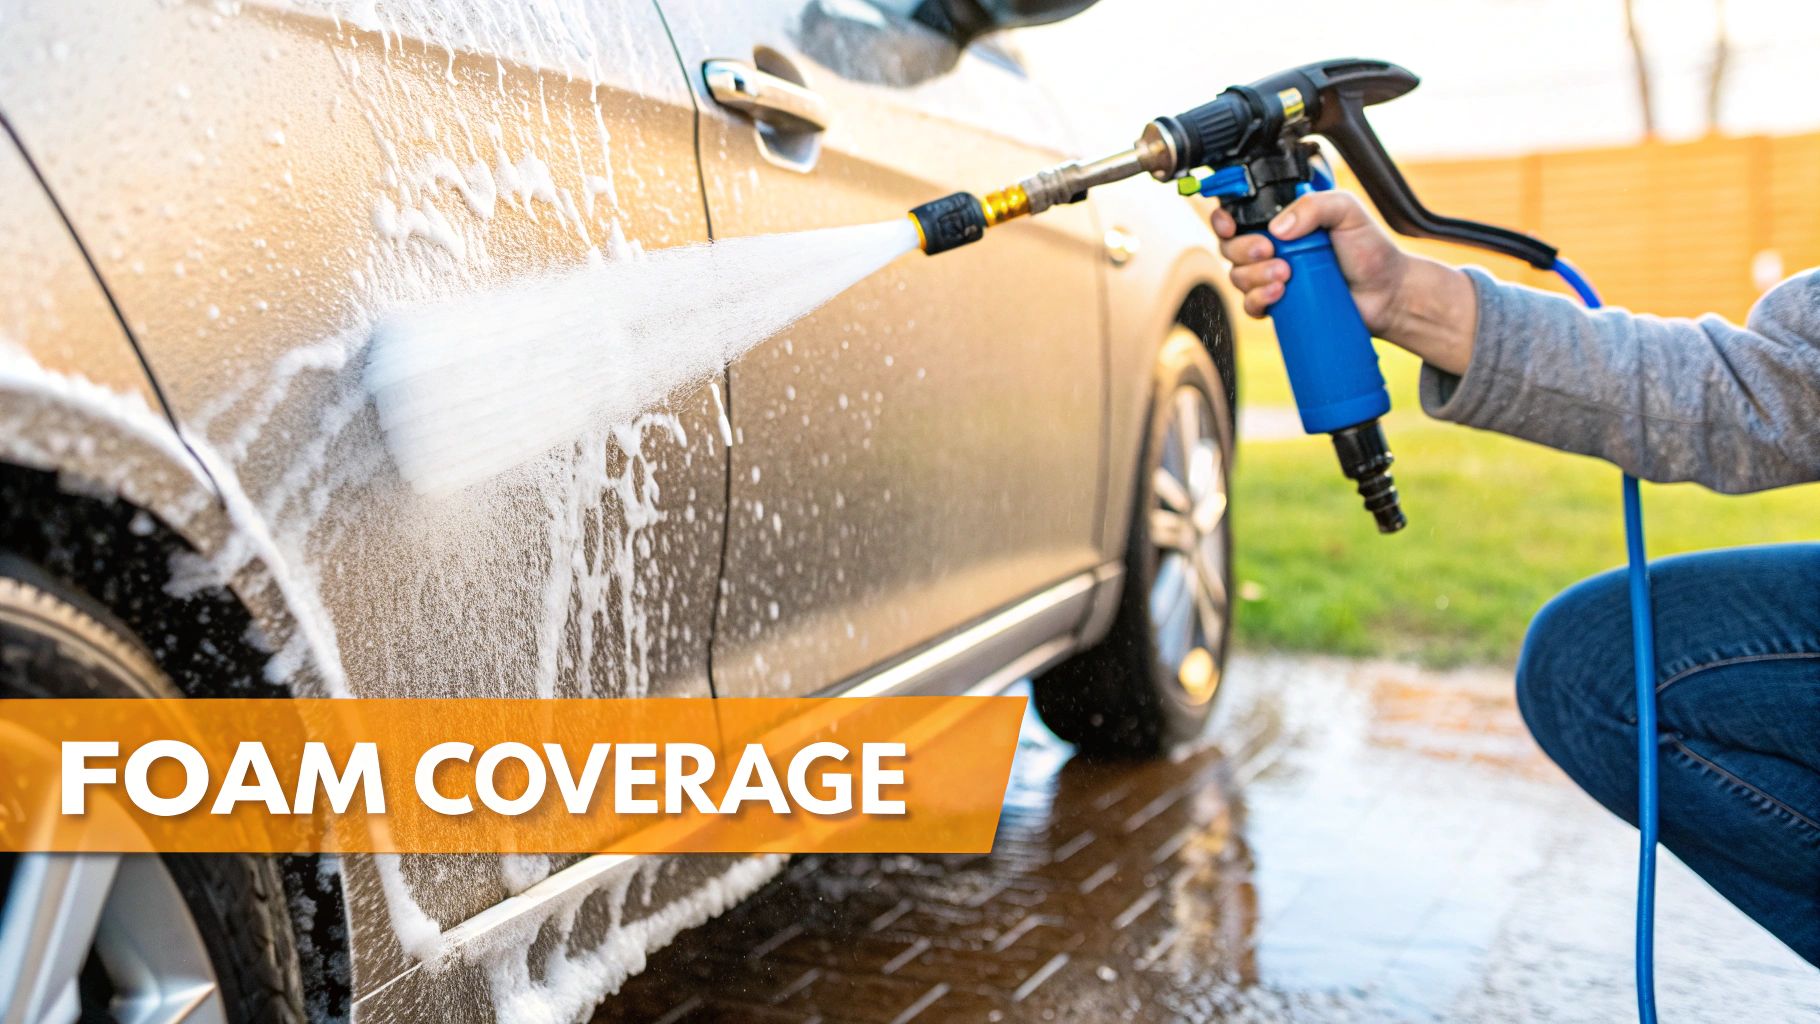
Alright, this is where the fun really starts. Your SwiftJet is all set up and ready to go, so it's time to lay down that thick, satisfying blanket of foam.
Before you pull the trigger on the suds, though, do a quick pre-rinse of the entire vehicle using just your regular garden hose. This quick step is a game-changer; it knocks off all the loose dust and grit, essentially clearing the way for the foam to get to work on the really tough, baked-on grime.
Start From The Bottom
Here’s a pro tip that makes a world of difference: always start foaming from the bottom of the car and work your way up. I know, it feels a bit backwards, but trust me on this one.
When you start low, you let the foam dwell longer on the dirtiest parts of your car—the rocker panels, wheel wells, and lower door sections. If you started from the top, the clean soap would immediately start running down and diluting the foam on those grimy areas. This bottom-up method ensures every panel gets the full, concentrated cleaning power it needs.
Let The Foam Do The Work (Dwell Time)
Once your car looks like it's covered in snow, it's time to just step back and let the foam work its magic. This is called "dwell time," and it's the most critical part of the process. The active agents in the soap are busy breaking down dirt and lifting it off the paint.
Expert Tip: You're aiming for a dwell time of about 3 to 5 minutes. This is the sweet spot. The biggest mistake you can make is letting the foam dry on the car. This can leave behind soap scum and water spots that are a real pain to remove.
To prevent this, always wash your car in a shady spot or during the cooler parts of the day. If you notice a section starting to dry out, just give it a quick, light mist of water to keep it wet and active.
It's no surprise that low-pressure foam guns are becoming so popular. They give you that professional-level clean without needing an expensive pressure washer, and they're much more water-efficient. The growing interest is driven by detailers and weekend enthusiasts alike, as shown by recent research on the low-pressure foam gun market.
Nailing your foam application and dwell time is the key to figuring out how to use a car wash foam gun like a pro.
The Final Wash Rinse and Dry
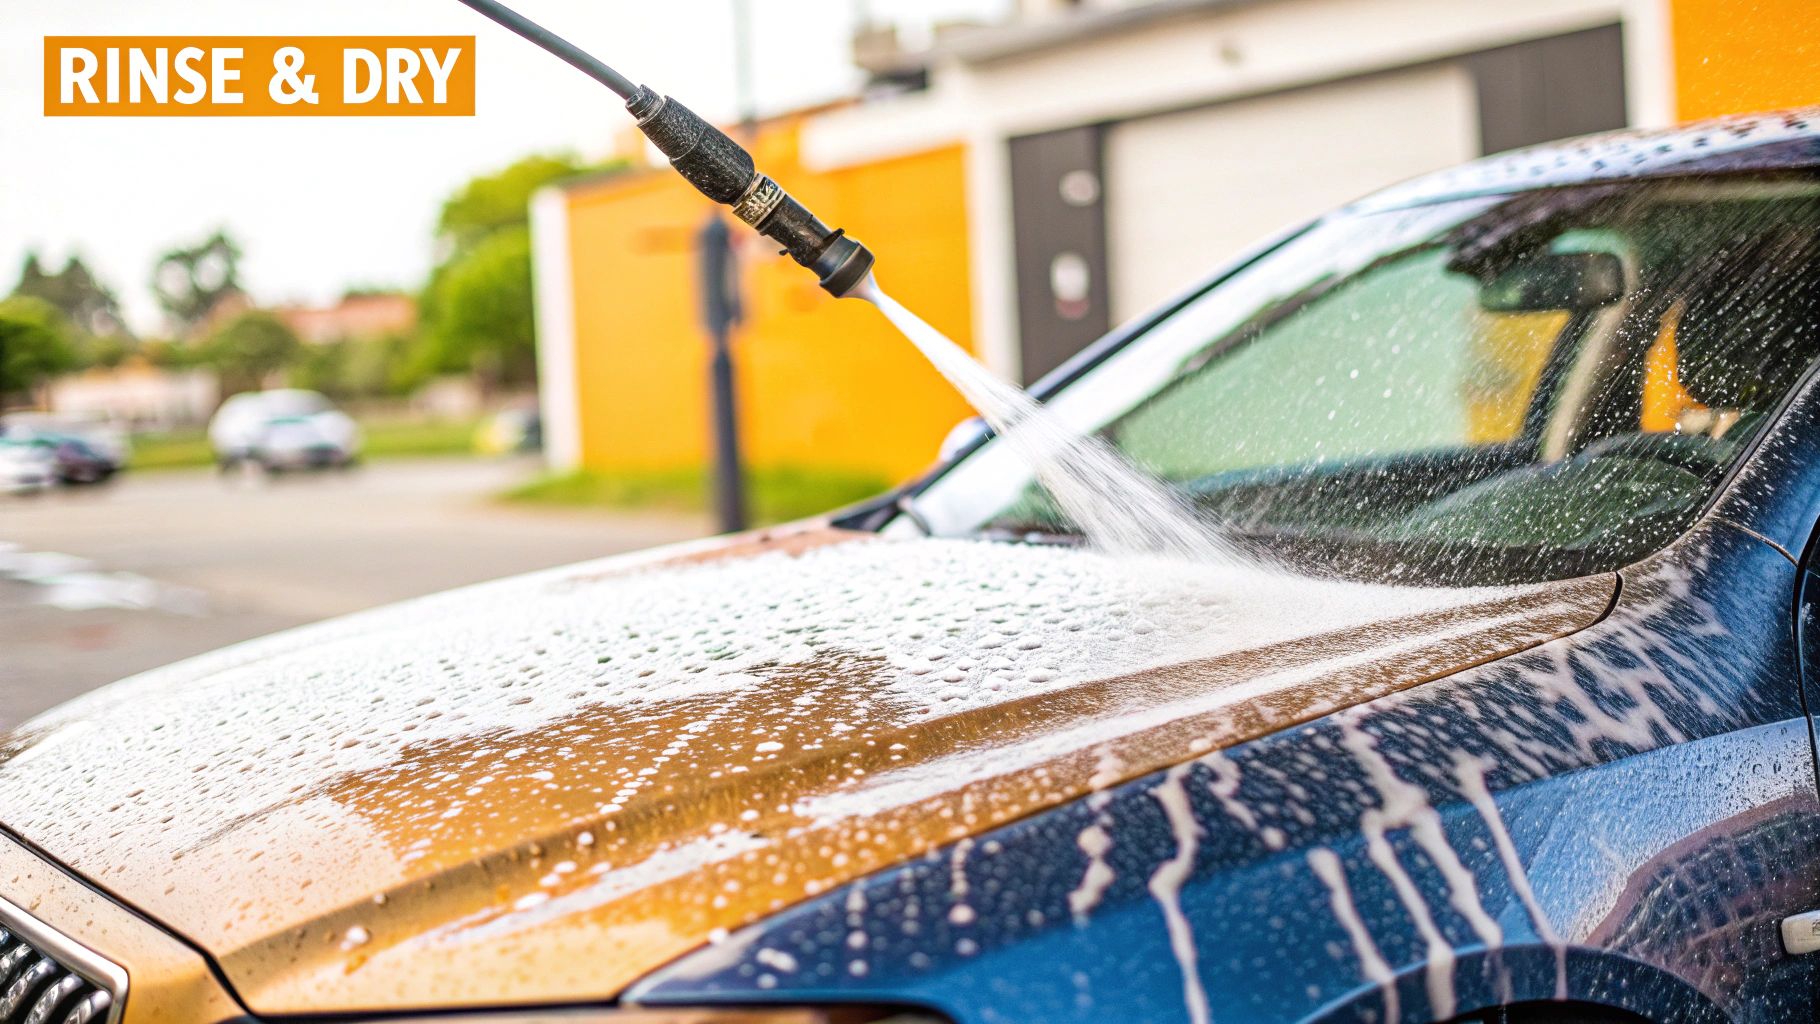
Once the foam has done its job breaking down the heavy grime, it’s time to get hands-on. A gentle contact wash is what really lifts away that last layer of road film, but doing it the right way is crucial to avoid scratching your paint.
This is where the tried-and-true two-bucket method comes into play. It’s a non-negotiable for anyone serious about protecting their car's finish. You’ll need one bucket for your car shampoo and another filled with clean water. Make sure both have a grit guard at the bottom—it’s a small investment that makes a huge difference.
Executing The Perfect Contact Wash
Always start washing from the top of the vehicle and work your way down. Gravity is your friend here; you don't want dirt from the lower panels running down over areas you've already cleaned.
Dip your clean microfiber wash mitt into the soap bucket and gently wash one panel at a time—the roof, for instance. I recommend using straight-line motions, not circles, as this is less likely to create swirl marks if you accidentally pick up a piece of grit.
After that single panel is done, here's the most important part: dunk that mitt into your rinse bucket. Swirl it against the grit guard to knock all the dirt loose before you even think about putting it back into your soapy water.
Why It Matters: This simple habit is the key to a scratch-free wash. It stops you from dragging dirt and grit from a filthy area, like your rocker panels, all over a clean one, like the hood. You're effectively trapping the contaminants in the rinse bucket.
As you finish each section, give it a thorough rinse with your hose. Don't let soap dry on the paint, as it can leave behind residue that’s tough to remove.
Once the entire car is washed and rinsed, the final step is drying. Grab a high-quality, plush microfiber drying towel. I’ve found the "blotting" method works best—just lay the towel across a panel and pat it dry. This soaks up the water without the friction of wiping, which is your best defense against water spots and helps reveal that brilliant shine.
For a deeper dive, you can find more of our top tips for achieving a sparkling car wash finish.
Your Foam Gun Questions, Answered
Once you get the hang of your foam gun, you'll start noticing the little details. That's when the questions pop up. Let's run through some of the most common ones we hear from fellow car lovers so you can get back to washing.
Why Is My Foam So Watery?
Getting thin, runny foam that just sheets off your car is a classic rookie problem, but it's an easy fix. More often than not, it boils down to your soap-to-water ratio or simply not having enough water pressure.
First thing’s first: try adding more soap. Some formulas are less concentrated than others and just need a little extra kick to get thick. At the same time, give your garden hose a quick check. Make sure the spigot is cranked all the way open and there are no kinks in the line restricting that flow.
Can I Just Use Dish Soap?
I get the temptation, but this is a hard no. Dish soaps are packed with aggressive degreasers meant to obliterate baked-on food. When you use that on your car, you're not just cleaning it—you're stripping away the essential wax or sealant that protects your paint. That leaves it looking dull and totally exposed to the elements.
Always, always stick with a pH-neutral car wash soap. These are engineered to gently lift away dirt and road grime without harming your car’s clear coat or any protective layers you've applied.
Foam Gun vs. Foam Cannon: What's the Real Difference?
It’s an easy mistake to mix these two up, but it all comes down to the power source.
- A Foam Gun is your go-to for home use. It hooks right up to a standard garden hose and works with your home's existing water pressure.
- A Foam Cannon, on the other hand, needs a pressure washer to do its thing, blasting water through at high pressure.
That high-pressure blast is why a foam cannon can create that super-thick, shaving cream-style foam you see in professional detailing shops. But for most of us working in our own driveways, a high-quality foam gun like the SwiftJet is the perfect solution. It delivers fantastic results without needing to invest in a pricey pressure washer.
For a deeper dive, check out our full guide on how to use car wash foam gun to get the best possible finish.
Ready to take your car wash game to the next level? The SwiftJet Car Wash Foam Gun makes getting that professional, scratch-free shine at home a total breeze. Click here to get your SwiftJet today!