
Not all water stains are created equal, and knowing what you're up against is half the battle. The key to getting rid of them for good is figuring out what kind of damage you're actually looking at. Some are just simple mineral deposits (Type I) sitting on the surface, which come off pretty easily. Others, known as etched spots (Type III), have actually bonded with your car's clear coat and started to eat into it, meaning you'll need to break out the big guns like a polisher.
Decoding the Damage on Your Car's Paint
Before you reach for any bottle on your shelf, you have to understand the enemy. Those annoying white spots are just mineral leftovers—mostly calcium and magnesium—that get left behind when a drop of water evaporates. How bad the stain gets really depends on what was in that water and how long you let it sit there.
Think of it this way: the hard water from a rogue lawn sprinkler is usually packed with way more minerals than a gentle rain shower. Let the sun bake those minerals onto a body panel, and they can start to etch their way into the clear coat. Before you know it, you've got a permanent blemish that a simple wash just won't touch.
Identifying the Stain Type
Figuring out if you have a simple deposit or a more serious etched spot is critical. This one step will determine your entire game plan and save you from wasting time on stuff that won't work—or worse, accidentally making things worse.
- Type I Mineral Deposits: These are the ones you'll see most often. They look like faint, chalky rings right on top of the paint. If you run your finger over one (on a clean car, of course), you might feel a tiny bit of texture, but the paint itself still feels smooth. These are your typical culprits from hard tap water or a recent rain.
- Type II Bonded Contaminants: This is where things get a little more serious. The minerals have started to create a stronger bond with the clear coat. A regular wash won't be enough to lift them, so you'll likely need a dedicated chemical remover or a clay bar to break them down.
- Type III Etched Spots: This is the big one. The damage is real. Whether it's from acid rain or just intense heat, the minerals have physically eaten into the clear coat, leaving a tiny, permanent crater. You can often feel a clear dip or indentation when you run your fingernail over it.
This flowchart gives you a visual guide on how a simple spot can turn into a bonded or etched stain over time.
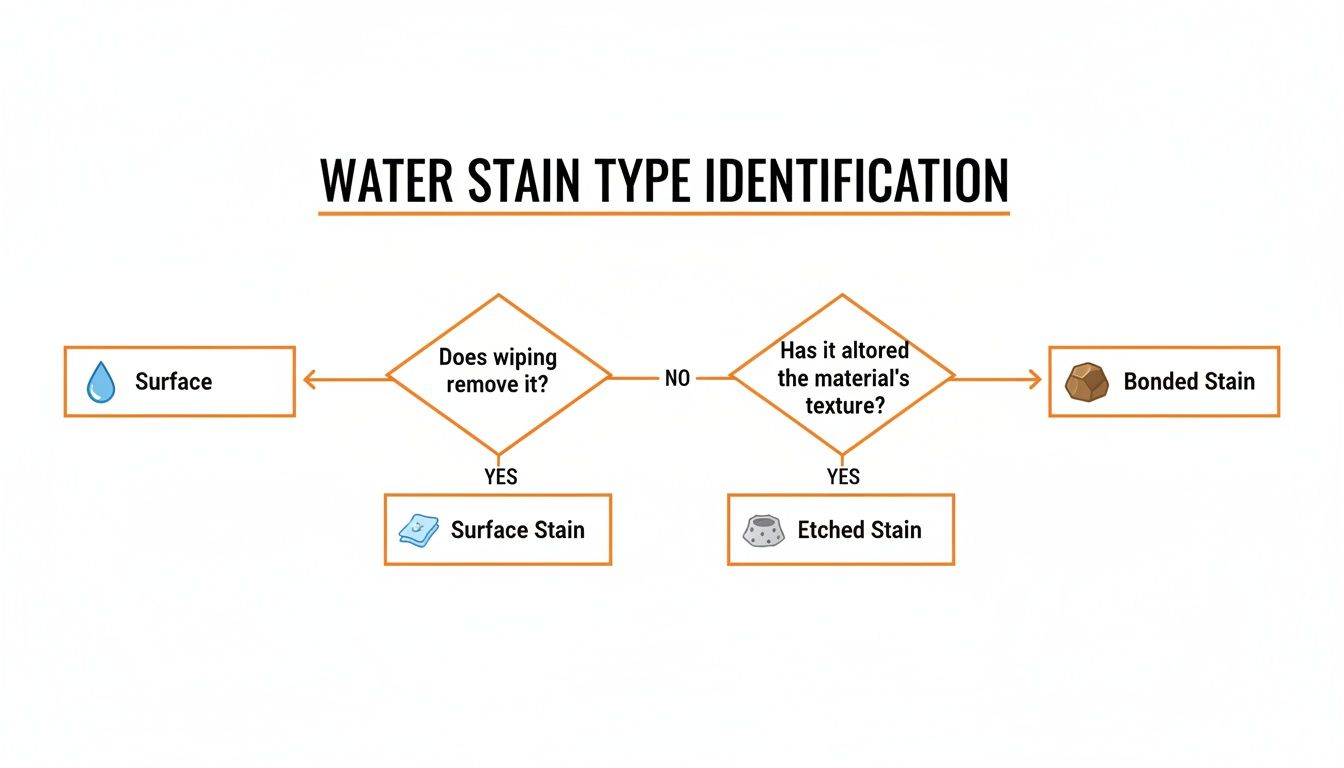
The main thing to remember is that the longer a water spot sits, the higher the chance it'll evolve from a simple surface issue to a much bigger problem.
Why a Proper Diagnosis Matters
Look, you wouldn't use a sledgehammer to hang a picture frame. Going straight to a heavy machine polisher for a light Type I stain is total overkill and just wears down your clear coat for no reason. On the flip side, trying to wipe away a deep Type III etch with a quick detailer spray is guaranteed to end in frustration.
Understanding the science behind water spots is key, and it doesn't just apply to paint. For example, this ultimate guide to hard water spots on windows shows how the same exact minerals cause headaches on glass.
By accurately diagnosing the stain, you can choose the least aggressive method necessary, preserving your car’s paint and achieving a perfect finish with minimal effort.
Taking a minute to diagnose the problem first saves you time, money, and the health of your car's finish. For a deeper dive into specific solutions, you can also check out our guide on how to remove hard water stains.
Assembling Your Water Spot Removal Toolkit
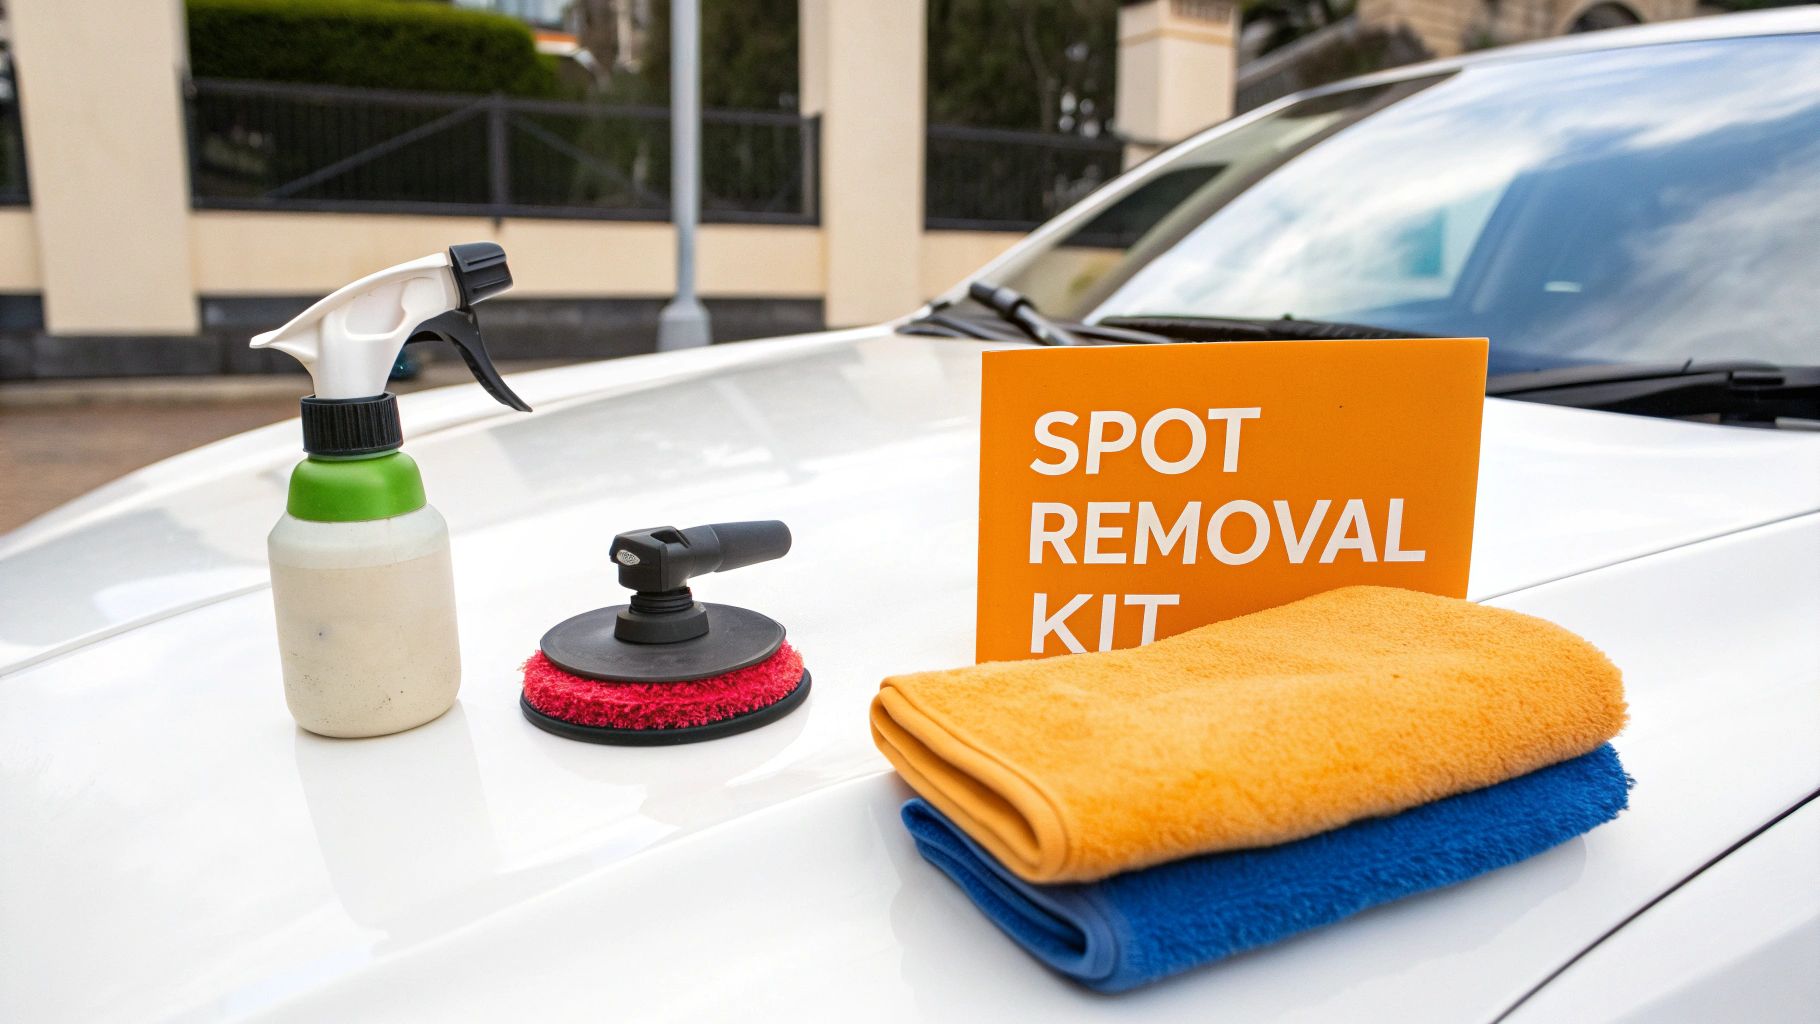
Jumping into a detailing job unprepared is a surefire way to get frustrated and, even worse, potentially damage your car's finish. Having the right tools at your fingertips makes all the difference. What you'll need really depends on how bad the water stains are—your toolkit could range from a few simple household items to some serious detailing equipment.
But before you even touch a single spot, the car has to be clean. I mean, really clean. Giving it a proper wash, especially with a foam gun like the SwiftJet, is the perfect starting point. It'll lift away all that loose dirt and grit so you aren't grinding it into the paint while you’re trying to remove the stains.
Water Stain Removal Toolkit Comparison
This table outlines the necessary tools and products for removing water stains based on their severity, helping you gather the right supplies for your specific situation.
| Stain Severity | Essential Tools | Recommended Products |
|---|---|---|
| Light | • Several clean microfiber towels • Spray bottle |
• 50/50 mix of distilled water and white vinegar • Quick detailer spray |
| Moderate | • Clay bar or clay mitt • Clay lubricant • High-quality microfiber towels |
• Dedicated water spot remover spray • Car soap (for re-washing) |
| Severe | • Dual-action (DA) polisher • Foam or microfiber cutting/polishing pads • Isopropyl alcohol (IPA) wipe down |
• Light-to-medium cutting compound • Finishing polish • Paint sealant or wax for protection after correction |
Having the right gear for the specific type of stain you're facing is half the battle. This way, you avoid using a sledgehammer to crack a nut—or worse, trying to fix deep etches with a simple spray and wipe.
Essentials For Light To Moderate Spots
Most of the time, you'll be dealing with fresh mineral deposits that haven't had a chance to permanently etch the clear coat. For these common annoyances, your go-to supplies are simple and effective. You don't need a professional setup to handle these.
Here’s what you should have ready:
- Plush Microfiber Towels: Don't skimp here. Grab at least three or four clean, high-quality towels for applying products, wiping off residue, and drying everything down.
- White Distilled Vinegar: A classic DIY solution for a reason. Mixing it 50/50 with distilled water creates a gentle acid that dissolves light mineral deposits without being too harsh on your paint.
- Dedicated Water Spot Remover: If vinegar doesn't cut it, a commercial water spot remover is your next best bet. These formulas are engineered to break down stubborn mineral bonds safely.
The issue is so widespread that the global market for automotive water spot removers was valued between USD 1.27–1.45 billion in 2024. It’s clear that getting rid of these spots is a huge concern for drivers everywhere. You can see more data on this growing market over at Growth Market Reports.
Heavy-Duty Tools For Etched Stains
Now, if you're up against stains that have been there for a while, you've moved beyond simple chemical cleaners. When minerals bond to the paint or, worse, etch into the clear coat, you have to step up your game with more muscle. For a full rundown of professional-grade tools, you can check out our complete car detailing supplies list.
For deeply etched spots that you can feel with your fingernail, a simple chemical wipe-down won't be enough. You will need to physically level the clear coat to erase the damage.
This kind of paint correction calls for more specialized equipment. Your heavy-hitter toolkit should include a clay bar or clay mitt to decontaminate the surface and pull out any bonded particles, leaving the paint feeling smooth as glass. For the deepest etches, you’ll need a dual-action (DA) polisher with the right pads and a light-cutting compound. This setup lets you carefully remove a microscopic layer of the clear coat, which effectively erases the stain and brings back that deep, flawless shine.
A Practical Guide to Removing Light Water Spots
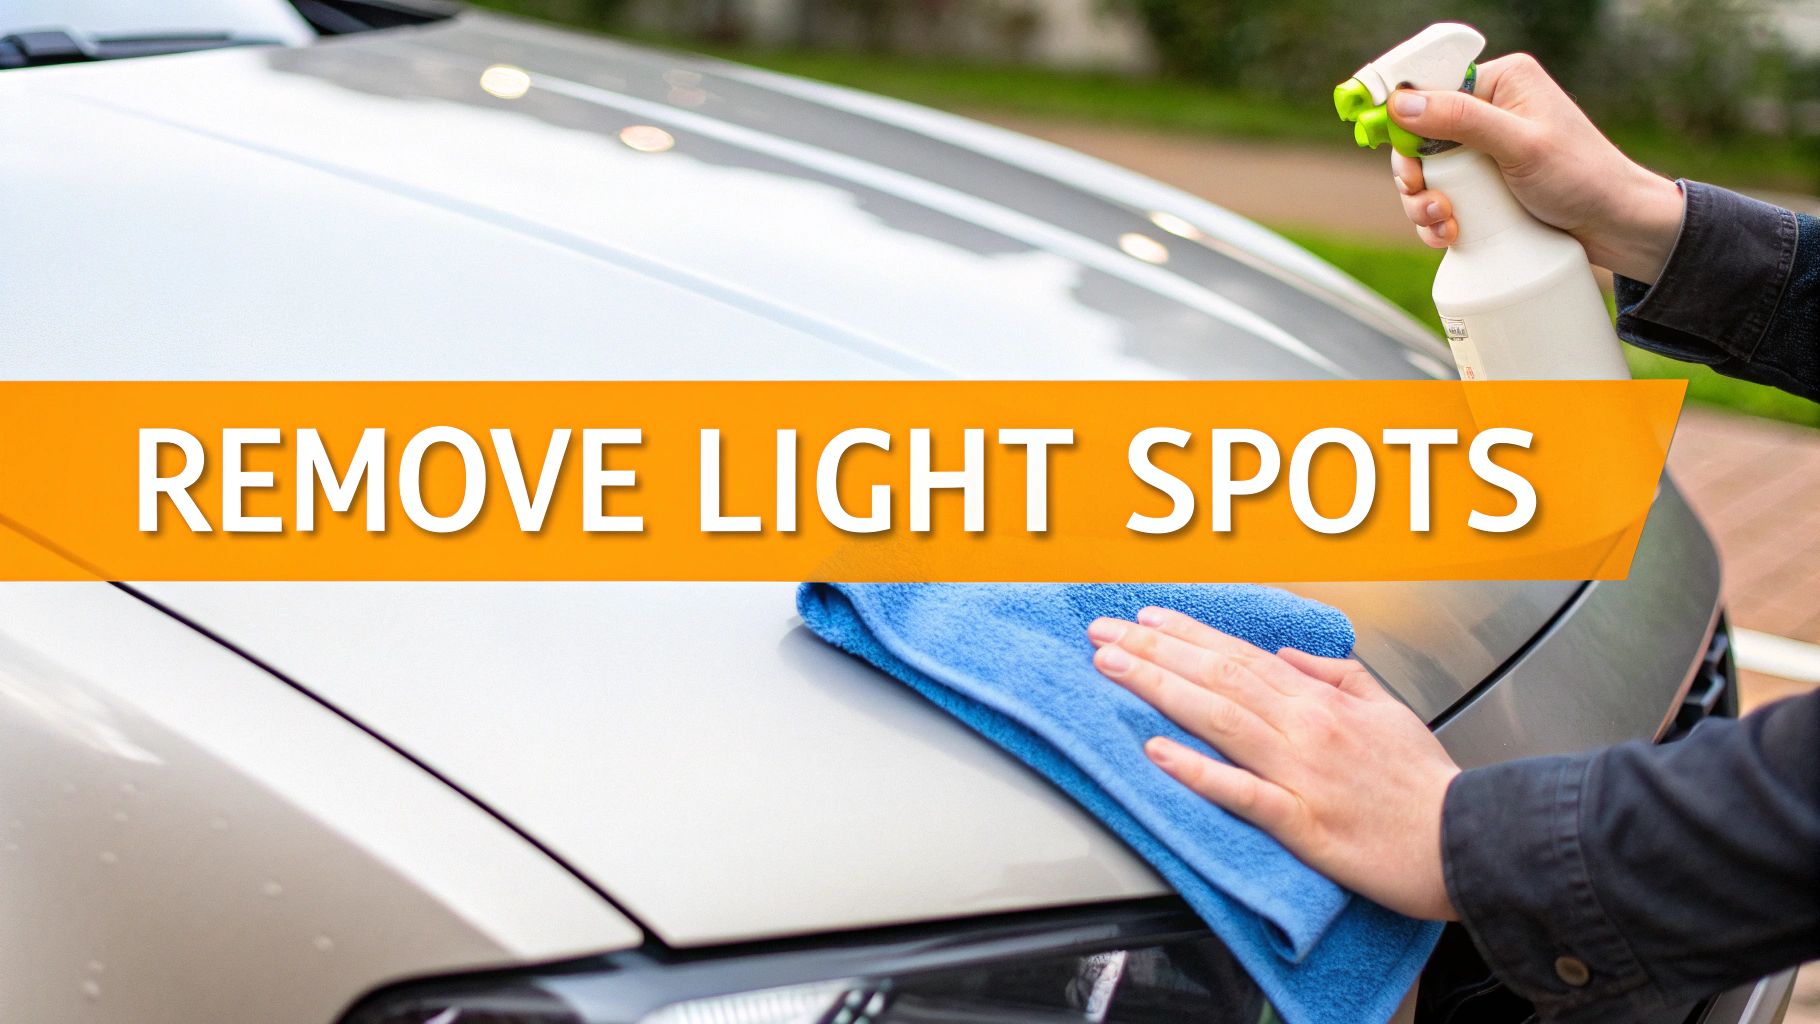
This is where we get into the nitty-gritty of dealing with the most common culprit: those fresh mineral deposits that haven't had a chance to bake into your paint. We're talking about Type I spots—the annoying rings left behind by a rogue sprinkler or a wash that dried too fast in the sun.
The good news? These are the easiest to handle. You can put away the heavy-duty polishers and aggressive chemicals for now. A little patience and the right technique are all you really need to get your paint looking pristine again.
First thing’s first: always work on a surface that’s clean and cool to the touch. Trying to tackle water spots on a hot panel or in direct sunlight is a recipe for disaster. Any product you use will evaporate almost instantly, which can actually make the spotting worse. A proper wash, maybe with a foam gun like the SwiftJet to lift all the loose dirt, preps the paint perfectly for what comes next.
The Go-To Vinegar Solution
For light mineral spots, a simple household remedy is often your best first line of defense. A mix of white distilled vinegar and distilled water is a classic for good reason. The mild acidity is just right for dissolving the alkaline minerals, like calcium, that create those chalky outlines on your paint.
Here’s my tried-and-true process for this method:
- Mix It Up: Grab a clean spray bottle and create a 50/50 solution of white distilled vinegar and distilled water. It's really important to use distilled water here—tap water is full of minerals and will just put you back at square one.
- Spray and Wait: Lightly mist a small, manageable area, no bigger than a 2x2 foot square. Let the solution sit on the surface for about 30 to 60 seconds. This "dwell time" gives the acetic acid a chance to work its magic and break down the mineral bonds.
- Wipe Gently: Take a clean, plush microfiber towel and gently wipe the area. Use very little pressure. The idea is to lift the dissolved minerals off the surface, not grind them into your clear coat.
- Rinse and Dry: This part is critical. Immediately after wiping, you need to neutralize the vinegar. You can do this by rinsing the area with plain water or using a quick detailer spray. Then, dry the panel completely with a fresh, dry microfiber to prevent any new spots from forming.
Working in small sections is key. It ensures you have total control and prevents the vinegar solution from drying on the paint, which could cause its own set of problems.
Pro Tip: Always, always test any cleaning solution on a small, hidden spot first. While this vinegar mix is safe for virtually all modern clear coats, it’s just smart practice. You want to be sure it plays nice with your car’s specific finish and any wax or sealant you might have on there.
When Vinegar Doesn't Cut It
So you’ve tried the vinegar trick a couple of times, and that one stubborn spot just won’t budge. Don’t worry. This just means it's time to step up to a product made specifically for this job: a dedicated chemical water spot remover.
These products are formulated with a slightly stronger (but still safe) blend of acids and surfactants designed to tackle mineral deposits on automotive paint.
The process is pretty much the same as with the vinegar: spray, let it dwell for the time recommended on the bottle, and wipe away gently. The golden rule when dealing with light spots is to always start with the least aggressive method that gets the job done. It’s the best way to preserve your car’s clear coat and keep it looking great for years to come.
Bringing Out the Big Guns for Stubborn and Etched Stains
So, the vinegar trick didn't work. When gentle methods fail, it's a sure sign the mineral deposits have dug in and formed a serious bond with your clear coat. These are the stubborn spots that laugh off the basic stuff, and they demand a more targeted approach. But don't worry, you haven't run out of options; you just need to escalate your strategy.
This is where we get into dedicated chemical and mechanical solutions. These are the go-to techniques for Type II and Type III water stains—the kind that have either chemically bonded to the surface or, worse, have started to physically etch into the clear coat itself.
Level Up with a Dedicated Water Spot Remover
If vinegar didn't cut it, your next logical move is a professional-grade chemical water spot remover. These products are carefully formulated with a balanced blend of acids and lubricants designed specifically to dissolve heavy mineral buildup without damaging your paint. Think of it as using a scalpel instead of a butter knife.
The application is simple, but you need to be careful:
- Always work on a cool panel, completely out of direct sunlight.
- Spray the remover onto the problem area and let it dwell for the time recommended by the manufacturer, which is typically 30-60 seconds.
- Gently wipe the residue away with a fresh microfiber towel.
- Immediately neutralize the area with a quick detailer spray or a quick water rinse, then dry it thoroughly.
Whatever you do, don't let these products dry on the paint. Their acidic nature is what makes them effective, but it can also cause new problems if left to sit for too long. If the spots are still there after a couple of tries, it’s time to switch from chemical to mechanical tactics.
Mechanical Decontamination with a Clay Bar
Run your hand over the paint after washing it. If it feels gritty or rough, you're feeling bonded contaminants. This is exactly what a clay bar is made for. It glides across a lubricated surface and literally shears off anything stuck on top of the clear coat, including those tough mineral deposits.
Using a clay bar restores that perfectly smooth, glass-like feeling, which is an absolutely critical step before you even think about polishing. If you need a full walkthrough, check out our guide on how to clay bar your car the easy way. This process won't remove etching below the surface, but it clears the way so you can.
A classic rookie mistake is jumping straight to polishing a contaminated surface. All you're doing is grinding those tiny, abrasive minerals into your paint, creating a whole new set of swirls and scratches to deal with.
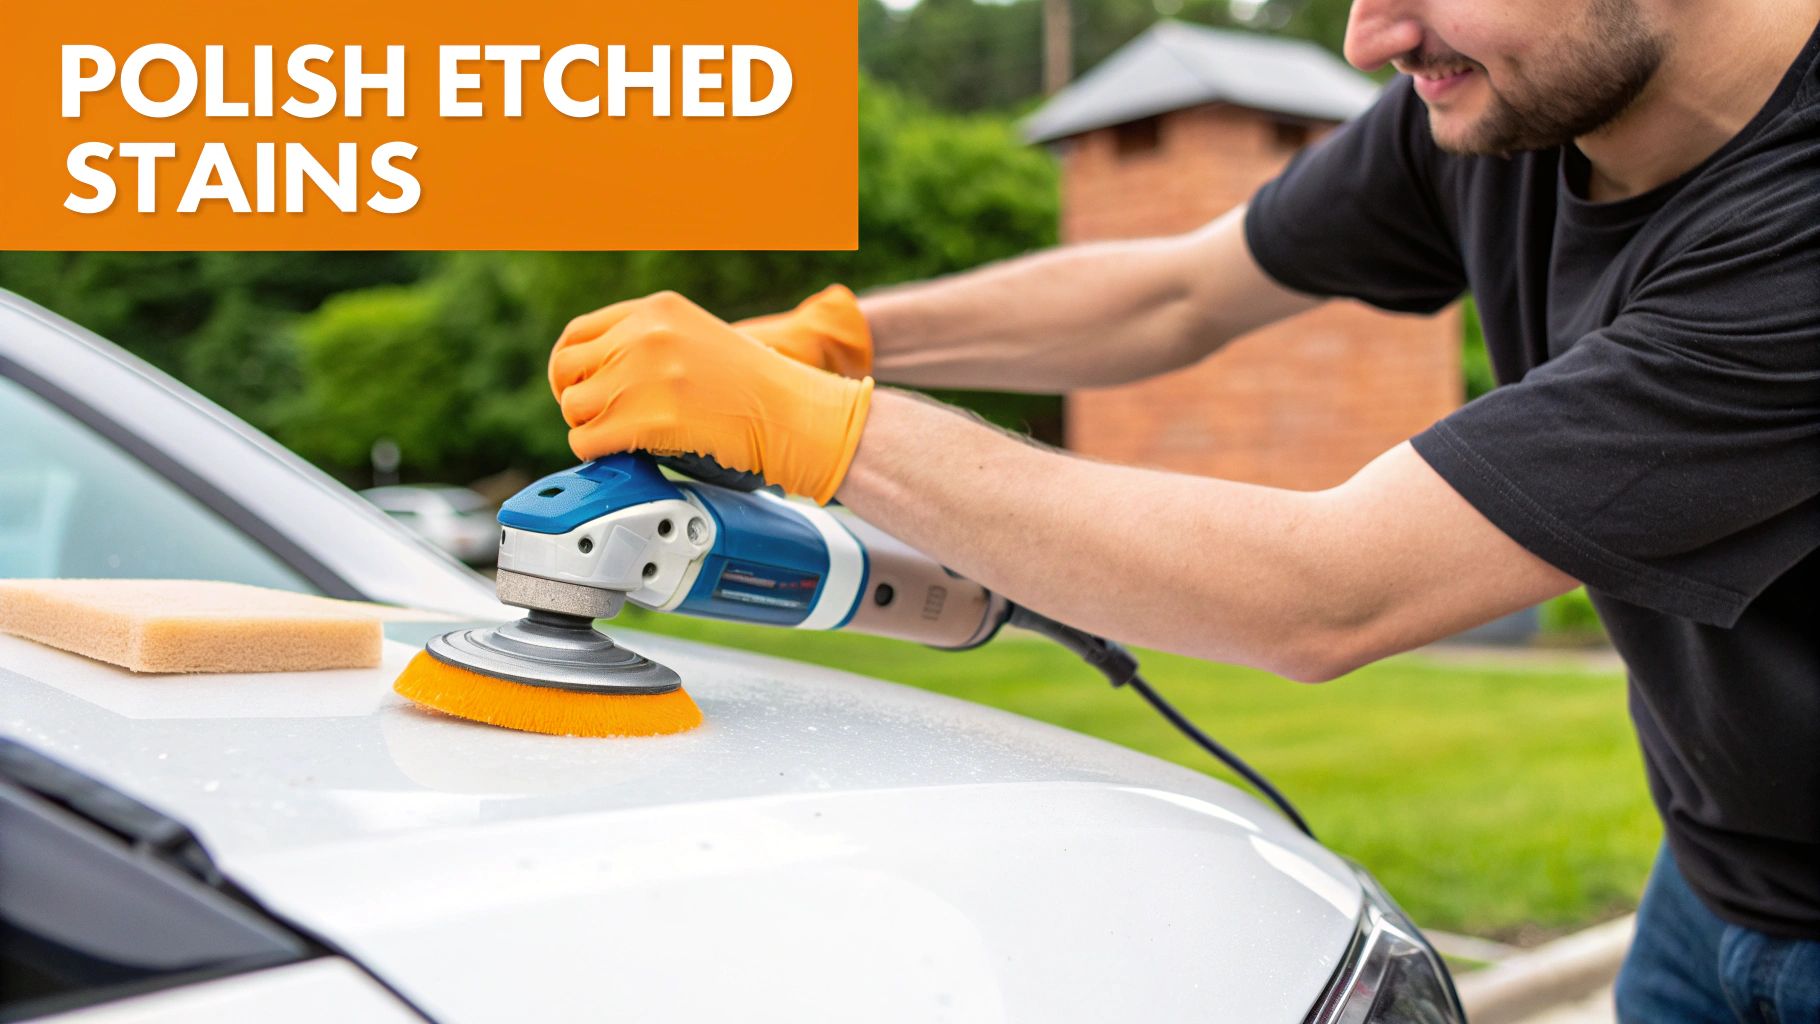
Erasing Etched Stains with Machine Polishing
If you've washed, chemically treated, and clayed the surface and you can still see the faint outline of a water spot, you've got an etched stain. This isn't something on your paint anymore; it's a tiny crater in your paint. The only way to fix it is to carefully level the surrounding clear coat until the surface is perfectly flat again.
This is a job for a dual-action (DA) polisher.
For anyone who isn't a seasoned pro, a DA polisher is much safer and more forgiving than a high-speed rotary buffer. Its oscillating motion makes it far less likely you'll burn through the paint. The key is pairing the machine with the right pad and compound for the job.
- Compound Selection: Always start with the least aggressive product you think will work. For most water spot etching, a light-cut compound or even a fine finishing polish is all you'll need.
- Pad Choice: Match your compound with a light polishing or finishing foam pad. Stay away from heavy cutting pads unless you're tackling deep scratches and have the experience to back it up.
- The Process: Squeeze a few small drops of polish onto the pad, spread it over a small 2x2 foot section, and move the polisher in slow, overlapping passes. After a few passes, wipe the residue away with a clean microfiber and inspect your work under good lighting.
The demand for this level of paint correction is a huge reason the professional detailing world has exploded. The global car detailing services market was valued at USD 41.40 billion in 2024 and is on track to hit USD 58.06 billion by 2030, according to a report from Grand View Research.
When water stains have physically etched into the surface, polishing isn't just an option—it's the final answer. It’s how you restore that deep clarity and gloss, making the damage disappear for good.
How to Prevent Water Stains from Coming Back
It's one thing to get rid of water spots, but it’s another to keep them from coming back. After all the work you’ve put in to restore your car's finish, the last thing you want is a fresh set of mineral rings after the next rainfall. This is where you shift from a reactive mindset to a proactive one.
The secret is to make your car’s surface as inhospitable to water as possible. You want to create a hydrophobic surface that forces water to bead up and roll away, taking those pesky minerals with it. When water can't cling to your paint, it can't leave deposits behind as it evaporates.
Build a Protective Shield on Your Paint
The most effective long-term strategy is applying a dedicated layer of protection. Think of it as a sacrificial shield that takes the abuse so your clear coat doesn't have to. You’ve got a few great options, each with its own pros and cons.
-
Traditional Waxes: Carnauba-based waxes deliver that deep, warm glow and create excellent water beading. Their downside is longevity; you’ll typically get a few weeks to a couple of months of protection before needing to reapply. They're a classic for a reason, but they require regular upkeep.
-
Paint Sealants: These are your workhorses. As synthetic polymers, sealants form a much stronger and more durable bond with your paint than natural waxes. A good quality sealant will easily give you up to six months of solid hydrophobic protection.
-
Ceramic Coatings: If you’re looking for the ultimate defense, this is it. A ceramic coating creates a semi-permanent, glass-like layer over your paint that is incredibly hard and slick. This surface is so hydrophobic that water flies right off. A professionally applied coating can last for years, making it incredibly difficult for minerals to get a foothold.
For the most serious protection against not just water spots but also rock chips and scratches, you can step up to a paint protection film (PPF), which is a clear, self-healing barrier.
Refine Your Washing and Drying Routine
How you wash and dry your car is just as important as the products you use. A few simple tweaks to your routine can make a world of difference.
The global market for car cleaning products is on track to reach USD 6.78 billion by 2031, largely driven by the popularity of foam-based cleaners. A thick pre-wash foam lifts dirt and minerals away from the paint before your wash mitt ever touches the surface, dramatically reducing the risk of both spots and scratches.
First, always wash your car in the shade and make sure the panels are cool to the touch. This slows down evaporation and gives you more time to work.
Second, and this is crucial: never let your car air dry. This is practically an invitation for water spots, especially if you're working in direct sunlight. As soon as you’re done rinsing, grab a plush, high-quality microfiber drying towel and gently pat the surface dry.
For an even safer, touch-free method, use a car dryer or even a powerful electric leaf blower. This is the perfect way to blast water out of tight spaces like mirrors, grilles, and emblems where it loves to hide and cause drips later on. These small habits are what separate a good finish from a flawless one.
Got Questions? Let's Talk Water Spots
Even the best detailers had questions when they started. It’s totally normal to feel a bit hesitant when you’re about to take a polisher to your paint for the first time. Let’s clear up a few of the most common questions I get asked, so you can move forward with confidence.
Can I Just Grab Windex or a Household Cleaner?
I know it’s tempting, but please, step away from the kitchen cabinet. Using a household cleaner on your car's paint is one of the fastest ways to create a much bigger problem.
Cleaners like Windex or other all-purpose sprays are packed with harsh chemicals, often including ammonia. These ingredients are designed to cut through grease and grime on hard surfaces like glass and countertops, not delicate automotive clear coats. They'll strip off your wax, sealant, and any other protection in seconds, leaving your paint completely exposed. Worse, they can permanently cloud or even etch the clear coat, turning a minor water spot issue into a potential repaint.
My rule of thumb is simple: If it wasn’t made for a car, it doesn’t touch the car. The risk of irreversible damage just isn’t worth it.
So, Will a Clay Bar Get Rid of Etched Spots?
A clay bar is a must-have in any detailing arsenal, but it's important to know its limits. Think of it as a tool for things on the paint, not in the paint. It does an incredible job of grabbing and pulling off the gritty mineral deposits left behind by Type 1 water spots. After a good claying, the surface will feel perfectly smooth.
But if those minerals have had time to sit and actually etch into the clear coat, the clay bar won't help with the visual defect. You'll have a smooth crater instead of a gritty one. For etching, you have to go a step further and physically level the surrounding paint with a polish to make that mark disappear.
How Do I Know When It’s Time to Call a Pro?
This is a great question, and there's an easy way to check. After you've washed and dried the area completely, gently run your fingernail over the water spot. Can you feel a distinct dip or catch the edge of a crater?
If you can feel it with your nail, the etching is pretty deep. At this point, trying to fix it yourself with a standard dual-action polisher could be risky. You might end up removing too much clear coat, which is a far bigger problem. For these more severe cases, your best bet is to consult a professional detailer. They have the experience and specialized tools, like paint depth gauges and wet sanding equipment, to safely correct the damage without compromising your paint's integrity.
Ready to make your next car wash easier and more effective? The SwiftJet Car Wash Foam Gun connects to any garden hose to cover your vehicle in thick, dirt-lifting foam, preventing scratches and future water spots. Get yours today at swiftjetusa.com.