
Let’s get one thing straight: removing swirl marks means carefully leveling your car's clear coat. You're essentially using a machine polisher and a specialized abrasive compound to ever-so-slightly remove a microscopic layer of paint around the scratches.
This process smooths out the surface, letting the light reflect evenly and bringing back that incredible gloss. The trick is pairing the right tools, like a good dual-action polisher, with the right technique. When you get it right, the finish is flawless. Get it wrong, and you could do more harm than good.
Why Swirl Marks Ruin Your Car's Perfect Finish
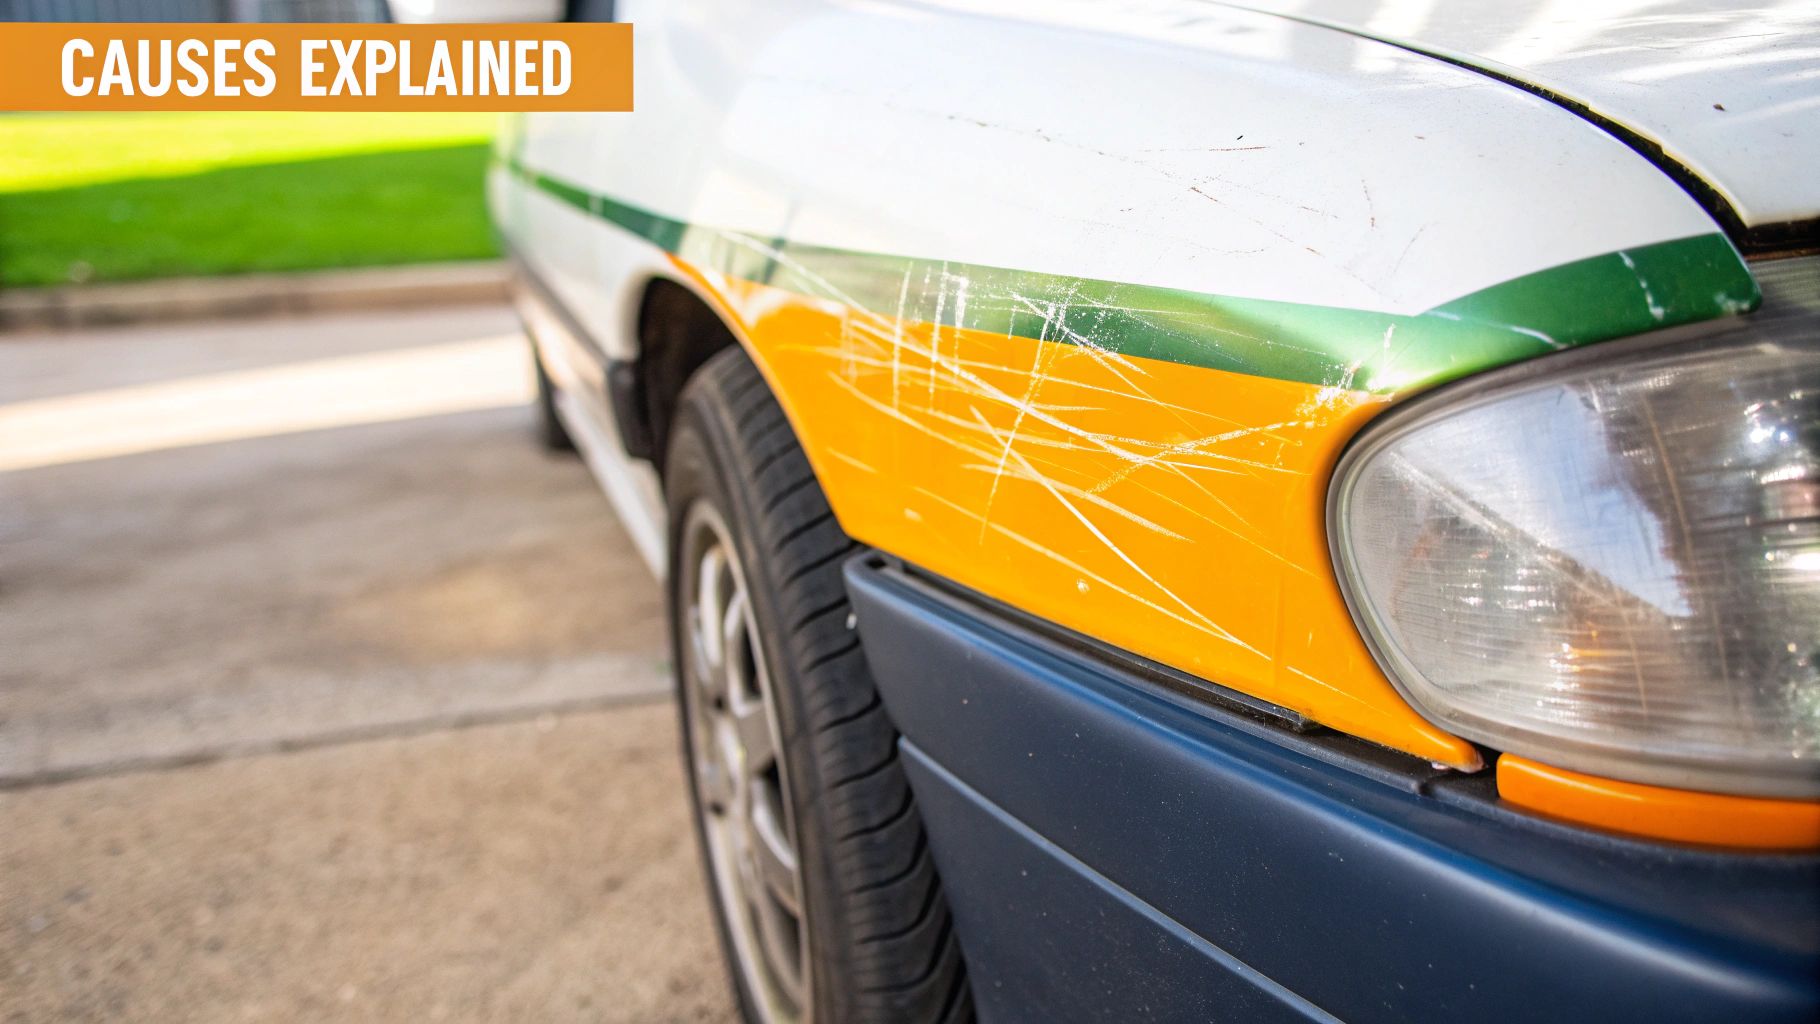
We’ve all been there. You wash your car, stand back to admire your work, and then the sun hits it just right. Suddenly, you see a frustrating spiderweb of fine scratches covering the paint. Those are swirl marks.
Contrary to their name, they aren't actually circular. They're just a massive collection of tiny, straight-line scratches in your car’s clear coat. These little imperfections act like a shattered mirror, scattering light in every direction instead of reflecting it uniformly. This is exactly why your paint looks dull and hazy, especially under direct sunlight, robbing it of that deep, wet-look shine we all crave.
So, where do they come from? Most of the time, they’re the result of seemingly innocent car care habits. That quick trip through the automatic car wash with its giant, spinning brushes is probably the biggest offender. But even washing by hand can cause swirls if you're using a gritty wash mitt, a dirty towel, or the wrong technique, which just grinds tiny bits of dirt and debris across your paint.
Understanding the enemy is the first step to defeating it. Once you know what's causing the swirls, you can change your washing and drying habits to stop creating new ones. Frankly, prevention is just as crucial as the correction process itself.
At their core, swirl marks destroy the smooth, reflective nature of your paint. A perfectly flat surface reflects light like a mirror, giving you that crisp, deep shine. Swirls break up that reflection, causing light to bounce chaotically, which our eyes just see as a dull, lifeless finish.
This is such a widespread issue that it has created a massive industry. Consumer spending on vehicle maintenance, especially on products designed to fix imperfections like these, is a huge part of the car care market. Globally, the car care products market was valued at around USD 11.04 billion and is expected to keep growing. You can dive deeper into the car care product market trends to see just how big the demand for a perfect finish really is.
By learning to remove swirl marks the right way, you’re doing more than just cleaning your car—you’re restoring its beauty and its value. The end goal is simple: get rid of the damage you have now and build the right habits to protect your hard work for good. That's how you get that professional, showroom-quality look that turns heads.
Common Mistakes That Cause Swirl Marks
It's easy to accidentally create swirl marks. Here’s a quick look at the everyday actions that lead to swirl marks and the simple changes you can make to prevent them.
| Common Mistake | What Really Happens | How to Fix Your Method |
|---|---|---|
| Using one bucket to wash | Your wash mitt picks up dirt, dunks back into the clean water, and contaminates the whole bucket. | Use the two-bucket method: one for soapy water, one for rinsing the mitt. |
| Washing in direct sunlight | The sun quickly dries soap and water, leaving spots and making you scrub harder. | Always wash in the shade or on a cool, overcast day. |
| Using old, gritty towels | Old towels or sponges trap dirt particles that act like sandpaper on your clear coat. | Use high-quality microfiber towels for washing and drying. Replace them when they get old. |
| Automatic car washes | The aggressive, often dirty, brushes used in tunnel washes are notorious for creating swirls. | Hand-wash your car yourself or find a reputable touchless car wash. |
| Drying with a regular bath towel | Bath towels have coarse fibers that are too abrasive for automotive paint. | Stick to plush, high-GSM microfiber drying towels designed specifically for cars. |
Paying attention to these small details during your wash routine can make a massive difference. Prevention is always easier than correction.
Your Essential Swirl Toolkit
If you've ever walked into a detailing supply shop, you know how overwhelming it can be. Let's cut through the noise. This isn’t just a shopping list; it’s a breakdown of what you actually need to get real results, based on countless hours spent in the garage.
The heart of any real paint correction is the machine polisher. For almost everyone, from weekend warriors to seasoned pros, the Dual Action (DA) polisher is the weapon of choice. A rotary polisher just spins, which can build up heat and burn through paint in a heartbeat if you're not careful. A DA, on the other hand, oscillates in a random pattern, making it way more forgiving and dramatically lowering the risk of damage.
The Right Polishes and Pads
A polisher is useless without the right pads and polishes. You’ll need a small collection of foam pads, each with a different level of abrasiveness. Think of it like sandpaper, going from coarse to fine.
A solid starter pack should include:
- A Cutting Pad: This is your workhorse. It’s a firm pad you’ll pair with a compound to level out the more serious swirl marks and scratches.
- A Polishing Pad: Softer than the cutting pad, this one is used with a finer polish to remove light hazing and refine the paint’s finish.
- A Finishing Pad: This is the softest of the bunch. Its job is to work with a finishing polish to bring out that deep, wet-looking gloss.
The liquids you use are just as important. A compound has a heavy "cut" for removing bigger defects. A polish is much finer and is all about refining the surface to a mirror shine. The golden rule? Always start with the least aggressive combo you think might work.
The whole point of paint correction is to remove the absolute minimum amount of clear coat possible. Going in with a heavy compound when a light polish would have done the trick is a rookie mistake that unnecessarily thins your paint.
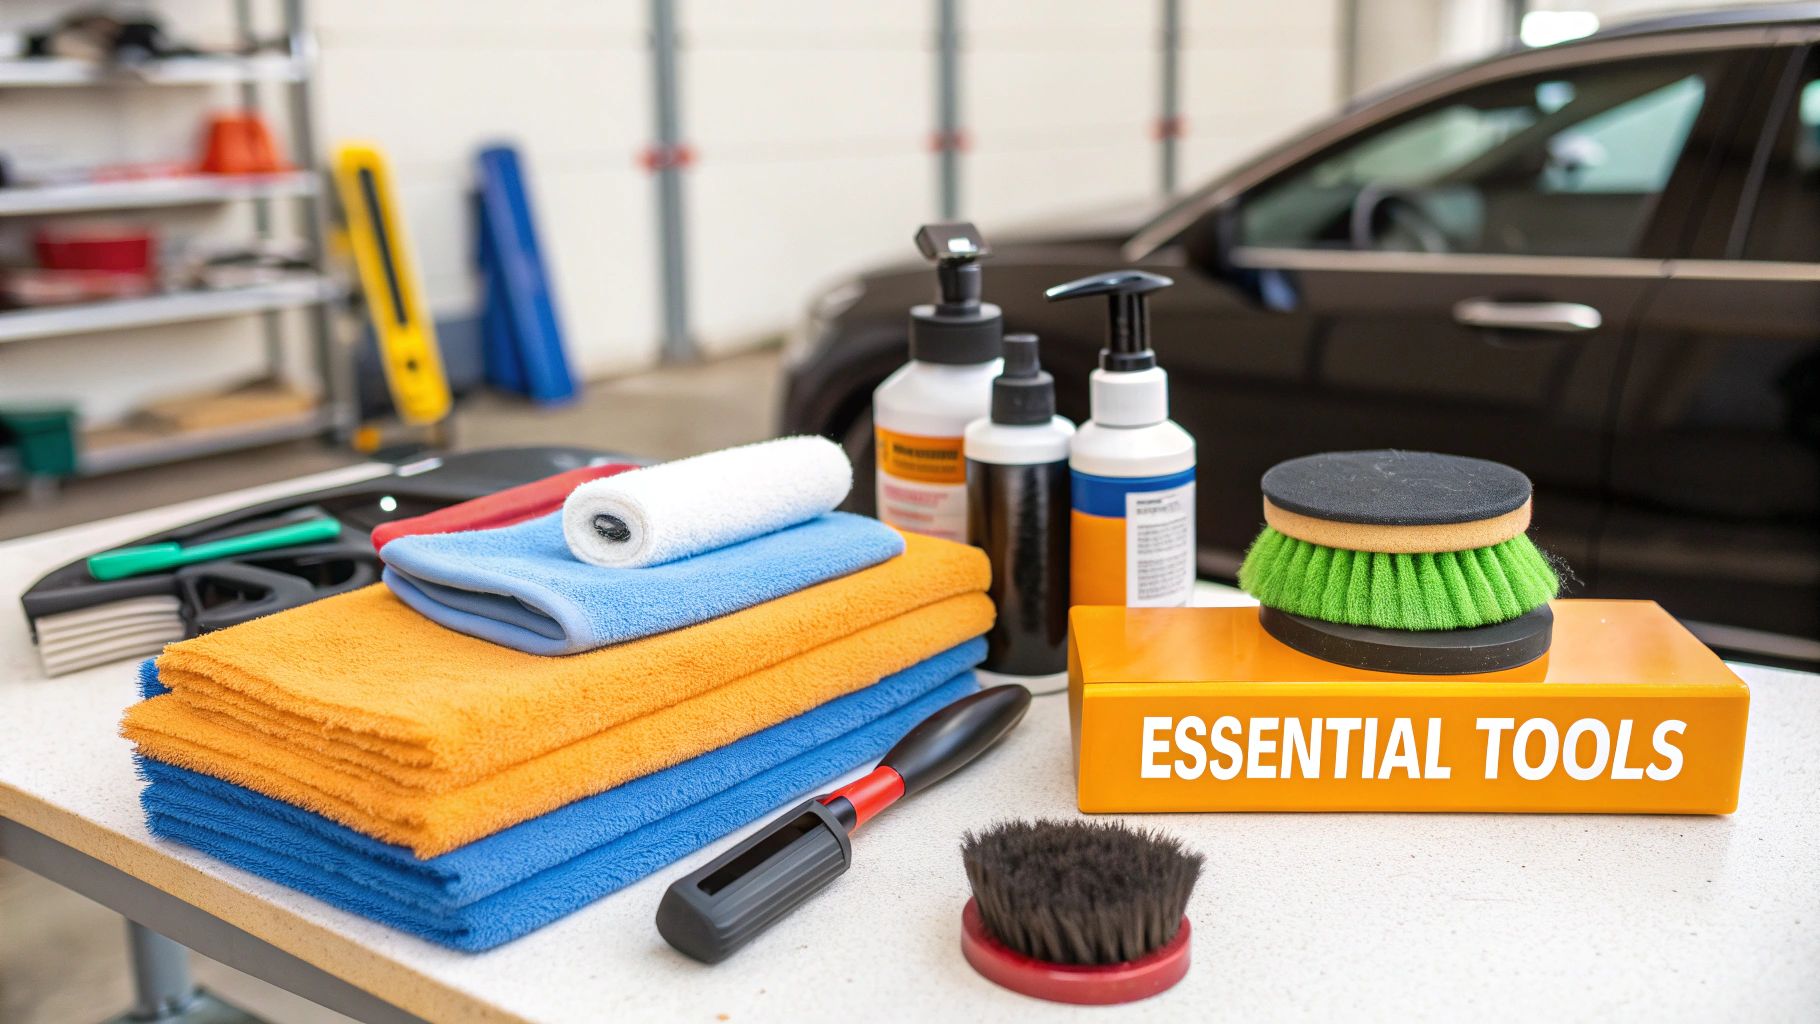
Essential Supporting Tools
Beyond the polisher and its accessories, a few other items are non-negotiable for a professional job. Good microfiber towels are a must—cheap ones will just put new scratches right back into the paint you just perfected. You'll also want some quality painter's tape to mask off any plastic trim, rubber seals, or sharp edges you don't want the polisher to touch.
Finally, the detailer's secret weapon: a spray bottle with an isopropyl alcohol (IPA) solution, mixed about 50/50 with distilled water. After polishing a section, a quick spray and wipe-down with this mix removes any leftover oils from the polish. Those oils can fill in and hide fine swirls, fooling you into thinking you're done. The IPA wipe reveals the true state of the paint, ensuring the defects are actually gone.
Having this core kit is fundamental, but if you're looking to build a more complete arsenal, check out our comprehensive auto detailing equipment list for 2025.
The Critical Pre-Correction Surface Prep
Ask any seasoned detailer, and they'll tell you the same thing: a flawless finish is 80% preparation. Honestly, rushing this part is the biggest mistake you can make. If you try to polish a car that isn't perfectly clean, you’re just grinding dirt into the paint and creating more scratches.
Before a polisher even comes near your paintwork, the surface needs to be surgically clean. This goes way beyond a quick trip through the car wash; we're talking about a deep, multi-stage decontamination that removes every last speck of grit. This ensures your polishing pads are only working on the clear coat, not on leftover contaminants.
Running the Decontamination Gauntlet
Your first line of attack is a solid, proper wash. It’s essential to master proper cleaning techniques for your vehicle before you start any paint correction, because bad washing habits are a primary cause of swirl marks in the first place. Always use a two-bucket wash method to lift away loose dirt without dragging it across your paint.
With the surface dirt gone, it's time for chemical decontamination. If you've never used an iron remover, you're in for a treat. You'll spray it on a panel that looks completely clean and watch as it bleeds purple, dissolving the microscopic iron particles embedded in your paint from brake dust and industrial fallout. A regular wash simply can't touch this stuff.
Pro Tip: After the chemicals have done their job, it’s time for mechanical decontamination using a clay bar or a synthetic clay mitt. This step is what physically pulls out bonded gunk like tree sap and paint overspray, leaving the surface feeling as smooth as glass. That slick, glassy feel is exactly what you're aiming for.
Next, you'll need to strip the surface of any old waxes, sealant residues, or oils from the previous steps. A wipe-down with a 50/50 mixture of Isopropyl Alcohol (IPA) and distilled water does the trick perfectly. This final step guarantees your polishing compound makes direct contact with the clear coat for maximum effectiveness.
Mastering the Art of Paint Correction
https://www.youtube.com/embed/Pmc_fO1WhbE
Now that you've got a perfectly prepped surface, it's time for the most rewarding stage of all: paint correction. This is where you physically erase those frustrating swirl marks, but it’s a process that demands finesse and a methodical approach. Trust me, rushing this part can easily create more problems than you started with.
The absolute golden rule here is to always start with a test spot. Find a less obvious area, like the bottom of a door panel, and use it as your practice ground. This is your chance to dial in the perfect combination of pad and polish for your car’s specific paint before you touch a highly visible panel like the hood.
Finding Your Polishing Rhythm
I always recommend starting with your least aggressive combination. That usually means a finishing polish on a soft polishing pad. Dab a few pea-sized drops onto the pad and work it in slightly. Set your polisher to a low speed and spread the product over a small, manageable section—think about 2-foot by 2-foot.
Once it's spread evenly, bump up the polisher's speed. Now, you’ll want to work in a slow, deliberate cross-hatch pattern. Guide the machine about one inch per second, moving horizontally across your section, then vertically over the same area. This movement is key to getting full, even coverage. Let the machine's weight do the heavy lifting; you only need to apply light, steady pressure.
As you work the polish, you’ll notice it starts to change from a hazy film to almost clear. That's the abrasives breaking down and doing their job—it’s the visual cue that you're almost done. After one last slow pass, stop the polisher and wipe the residue off with a fresh, clean microfiber towel.
This simple workflow is the core of achieving a flawless, swirl-free finish.
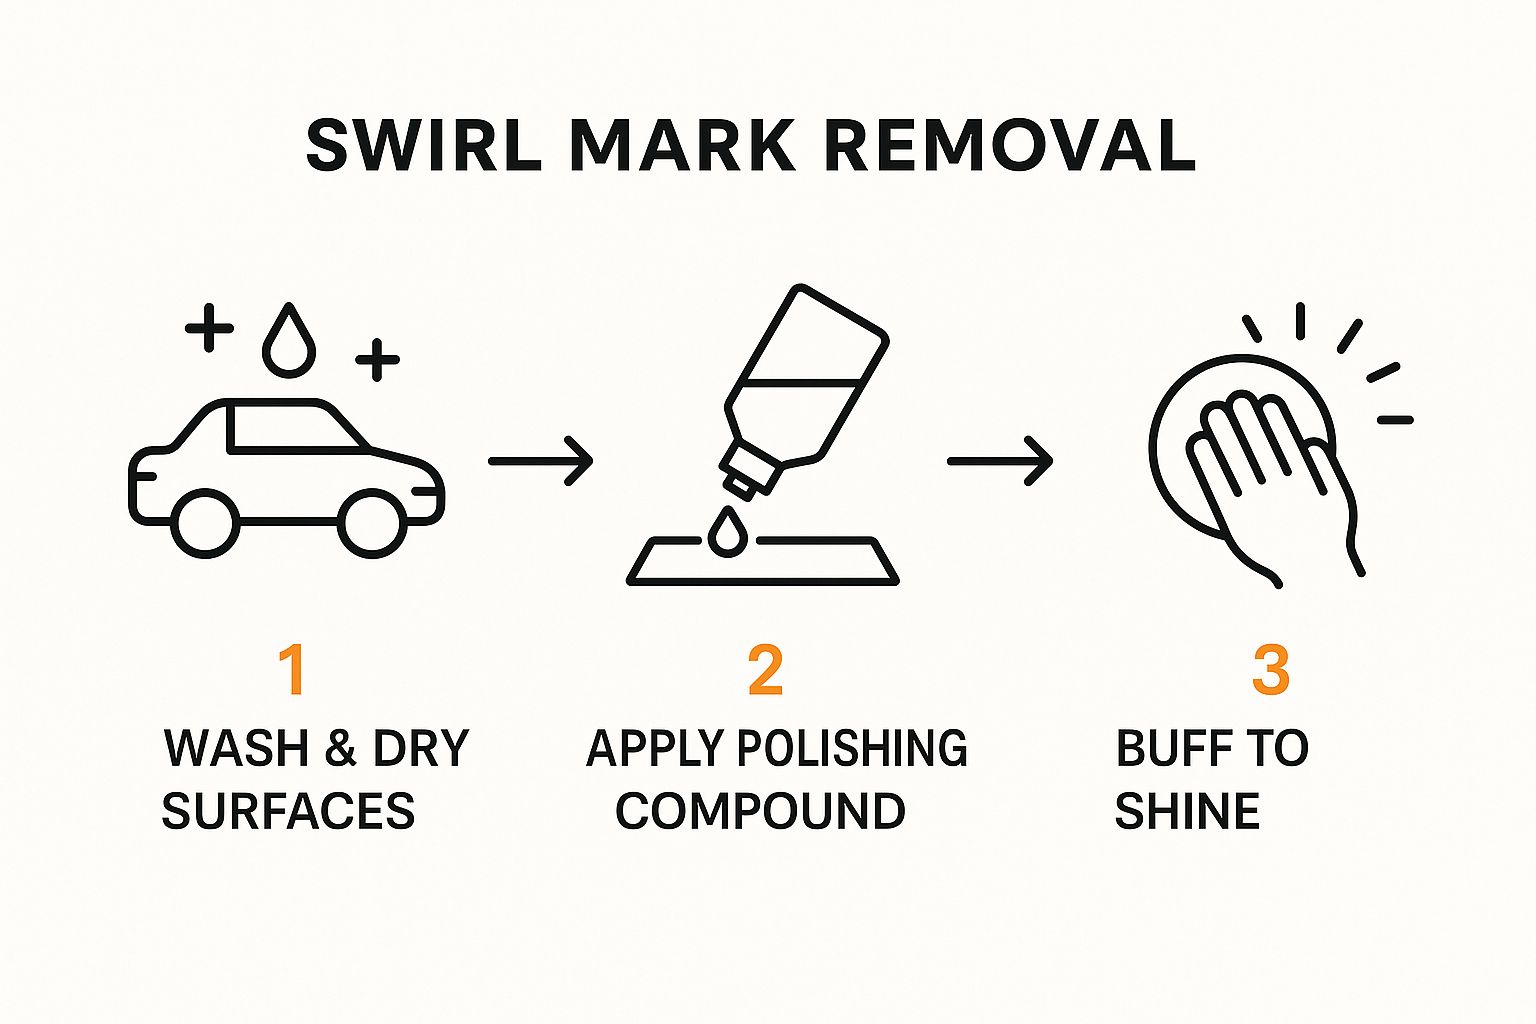
As you can see, successful swirl removal is all about a sequence where each step perfectly sets up the next.
Reading the Results and Adjusting
Grab a good light and inspect your test spot. Are the swirls gone? If the answer is yes, you've found your winning formula! Now you can confidently repeat that exact process across the rest of the car, working panel by panel.
What if the swirls are still there? Don't just press harder. The professional approach is to step up your aggressiveness methodically. First, try the same polish on a slightly firmer pad. If that’s not enough, then move to a more abrasive compound on a cutting pad, but always remember to follow that up with a finishing polish to refine the surface back to a perfect gloss.
This disciplined "test-and-adjust" method is what separates the pros from the amateurs. It takes the guesswork out of the equation and ensures you only remove the bare minimum amount of clear coat needed to get the job done right.
Of course, none of this matters if you start with a dirty car. Polishing a contaminated surface will just grind that dirt right into the paint, so make sure you truly know the best way to wash your car at home before a single drop of polish touches your paint.
Locking In the Shine and Protecting Your Work
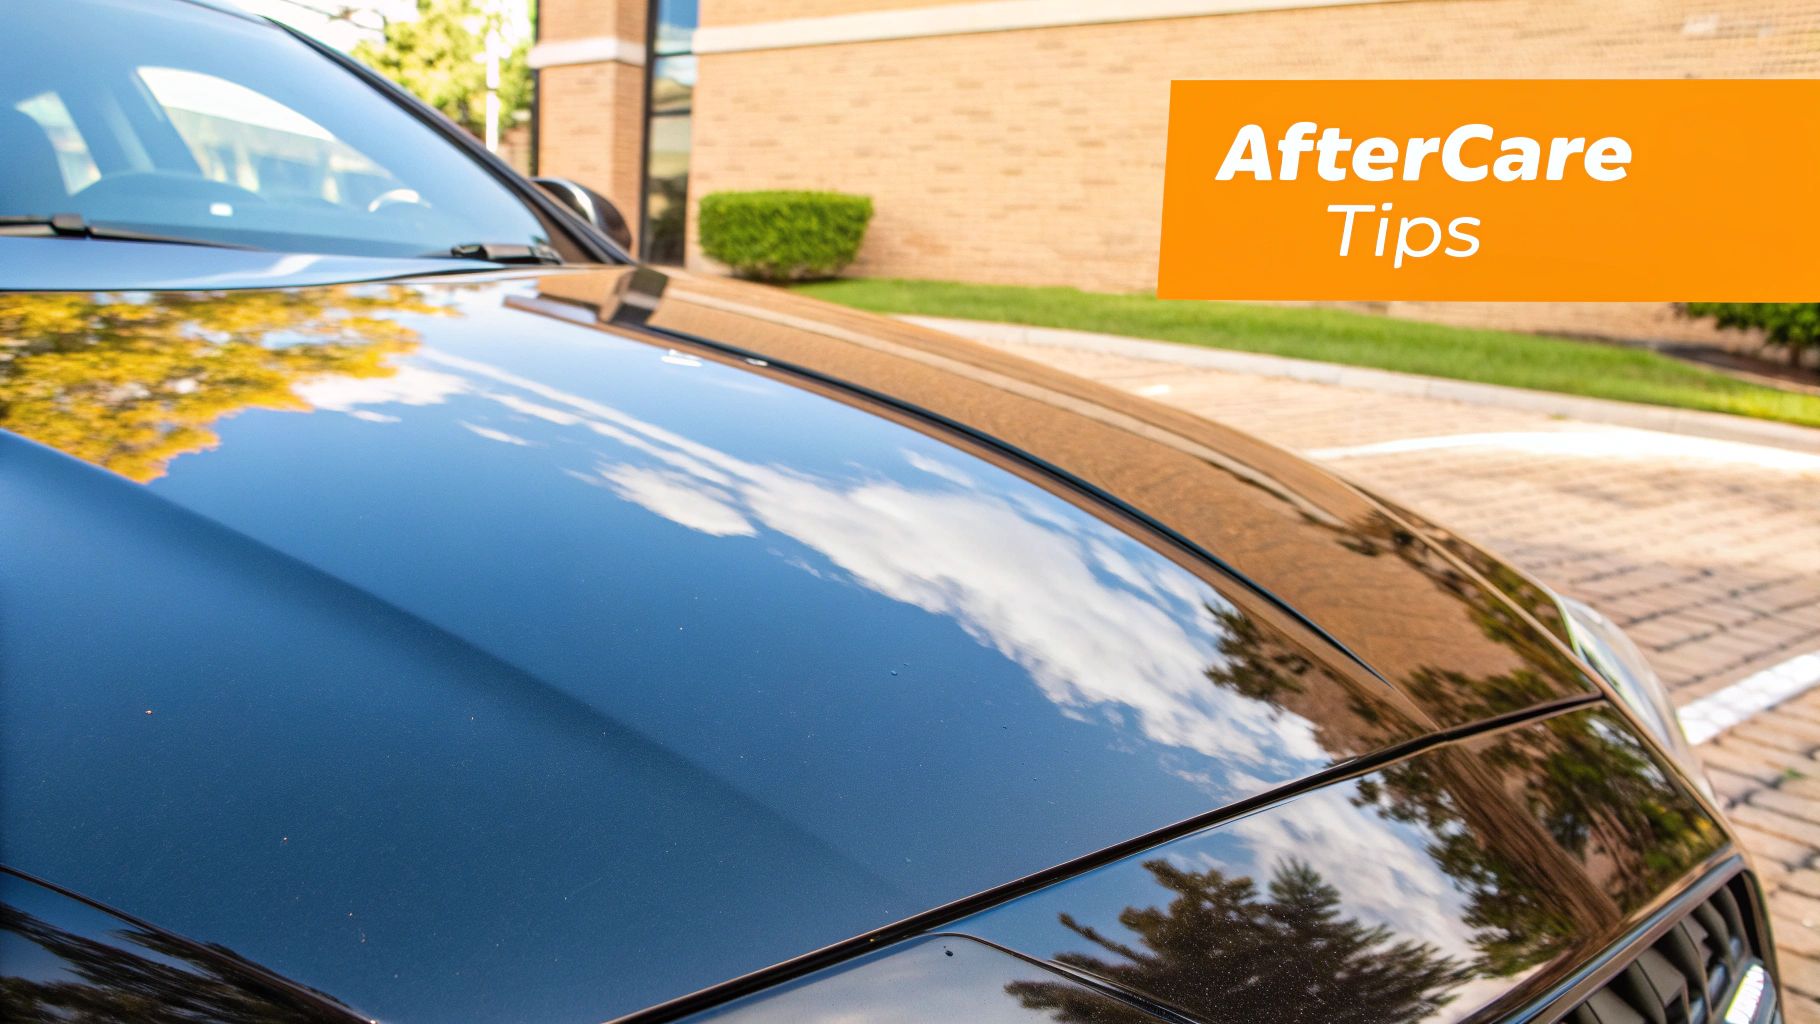
After all that hard work, your paint looks incredible. Don't drop the ball now. This next step is absolutely critical to make sure it stays that way. Protecting that fresh, flawless finish isn't just a suggestion—it's your insurance policy against undoing all your effort.
Before you even think about wax or coatings, you need to do one last, crucial wipe-down with an Isopropyl Alcohol (IPA) solution. This might seem like an extra hassle, but it’s what separates a good job from a great one. This step strips away any lingering polishing oils that can temporarily fill in the tiniest imperfections, giving you a false sense of perfection. Once the surface is truly bare and surgically clean, your chosen protectant can bond directly to the clear coat for a much stronger, longer-lasting hold.
Choosing Your Paint Protection
With a perfectly prepped surface, you’ve got a few fantastic options. Each one strikes a different balance between the final look, how long it lasts, and the effort required to apply it.
-
Carnauba Wax: The old-school favorite for a reason. It delivers a warm, deep, wet-looking glow that many car lovers, myself included, find impossible to beat. Its beauty is its main selling point, though, as you’ll be lucky to get more than a few months of protection out of it.
-
Paint Sealant: Think of this as a modern, synthetic alternative to wax. These polymers create a slick, hard shell over your paint that provides excellent protection. You’ll get a sharp, reflective shine and much better durability—often six months or more.
-
Ceramic Coating: This is the ultimate in long-term paint defense. A ceramic coating creates a semi-permanent, glass-like layer on your paint that can last for years, not months. It offers the best resistance against chemicals, bird droppings, and even light scratches.
Ultimately, what you choose comes down to your goals and how much you enjoy the process. If you find the ritual of waxing your car every couple of months therapeutic, carnauba is a fantastic choice. For anyone who prefers a set-it-and-forget-it approach, a sealant or ceramic coating is the obvious winner.
Demand for easy-to-apply protectants is booming. The market for products like user-friendly spray waxes—perfect for maintaining that swirl-free finish—was already valued at USD 0.05 billion in 2024 and continues to climb. People want simple ways to keep their hard work looking its best.
This final protective layer is what truly guarantees the longevity of your paint correction. To explore these options in more detail, check out our guide on how to protect car paint with pro secrets for lasting brilliance.
Your Top Questions About Swirl Mark Removal
Even when you've got the basics down, a few questions always seem to surface. Learning how to get rid of swirl marks for good is a hands-on skill, and running into a few puzzles is just part of the process. Let's tackle some of the most common ones we hear from fellow car lovers.
Can I Actually Get Rid of Swirls by Hand?
Look, it's technically possible to address very, very light swirl marks by hand. But I'll be honest with you—it’s a marathon of a task that demands a ton of elbow grease.
The bigger issue is consistency. It's incredibly difficult to apply even pressure by hand, which means you're unlikely to get that perfectly flat, clear finish a machine polisher can achieve. For anything more than the faintest of micro-scratches, a dual-action (DA) polisher is your best friend. It’s not just faster; it delivers professional results.
How Do I Pick the Right Polish and Pad?
This is where the magic happens, and it's the most important choice you'll make. The golden rule is simple but non-negotiable: always start with the least aggressive combination you think will get the job done.
Kick off your test spot with a finishing polish on a light polishing pad. Work it in properly, wipe it off, and inspect your results. If you still see swirls, your next move is to swap to a medium-cut pad with that same polish. Only if that still doesn’t cut it should you consider moving up to a more aggressive compound.
Think of it this way: polishing is physically removing an incredibly thin layer of your car's clear coat. By starting with the gentlest method first, you ensure you're only taking off the bare minimum needed to get that flawless look. This preserves your paint's integrity for years to come.
Remember, polishing is a corrective step, not a weekly routine. The real goal is to perfect the paint once, lock in that shine with a durable sealant or wax, and then protect it with safe washing habits so you don't have to do this all over again.
Ready to start your journey to perfect paint? The SwiftJet Car Wash Foam Gun is the key to mastering that crucial prep wash, giving you a perfectly clean canvas for swirl removal. Check it out at https://swiftjetusa.com.