
To get bug stains off your car, you have to move fast. The best approach is to pre-soak the mess with a dedicated bug remover or a thick blanket of foam from a foam gun. After letting it dwell, you can gently wipe the area with a microfiber mitt before washing and rinsing everything clean. The golden rule? Never scrub dry bug guts—that’s a surefire way to permanently scratch your car's paint.
Why Bug Splatter Is Your Paint's Worst Enemy
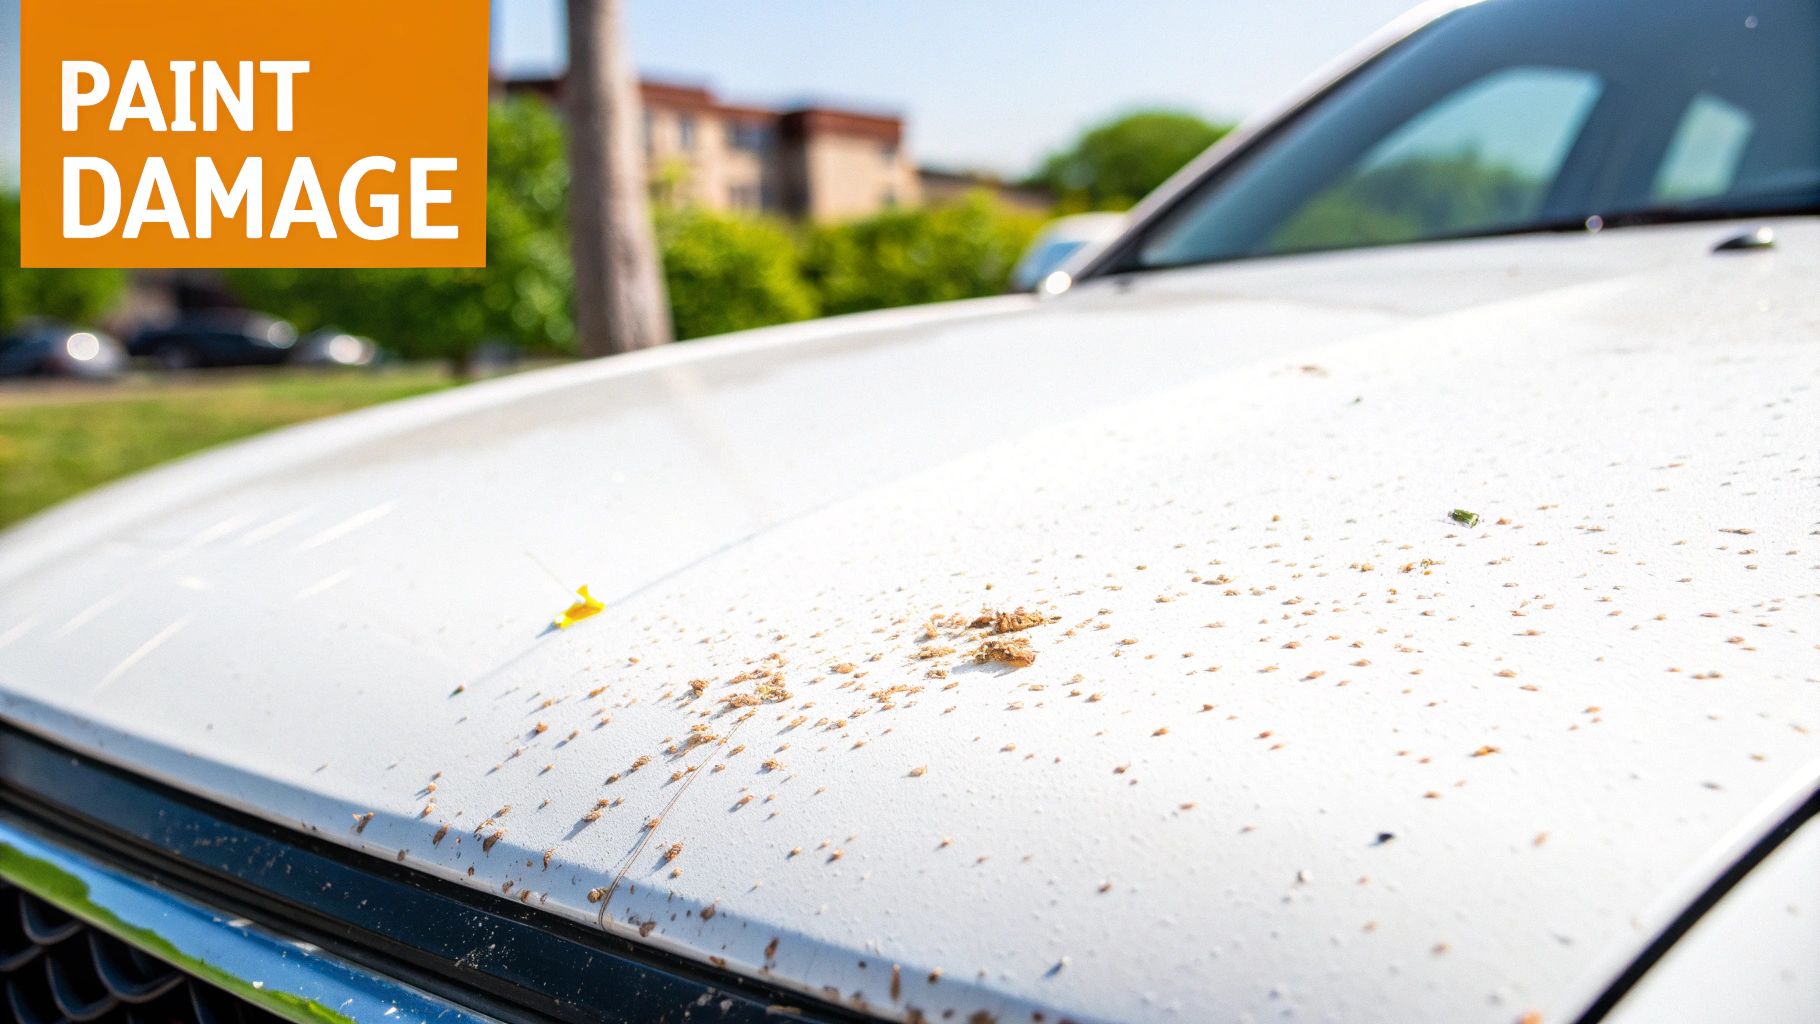
That splat on your hood isn't just an ugly mark; it's a tiny chemical bomb going off on your car's finish. Bug guts are incredibly acidic and full of enzymes that immediately start eating away at your vehicle's clear coat. Think of it like spilling a harsh solvent on a delicate surface—the damage begins on contact.
The real trouble starts when the sun comes out. Heat supercharges the chemical reaction, essentially baking the acidic goo directly into the paint. This process is called "etching," and it's not a stain you can just wipe away. It's physical damage.
The Science of Paint Damage
Your car's paint is made up of several layers, and the clear coat is its first line of defense. Bug residue punches right through that shield, creating microscopic pits and dull spots. What seems like a simple cleaning job can quickly become a permanent flaw.
In as little as 48 hours, especially in direct sunlight, the acidic residue from bug splatter can cause permanent etching. At that point, you're looking at professional paint correction to fix it.
This common problem has created a huge demand for specialized cleaners. In fact, the car insect remover market is projected to become a $500 million industry by 2025. It's a universal issue for drivers, with over 1.4 billion vehicles on the road and bug encounters spiking by up to 40% higher on highways during the summer.
Long-Term Consequences of Neglect
If you let those spots sit, you're risking more than just an eyesore. A compromised clear coat will eventually fail, leading to oxidation, fading, and peeling paint. If the damage is already severe, you may need to learn how to fix oxidized paint and restore your car's shine.
Ultimately, getting those bugs off quickly isn't just about keeping your car looking good. It’s about protecting your investment, preserving its resale value, and dodging a costly bill from the body shop. A few minutes of cleaning today can easily save you hundreds, if not thousands, down the road.
Getting Your Bug Removal Arsenal Ready
Before you even touch that bug splatter, let’s talk tools. Getting this right from the start is half the battle. If you reach for an old bath towel or, even worse, a kitchen sponge, you’re setting yourself up for a paint correction nightmare. Seriously, you can do more harm than good in a matter of seconds.
Think of it this way: you wouldn't use a hammer to fix a watch. Your car's clear coat is delicate, and your goal is to gently dissolve and lift the bug guts, not grind them into the paint. Having the right stuff on hand means you won't get frustrated and grab the wrong tool.
Your Go-To Cleaning Agents
Your first line of defense is a cleaner specifically made for this job. You need something that can break down those stubborn, acidic bug proteins without being harsh on your paint. It might be tempting to grab a bottle of all-purpose cleaner from under the sink, but those can strip away your wax and sealant, leaving your paint totally exposed.
- Dedicated Bug & Tar Remover: These are your best bet. They’re chemically engineered to dissolve insect remains and are pH-balanced, so they're tough on bugs but safe for your car's finish.
- High-Quality Car Wash Soap: A good, pH-neutral soap is a must-have for the final wash. It creates the lubrication needed to let any lingering gunk slide right off the surface. And please, never use dish soap—it's way too aggressive.
- Quick Detailer Spray: If you catch the bug splatters while they're still fresh, a quality quick detailer can be a lifesaver. It adds just enough lubrication to help you wipe the mess away before it gets baked on by the sun.
The Right Tools For The Job
Once you’ve got your cleaners picked out, you need the right tools to apply them. This is where most people go wrong and end up with scratches. Using soft, paint-safe materials isn't just a suggestion; it's a rule. For a full rundown, take a look at our guide on building the ultimate car detailing supplies list.
A foam gun is a detailer's secret weapon. It shoots a thick, clinging foam that lets the soap sit on the surface and do the heavy lifting for you. It breaks down all that bug residue and road grime without you ever having to scrub, which is a huge win for preventing swirl marks.
Here’s a quick checklist of what you should have ready:
- Two Wash Buckets with Grit Guards: This is non-negotiable for safe washing. One bucket is for your soapy water, and the other is for rinsing your mitt. This simple setup keeps you from dragging dirt and grit right back onto your paint.
- Plush Microfiber Towels: You’ll want at least two—a dedicated one for washing and a fresh, clean one for drying. Microfiber is incredible because its soft fibers trap dirt deep within, pulling it away from your car’s surface.
- Foam Gun (like the SwiftJet): This is a game-changer. It hooks right up to your garden hose and turns your car soap into a super thick foam. It's perfect for pre-soaking those bug-covered bumpers and grilles, letting the chemicals do the work instead of your elbow grease.
Your Guide To Safely Removing Bug Stains
Alright, with your supplies gathered, it's time to get those bug splatters off your car for good. The real key here is patience and using the right approach—trying to scrub them off with brute force is a recipe for disaster. Always remember, you're not just cleaning a stain; you're trying to protect your car's delicate clear coat.
First things first, never, ever try to remove bugs from a hot panel or in direct sunlight. Heat is your enemy here. It can bake the bug guts (and your cleaning chemicals) right into the paint, causing even more damage. Always find some shade or pull into the garage, and make sure the surface is cool before you start.
Prep and Pre-Soak
Before you reach for any cleaner, give the bug-splattered areas a good rinse with your hose. This simple step knocks off any loose bits and starts rehydrating the dried-on mess, which makes the next steps way easier. Really focus on the usual suspects: the front bumper, grille, hood, and side mirrors.
After the rinse comes the pre-soak, and honestly, this might be the most crucial part of the whole process. This is where you let your cleaner do the work for you. Whether you’re using a dedicated bug remover spray or a foam gun like the SwiftJet, the idea is to cover the stains with a thick layer of cleaner and let it sit.
This chart breaks down which tool to grab based on how long the bugs have been there.
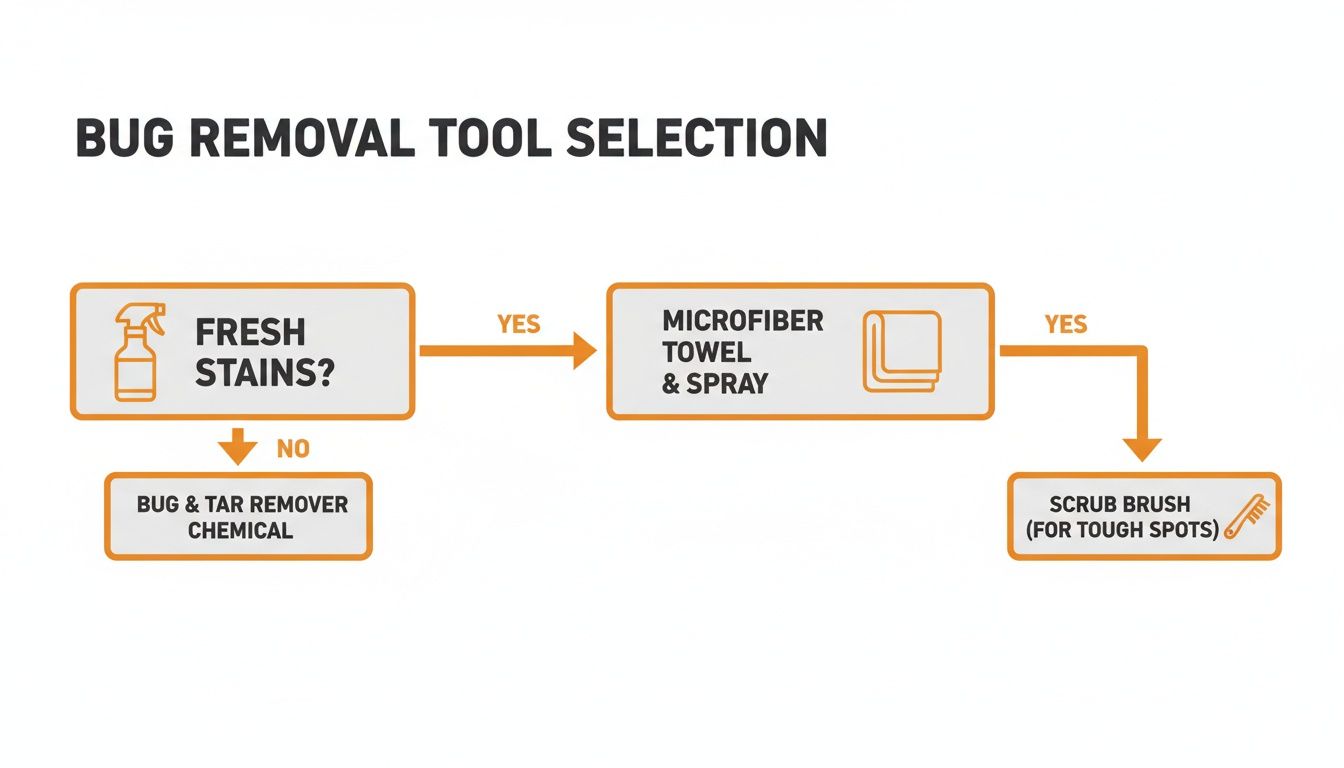
As you can see, for fresh splatters, a quick spray and a gentle wipe with a microfiber towel is usually all it takes. You can save the more intensive methods for those stubborn, baked-on stains.
Let the product dwell for the time recommended on the bottle—usually somewhere between 30 seconds and a few minutes. You’ll actually see the bug residue start to soften and break down.
The pre-soak method is so effective that it's driven huge demand in the car care market. The global market for foaming bug removers was valued at around $2 billion in 2025 and is projected to grow by 5% annually through 2033. Why? Because car owners know these products lift stains without harsh scrubbing. You can check out more foaming bug remover trends from Data Insights Market to see how popular this approach has become.
Bug Stain Removal Method Comparison
To help you choose the best approach, here’s a quick comparison of the common methods you might use. Each has its pros and cons depending on how bad the stains are and your comfort level.
| Method | Effectiveness | Skill Level | Paint Safety Risk |
|---|---|---|---|
| Soft Wash & Spray | High for fresh stains, moderate for older | Beginner | Low |
| Foam Gun Soak | Very high for all stains | Beginner | Very Low |
| Bug & Tar Remover | Very high for stubborn, etched stains | Beginner | Low to Moderate |
| Clay Bar Treatment | Excellent for embedded contaminants | Intermediate | Moderate |
| Polishing | Excellent for removing light etching/stains | Advanced | High |
This table makes it clear that starting with a less aggressive method like a foam soak is almost always the safest and most effective bet for your paint.
The Gentle Wiping Technique
Once the cleaner has had time to work its magic, it’s time for some gentle agitation. Dunk your microfiber wash mitt into your bucket of car wash soap. That soap is critical—it provides the lubrication you need to create a slippery barrier between the mitt and the paint, preventing scratches.
When you start wiping, use almost no pressure. Seriously. You want to lift the bug remains, not scrub them into the paint.
- Work in straight lines: Gently wipe in one direction, either back-and-forth or up-and-down. Swirling motions are how you get those ugly swirl marks in your clear coat.
- Flip and rinse often: After a pass or two, flip your mitt to a clean side. After a small section, dunk it in your rinse bucket to knock off the gunk before getting fresh soap from your main wash bucket.
Pro Tip: Never use the same microfiber towel you used for bug removal on other parts of your car. Designate one towel just for the tough jobs to avoid dragging tiny, abrasive bug shell fragments all over your paint and windows.
If you hit a stubborn spot that doesn’t want to budge, resist the temptation to press harder. Just reapply your bug remover or foam, let it dwell for another minute, and try again. Patience is your best friend.
Final Rinse and Dry
After you’ve gently wiped away all the bug residue, give the area a final, thorough rinse. Make sure you flush out all the cleaner and soap from the grille, around the mirror housings, and any other crevices where it might hide.
Finally, dry the area completely with a clean, plush microfiber drying towel. You can pat the surface or use a gentle dragging motion to soak up the water. If you let it air-dry, you’ll just end up with water spots, creating another job for yourself. A proper drying lets you inspect your work and see that perfectly clean, bug-free surface, ready for a protective coat of wax or sealant.
Tackling Stubborn And Etched-In Stains
Sometimes, no matter how quickly you try to act, you find bug stains that have been baking in the sun for days or even weeks. At this stage, a simple wash just isn't going to cut it. The acidic bug residue has likely started to etch into your car’s clear coat, creating a much more stubborn blemish.
So, how do you know what you're dealing with? After a thorough wash, gently run your fingernail over the spot. If it feels perfectly smooth, you’re just dealing with a tough stain. But if you feel a slight dip or roughness, the bug guts have unfortunately started to etch the paint.
Using a Clay Bar for Embedded Grime
For those stubborn surface stains that a regular wash won’t touch, a clay bar is your best friend. This is a must-have tool in any detailer's kit, designed to safely pull embedded gunk out of your paint's pores, leaving behind a surface that’s as smooth as glass. It's fantastic for the gritty, textured remnants of bug splatters.
Using a clay bar might seem a bit advanced, but it's really a simple process if you do it right. The golden rule is lubrication—never, ever glide clay over a dry surface, as this will just scratch the paint. For a full walkthrough, take a look at our guide on https://www.swiftjetusa.com/blogs/news/how-to-clay-bar-car-easy-step-by-step-guide. This technique is a game-changer when bug stains feel "stuck on."
It’s no surprise that specialized products are becoming more popular. The tar and bug removers market was valued at $1.43 billion in 2024, which shows just how big of a problem this is for the 85% of highway-driven cars affected by bug residue every year. Good cleaners can break down those tough organic bonds in less than five minutes.
Correcting Light Paint Etching
What if you've clayed the area and can still see a faint outline of the bug splatter? That's the tell-tale sign of paint etching. This calls for a more corrective approach using a fine-grit polishing compound. A good polish contains tiny abrasives that gently level the clear coat, removing a microscopic layer to smooth out the imperfection and restore clarity.
You can tackle this in two main ways:
- By Hand: Put a pea-sized amount of polish on a microfiber applicator pad. Work it into the spot using small, overlapping circular motions with light to moderate pressure. It takes some elbow grease, but it gets the job done.
- With a Polisher: For a faster, more uniform result, a dual-action (DA) polisher with a light polishing pad is the way to go. This is how the pros achieve a flawless finish and it’s surprisingly easy to learn.
Once you’re done polishing, wipe the residue away with a clean microfiber towel to reveal that restored, glossy finish. While bug splatter is a unique challenge, the same principles apply to removing etched-in stains from delicate surfaces like glass.
Crucial Final Step: Remember, polishing removes any wax or sealant you had on the paint. It is absolutely essential to apply a fresh coat of wax or a paint sealant to the corrected area. Don't skip this, or you'll leave the paint vulnerable to future damage.
How to Prevent Future Bug Damage
After all that work scrubbing bug stains off your car, the last thing you want is to do it all over again next week. Let's be honest, the easiest way to deal with bug guts is to stop them from causing damage in the first place. This is where a little proactive protection becomes your best friend in the detailing world.
Think of your car's clear coat as being like your skin. If you go out in the sun without sunscreen, you get burned. A protective layer on your paint acts the same way—it creates a barrier that takes the abuse so your clear coat doesn't have to.
Create a Sacrificial Barrier
A slick, water-beading surface makes it incredibly hard for anything—bug splatter, tar, road grime—to get a solid grip on your paint. When a bug hits a protected surface, it splatters against that slick layer instead of immediately bonding with and eating into your clear coat. It's a simple concept that turns a potentially permanent paint-etching problem into a minor cleanup job.
You’ve got three solid options for paint protection:
- Wax: This is the old-school favorite. A good carnauba wax gives you a beautiful, deep gloss and decent protection. The trade-off? It doesn't last very long, usually just a few weeks to a couple of months.
- Sealant: Think of a paint sealant as a modern, synthetic version of wax, engineered purely for durability. It forms a tough, slick bond with your paint that can easily last four to six months, offering fantastic resistance to acidic bug guts.
- Ceramic Coating: This is the top dog of paint protection. A ceramic coating creates a semi-permanent, glass-like shell over your paint that can last for years. It’s so slick that cleaning off bugs often takes nothing more than a spray of water.
If you want to dive deeper into these options, our guide on how to protect car paint with pro secrets for lasting brilliance breaks it all down.
The goal of a wax, sealant, or coating is simple: make the surface so slippery that bug guts can't stick. This not only prevents paint damage but makes washing them off incredibly fast and safe—often just a quick rinse is all you'll need.
Be Prepared On The Go
Even the best ceramic coating can get overwhelmed on a long road trip through the countryside in July. For those bug-heavy journeys, having a small emergency kit in your trunk is a game-changer. It's a pro-level move that can save you from a major detailing headache later.
Your mobile bug-removal kit is simple:
- A bottle of good-quality quick detailer spray (for lubrication).
- A clean, plush microfiber towel you use only for this job.
Next time you stop for gas or a bite to eat, take 30 seconds to walk around to the front of your car. See any fresh splatters on the bumper, grille, or mirrors? Just mist the spot with your quick detailer and gently wipe it away.
Getting to them before the sun has a chance to bake them on is the single best preventative tactic you can use. A minute of work at a rest stop can spare you an hour of scrubbing and polishing when you get home.
Answering Your Top Bug Removal Questions
Even after you've got the basics down, a few questions always seem to pop up. Let's run through some of the most common ones I hear from car owners so you can tackle bug removal with total confidence.
Can I Just Use WD-40 or a Dryer Sheet?
I get this one a lot. You've probably seen a video or two online claiming you can just grab a dryer sheet or a can of WD-40 to wipe bugs away. While these "hacks" might seem to work at first glance, they're a really bad idea for your car's paint.
Think about it: dryer sheets are loaded with fabric softeners and chemicals designed for clothes, not for a delicate automotive clear coat. They can leave a weird, hard-to-remove film and sometimes contain abrasive fibers. WD-40 is a powerful solvent, and while it'll dissolve bug guts, it will also strip away any wax or sealant you have, leaving behind an oily mess that's a magnet for dust.
Stick to the products made for the job. Specially formulated bug removers are pH-balanced to target the acidic bug proteins without destroying your car's protective layers. Don't gamble with your paint just to save a few bucks.
How Long Do I Have Before Bugs Damage My Paint?
Time is not on your side here. When it's cool and cloudy, you might have a few days before the acidic bug residue starts causing real problems.
But on a hot summer day with the sun beating down? That process accelerates dramatically. The acids and heat work together to etch into your clear coat, and you could see permanent damage in as little as 48 hours.
The best advice is simple: get them off as soon as you reasonably can. If you're on a long road trip, use a pit stop at a gas station to give the front of your car a quick wipe-down with a detailer spray. It's much easier to deal with them when they're fresh.
Are Bug Deflectors Worth It?
Those plastic shields you see on the front of hoods can definitely help, but they aren't a cure-all. Their main job is to change the aerodynamics at the front of your vehicle, creating an updraft that pushes some bugs up and over the roof.
Here's the real-world breakdown of what to expect:
- Fewer hits on the hood: They are pretty effective at protecting the hood and the lower half of your windshield.
- They don't stop everything: Your front bumper, grille, and side mirrors are still going to get hammered. They're a bug graveyard.
- They get messy: The deflector itself becomes the primary target, so you'll have to clean it just as often as you would have cleaned your hood.
A bug deflector is a good piece of a larger puzzle. It helps manage the problem, but it’s no substitute for having a good wax or sealant on your paint and washing the bugs off promptly.
Ready to make bug removal a quick and painless task? The SwiftJet Car Wash Foam Gun lays down a thick, cleansing foam that dissolves bug stains without harsh scrubbing. Grab yours today and get a free microfiber mitt with your order!