
Before you can bring out that showroom shine, you need to have the right gear on hand. Properly detailing a car is a methodical process—you clean, decontaminate, correct, and then protect every surface. It all starts with putting together a well-thought-out detailing kit.
Let's walk through how to build your arsenal, from the absolute must-haves for a safe wash to the more advanced tools that deliver truly professional results.
Building Your Professional Detailing Kit
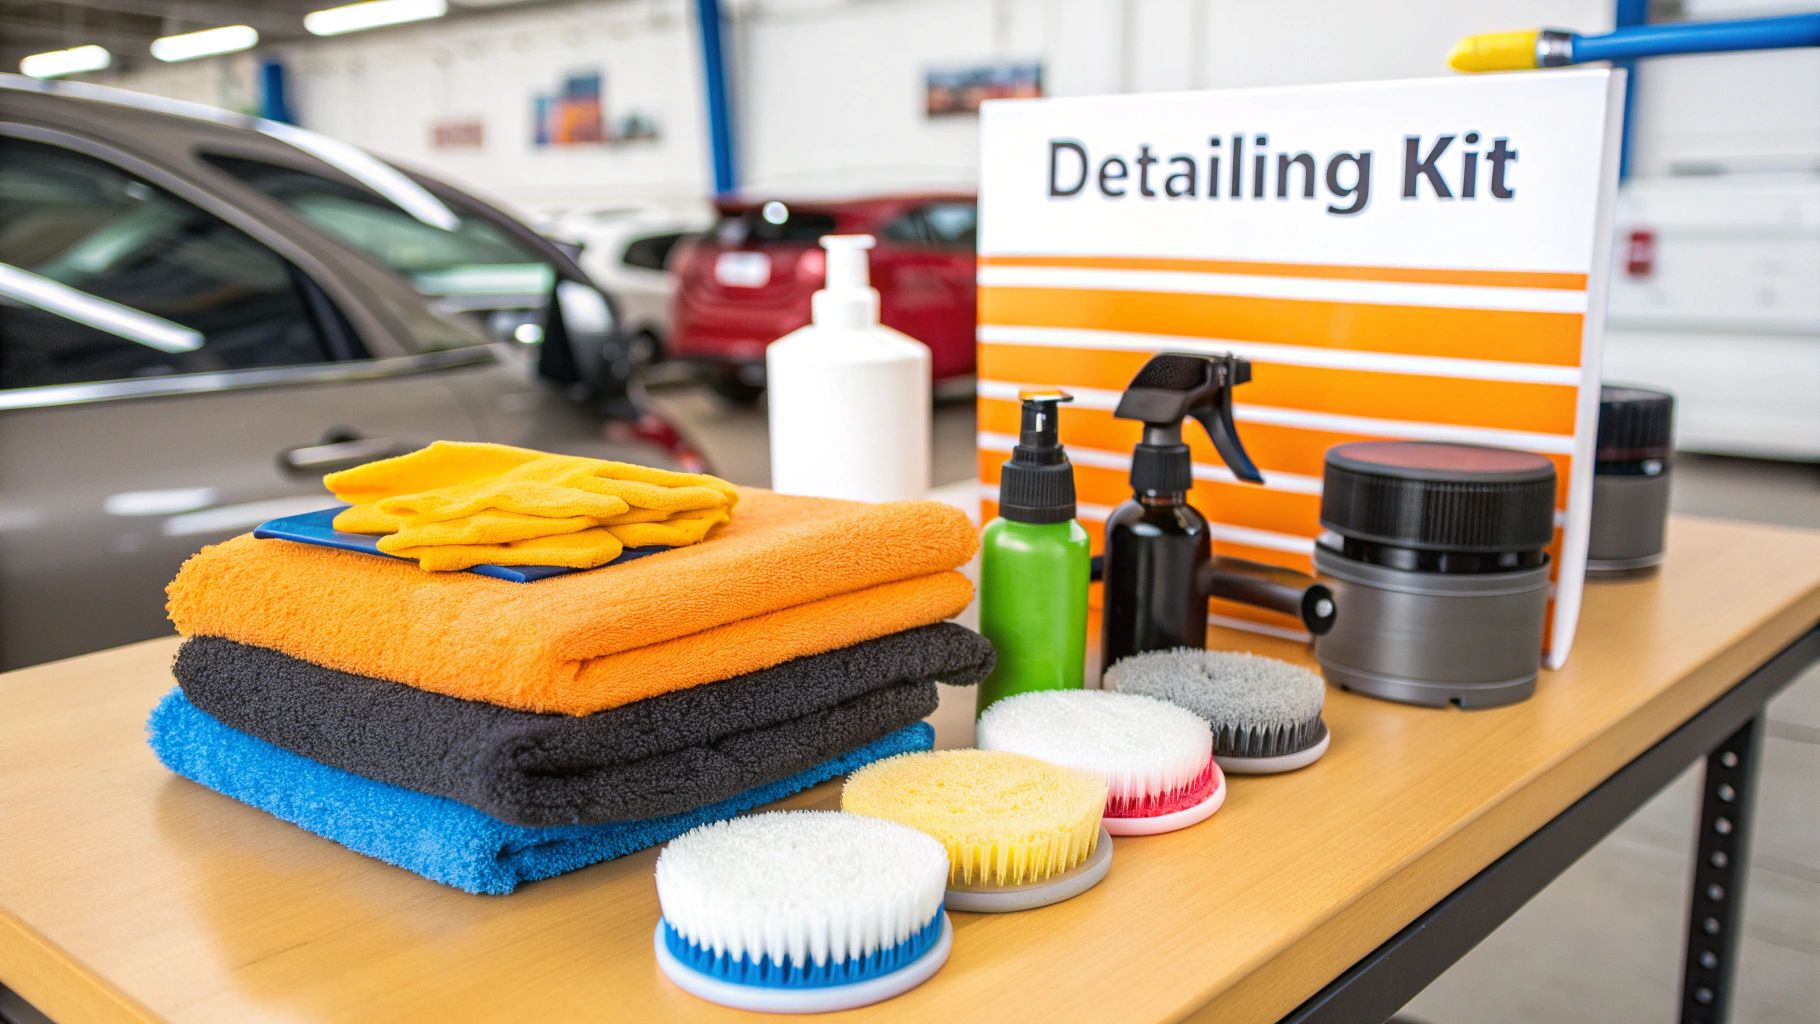
A top-tier finish doesn't start when the water hits the paint; it starts with gathering the right tools for the job. Staring at a wall of car care products can be intimidating, but it’s really just about separating the essentials from the extras.
Think of it in tiers. Every car enthusiast needs a core set of supplies. These are the non-negotiables, the foundation of any great detail.
The Must-Have Essentials
At the bare minimum, you need the right tools to clean your car safely and effectively. You can find some great rundowns on essential carwash equipment online, but here are the absolute basics I never work without:
- Two Buckets: This is non-negotiable. One bucket holds your soapy water, and the other is just for rinsing your wash mitt. This is the heart of the two-bucket wash method and the single best way to stop dirt from getting dragged back onto your paint.
- A Solid Car Shampoo: Look for a pH-neutral soap. Dish soap and other household cleaners are way too harsh; they’ll strip off any wax or sealant you have, leaving your paint totally exposed.
- Microfiber Wash Mitt: A plush, high-quality mitt is so much gentler on your car's finish than an old sponge. Sponges trap dirt and grit against the paint, which is a classic recipe for creating fine scratches.
- Plenty of Microfiber Towels: You can never have too many. You'll need dedicated towels for drying, separate ones for cleaning glass, and others just for applying and buffing off products like wax or polish.
A rookie mistake I see all the time is using the same towel for multiple jobs. A towel with wax residue will leave a streaky mess on your windows, and one used on your wheels can easily transfer brake dust and scratch your paint. Keep them separate!
To help you get started, here's a quick table breaking down the basics versus the gear you'll want as you get more serious about detailing.
Essential vs. Advanced Detailing Supplies
| Category | Essential Item (Beginner) | Advanced Item (Enthusiast) |
|---|---|---|
| Washing | Two Buckets & Microfiber Mitt | SwiftJet Foam Gun & Pressure Washer |
| Drying | High-Pile Microfiber Towel | Dedicated Car Dryer / Air Blower |
| Decontamination | Iron Remover Spray | Clay Bar or Clay Mitt |
| Paint Correction | All-in-One Polish (by hand) | Dual-Action (DA) Polisher |
| Protection | Spray Wax or Sealant | Ceramic Coating Kit |
This gives you a clear path from just keeping your car clean to truly perfecting its finish.
Stepping Up to Advanced Tools
Once you’ve got the basics down, you can start bringing in tools that create those jaw-dropping results. This is where you move beyond just washing your car and start detailing it.
A foam gun, like the SwiftJet, is the perfect first upgrade. It hooks right up to a regular garden hose and blankets your car in thick suds. This foam pre-wash loosens up the heavy grime and pulls it off the surface before you ever have to touch it with a mitt, drastically cutting down the risk of swirl marks.
For a full breakdown of everything you might want in your kit, check out our complete car detailing supplies list.
From there, you can explore things like a clay bar for pulling embedded contaminants out of the paint or a dual-action polisher to buff out fine scratches. These are the tools that separate a clean car from a show-stopper.
The Perfect Exterior Wash and Decontamination
Alright, with your detailing kit ready to go, the real fun begins. Achieving that perfect, flawless exterior finish is more than just a quick five-minute rinse. It's a careful process, a system designed to lift away all the dirt and grime without putting swirl marks or fine scratches back into your paint.
The first, and arguably most important, step is a solid pre-wash. This is exactly where a tool like the SwiftJet foam gun proves its worth. By covering your car in a thick blanket of suds, the foam gets to work immediately, dissolving and loosening the heavy grit and dirt clinging to the surface. It does the heavy lifting for you, so by the time you actually touch the paint with a wash mitt, most of the abrasive particles are already gone.
The Two-Bucket Wash Method
Once the foam has done its job and you've rinsed it off, it's time for the contact wash. For this, the two-bucket method isn't just a suggestion—it's the gold standard for anyone who's serious about protecting their car's finish. It’s a brilliantly simple concept that makes a world of difference.
Here’s how it breaks down:
- Wash Bucket: This one gets your pH-neutral car shampoo and water.
- Rinse Bucket: This one is just plain, clean water.
You'll dunk your clean microfiber mitt into the soapy wash bucket, gently clean one panel of your car, and then—here’s the crucial part—rinse the dirty mitt thoroughly in the clean water bucket before you ever go back for more soap. This single action stops you from reintroducing all that grit into your clean wash water and dragging it all over your paint. To really master this, check out our deep dive into the two-bucket wash method.
This infographic gives you a great visual of the core washing process.

As you can see, the whole process flows logically from one stage to the next, always prioritizing the safety of your paintwork to prevent accidental scratches.
Decontaminating Your Paint
Even after the most careful wash, your car's paint still isn't 100% clean. It's covered in tiny, bonded contaminants that a normal wash just can't remove. We're talking about things like brake dust, industrial fallout, and little specs of road tar that have literally baked onto the clear coat, leaving the surface feeling gritty and rough.
This is where the decontamination stage comes in, and the best tool for the job is a clay bar.
Think of using a clay bar as giving your paint a deep-cleansing spa treatment. As you glide it over a lubricated panel, it gently grabs and pulls out all those embedded particles, leaving behind a surface that’s as smooth as glass. This step is absolutely essential before you even think about polishing or waxing.
Using a clay bar is straightforward. You'll need a good clay lubricant spray. Just mist a small section of a panel, then gently glide the clay back and forth. You'll literally feel the surface change from rough to silky smooth under your fingertips. Remember to fold the clay often to expose a fresh, clean surface.
After your car has been washed and clayed, you finally have a truly pristine surface. It's a perfectly prepped canvas, ready for the next steps in detailing: paint correction and protection.
Mastering Paint Correction and Polishing
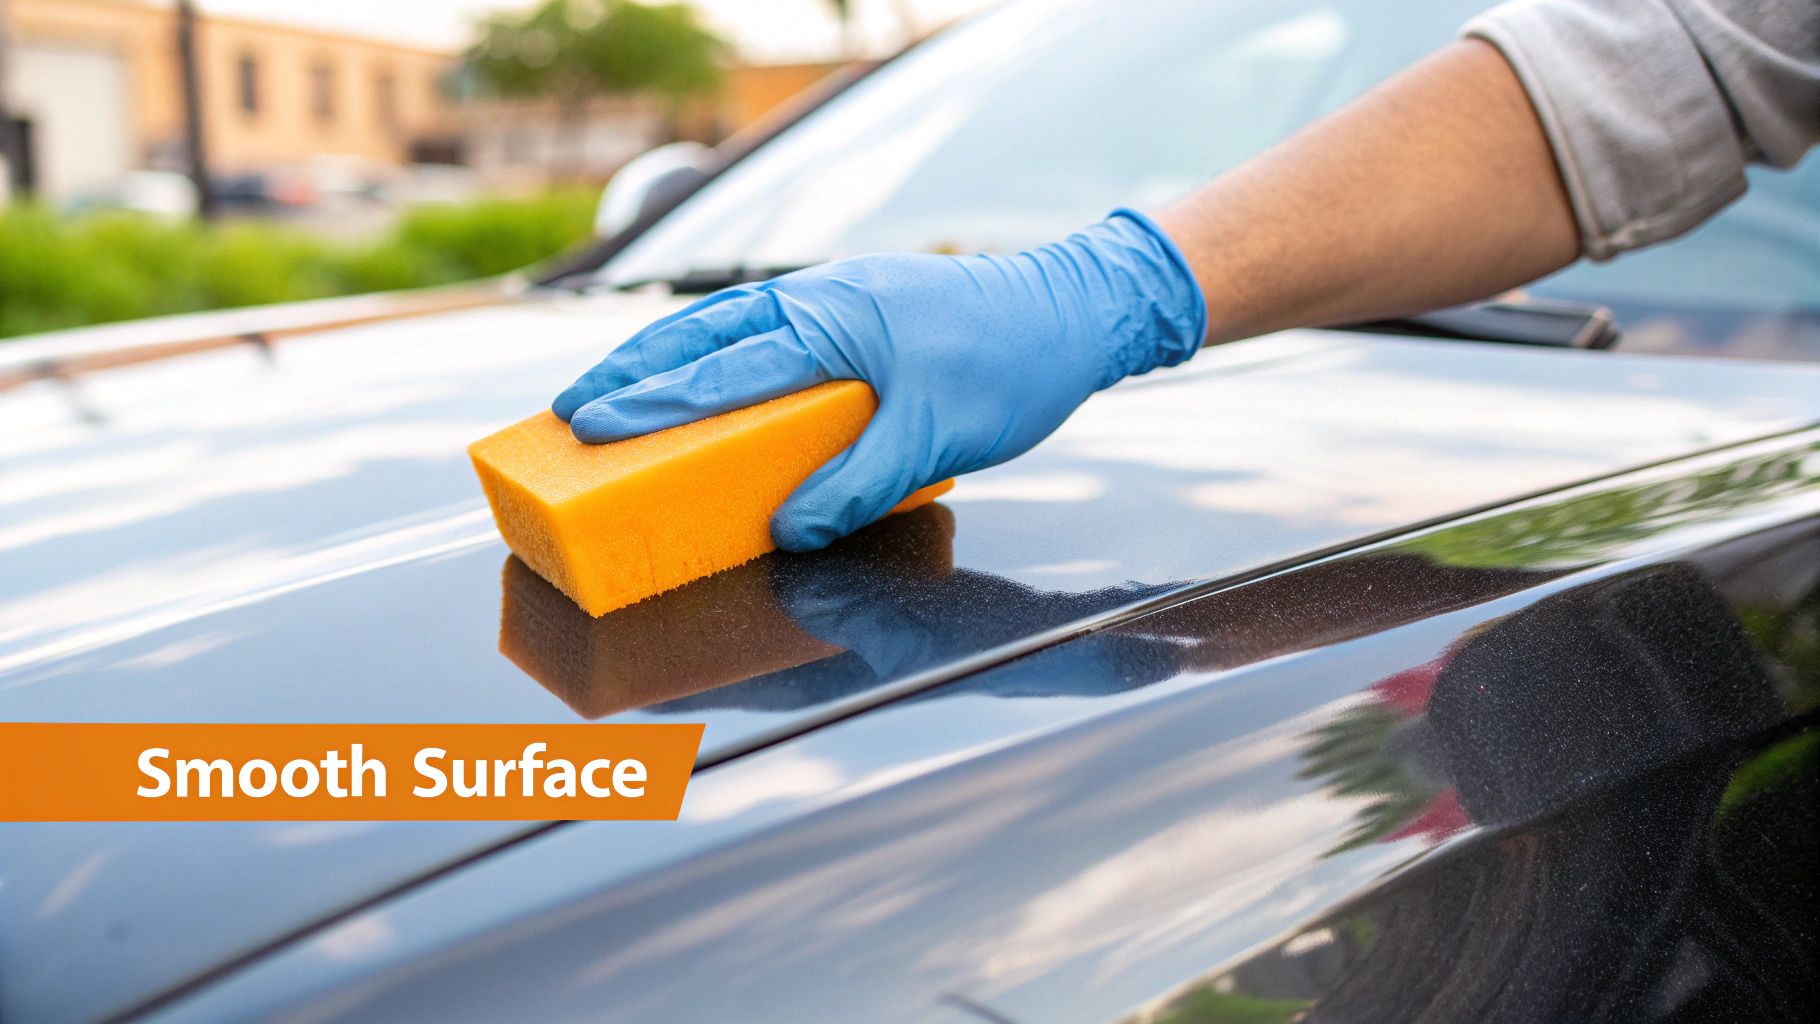
Alright, your car's surface is now surgically clean and smooth. This is where the real magic happens. Paint correction is arguably the most satisfying part of any detail—it’s the step that physically erases damage and brings back that deep, wet shine your car had on the showroom floor.
We’re talking about compounding and polishing. Think of them as two sides of the same coin. Compounding is the heavy lifter; it uses aggressive abrasives to cut down and level out more serious defects like noticeable scratches, nasty swirl marks, and oxidation.
Polishing is the finesse step. It uses a much finer abrasive to refine the surface after compounding, or to simply remove light swirls on its own. Polishing is what dials up that jaw-dropping gloss, clarity, and depth.
Choosing Your Correction Method
So, compound or polish? The paint will tell you what it needs. Just grab a bright LED flashlight (your phone's will do in a pinch) and inspect the finish up close after you've washed and clayed it.
- Heavy Swirls and Scratches: See a mess of spiderwebs and deeper lines that catch your fingernail? You'll probably need to start with a compound to level things out.
- Dullness and Fine Swirls: If the paint just looks a bit tired, hazy, or has very light "love marks," a good polish is likely all you need to make it pop again.
The golden rule here is to always start with the least aggressive method first. Do a small test spot with just a finishing polish. If it looks great, there's no need to bring out the big guns. This approach saves you time and, more importantly, preserves your car's precious clear coat.
Using a Dual-Action Polisher
If you're serious about detailing, a dual-action (DA) polisher is one of the best investments you can make. Unlike an old-school rotary buffer that can burn through paint in a heartbeat, a DA oscillates in a random pattern. This makes it incredibly safe for beginners and virtually eliminates the risk of causing damage.
Good technique is what separates a pro finish from an amateur one. Stick to small 2x2 foot sections at a time. Squeeze 3-4 pea-sized drops of your product onto the pad. Then, guide the machine slowly across the section in an overlapping cross-hatch pattern—a few passes side-to-side, then a few up-and-down. Wipe the residue off with a clean microfiber and check your progress.
More and more people are getting into this level of car care, and for good reason. The U.S. carwash and auto detailing industry is on track to become a $20.2 billion market by 2025. It's a clear sign that owners are looking for that professional finish they can achieve right in their own garage.
Getting the hang of polishing takes a bit of practice, but the results are absolutely worth it. For a deeper dive into the nuances, check out our dedicated guide on how to polish car paint.
You’ve put in the hours—washing, claying, and polishing your car’s paint to a mirror finish. Now, for the most important part: locking it all in. This is where you lay down a protective shield to keep that hard-earned shine safe from the elements.
Think of it like this: leaving freshly polished paint unprotected is like refinishing a beautiful hardwood floor and then letting everyone walk on it with muddy boots. All that effort goes to waste. The final protection stage guards against UV damage, acid rain, bird bombs, and everyday road grime.
What you choose here really depends on your goal. Are you after a warm, classic glow, or are you looking for tough, long-lasting armor? Let's break down the top three choices.
Carnauba Wax: The Enthusiast's Choice for a Deep Glow
For generations of car lovers, nothing beats the look of a quality carnauba wax. It's the old-school classic, and for good reason. Sourced from Brazilian palm trees, it gives your paint a deep, wet, and incredibly warm look that just pops, especially on dark-colored cars.
The trade-off? Longevity. A good carnauba wax will only give you about 4 to 6 weeks of solid protection before it starts to fade. This makes it the perfect choice for the enthusiast who genuinely enjoys the ritual of spending a Saturday afternoon bonding with their car, buffing it to a perfect shine.
There's something special about applying a paste wax by hand. It's a tactile experience that connects you to every line and curve of your vehicle. It’s less about just getting the job done and more about appreciating the art of detailing.
Synthetic Sealants: Modern Protection for the Real World
If you're more of a "set it and forget it" person, a synthetic paint sealant is your go-to. These are engineered polymers designed to chemically bond to your paint's clear coat, creating a much more durable layer of protection than natural wax.
You can expect a quality sealant to last anywhere from 4 to 6 months, sometimes even longer. While they might not have the same organic warmth as carnauba, they deliver a slick, sharp, almost glass-like gloss. A huge bonus is that their super-slick surface makes future washes a breeze because dirt and water just can't seem to stick.
Ceramic Coatings: The Ultimate Armor
Want the absolute best in long-term, rugged protection? Welcome to the world of ceramic coatings. These aren't just a layer sitting on top of your paint; they're liquid polymers that cure to form a semi-permanent, hardened glass-like shell that chemically bonds with the surface. A professionally applied coating can last for years, not just months.
This is the top-tier of paint protection. It offers incredible resistance to scratches and chemicals, and its hydrophobic properties are insane—water beads up and flies right off the surface. The massive popularity of this level of care is a big reason why exterior services account for roughly 64% of the car detailing market in North America. You can dive deeper into the numbers in this car detailing services market report.
Applying a true ceramic coating is a much more demanding and less forgiving process than waxing, but the payoff is enormous. It's a serious investment in keeping your vehicle's finish looking brand new for the long haul.
Giving Your Car's Interior the Same VIP Treatment
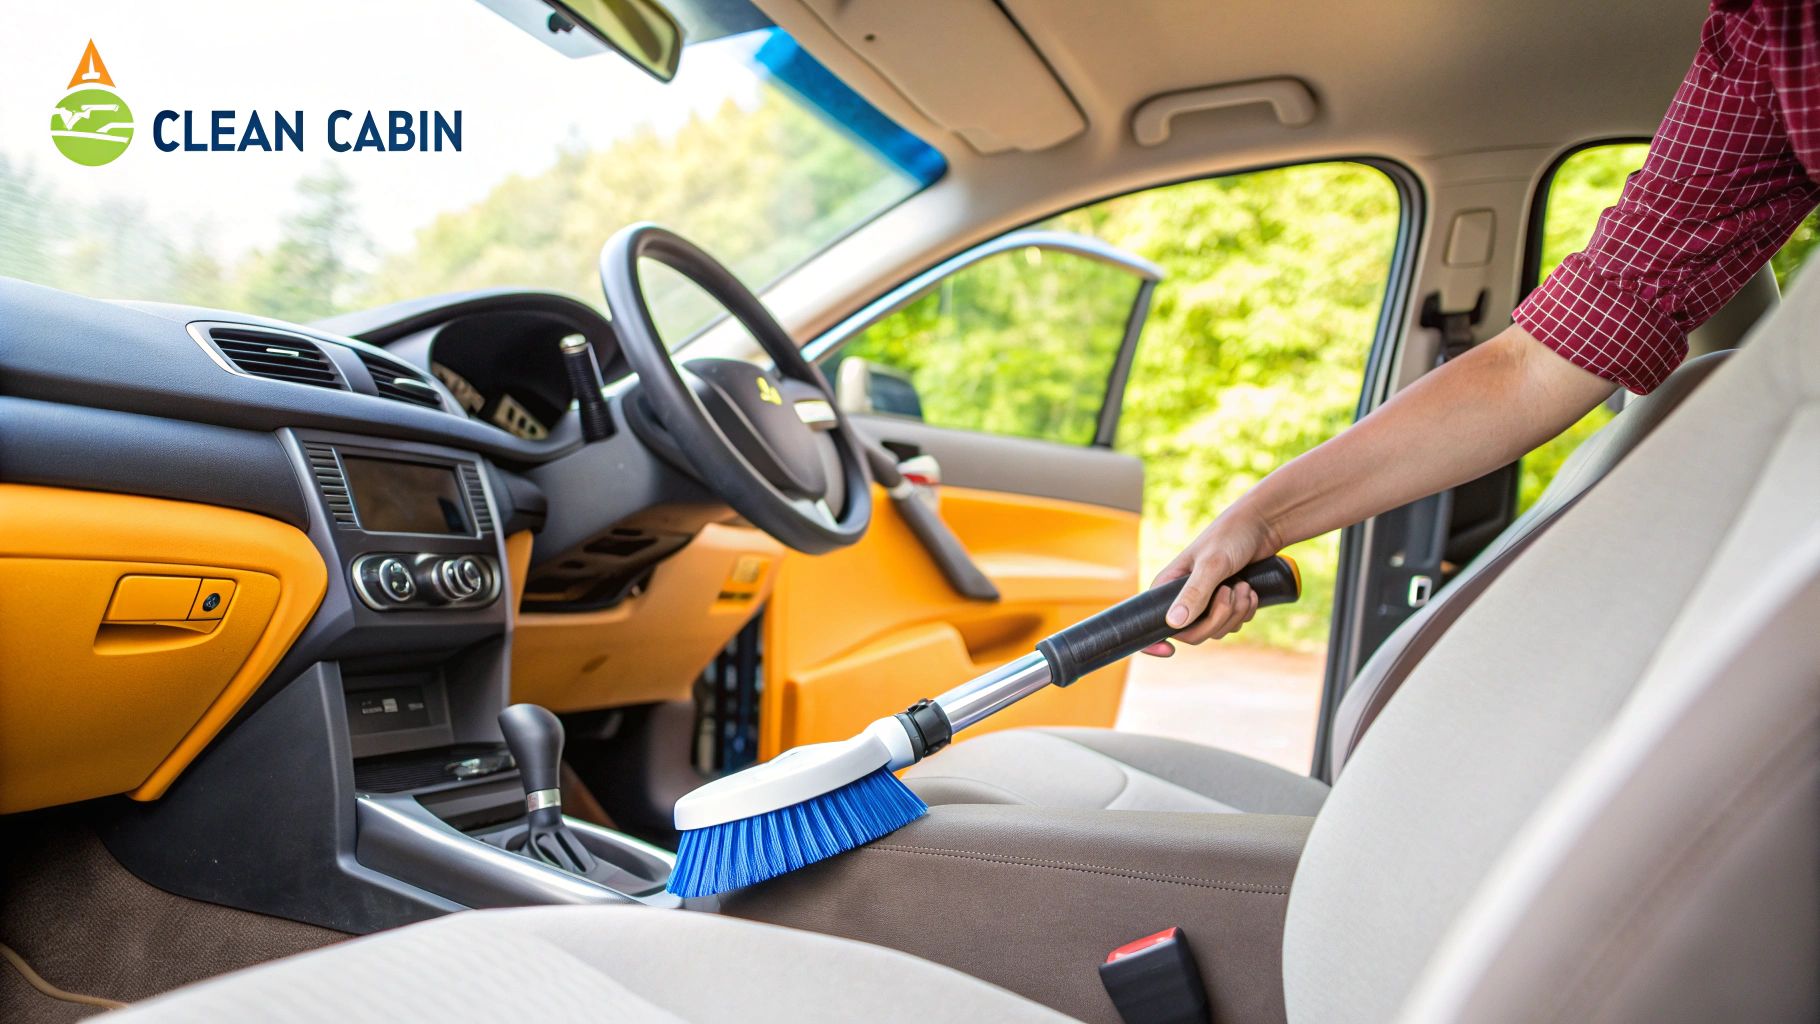
With the paint gleaming, it’s time to move inside. After all, this is where you spend your time, so a clean, fresh cabin is every bit as important as a swirl-free shine. It’s what separates a quick wash from a true detail.
The secret to a great interior detail is simple: work from the top down. Gravity is your friend here, so you want any dust, crumbs, or debris to fall onto surfaces you haven't cleaned yet. This approach saves you from having to do the same job twice.
Get Rid of the Clutter and Unleash the Vacuum
Before you even think about cleaners and brushes, you need a blank canvas. Pull everything out of the car—floor mats, trunk organizers, that pile of receipts in the door pocket, and any trash that’s found a home under the seats. A completely empty cabin is non-negotiable for a proper clean.
Now, grab a powerful vacuum with a good set of attachments. A shop vac is ideal, but a strong household one will do. Start high, with the headliner and pillars, then work your way down to the dashboard, seats, and finally, the carpets. A crevice tool is your best friend here; use it to get deep between the seats and along the edges of the center console where dirt loves to hide.
For the carpets, here's a pro tip: before you vacuum, take a stiff-bristled brush and really agitate the fibers. This one little step makes a world of difference by loosening all the ground-in dirt, pet hair, and sand, making it much easier for the vacuum to pull everything out.
Wiping Down Every Surface
With all the loose gunk gone, it’s time to tackle the grime on your hard surfaces. For this, you’ll need a quality all-purpose interior cleaner and a few fresh microfiber towels.
- Plastics and Vinyl: The key here is to spray the cleaner onto your towel, not directly onto the dashboard or door panels. This simple habit prevents overspray from getting on your glass and electronics. A gentle wipe is all it takes.
- Sensitive Screens: Your infotainment screen is delicate. Use a dedicated screen cleaner or just a clean microfiber towel that's slightly damp with water. Stay away from ammonia-based glass cleaners, as they can ruin the anti-glare coatings.
- Leather Seats: Grab a pH-neutral leather cleaner and a soft-bristled brush. Gently work the cleaner into the leather to lift dirt out of the grain. Wipe the residue off with a clean towel, and always follow up with a good leather conditioner. This keeps the leather soft and prevents it from drying out and cracking over time.
A huge mistake I see people make is slathering on those greasy, high-gloss interior protectants. They might look shiny for a day, but they attract dust like a magnet and can create a dangerous glare on your windshield. The goal is always a clean, satin, factory-fresh finish.
This kind of meticulous care is why the professional detailing industry is booming. The global car detailing service market hit a value of $37.41 billion in 2024, a clear sign that people are more invested than ever in keeping their cars looking their best. You can dig into the numbers in this comprehensive market analysis.
The Finishing Touches for a Showroom Feel
Now for the little things that pull it all together. Use a separate, ammonia-free glass cleaner for the inside of your windows. A clean waffle-weave microfiber towel is perfect for getting that crystal-clear, streak-free finish.
Finally, put your clean floor mats back in. If you've got any lingering odors, now's the time for an odor-eliminating spray (not just a cover-up air freshener). With that, your car's interior won't just look clean—it will feel and smell like it just rolled off the lot, putting the perfect finishing touch on your detail.
Your Car Detailing Questions, Answered
Even with the best guide in hand, you’re bound to have questions when you're getting serious about detailing your car. Knowing the right answers is often what separates a decent job from a jaw-dropping finish. Let’s clear up some of the most common things that trip people up.
This is your go-to spot for those little details that make a huge difference.
How Often Should I Actually Detail My Car?
This is probably the number one question I get, and the honest answer is: it depends. A full-on, deep detail—we're talking clay bar, polish, and a solid sealant or wax—is something you'll want to tackle once or twice a year. Think of it as a major reset for your paint, stripping away the old and laying down a fresh, tough layer of protection.
Now, for regular maintenance, a good, proper wash should be on your list every one to two weeks. Don't let that road grime, bird mess, and other gunk sit around. The longer it's on your paint, the more damage it can do.
As for the inside:
- A quick vacuum and a wipe-down of the steering wheel, shifter, and door handles should happen weekly or bi-weekly.
- A deeper clean of the carpets, seats, and all the plastic bits is best done every month or two.
Of course, your personal situation matters. A car that lives in a garage and only comes out on sunny weekends needs far less attention than a daily driver that battles city traffic and sits outside in the elements. Winter road salt? You'll be washing a lot more often.
What’s the Real Difference Between Polishing and Waxing?
This one trips up so many people. They both make your car shiny, but they do completely different jobs.
Polishing is all about correction. It uses a very mild abrasive to shave off a microscopic layer of your clear coat. That sounds scary, but it's how you safely remove those annoying swirl marks, light scratches, and dull, oxidized paint. This is what brings back that deep, wet-looking gloss.
Waxing is all about protection. A wax or sealant adds a sacrificial layer on top of your paint. It doesn't remove anything. This layer is what takes the beating from UV rays, acid rain, and dirt, all while adding its own slickness and shine.
The golden rule is simple: You always polish before you protect. Slapping a coat of wax over swirled paint just means you’re sealing in all those imperfections. Correct the paint first, then lock in that perfect finish.
Is It Possible to Accidentally Damage My Car’s Paint?
Absolutely, but it's also incredibly easy to avoid. Most paint damage during detailing comes from a few rookie mistakes. The biggest culprit? Using dirty towels or sponges. You’re essentially just grinding dirt and grit right into your clear coat, which is a surefire way to create scratches.
Another common pitfall is getting too aggressive with a machine polisher. Leaning on it with too much pressure or staying in one spot for too long can build up heat and burn right through the paint. And please, step away from the dish soap—using harsh, non-automotive chemicals will strip away any wax or sealant you have and can dull your finish.
Stick to the basics, like the two-bucket wash method, and always start with the least aggressive polish you think you need. Do that, and you'll get incredible, pro-level results without any of the risks.
Ready to make your next car wash faster, safer, and more effective? The SwiftJet Foam Gun connects to any garden hose to cover your car in thick, dirt-lifting foam, minimizing the risk of scratches before you even touch the paint. Elevate your detailing game today.