
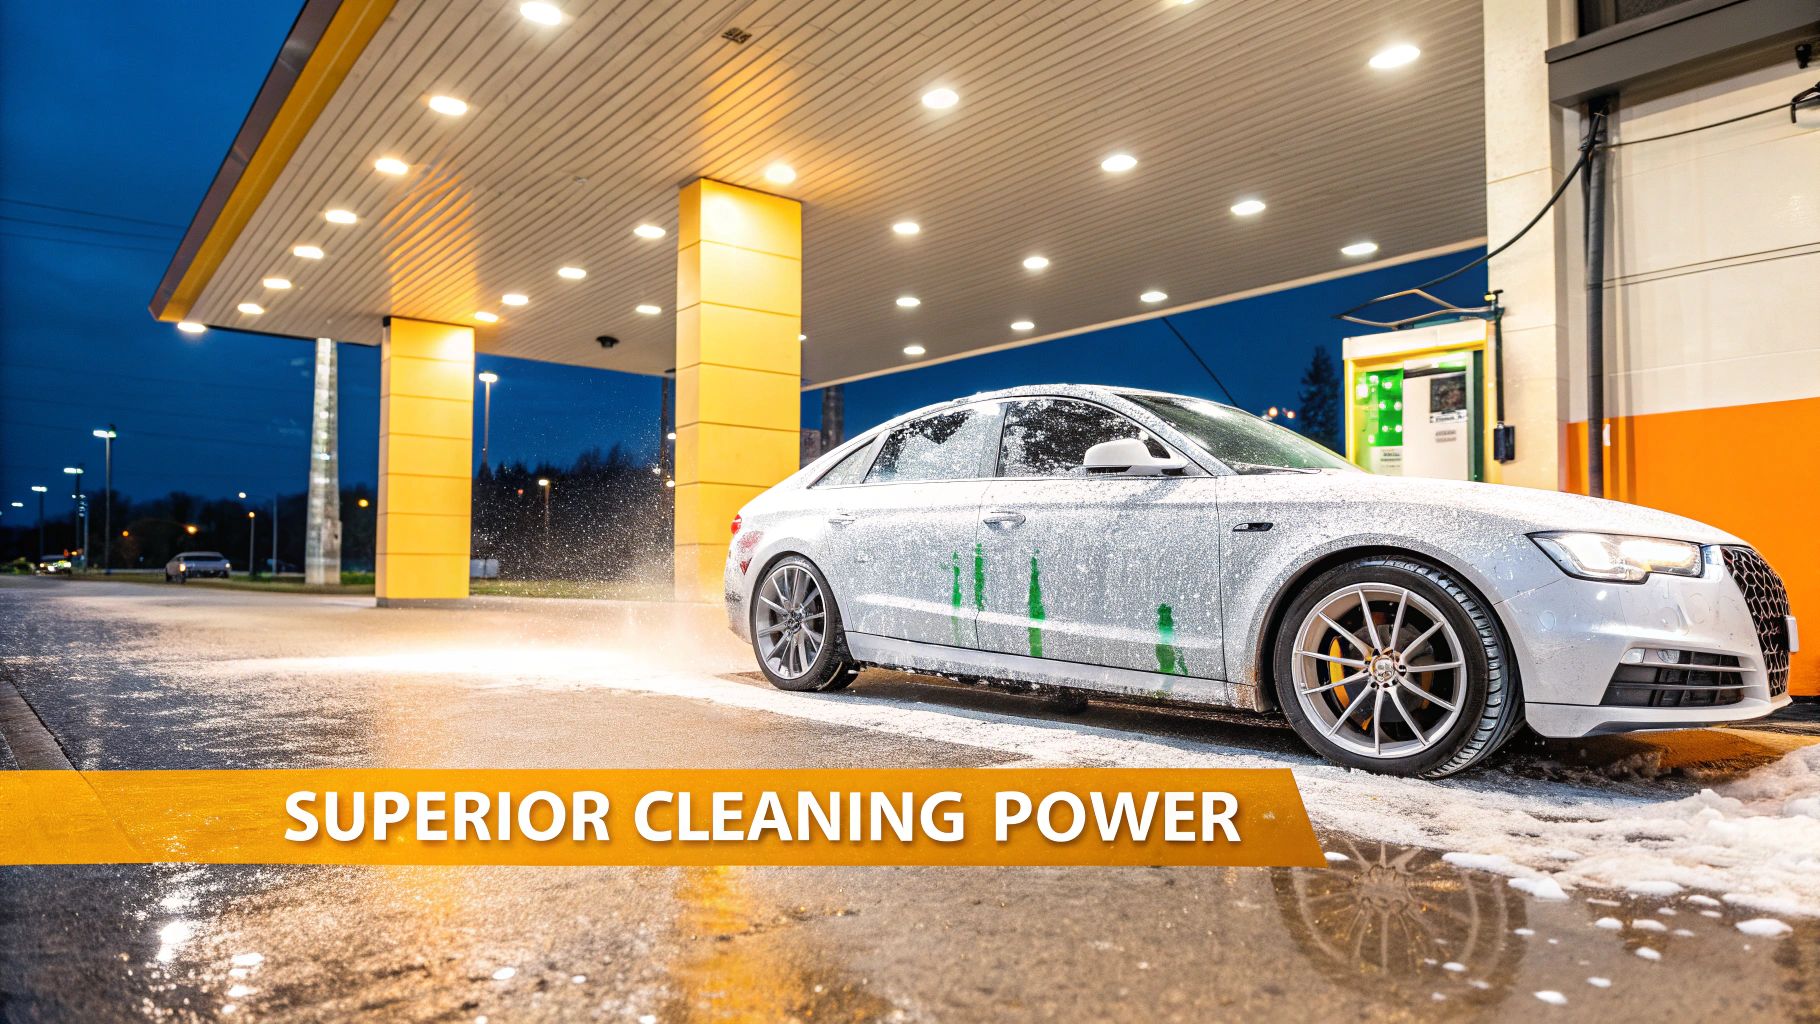
If you're serious about washing your car at home and want to move past the old-school bucket and sponge, a foam blaster car wash gun is your single biggest upgrade. It's a simple tool that works by injecting air into a mix of soap and water, creating a thick, shaving-cream-like foam that clings to every surface of your vehicle.
This process is what's known as a pre-soak, and it’s the secret to dramatically reducing the risk of swirl marks and scratches. It's faster, safer for your paint, and frankly, a lot more effective.
Why a Foam Gun Changes Your Car Wash Game
Still lugging around a bucket of soapy water? You're not just working harder, you're putting your car's paint job at risk. Every time you wipe a gritty sponge or mitt across a dirty panel, you’re dragging abrasive particles across the clear coat. This creates a web of microscopic scratches, or swirl marks, that rob your paint of its depth and shine over time.
A foam blaster car wash foam gun completely flips the script by enabling a touchless pre-wash. The foam is thick enough to hang on vertical surfaces, giving it time to break down, encapsulate, and lift away dirt, sand, and road grime.
This creates a super-slick, lubricated layer. When you rinse, all that nasty grit slides right off with the foam. The result? Most of the dangerous stuff is gone before your wash mitt ever touches the paint.
A Smarter Way to Protect Your Paint
That pre-soak step is the real game-changer. It’s what separates a quick wash from a proper detail. By letting the foam do the initial hard work, you minimize the amount of physical scrubbing you have to do, which is always the riskiest part of the process.
Think of it like giving your car a protective bubble bath. The foam gently loosens the dirt instead of you grinding it into the finish. It’s a simple change in approach that pays off big time in preserving your car’s look.
But it isn't just about paint safety—it's also about working smarter, not harder.
- Lightning-Fast Coverage: You can blanket your entire car in a thick layer of foam in less than a minute. No more going back and forth to the bucket.
- Saves Water: You might be surprised to learn that foam guns are incredibly water-efficient. In fact, they can cut your water consumption by up to 50% compared to just leaving the hose running. The growing popularity of this is even showing up in industry reports on car wash trends.
- It's Actually Fun: Let’s be real. Covering your car in a mountain of foam is way more satisfying than dunking a mitt in a bucket of murky water. It turns a weekend chore into something you'll actually look forward to.
Foam Gun Wash vs Traditional Bucket Wash
To really see the difference, it helps to put the two methods side-by-side. The traditional two-bucket method is a classic for a reason—it’s a huge improvement over a single bucket—but foam technology takes things a step further.
| Feature | Foam Blaster Car Wash Foam Gun | Traditional Bucket Method |
|---|---|---|
| Initial Cleaning | Touchless pre-soak lifts heavy dirt before physical contact. | Relies on manually washing dirt off with a mitt from the start. |
| Scratch Risk | Low. Most abrasive grit is rinsed away before scrubbing. | Higher. Grit is trapped in the mitt, increasing swirl risk. |
| Speed | Extremely fast. The entire vehicle is foamed in under 60 seconds. | Slower. Requires repeated trips to the buckets. |
| Water Usage | Highly efficient, reducing water waste. | Can use significantly more water, especially with a running hose. |
| Fun Factor | High. Creates a satisfying, professional-looking foam blanket. | Low. It feels more like a chore. |
| Soap Usage | Uses concentrated soap, but application is very efficient. | Can lead to wasted soap from frequent water changes. |
While the two-bucket method is a solid detailing practice, adding a foam gun as the first step provides a level of safety and efficiency that a bucket just can't match.
Getting Your Setup Dialed In
A great finish doesn't just happen when the foam starts flying. Honestly, the real magic starts before you even turn on the water. Taking a few minutes to get your space and gear ready is what separates a quick, frustrating wash from a truly professional detail. The whole idea is to create a smooth workflow where everything you need is right there, exactly when you need it.
First up, let's talk location. Washing your car in direct, blazing sun is probably the single biggest mistake I see people make. The heat bakes the soap and water onto your paint before you can rinse it off, leaving you with stubborn water spots and a streaky mess. Always try to find a shady spot—your garage, a carport, or even under a big tree works great. If you absolutely have to wash in the sun, aim for early morning or late afternoon when the car's surface is much cooler to the touch.
Getting Your Gear in Order
Once you've found your spot, it's time to gather your tools. Having everything laid out and ready to go means you won't be running around mid-wash, which is usually when things go wrong.
Here’s what I always have on hand:
- The SwiftJet Foam Blaster: The main event, of course. Make sure it's clean and ready for action.
- Good Car Soap: Don't skimp here. You'll want a soap made specifically for a foam blaster car wash foam gun to get that thick, clinging foam we're after.
- Two Buckets: This is non-negotiable for me. One bucket is for your soapy water, and the other is just for clean rinse water. This is the classic two-bucket method, and it stops you from grinding dirt right back into your paint.
- Microfiber Wash Mitts: Grab at least two. You want them clean and fluffy.
- Drying Towels: A big, thirsty microfiber drying towel is your best friend for getting a perfect, spot-free finish.
My Go-To Tip: Before you even think about adding soap, blast the entire car with just plain water. A good pre-rinse can knock off up to 70% of all the loose dirt and grit. This lets the foam do its real job on the stuff that's actually stuck to your paint.
Mixing the Perfect Foam Formula
The real secret to getting that thick, shaving-cream-like foam isn’t just about the tool itself. It's all in the soap-to-water ratio. Getting this mix right is what transforms a runny, weak wash into a powerful pre-soak that gently lifts dirt away from your paint.
Think of it like a good recipe. Too little soap gives you watery suds that just slide off without doing much of anything. Too much, and you're just wasting product and potentially leaving a sticky film behind. What you're aiming for is a thick, clinging foam that has enough "dwell time" to actually break down the grime.
Your Starting Point Formula
A fantastic, tried-and-true starting point for most car soaps is 3 ounces of soap for every 28-30 ounces of water. I've found this to be a reliable baseline that works great in most situations.
Just pour your soap into the SwiftJet’s canister first, then top it off with warm water. A little tip from experience: using warm water really helps the soap dissolve and gives you much richer suds from the get-go.
Pro Tip: Whatever you do, don't shake the canister! A vigorous shake just creates a bunch of foam inside the bottle before you even start spraying. That premature foam actually hurts the gun's ability to produce that thick, consistent foam you want. Instead, just give the canister a gentle swirl to mix everything together.
This initial ratio is your foundation. From here, you can start tweaking things based on what you see. For a deeper look at how different soaps and water types can change things, check out our foam cannon soap ratio guide.
Adjusting for Perfect Suds
Keep in mind that not all water is the same. If you live in an area with hard water, you might notice your foam isn't as thick as you'd like. The extra minerals in hard water can mess with how well the soap lathers up.
If your foam looks a little thin and watery, don't be afraid to add another half-ounce of soap to your mix. Test it on a small section and see what happens. On the other hand, if your foam is so dense it's a pain to rinse off, you can dial back the soap a bit on your next wash.
Learning to read the foam is the key. Here's what to look for:
- Too Thin: The foam looks almost see-through and runs off the car in just a few seconds. It’s not clinging long enough to work.
- Too Thick: It’s so heavy it barely moves, or you notice a residue after rinsing.
- Just Right: The foam is a solid white, sticks to the doors and roof for several minutes, and then slowly slides down, taking the dirt with it.
Once you get the hang of mixing for your foam blaster car wash foam gun, you'll be able to get those satisfying, professional-level results every single time you wash your car.
Getting Your Foam Gun Connected and Dialed In
With your soap solution mixed, it's time to get the SwiftJet hooked up and ready for action. This is the part where we fine-tune the settings to get that satisfyingly thick, clinging foam. The good news is, connecting it is a breeze, whether you're using a regular garden hose or a pressure washer.
If you're using a garden hose, the quick-connect fitting that comes with it makes setup a literal snap. Just make sure you thread it on nice and tight to the handle to avoid any annoying drips or leaks. For those of you using a pressure washer to get that extra-thick foam, you'll just need the right adapter for your specific wand. Most pressure washers use a standard 1/4" quick-connect fitting, which makes finding one easy.
The simplicity of this design is a big part of why foam guns have become so popular for at-home car care. People love having that professional-level control right in their own driveway. If you're curious about the bigger picture, you can see just how much this market is growing in a recent market analysis.
Mastering the Adjustments for Perfect Foam
Your foam blaster car wash foam gun has two main controls, and learning to use them is the key to a perfect wash. Think of them as your command center for foam thickness and spray pattern.
- The Soap Control Dial (Top): This is your soap-to-water ratio control. Crank it toward the "+" sign, and the gun will pull more soap from the canister, giving you that super-rich, dense foam. Dial it back toward the "-" sign for a thinner, wetter foam, which is perfect for lighter cleaning jobs or a final foamy rinse.
- The Spray Nozzle (Front): This is all about shaping your foam stream. A quick twist lets you go from a wide, 90-degree fan—ideal for blanketing big areas like the roof or doors—to a concentrated jet stream. That focused stream is fantastic for blasting caked-on mud out of wheel wells or bugs off the grille.
The image below gives you a great visual of how dialing in these settings fits into the whole car washing process.
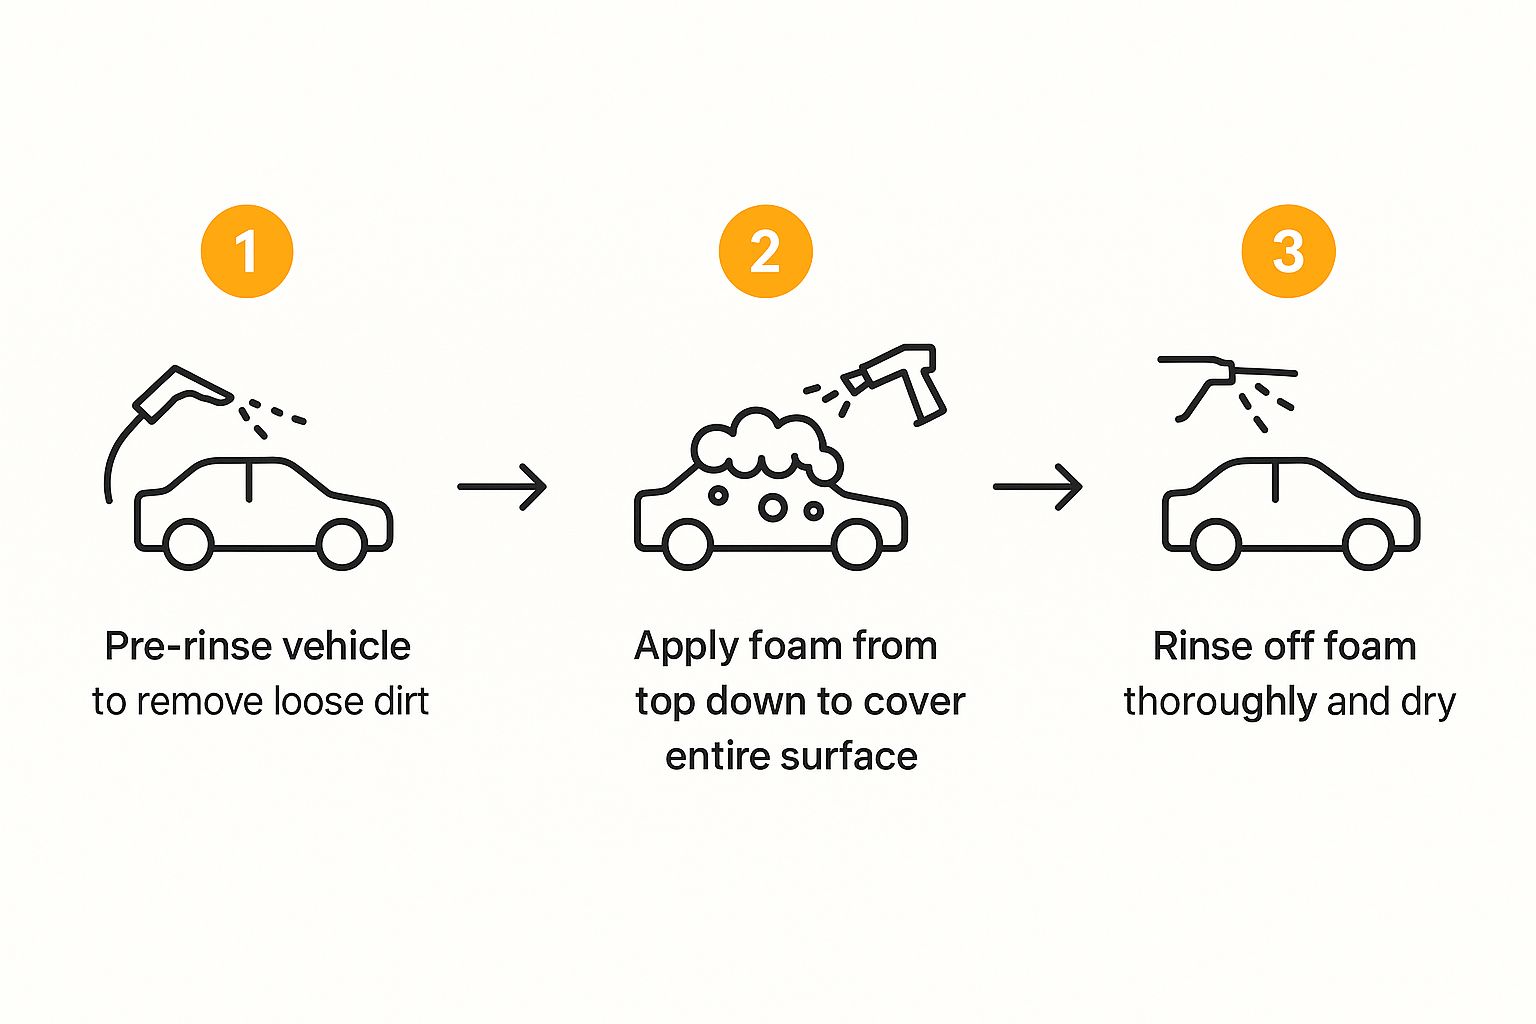
As you can see, it really boils down to three key stages: rinse, foam, and rinse again. Getting your settings just right makes that middle "foam" stage incredibly effective.
My Go-To Settings: When I'm washing my truck after it's gotten really grimy, I'll start with the soap dial turned almost all the way up and the nozzle set to a wide fan. I'll cover the whole truck, then, without missing a beat, I'll twist the nozzle to that powerful jet stream to hit the really dirty spots like the lower body panels and front bumper before I even think about rinsing.
Getting a feel for how these two adjustments work together is what separates a good wash from a great one. To really geek out on the mechanics, check out our guide on how a car wash foam gun works.
Applying Foam Like a Professional Detailer
This is the fun part—watching your car disappear under a blanket of thick, dirt-lifting foam. But there’s a method to the madness that separates a simple spray-down from a truly effective pre-wash. The number one rule I tell everyone? Always, always work from top to bottom.
Start with the roof and let gravity do the heavy lifting for you. As the foam slowly drips down the sides, it spends the most time dwelling on the grimiest parts of your vehicle—the lower panels, bumpers, and wheel wells where all the road gunk lives. This gives the soap more time to work where it's needed most.
Getting That Perfect, Even Coat
To avoid those sad, streaky patches, resist the urge to just wave the nozzle around. Instead, use a steady, side-to-side sweeping motion, almost like you're spray-painting. Here’s a little trick I’ve picked up over the years: overlap each pass by about 50%. This simple adjustment guarantees you get a nice, uniform layer of foam across every single panel. No missed spots, no thin patches.
Some areas on your car are just magnets for grime and need a little extra love from your foam blaster car wash foam gun.
- Front Bumper & Grille: This is where bugs and road debris meet their end.
- Side Mirrors: They catch a surprising amount of kick-up from the road.
- Behind the Wheels: A notorious hiding spot for brake dust and caked-on muck.
- Lower Rocker Panels: These get a constant shower of dirt from your own tires.
Don't be shy about giving these trouble spots an extra blast. You want the foam to have plenty of time to break down all that stubborn contamination before you even think about touching the paint with a mitt.
Looking for more ways to up your car wash game? Check out our other guide for some top tips for a sparkling finish.
This top-down foaming technique isn't just a pro tip; it’s part of a bigger shift in car care. Low-pressure foam guns are becoming the go-to tool because they deliver that thick, clingy foam using less water, which is better for the environment and more effective at cleaning.
The Final Rinse and Keeping Your SwiftJet Pristine
Once the foam has had a chance to work its magic and lift away all that dirt, it’s time for the final rinse. This is where you get that spotless, streak-free shine. You’ll want to rinse the same way you applied the foam: from the top down.
Starting at the roof lets gravity do the heavy lifting for you, pulling all the suds and grime down and off the car. Make sure you hit every panel, paying special attention to those tricky spots like behind the mirrors, in the panel gaps, and around the trim where soap loves to hide.
After a thorough rinse, grab a high-quality, plush microfiber drying towel. This step is key to preventing water spots from ruining all your hard work.
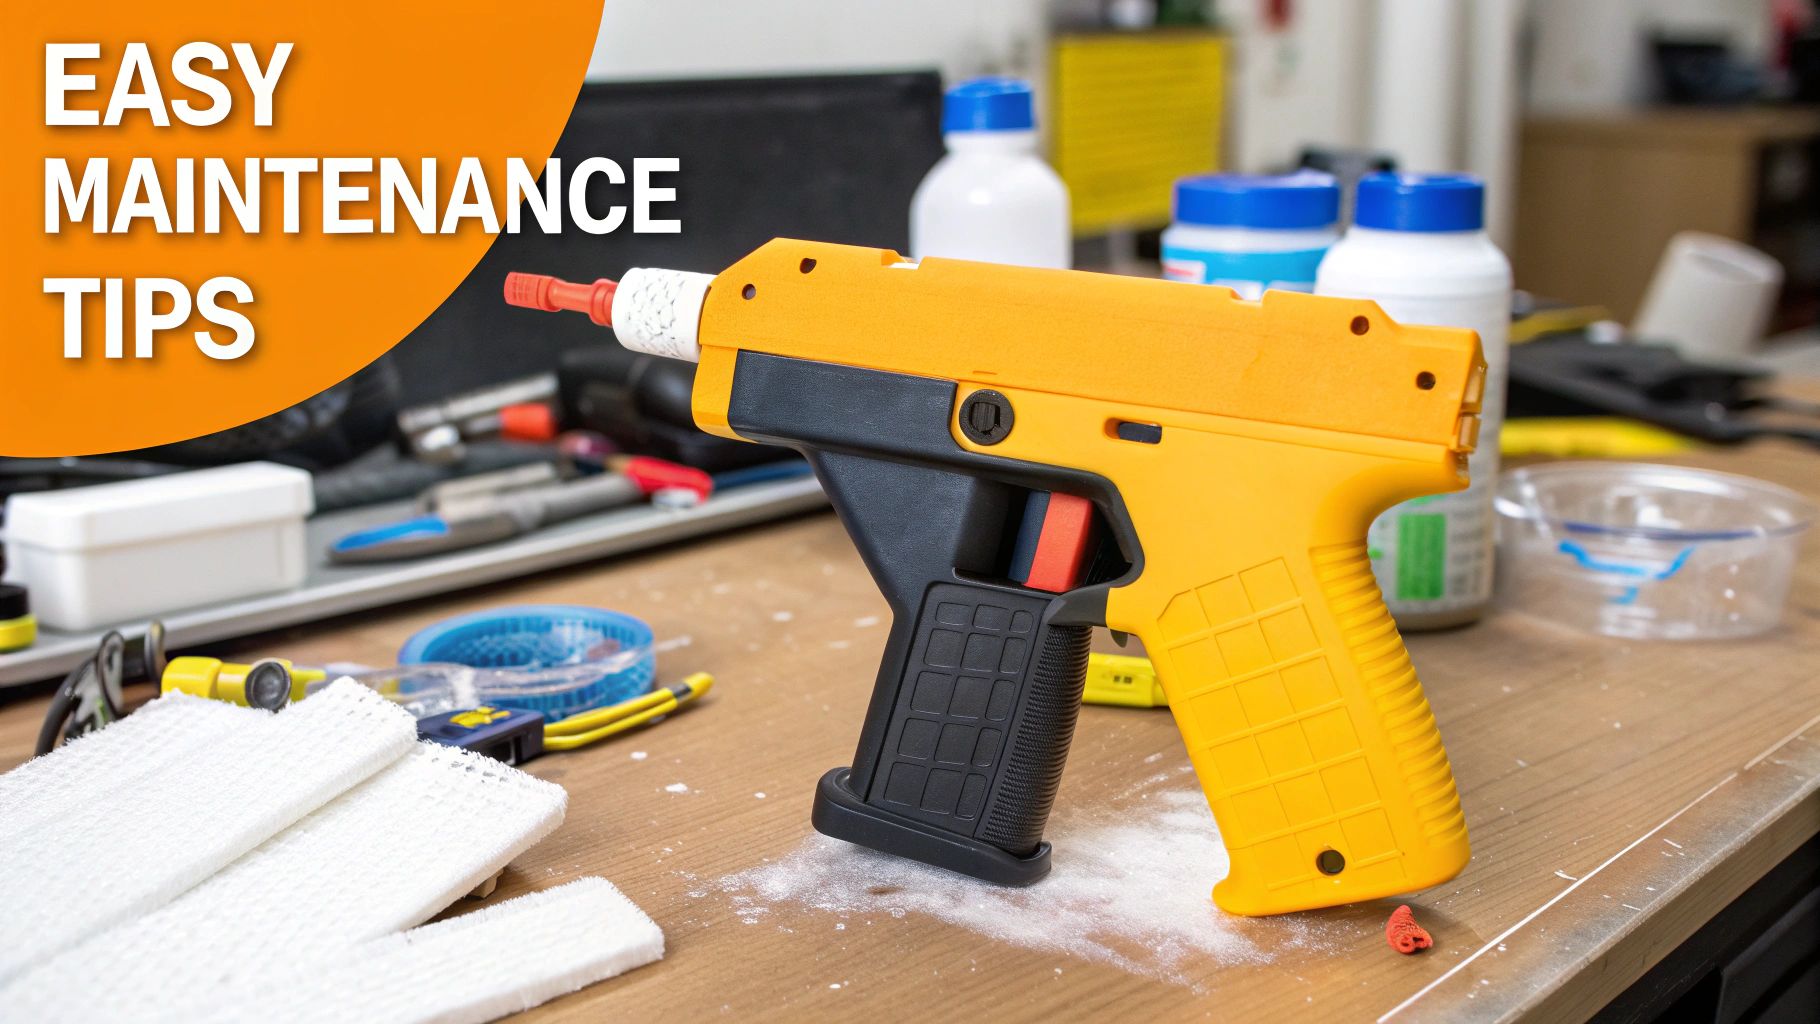
How to Clean Your Foam Blaster After Each Wash
This might be the most important step for keeping your SwiftJet working like new. You have to clean it right after you're done washing the car. It seriously takes less than a minute, but it's the number one way to prevent soap residue from drying inside and causing clogs.
Here's the quick and easy cleaning routine:
- Unscrew the soap canister from the gun.
- Give it a quick rinse and fill it with clean water.
- Screw it back onto the handle.
- Spray that clean water through the gun for about 30 seconds.
That's it. This simple flush clears any leftover soap from the filter and mixing valve, guaranteeing your tool is good to go for your next wash.
A clean tool is a consistent tool. I can't tell you how many times people complain about weak foam, and 99% of the time, it's because of a clog. That 30-second flush is your best defense. Do it every time, and your SwiftJet will perform perfectly for years.
Got Questions About Your Foam Blaster? We've Got Answers.
When you first get your hands on a foam blaster, it's normal to have a few questions. Let's tackle the most common ones so you can get that perfect, sudsy wash right from the start.
Can I Just Use Any Old Car Soap?
You can, but you probably won't want to. While pretty much any car wash soap will make some bubbles, the real magic comes from using a soap specifically designed for a foam gun. These are usually more concentrated and formulated to whip up that super thick, shaving-cream-like foam that clings to your car.
A word of caution: whatever you do, steer clear of dish soap. It's fantastic for greasy plates but way too harsh for your car's paint, stripping away any wax or sealant you've applied.
Is a Regular Garden Hose Really Enough?
Absolutely. The SwiftJet is built to work great with a standard garden hose. You'll get plenty of thick, dirt-lifting foam.
It's worth knowing that the foam blasters you see hooked up to pressure washers (those are often called foam cannons) will create an even more ridiculously thick layer of foam. That's just a function of the high pressure, but for a safe, effective wash at home, your hose is all you need.
Here's the key thing to remember: A foam gun is the ultimate pre-wash tool. It dramatically reduces the risk of scratching your paint, but it's not a complete replacement for a good hand wash. The foam’s job is to soften, lift, and lubricate all that heavy grit, so when you finally touch the car with a wash mitt, you're not just grinding it into the clear coat.
For the best possible finish, always follow the foam bath with a gentle two-bucket hand wash.
Ready to see what all the fuss is about and give your car the sudsy, scratch-free wash it deserves? The SwiftJet makes getting that pro-level clean in your own driveway incredibly easy and satisfying.