

You walk out to your car, catch the headlights in the sun, and there it is. That cloudy yellow film that makes the whole front end look tired. At night, it gets worse. The beam looks weaker, the lens looks dirty even after a wash, and the car suddenly feels older than it is.
That's the moment individuals often start searching for a fast fix. Some grab a polishing kit. Some wipe on wax. Some restore the lens, get great clarity for a while, then watch the haze creep back in. The missing piece is usually protection. Not shine. Protection.
Why Your Headlights Look Old and What You Can Do
Modern headlight lenses are usually polycarbonate, not glass. That material is tough and light, but it needs UV protection. Once the factory protective layer breaks down, the surface starts oxidizing. That's why the lens turns dull, yellow, or chalky instead of staying clear.
The frustrating part is that oxidation doesn't just hurt looks. It also cuts into usable light output. A headlight can still turn on normally and still perform poorly because the lens is scattering the beam before it gets down the road.
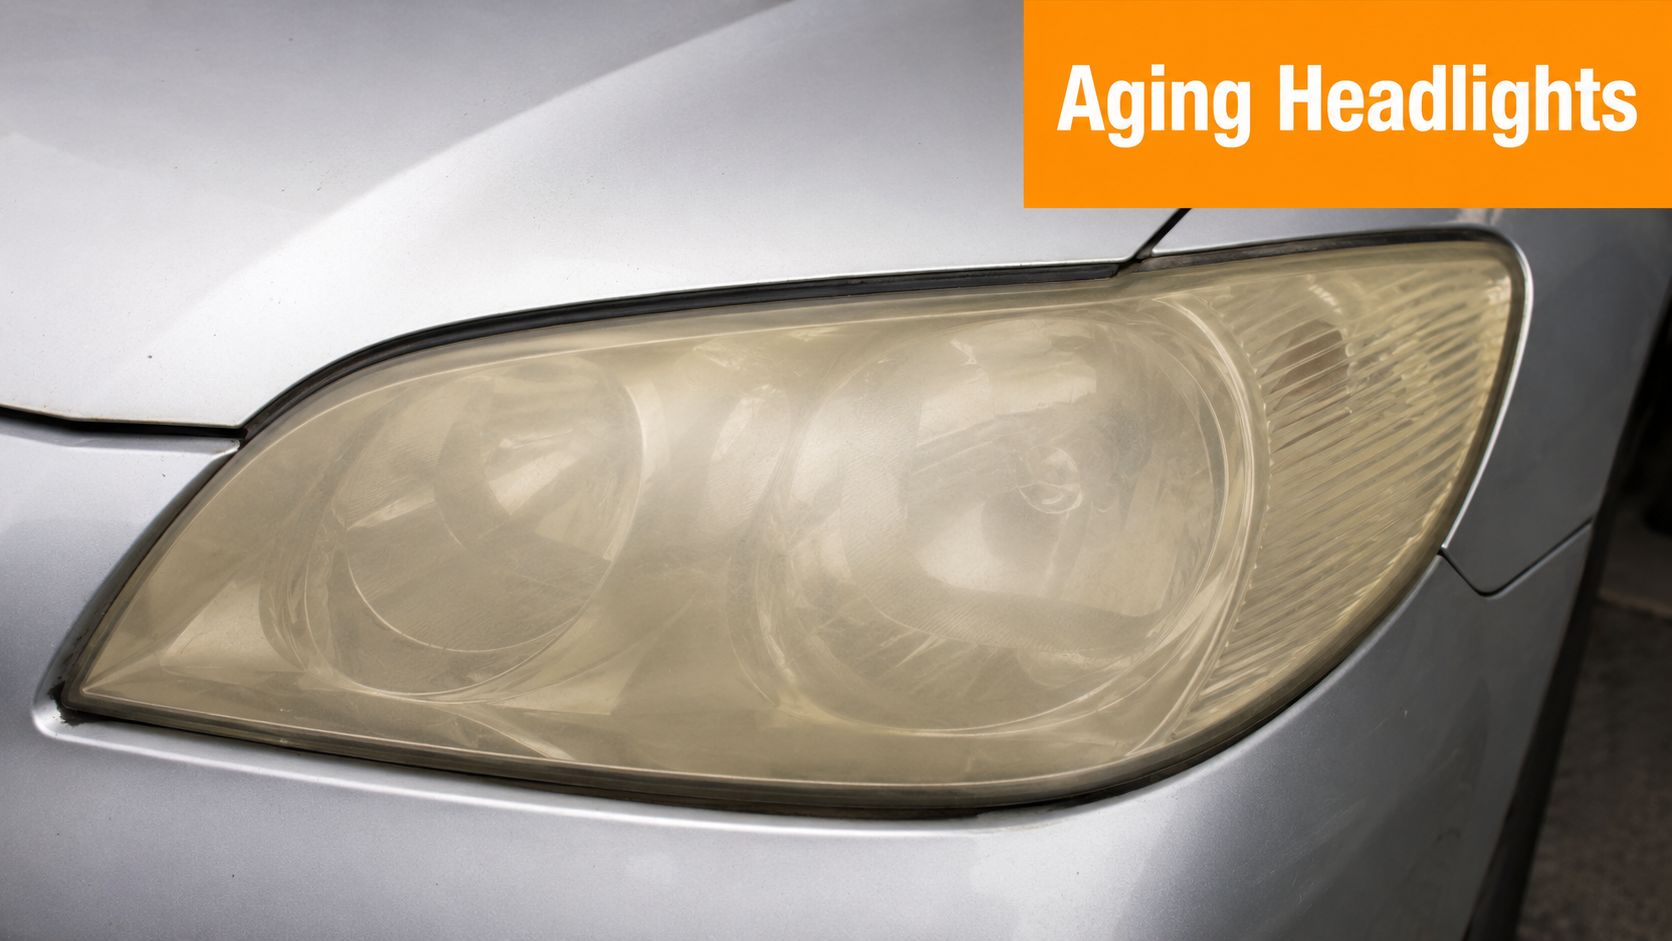
I see the same pattern all the time. A driver restores the headlights enough to make them look decent, but skips a proper protective layer. A few washes, a hot summer, some road grime, and the surface starts slipping backward. If you're already at the point where sanding and polishing are on the table, it helps to look at professional vehicle headlight care so you can compare a pro-level process against the average quick fix.
For readers still dealing with the oxidation stage first, this guide on how to clean oxidized headlights is a useful starting point before you think about sealing anything.
What usually works and what doesn't
A few methods improve appearance fast but don't hold up well:
- Basic polishing only: Good for removing haze, bad for long-term protection if you leave the lens bare.
- Wax on restored plastic: Better than nothing, but it's still a short-term layer.
- Household hacks: Toothpaste and similar tricks may brighten the lens a bit, but they don't solve UV exposure.
Clear headlights don't stay clear just because you polished them. They stay clear because you protected the fresh surface after polishing.
That's where ceramic coating earns its place. It's not magic, and it won't fix internal damage inside the housing, but it can give a restored lens a fighting chance against UV, water, grime, and repeat oxidation.
What Is a Headlight Ceramic Coating
A headlight ceramic coating is a liquid-applied protective layer that cures into a hard, glass-like shell over the lens. On headlights, the goal isn't just gloss. It's to create a bonded barrier on the polycarbonate so the lens resists UV attack, water spotting, and surface contamination.
Think of it as liquid armor for plastic. Wax sits on top and fades away. A ceramic coating bonds more tightly to the surface, so it behaves less like a temporary dressing and more like a semi-permanent shield.
Why it lasts longer than wax or sealant
This is the practical difference that matters in a driveway. Waxes and most simple sealants wash down, wear off, and lose effectiveness fairly quickly. Ceramic coatings hold on longer because they cure into a more durable layer.
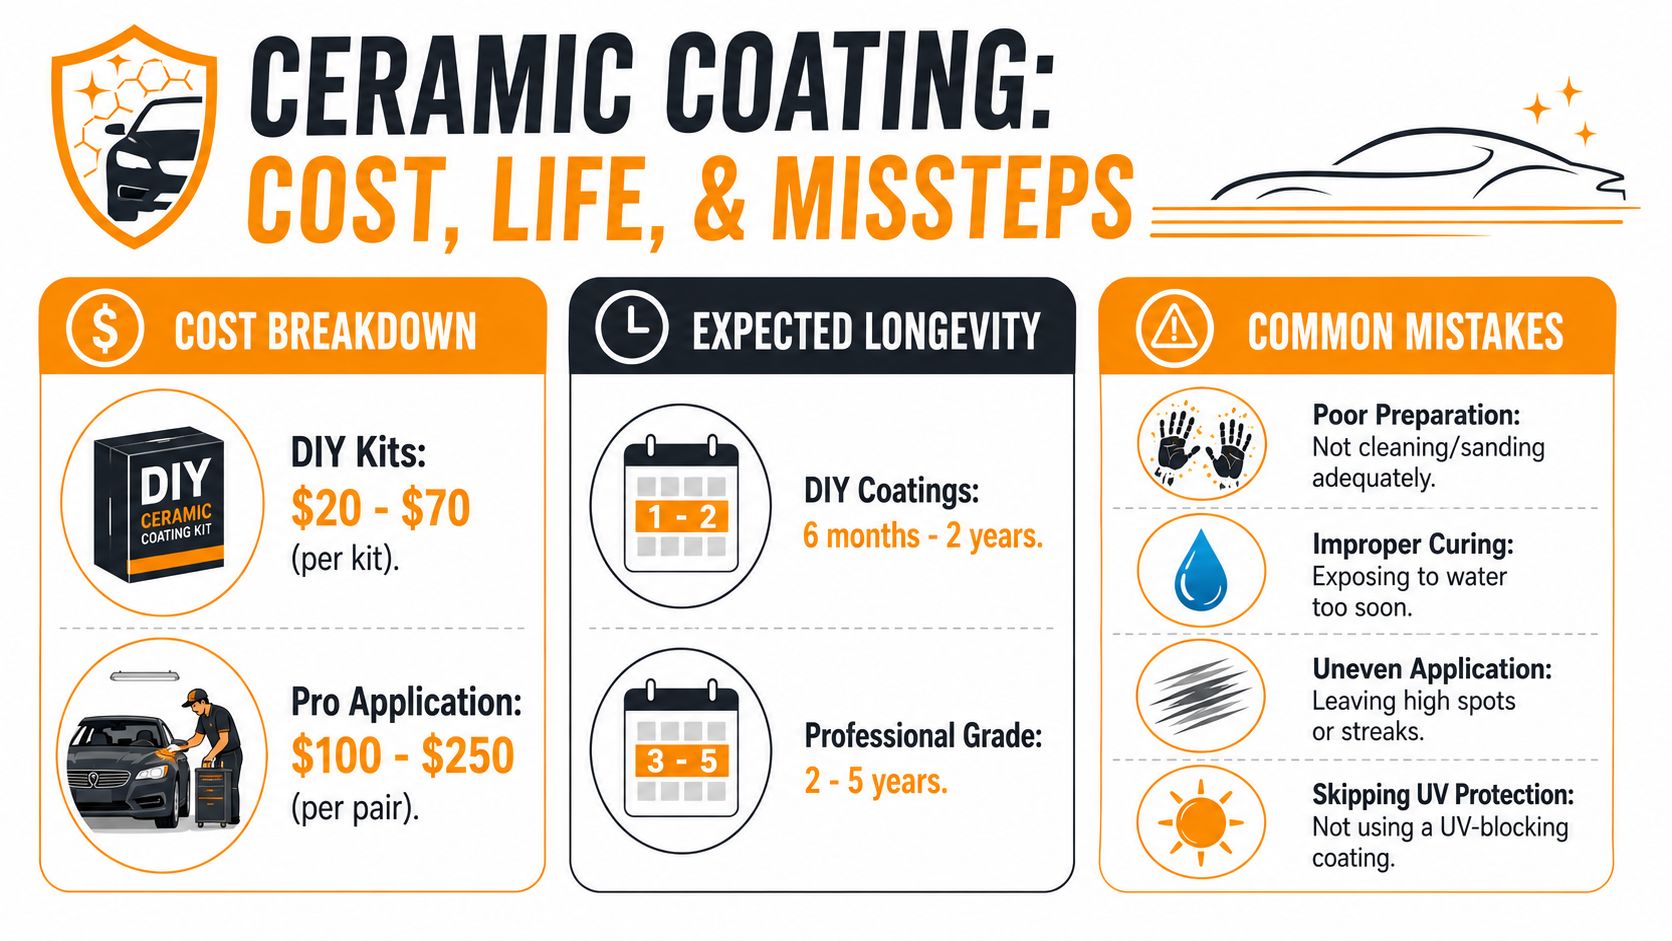
According to this headlight ceramic coating breakdown, ceramic coatings offer a lifespan of 2 to 5 years, a 200% to 500% increase over the 6 to 12 month durability of typical DIY sealants. That gap is why detailers reach for ceramic when the customer wants protection instead of a temporary cosmetic boost.
What it does not do
A coating protects what's there. It doesn't rebuild missing plastic, fix rock pitting, or erase damage inside the housing.
If your lens has internal haze, burn marks, or crazing under the outer surface, coating won't make that disappear. The lens has to be corrected first. On neglected headlights, that usually means sanding and polishing before coating ever touches the surface.
Here's the short version:
- Use ceramic coating after restoration: That's when it makes sense.
- Don't apply it over active oxidation: You'll lock in a bad surface.
- Don't expect showroom perfection on every old lens: Severely aged headlights often improve a lot, but not every lens comes back fully.
Practical rule: Ceramic coating is a protector, not a miracle repair.
That's also why product claims need context. A lot of the optimistic longevity language you see is based on cleaner, newer surfaces. Older headlights can still benefit from ceramic coating for headlights, but the result depends heavily on how compromised the plastic already is before you start.
The Protective Benefits of Ceramic Coating
Once the lens has been corrected properly, the coating's job is simple. Keep that fresh surface from sliding backward.
UV resistance that matters on plastic lenses
The biggest enemy is sunlight. That's what drives the yellowing and hazing vehicle owners seek to reverse. A good coating acts like long-wear sunscreen for the lens. It won't make the headlight bulletproof, but it slows down the cycle that turns clear plastic cloudy.
That matters most on cars parked outside every day. South-facing driveways, hot climates, and long commutes all punish unprotected plastic.
Hydrophobic behavior and easier cleaning
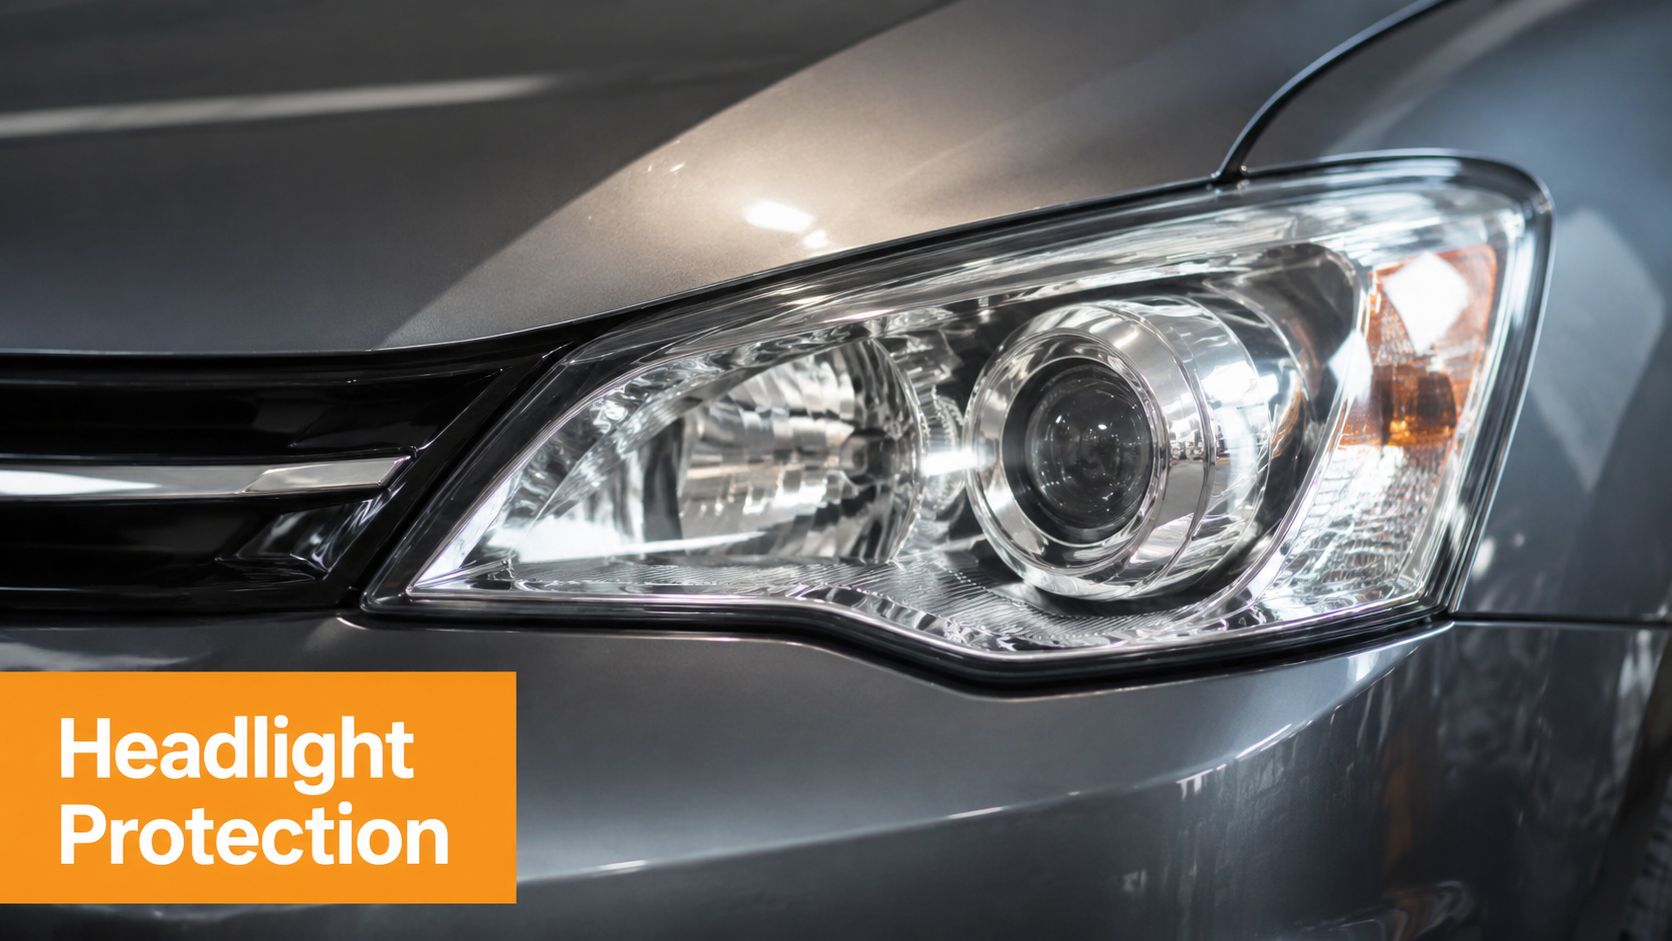
Ceramic offers a distinct advantage in daily use. High-performance coatings create a hydrophobic barrier with a water contact angle greater than 110°, which helps water sheet off instead of lingering on the lens and causing the staining that speeds up oxidation.
What that means in real life is less water spotting, easier bug cleanup, and less grime sticking after rain.
Light chemical and abrasion resistance
Ceramic coating also adds a sacrificial layer between the lens and the junk it sees every week. Bug residue, road film, soap residue, and harsh cleaners are less likely to bite into the plastic when that barrier is in place.
It also helps with very light surface marring. I wouldn't oversell this part. It's not the same thing as thick film protection. But compared with leaving a polished lens bare, the coated surface stands up better to routine washing and normal use.
A practical way to think about the benefits:
- UV defense: Helps slow repeat yellowing.
- Water behavior: Helps reduce spotting and grime adhesion.
- Surface resilience: Gives you a buffer against minor abuse during washing and road use.
A coated lens is easier to maintain because contamination releases more easily. That doesn't mean you can neglect it. It means your normal wash routine works better.
If your goal is clarity that lasts longer than a simple polish-and-wax job, these are the reasons ceramic coating for headlights has become such a common finishing step.
Comparing Headlight Protection Options
If you're deciding how to protect restored headlights, ceramic coating is only one path. It's a strong one, but not the only one. The right choice depends on how long you want the result to last, how much effort you'll tolerate, and whether you mind repeating the process later.
Some readers also like comparing kits before committing, and these headlamp restoration kit reviews can help if you're still choosing your starting point.
Headlight protection method comparison
| Method | Durability | Average Cost | DIY Difficulty |
|---|---|---|---|
| Ceramic coating | Long-lasting when prep is done well | Moderate | Moderate |
| PPF film | Very strong physical protection | Higher | High |
| Synthetic sealants | Short-term protection | Lower | Easy |
| Polishing and waxing | Short-term cosmetic improvement | Lower | Easy to moderate |
Where ceramic coating fits best
Ceramic coating sits in the middle of the market in a good way. It gives noticeably better durability than waxes or sealants without the installation demands of paint protection film.
For most DIYers, that's the sweet spot. You can restore the lens, apply the coating by hand, and get a result that looks sharp without learning how to stretch and trim film.
When PPF makes more sense
PPF is the heavy-duty option. It gives physical impact protection that ceramic cannot match. If you drive a lot of highway miles, deal with sandblasting road conditions, or just want the strongest barrier against pitting, PPF deserves serious consideration.
The trade-off is fitment and installation. Film on a curved headlight can be finicky. Bad alignment, trapped moisture, and lifted edges will ruin the result faster than a mediocre coating job.
Where sealants and wax still have a place
I still think waxes and synthetic sealants are valid for someone who enjoys frequent maintenance and wants the easiest application. They're fine for upkeep on a vehicle that already lives an easy life, especially if the owner doesn't mind reapplying protection often.
Their weakness is consistency. They don't hold up like ceramic, especially on headlights that sit at the front of the car collecting sun, bugs, and wash chemicals.
The simple truth about polishing alone
Polishing restores clarity. It is not protection.
That's the mistake a lot of people make. They finish sanding and polishing, admire the clear lens, and stop there. The headlight looks fixed, but the vulnerable fresh surface is now exposed. That's why so many restored headlights look great for a short window and then start fading again.
If you want a balanced option, ceramic coating is usually the practical answer. If you want the toughest physical barrier and don't mind a trickier install, PPF is hard to beat.
DIY vs Professional Ceramic Coating Application
This decision comes down to three things. Budget, time, and how much risk you're comfortable taking.
If your headlights are only mildly tired and you're patient with prep, DIY can work very well. If the lenses are heavily oxidized, textured around the edges, or already showing signs of more serious age-related damage, a professional can save you from wasting a weekend and still ending up with a mediocre result.
Choose DIY if you like hands-on work
DIY makes sense when you're willing to slow down and follow the process exactly. The coating step itself isn't usually the hard part. The prep is.
You'll need to wash, decontaminate, sand if needed, polish if needed, wipe the surface properly, and keep moisture away while the coating flashes and cures. If that sounds satisfying instead of annoying, you're probably a good DIY candidate.
DIY is also a good fit when:
- You're treating one or two vehicles: There's no rush and no customer deadline.
- You already own basic detailing tools: Tape, microfiber towels, sanding supplies, and applicators.
- You're okay learning by doing: Minor imperfections won't ruin your week.
Pay a pro if the lens condition is ugly
Professional application earns its keep on difficult headlights. A seasoned detailer can read the lens fast. They'll know whether the haze is on the surface, under it, or baked into the plastic in a way that limits the final result.
A pro setup also helps with environment control. Clean workspace, better lighting, better prep discipline, and fewer chances of trapping contamination under the coating.
If you're weighing services against products, this overview of automotive ceramic coating is helpful for understanding where headlights fit into the broader coating world.
If you're nervous about sanding, worried about touching adjacent paint, or don't have a dry place to let the coating cure, paying a pro is usually cheaper than redoing bad work.
The real trade-off
DIY saves money and teaches you a skill. Professional work reduces uncertainty.
Neither path is automatically better. I'd rather see someone choose the simpler route they can execute well than buy a premium coating and rush through the prep. Headlights reward patience more than product hype.
Your DIY Ceramic Coating Application Checklist
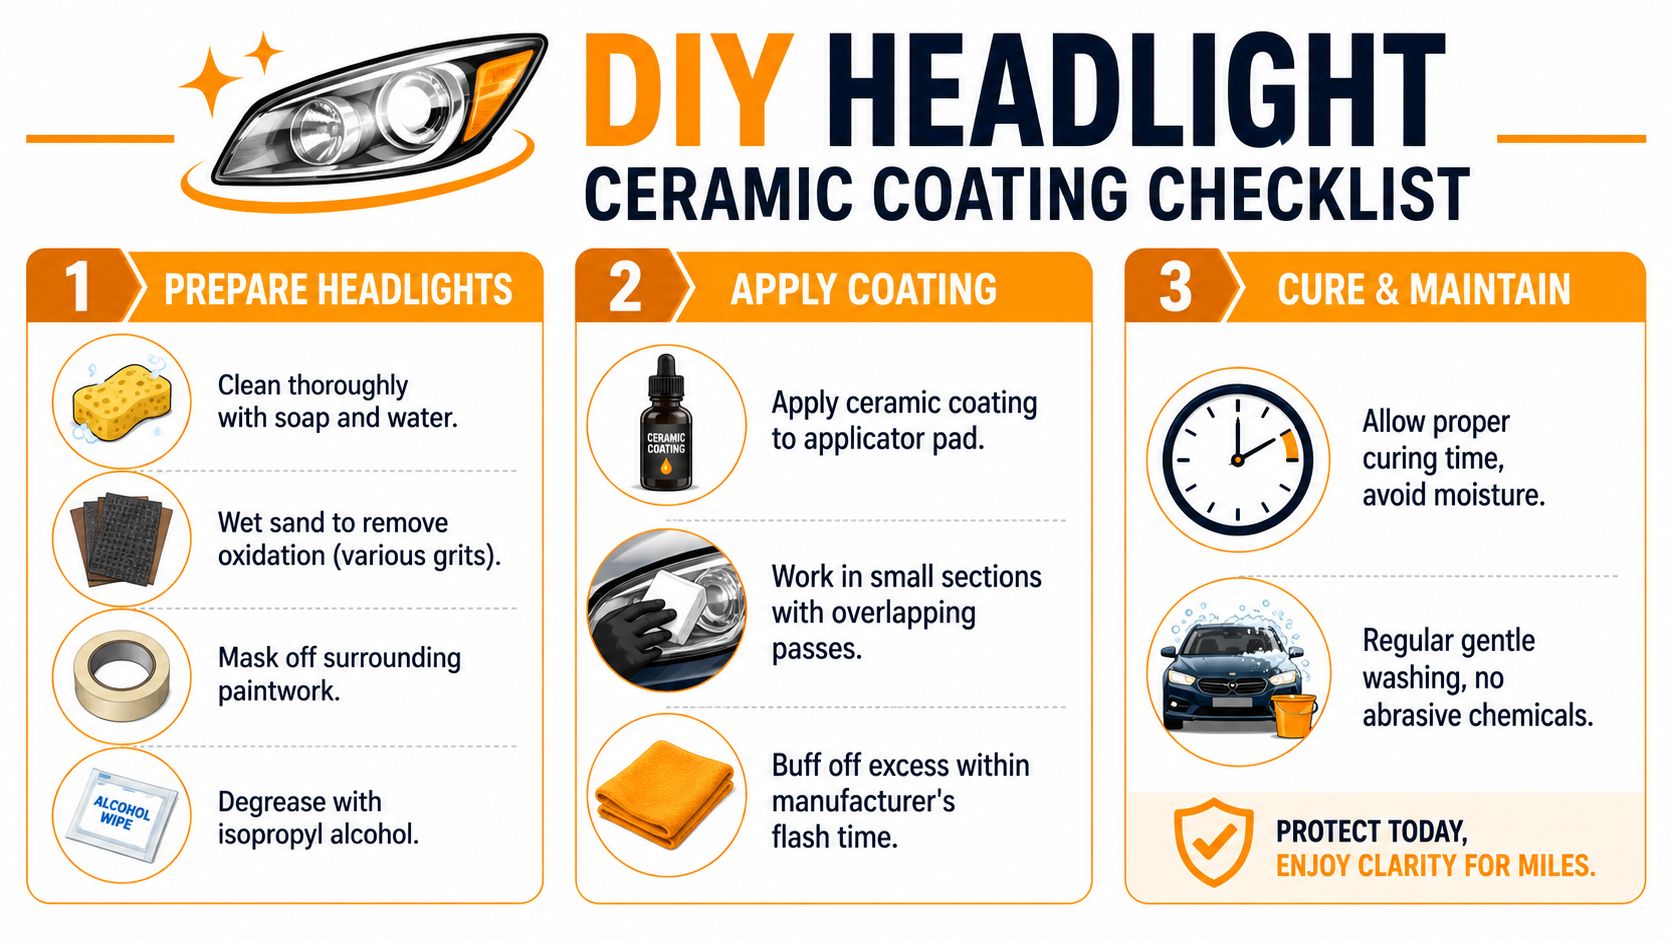
Good results come from sequence, not shortcuts. The biggest mistake DIYers make is treating the coating like the main job. It isn't. The restoration and prep decide whether the coating bonds cleanly and cures evenly.
Prepare headlights
Start with a proper wash. Strip away dirt, bug residue, traffic film, and any old dressing left on the lens. Then mask the paint, trim, and edges around the headlight before you sand or wipe with solvents.
If the headlight is already oxidized, correct that first. On neglected lenses, that usually means wet sanding to remove the dead layer, then refining the surface until the lens is uniformly clear enough for coating.
Use this prep mindset:
- Clean first: Soap and water before anything abrasive touches the lens.
- Correct the surface: Wet sanding and polishing if oxidation is present.
- Protect surrounding panels: Masking tape is cheap. Repainting trim isn't.
Decontaminate before coating
After correction, the surface has to be surgically clean. Residual polish oils, sanding slurry, and moisture all interfere with bonding. A prep wipe and fresh microfiber towel matter here.
This is also where older headlights catch people out. Water likes to hide in seams, edges, textured trim, and around the housing. If the area has crevices, don't assume “looks dry” means dry.
For textured housings, the most reliable process is a 3-step drying protocol identified in testing: compressed air evacuation, a 10-minute ambient wait, and a final wipe with a hydrophobic prep spray. That protocol matters because water trapped in textured areas has been tied to bloom and peeling in failed DIY applications.
Apply the coating with control
Apply the coating to a suede or microfiber applicator, not directly to the lens. Work in small sections with overlapping strokes so you don't leave dry spots. Keep your passes orderly. Random circles usually create uneven coverage.
Many coatings need a short flash period before you level any residue with a clean microfiber. Watch the surface closely. If you let residue sit too long, you can end up with streaks or high spots that are annoying to remove after cure.
A lot of products also benefit from a second coat for better barrier density, especially when the lens has been restored and you want fuller coverage.
Here's a useful planning detail. A 50ml bottle can protect up to 50 headlight pairs, which makes a professional-grade bottle practical if you maintain several vehicles or do occasional detail work for friends.
A quick visual walkthrough helps if you like seeing the hand motion and wipe timing in action:
Cure and maintain
Once the coating is on, leave it alone. No water, no washing, no touching to “fix” a spot after it starts setting.
Cure windows vary by product and conditions, but the rule stays the same. Dry environment, no contamination, no rushing. After cure, maintain the lens with gentle washing and skip abrasive cleaners.
The coating can't make up for sloppy prep, but careful prep can make an average coating perform surprisingly well.
Cost, Longevity, and Common Mistakes to Avoid
It's important for expectations to get real. Ceramic coating for headlights can last well, but aged, restored lenses do not behave like fresh factory lenses. That's the detail many guides skip.
A study cited in the available data found that UV-induced micro-cracking in aged polycarbonate can reduce coating bond strength by 45%, resulting in a real-world lifespan of 14 months on restored headlights compared to 36 months on new ones. That's the honest version of longevity. If you're coating a five-year-old or older lens that has already oxidized, don't judge your result against the promise printed for a new car.
The mistakes that shorten lifespan fastest
Most failures come from process, not product. These are the repeat offenders:
- Poor prep: Oxidation, polishing oils, or residue left behind before coating.
- Hidden moisture: Water trapped in seams or textured trim.
- Bad application conditions: Hot panels, direct sun, or dirty work area.
- Uneven leveling: Leaving streaks or high spots to cure on the lens.
If you avoid those mistakes, you give the coating the best chance it has. If the lens is old and compromised, you still may not get “new car” durability. That's not failure. That's the material telling the truth about its condition.
The win here is practical. A well-restored and properly coated old headlight usually looks better, stays easier to clean, and resists repeat haze longer than the same lens left bare or protected with a short-lived wipe-on product.
If you're keeping headlights clear as part of your regular wash routine, SwiftJet makes the maintenance side easier. Its foam gun connects to a standard garden hose, lays down thick soap fast, and helps you clean lenses and front-end grime gently without turning every wash into a full detail session.
