
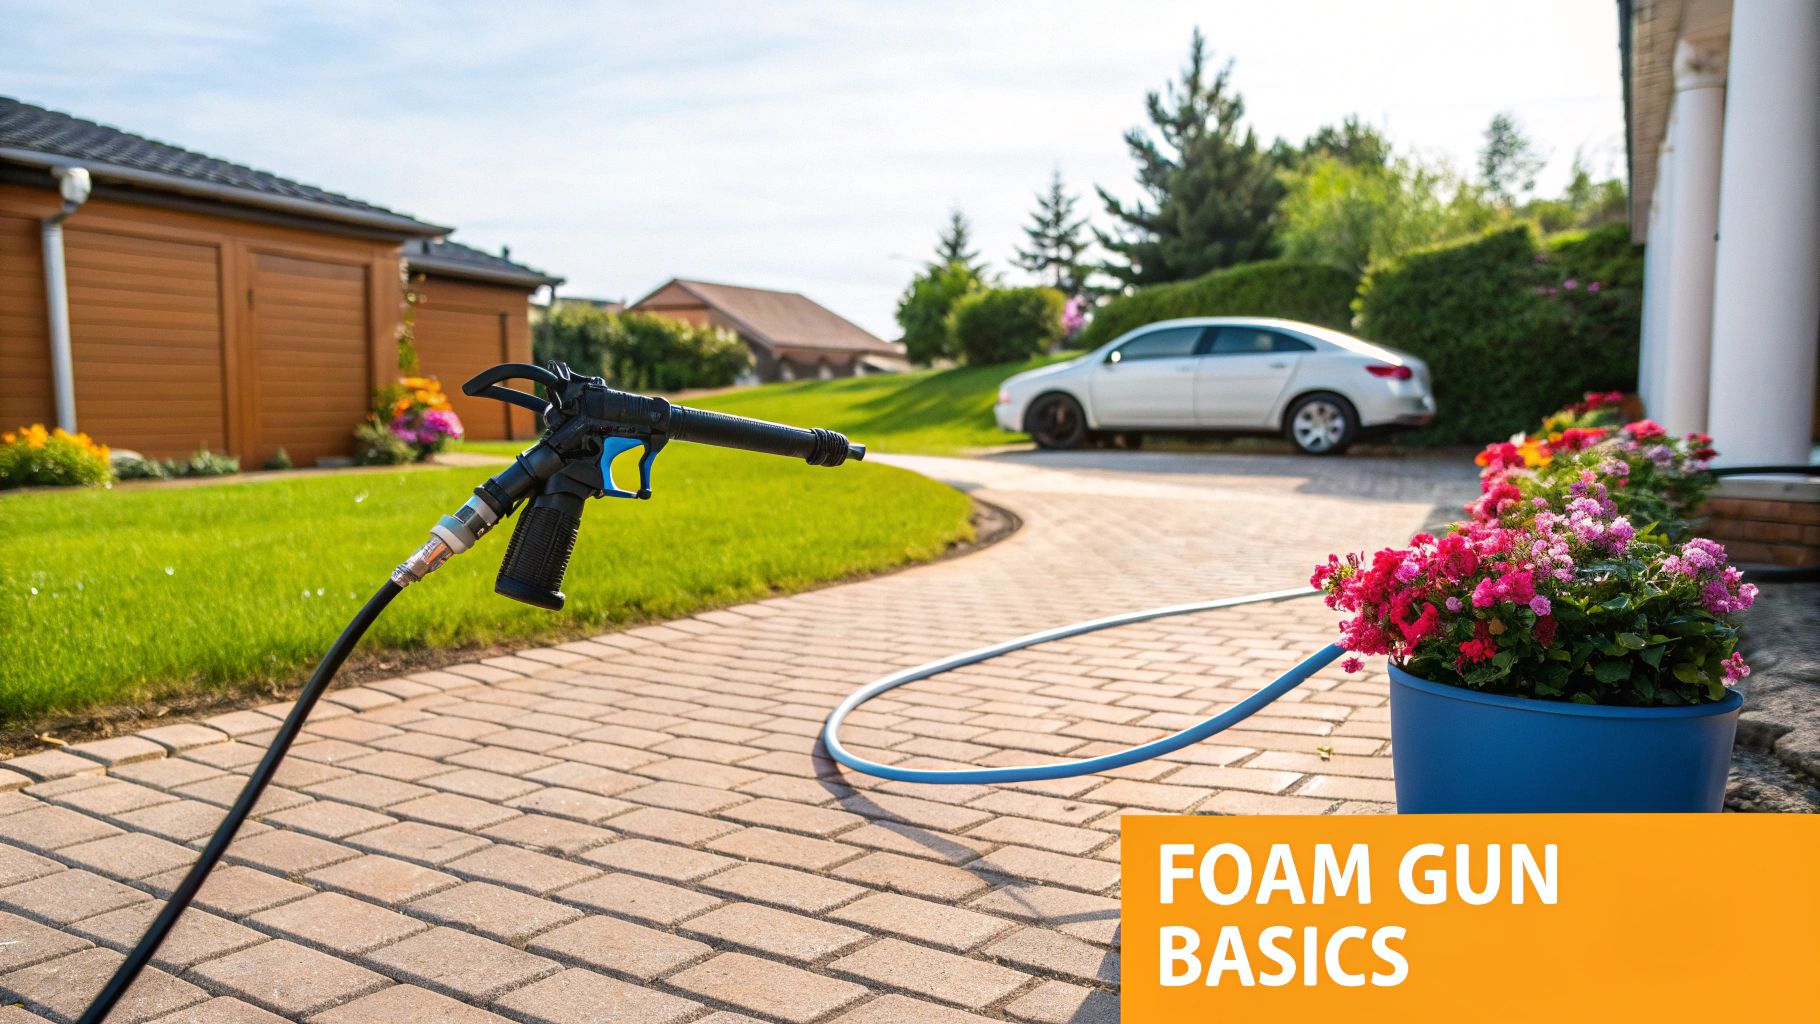
If you've ever wanted to get that professional, swirl-free shine without leaving your driveway, a car wash foam gun with hose is the tool you've been missing. It hooks right up to a standard garden hose and mixes car wash soap with water to create a thick, satisfying foam that clings to your vehicle. This simple device is a much safer and more effective way to wash your car than using a high-pressure washer or the old bucket-and-sponge routine.
Why a Foam Gun Is a Game Changer for Your Car
Let's be honest, those automated car washes can be brutal on your paint. The harsh brushes and gritty, recycled water are a primary cause of those fine scratches and swirl marks that dull your car’s finish. Even the traditional two-bucket method, while safer, still risks grinding dirt into the paint if you aren't extremely careful.
A foam gun completely flips the script.
Instead of immediately scrubbing at caked-on grime, you're letting the thick foam do the hard work. It encapsulates all those tiny dirt and dust particles, lifting them away from the surface before you ever touch the car with a wash mitt. This pre-soak stage is what really separates a good wash from a great one.
The Science of a Safer Wash
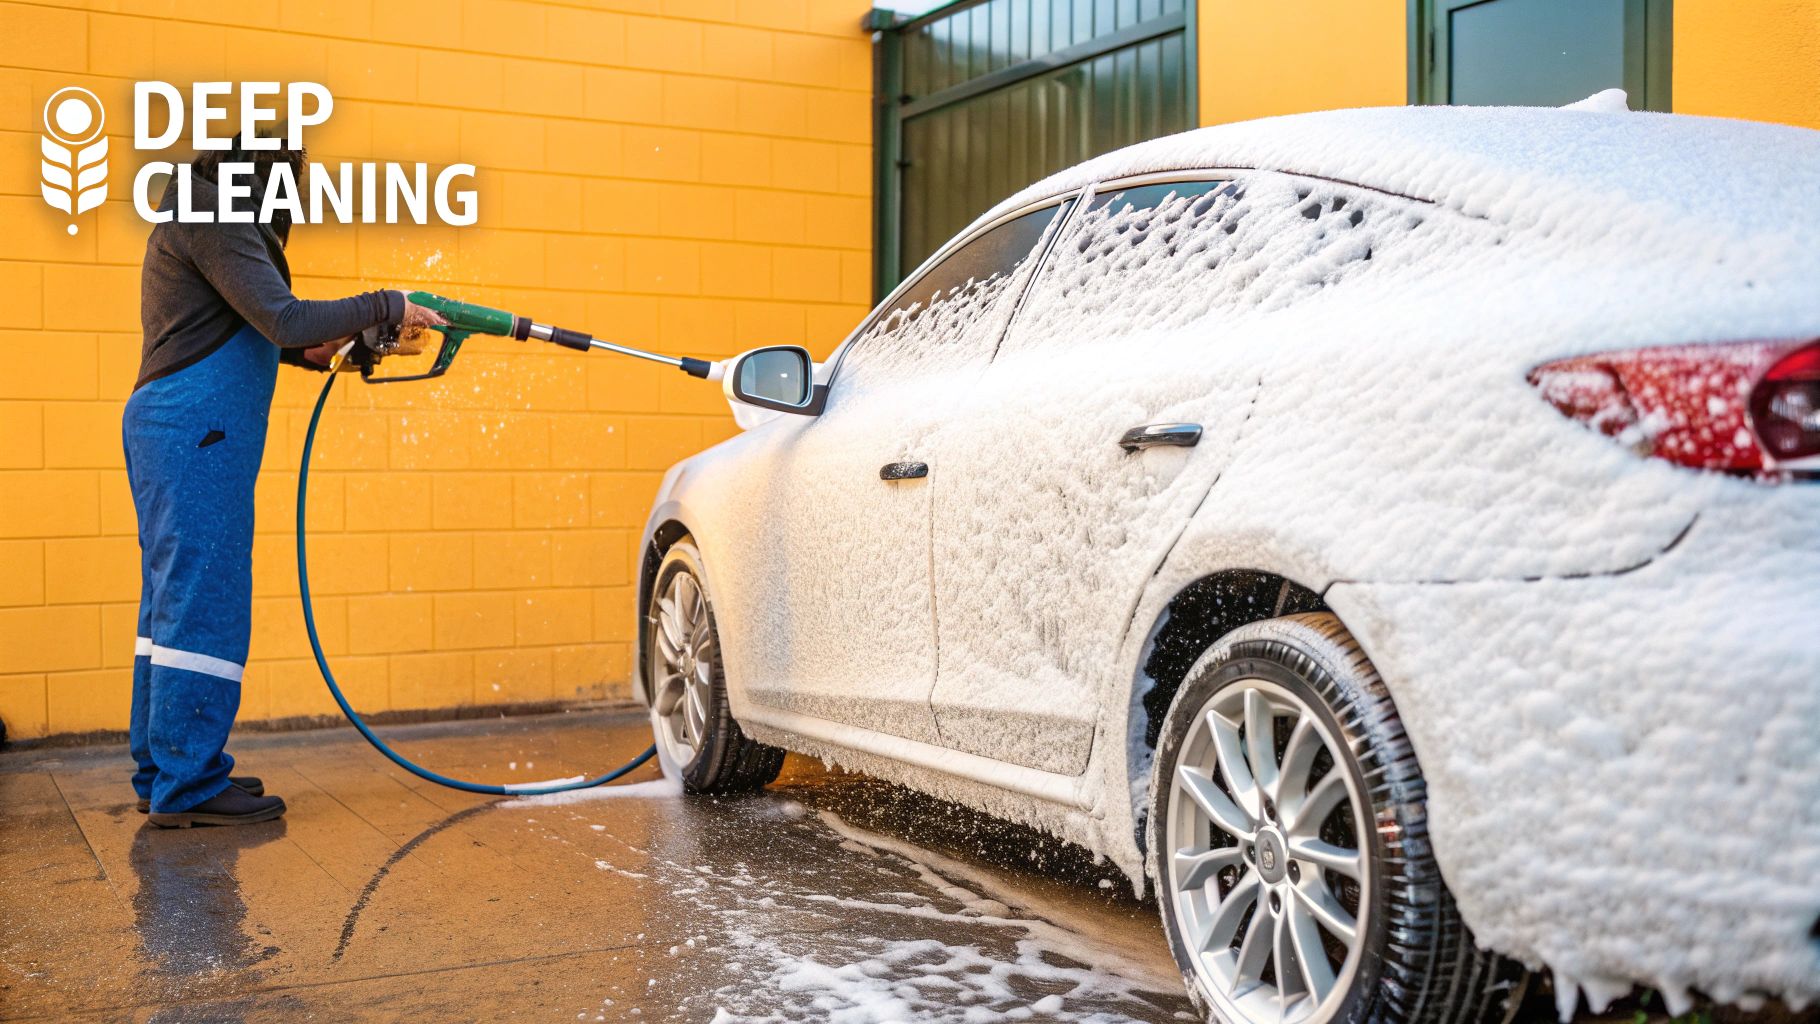
That rich lather from a car wash foam gun with hose isn't just for looks—it serves a very specific purpose. It creates an incredibly slick layer of lubrication between your wash mitt and your car’s delicate clear coat.
This slippery barrier is key. It drastically cuts down on friction, which is the number one enemy of a perfect finish and the main cause of wash-induced scratches. The foam's "dwell time," or how long it clings to the vertical panels of your car, gives the cleaning agents in your soap time to break down road film, bug splatters, and other gunk.
What you get is a deep clean that’s also incredibly gentle on your paint, preserving any wax or ceramic coating you have. It’s the same method professional detailers have trusted for years, but now it’s easy enough for anyone to do in their own garage.
The core benefit is simple: less physical contact means less risk of damage. The foam dissolves and lifts grime, so your wash mitt is just guiding it away rather than grinding it into the finish.
Benefits Beyond a Better Shine
Protecting your paint is the main goal, but a foam gun brings a few other practical perks to the table.
- It’s Fast: You can cover an entire SUV, truck, or van in just a few seconds, which seriously cuts down on your total wash time.
- Saves Water: Believe it or not, this method often uses less water than just rinsing continuously with a standard hose nozzle.
- Super Versatile: Don't just stop at the car. You can use it to clean RVs, boats, siding, and outdoor furniture, making it a handy tool for all sorts of jobs.
Of course, a great wash is just one part of keeping your car looking its best. It’s all about building good habits and following some general car care tips. If you really want to dial in your entire process from start to finish, check out our complete guide for more https://www.swiftjetusa.com/blogs/news/how-to-wash-your-car-at-home-easy-tips-for-perfect-results.
How to Choose the Right Foam Gun for Your Hose
Picking the right foam gun for your garden hose can seem a little overwhelming at first, but it really just comes down to knowing what to look for. The whole DIY car detailing world has exploded recently. We're talking about a market for low-pressure foam guns that’s already sitting at around USD 2 billion and is expected to climb to nearly USD 3 billion by 2028. People are catching on to how effective and water-smart these tools are.
With so many foam guns flooding the market, a little bit of knowledge goes a long way. Let's break down what actually matters so you can find the perfect tool for your setup.
H3: Foam Gun vs. Foam Cannon: What's the Real Difference?
First things first, let's clear up some lingo you’ll see everywhere.
A foam gun is what we're talking about here—it clips right onto your standard garden hose. It works with your home's regular water pressure to mix soap and water into a nice, sudsy foam. For 99% of us washing our cars in the driveway, this is the perfect solution.
A foam cannon, on the other hand, is a different beast entirely. It requires a pressure washer to work. That high-pressure blast is what creates that super-thick, almost shaving cream-like foam you see in videos. It's impressive, no doubt, but it's often more than you need for a regular wash and means buying another expensive piece of equipment.
For keeping your car clean week after week, the good old hose-end foam gun is the smarter, more practical choice.
H3: Don't Skimp on the Fittings
When you start comparing different models, the first thing I always tell people to check is the fittings—the little connectors for the nozzle, the soap bottle, and the hose attachment itself. A lot of the cheaper foam guns use plastic fittings, and I've seen them crack, leak, and strip out after just a few months of regular use. It's incredibly frustrating.
This is non-negotiable for me: look for a foam gun with solid brass fittings. Brass holds up so much better against wear and tear, and it won't corrode. You get a solid, leak-proof connection that will last for years. It’s a small detail that makes a massive difference in how long your tool will last.
Pro Tip: For a really deep dive into materials, spray patterns, and more, check out our ultimate guide to choosing an auto foam gun. It covers everything you need to know.
To make this a bit clearer, here’s a quick table breaking down the most important features to look for when you're shopping.
Comparing Key Foam Gun Features
| Feature | What to Look For | Why It's Important for Your Wash |
|---|---|---|
| Fittings Material | Solid Brass over plastic | Provides a durable, leak-free connection that resists corrosion and stripping over time. |
| Adjustable Spray Nozzle | A nozzle that shifts from a wide fan to a narrow stream. | Allows you to cover large panels quickly and then switch to a jet for stubborn, caked-on grime. |
| Soap Dilution Ratio Dial | A clearly marked dial for controlling the soap mix. | Gives you total control to create thick foam for a filthy truck or a lighter mix for a quick rinse. |
| Canister Size & Material | A 32 oz canister made of HDPE plastic. | Large enough for an SUV, and HDPE plastic holds up against harsh car-washing chemicals. |
| Quick-Connect Feature | A quick-release fitting for the nozzle. | Lets you instantly detach the soap bottle and use the nozzle as a regular hose sprayer for rinsing. |
Paying attention to these specific features will ensure you get a tool that's not just effective, but also a pleasure to use for years to come.
H3: Get the Control You Need
Beyond the build quality, the best foam guns give you options to tailor the foam to the job at hand. Two features are critical here:
- An adjustable spray nozzle: This is a must-have. You need to be able to switch from a wide fan spray—perfect for laying down a thick blanket of foam on the roof or doors—to a focused jet stream. That direct stream is your best friend for blasting mud out of the wheel wells or getting bug guts off the front bumper.
- A soap control dial: This little dial is your key to foam perfection. It lets you fine-tune the soap-to-water ratio. Dial it up for a super-thick foam when you're tackling a month's worth of road grime, or dial it back for a thinner, wetter foam if the car is just a little dusty.
The soap canister, or bottle, is another thing to consider. I've found that a 32 oz (about 1 liter) bottle is the sweet spot. It holds plenty of soap solution to cover even a large truck or SUV without having to stop and refill. If you have a smaller car, a more compact canister can feel a bit lighter and easier to handle, so it really comes down to personal preference.
Setting Up Your Foam Gun for the First Wash
Alright, you've got your new car wash foam gun with hose in hand, and it's time for the really fun part. Getting it set up for that first wash is pretty simple, and after you do it once, it’ll feel like second nature. Our goal here is to make sure that first wash goes off without a hitch, paving the way for countless perfect cleanings.
Before you even think about foam, grab the regular spray nozzle for your hose. Give your vehicle a good, solid rinse to knock off all the loose stuff—dust, dirt, leaves, and any other grit. This is a non-negotiable first step. It prevents you from dragging those abrasive bits across your paint when you start washing, which is exactly how scratches happen.
Mixing Your Soap Solution
Now for the main event: mixing the suds. The ratio of soap to water is everything when it comes to creating that thick, satisfying foam you're after. If you get it wrong, you’ll end up with a sad, watery liquid that just runs right off the car. Get it right, and you'll be working with a rich lather that clings to every panel and pulls dirt away.
As a rule of thumb, most quality car wash soaps made for foam guns call for about 1-2 ounces of soap for every 10 ounces of water.
A classic rookie mistake is dumping in extra soap, thinking it'll create more foam. It doesn't. You just end up wasting good soap and can even leave a stubborn film on your car that’s a pain to rinse off. Always start with the manufacturer's directions on the soap bottle.
Here’s the simple, no-fail way to mix it:
- Water First, Always. Pour the right amount of warm water into the foam gun’s canister before anything else.
- Then, the Soap. Add the car wash soap on top of the water. This little trick prevents the soap from sudsing up prematurely inside the canister, which can throw off your measurements.
- Gentle Swirl. Screw the lid on tight and just give the canister a gentle swirl. Don't shake it like a cocktail—that just creates foam inside the bottle when you want it on your car.
This diagram lays out the basic flow from setup to application. It's a straightforward process once you've got the hang of it.
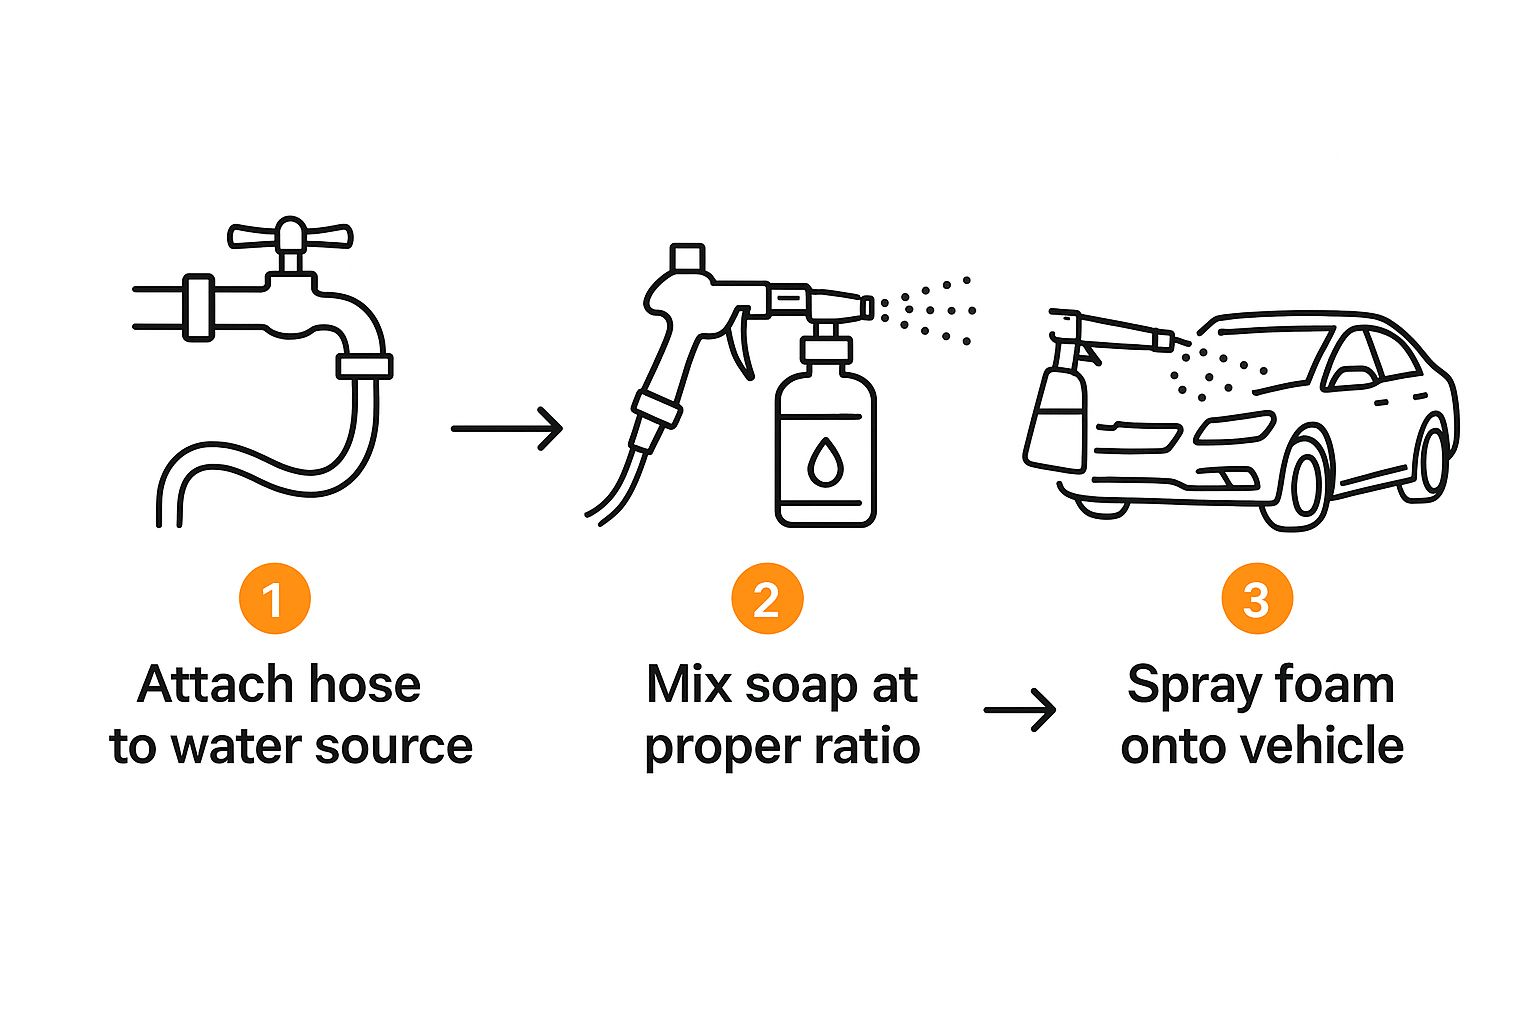
As you can see, it’s all about connecting your gear, mixing the solution properly, and then getting ready to spray.
Connecting and Adjusting the Gun
With your soap solution ready to go, screw the canister firmly onto the sprayer head of the foam gun. Now, connect the whole assembly to your garden hose. Make sure it's good and tight to prevent leaks; there's usually a little rubber washer in there that creates the seal, so double-check that it's seated correctly. Even a small drip is annoying and can mess with your water pressure.
Before you go wild spraying your car, take a second to play with the two main adjustments on the gun:
- The Soap Ratio Dial: This is the knob on top that controls how much soap solution gets mixed into the water stream. I'd recommend starting it on a medium-to-high setting and seeing how the foam looks. You can always dial it back.
- The Spray Nozzle: This is the part at the very front. Twist it to change the spray pattern from a wide, horizontal fan (perfect for big areas like doors and the roof) to a focused jet stream for blasting grime out of tight spots.
If you want an even deeper dive into the settings and techniques, check out our full guide on how to use a foam gun.
Applying Foam Like a Pro
This is it. You're ready to cover your car. Aim the foam gun, squeeze the trigger, and let the foam fly.
The best way to do this is to work from the top of the car down. Start with the roof, then hit the windows, the hood and trunk, and finish with the lower side panels and wheels.
Working top-down lets gravity do some of the work for you. The foam from the roof will run down over the dirtier lower sections, giving them a longer "dwell time" to loosen up all that road grime. The goal is to cover every single inch until your car looks like it was just in a blizzard. Let that foam sit and work its magic for a few minutes, but never let it dry on the paint, especially if you're washing in direct sunlight.
Getting Serious with Your Foaming Game
Once you’ve got the basics down, it’s time to move past just making foam and start using it like a pro. This is where you can really elevate your car wash from a simple chore to a genuine detailing session. It all comes down to learning how to dial in your foam, let it do the heavy lifting, and pair it with time-tested detailing practices.
A huge part of this is understanding dwell time. This is just a fancy term for how long you let the foam sit on the car. So many people get impatient and rinse it off too quickly. You have to give the soap a chance to work its magic, breaking down all that road film and grime so it just slides right off.
Dialing in the Perfect Foam
Your car isn't always dirty in the same way, so why would you use the same kind of foam every time? That little adjustable dial on your car wash foam gun with hose is your best friend here, letting you tweak the foam's thickness for any job.
- Light dust and pollen: For this, you want a thinner, wetter foam. Just dial back the soap-to-water ratio. This creates a runnier solution that gets in and lifts off fine particles without a ton of effort.
- Caked-on mud and road grime: This is when you crank it up. A higher soap ratio gives you that thick, satisfying, shaving-cream-like foam. It clings to the sides of your car, giving it maximum time to break down the tough stuff.
I always think of it like cooking. Sometimes you just need a light vinaigrette, other times you need a thick, hearty stew. After a long highway trip, your front bumper is going to be a mess. A thick foam left to sit for a few minutes will soften everything up, making it a breeze to wash away. But for a quick touch-up on a car that mostly stays in the garage? A light foam is all you need.
The real trick is to match the foam to the filth. Thicker foam gives you more lubrication and cleaning muscle for the heavy jobs, while a lighter foam is perfect for a quick maintenance wash.
This ability to adapt is a big reason why the market for low-pressure foam guns is booming—it’s expected to hit around USD 250 million by 2025. People want tools that give them professional-level control at home. If you're interested in the market data, you can dig deeper into the trend reports. Learn more about the market's trajectory at Archive Market Research.
Why You Still Need the Two-Bucket Method
A foam gun does a fantastic job of minimizing scratches, but if you want the absolute safest wash possible, you need to bring in the classic two-bucket method. It’s a cornerstone of detailing for a good reason, and it works perfectly with a foam pre-soak.
Here’s how you combine them for the ultimate safe wash:
- Pre-Soak First: Coat the entire vehicle in a nice, thick layer of foam. Let it sit for 3-5 minutes—don’t rush it!
- Power Rinse: Blast off all that foam with your hose. You'll be amazed at how much dirt comes off before you even lay a hand on the paint.
- Set Up Your Buckets: Now, get your two buckets ready. One is for your soapy wash solution, and the other is just for plain rinse water.
- Wash and Rinse: Dunk your wash mitt in the soap bucket, wash one panel of the car, and then—this is the crucial part—rinse the dirty mitt in your clean water bucket before putting it back in the soap.
Following this process ensures you're never dragging grit from a dirty panel all over the rest of your car. It’s the single best way to prevent those dreaded swirl marks and keep your paint looking flawless.
Keeping Your Foam Gun in Top Condition
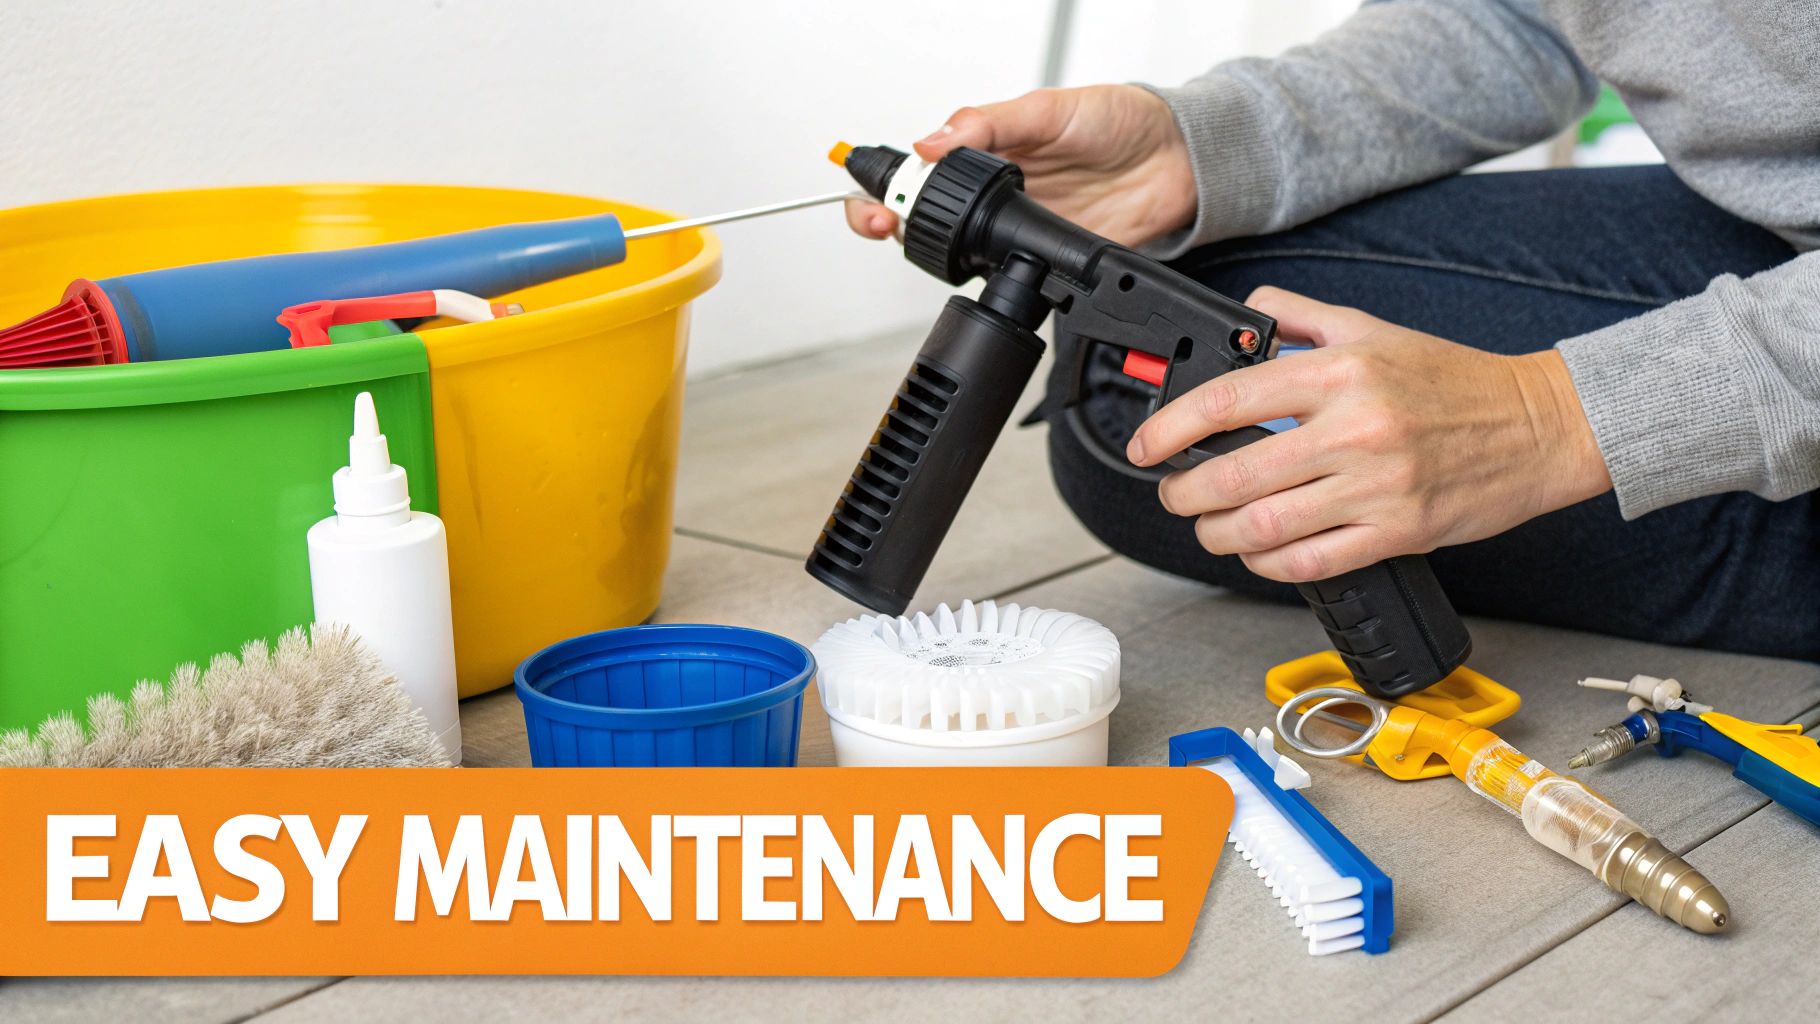
A little maintenance goes a long way. If you want your car wash foam gun with hose to work flawlessly for years, you can't just toss it in the garage after a wash. A bit of care after each use is all it takes to prevent the most common frustrations, ensuring it's always ready to go.
The good news? The whole routine takes less than two minutes. The number one reason I see these tools fail is that old soap residue builds up and hardens inside the mixing chamber and filter. This gunk restricts water flow and stops the gun from siphoning soap properly, leaving you with sad, watery foam instead of that thick lather you're after.
To stop that from happening, you just need to flush the system with clean water after every single wash. It's a non-negotiable step for long-term reliability.
The post-wash flush is the most crucial habit you can develop. It’s a two-minute task that prevents 90% of common foam gun problems, like clogging and poor performance.
This simple preventative step is key. And it's becoming more important as more people discover these tools. The global foam gun market was valued at around USD 100 million in 2024, and it's only growing from there. It just goes to show how many people are looking for better ways to wash their cars at home. You can find more insights on this trend over at Verified Market Reports. Proper maintenance ensures these popular tools actually last.
Your Two-Minute Flushing Routine
Here’s the exact process I follow as soon as I’m done foaming my car.
- Empty the Canister: First thing, unscrew the soap canister. You can pour any leftover soap solution back into its original bottle to save for next time.
- Rinse It Out: Give the now-empty canister a quick rinse with your hose to get the bulk of the suds out.
- Fill and Flush: Fill the canister about halfway with clean water and screw it back onto the foam gun. Squeeze the trigger and let that clean water run through the system for about 30-45 seconds. Keep going until the spray is completely clear.
This quick flush pushes any lingering soap out of the internal filter, nozzle, and siphon tube. It stops clogs before they ever have a chance to form.
Quick Troubleshooting for Common Headaches
Even with perfect care, things can sometimes go sideways. If you run into a hiccup, here’s how to solve the most common problems I've seen.
- Leaky Hose Connection: Spotting a drip where the gun meets the hose? Nine times out of ten, the culprit is the little rubber gasket. Pop the connector off and check that the washer is seated correctly. If it looks cracked or worn out, it's time for a new one.
- Weak or Watery Foam: This is almost always one of two things: a clog or a bad soap ratio. Your first move should be to turn up the soap-to-water ratio using the dial. If that doesn't thicken things up, your internal mesh filter is probably clogged with old soap scum and needs a good cleaning.
Answering Your Top Foam Gun Questions
Once you get the hang of your foam gun, you'll find it's a game-changer. But like any new piece of kit, a few common questions tend to surface. Let's tackle them head-on so you can get the best possible wash every single time.
Can I Just Use My Regular Car Soap?
You could, but you'll be seriously disappointed with the results. Most traditional car soaps are formulated for a bucket wash; they just don't have the right stuff to create that thick, shaving-cream foam we're all after.
For the kind of suds that cling to your paint and lift dirt away, you need a soap made for the job. Look for products specifically labeled as a "foaming" or "foam cannon" car wash. These are packed with the right kind of surfactants that go wild when mixed with water and air. It’s the single biggest factor in going from a runny, watery spray to a truly effective foam blanket.
What’s the Real Difference Between a Foam Gun and a Foam Cannon?
This is probably the most frequent question I hear, and it all boils down to one simple thing: water pressure.
- A foam gun hooks right up to your garden hose. It works with standard household water pressure and is the perfect tool for weekly maintenance washes. It’s safe, simple, and incredibly effective.
- A foam cannon is a different beast entirely—it needs a high-pressure washer to work. That immense pressure creates an insanely thick foam, but it also means more expensive gear and a bit more risk. If you're not careful, that high pressure can be too aggressive for delicate trim or older paint.
For most enthusiasts just trying to keep their daily driver or weekend toy clean, the hose-end foam gun hits the sweet spot. It delivers fantastic foaming action without the cost, complexity, or potential risks of a full-blown pressure washer setup.
Is a Foam Gun Actually Better for Water Conservation?
It seems counterintuitive, right? All that foam looks like a lot of water. But in reality, a foam gun is often much more efficient than the old bucket-and-hose method.
Think about it: with a bucket, you're constantly re-wetting your mitt and then using a free-flowing hose to rinse panel by panel, often multiple times. A foam gun gives you a single, controlled application. You cover the car, let the foam do its work, and then do one final, efficient rinse. This focused process almost always results in using less overall water.
Ready to see the difference for yourself? The SwiftJet foam gun turns your standard garden hose into a serious detailing powerhouse. Experience a faster, safer, and more effective wash by getting your SwiftJet today!