
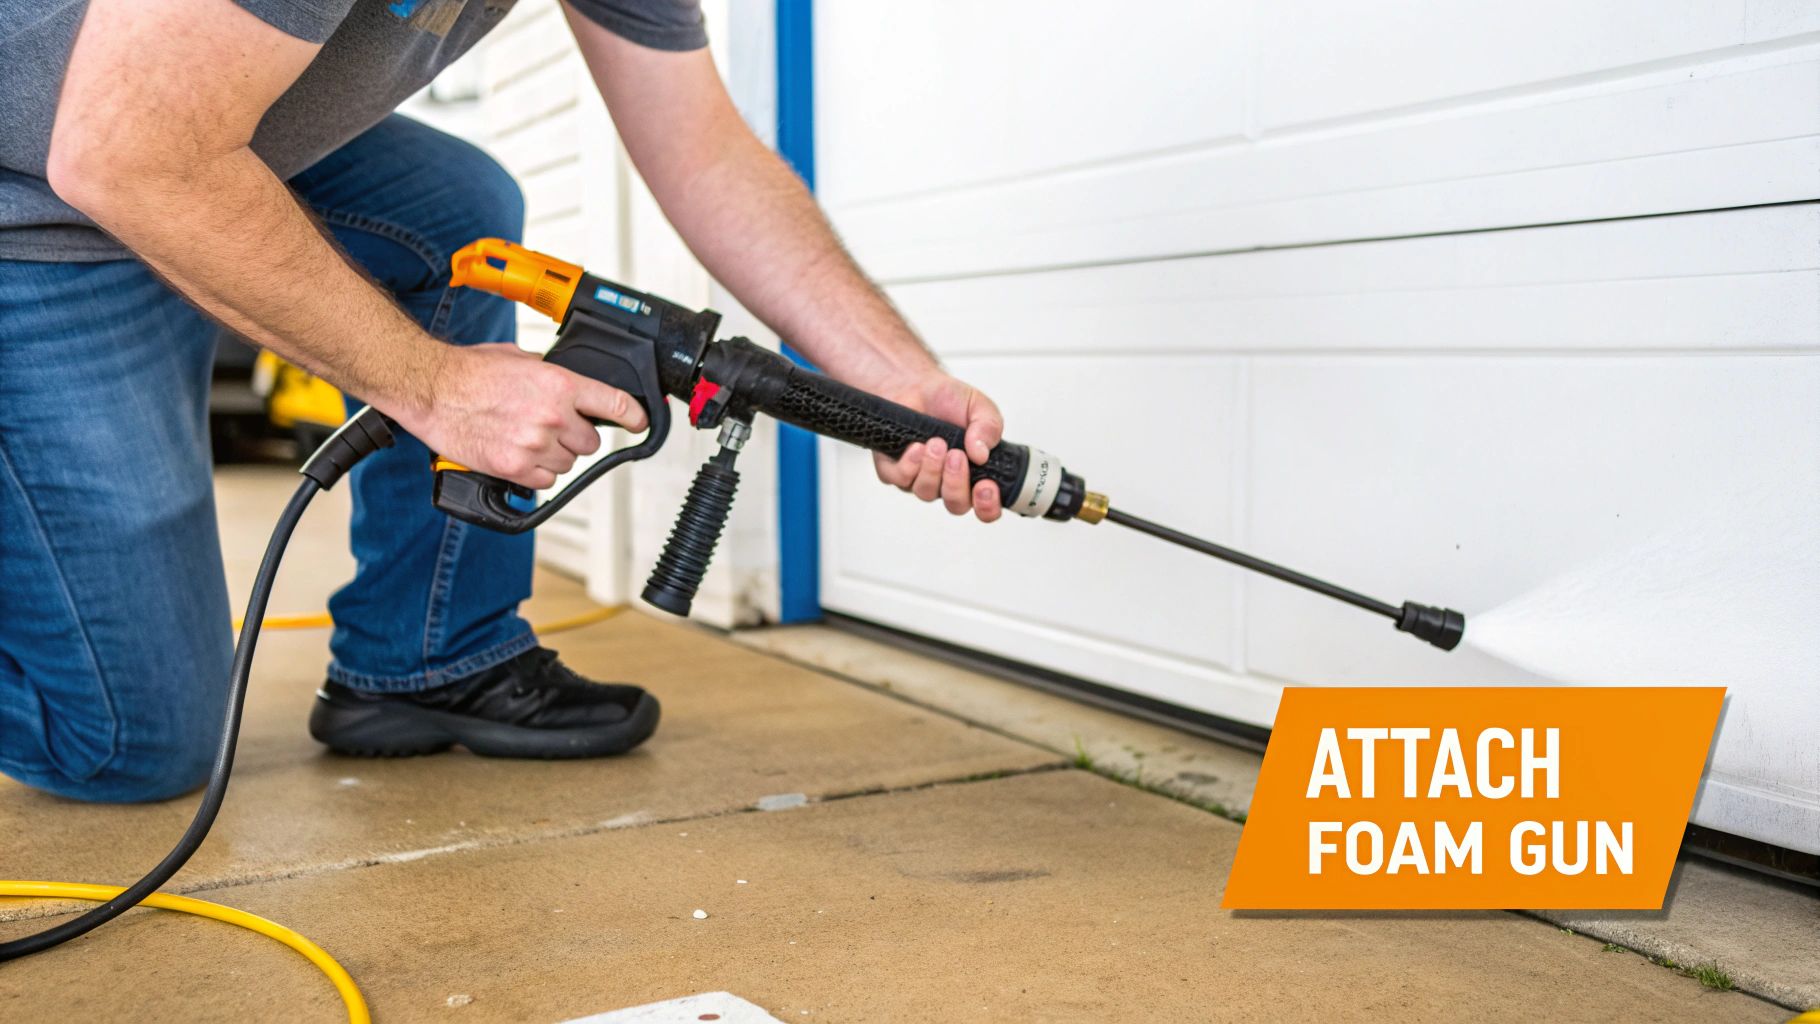
Using a car wash foam gun is pretty straightforward. You just fill the canister with your soap and water mix, hook it up to a regular garden hose, and you're ready to spray down your vehicle with a thick blanket of suds.
This pre-soak is the real magic. It's the key to lifting away the worst of the dirt and grime before you ever have to touch the paint, which is a massive win for preventing swirl marks and fine scratches.
Why a Foam Gun Gives You a Safer Car Wash
It’s easy to get caught up in how cool it looks to cover your car in a thick layer of snow-like foam, but the real benefit is all about protecting your paint.
Think about traditional washing methods. You're often just grinding abrasive dirt particles right into your car’s clear coat with a sponge or mitt. That's exactly how those frustrating swirl marks happen.
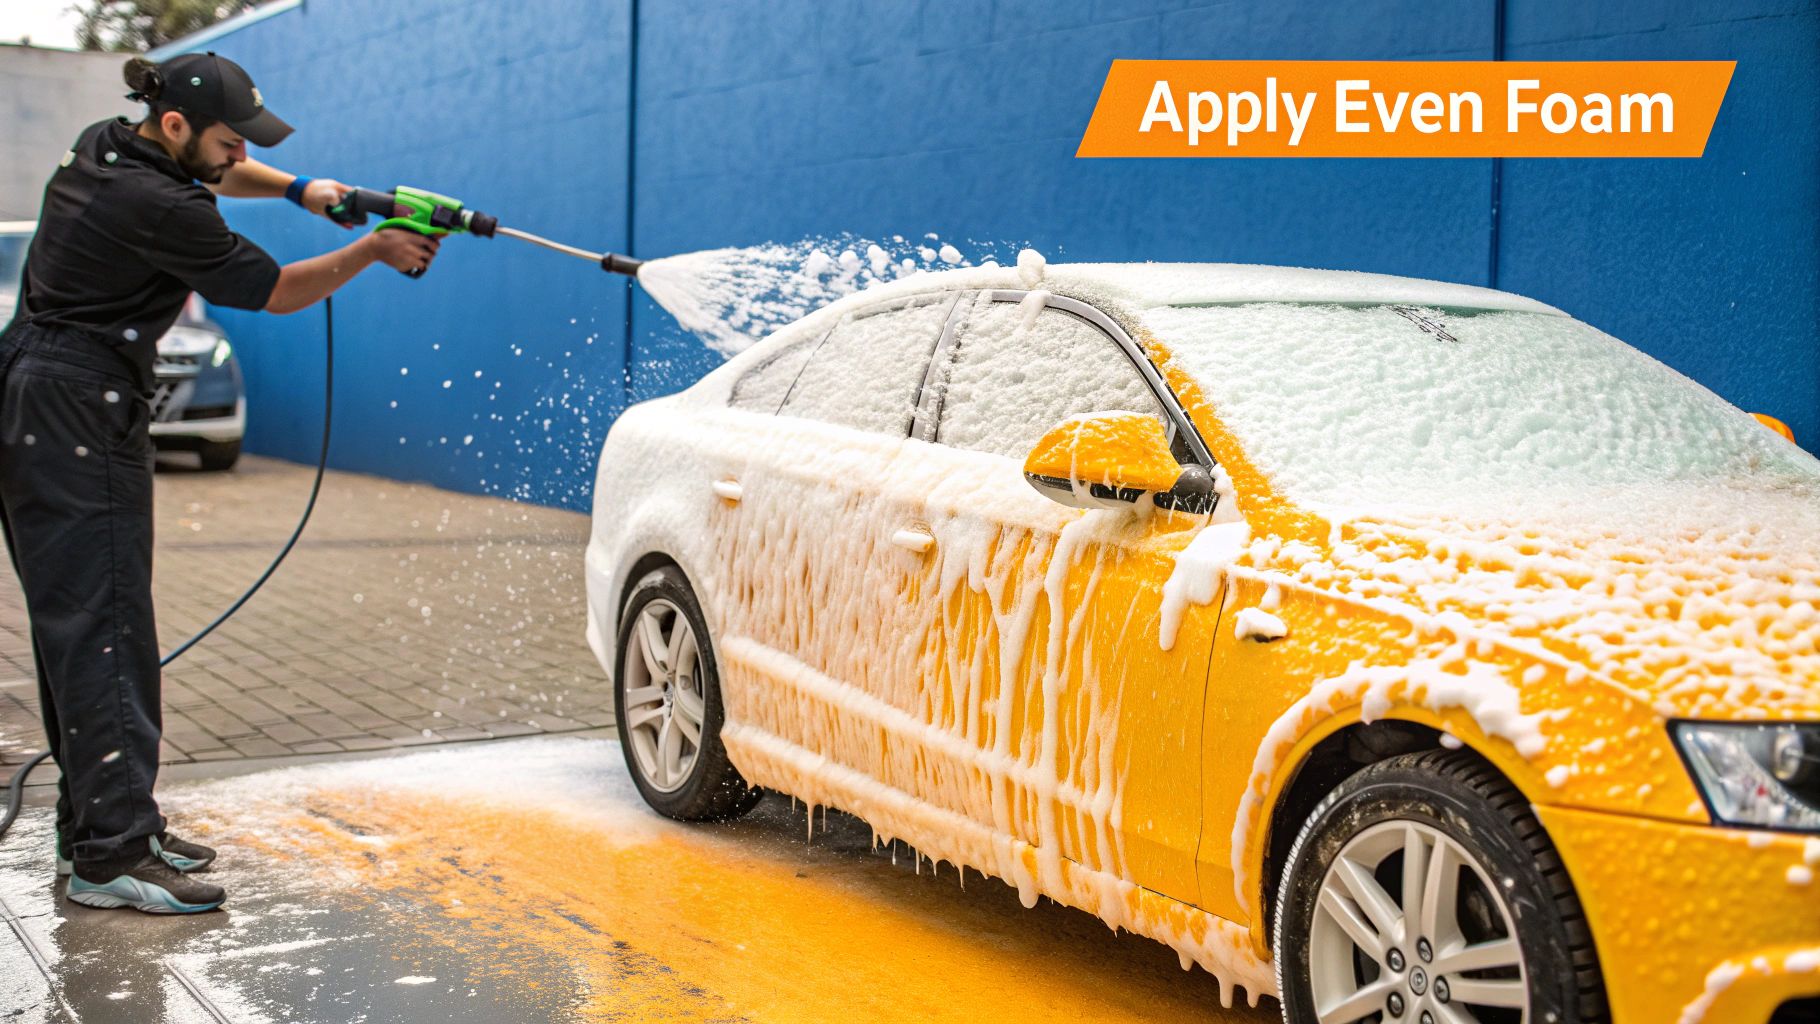
A foam gun flips the script entirely. By covering your vehicle in a heavy layer of suds, you’re giving the soap some essential "dwell time" to do its job properly.
The Science Behind a Good Pre-Soak
Let the foam sit for about 3-5 minutes. During this time, the active cleaning agents in your car shampoo are hard at work, breaking down and surrounding all the nasty stuff—dirt, road grime, you name it. The foam actually lifts these particles up and away from the surface, trapping them in the suds.
This simple step accomplishes a few critical things:
- Creates Lubrication: The foam creates an incredibly slick surface, prepping it perfectly for a gentle contact wash.
- Loosens Stubborn Grime: It goes to work softening tough contaminants like bug guts and bird droppings, making them easier to remove.
- Reduces Scratch Risk: It gets rid of the majority of abrasive grit before your wash mitt ever touches the paint.
The whole point of the pre-soak is to get as much dirt off as possible without ever touching the car. You're essentially doing 80% of the cleaning before you even start the "washing" part, which is a core principle of a professional car wash at home.
Once you rinse all that foam away, most of the harmful debris goes with it. What's left is a much cleaner, safer surface for your wash mitt to glide across. Honestly, this one pre-wash step is the most effective thing you can do to protect your investment and keep that showroom finish looking flawless, right from your own driveway.
Gathering Your Gear for a Flawless Finish
Any seasoned detailer will tell you a great car wash starts before you even turn on the water. A little prep work makes all the difference, turning a potential chore into a genuinely satisfying job. First things first: get your car out of the direct sun. Washing in a shaded spot prevents soap and water from drying on the paint, which is the number one cause of those annoying spots and streaks.
Once you've found the right spot, it's time to get your tools ready. Having everything you need close by means you can get into a good rhythm without stopping to hunt for something. It’s a simple setup, but it’s the foundation for a safe, scratch-free wash.
Your Essential Wash Day Checklist
- Two Wash Buckets: This is non-negotiable. You’ll need one bucket for your car shampoo and another filled with clean water for rinsing your wash mitt. It’s the heart of the two-bucket method and the best way to keep grit off your paint.
- Microfiber Wash Mitt: Forget old sponges. A good microfiber mitt is designed to trap dirt deep in its fibers, lifting it safely away from the car’s surface.
- High-Quality Car Shampoo: The soap you use really matters. Steer clear of household cleaners like dish soap, as they're too harsh and can strip away the wax or sealant you’ve worked so hard to apply.
- Plush Drying Towels: To avoid swirls and get a perfect, streak-free shine, a big, soft microfiber drying towel is a must-have.
Honestly, the most important choice you'll make here is your car shampoo. For regular maintenance washes, a pH-neutral soap is perfect—it cleans effectively without damaging your wax or ceramic coating. If you're dealing with a car that's caked in mud, you might need something a bit stronger.
The demand for better, safer cleaning tools has made the car care world explode. Just look at foam guns—the market was valued at around USD 100 million in 2024 and is expected to hit USD 150 million by 2033. It’s all because people like us want that professional, paint-safe clean at home.
You can learn more about picking the right tool in our https://www.swiftjetusa.com/blogs/news/ultimate-guide-to-choosing-an-auto-foam-gun-for-perfect-car-cleaning.
Of course, a full detail goes beyond just the paint. A well-rounded kit might also include things like a good car air compressor for tire care. Now that you've got your gear lined up, you're ready to get to the fun part.
Dialing In Your Foam Gun for Perfect Suds
Getting that perfect, shaving-cream-thick foam isn't about luck—it's about learning how to dial in a few key adjustments. This is where you really turn a standard garden hose into a serious detailing tool. Let's get your SwiftJet set up for a flawless finish.
First things first, make sure you have a rock-solid connection. A loose, leaky fitting at the hose is the number one reason for weak, runny foam. That little drip might not seem like a big deal, but it kills the water pressure you need to create thick suds.
Finding the Sweet Spot for Your Soap-to-Water Ratio
The secret to rich, clingy foam starts right inside the canister. Most car wash soaps will give you a generic dilution ratio, but factors like your local water hardness can completely change the results.
I've found that a 1:10 soap-to-water ratio is a fantastic starting point. Don't treat it as a hard rule, though. If your foam looks a little thin and watery, just add a bit more soap concentrate on your next wash until you find what works for you and your setup.
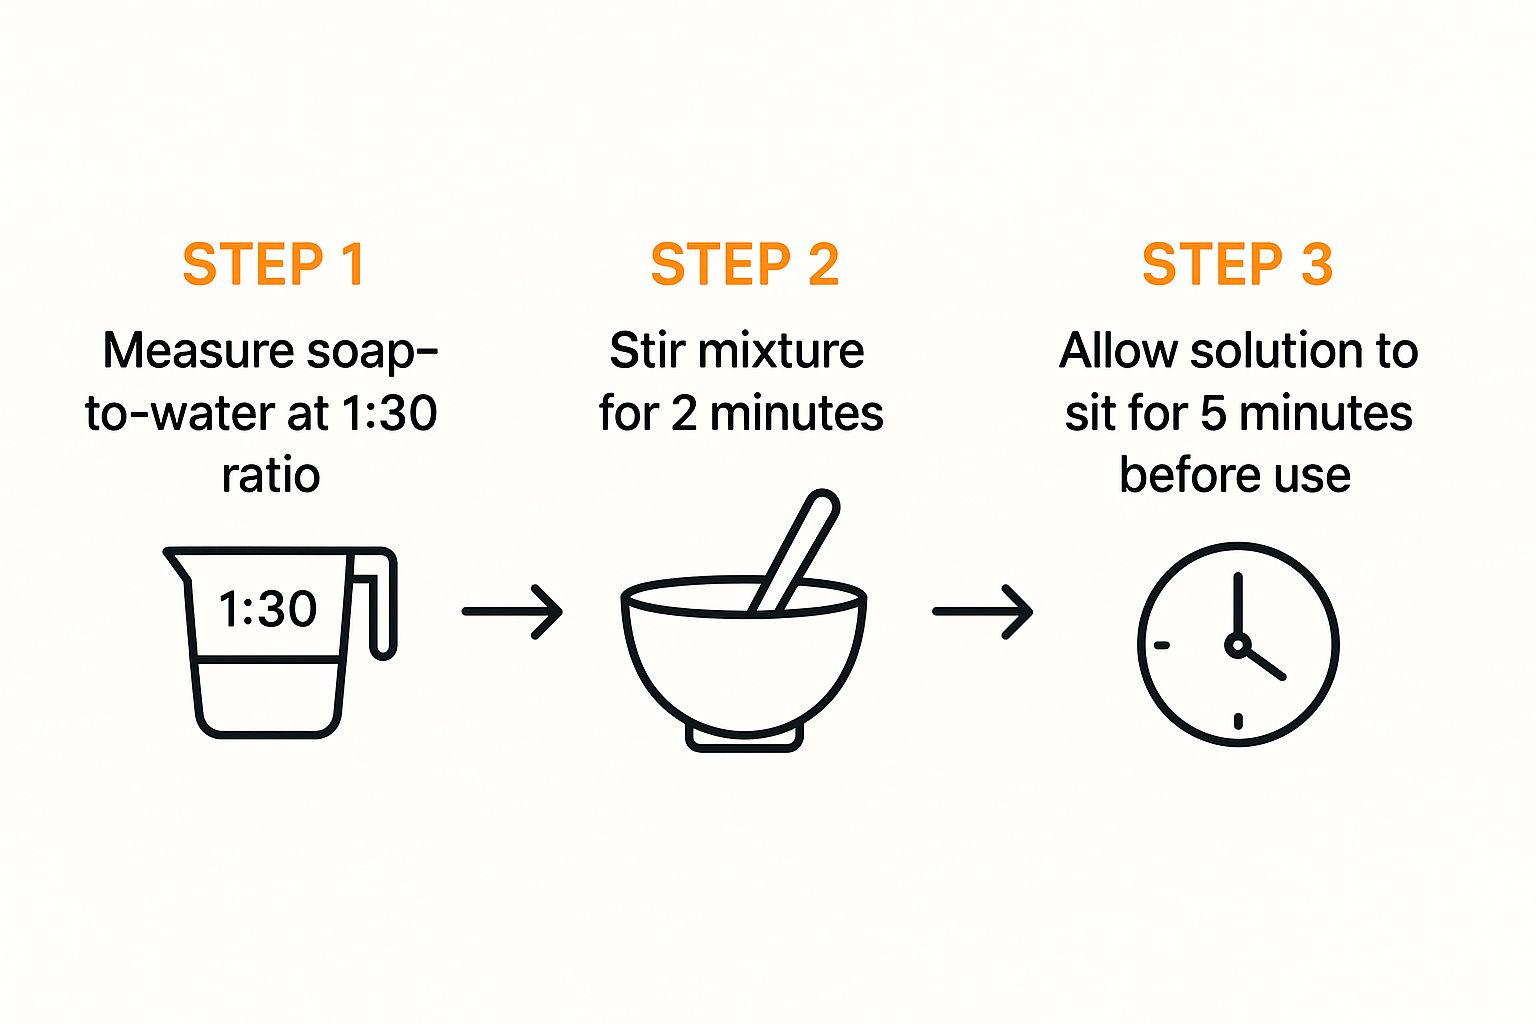
Here's a little pro tip: once you've mixed the soap and water, let it sit for a minute. This gives the soap a chance to fully dissolve, which helps prevent clumps from clogging the nozzle and ensures you get that smooth, consistent foam you're after.
Mastering Your Foam Gun’s Controls
Your SwiftJet foam gun has two main adjustments that give you total command over your suds. Getting a feel for these is the key to going from a novice to a pro.
- The Top Dial (Soap Mixture Control): Think of this as your foam thickness knob. It controls how much soapy water gets pulled from the canister and mixed into the stream. For the richest, thickest foam possible, crank this dial all the way to the maximum setting (+).
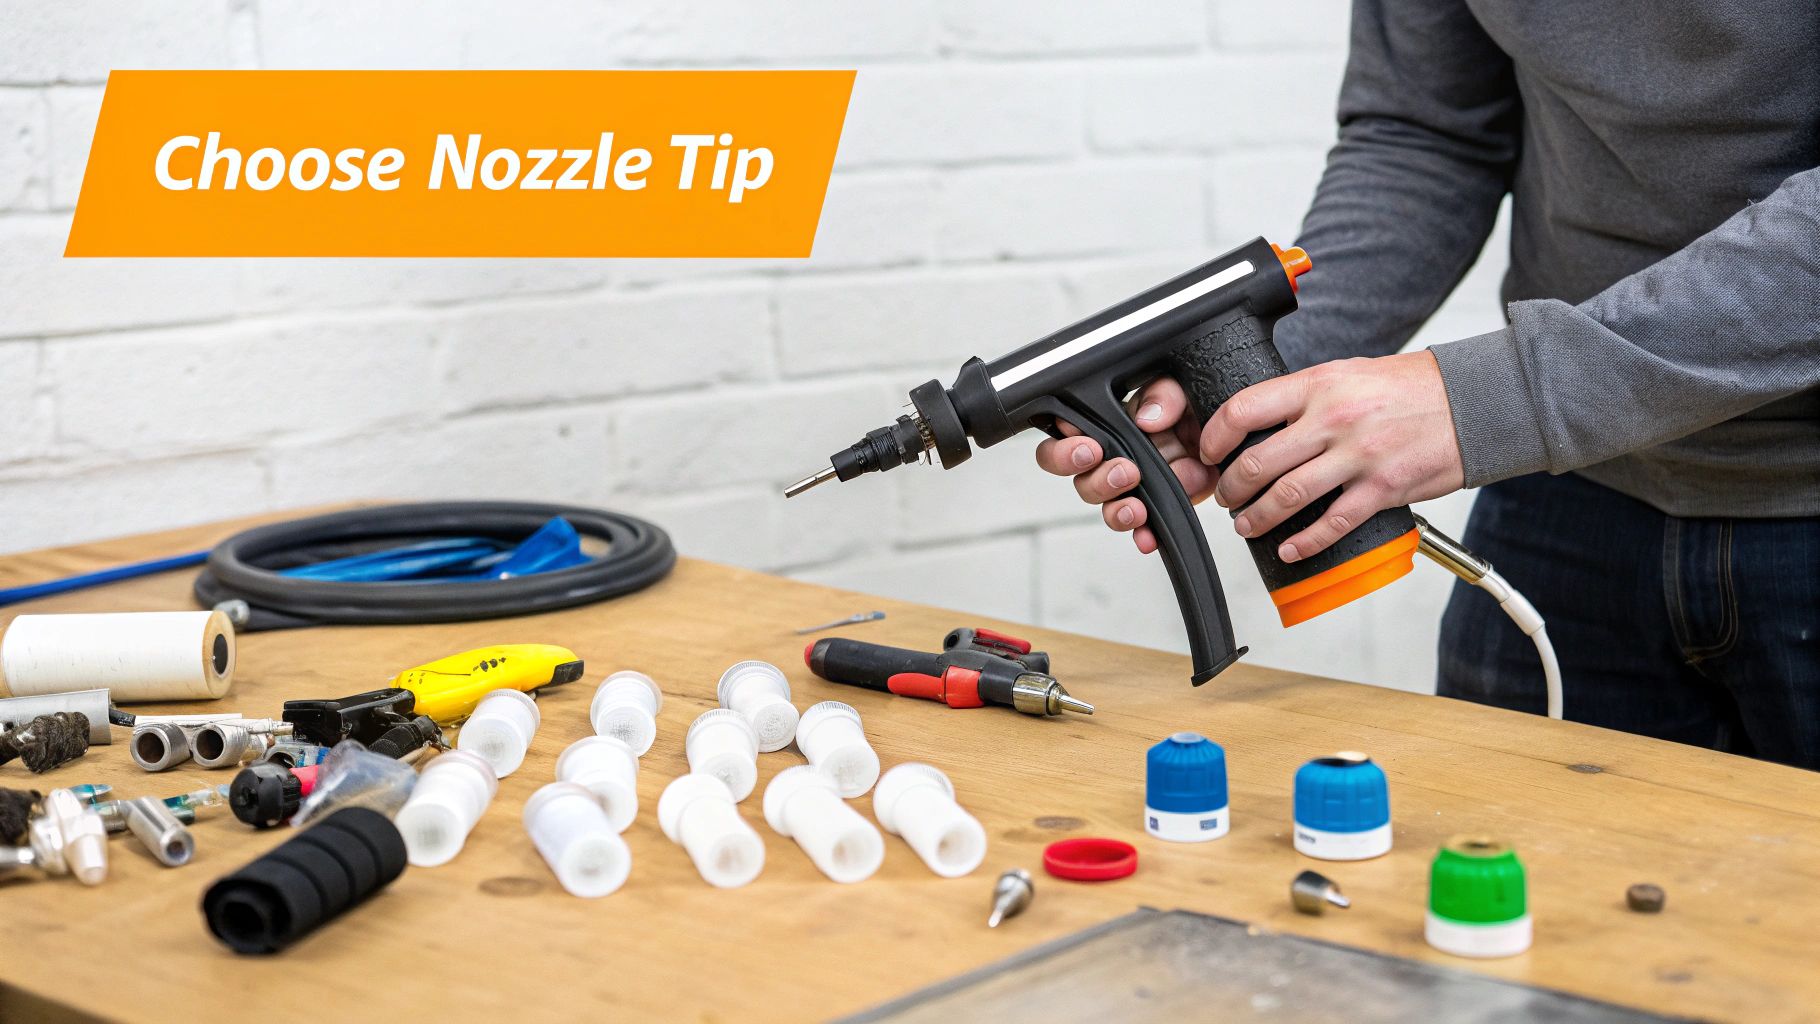
- The Front Nozzle (Spray Pattern): This lets you shape the foam spray. A wide, flat fan pattern is perfect for quickly covering big areas like the roof and doors. Twist it to a narrower, more direct stream to blast grime out of wheel wells or target stubborn dirt on rocker panels.
A huge mistake I see people make is not turning the soap mixture dial all the way up. If your foam looks more like bubbly water, check this setting first. It’s the single biggest factor in getting thick suds.
When you're ready to foam the car, start at the top. Hit the roof first and let gravity do the work, pulling the suds down over the windows and side panels. Then work your way down the rest of the vehicle. This top-down method gives the foam more time to dwell on the lower parts of the car, which are usually the dirtiest.
If you want an even deeper dive, our complete guide on how to use a foam gun breaks down every detail.
Foam Consistency Troubleshooting Guide
Even with the best technique, sometimes your foam just doesn't cooperate. This quick guide will help you diagnose the problem and get back to making perfect suds.
| Problem | Likely Cause | How to Fix It |
|---|---|---|
| Foam is thin and watery. | The soap mixture dial is set too low, or the soap-to-water ratio is too weak. | Turn the top dial to its maximum setting (+). Add more soap concentrate to the canister. |
| Foam comes out in splatters. | The nozzle might be clogged, or the soap hasn't fully dissolved. | Unscrew and rinse the nozzle. Let the soap mixture sit for a minute before using. |
| Low foam output. | Poor water pressure from a leaky connection or a kinked hose. | Tighten the hose connection to the gun. Make sure your hose is fully uncoiled. |
| Foam is too thick/uses too much soap. | The soap-to-water ratio is too concentrated. | Add more water to the canister to dilute the soap solution slightly. |
Think of these settings as a recipe—once you find the perfect combination for your soap and water pressure, you'll be able to repeat it every time for a perfect pre-soak.
Advanced Techniques for a Showroom Shine
Alright, you've got the hang of the basics. Now, let's talk about how to use your foam gun like a seasoned pro. It's these next-level techniques that really separate a quick wash from a jaw-dropping, showroom-quality finish.
It all starts with something called dwell time. This is just a fancy term for how long you let the foam sit on the car to do its job. You want to give the suds a solid 3-5 minutes to work their magic, breaking down all that dirt and road grime. The key, though, is to never let it dry on the paint. Rinsing before it has a chance to dry is non-negotiable if you want to avoid streaks and water spots.
Integrating Foam into Your Contact Wash
Here’s a trick that makes a massive difference: use the foam gun during your hand wash, not just as a pre-soak. After your first foam and rinse cycle, go back and lay down a fresh, light coat of foam on the specific panel you're about to wash with your mitt.
This creates an incredibly slick layer of lubrication. Your wash mitt will glide over the surface like it’s on ice, which dramatically cuts down the risk of creating swirl marks or fine scratches. It’s all about creating a sudsy buffer between the mitt and your car’s delicate clear coat.
The goal is to keep the surface as slick as possible while you wash. Re-foaming each panel right before you touch it with a mitt is a classic detailer's trick for an ultra-safe clean.
Targeting Stubborn Dirt with Precision
We all know those problem areas—the lower panels, wheel wells, and front bumper seem to attract the worst of the road's filth. A single pass with the foam gun often isn't enough to conquer the caked-on gunk here.
For these extra-dirty spots, hit them with a second, more concentrated blast of foam right after the initial pre-soak.
- Rocker Panels: These always get hammered with road tar and mud. Give them another coat.
- Wheel Wells: A direct shot of foam can start dislodging stubborn brake dust and grime.
- Front Bumper: Let an extra layer of foam soak on the bumper to soften up those baked-on bug splatters.
This targeted approach gives the toughest contaminants a little extra cleaning power where it’s needed most. When you combine smart dwell time with strategic re-foaming, you'll start achieving that deep, flawless shine every single time. Your car won't just look clean; it'll look professionally detailed.
Keeping Your Foam Gun in Top Shape
Like any good tool, your SwiftJet foam gun will treat you right if you treat it right. A little care goes a long way, and it only takes a couple of minutes after each wash to keep it working like new. These simple habits are your best defense against the gunk and buildup that kill foam quality and cause clogs.
Proper maintenance isn't just about performance; it's about protecting your investment. The DIY car detailing scene is bigger than ever, and low-pressure foam guns are a huge part of it. The global market for these tools was valued at $2 billion in early 2025 and is expected to climb to $3 billion by 2028. You can dig into more stats on this growing market over at marketreportanalytics.com.
The 30-Second Post-Wash Flush
When you're done washing your car, resist the urge to just disconnect the gun and toss it in the garage. Take a moment to clear it out first.
Simply unscrew the soap canister and put it to the side. Then, reconnect the gun to your hose and squeeze the trigger, letting clean water run through it for about 30 seconds. This quick rinse is the single most effective thing you can do to prevent soap residue from drying inside and causing problems later.
The Occasional Deep Clean
Every couple of months, or whenever you notice your foam seems a bit weak or watery, it's time for a quick inspection and deep clean.
- Check the Nozzle and Filter: Unscrew the front nozzle to get to the small mesh filter inside. Pop it out and let it soak in warm, soapy water for about 15 minutes. This will dissolve any stubborn soap scum or mineral deposits that have built up.
- Inspect the O-Rings: Take a look at the rubber O-rings where the gun connects to your hose. If you see any cracks or signs of wear, it's time for a replacement. A bad O-ring is usually the culprit behind annoying, pressure-killing leaks.
Seriously, taking five minutes for a quick deep clean every now and then will guarantee your SwiftJet is always ready to spray thick, satisfying foam. It's a small price to pay for consistent, professional results every time.
A Few Common Foam Gun Questions We Hear All the Time
https://www.youtube.com/embed/DcD-VN4nf_Y
Even after you’ve got the hang of your foam gun, a few questions always seem to pop up. Let’s walk through some of the most common ones we get from car enthusiasts—both newcomers and seasoned pros—to help you dial in that perfect wash.
Is It Okay to Use Dish Soap in My Foam Gun?
I get this one a lot, and the short answer is a hard no. It might seem like a cheap and easy alternative, but dish soap is your car's worst enemy.
Those soaps are packed with powerful degreasers made to annihilate caked-on food. That same aggressive formula will absolutely strip the wax or sealant right off your paint, leaving it exposed and unprotected. You’ll end up with a dull finish and have to spend time and money reapplying that protection way too soon. Stick with a quality, pH-neutral car wash shampoo; it's designed to clean your paint without ruining the finish.
Foam Gun vs. Foam Cannon—What's the Real Difference?
The key difference is the power source. A foam gun connects to a standard garden hose and uses household water pressure. A foam cannon, on the other hand, requires a pressure washer for its operation.
Because a pressure washer pushes out so much more force, a foam cannon can generate that incredibly thick, clingy foam you see in professional detailing videos.
Both tools are fantastic for laying down a pre-soak, but the cannon definitely has more firepower. For most of us washing our cars in the driveway, a good foam gun gives you 90% of the benefit without needing to buy, set up, and lug around a pressure washer.
How Do I Get Thicker, Richer Foam?
If your foam is coming out a bit thin or watery, don't worry—it’s usually a simple fix. Getting that satisfying, shaving-cream consistency is all about a few small adjustments.
Here's what I always try first:
- Up the Soap-to-Water Ratio: This is the easiest first step. Just add a bit more soap concentrate to the canister. Often, a slightly richer mix is all it takes.
- Crank the Soap Dial: Find that dial on top of your foam gun and turn it all the way to the max setting. This lets the most soap possible mix into the water stream.
- Check Your Water Pressure: A kinked hose or a loose connection can kill your water pressure and, in turn, your suds. Make sure everything is flowing freely from the spigot to the gun.
It's also worth noting that using a high-quality car shampoo specifically made for foaming can make a world of difference.
Ready to see what a real pre-soak can do for your car's finish? The SwiftJet Car Wash Foam Gun makes getting that professional touch simple. Click here to get your SwiftJet today!