
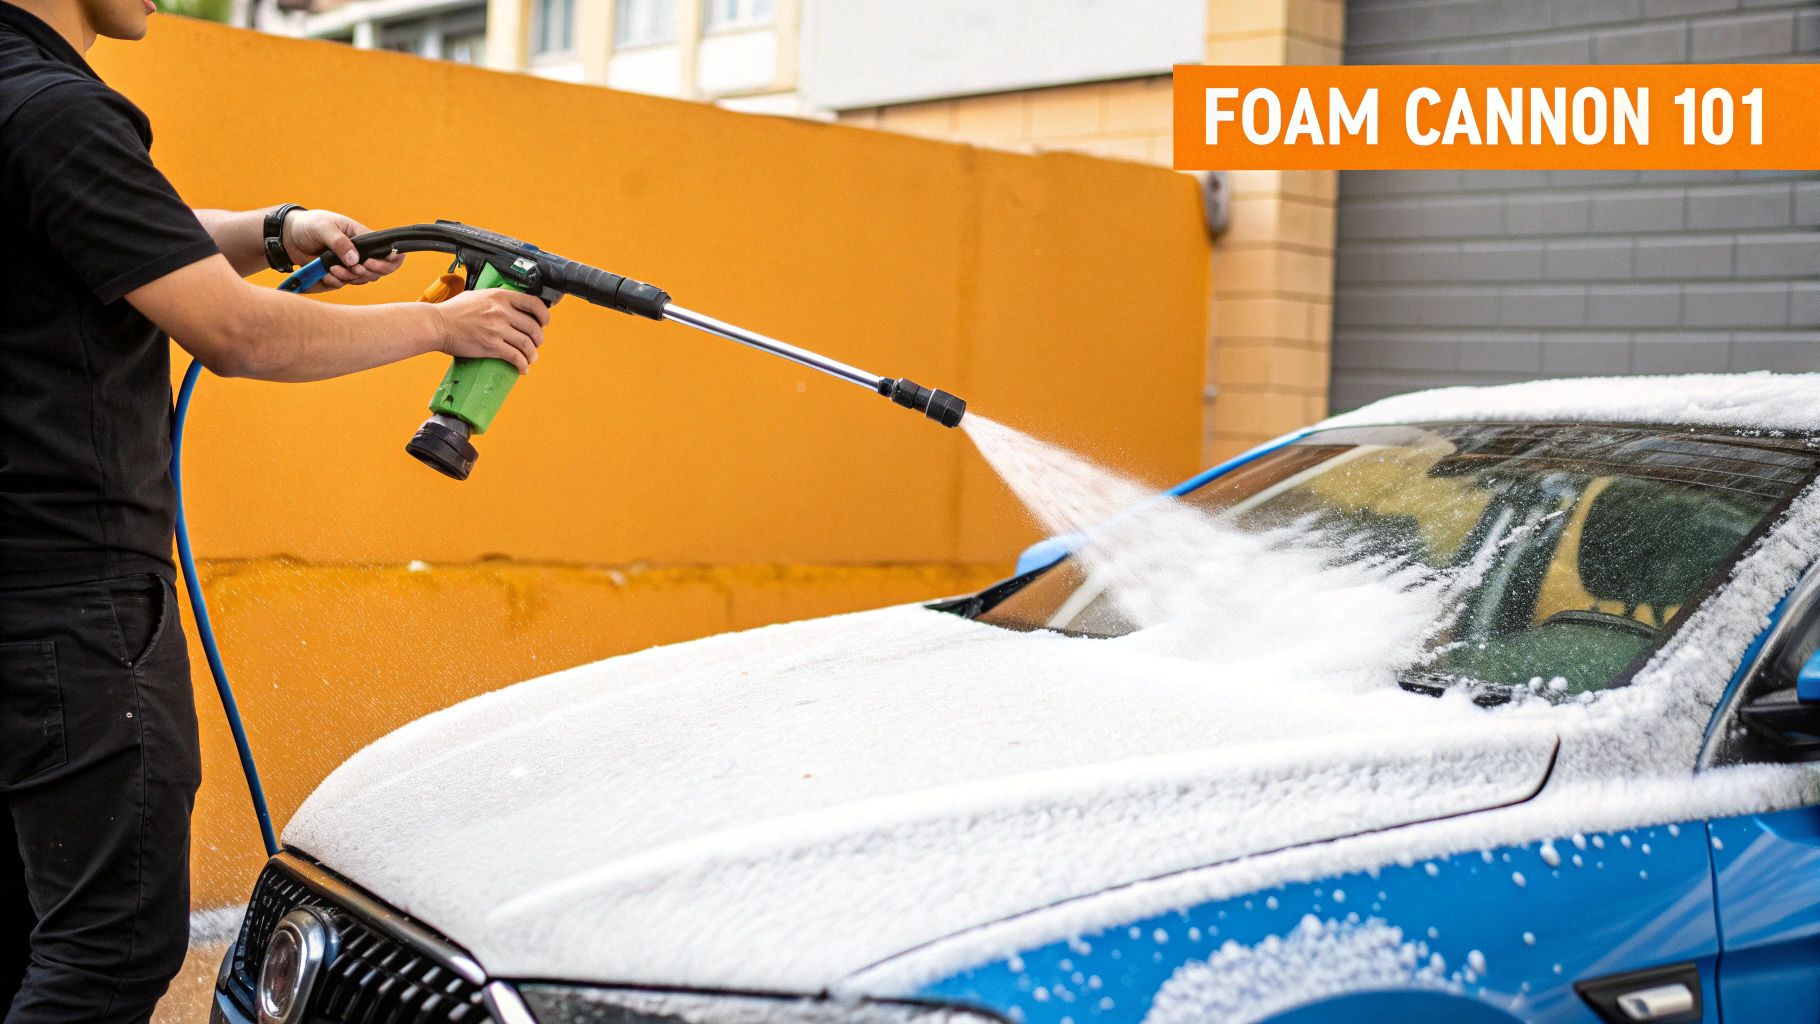
A car wash foam cannon gun is a detailing tool that hooks up to your pressure washer and completely covers your vehicle in a thick blanket of suds. This isn't just for show—this layer of foam is your first line of defense against scratches. It clings to the paint, breaking down and lifting away dirt before you ever have to touch the car with a wash mitt. It's a game-changer for reducing swirl marks.
Why a Foam Cannon Will Change Your Car Wash Routine
Let's face it, the old bucket-and-sponge method can feel like a chore. All that scrubbing isn't just tiring; it’s a prime opportunity to accidentally grind dirt and grit into your car's finish. This is exactly where a foam cannon completely flips the script, making the process faster, safer, and honestly, a lot more fun.
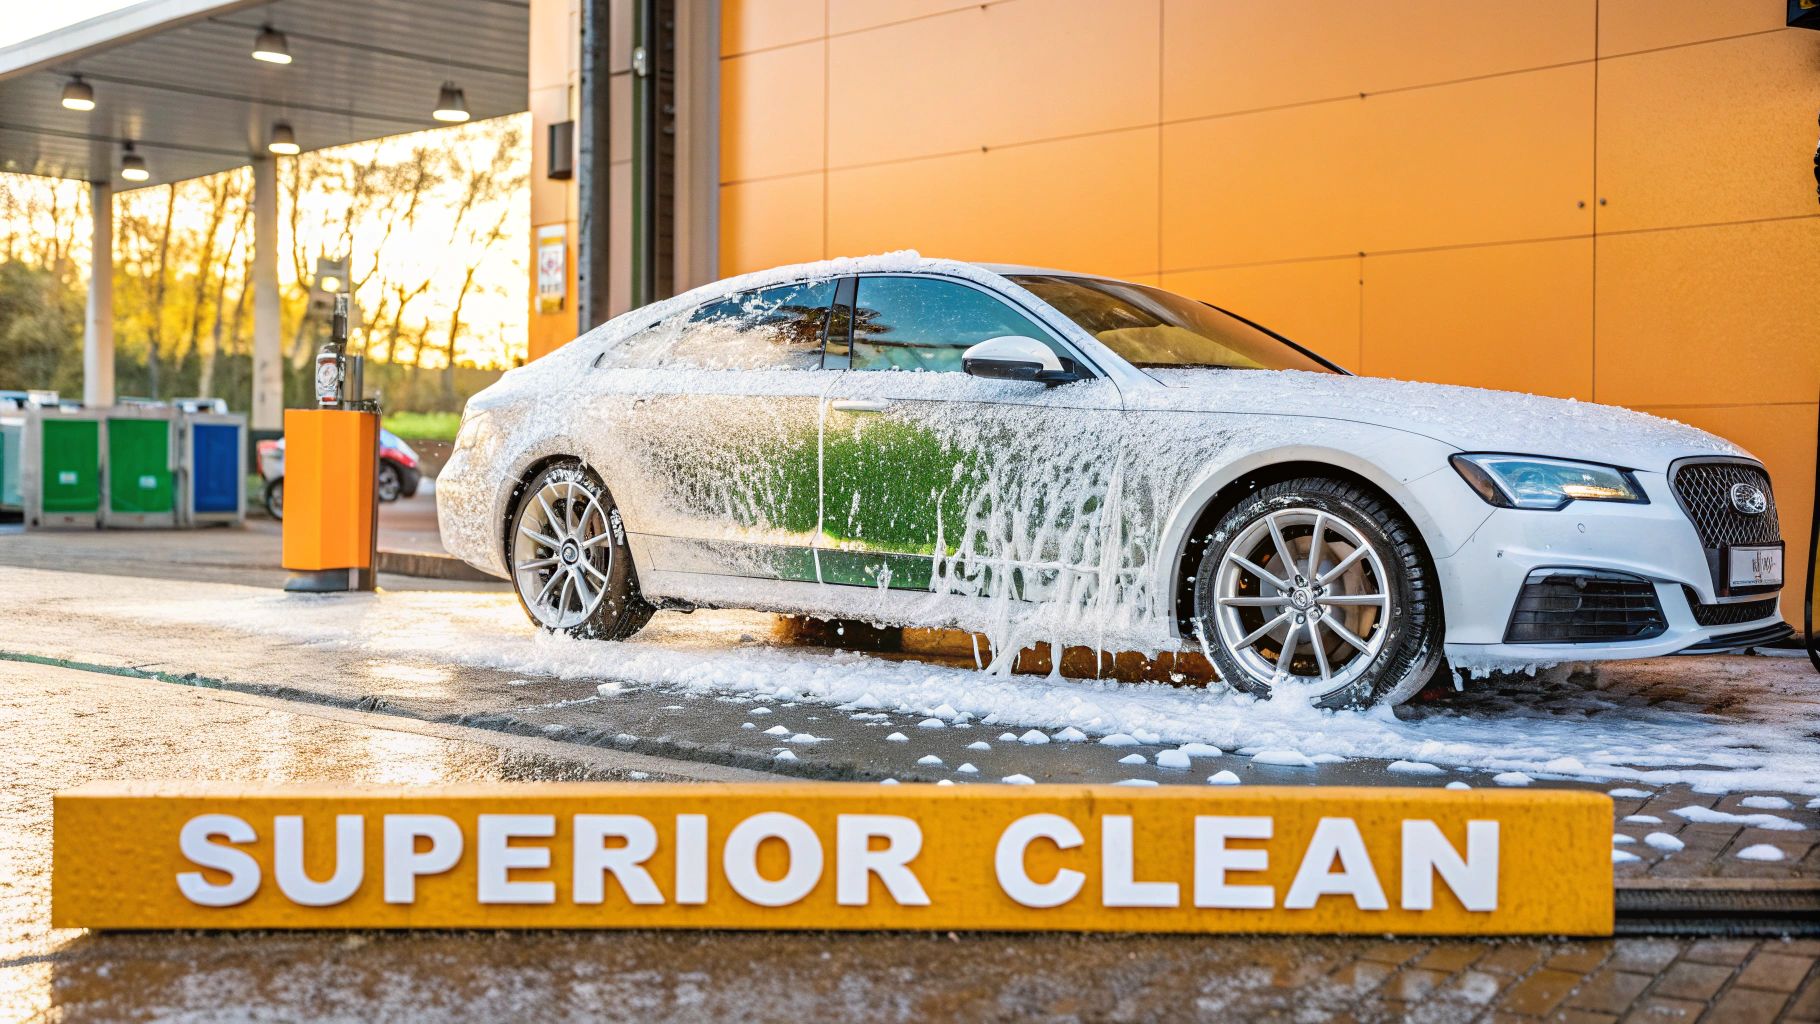
The magic isn't just seeing your car disappear under a satisfying blanket of foam. It's about what that foam is actually doing. The thick suds are engineered to soften, lift, and encapsulate all the heavy grime sitting on your paint.
The Power of a Pre-Soak
Think of this step as a "pre-soak" for your car. The foam is designed to have a long dwell time, which just means it sticks to the car’s panels instead of instantly running off. As it slowly slides down the vehicle, it pulls a huge amount of loose dirt and road film away with it.
This pre-wash stage is brilliant for a few reasons:
- Less Grime, Less Grinding: It gets the most abrasive gunk off the car before your wash mitt ever touches the paint.
- Preventing Scratches: With less dirt to push around, you dramatically lower the risk of causing those dreaded micro-scratches and swirl marks.
- Better Lubrication: The foam that remains on the car acts as a slick lubricant, helping your wash mitt glide effortlessly across the surface.
The real win here is minimizing damage to your paint. By removing most of the dirt without physical contact, you sidestep the main cause of scratches from traditional washing methods.
This single tool is the secret to getting a pro-level, safe clean right in your own driveway. If you're weighing your options, getting a handle on the differences between a foam gun vs cannon can point you in the right direction. From here, we'll dive into all the practical advice you need to get foaming.
Choosing the Right Foam Cannon and Car Soap
Picking the right car wash foam cannon gun and soap can seem like a tough choice, but it really just boils down to the pressure washer you already own. The market for these tools has absolutely exploded, with global sales clearing 20 million units in 2023. That kind of growth shows just how indispensable they've become for anyone serious about car care.
This isn't just a fleeting trend, either. Projections show a steady 7% annual growth, which you can read about in the full market report on MarketReportAnalytics.com. The most important thing to remember is that not all foam cannons are created equal. You have to match the cannon to your pressure washer's power, or you'll never get that thick, satisfying foam you're after.
Matching a Cannon to Your Pressure Washer
Before you buy anything, you need to know your pressure washer’s specs. The two numbers that matter most are Gallons Per Minute (GPM) and Pounds per Square Inch (PSI). Think of GPM as the volume of water and PSI as the force behind it.
A higher GPM is your best friend for creating thick, shaving cream-like foam. The cannon's internal orifice size needs to be a perfect match for your machine's output. If you pair a cannon designed for a beastly gas-powered unit with a small electric washer, you’ll just get soapy water. It’s all about creating the right balance of water, air, and soap.
Foam Cannon Compatibility Checklist
Use this table as a quick reference to find the right orifice size for your setup. Getting this detail right makes all the difference.
| Pressure Washer Type | Recommended PSI Range | Recommended GPM Range | Ideal Orifice Size |
|---|---|---|---|
| Electric (Consumer) | 1500 - 2000 PSI | 1.2 - 1.8 GPM | 1.1mm |
| Electric (Prosumer) | 2000 - 2800 PSI | 1.8 - 2.5 GPM | 1.1mm or 1.25mm |
| Gas (Entry-Level) | 2500 - 3200 PSI | 2.0 - 2.8 GPM | 1.25mm |
| Gas (Professional) | 3200+ PSI | 2.8+ GPM | 1.25mm or larger |
Most quality foam cannons come with a 1.1mm orifice pre-installed and include a 1.25mm one in the box, so you can swap it out to fine-tune your foam.
My number one tip? Spend a few extra bucks on a foam cannon with high-quality brass or stainless steel fittings. I've seen countless plastic connectors crack under pressure or just get brittle over time. A solid build will save you from leaks and frustration down the road.
Selecting the Perfect Car Soap
Your hardware is only half the battle; the soap you run through it is just as critical. You can't just grab any old car wash liquid and expect great results. You specifically need a soap formulated to generate thick, clingy suds when mixed with a high-pressure stream of water and air.
The most important quality to look for is a pH-neutral formula. Why? Because harsh acidic or alkaline soaps will eat right through your wax, sealant, or ceramic coating. It would be a shame to strip away that protective layer you worked so hard to apply just to get your car clean.
Finally, don't make the common mistake of thinking more soap equals more foam. It’s actually the opposite. Overloading the canister just wastes product and can lead to a soupy, runny mess. Stick to the dilution ratio on the bottle—it’s usually just one or two ounces of soap for a standard 32-ounce canister.
If you want to go deeper into finding the right product, we've put together a complete guide on the best car wash soap for a foam cannon.
Your First Wash: From Setup to Suds
Alright, you've got your gear. Now for the fun part. Getting from a brand-new foam cannon in a box to a car dripping in thick, dirt-lifting suds is pretty simple, but a few small details can make a huge difference. Let's get it right so your first wash feels like you've been doing this for years.
First things first, let's put it together. Most cannons have two main pieces: the heavy brass body that connects to your pressure washer and the plastic soap bottle. Just screw the bottle onto the body until it's hand-tight. You don't need to crank it down.
Getting the Soap-to-Water Ratio Just Right
Here's where the magic really happens. The secret to that thick, shaving-cream-like foam is all in the mix. It feels like more soap should equal more suds, but that's a common rookie mistake. Overdo it, and you'll get a runny, watery mess that just slides off your paint.
For a typical 32-ounce bottle, this is my go-to starting formula:
- Fill the bottle about 80% of the way with warm water. Trust me, warm water makes a big difference; it helps the soap dissolve completely.
- Next, add 1-2 ounces of a quality car wash soap designed for foam cannons. Always glance at the soap bottle's instructions, as some are super concentrated.
- Gently swirl the bottle to mix everything. If you shake it like a cocktail, you'll just have a bottle full of foam before you even connect the pressure washer.

As you can see, it's a pretty straightforward process to get that perfect pre-soak.
How to Apply Foam Like You've Done It a Thousand Times
Before you even think about spraying foam, give your car a solid rinse with just the pressure washer. This isn't a step to skip. It blasts away all the loose dirt, sand, and grit so the foam can focus on the stubborn, stuck-on grime underneath.
Once you’re ready, start foaming from the top of the car and work your way down. Hit the roof, then the windows, hood, trunk, and finally the sides. This top-down method uses gravity to your advantage, letting the suds constantly run down over the lower panels, which are usually the filthiest.
Pro Tip: Never wash your car in direct sunlight or when the paint is hot. I see people make this mistake all the time. The heat causes the soap to dry on the surface almost instantly, leaving behind nasty water spots and a streaky soap film that’s a real pain to get off. Do yourself a favor and wash in the shade or wait for a cooler time of day, like early morning or evening.
Mastering Advanced Foam Cannon Techniques
Alright, so you've got the basics down. Now it's time to elevate your foam game from just "washing the car" to achieving a truly professional-level clean. This is where the real art of using a car wash foam cannon gun comes into play—it's all about the subtle tweaks that make a massive difference.
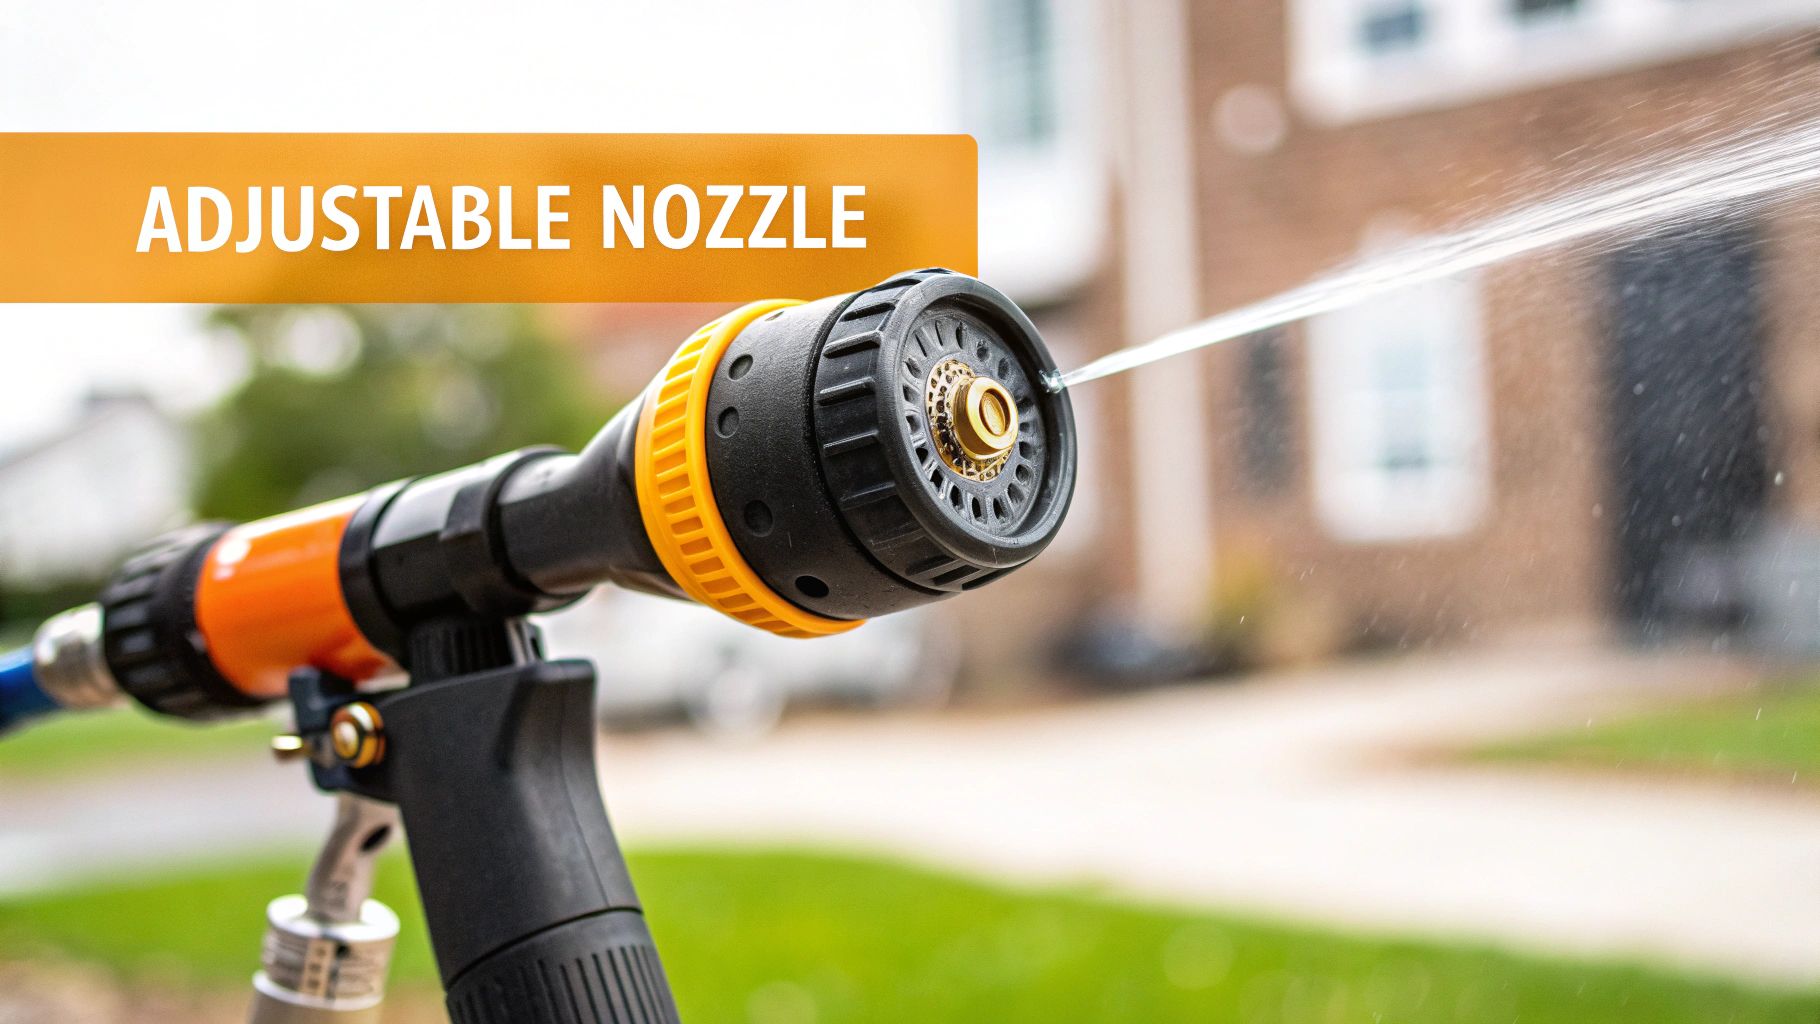
Think of it this way: anyone can spray foam on a car, but a true enthusiast knows how to control it. The secret lies in mastering the two key adjustments on your cannon: the front fan nozzle and the top dial for the soap-to-water mix. Getting a feel for these is what separates a quick rinse from a detailer-grade wash.
It's no surprise this method is catching on. The car wash foam cannon market is on track to hit an impressive $150 million by 2025. That boom shows just how many people are discovering this better way to care for their cars at home. You can dive deeper into the numbers in this market analysis from DataInsightsMarket.com.
Fine-Tuning Your Foam Application
Let's start with the front nozzle—this is your control for the foam's spray pattern. Twist it one way and you get a wide, flat fan that’s perfect for blanketing big areas like the hood, roof, and doors in seconds. Twist it the other way, and you get a tight, concentrated jet of foam. This is my go-to for blasting caked-on mud out of wheel wells or targeting the grime that collects on rocker panels.
Now for the top dial. This little knob is your foam thickness controller. Turn it toward the “+” to pull more soap into the mix, which gives you that super-thick, shaving-cream-like foam. Dial it back toward the “-” for a thinner, wetter foam, which is great for lighter jobs.
Here’s how I put it all together during a typical wash:
- The Initial Foam Blanket: I start with a wide fan and crank the soap dial up high. The goal is a thick coat of suds that will cling to every surface.
- Targeting Trouble Spots: For bug guts on the bumper or stubborn road tar, I'll switch to a narrow stream. This focuses the cleaning power exactly where I need it without wasting soap elsewhere.
- Quick Maintenance Washes: If the car isn't too dirty, I'll use a thinner mixture by dialing back the soap. It saves product but still gets the job done.
The single most important concept to master is dwell time. This is simply how long you let the foam sit on the car. You're aiming for 3-5 minutes, which gives the soap enough time to break down dirt and grime. But here's the critical part: you absolutely must rinse it off before it dries. Letting foam dry on your paint will leave behind nasty soap scum and streaks.
Foam Cannon Care and Troubleshooting
Your foam cannon is a workhorse, but a little TLC will keep it churning out that thick, satisfying foam for years. Think of it less as a chore and more as a simple habit that protects your investment. The best part? It barely takes any time.
The golden rule of foam cannon ownership is simple: flush it with clean water after every use. I can't stress this enough. Just run plain water through it for about 30 seconds. This quick rinse is crucial because it clears out leftover soap before it can dry into a gunky, performance-killing residue. This is single-handedly the best way to prevent clogs in the mesh filter and orifice.
It's no surprise these tools have become so popular. The global car wash foam cannon market was valued at around $2 billion in 2023, with brands like Chemical Guys and Adam's Polishes leading the charge. You can see more details on this expanding market over at MarketReportAnalytics.com.
Solving Common Foam Frustrations
Even with diligent maintenance, you might one day find your foam looking a bit sad—watery, weak, or sputtering. Don't worry. Nine times out of ten, it's an easy fix that you can sort out in a few minutes.
Before you start taking things apart, run through this quick mental checklist:
- Is it clogged? A blocked orifice is almost always the cause of weak foam. Take a look at the small brass nozzle and the mesh filter inside for any soap scum or mineral buildup.
- Are all connections tight? A loose connection between the cannon and your pressure washer wand, or even a loosely screwed-on bottle, can introduce air leaks and completely wreck your foam quality.
- Did I mix the soap right? We've all done it. Double-check your soap-to-water ratio. Too little soap gives you sudsy water; too much can also cause issues.
Most of the time, the problem is just a simple blockage. Getting familiar with the basics of your tool makes fixing it a breeze. To get a better handle on the mechanics, take a look at our guide on how a car wash foam gun works. A little know-how will get you back to blanketing your car in foam in no time.
Got Questions? We've Got Answers.
Even after you've used your foam cannon a few times, some questions tend to bubble up. Let's tackle some of the most common ones I hear from people just getting started.
Can I Just Hook This Up to My Garden Hose?
This is, without a doubt, the number one question people ask. The short answer is no; a true foam cannon needs a pressure washer to work its magic. It's that high-pressure stream of water that forces air into the soap solution, whipping it up into that thick, shaving-cream-like foam you're looking for.
Now, you might see "foam guns" advertised for garden hoses. While they're a step up from the old bucket-and-sponge method, they just can't produce the same results. They create more of a watery, sudsy spray rather than the dense foam that clings to your car and lifts away dirt.
How Often Do I Really Need to Clean the Filter?
Think of it like this: a little maintenance goes a long way. After every single wash, you should run clean water through the cannon for about 30 seconds. This simple flush is your best defense against soap residue drying up and causing clogs down the line.
For a more thorough cleaning, I recommend pulling out the internal mesh filter every 10-15 washes or so. If you suddenly notice your foam looking weak and watery, a clogged filter is almost always the culprit. Pop it out, give it a good rinse, and you'll be back in business.
Yes, a foam cannon isn't just safe for ceramic coatings and vinyl wraps—it's one of the best ways to wash them. The whole point of the foam pre-soak is to reduce how much you have to physically touch the paint, which is what causes swirls and scratches on those delicate surfaces. The key is to always use a quality, pH-neutral car soap.
Using the right soap is crucial. It ensures you're gently lifting dirt and grime without stripping away the expensive protective layer you've invested in.
Ready to take your at-home car wash to the next level? The SwiftJet Car Wash Foam Gun is the tool you need for a professional, scratch-free shine. Grab yours today and see what real foam can do.