

You're probably standing in the garage looking at a hood, a fender, or maybe the whole car, thinking the same thing most first-timers think. The color is the easy part. The hard part is getting that smooth, even finish without stripes, dry spray, runs, or a panel that looks great from one angle and rough from another.
That's where the right car paint sprayer changes the job. It doesn't guarantee a professional result by itself, but it gives you the control that rattle cans and shortcut tools never do. If your goal is a full repaint that looks intentional, you need to understand how the gun, compressor, paint thickness, temperature, and your own hand speed all work together.
The mistake most DIY painters make is chasing one magic setting. They want one PSI number, one distance, one pass speed. Real paint work doesn't happen that way. A setup that lays basecoat beautifully in one garage can spray badly the next day if the paint is mixed a little heavier or the compressor can't keep up. Good painters don't memorize a single number. They read the material, watch the fan, and adjust.
Your Guide to a Flawless Automotive Finish
You've got the car masked, the booth space cleaned as well as a home garage allows, and the first mixed cup on the bench. Then the actual test starts. The fan looked right on paper, but the paint is laying heavier than expected on one panel, lighter on the next, and your compressor is already cycling harder than you planned.
That is the point where a good repaint either stays under control or starts going sideways.
Spray equipment changed auto finishing because it gave painters a faster, more consistent way to apply material, a shift documented in the early history of automotive painting by The Henry Ford's overview of vehicle paint development. The lesson still matters in a home shop. A car paint sprayer can produce a professional-looking finish, but only when the gun, air supply, material mix, panel prep, and shop conditions are working together.
Beginners usually want one fixed answer. Set the gun to one PSI, hold it one distance from the panel, and spray every product the same way. That approach causes a lot of failed jobs. Urethane primer, basecoat, and clear do not behave the same. A cool morning, a hot afternoon, and a compressor that struggles to keep up will all change how the paint leaves the gun and how it lands on the panel.
Use a working method instead.
Start by reading the material, not the label on the gun box. If the paint is mixed a little thick, atomization gets coarser and the surface can texture up fast. If the shop is hot, solvents flash quicker and a pass that looked wet on your test piece can go dry on the roof or hood. If the compressor is undersized, pressure drop during a long pass changes the fan shape and the finish changes with it. That is why experienced painters test, watch, and adjust instead of chasing one magic number.
A setup that fits your actual workspace matters too. Painters working in smaller garages often need to think harder about air demand, duty cycle, and mobility than painters in a full shop. If you are comparing compact spray systems and portable options, this guide to 12-volt sprayer setups and portable spraying applications gives useful context on where small mobile equipment makes sense and where it does not.
What a motivated DIY painter actually needs
A clean result usually comes from four things done right at the same time:
- A gun and fluid tip that match the product you are spraying
- A compressor that can maintain pressure through the whole pass
- Panels prepped flat, clean, and fully ready for material
- A habit of adjusting for viscosity, temperature, and air supply instead of spraying everything one way
Shop rule: If the surface is wrong, the paint will show it. If the air is unstable, the fan pattern will show that too.
That is the sure path to a flawless finish. Choose a sprayer that suits the material. Set it up around your existing compressor. Watch how the paint behaves in today's temperature, not yesterday's. Do that, and the gun becomes a precision tool instead of an expensive way to make the same mistake faster.
Understanding Car Paint Sprayer Types
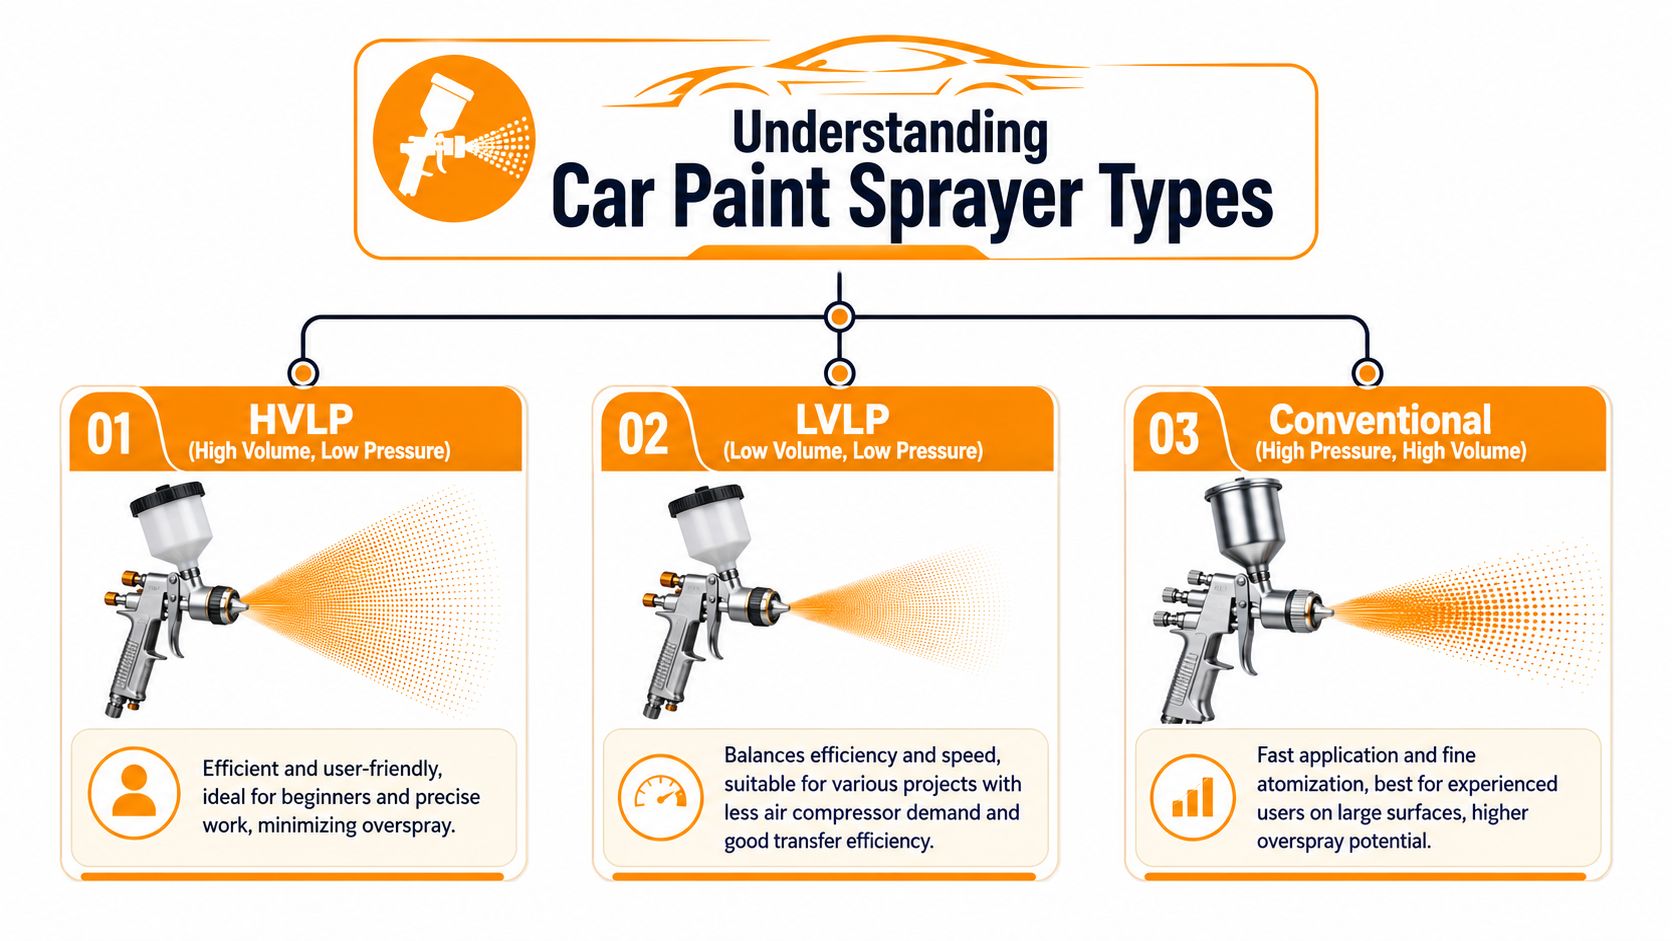
Walk into any paint supply conversation and people start throwing around HVLP, LVLP, conventional, turbine, airless. For automotive work, most of the confusion disappears once you focus on one question: how does the gun atomize paint, and what does that mean on the panel?
HVLP for control and efficiency
HVLP means High Volume Low Pressure. Specifically, it's a broad, softer stream of air that moves paint onto the panel with less violence. That softer delivery helps keep more material on the car and less floating around the garage.
HVLP became the household standard in the industry in the 1990s as a response to Southern California's 1987 Rule 1151, and these guns reached transfer efficiencies of 65 percent or higher, which is why they became so important for both compliance and material savings (history of HVLP spray gun development).
For a beginner, HVLP is usually the safest starting point because it gives you more room to control overspray and watch the wet edge build.
LVLP for smaller air systems
LVLP stands for Low Volume Low Pressure. It's often chosen by painters working with lighter-duty compressors or smaller shops where air supply is the limiting factor. LVLP guns can be very usable for automotive panels, especially when the operator understands how to slow down and keep the gun tuned.
The trade-off is simple. You may get lower air demand, but you need to pay attention to fan shape and material flow. A weak setup can tempt you into moving too slowly or too close, which creates texture or runs.
If you're comparing handheld and powered spraying tools beyond automotive refinishing, this broader look at different sprayer setups for home use helps show why not every sprayer category belongs near a vehicle finish.
Conventional guns for speed and atomization
A conventional high-pressure gun hits harder. Picture a pressure washer compared with a garden shower. That higher energy can atomize paint very finely, and experienced painters can move fast with it on large surfaces.
The downside is overspray and waste. It's less forgiving in a home garage, and if your booth conditions are poor, the extra airborne material works against you.
Why cheap airless sprayers are the wrong shortcut
A lot of DIY jobs often go sideways. People see a low-cost airless sprayer online and start wondering if they can skip the learning curve. In automotive work, that's usually the wrong bet.
Airless units are widely criticized by experienced painters and forum users because they don't give the same atomization control you need for a proper automotive finish. They can move material, but moving material is not the same thing as laying base and clear evenly. The problem gets worse when a first-time user mistakes coverage for quality.
If you can't control how the material breaks up at the panel, you're not painting a car. You're coating one.
For vehicle refinishing, the main types worth serious attention are HVLP, LVLP, and conventional guns. Everything else is usually a compromise you'll have to fix later with sanding, buffing, or repainting.
How to Select the Perfect Car Paint Sprayer
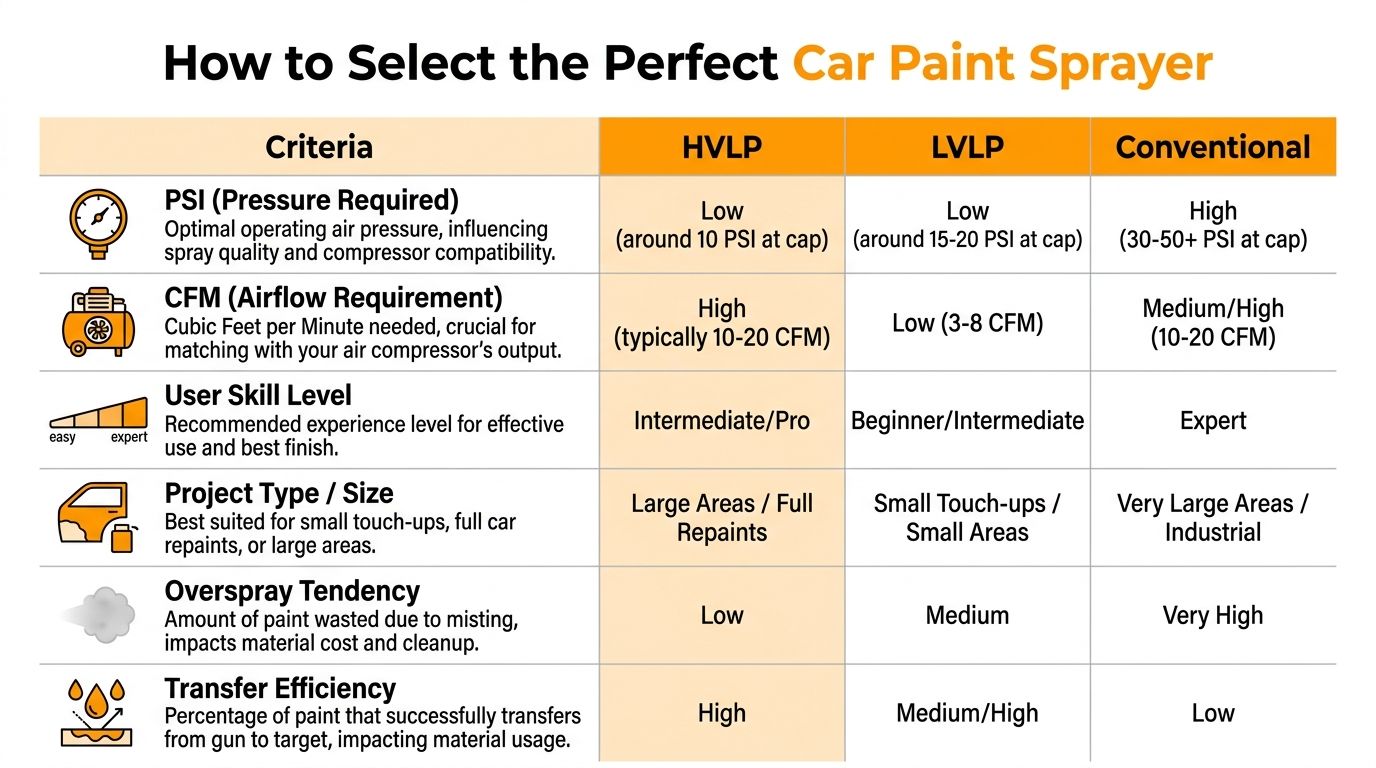
Buying a sprayer without matching it to your compressor is like bolting a race carb onto an engine that can't feed it. The gun may be good. The result still won't be. Selection starts with the whole air system, then moves to tip size, feed style, and the kind of materials you'll spray.
Match the compressor first
For automotive painting, HVLP spray guns require 10–15 CFM at 40 PSI, and pros recommend a compressor that delivers at least 50% more CFM than the gun's requirement so the system doesn't struggle during a pass. The same source notes that a 60-gallon tank is essential for full car painting because it gives you 2–3 minutes of continuous spraying, while a 20-gallon tank only supports 30–60 seconds and is really for small touch-ups (air compressor sizing for painting a car).
That matters more than people realize. A lot of bad paint jobs aren't caused by “bad spraying.” They happen because the painter starts a panel with a healthy fan and finishes it with falling pressure.
Hose and regulator details that matter
The air path matters almost as much as compressor size. The verified guidance for automotive painting calls for 3/8-inch or 1/2-inch ID hoses rated for at least 300 PSI, with hose length kept under 50 feet to reduce pressure drop. It also recommends dual regulators, one at the compressor and one at the gun, so you can control system pressure and then fine-tune atomization at the tool (compressor and hose setup details for automotive spraying).
That's the difference between “air pressure” as a number on the tank and useful pressure where the paint atomizes.
Choose tip size by material, not by habit
A common beginner mistake is trying to run everything through one tip. That's asking one wrench to fit every bolt on the car.
Use this as your baseline:
| Material | Tip range |
|---|---|
| Heavy-bodied primer | 1.7–2.2 mm |
| Basecoat | 1.3–1.6 mm |
| Clearcoat | 1.3–1.6 mm |
Those ranges come straight from verified spray gun guidance, which also notes that too small a tip for thick material causes spitting, uneven patterns, and poor flow, forcing you into bad workarounds like over-thinning or cranking pressure higher than you should (automotive spray gun tip size guidance).
Gravity feed or siphon feed
For most modern automotive work, gravity-feed guns are the practical choice. They use the paint sitting above the gun, so they're efficient, easy to clean, and common for primers, basecoats, and clears.
Siphon-feed guns still have uses, but they're bulkier and less common for home refinish work. If you're repainting a whole car in a garage, gravity feed is usually the easier tool to learn on and maintain.
A simple buying framework
Don't buy based on branding alone. Buy based on the job in front of you.
- If you're painting a full car: Prioritize a true automotive HVLP gun, enough compressor capacity, a larger tank, and proper hose sizing.
- If you're doing touch-ups and small panels: A smaller setup can work, but don't expect it to behave like a full-shop air system.
- If your compressor is marginal: Consider whether the gun is really the problem, or whether the air supply is too small for continuous panel work.
- If you want one gun for everything: Don't. At minimum, plan around different tip sizes or separate gun setups for primer and finish materials.
The right car paint sprayer isn't the one with the most hype. It's the one your compressor can feed, your material can flow through, and your skill level can control.
The Critical Steps Before You Ever Pull the Trigger
You can spend good money on paint, set up a decent gun, and still ruin the job before the first pass if the panel, air, and workspace are not ready. That is how a lot of DIY repaints go wrong. The painter blames pressure or reducer, but the underlying problem started earlier with poor cleaning, bad sanding, or a garage full of floating dust.
Good spraying starts before mixing paint. It starts with a panel that is straight, clean, and sanded to match the product you are about to spray. It also starts with a setup routine that accounts for real variables. Paint thickness changes with temperature. Air pressure changes across long hoses and tired compressors. A gun that sprayed fine yesterday can lay down dry and rough today if the material is colder or mixed a little heavier.
Surface prep decides whether the finish lasts
Paint does not hide bad groundwork. It highlights it.
If clear coat is peeling, rust is active, filler is still wavy, or an old repair edge has not been feathered properly, the topcoat will show every one of those problems once the gloss hits it. Fresh color and clear can make a bad panel look worse because shine gives defects sharper definition.
Start by thoroughly judging the panel. Strip failed material. Feather every edge until you cannot catch it with a fingernail. Finish the bodywork before you start thinking about gun settings. If the shape is wrong in primer, it will still be wrong in base and clear.
A proper prep routine usually includes:
- Removing failed paint and feathering edges so old transitions do not print through later
- Correcting metal and filler work until the panel is straight under a guide coat
- Sanding in stages so each step removes the previous scratch pattern instead of trapping it
- Cleaning with wax and grease remover before masking and again before paint so oils, polish residue, and fingerprints do not cause fisheyes
- Masking tightly and deliberately to avoid ragged edges, overspray on trim, and extra cleanup
If you are sorting out abrasive choice during prep, this guide on when to use 220 grit sandpaper helps explain where that grit fits and where it is too aggressive to stop.
Match the prep to the material and conditions
This is the part newer painters skip. They sand everything the same way, mix the paint by the label, set one pressure number, and hope the gun sorts it out. Real paint work is less forgiving.
A cold morning thickens material. A hot afternoon can make it flash too fast. A small compressor may hold pressure for a test burst, then fall behind halfway across a door. Those variables should change what you do before you ever spray the car. You may need to let materials warm up, shorten the hose run, drain moisture from the tank, or spend more time testing your pattern because your setup is near its limit.
That is also why prep and product choice work together. Some coatings build harder, sand differently, and hold up better once the job is done. If you are comparing topcoat durability, this overview of durable spray paint finishes gives useful context on what the final protective layer is expected to do.
The workspace can ruin a good panel fast
A home garage can produce a solid job if it is controlled. If it is dirty, cramped, and poorly lit, it will fight you the whole way.
Check these before you mix anything:
- Airflow: enough ventilation to clear overspray, but not so much that it blows dust across wet paint
- Floor and surfaces: vacuum, wipe down, and get loose dirt off shelves, walls, and plastic
- Lighting: bright enough to read the wet edge and catch dry spray before it becomes a full-panel problem
- Hose and compressor setup: no leaks, no water in the line, and no awkward routing that drags across the panel or your legs
- Panel access: room to walk the length of the pass without changing speed or body position
I tell first-timers to do a dry run with the gun empty. Walk the car, follow the panel lines, and make sure the hose does not snag. That small check prevents a lot of ugly mistakes.
Rushed prep usually shows up later as solvent pop, trash in the clear, lifting edges, fisheyes, or a finish that looked decent for a week and then started failing. Careful prep gives you something better than confidence. It gives you control.
Your Step by Step Guide from Primer to Clear Coat
You can do everything right in prep and still ruin a panel in thirty seconds. The usual cause is treating spray-gun settings like a fixed recipe instead of a live adjustment. Paint temperature changes. Reducer choice changes. Compressor output changes as it cycles. Good results come from reading those variables before they turn into texture, striping, or a run.
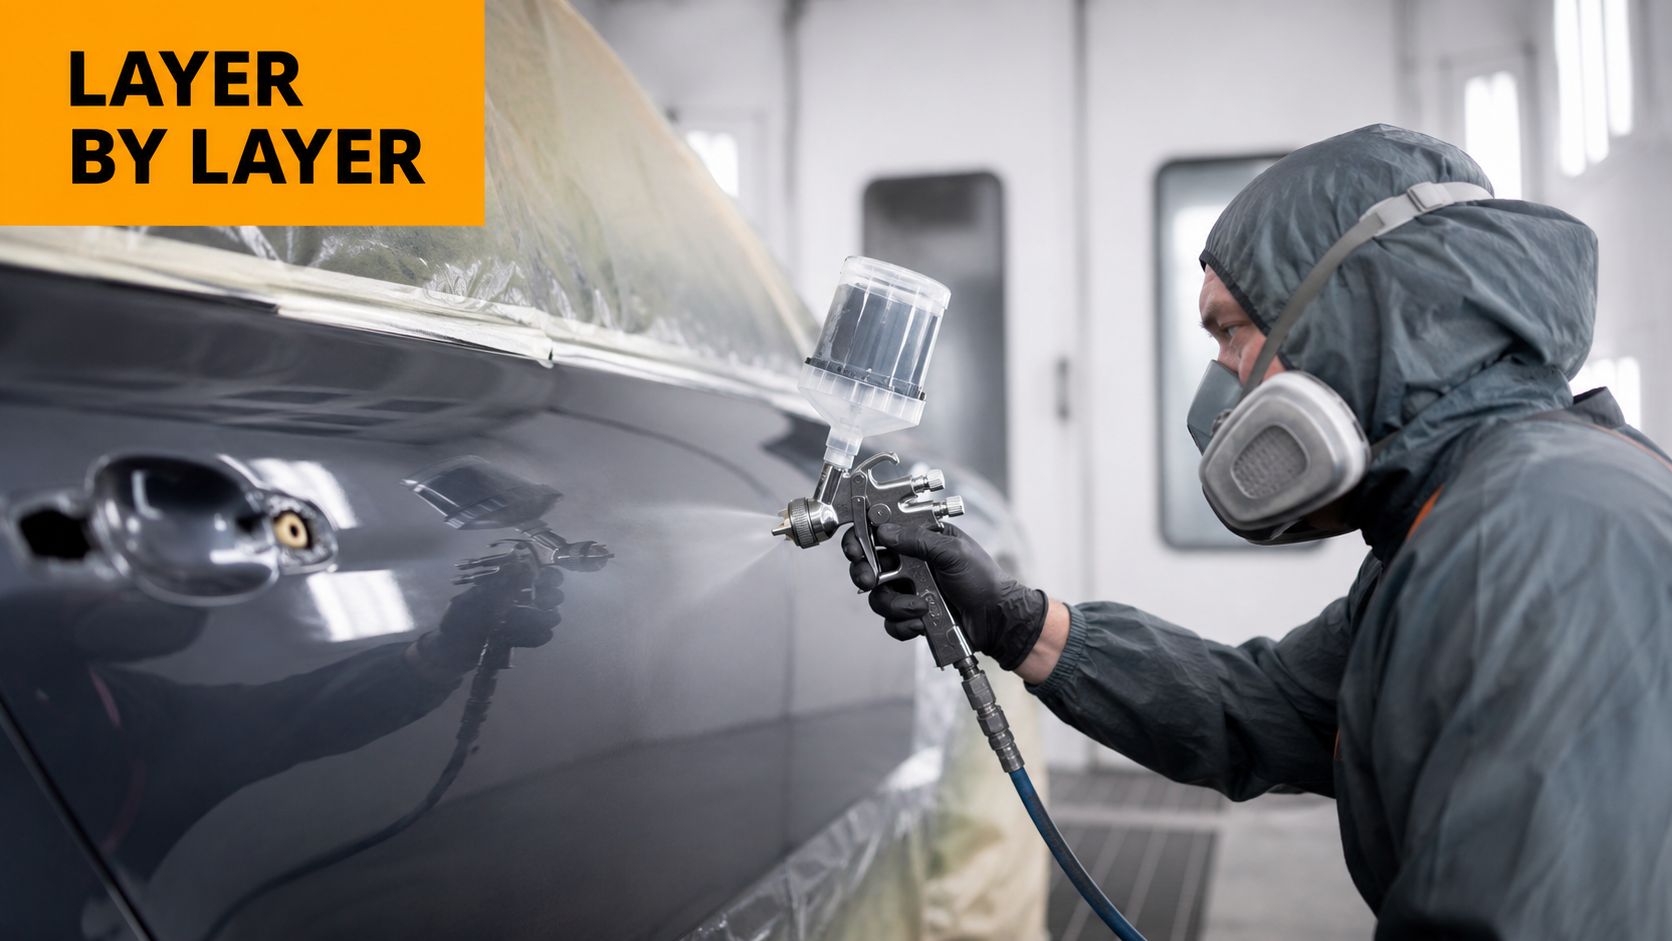
Set the gun for the material in front of you
Primer, base, and clear do not want the same setup. High-build primer usually needs a larger fluid tip than basecoat or clear because it carries more solids and has to lay down enough film to block straight later. Many gun makers group primer around the larger end of the range and basecoat-clear work around the smaller end. SATA's spray gun setup guidance is a good reference for matching material flow and atomization to the job (spray gun setup basics from SATA).
Use that as a starting point. Then adjust to what the material is doing.
A thick primer on a cool morning may need more help to atomize cleanly. A thin basecoat on a hot afternoon can dry before it levels if you chase pressure too high or hold the gun too far off the panel. A small compressor can also change the answer because line pressure at the regulator is not the same as stable pressure at the cap once you are spraying for real.
Build the pattern before you paint the car
Always spray masking paper or a test panel first. I want to see the fan shape, how wet the material lands, and whether the compressor keeps up through a full pass, not just a quick burst.
Work in this order:
- Set fan width for the panel. A wide fan helps on hoods and doors. A slightly tighter fan gives better control on pillars, bumper corners, and lower rockers.
- Set fluid flow. Too much fluid hides weak atomization for a second, then shows up as sagging, mottling, or heavy texture.
- Adjust pressure while spraying, not just at rest. If the fan tails, spits, or loads the center, correct that now.
- Read the wetness of the pattern. Dry edges usually mean the material is too thick, the gun is too far away, the air is too high for the product, or the panel and booth are too warm.
- Check again after the compressor cycles. Plenty of home setups spray well for the first pass and fall off halfway through the second.
That routine saves paint.
Gun movement decides how the film builds
Keep the gun square to the panel. Hold a steady distance. Overlap each pass consistently enough that the new pass melts into the one beside it instead of stacking ridges.
The wrist is where many first paint jobs go bad. If you arc the gun, the center of the fan gets closer than the top and bottom, and the panel gets a heavy stripe through the middle. Move your whole arm and body so the gun stays parallel from the start of the pass to the release.
I tell first-timers to watch the reflection behind the fan, not the tip of the gun. The reflection shows whether the surface is laying down evenly.
Spray sequence from primer to clear
Primer: Apply medium, even coats that give you enough film build to block the panel straight. Do not chase gloss in primer. Its job is to fill, seal, and create a uniform foundation. Let it cure as directed, then sand it flat before you move on.
Basecoat: Focus on coverage and consistency. A basecoat pass should look controlled, not overloaded. On metallics and pearls, keep your distance and overlap disciplined because uneven gun speed or a sudden pressure change can shift the flake and leave patchy color.
If you want a better sense of how top layers behave and why they matter for gloss retention and durability, this explainer on durable spray paint finishes is a useful companion read.
{{< youtube Lw0ObOdWnRE >}}
Clearcoat: Clear needs enough material to flow together, but too much too soon will sag on a door or flood an edge. The first coat should establish an even wet film. The next coat or coats build depth and gloss. Let the clear level on its own. Forcing shine by slowing down too much usually causes more work later with denibbing, sanding, and polishing.
Adjust for temperature, viscosity, and compressor limits
This is the part DIY painters skip, and it is why two people can use the same gun and get very different results.
- If the material feels thick through the gun: Confirm mix ratio first, then check whether the tip is too small or atomization is too weak for that product.
- If the day is hot and the surface flashes fast: Watch for dry spray at panel edges and on long passes across the roof or hood.
- If the day is cool and the coating stays heavy: Resist the urge to slow down and dump more material on the panel.
- If your compressor struggles to recover: Reduce your working pace, shorten the section you spray at one time, or reconsider whether the setup can support a full-car repaint without pressure drop.
Static PSI numbers are only the opening move. The actual job is matching fluid delivery, atomization, and hand speed to the paint you mixed, the temperature in the garage, and the air your compressor can deliver for a complete pass.
Spray one test pattern. Evaluate it carefully. Then tune the gun before you commit to the car.
Fixing Runs Orange Peel and Other Imperfections
You finish a pass on the hood, step to the side, and the reflection tells you the job changed. One area looks pebbled, another is starting to sag, and the edge near the fender feels dry. That is how paint defects usually show up in a real garage. Several variables drift at once, and the panel records every mistake.
Most flaws come from a mismatch between material flow, atomization, flash time, and hand speed. The fix is rarely just “add pressure” or “turn the fluid down.” Read the defect, then trace it back to the condition that created it. That approach saves sanding, rework, and a lot of wasted clear.
Orange peel usually starts with the setup the panel received
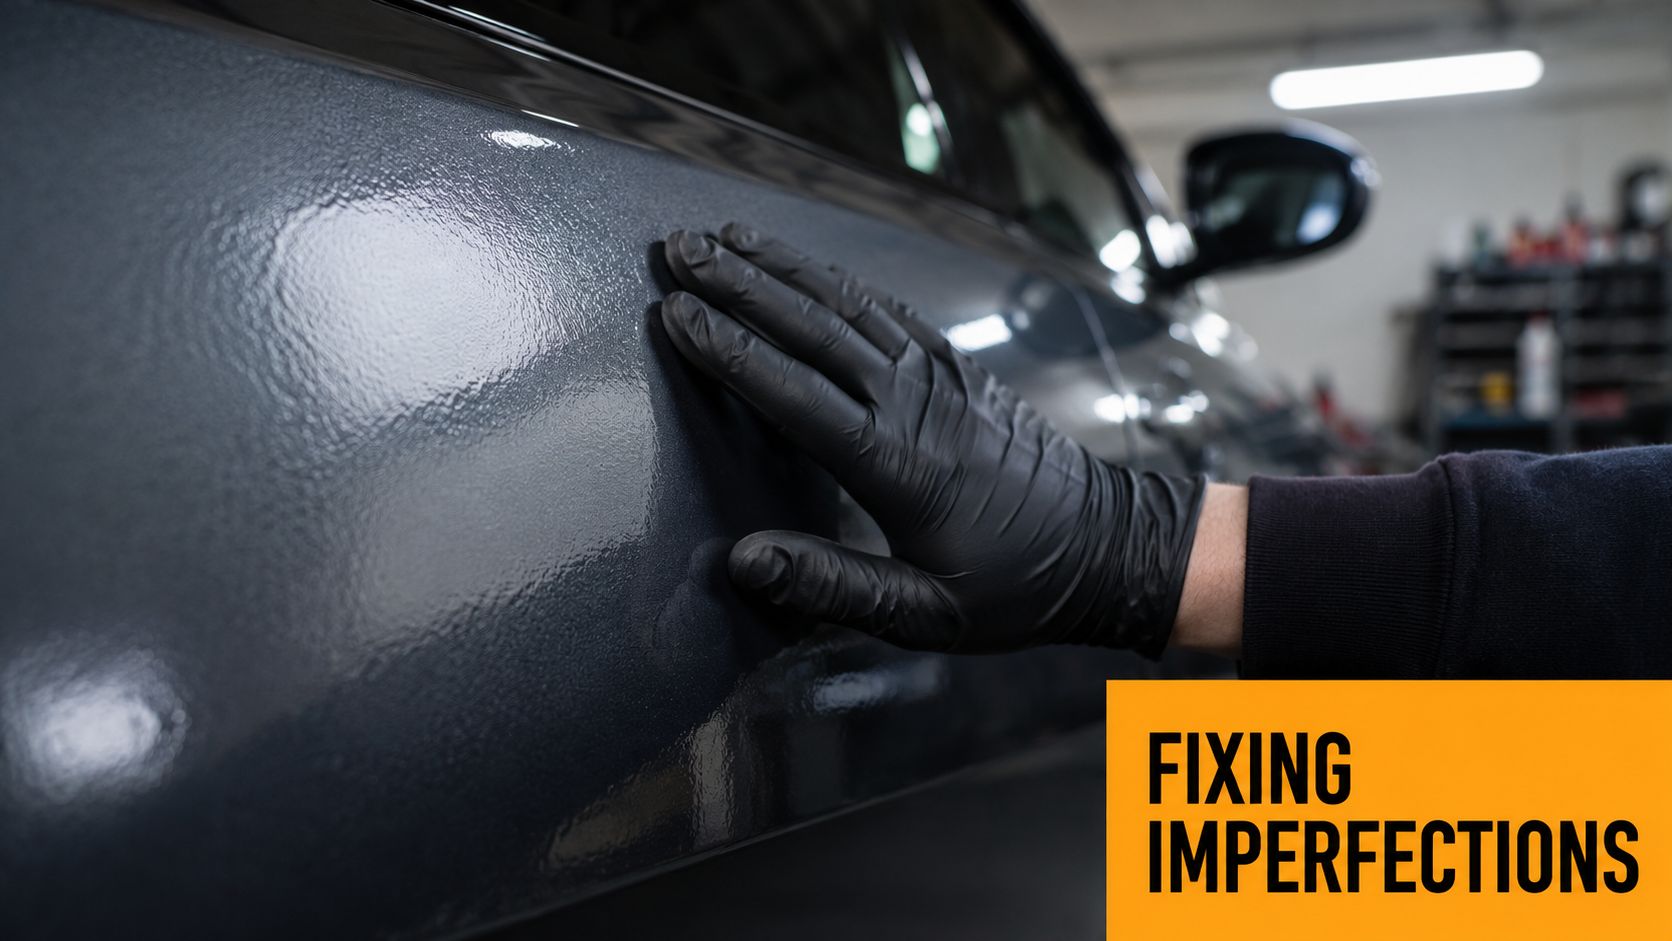
Orange peel shows up when the coating does not level before it flashes. Sometimes the gun is part of that. Often the bigger cause is a combination of paint that is still too thick for the tip, a panel temperature that speeds up solvent release, or a compressor that cannot hold steady air through a long pass.
Distance matters too. Spray too far off the panel and the droplets start drying in the air. They land rough and stay rough. On a hot day, or with a fast reducer, that problem gets worse across a roof or hood because the first half of the pass and the second half are not spraying under the same conditions.
What the defect usually means
- Runs and sags: The film built too heavy in one spot. Common causes are slow hand speed, holding the gun too close, pausing at body lines, or overlapping too heavily on vertical panels.
- Orange peel: The coating landed without enough atomization or without enough wet edge to flow together. Check viscosity, tip size, air consistency, distance, and shop temperature.
- Tails in the spray pattern: Start by checking the air cap for blockage. If the cap is clean, look at pressure drop, uneven fluid delivery, or dried material affecting the tip.
- Dry spray: The paint is reaching the panel too dry to melt in. That usually points to too much distance, too much speed, hot conditions, or a reducer that is flashing too fast for the job.
- Fish eyes and small craters: Contamination. Silicone, oil, wax residue, dirty air lines, or a panel that was not cleaned thoroughly before spraying.
Diagnose one variable at a time
Do not change gun pressure, fluid setting, reducer choice, and technique all at once. You will lose the cause and chase the problem in circles.
Work through the job in order:
- Spray a test pattern and check whether the fan is even from top to bottom.
- Look at the defect location. A run in the middle of a pass means something different than a run at an edge or body line.
- Check material behavior in the cup and on the panel. If it sprays heavy and coarse, the mix, tip, or atomization may be off.
- Watch the compressor during a full pass. Some setups hold pressure for a short test burst, then fall off halfway across the panel.
- Match the correction to the condition. If the day warmed up, reduce panel size or adjust your pace. If the product is laying down thick, confirm the mix and hardware before changing your stroke.
I tell first-time painters to trust the pattern, then trust the panel. If the fan changes while you are moving, suspect air supply. If the fan stays stable but the surface still looks rough, the problem is usually viscosity, flash time, or technique.
Correct the flaw without making a bigger repair
Let the coating cure before you attack it with sandpaper. A soft run smears. Soft clear also rolls up on the paper and leaves a repair that takes longer to straighten out.
For a run or sag, shave or block only the high spot after cure, then refine the sanding marks and polish if the film build allows it. For orange peel, level the texture evenly across the affected area instead of cutting one low spot too hard. For dry spray, the answer is often to respray after correction, because polishing rough overspray rarely matches a properly laid finish.
Small defects are normal on a full repaint. Repeating defects are a setup problem. The painter who learns to read viscosity, temperature, and compressor performance will fix the cause, not just the surface.
Protecting Yourself and Your Sprayer Investment
A full repaint isn't just a finishing job. It's chemical exposure, airborne overspray, compressed air, solvents, and cleanup. Treat it casually and you put your lungs, eyes, and skin at risk. Treat it like a professional process and the work gets safer and the tools last longer.
Safety is part of the craft
Wear proper respiratory protection for automotive coatings, especially when spraying clears and catalyzed products. A dust mask isn't paint PPE. You also want gloves, eye protection, and clothing that keeps overspray off your skin.
Ventilation matters too. You need airflow that clears contaminated air without stirring up dust onto fresh paint. The garage should protect the job, but it also has to protect you.
Clean the gun before paint turns into a repair bill
The quickest way to ruin a good car paint sprayer is to let material sit in it. Cleanup starts the moment you're done spraying.
Use a disciplined routine:
- Empty leftover material promptly
- Flush the gun with the correct cleaner
- Remove and clean the air cap, fluid tip, and needle carefully
- Check passages for residue instead of assuming they're clean
- Lubricate the moving parts as recommended for the gun
- Store it dry and protected
A dirty gun doesn't just spray poorly next time. It sends you chasing fake problems. Suddenly you think the fan is inconsistent, the fluid knob is touchy, or the gun “just isn't right anymore,” when the actual issue is dried material in the passages.
Professional-looking work comes from professional habits. Safety and maintenance are two of the biggest ones.
If you care about the finish on your vehicle, you should care just as much about how you wash and maintain it afterward. SwiftJet makes that easier with practical car care tools designed for home users who want better results without overcomplicating the job. If you've put serious effort into your paint, keeping it clean with the right foam setup is a smart next step.
