

You wash the car, step back, and there it is. A scratch you swear wasn't there yesterday. The typical reaction is to reach for a bottle labeled “scratch remover” and start rubbing. That's how a small defect turns into a larger one.
If you want to buff scratches out of car paint safely, the essential work starts before the buffer touches the panel. Dirt trapped around the scratch, a loaded pad, or a rushed first pass can leave fresh swirls around the damage you're trying to fix. Good correction is partly abrasion control and partly contamination control.
A lot of scratches are fixable at home. A lot are also misdiagnosed. Knowing the difference is what separates a clean repair from a bad afternoon.
First Diagnose Your Car's Scratches
That sinking feeling is real, but the first question isn't how to buff it. It's what kind of scratch you're looking at.
Surface-level scratches are the most common kind of car damage, and clear coat scratches are the most common category that can be buffed successfully. The reason this matters to DIYers is simple: approximately 60% of American vehicle owners have experienced some form of damage to their parked cars, with many of those marks being surface-level scratches from everyday causes like branches, debris, and poor washing habits, according to Major League Detailing on repairable surface scratches.
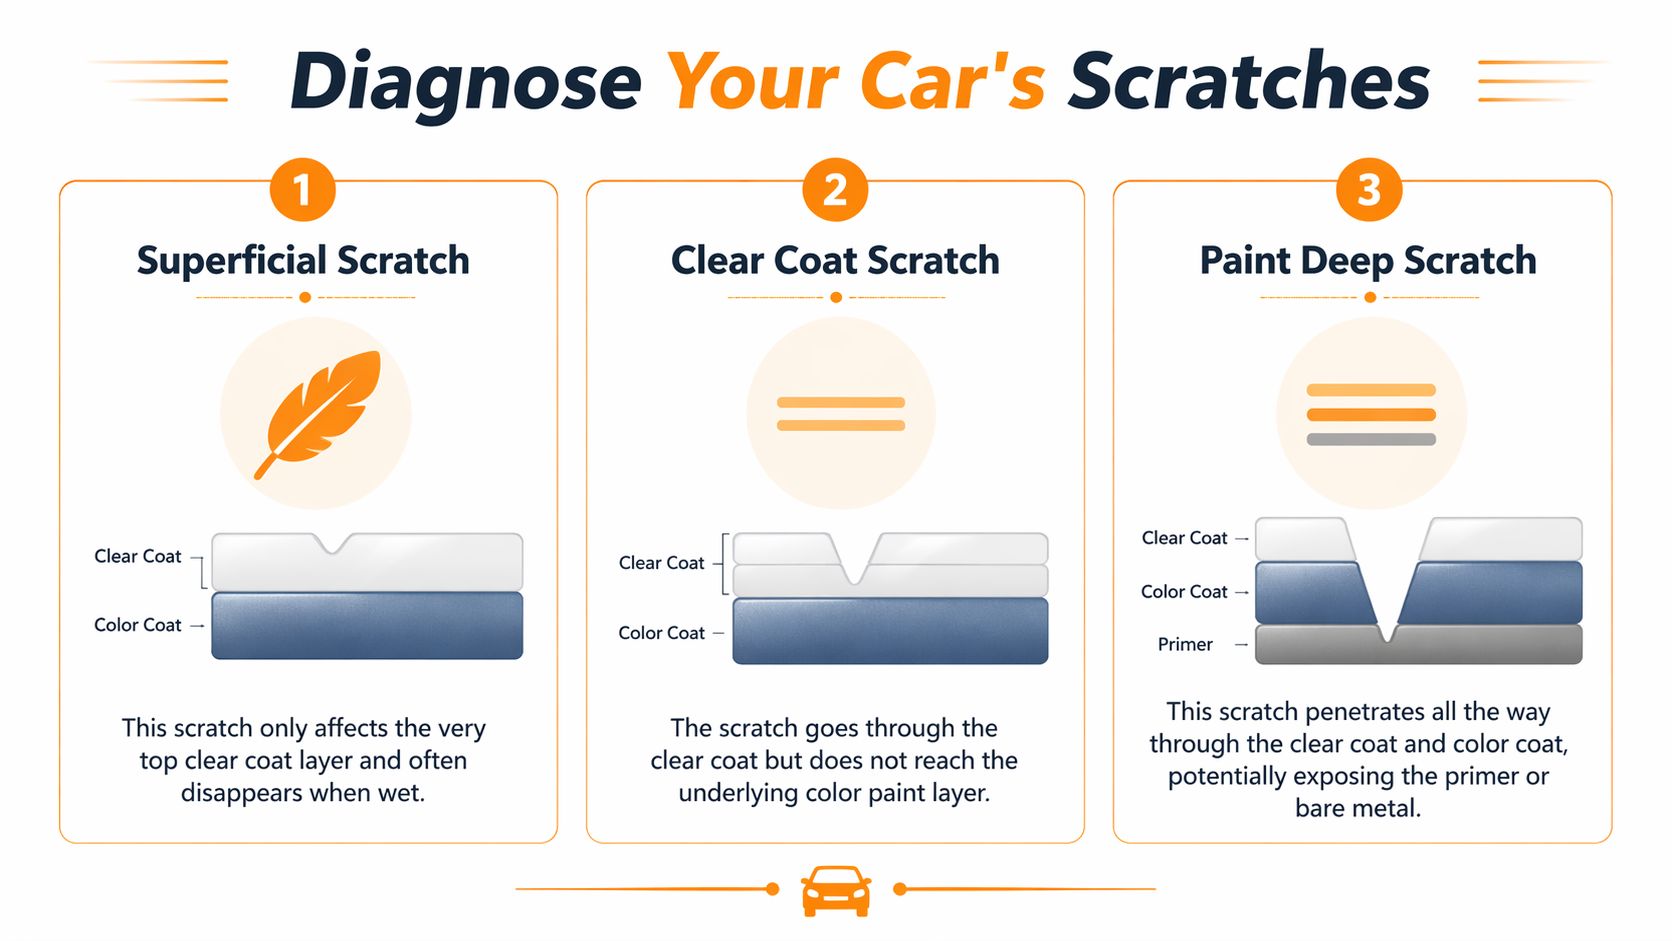
Use the fingernail test first
Run a clean fingernail lightly across the mark.
If your nail doesn't catch, you're usually dealing with a light defect in the upper clear coat. These are the scratches that often fade when the panel is wet and respond well to polishing.
If your nail catches slightly, the scratch is more serious. It may still be in the clear coat, but you're closer to the limit where machine correction needs to be more deliberate.
If your nail catches firmly or you can see a different color underneath, stop thinking about buffing. You're likely into the base coat, primer, or worse.
Practical rule: If the scratch fades when wet and your fingernail glides over it, that's usually your green light for DIY correction.
Check it dry, wet, and in different light
One of the easiest mistakes is inspecting the scratch only once. Look at it in shade, then after a light mist of water, then under stronger directional light if you have it.
That quick sequence tells you a lot:
- Dry and obvious, wet and reduced: usually a clear coat issue
- Dry and obvious, wet and unchanged: often deeper than it first looked
- Visible only at certain angles: often a swirl or shallow marring problem rather than a true gouge
Dark paint makes all of this harder because it shows every defect. If you're working on black paint, this guide on how to remove scratches from black car paint helps you think about visibility, not just depth.
Three scratch levels that matter in the garage
| Scratch type | What it looks like | DIY outlook |
|---|---|---|
| Superficial scratch | Light mark, often fades when wet, nail doesn't catch | Good candidate for hand polish or light machine work |
| Clear coat scratch | More defined line, may catch the nail slightly | Often correctable, but needs better technique and pad/product choice |
| Paint deep scratch | Color change, primer showing, strong nail catch | Not a buffing job |
Most frustration starts with bad classification. People attack a deep scratch with polish and wonder why nothing happens. Or they attack a light mark too aggressively and remove more clear coat than needed. Diagnosis is the part that saves paint.
Assembling Your Scratch Removal Toolkit
The auto parts aisle makes this look more confusing than it is. You don't need every bottle on the shelf. You need a small kit that matches the type of defect and keeps the surface clean while you work.
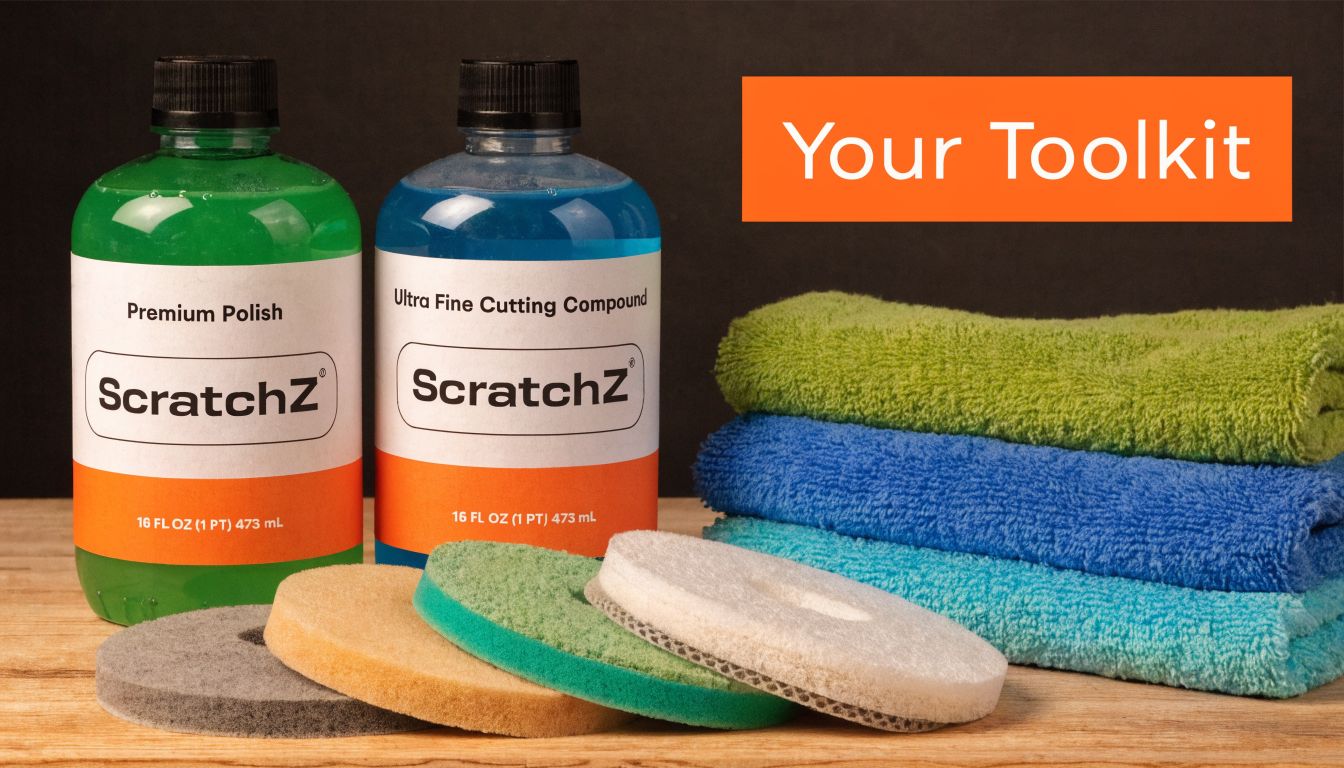
The products that actually do the correction
A cutting compound removes material faster. That's what you reach for when the scratch is visible and you need leveling power.
A finishing polish refines what the compound leaves behind. It restores gloss and clarity so the area doesn't look dull or hazy.
You also need to decide whether you're correcting by hand or with a machine. For small, isolated marks, hand application can work. For broader defects or better consistency, a DA polisher is the smarter tool. If you're comparing options, this breakdown of a car buffer polisher is worth reading before you buy.
Pads, towels, and prep tools
The pad matters as much as the liquid.
- Firm cutting pad: Use this with compound when the scratch needs actual correction.
- Medium polishing pad: Follow with this to refine the area.
- Microfiber towels: Use plush, clean towels for wipe-off. A dirty towel can undo your work fast.
- Clay bar or clay mitt: This removes bonded contamination that washing leaves behind.
- Automotive tape: Good for protecting trim, badges, and sharp edges.
Dirty tools don't just lower results. They create new defects that look a lot like the original problem.
The missing piece in most scratch-removal kits
Most guides focus on compounds and pads. They skip the part that determines whether your first pass helps or harms the finish.
A frequent gap in scratch-removal advice is contamination control. SoapyShark notes that many guides overlook “scratch-within-scratch” scenarios, where leftover grit gets dragged through the panel during correction. The same source also states that pre-buff foaming with thick, clinging foam lifts embedded contamination more safely, and links that risk to a 30% rise in home DA polisher sales in the DIY market in its discussion of buffing prep at SoapyShark's guide to buffing out scratches.
That matters because scratch correction is controlled abrasion. If you leave grit on the paint, your compound and pad stop being precision tools and start acting like sandpaper with debris mixed in.
A practical shopping list
If you want a clean, usable setup, start here:
- Wash supplies: pH-balanced car shampoo, wash mitt, drying towel
- Decontamination: clay bar or clay mitt with lubricant
- Correction liquids: one cutting compound, one finishing polish
- Machine path: DA polisher, cutting pad, polishing pad
- Hand path: foam or microfiber applicator pads
- Inspection items: good lighting, masking tape, several clean microfiber towels
Keep the kit tight. The person with three good pads and clean towels usually gets better results than the person with ten random bottles and no process.
The Complete Car Scratch Buffing Process
Buffing scratches out of car paint isn't one action. It's a sequence. The biggest gains come from doing each stage cleanly, especially the prep.
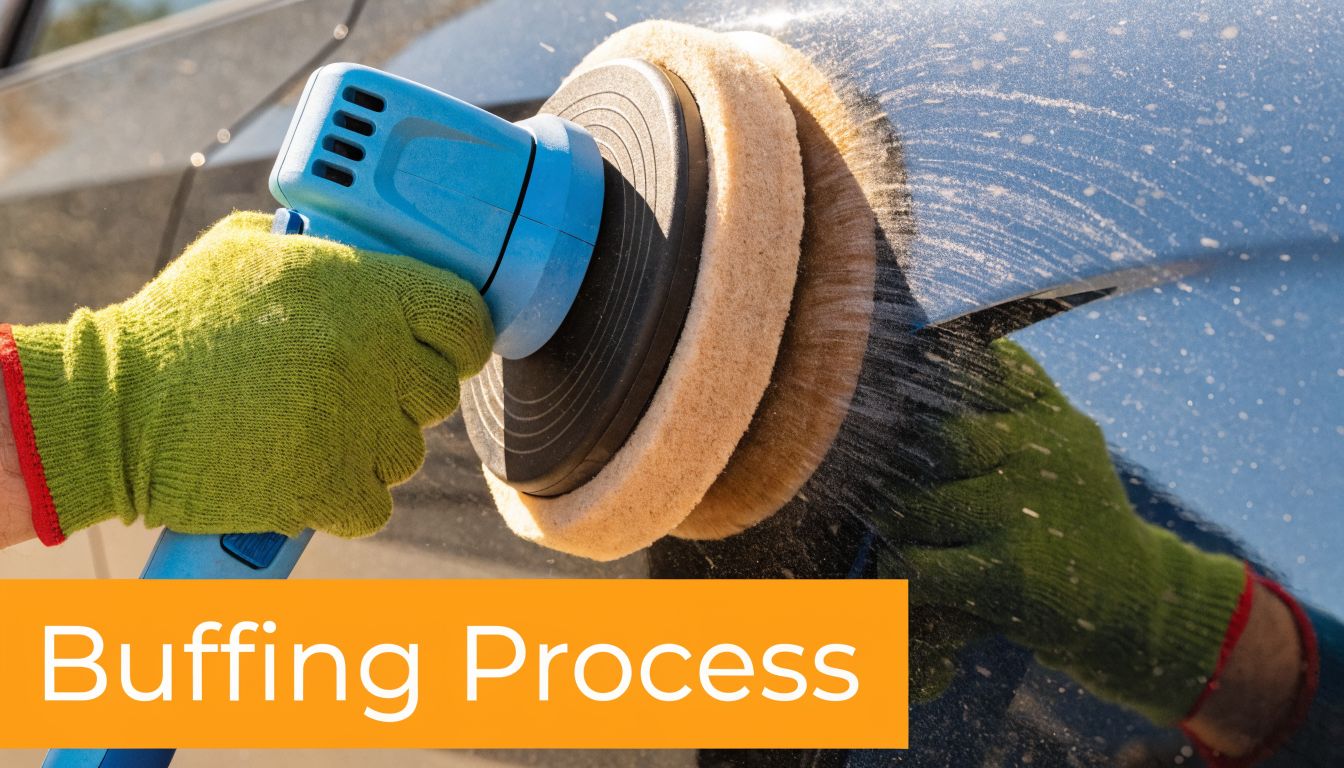
Start with a genuinely clean panel
Wash the vehicle thoroughly before you inspect or polish anything. Don't rush this. The panel around the scratch has to be free of loose dirt, road film, and drying residue.
Then decontaminate it. For light clear coat scratches, Titan Coatings outlines a prep process that starts with washing and decontaminating with a clay bar, noting that claying removes 99% embedded contaminants before correction in its scratch-buffing process at Titan Coatings scratch removal methodology.
After claying, dry the panel and inspect it again. A surprising number of “scratches” are partly contamination trails or transfer marks that look worse before proper cleaning.
Tape edges and choose the least aggressive path
Tape off adjacent trim, textured plastic, badges, and sharp panel edges. Those areas grab product and are less forgiving.
Then pick your starting method based on the diagnosis:
- Very light mark: hand polish first
- Clear coat scratch with no firm nail catch: DA compound and polish
- More pronounced clear coat scratch: may need a stronger correction path
- Anything through the paint: don't buff it as if it's a surface defect
Start mild because you can always step up. You can't put removed clear coat back.
Hand correction for small, light defects
For isolated light scratches, hand work is still useful. Use a foam or microfiber applicator with a small amount of polish or light compound and work a tight area with steady, overlapping motion.
The key is control, not force.
- Clean and dry the section.
- Apply a small amount of product to the applicator.
- Work the scratch and the area immediately around it.
- Wipe with a clean microfiber towel.
- Reinspect in good light.
Hand correction is slower, but it lets you localize the repair. On a single shallow mark near a door handle or trunk lip, that's often the smartest move.
Machine correction for light clear coat scratches
This is the process most DIYers are really asking about when they want to buff scratches out of car paint.
For light clear coat scratches, expert methodology uses a dual-action polisher with a cutting compound and a firm foam, microfiber, or wool cutting pad, followed by a polishing step. Titan Coatings states this approach achieves 80-95% removal success rates on modern automotive clear coats, and it describes a test-spot method using 3 pea-sized drops of compound on a 2x2 ft section, a DA set at 4-6 speed, and a cross-hatch pattern for 2-3 passes, followed by wipe-off with a 300+ GSM edgeless microfiber towel in its process guide at this detailed buffing compound method for car scratches.
Here's how to apply that in practice.
Do a test spot before the whole panel
Don't chase the entire hood or door first. Pick the worst representative area and test your pad and product there.
Use the cutting pad and compound first. Spread the product over the section before increasing speed. Work in a cross-hatch pattern, side to side, then up and down. Let the machine do the work.
If the defect improves cleanly, keep going with that combination. If not, stop and reassess whether the scratch is too deep for this level of correction.
A test spot tells you two things. Whether the scratch is fixable, and whether your process is clean enough to avoid adding haze.
Refine the finish after compounding
Compounding levels defects, but it can leave a light haze or micro-marring. That's normal. Follow with a polishing compound on a medium polishing pad.
Use overlapping passes and reduce your pressure. You're not trying to cut anymore. You're restoring clarity and gloss so the repaired area blends into the surrounding paint.
This is also where many beginners either quit too early or overwork the panel. If the scratch is mostly gone and the finish is clean, move on.
A quick visual reference helps if you want to see machine movement and body position in action:
What to do with deeper clear coat scratches
Some scratches sit in the middle ground. They catch the fingernail slightly and stay visible wet or dry. Those often need more than a simple compound pass.
AutoZone's OEM-paint methodology describes a process for deeper clear coat scratches using wet-sanding with 3000-5000 grit, followed by compound, polish, and then a wax or SiO2 sealant. It reports 60-85% full correction rates while avoiding repaint when done properly, and notes a 25% burn-through risk from dry sanding on thin clear in its guide to removing deeper scratches from your car.
For most DIYers, this is the caution zone. Wet-sanding works, but only if you understand how fast material removal can escalate when pressure, lubrication, or sanding checks are inconsistent.
Final wipe and protection
Once correction is done, wipe the area with a clean microfiber towel and inspect it from multiple angles. Then protect it.
A wax or paint sealant helps the corrected section resist UV exposure and environmental grime, and it especially gives you a clearer read on the finish by reducing dry-looking haze after polishing.
Good scratch removal isn't just making the line smaller. It's leaving the panel looking normal again.
Common Mistakes and How To Avoid Them
Most failed scratch repairs don't fail because the product was wrong. They fail because the process was careless.
Mistake one is working dirty or working hot
A dirty panel loads the pad with grit. A hot panel makes product flash too quickly and wipe badly. Both problems make people push harder, and that usually creates more marring.
Work in the shade if you can. Make sure the paint feels cool to the touch. Change or clean pads before they get caked with spent product.
If you're building a better maintenance routine around correction and prevention, Pete Nelson Automotive has a useful checklist on essential steps to prepare your car for seasonal changes. Seasonal grime, pollen, and winter residue all affect how safely you can polish.
Too much pressure ruins good technique
A DA polisher is forgiving, but it isn't idiot-proof. Beginners often lean on the machine because they think more pressure means more cut.
It usually means heat, pad stall, and uneven results.
Use enough pressure to keep the pad planted. Then let the machine and abrasive do the correction. If the scratch isn't improving, don't muscle through it. Reassess the defect, the pad, or the product.
The invisible scratch problem
Some scratches only show up in sunlight or at a low angle. Those are often the most frustrating because they disappear in the garage and come back outside.
Custom Paint Forum specifically calls out angle-specific or “invisible” scratches visible only under direct sunlight, and warns that over-polishing can worsen them by inducing haze, causing a 15-20% drop in gloss if more than 3 passes are made without a sealant in its discussion of sunlight-only scratch visibility.
That changes how you inspect.
- Use directional light: Check with sunlight or a focused inspection light, not just garage overheads.
- Count your passes: If you've already made several clean passes, more polishing may lower clarity instead of improving it.
- Seal after correction: A protected finish reads more accurately than a dry, overworked panel.
If a scratch only appears at one angle, don't assume it needs more aggression. It may need better refinement.
When to Call a Professional Detailer
DIY correction makes sense when the scratch lives in the clear coat and responds to the least aggressive method. It stops making sense when the defect is too deep, too broad, or too close to the edge of what the paint can safely give up.
If your fingernail catches firmly, if you can see primer, or if bare metal is exposed, put the buffer down. Buffing won't rebuild missing paint. It can widen the damaged area and make the repair more complicated.
There's also a practical market reality here. The decision between DIY and professional repair often comes down to scratch severity and budget, but severe damage pushes many owners toward the pro route. That's not a niche problem either. Approximately 44% of vehicle owners report their parked cars sustaining large scrapes or dents, which helps explain why both DIY products and professional correction services stay busy, as noted in All Things Fresh Car Detailing's discussion of scratch repair choices.
Signs the job has moved past DIY
- Color transfer is gone but the line remains: likely deeper than a polish-only fix
- The scratch has sharp edges or exposed substrate: needs paint repair, not just correction
- It's on a body line or near an edge: those areas are riskier to compound aggressively
- You've improved it, then stalled out: a pro may be able to reduce it further with better tools and paint-depth judgment
A good detailer or body shop doesn't just chase the defect. They decide whether the best result comes from polishing, wet-sanding, touch-up, or refinishing. That's where their value lies. Knowing when not to polish is part of professional skill.
Frequently Asked Questions About Scratch Removal
Can you buff scratches out of car paint by hand?
Yes, for light defects and small areas. Hand work is slower and less consistent than a DA polisher, but it gives you good control on isolated scratches. If the mark needs broader leveling, machine polishing usually delivers a cleaner result.
Do car detailing services actually remove scratches?
Sometimes yes, sometimes no. It depends on scratch depth, paint condition, and how much clear coat is available to correct safely. If you want a plain-English breakdown of that distinction, Does car detailing remove scratches gives a useful overview of what detailing can and can't fix.
Are black cars harder to correct?
Yes. Black paint doesn't necessarily scratch more easily, but it shows every defect, haze trail, and wipe mark. That means cleaner towels, cleaner pads, and better inspection matter more.
Should you wax or seal the area after buffing?
Yes. A corrected panel should be protected after polishing. A wax or sealant helps preserve gloss and makes the finish easier to maintain.
Can you buff scratches out of matte paint?
Don't treat matte paint like gloss paint. Traditional polishing changes the look of a matte surface, which defeats the finish. If the vehicle has matte paint, use products and methods designed specifically for matte care.
How often is it safe to polish a car?
Only when the paint needs correction. Polishing removes a small amount of clear coat, so it shouldn't be a routine reflex. Correct defects selectively, then focus on washing and drying in ways that prevent new marring.
If you want to prevent new wash-induced scratches before you ever reach for compound, a foam-first wash setup helps a lot. The SwiftJet foam gun connects to a standard garden hose and lays down thick foam that loosens grime before contact washing, which makes scratch prevention easier for daily drivers, trucks, and RVs alike.
