
Unlock a Spotless Interior: Your Guide Starts Here
A clean car interior contributes to a healthier, more enjoyable driving experience. This guide delivers essential car interior cleaning tips to transform your vehicle. You'll discover 7 straightforward yet effective techniques, from the crucial vacuum-first rule and microfiber cloth system to deep sanitization with steam cleaning and specialized leather care. Learn the top-down cleaning method, dashboard restoration, and professional odor elimination to achieve and maintain a pristine vehicle, making every journey more pleasant. These methods will help you tackle dust, grime, and hidden germs efficiently.
1. The Vacuum-First Rule
When embarking on the mission to restore your car's interior, the undisputed champion of starting steps is The Vacuum-First Rule. This foundational principle in car interior cleaning tips dictates that before any liquid cleaners, conditioners, or protectants touch your car’s surfaces, a thorough vacuuming session is paramount. Its core purpose is to meticulously remove all loose dirt, dust, crumbs, pet hair, and other debris from every nook and cranny. Skipping this crucial stage is akin to painting a dirty wall – you’ll achieve a gritty, subpar finish, and worse, risk scratching delicate interior surfaces.

The logic is simple: your car's interior collects vast amounts of particulate matter. If you apply liquid cleaners or even a damp cloth before vacuuming, these loose particles can become abrasive, potentially scratching plastics, leather, and screens. They can also mix with cleaning solutions to form a muddy paste, smearing grime rather than removing it effectively. This is why the Vacuum-First Rule is universally recognized as the cornerstone of car interior cleaning tips, ensuring all subsequent efforts yield superior results and making it deserving of the top spot on our list.
Core Features & Their Impact Adherence to this rule is built on key features that deliver significant benefits:
- Its primary function is to remove loose debris, thereby preventing scratching. This protects the aesthetic and integrity of dashboards, seats, and trim.
- Vacuuming prepares surfaces for effective cleaning. With loose grime gone, cleaners directly attack embedded dirt and stains for a deeper clean.
- The method inherently involves reaching into cracks and crevices. Using attachments ensures that often-neglected areas like seat tracks and console gaps are cleared of buildup.
- Crucially, it works on all interior surfaces, from carpets and upholstery to hard plastics and leather, making it a universal first step.
The Clear Advantages (Pros) Starting with a thorough vacuum offers distinct upsides:
- It prevents dirt from becoming muddy paste when wet cleaners are introduced, keeping the process cleaner.
- This, in turn, extends the life of cleaning products and applicators like microfiber towels, as they encounter less loose soil.
- Most importantly, it significantly reduces the risk of surface damage by eliminating abrasive particles before they can be dragged across finishes.
- Consequently, all subsequent cleaning becomes more effective and efficient, as cleaners target true grime, saving time and effort.
Acknowledging Potential Drawbacks (Cons) While indispensable, some practicalities to consider include:
- The need for multiple vacuum attachments (crevice tool, upholstery brush, soft dusting brush) for comprehensive cleaning.
- Thorough coverage can be time-consuming, as meticulous vacuuming of every surface requires patience.
- For deeply embedded debris like stubborn pet hair or ground-in dirt, a standard household vacuum might be insufficient, potentially necessitating a more powerful vacuum like a shop vac. Even with these considerations, the investment in thorough vacuuming consistently pays off.
Actionable Tips for Mastering the Vacuum-First Rule Apply these car interior cleaning tips for a superior vacuuming stage:
- Equip Yourself: Gather a crevice tool (for tight spaces like seat tracks), an upholstery brush (seats, carpets), and a soft dusting brush (delicate surfaces, vents).
- Top-Down Strategy: Work from highest to lowest (headliner gently, then dashboard, door panels, seats, finally carpets) so dislodged dirt falls onto uncleaned areas.
- Floor Mat Focus: Remove all floor mats. Shake/beat them (gently for carpeted ones) and vacuum thoroughly outside the car, also cleaning the carpet beneath.
- Seat Accessibility: Slide front seats fully forward, then back, to meticulously vacuum underneath and around seat tracks.
- Target Hidden Dirt: Use the crevice tool diligently in seat seams, around the gear shifter, cup holders, door pockets, and trim edges.
- Clear Air Vents: Employ a soft brush attachment to suck dust out of air vents.
- Include Cargo Space: Don't forget the trunk or cargo area.
- Thoroughness Over Speed: Multiple, slow, overlapping vacuum passes are more effective than a single quick one.
Industry Endorsement and Popularization The Vacuum-First Rule is standard practice in professional auto care. Professional detailers universally begin with exhaustive vacuuming, as do reputable car wash services offering interior cleaning. Automotive manufacturers also often recommend this sequence. The rule's prevalence is championed by the professional auto detailing industry, with organizations like the International Detailing Association (IDA) embedding it in their standards. Training programs, such as those by Chemical Guys, consistently stress this "vacuum first" mantra, educating enthusiasts and professionals alike.
When and Why This Rule Always Comes First The "when" for the Vacuum-First Rule is simple: always. It's the non-negotiable first step in any car interior cleaning, from touch-ups to deep cleans. The "why" is equally compelling: it primarily prevents damage by removing abrasive particles. It ensures cleaners work effectively on true grime, often reducing product use, and stops dirt from creating a muddy mess with liquids. This foundational step ensures a cleaner, professional-looking interior, preserving your vehicle's condition and making it a vital part of any car interior cleaning tips.
2. Microfiber Cloth System
When it comes to achieving a truly professional and hygienic clean for your car's interior, one of the most impactful car interior cleaning tips you can adopt is the Microfiber Cloth System. This isn't just about grabbing any old rag; it's a systematic approach used by professional detailers and discerning car enthusiasts to ensure pristine results without risking damage or cross-contamination. By designating different colored microfiber cloths for specific areas within your vehicle, you elevate your cleaning game significantly, transforming a mundane chore into a precise and effective maintenance routine.
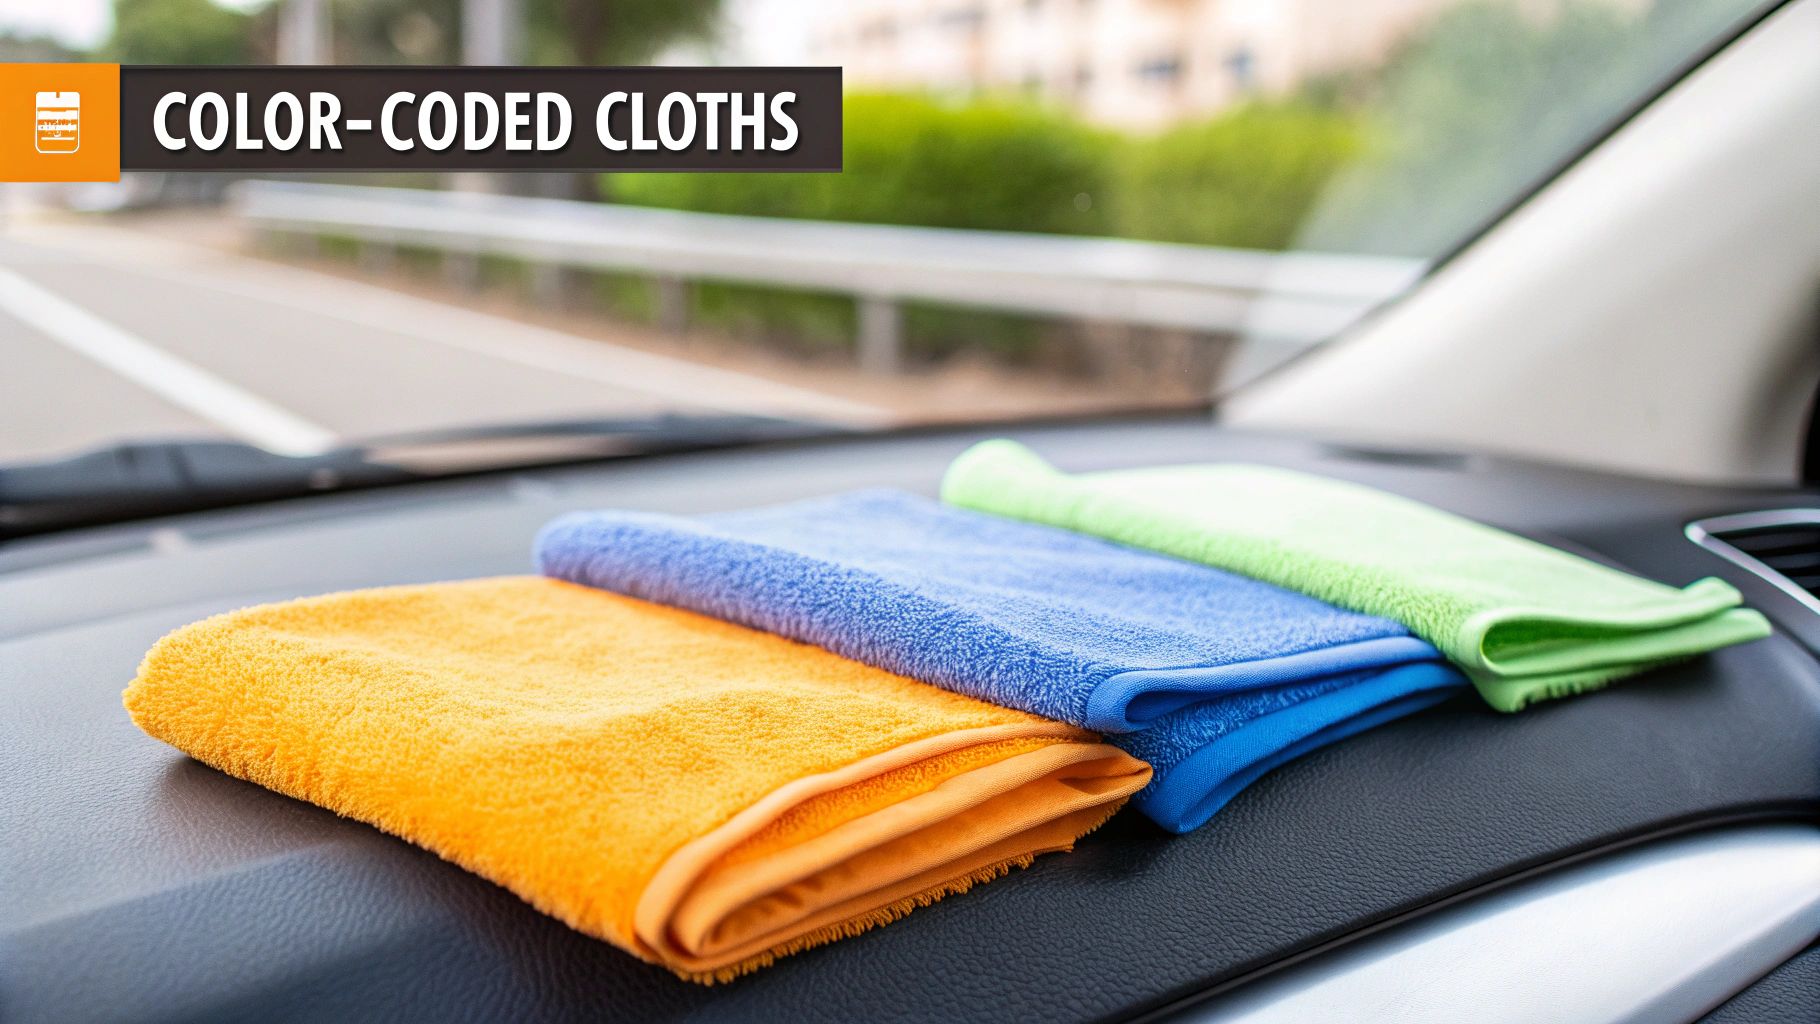
The core principle of a microfiber cloth system is brilliantly simple yet profoundly effective: assign specific tasks to specific cloths, identified by their color. For example, you might use a blue cloth exclusively for glass and mirrors, a yellow one for the dashboard and plastic trim, and a green one for leather or fabric seats. This meticulous organization is paramount in preventing cross-contamination – the unintentional transfer of dirt, grime, oils, and cleaning chemicals from one surface to another. Imagine wiping down your greasy door jambs or dusty pedals, then using that same cloth on your delicate infotainment screen or leather upholstery. You’d inadvertently transfer abrasive grit and residues, potentially scratching sensitive surfaces or leaving unsightly streaks. Worse, you could spread bacteria from high-touch, heavily soiled areas like the steering wheel or gear shifter to cleaner surfaces. The color-coded system acts as a visual safeguard, ensuring that the cloth used for the dirtiest jobs, like cleaning floor mats or door sills, never comes into contact with the dashboard or windows. This dedication to hygiene is one of the cornerstone car interior cleaning tips for maintaining a fresh and healthy environment inside your vehicle, especially crucial for families, pet owners, or anyone sensitive to allergens.
The benefits of implementing a microfiber cloth system extend far beyond just organization. Microfiber technology itself offers distinct advantages, making these cloths superior cleaning tools:
- Color-Coded Organization System: This visual cue system is the heart of the method. It simplifies your workflow, making it easy to grab the right tool for the job without second-guessing. This systematic approach is a key reason why professional car interior cleaning tips often emphasize dedicated tools.
- Superior Dirt and Liquid Absorption: Microfiber cloths are made from incredibly fine synthetic fibers, often a blend of polyester and polyamide. These fibers are split, creating a vast surface area and a positive charge that attracts and traps negatively charged dust particles like a magnet. They can absorb up to seven times their weight in liquid, making them far more effective than cotton rags or paper towels for spills and general cleaning.
- Lint-Free Cleaning Performance: One of the biggest frustrations with interior cleaning is leaving behind lint, especially on glass and glossy surfaces. High-quality microfiber cloths are virtually lint-free, ensuring a streak-free, crystal-clear finish on windows, mirrors, and touchscreens.
- Reusable and Washable: Unlike disposable paper towels, microfiber cloths are designed for longevity. They can be washed and reused hundreds of times, making them an environmentally friendly and cost-effective long-term solution. This reusability is a practical aspect of many effective car interior cleaning tips.
- Prevents Cross-Contamination: As highlighted, this is a primary benefit. By isolating contaminants to specific cloths, you maintain the integrity of cleaner surfaces and prevent the spread of grime and germs.
- More Effective Than Paper Towels or Rags: Due to their unique fiber structure, microfiber cloths clean more deeply. They don't just push dirt around; they lift and trap it within the fibers until laundered.
- Doesn’t Scratch Delicate Surfaces: The ultra-soft, fine fibers are gentle on even the most delicate interior surfaces like piano black trim, navigation screens, and clear plastic instrument cluster covers. When used correctly (i.e., not rubbing in heavy, abrasive dirt), they polish and clean without causing micro-scratches.
- Cost-Effective Long-Term Solution: While the initial outlay for a set of quality microfiber cloths might be higher than a pack of cotton rags or paper towels, their durability and reusability make them far more economical over time.
The microfiber cloth system isn't just for occasional deep cleans; it's a best practice to incorporate into every car interior cleaning session. Whether you're doing a quick touch-up, a weekly wipe-down, or a comprehensive detailing job, using designated cloths will consistently yield better results.
You should adopt this approach because it fundamentally improves the quality and safety of your cleaning process. It’s essential for:
- Maintaining Vehicle Value: A clean, well-maintained interior is a significant factor in a car's resale value. Preventing scratches and preserving the original finish of surfaces contributes directly to this.
- Ensuring Hygiene: For families with young children who might touch various surfaces and then their mouths, or for anyone concerned about germs, a color-coded system helps minimize the spread of bacteria. This is one of the most practical car interior cleaning tips for health-conscious individuals.
- Protecting Delicate Materials: Modern car interiors feature a variety of sensitive materials, from soft-touch plastics and leather to high-gloss trims and electronic screens. Using dedicated, clean microfiber cloths is the best way to care for them without causing accidental damage.
- Achieving Professional Results: If you take pride in your vehicle and want that showroom shine, this system is a non-negotiable. It's what the pros use because it works, ensuring every surface is treated appropriately.
This system is particularly beneficial for RV travelers and campers who deal with diverse cleaning needs in a compact living space, and for professional detailers who need efficiency and guaranteed results for their clients. Even for the everyday driver, implementing this simple strategy can transform their approach to car care.
To get the most out of your microfiber cloth system, consider these practical car interior cleaning tips:
-
Establish a Clear Color Code: While there's no universal standard, a common and intuitive system is:
- Blue: Glass and mirrors (due to its association with window cleaners).
- Yellow: Dashboard, plastic trim, vinyl, and general interior surfaces.
- Green: Leather and fabric upholstery (can be used with specific cleaners for these materials).
- Red/Orange: Heavily soiled areas like door jambs, sills, pedals.
- White/Grey: Applying protectants or final buffing. The key is consistency. Choose a system that makes sense to you and stick with it.
- Proper Washing is Crucial: To maintain their effectiveness, microfiber cloths need specific care. Wash them separately from other laundry, especially cotton items that can shed lint and clog the microfibers. Use a dedicated microfiber detergent or a mild liquid detergent without dyes or perfumes. Crucially, never use fabric softener or dryer sheets, as these products coat the fibers and drastically reduce their absorbency and cleaning power. Air dry them or tumble dry on a low heat setting.
- Separate Storage for Clean and Dirty Cloths: Keep your clean microfiber cloths in a sealed bag or container to prevent them from collecting dust. Have a designated laundry bag or bin for used cloths to avoid cross-contamination before washing.
- Know When to Replace Them: Over time and many washes, microfiber cloths will eventually wear out. If a cloth starts to feel rough, snags easily, loses its absorbency, or consistently leaves streaks even after proper washing, it's time to replace it.
- Choose Quality Cloths: Not all microfiber is created equal. Look for cloths with a high GSM (grams per square meter) for plushness and absorbency, and ensure they have a good blend of polyester and polyamide. For those serious about their vehicle's upkeep, investing in a quality set is a wise decision. To explore a comprehensive list of essential detailing tools, including various microfiber options, you can Learn more about Microfiber Cloth System.
The efficacy of the color-coded microfiber cloth system isn't just theoretical; it's a proven methodology embraced across the automotive care industry. Professional detailers worldwide rely on this system daily to deliver flawless results and maintain efficiency. You'll see it in action at high-end auto detailing chains like Zips Car Wash, where strict protocols for cleanliness and surface protection are paramount. Luxury car dealerships also frequently employ this system within their service and detailing departments to ensure customer vehicles are returned in impeccable condition. The widespread adoption of this technique has been championed by leading names in car care education like Meguiar's and Griot's Garage, and supported by standards from the Professional Detailing Association. This broad endorsement underscores its importance as one of the fundamental car interior cleaning tips for anyone serious about vehicle care.
While the microfiber cloth system is overwhelmingly beneficial, it's fair to acknowledge a few considerations:
- Initial Investment: Acquiring a comprehensive set of different colored, high-quality microfiber cloths does represent an initial investment. However, this is offset by their durability and long-term savings.
- Requires Proper Washing and Maintenance: They need specific laundering care – separate washing, no fabric softener, and low-heat drying. This is a small but necessary step for optimal performance.
- Can Retain Odors if Not Cleaned Properly: If heavily soiled cloths are left unwashed or laundered incorrectly, they can retain odors. Prompt, correct washing mitigates this.
Despite these minor points, the advantages of preventing cross-contamination, achieving a lint-free and scratch-free clean, and the overall effectiveness make the microfiber cloth system an indispensable part of any effective car interior cleaning regimen.
3. Top-Down Cleaning Method
If you're searching for game-changing car interior cleaning tips that professionals swear by, look no further than the Top-Down Cleaning Method. This systematic approach is a cornerstone of efficient and effective vehicle detailing, utilized by everyone from high-end detailing shops to meticulous DIY auto care enthusiasts. Its brilliance lies in a simple, undeniable force: gravity.
The Top-Down Cleaning Method dictates that you begin cleaning your car's interior from the highest point – typically the headliner – and systematically work your way down to the lowest point, the floor mats and carpets. As you clean surfaces like the headliner, sun visors, interior pillars, and even the tops of your windows, any dislodged dust, debris, cleaning solution overspray, or grime will naturally fall onto surfaces that have not yet been cleaned. This gravity-assisted process is the key to its effectiveness, preventing the frustrating and time-consuming scenario of having to re-clean already pristine lower surfaces. Imagine spending time meticulously cleaning your dashboard, only to then agitate the headliner and watch a fresh sprinkle of dust undo your hard work. The Top-Down Method elegantly sidesteps this common pitfall, making it an indispensable part of any serious car interior cleaning regimen.
This method absolutely deserves its prominent place in any list of car interior cleaning tips because it fundamentally optimizes the cleaning process. It’s not just a suggestion; it's a professional detailing standard built on logic and efficiency. Key features of this approach include:
- Gravity-Assisted Cleaning Process: This is the core principle, ensuring dirt moves towards uncleaned areas.
- Systematic Approach to Interior Cleaning: It provides a clear, step-by-step order, ensuring no surface is overlooked.
- Prevents Re-contamination of Cleaned Surfaces: This avoids the "clean, then clean again" cycle.
- Professional Detailing Standard: Its adoption by pros speaks volumes about its effectiveness.
The benefits for anyone cleaning their vehicle, whether it's a daily driver, a cherished classic, or a spacious RV, are substantial:
- Maximizes Cleaning Efficiency: You work smarter, not harder, by letting gravity do some of the work for you.
- Prevents Double Work: Eliminates the need to go back over areas, saving valuable time and cleaning products.
- Ensures Comprehensive Coverage: Following a set order helps ensure every nook and cranny gets attention.
- Reduces Cleaning Time Overall: While it might seem meticulous, the prevention of re-cleaning ultimately speeds up the entire process.
You should employ the Top-Down Cleaning Method every single time you undertake a thorough cleaning of your car's interior. It's perfect for seasonal deep cleans, pre-sale detailing, or simply maintaining that new-car feel. For camping and RV travelers, this method is especially useful in larger interiors where dust and dirt can accumulate in many overhead compartments and surfaces. The "why" is straightforward: it’s the most logical, time-saving, and thorough way to achieve a spotless interior without wasted effort or cleaning supplies.
Here’s how to effectively implement the Top-Down Cleaning Method:
- Headliner, Sun Visors, and Pillars: Start at the very top. Headliners are often delicate, so use a gentle fabric cleaner or a specialized headliner cleaner. Lightly mist a clean microfiber towel (avoid spraying directly onto the headliner to prevent oversaturation and potential damage to adhesives) and gently wipe or blot the surface. Clean sun visors (checking material type first – usually vinyl or fabric) and the surrounding plastic or fabric pillar covers. Don't forget grab handles and dome light fixtures.
- Dashboard, Instrument Panel, and Center Console: Once the uppermost areas are done, move to the dashboard, steering wheel, instrument cluster, infotainment screen, and the entire center console, including cup holders and air vents. Use soft detailing brushes to dislodge dust from crevices and vents. Wipe surfaces with an appropriate interior cleaner and microfiber towels. For screens, use a dedicated screen cleaner. Applying a UV protectant to the dash can prevent fading and cracking, a valuable tip among car interior cleaning tips for long-term care.
- Seats and Door Panels: Next, address the seats (fabric, leather, or vinyl) and the interior door panels. Vacuum seats thoroughly using crevice and upholstery attachments. Treat stains on fabric seats with a spot cleaner or use a fabric shampoo for deeper cleaning. For leather, use a dedicated leather cleaner followed by a conditioner. Wipe down all surfaces of the door panels, including armrests, handles, switches, and speaker grilles.
- Floor Mats and Carpets: Finally, tackle the lowest surfaces. Remove all floor mats. Shake them out vigorously, then vacuum them. If they are rubber or all-weather mats, wash them with an appropriate cleaner and water, then allow them to dry completely. For carpeted mats, vacuum and spot-treat, or use a carpet extractor for a deeper clean. Thoroughly vacuum the vehicle's entire carpet, moving seats forward and backward to access all areas, including under the pedals.
The success of the Top-Down Cleaning Method is widely acknowledged. Professional detailing shops worldwide, as well as high-end services like Autobell, implement this sequence because it delivers consistent, high-quality results and optimizes their workflow. Even auto manufacturers often use similar top-down principles in their final quality control cleaning. Esteemed figures in the detailing world, such as Larry Kosilla of AMMO NYC, and franchise systems like DetailXPerts, advocate for this method, and it's a staple in automotive detailing textbooks and training programs.
Pros:
- Maximizes cleaning efficiency by working with gravity.
- Prevents re-cleaning and wasted effort.
- Ensures all surfaces are systematically addressed.
- Reduces overall time spent on interior detailing.
Cons:
- Requires discipline to maintain the sequence.
- May feel counterintuitive initially if you're used to tackling the dirtiest (often lowest) areas first.
- Overhead work, especially on the headliner in larger vehicles, can be physically demanding for some.
By understanding and consistently applying the Top-Down Cleaning Method, you can significantly elevate the quality and efficiency of your vehicle cleaning efforts. For those keen on mastering this and other foundational techniques, you can Learn more about Top-Down Cleaning Method and discover further insights for achieving professional results. This approach is a true game-changer, ensuring your car's interior is not just clean, but meticulously cared for from top to bottom.
4. Steam Cleaning for Deep Sanitization
When seeking top-tier car interior cleaning tips, steam cleaning emerges as a formidable solution for deep cleaning and sanitization. This method harnesses the power of high-temperature vapor to refresh your vehicle's cabin, eliminating grime, odors, and harmful microorganisms without harsh chemicals, making it a cornerstone of meticulous auto care.
What is Steam Cleaning and How Does It Work? Steam cleaning employs water heated beyond its boiling point (typically over 200°F / 93°C) to produce a "dry" steam with low moisture content. This superheated vapor is then precisely applied to various interior surfaces. The process is twofold: the intense heat instantly loosens and dissolves stubborn dirt, grease, and sticky residues by breaking down their molecular bonds. Simultaneously, this high temperature effectively sanitizes surfaces by killing bacteria, viruses, mold spores, and dust mites on contact. Because it primarily uses tap water, it’s an inherently chemical-free cleaning method, ideal for those seeking effective yet gentle car interior cleaning tips.
Why Steam Cleaning Shines: Key Features & Benefits Steam cleaning's prominence in car care stems from its impressive array of features and benefits:
- Chemical-Free Power: It cleans and sanitizes using only water, eliminating chemical residues and fumes, which is safer for occupants and materials.
- High-Temperature Sanitization: Achieves a level of hygiene often unmatched by traditional cleaners, effectively neutralizing 99.9% of common bacteria, allergens, and viruses. This is a huge plus for families and allergy sufferers.
- Versatile Application: Highly effective on fabric seats, carpets, floor mats, and headliners. It can also be carefully used on hard surfaces like dashboards and door panels.
- Molecular Odor Elimination: Penetrates deep into fibers to destroy odor-causing bacteria and molecules at their source, rather than just masking smells from pets, smoke, or food.
- Eco-Friendly & Safe: Kind to the environment by reducing chemical use and safe for children and pets due to the absence of harsh residues.
- Tackles Tough Stains: The heat and moisture work together to lift stubborn, set-in stains that other cleaning methods might leave behind.
When to Steam Clean Your Car's Interior This deep cleaning method is particularly beneficial in several situations:
- For a thorough sanitization after illness or to combat seasonal allergens.
- To eradicate stubborn stains from food, drinks, mud, or pet mishaps.
- When battling persistent odors from smoke, pets, or mildew.
- As part of a regular deep clean to maintain a pristine and healthy cabin environment.
- To refresh and sanitize a newly acquired used car. It's especially potent for fabric upholstery, carpets, and areas prone to spills or high traffic.
The Steam Cleaning Workflow: A Step-by-Step Guide
Effective steam cleaning isn't merely about applying steam; it's a systematic process. Proper preparation, application, and post-cleaning care are vital for achieving optimal results and safeguarding your car's interior. This methodical approach is a key takeaway for anyone looking to implement advanced car interior cleaning tips.
The infographic below outlines a straightforward three-step workflow for effectively steam cleaning your car's interior. It visually breaks down the process into manageable actions:
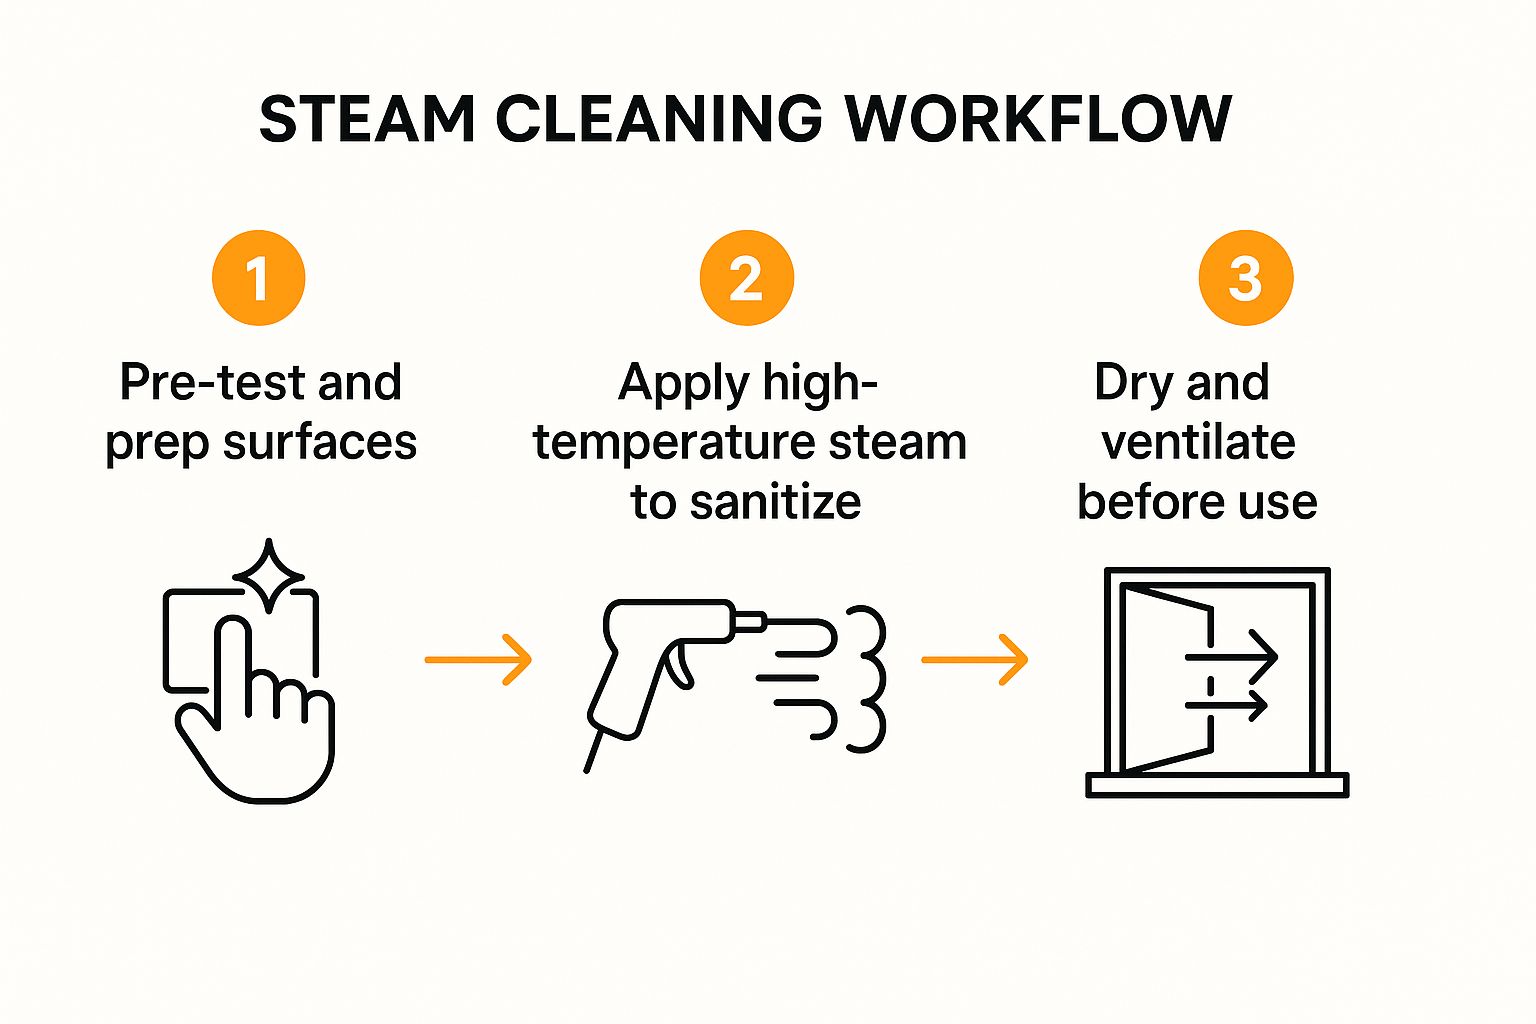 As the infographic illustrates, the key steps involve: Step 1: Pre-test and prep surfaces, which includes thorough vacuuming and testing steam on an inconspicuous area; Step 2: Apply high-temperature steam to sanitize, using appropriate attachments and techniques for different surfaces; and finally, Step 3: Dry and ventilate before use, ensuring the interior is completely dry to prevent mildew and odors. This visual underscores that the structured flow—from careful preparation through meticulous application to thorough drying—is crucial for harnessing the full sanitizing power of steam safely and effectively.
Actionable Tips for Best Results To leverage steam cleaning effectively, keep these tips in mind:
- Vacuum First: Always remove loose dirt and debris with a thorough vacuuming before steaming.
- Test Small: Perform a spot test on an inconspicuous area to check for colorfastness or adverse reactions.
- Use Correct Attachments: Employ nozzles, brushes, and fabric tools designed for specific surfaces to enhance cleaning and prevent damage.
- Keep Moving: Constantly move the steamer head to avoid over-saturating any single area, especially on fabrics and headliners.
- Wipe as You Go: Use a clean microfiber towel to wipe away the loosened dirt and moisture immediately after steaming a section.
- Ensure Thorough Drying: Ventilate the car well by opening doors/windows and use fans if possible. Complete drying is essential to prevent mildew.
Potential Drawbacks to Consider While highly effective, steam cleaning has a few considerations:
- Equipment Needed: Requires purchasing or renting a steam cleaner, representing an initial cost.
- Risk of Over-Wetting: Incorrect use can lead to excessive moisture, prolonging drying time or potentially damaging sensitive materials if not managed.
- Caution with Electronics: Avoid direct steam application on infotainment systems, electronic controls, and sensitive dashboard components.
Industry Adoption & Popular Brands The efficacy of steam cleaning is well-recognized. Luxury car dealerships utilize it for pre-delivery preparations, professional detailing services like Spiffy offer it for premium deep cleans, and rental car companies rely on it for sanitizing fleets between users. Its popularity has been fueled by reputable steam cleaner manufacturers such as Dupray and McCulloch, as well as by professional detailing equipment suppliers who advocate for its chemical-free power and deep cleaning capabilities. These examples underscore its value and effectiveness as one of the leading car interior cleaning tips.
Steam cleaning stands as a superior method for achieving a deeply cleaned and sanitized car interior. By understanding its principles and applying it correctly, you can significantly enhance the cleanliness and hygiene of your vehicle's cabin.
5. Leather Care Three-Step Process
For vehicle owners fortunate enough to have leather interiors, maintaining its luxurious look and feel is a top priority. Among the many car interior cleaning tips available, the Leather Care Three-Step Process—Clean, Condition, and Protect—stands out as a professional-grade methodology. This systematic approach is crucial not just for aesthetics, but for significantly extending the lifespan of your leather, ensuring it remains supple, comfortable, and free from unsightly damage. Neglecting leather can lead to dryness, cracking, and fading, diminishing both your driving pleasure and your vehicle's resale value.
Understanding the Three-Step Professional Approach
This comprehensive process addresses all aspects of leather degradation. It's more than just a quick wipe-down; it's a dedicated treatment designed to thoroughly care for a premium material. Here's how it works:
-
Step 1: Cleaning - The Foundation for Healthy Leather The first and most critical phase is cleaning. Over time, leather accumulates a surprising amount of dirt, body oils, sweat, food particles, and grime. These contaminants, if left unattended, can become abrasive, slowly wearing down the leather's surface. More importantly, they can clog the pores, preventing the leather from breathing and hindering the absorption of conditioners.
The key here is to use a pH-neutral leather cleaner. Leather is a natural material, and harsh, alkaline, or acidic cleaners (like all-purpose cleaners or dish soap) can strip its natural oils, dry it out, and even damage the finish. A pH-balanced formulation gently lifts dirt and oils without causing harm.
- How to Clean: Apply the cleaner to a microfiber towel or a soft horsehair brush (highly recommended for its ability to agitate dirt from the grain without scratching). Gently work the cleaner into the leather in small sections using circular motions. Avoid soaking the leather. For perforated leather, apply the cleaner to the towel/brush first, not directly onto the surface, to prevent clogging the holes. Wipe away the lifted dirt and residual cleaner with a clean, damp microfiber towel, and then dry with another clean, dry towel.
-
Step 2: Conditioning - Restoring Vital Moisture and Flexibility Once the leather is clean and free of contaminants, the next step is conditioning. Cleaning, even with a gentle product, can remove some of the leather's natural moisture. Conditioning replenishes these lost oils and emollients, restoring the leather's softness, flexibility, and rich feel. Think of it like moisturizing your own skin; it keeps the material hydrated and prevents it from becoming brittle.
A quality leather conditioner penetrates the pores, nourishing the fibers from within. This moisture restoration is vital for preventing the common issues of drying, cracking, and stiffness that can plague neglected leather.
- How to Condition: Apply a small amount of conditioner to a soft microfiber applicator pad or cloth. Gently massage it into the leather in thin, even coats using circular motions. It's better to apply two thin coats than one thick, gloopy one. Allow the conditioner to penetrate for the time recommended by the product manufacturer (often 15-30 minutes). Afterwards, buff off any excess conditioner with a clean, dry microfiber towel. The leather should feel soft and nourished, not greasy or sticky.
-
Step 3: Protecting - Guarding Against Future Damage The final step, protection, is often overlooked but is crucial for long-term preservation, especially in the harsh automotive environment. A leather protector or sealant creates an invisible barrier on the surface. This barrier helps to:
- Guard against UV Damage: Constant exposure to sunlight through car windows can cause leather to fade, dry out, and degrade. Many modern leather protectors contain UV inhibitors to significantly reduce this damage.
- Resist Stains and Spills: The protective layer gives you a window of opportunity to wipe up spills before they can soak in and cause permanent stains.
- Reduce Wear and Tear: It provides a sacrificial layer that takes the brunt of daily friction from getting in and out of the car, reducing wear on the leather itself.
- Make Future Cleaning Easier: Dirt and grime will sit on top of the protective layer rather than bonding directly with the leather, making subsequent cleaning quicker and more effective.
- How to Protect: After the conditioner has been fully absorbed and buffed, apply the leather protector according to the product's instructions. This usually involves spraying a light mist onto the surface and wiping it evenly with a clean microfiber towel, or applying it via an applicator. Allow it to dry completely.
Why This Method Deserves Its Place & When to Use It
This three-step process isn't just a random set of car interior cleaning tips; it's a scientifically-backed regimen endorsed by professionals and manufacturers. Luxury car brands like Mercedes-Benz often recommend a similar multi-step approach for maintaining their high-quality leather interiors. High-end detailing services universally employ this methodology because it delivers consistent, superior results. Even leather furniture manufacturers endorse similar techniques, highlighting the universal needs of this natural material.
This method is indispensable for:
- Preserving Suppleness and Appearance: It keeps leather looking and feeling new.
- Preventing Cracking and Fading: Addresses the root causes of leather degradation.
- Extending Leather Lifespan Significantly: Protects your investment.
- Maintaining Vehicle Resale Value: Well-maintained leather is a huge plus for potential buyers.
When to Use: For optimal results, this full three-step treatment should be performed every 3-4 months. However, frequency can vary based on usage, climate (hotter climates may require more frequent conditioning/protection), and how much direct sunlight the interior receives. The cleaning step might be needed more frequently for light-colored leather or high-traffic areas.
Features, Pros, and Cons
-
Features:
- Three-phase treatment system: Comprehensive care covering all needs.
- pH-balanced product formulations: Safe and gentle on delicate leather.
- UV protection components: Essential for preventing sun damage.
- Moisture restoration properties: Keeps leather soft and prevents cracking.
-
Pros:
- Extends leather lifespan significantly: The primary benefit, saving costly repairs or replacements.
- Maintains suppleness and appearance: Keeps leather looking and feeling luxurious.
- Prevents cracking and fading: Proactively addresses common leather issues.
- Preserves vehicle resale value: A well-cared-for interior commands a better price.
-
Cons:
- Requires multiple products and steps: You'll need a dedicated cleaner, conditioner, and protector.
- Time-intensive process: Proper application takes time and patience, but the results are worth the effort.
- Wrong products can damage leather: Crucial to select quality, leather-specific products. Avoid silicone-based products, which can create an artificial, greasy shine and seal the leather, preventing it from breathing and potentially drying it out over time.
- Regular maintenance required: This isn't a one-time fix; consistency is key.
Actionable Tips for Success
- Frequency: Clean and condition every 3-4 months. Protect at least twice a year, or with each conditioning.
- Tools: Use a soft horsehair brush for effective but gentle cleaning, especially on textured leather. Microfiber towels are essential for application and buffing.
- Application: Apply conditioners and protectors in thin, even coats.
- Product Choice: Opt for reputable brands known for quality leather care, such as Lexol, Chemical Guys, or products recommended by heritage brands like Connolly Leather (a historic supplier to luxury car manufacturers). These companies have popularized this systematic approach through their product lines and educational materials.
- Test Spot: Always test any new product on a small, inconspicuous area of the leather first to ensure compatibility and desired results.
Visualizing the Process
To see this three-step method in action and gain further insight into the techniques involved, check out this helpful video:
By adopting the Leather Care Three-Step Process, you're investing in the longevity, beauty, and value of your car's interior. It's a cornerstone of effective car interior cleaning tips for anyone with leather upholstery, transforming routine maintenance into a restorative treatment that yields lasting benefits. Whether you're a DIY auto care enthusiast, a professional detailer, or simply someone who appreciates a well-maintained vehicle, this method provides the ultimate care for your leather.
6. Dashboard and Plastic Restoration Technique
The dashboard, door panels, and various plastic trim pieces are defining elements of your car's interior landscape. Unfortunately, these surfaces are constantly battling the detrimental effects of UV radiation, extreme temperature shifts, and everyday wear and tear. Over time, this relentless exposure can leave them looking faded, discolored, brittle, and chalky, significantly detracting from your vehicle's overall appeal and comfort. The Dashboard and Plastic Restoration Technique is a vital component of any comprehensive list of car interior cleaning tips because it moves beyond mere surface cleaning to actively rejuvenate and protect these vulnerable components, breathing new life into an aging interior.
How This Restoration Process Revitalizes Your Interior
This isn't just about spraying on a shiny dressing; it's a methodical approach to restore and preserve. The process typically begins with a crucial deep cleaning stage. Specialized automotive interior cleaners or degreasing agents are used to meticulously remove embedded dirt, grime, body oils, and any remnants of old, failing protectants that can hinder the new product's effectiveness. This prepares a pristine surface, allowing the restoration products to bond correctly.
Once clean and dry, a dedicated plastic restoration product is applied. These advanced formulas are designed to penetrate the plastic's surface, replenishing lost plasticizers and oils that keep the material supple. Many contain conditioning agents, and some even include fine dye agents or pigment restorers that help bring back the original depth of color, particularly effective on faded black or grey plastics. The aim is to restore the material's original texture and hue, not just coat it. Following the restoration, a protective layer is established. High-quality restorers incorporate powerful UV blockers that act like sunscreen for your interior plastics, deflecting harmful rays that cause fading and degradation. Additionally, many of these products boast anti-static properties, which help to repel dust and keep surfaces cleaner for longer periods.
Key Features and Their Tangible Benefits
The effectiveness of this technique stems from its inherent features, which translate into significant benefits for your vehicle's interior:
- Multi-Step Restoration Process: This isn't a quick fix but a deliberate procedure involving cleaning, restoring, and protecting. This thoroughness ensures a more durable and visually appealing result compared to simple wipe-on dressings.
- UV-Blocking Protection: This is arguably one of the most crucial features. By forming a barrier against damaging ultraviolet rays, these products significantly slow down the aging process of plastics, preventing future fading, cracking, and brittleness. This protective quality is paramount for maintaining the integrity and appearance of your car interior elements.
- Color Restoration Capabilities: Modern restorers can dramatically revive the richness and depth of faded plastics. Dark trim pieces regain their deep, lustrous finish, and colored plastics look more vibrant, effectively turning back the clock on their appearance.
- Anti-Static Properties: A notable benefit is the reduction in dust accumulation. Treated surfaces resist attracting dust particles, meaning your dashboard and trim stay cleaner for extended periods, reducing the frequency of light dusting.
Collectively, these features lead to a dramatically improved interior appearance, making your car feel newer and more pleasant to be in. Beyond aesthetics, you gain robust protection against sun damage, extending the life of your interior components. The reduced dust attraction means less maintenance, and this entire approach is often a highly cost-effective alternative to replacing entire dashboard sections or trim pieces, which can be prohibitively expensive.
When and Why to Employ Dashboard and Plastic Restoration
Consider this technique if:
- Your dashboard or plastic trim looks faded, dull, or chalky: This is the most common reason and where restoration products shine.
- You want to enhance your vehicle's resale value: A well-maintained, rich-looking interior significantly boosts a car's appeal to potential buyers.
- As a preventative measure on new or well-maintained vehicles: Applying a protectant with UV blockers from the outset can keep your plastics looking new for years.
- You're seeking a budget-friendly interior refresh: Instead of costly replacements, restoration offers an affordable way to make a big visual impact.
Understanding the Pros and Cons
While highly effective, it's important to have realistic expectations:
-
Pros:
- Dramatically improves the aesthetic appeal of interior plastics.
- Provides essential protection against UV rays and premature aging.
- Reduces dust build-up, keeping the interior cleaner.
- Offers a significant cost saving compared to component replacement.
-
Cons:
- Results can vary depending on the type and condition of the plastic; very hard or porous plastics might respond differently.
- Some lower-quality products may leave a greasy or overly shiny residue if not applied correctly or if the product itself is subpar. Always opt for reputable brands.
- For severely damaged plastics (e.g., deep cracks, warping, physical breaks), this is a cosmetic improvement, not a structural repair.
- Regular reapplication (typically every 6-8 weeks, or per product instructions) is necessary to maintain the restored look and protective benefits.
Real-World Success Stories
The efficacy of dashboard and plastic restoration is widely recognized. Professional restorers frequently employ these techniques when working on classic car restorations, where preserving original components is key, and plastics are often brittle and faded. Used car dealers routinely use these methods as part of their lot preparation, understanding that a rejuvenated interior can significantly enhance a vehicle's marketability and perceived value. Furthermore, many auto detailing franchises offer dashboard and plastic restoration as a premium service, highlighting its value and the professional results that can be achieved.
Actionable Tips for Optimal Results
To achieve the best outcome when applying these car interior cleaning tips to your plastics, follow these steps:
- Start with a Deep Clean: Always begin by thoroughly cleaning the plastic surfaces with a dedicated interior cleaner or a degreasing agent suitable for automotive plastics. Use a soft detailing brush to gently lift dirt from textured areas and crevices. This ensures the restoration product can properly bond and penetrate without sealing in grime.
- Choose the Right Applicator: A microfiber or foam applicator pad is ideal. These distribute the product evenly without leaving lint or causing scratches. Apply a small amount of the restorer to the applicator rather than directly onto the plastic to avoid oversaturation and potential streaking.
- Apply Evenly and Work in Sections: Address one manageable section at a time, applying the product in thin, even coats. Overlap your strokes slightly to ensure uniform coverage. Avoid using too much product, as this can lead to a greasy finish and waste product.
- Buff to Your Desired Sheen: Allow the product to penetrate for the duration specified on its label (usually a few minutes). Then, take a clean, dry microfiber towel and buff the treated area. This crucial step removes any excess product and allows you to achieve the desired finish, whether it's a subtle matte look or a richer satin sheen.
- Maintain with Regular Reapplication: For enduring protection and appearance, plan to reapply the product every 6-8 weeks, or as directed by the manufacturer. Consistent reapplication is key to fighting off UV damage and maintaining that fresh, restored look.
Pioneering companies such as Mothers Polish company, 303 Products (famous for their 303 Aerospace Protectant), and Adam's Polishes (with their versatile VRT - Vinyl, Rubber, Tire dressing) have been at the forefront of developing and popularizing these advanced solutions, making professional-grade results accessible to both DIY enthusiasts and seasoned detailers.
By incorporating dashboard and plastic restoration into your car care routine, you're not just cleaning; you're actively preserving and enhancing a significant part of your vehicle's interior. For those interested in exploring related professional detailing approaches, you can Learn more about Dashboard and Plastic Restoration Technique and other efficient methods. This technique truly elevates your car interior cleaning tips from basic maintenance to comprehensive care.
7. Odor Elimination with Ozone Treatment
Persistent, lingering odors in your vehicle can turn even the most luxurious ride into an unpleasant experience. While many car interior cleaning tips focus on surface cleaning and pleasant-smelling air fresheners, some smells are so deeply embedded that they require a more powerful, specialized approach. Enter ozone treatment – a professional-grade solution designed to eradicate odors at their molecular source, rather than simply masking them. If you're battling stubborn smells from smoke, pets, food spills, or mildew, understanding ozone treatment can be a game-changer for achieving a truly fresh and clean car interior.
What is Ozone Treatment and How Does It Work?
Ozone (O₃) is a naturally occurring molecule composed of three oxygen atoms. You might recognize its clean, sharp scent after a thunderstorm – lightning is one natural way ozone is produced. In the context of car cleaning, ozone treatment utilizes a specialized machine called an ozone generator. This device takes regular oxygen (O₂) from the ambient air inside your car and, typically through a process of corona discharge (an electrical charge) or ultraviolet light, converts it into ozone (O₃).
The magic of ozone lies in its instability and high reactivity. The third oxygen atom in an O₃ molecule is loosely bound, making it eager to detach and react with other nearby molecules, including the volatile organic compounds (VOCs) that cause unpleasant odors. When ozone molecules come into contact with odor-causing particles – such as bacteria, mold spores, smoke residue, or chemical compounds from spilled food – an oxidation reaction occurs. During this process, the extra oxygen atom breaks off from the ozone molecule and binds to the odor-causing molecule. This chemical reaction effectively neutralizes the odor-causing particle by altering its molecular structure, rendering it odorless.
Essentially, ozone treatment doesn't cover up smells; it actively breaks down and destroys the offending molecules. Because ozone is a gas, it can penetrate virtually every nook and cranny of your car's interior, including the HVAC system, headliner, upholstery fibers, carpets, and hard-to-reach crevices that manual cleaning simply cannot address. After the treatment, the ozone naturally reverts back to stable oxygen (O₂), leaving no chemical residue behind.
Why Ozone Treatment Deserves Its Place in Car Interior Cleaning Tips
For truly challenging odor problems, ozone treatment stands out among car interior cleaning tips for several reasons:
- Unmatched Effectiveness: It tackles odors that other methods can't touch.
- Comprehensive Coverage: As a gas, it treats the entire volume of the car's interior, including the air and all surfaces.
- Source Elimination: It addresses the problem at a molecular level, ensuring odors don't return (provided the original source of contamination is also removed).
- Chemical-Free Neutralization: It sanitizes and deodorizes without introducing harsh chemicals or artificial fragrances.
When and Why to Use This Approach
Ozone treatment isn't typically your first line of defense for a minor spill. It's a more intensive solution best reserved for specific, challenging situations:
- Persistent Smoke Odors: Cigarette, cigar, or even wildfire smoke can deeply permeate fabrics and plastics. Ozone is highly effective at neutralizing these stubborn smells. Used car dealerships frequently employ ozone treatment to remove smoke odors from trade-ins, making them more appealing to potential buyers.
- Stubborn Pet Odors: Lingering pet smells from accidents, dander, or just that "wet dog" aroma can be incredibly difficult to remove with conventional cleaners.
- Mold and Mildew Smells: If your car has suffered a water leak, been exposed to excessive humidity (a common issue for RV travelers or vehicles in damp climates), or wasn't dried properly after a deep clean, mildew can develop. Ozone kills mold and mildew spores, eliminating the musty odor.
- Spoiled Food and Organic Spills: The smell of spilled milk, forgotten groceries, or vomit can be nauseating and persistent. Ozone can break down the organic compounds causing these odors.
- Post-Disaster Restoration: Professional disaster restoration companies often use ozone generators to remediate odors from fire, smoke, or flood-damaged vehicles and buildings.
- "Resetting" a Used Car: For DIY auto care enthusiasts or those purchasing a pre-owned vehicle, an ozone treatment can provide a fresh slate, eliminating any olfactory remnants of previous owners.
Features and Benefits:
- Molecular-Level Odor Destruction: The primary benefit is that odors are chemically altered and eliminated, not just covered by a stronger scent.
- Chemical-Free Treatment Process: Ideal for individuals sensitive to chemicals or who prefer a non-toxic approach to cleaning.
- Reaches All Interior Surfaces and Crevices: Its gaseous nature allows it to permeate fabrics, carpets, air vents, and hidden areas.
- Professional-Grade Effectiveness: Delivers results that are typically far superior to consumer-grade air fresheners or sprays for severe odor issues.
Pros:
- Complete Odor Elimination: Genuinely eradicates odors rather than temporarily masking them.
- Access to Impossible Areas: Cleanses the air and surfaces in places manual cleaning can't reach.
- No Chemical Residue: Ozone decomposes back into oxygen, leaving the car fresh without lingering chemicals.
- Effective on the Toughest Odors: Proven to work on smells that have resisted other cleaning methods.
Cons:
- Requires Specialized Equipment: Ozone generators, especially powerful ones, can be expensive and are typically used by professionals.
- Vehicle Must Be Unoccupied: Ozone is harmful to breathe for humans, pets, and plants. The vehicle must be sealed and unoccupied during treatment.
- Potential Material Degradation: Very high concentrations or prolonged exposure to ozone can potentially degrade rubber, plastics, and certain fabrics over time. Professionals are trained to use appropriate levels and durations to minimize this risk.
- Higher Cost: Professional ozone treatment is more expensive than buying an air freshener, but often worth it for severe issues.
- Not a Cleaning Substitute: Ozone treats odors, not dirt or stains. The source of the odor (e.g., a spill) must still be physically cleaned.
Actionable Tips for Readers:
If you're considering ozone treatment, whether through a professional service or by carefully using a purchased unit (more common for mobile detailers or serious DIYers), follow these tips for the best results:
- Thoroughly Clean First: This is one of the most crucial car interior cleaning tips when using ozone. Vacuum, shampoo carpets and upholstery, wipe down all surfaces, and remove any physical sources of odor (e.g., old food, trash, soiled items). Ozone neutralizes smells; it doesn't remove the dirt that might be causing them.
- Remove All Personal Items: Take out all belongings, especially plants, pets (obviously), food, and any sensitive electronics or delicate materials.
- Seal the Vehicle (If DIY): Ensure windows and doors are closed tightly to allow the ozone to concentrate.
- Run the HVAC System (Optional but Recommended): Some professionals recommend running the car's air conditioning on recirculation mode for a portion of the treatment to help draw ozone through the vents and sanitize the HVAC system.
- Ensure Proper Ventilation After Treatment: Once the ozone generator has completed its cycle and been turned off, it's vital to air out the vehicle thoroughly. Open all doors and windows for at least 30 minutes to an hour, or as recommended by the service provider or equipment manufacturer. Using fans can expedite this process.
- Allow Ozone to Dissipate Completely: Do not re-enter the vehicle until the distinct ozone smell (often described as a "clean" or "electrical" scent similar to post-thunderstorm air) has fully dissipated. This indicates the ozone has reverted to oxygen.
- Combine with Other Cleaning Efforts: For the ultimate refresh, follow up with any desired interior detailing, like conditioning leather or protecting plastics, once the car is fully aired out.
Ozone treatment, popularized by brands like OdorStop and widely adopted by the professional restoration industry and advanced auto detailing certification programs, represents a powerful tool. While it might not be an everyday solution, for those truly challenging odor nightmares, it's an invaluable car interior cleaning tip that can restore your vehicle's interior to a genuinely fresh and inviting state.
7 Key Car Interior Cleaning Tips Comparison
| Tip Title | Implementation Complexity 🔄 | Resource Requirements 💡 | Expected Outcomes 📊 | Ideal Use Cases ⭐ | Key Advantages ⚡ |
|---|---|---|---|---|---|
| The Vacuum-First Rule | Moderate - requires multiple attachments and thorough effort | Vacuum with various attachments, moderate time | Removes loose dirt, prevents scratches, improves overall cleaning effectiveness | All car interiors before wet cleaning | Prevents dirt mud, extends product life, reduces damage risk |
| Microfiber Cloth System | Low to Moderate - needs color coding and maintenance | Multiple color-coded microfiber cloths, washing care | Prevents cross-contamination, maintains hygiene and surface safety | Detailed interior sections (dashboard, seats, glass) | High absorption, lint-free, cost-effective long term |
| Top-Down Cleaning Method | Low - requires disciplined stepwise sequence | Basic cleaning tools, systematic approach | Maximizes efficiency, prevents re-contamination, comprehensive cleaning | Full interior cleaning sequence | Saves time, reduces double work, thorough coverage |
| Steam Cleaning for Deep Sanitization | High - specialized equipment needed, care to avoid over-wetting | Steam cleaner, surface prep and drying time | Kills bacteria/allergens, removes stains and odors chemically-free | Fabric seats, carpets, odor-prone areas | Chemical-free, highly effective sanitization, eco-friendly |
| Leather Care Three-Step Process | Moderate to High - multiple products and steps, careful application | pH-neutral leather cleaners, conditioners, protectants | Extends leather life, maintains suppleness and prevents cracking | Leather interiors in luxury and regularly maintained vehicles | Preserves appearance, prevents damage, adds UV protection |
| Dashboard and Plastic Restoration Technique | Moderate - multi-step with specialized products | Cleaners, restoration products, protectants | Restores color and texture, protects against UV, reduces dust attraction | Faded or worn dashboard/plastic trim | Improves appearance, cost-effective vs replacement, anti-static |
| Odor Elimination with Ozone Treatment | High - requires professional equipment and safety precautions | Ozone generator, ventilated space, vehicle unoccupied | Eliminates odors at molecular level, no chemical residue | Persistent smoke, pet, food, and mildew odors | Complete odor removal, reaches inaccessible areas, chemical-free |
Drive Gleaming: Your Car's Interior, Reimagined
You're now armed with a comprehensive set of 7 expert car interior cleaning tips, from the foundational vacuum-first rule and systematic top-down cleaning to specialized techniques like steam sanitization, three-step leather care, dashboard restoration, and powerful ozone odor elimination. By consistently applying these insights, you're truly equipped to tackle any mess and maintain a consistently fresh, inviting, and revitalized vehicle interior.
The real magic of mastering these car interior cleaning tips lies not just in a cleaner car, but in the enhanced driving comfort, the preservation of your vehicle's value, and the sheer pride of ownership. A meticulously maintained interior transforms your daily commute or road trip into a more enjoyable and healthier experience. Your next step is to integrate these strategies into a regular upkeep routine, making a pristine cabin the new standard.
With your car's interior looking pristine and reimagined for 2025, you might feel inspired to refresh other aspects of your life or projects. For those seeking creative ideas for their online presence, exploring some modern design inspiration for other projects can be a great next step.
Embrace these car interior cleaning tips, keep them handy, and enjoy the lasting satisfaction of a vehicle that feels showroom-fresh all year round!
Now, to complete that pristine look, ensure your car's exterior matches its immaculate interior. The SwiftJet Car Wash Foam Gun offers an efficient and effective way to achieve a brilliant exterior clean, complementing your dedicated interior efforts.